CS-Cart Web To Print is a powerful solution that allows customers to personalize products directly from the storefront.
It enables customers to add text, images, and clipart to design products as per their preference. Customers can customize items like T-shirts, hoodies, bags, shoes, and more with ease.
The admin can enable customization for selected products and define the number of sides available for design. Vendors can also manage Web To Print settings for their products when vendor privileges are enabled.
Customization is applied only within the defined printable area, and customers can also select and modify predefined templates.
This improves customer engagement, enhances the shopping experience, and helps increase sales by offering personalized products.
Also check out our CS-Cart Direct Print extension to enable instant printing functionality for your store.
Features
- Works seamlessly with both CS-Cart and Multi-Vendor stores.
- Allows the admin to define the canvas size (width and height) for product customization.
- Provides a clip area where customers can design the product within a specific printable section.
- Enables the admin to set the clip position on the canvas.
- Allows admin and vendors to enable Web To Print for selected products.
- Supports multiple customizable sides for a product.
- Provides backend options to create and manage default templates for each side.
- Customers can personalize products by adding text, images, and clipart.
- Displays the customized design in the shopping cart and order details as the product image.
- Allows both admin and customers to download customized files after order placement.
- Enables vendors to manage customizable products and templates (with vendor privileges and admin approval).
- Fully compatible with Multi-Vendor environment.
- Easy to configure, manage, and maintain from the admin panel.
Canvas Area: This is the area on which a customizable template is shown.
Clip Area: This is the area on which the product is edit/customize.
Installation:
After downloading the CS-Cart Web To Print add-on, you’ll get one zip file, one install.txt file, and a relevant User Guide manual doc. Read it carefully for proper configuration.
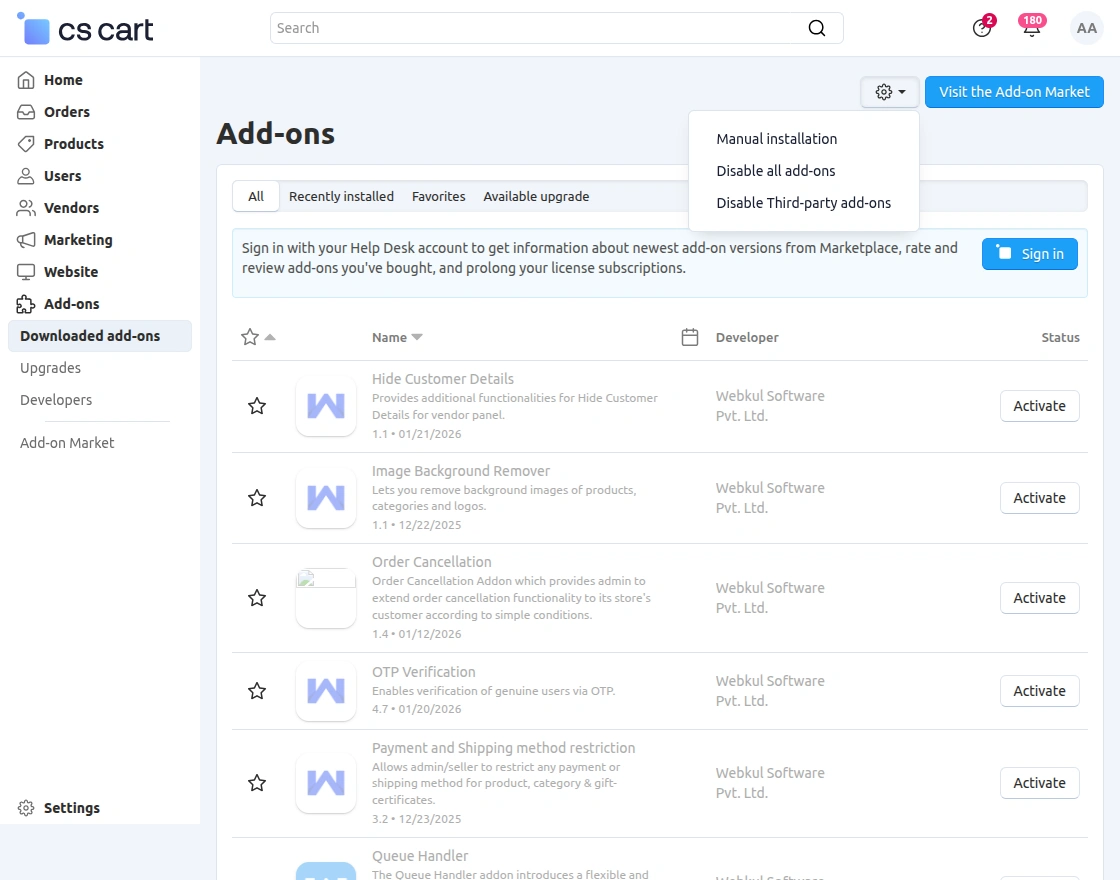
Go to Manage Add-ons, and click on “Manual Installation” as shown below in the snapshot.
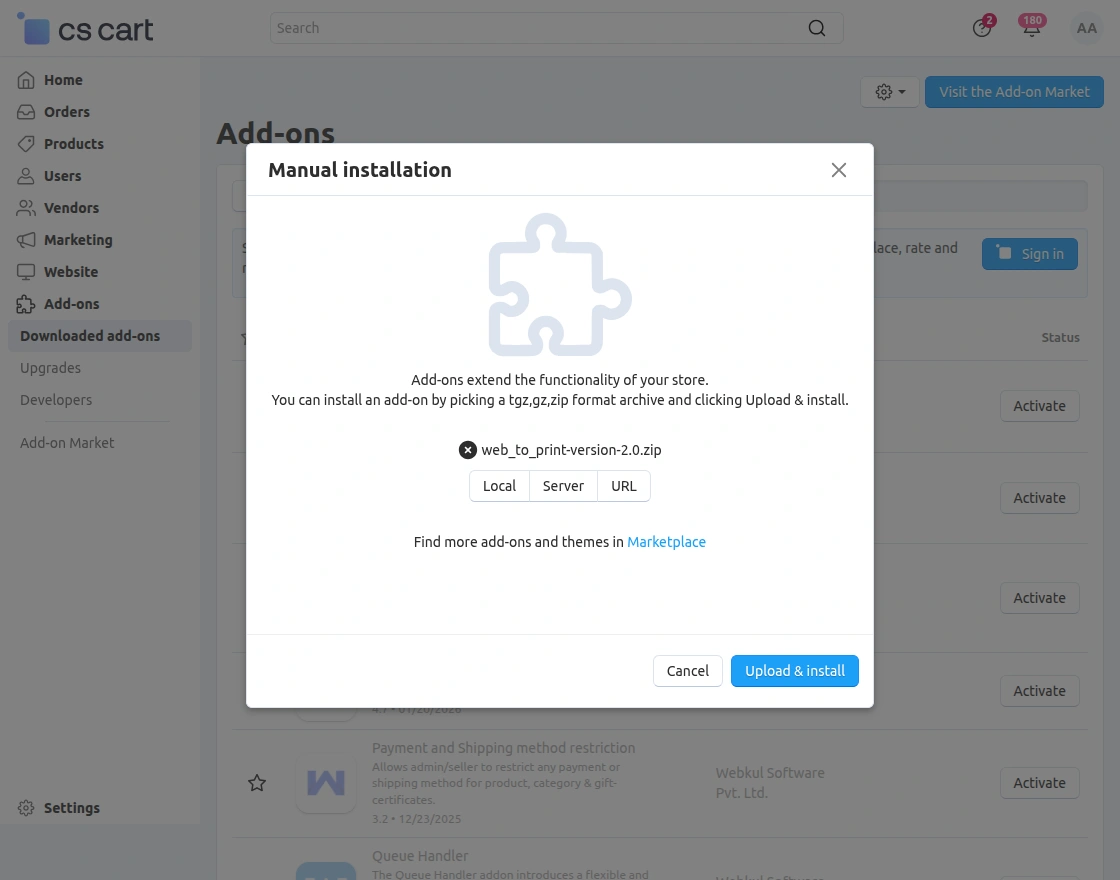
Click on “Local” to browse the zip file, and then click on “Upload & Install” as shown below in the snapshot.
CS-Cart Web To Print Configuration
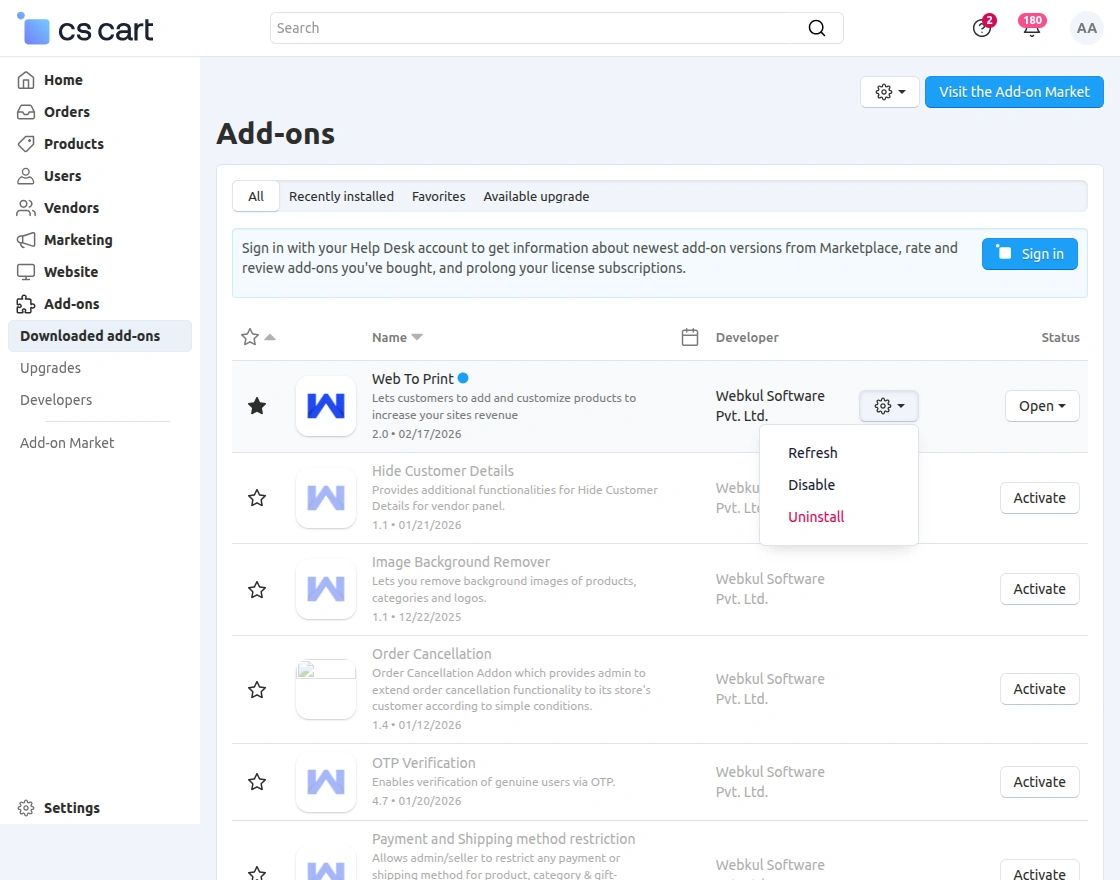
After installing the add-on, you will see CS-Cart Web To Print in the list of available add-ons. Next, configure the required settings.
Click on Settings to enable, disable, install, or refresh the add-on.
Ensure that the add-on is activated, as shown in the snapshot below.
To configure the add-on, go to Add-ons >> Developers >> Webkul Software Pvt Ltd. >> Web To Print >> Settings.
Completing these configurations ensures smooth setup and full control over product customization settings directly from your CS-Cart backend, as shown in the snapshot below.
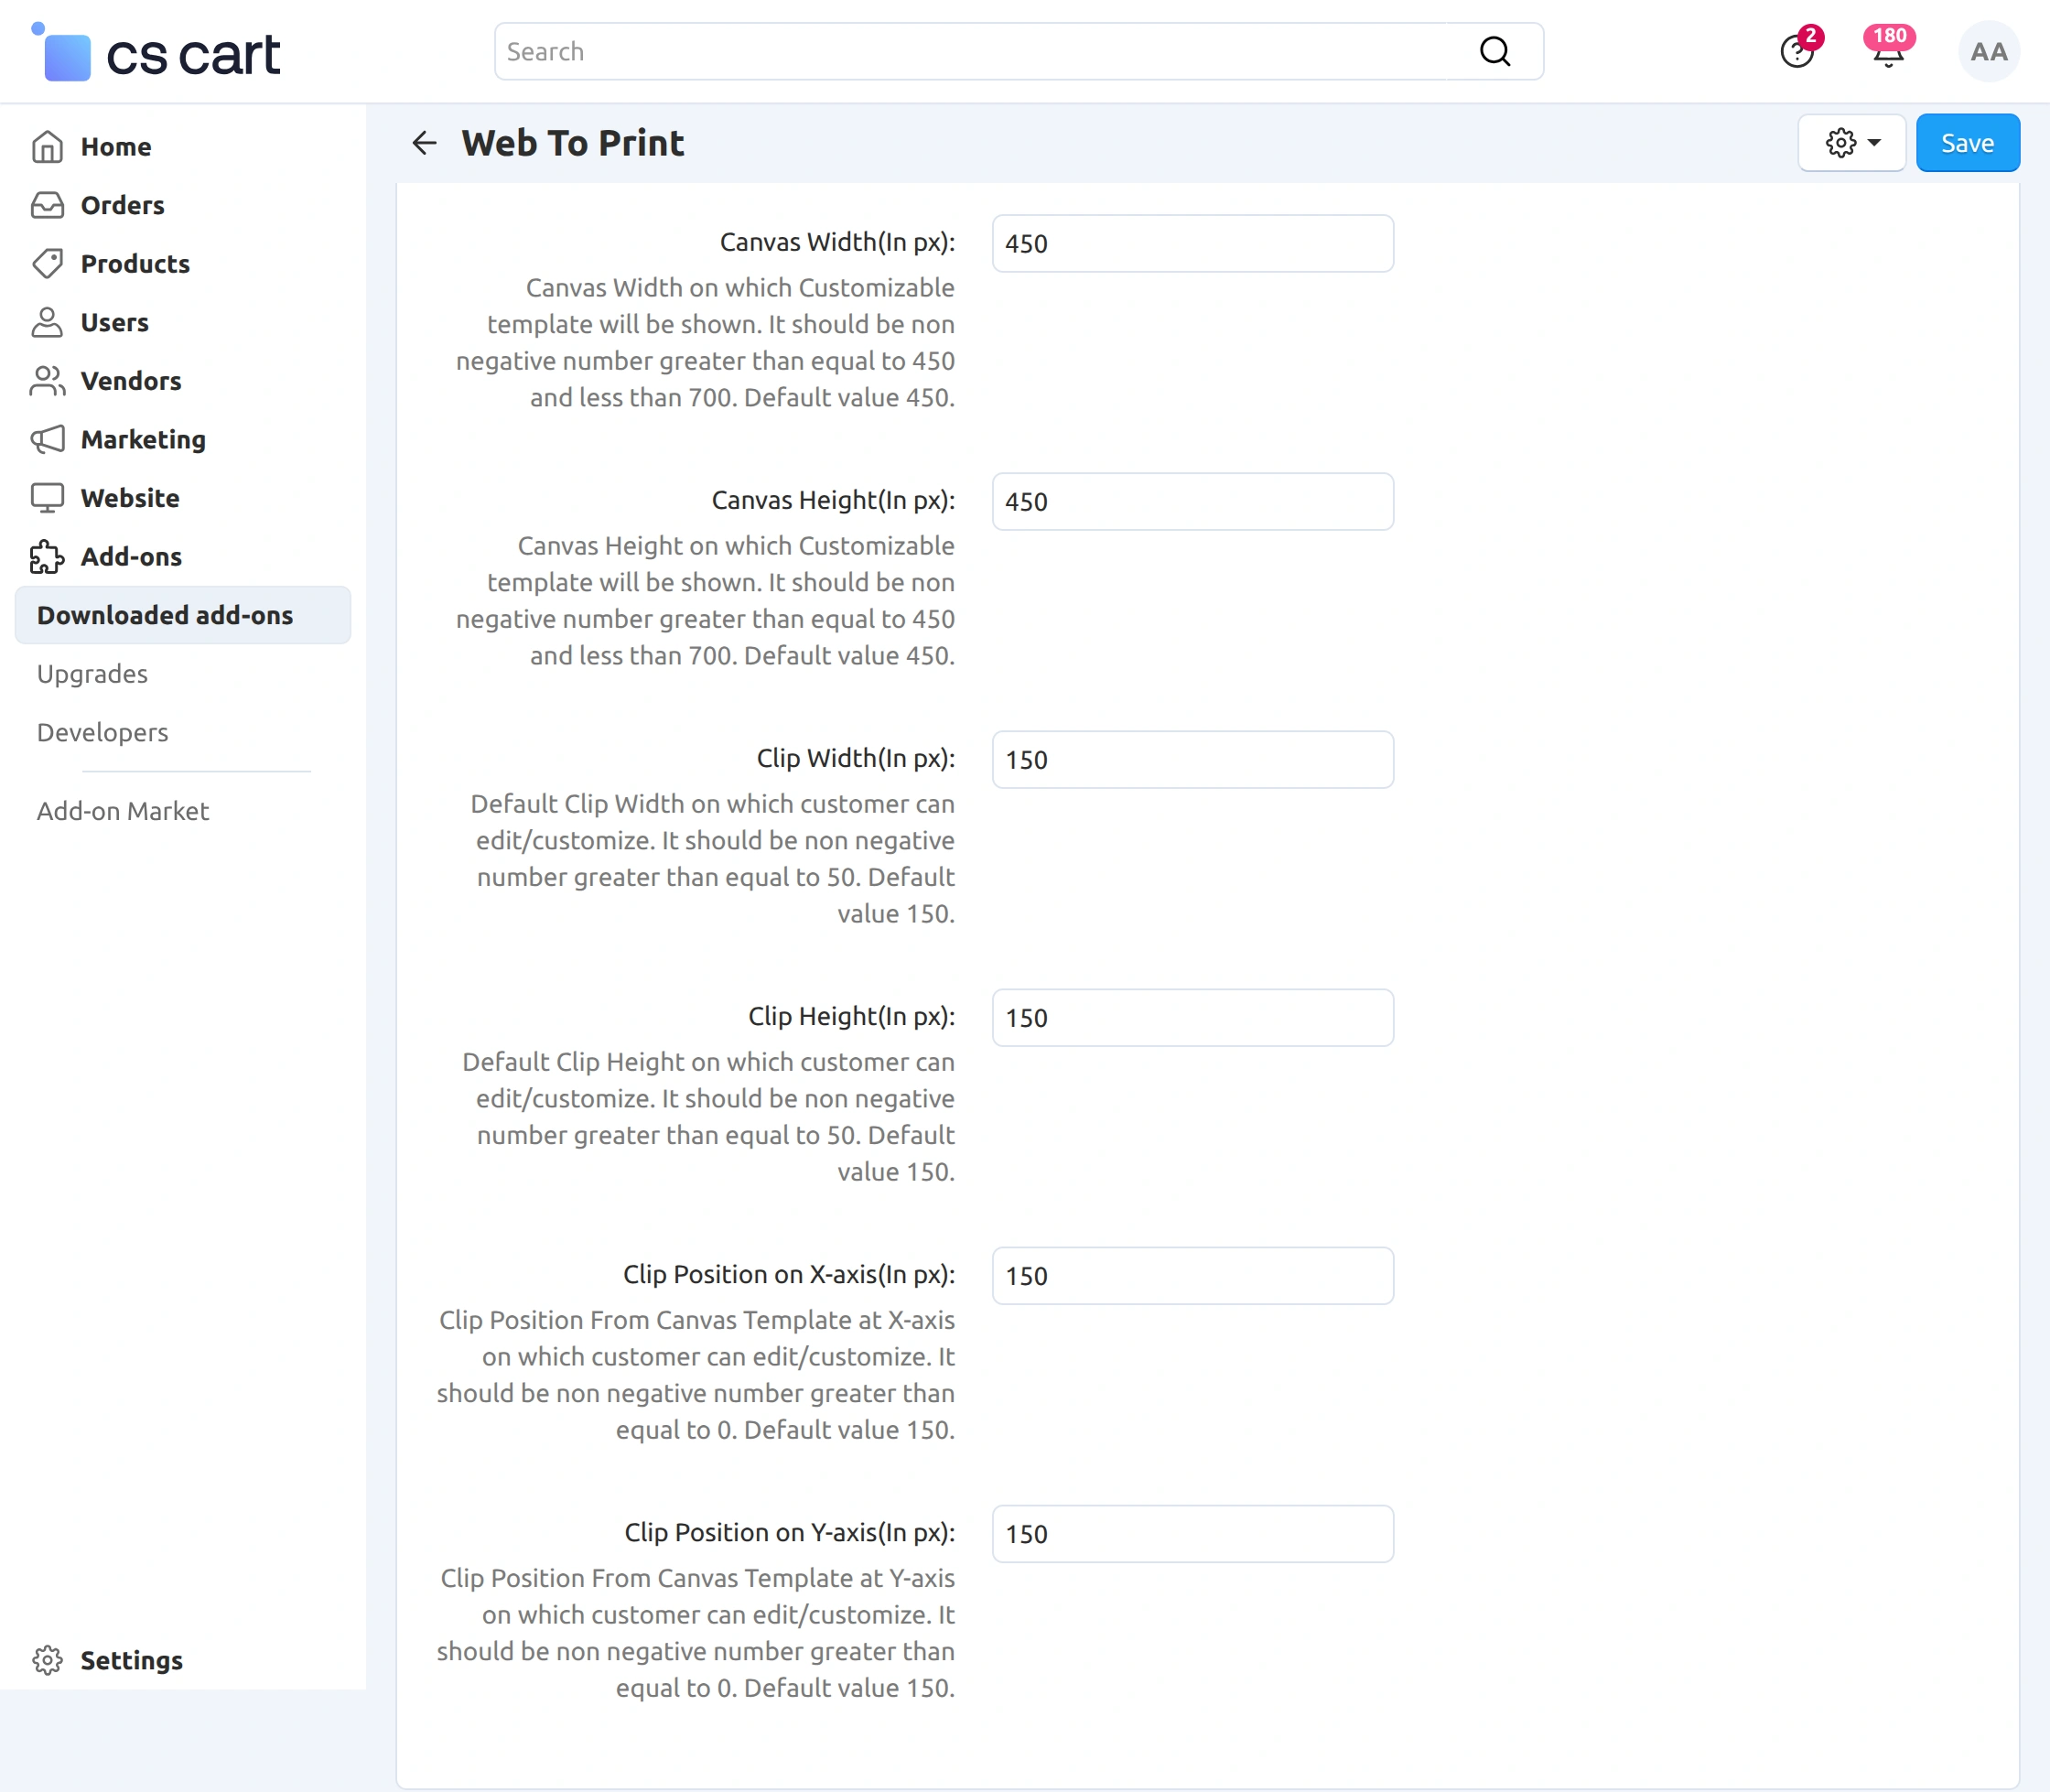
In this section, the admin can control the canvas and editable area where customers will customize the product.
The available settings include:
- Canvas Width & Height – Defines the total design area where the customizable template will be displayed. The value should be between 450 px and 700 px.
- Clip Width & Height – Specifies the editable area where customers can add text, images, or clip art.
- Clip Position (X-axis & Y-axis) – Allows the admin to set the exact position of the editable area within the canvas.
By configuring these settings properly, the admin can control how much area customers can customize and where the design section will appear on the product.
CS-Cart Web To Print – Admin End
After configuring the Web To Print settings, the admin can enable product customization and manage templates from the backend.
Enable Web To Print for a Product
To allow customers to customize a product, go to:
Products → Products, and open the required product, as shown in the snapshot below.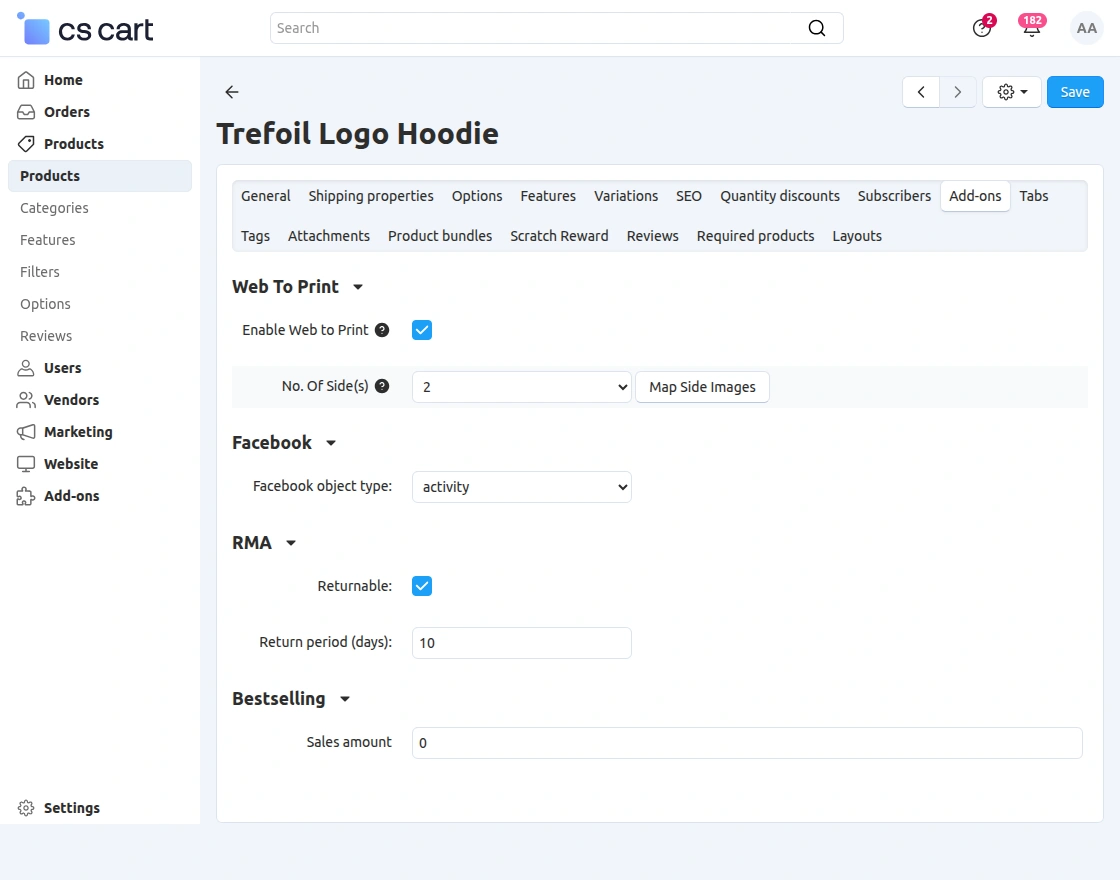
In the product edit page, navigate to the Add-ons tab.
Enable the Web To Print option and enter the number of sides that the customer can customize. Then click Save.
Map Side Images
After saving the product settings, the admin can map images for each customizable side, as shown in the snapshot below.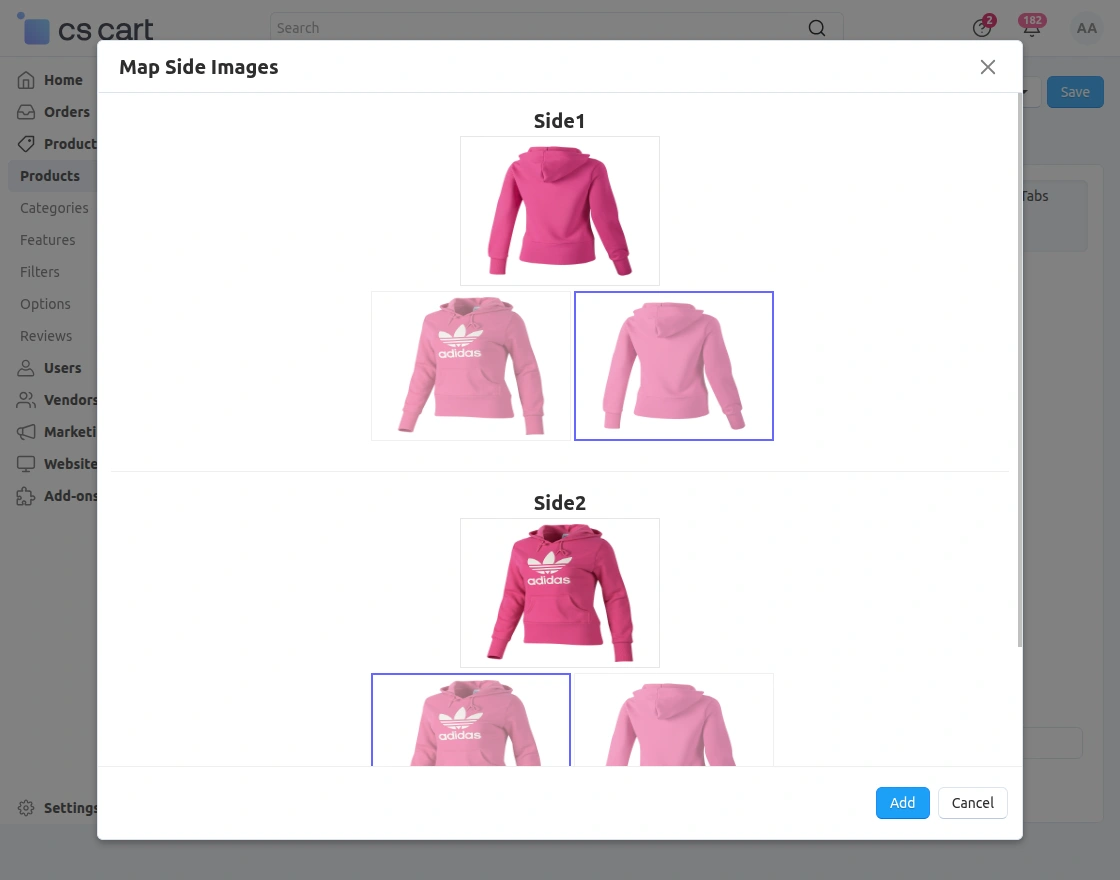
This allows the admin to define which product sides will be available for customization.
Manage Side Template
Once the side images are mapped and saved, a new tab Manage Side Templates will appear, as shown in the snapshot below.
From here, the admin can create and manage templates for each product side.
View Customizable Products
The admin can also view all customizable products by navigating to:
Marketing → Web To Print → Products, as shown in the snapshot below.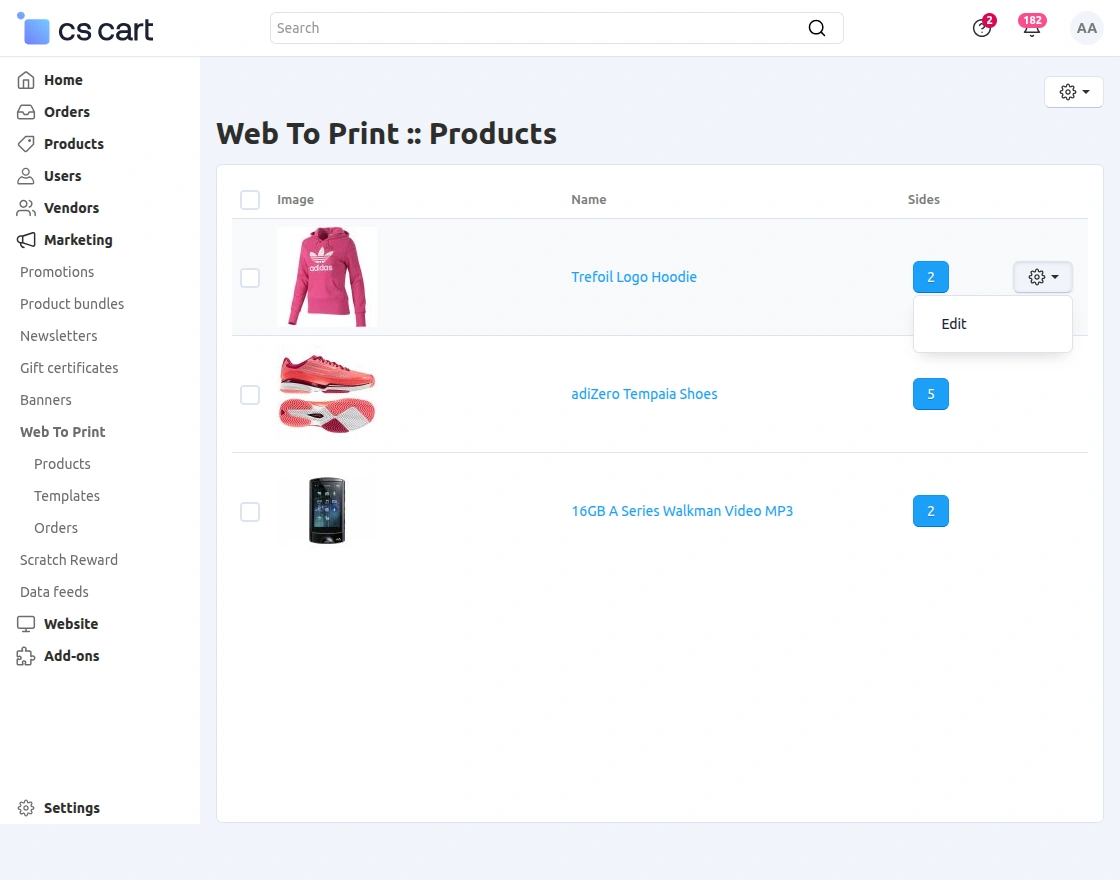
Here, the admin can see the list of products along with the number of customizable sides.
Manage Product Sides
After clicking on the number of sides, the Product Sides page will open, as shown in the snapshot below.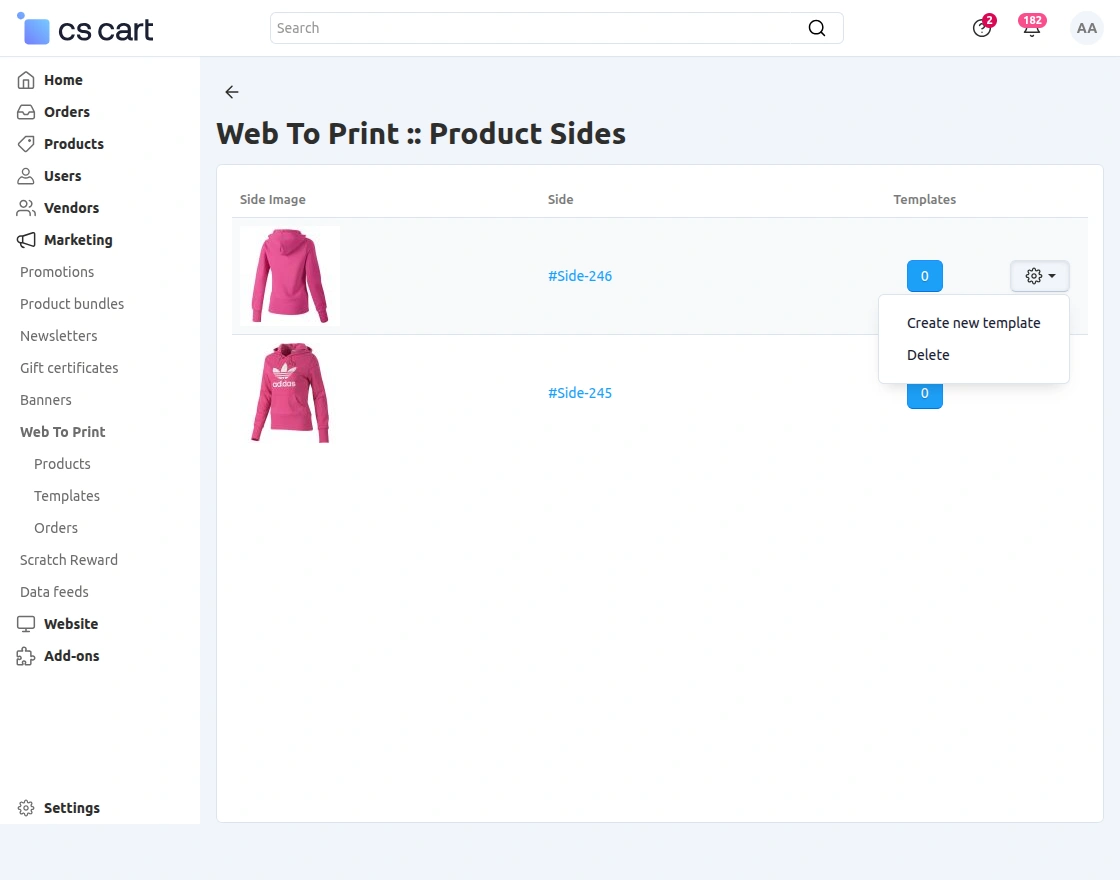
From this section, the admin can:
-
View all available product sides
-
Check the side images
-
Click on the settings icon to create a new template for the selected side
This allows the admin to create separate design templates for each side of the product.
Create Template for Product Side
After clicking on Create New Template, the template editor page will open where the admin can design the template for the selected side.
From this section, the admin can view all existing templates and click on the + (Create) button to add a new template.
Create New Template
After clicking on the Create button, the admin needs to enter the required details such as template name and status, as shown in the snapshot below.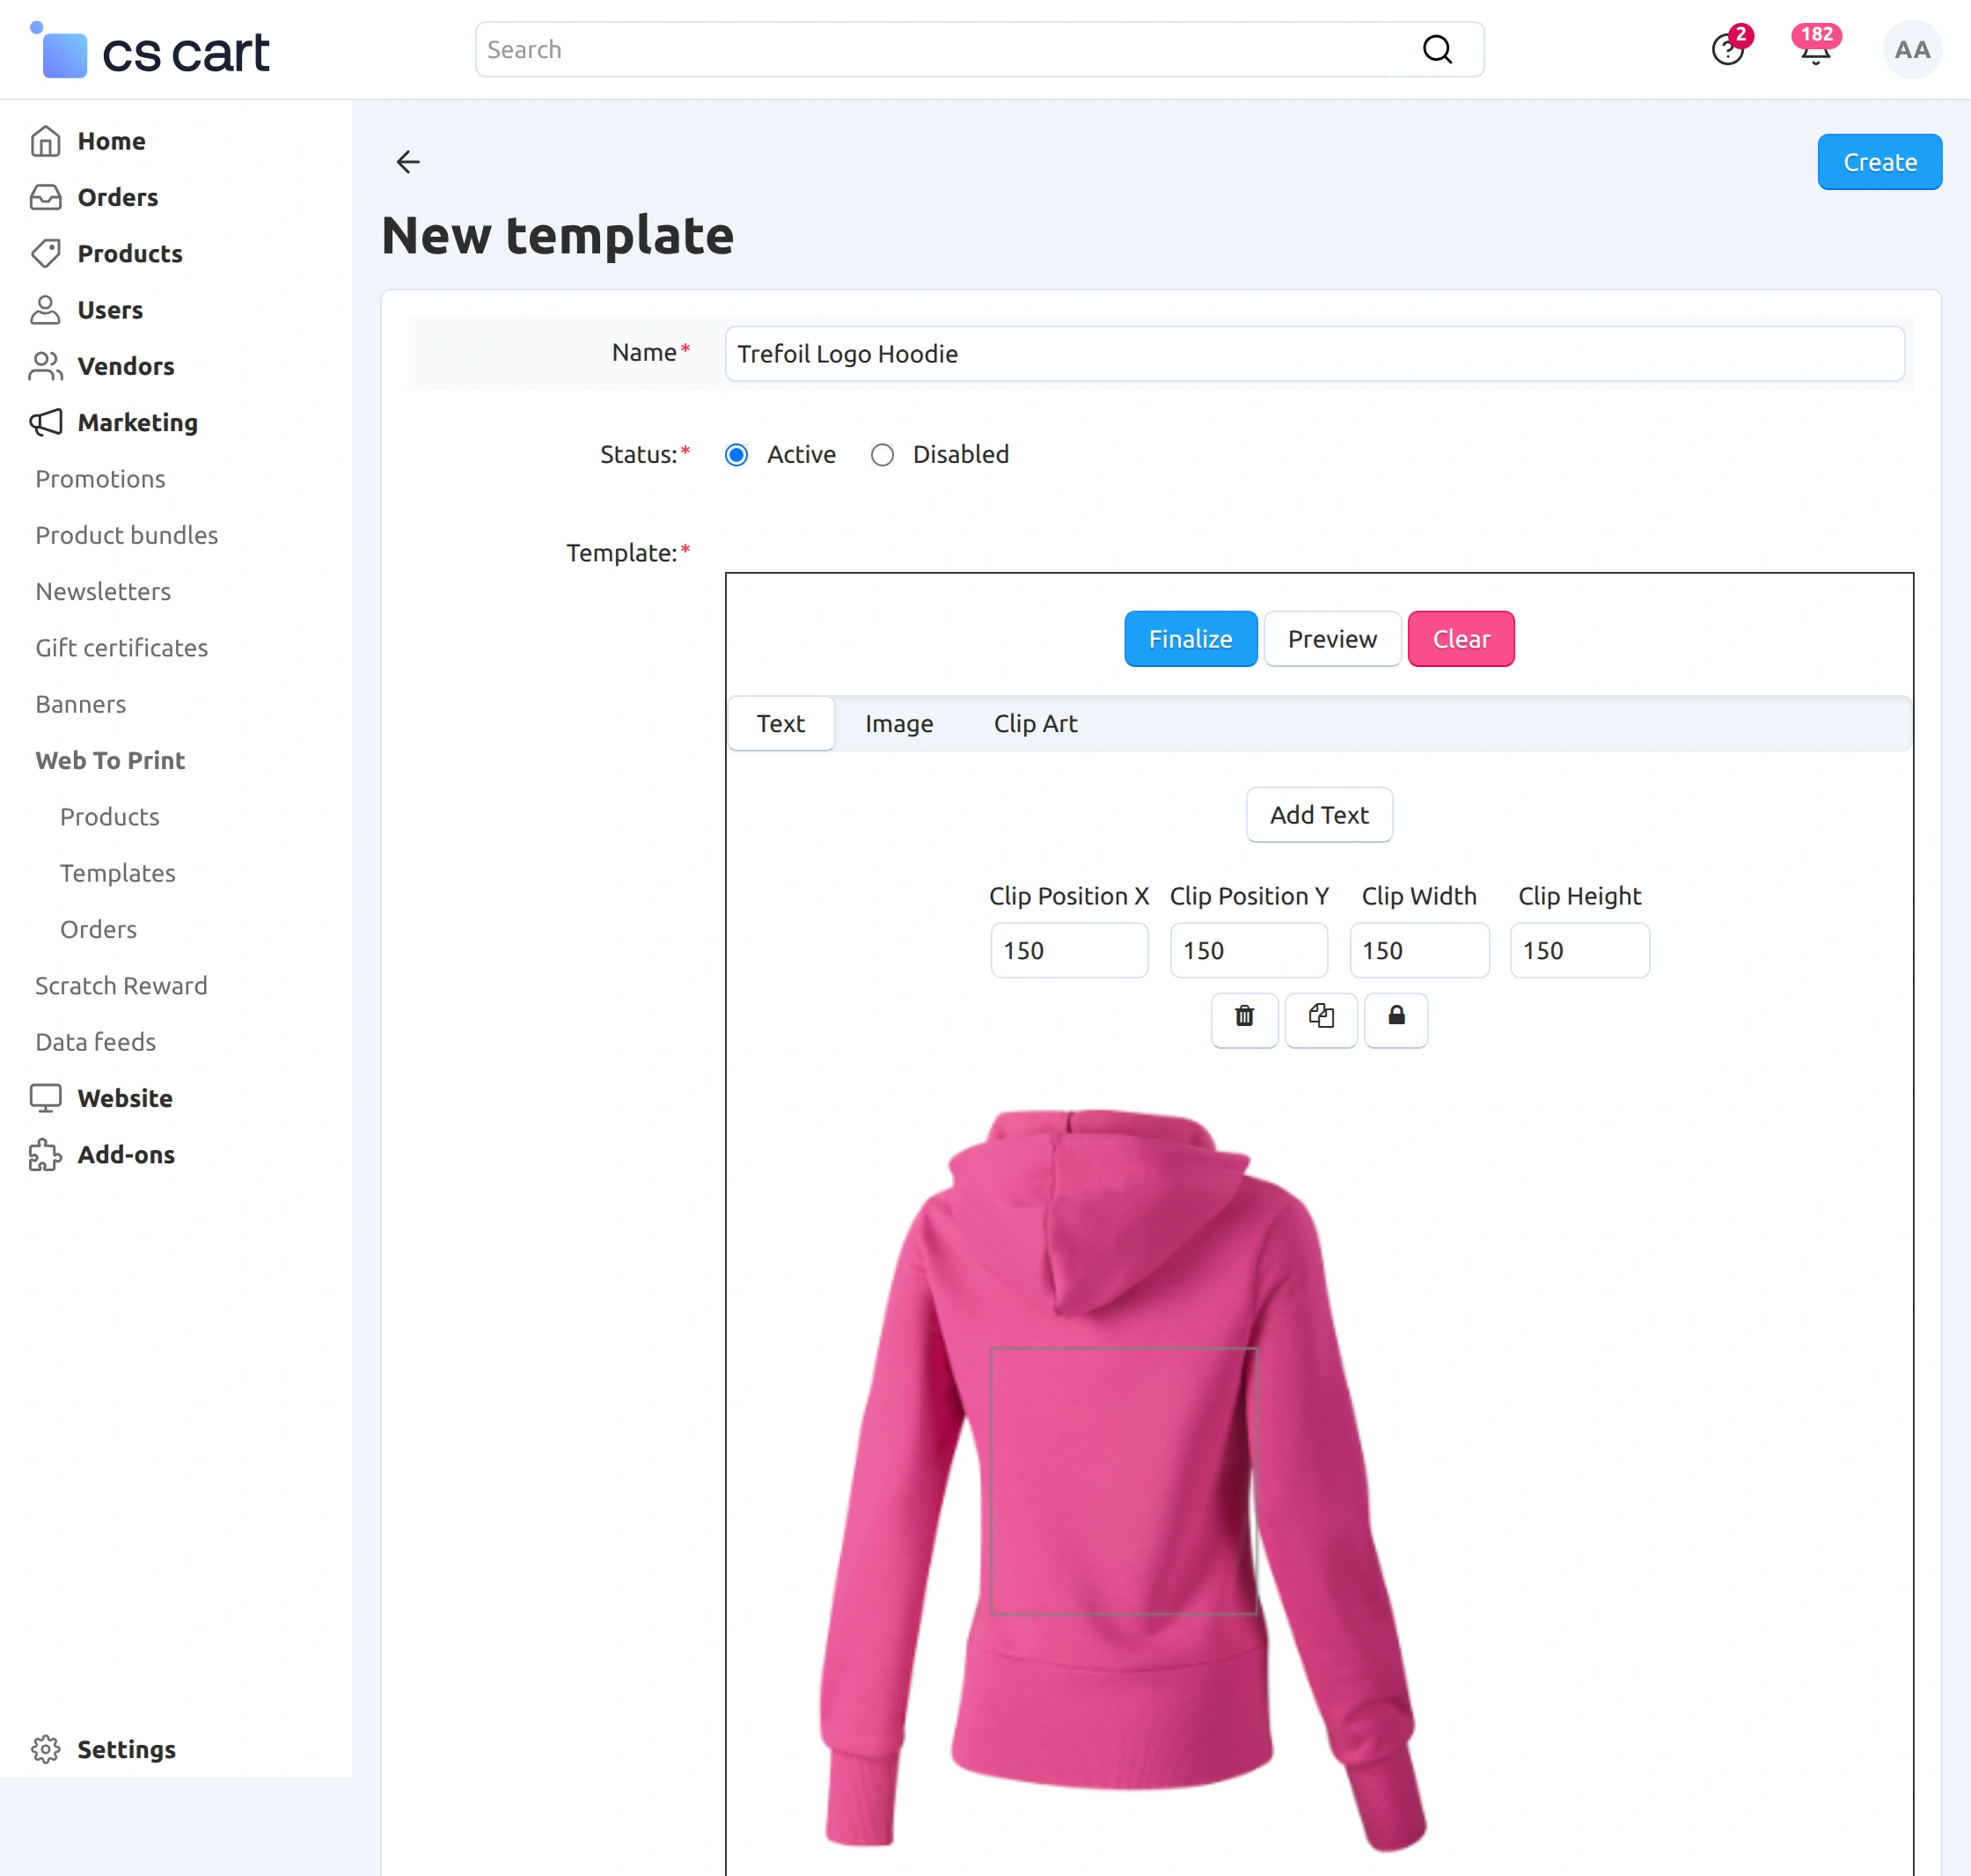
In the template editor, the admin can:
-
Add Text
-
Upload Images
-
Add Clip Art
-
Set Clip Position (X & Y)
-
Define Clip Width and Height
This allows the admin to control the editable area where customers will customize the design.
Finalize Template Design
Once the template design is ready, click on the Finalize button and then Create to save the template, as shown in the snapshot below.
After saving, the template will be available for the selected product, allowing customers to customize it from the storefront.
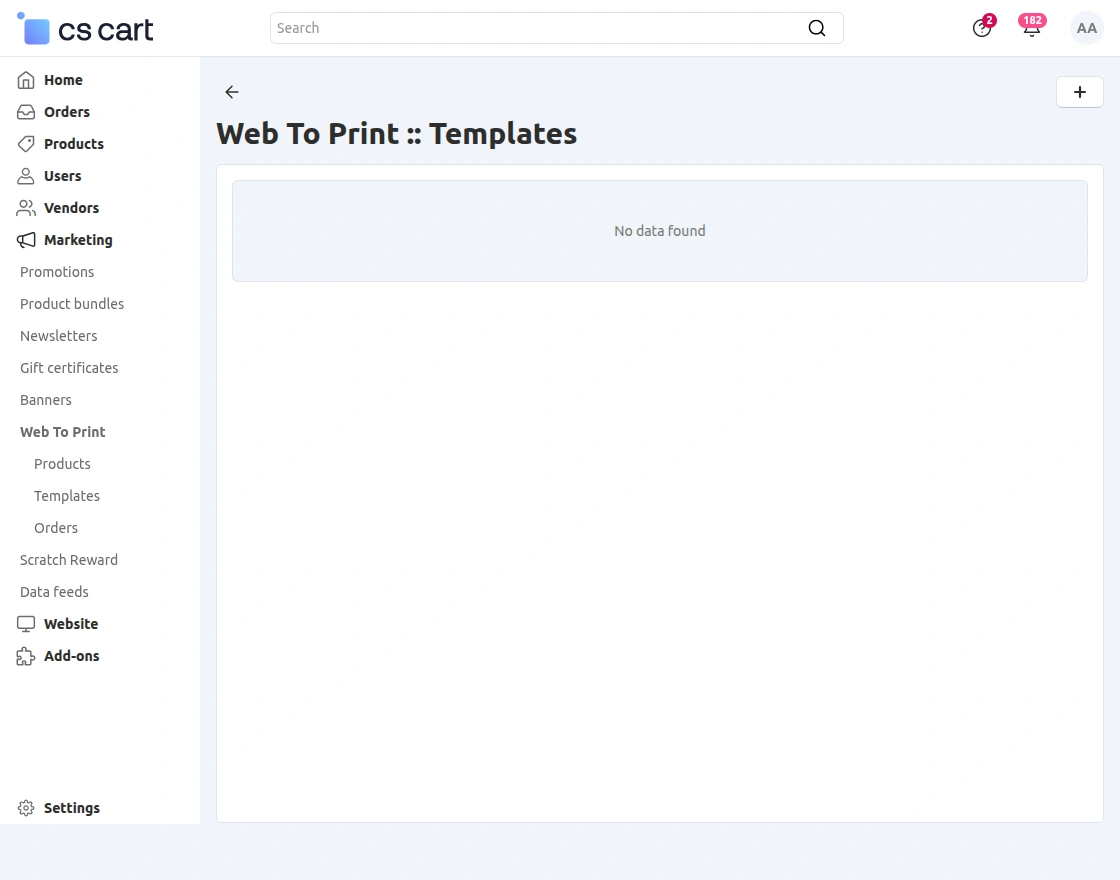
View Created Templates
After creating the template, the admin can view the list of all created templates by navigating to:
Marketing → Web To Print → Templates, as shown in the snapshot below.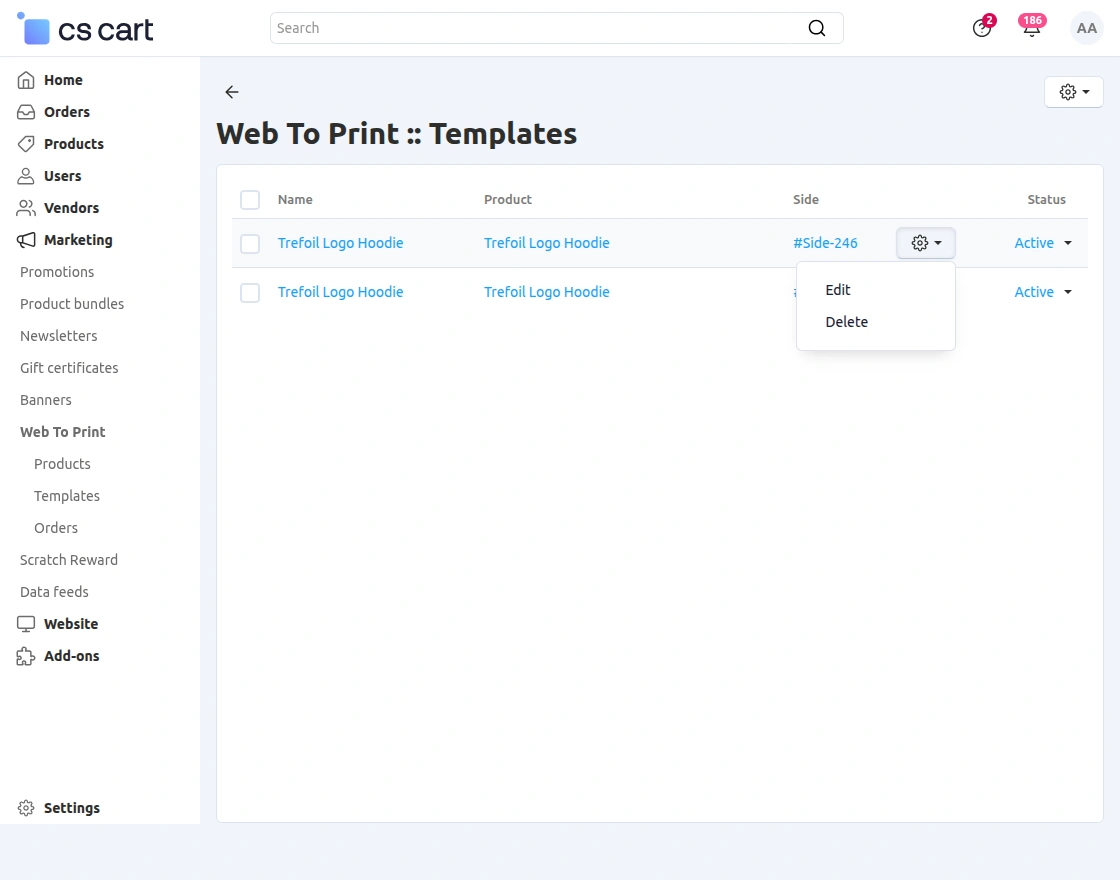
From this section, the admin can:
-
View template details such as Name, Product, Side, and Status
-
Edit an existing template
-
Delete a template if required
-
Enable or disable the template based on the requirement
This allows the admin to manage and update product design templates easily.
View Orders for Customized Products
After a customer places an order for a customized product, the admin can view and manage these orders from the backend.
To check the customized product orders, go to:
Marketing → Web To Print → Orders, as shown in the snapshot below.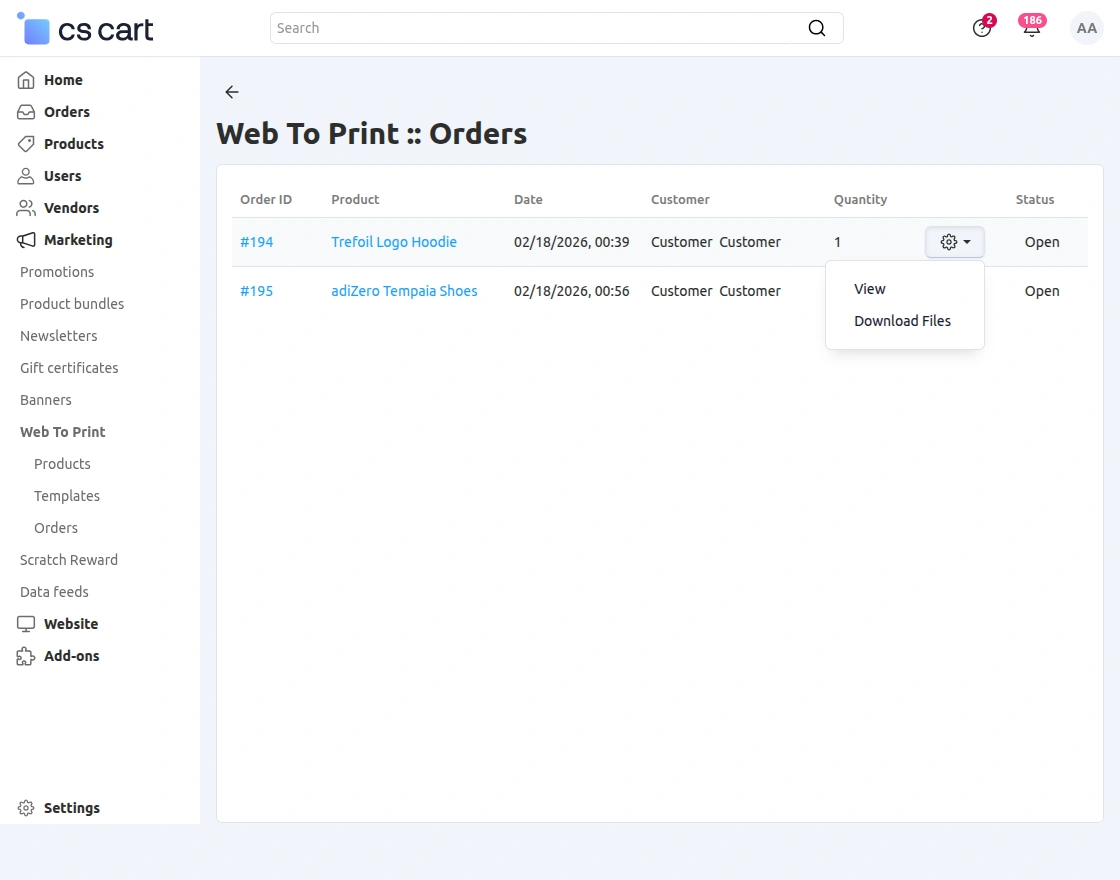
From this section, the admin can view important details such as:
-
Order ID
-
Product name
-
Order date
-
Customer details
-
Quantity and status
The admin can also use the action menu to View the order details or Download Files for printing.
View Order Customization Details
To view the customization details, click on the View option for the required order. The complete design information will appear, as shown in the snapshot below.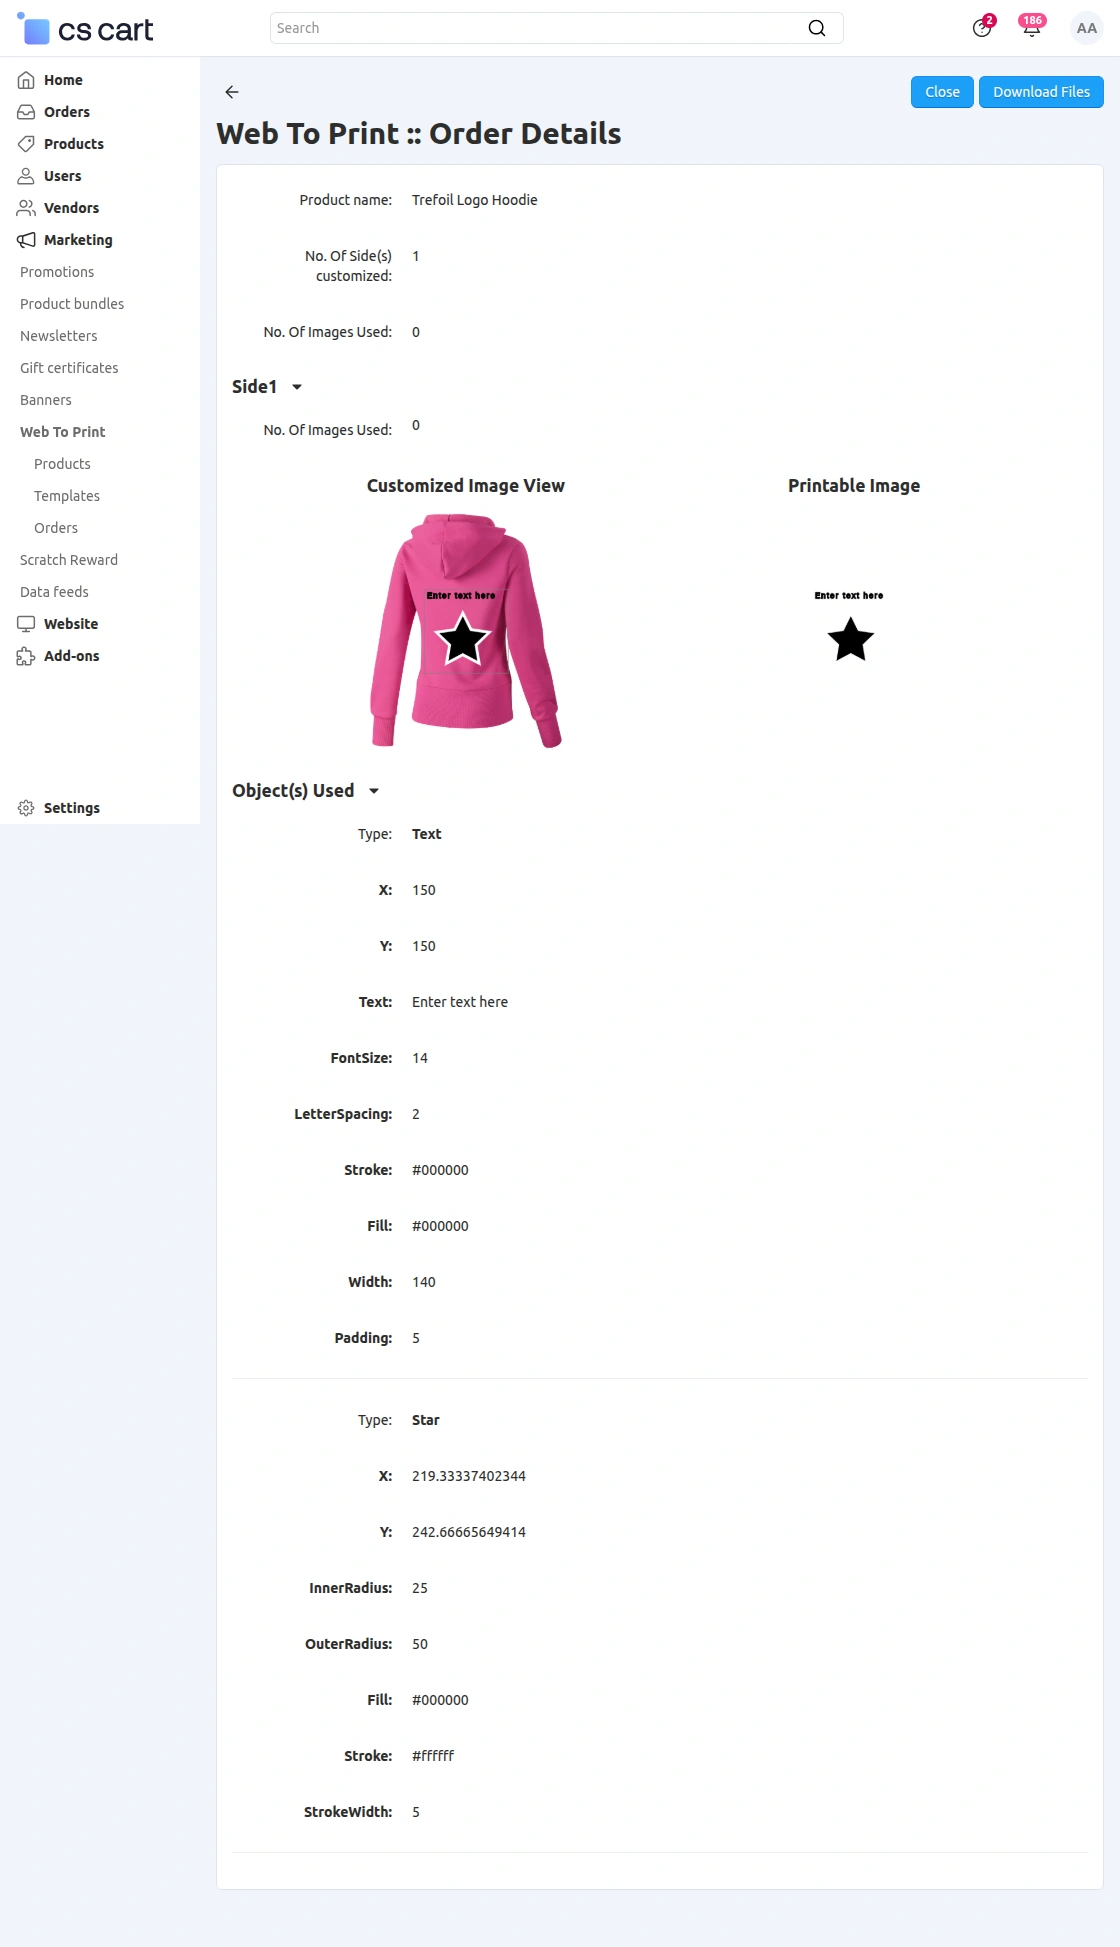
In this section, the admin can:
-
View the customized product preview
-
Check the printable image
-
See the number of customized sides
-
View all objects used (text, images, clip art) along with their properties
-
Download the finalized design files for printing
This allows the admin to verify customer designs and process customized product orders accurately.
Note for Vendor Functionality:
NOTE: To allow vendors to manage Web To Print features, the default Vendor Privileges add-on must be installed and enabled in CS-Cart.
To install the required add-on, go to Add-ons >> Developers >> CS-Cart and make sure that the Vendor Privileges add-on is installed and active, as shown in the snapshot below.
Create Vendor User Group
After installing and enabling the Vendor Privileges add-on, the admin needs to create a Vendor User Group.
This user group will be used to control which vendors will have restricted customer details.
Go to Users >> User groups from the admin panel, as shown in the snapshot below.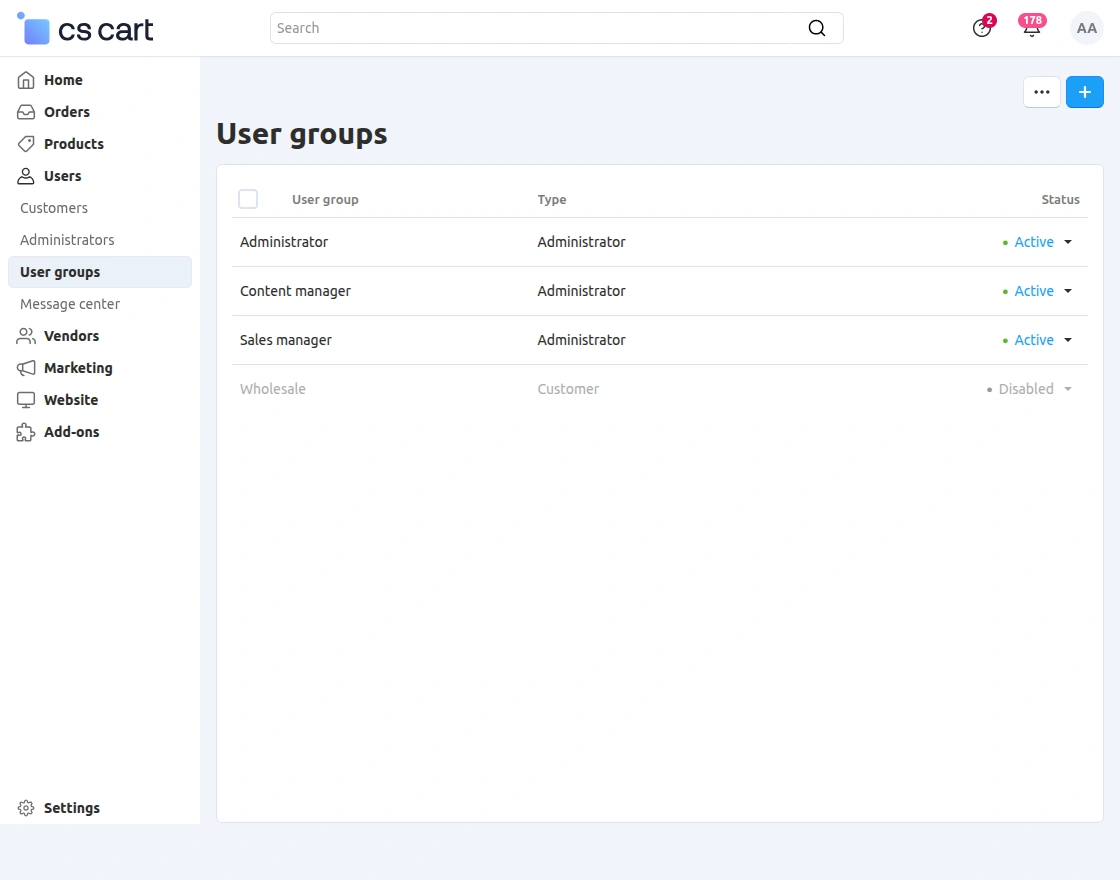
Click on the “+” icon to create a new user group. Enter the User Group name and select the Type as Vendor.
Set the status to Active and configure the required privileges as needed. Then click Save, as shown in the snapshot below.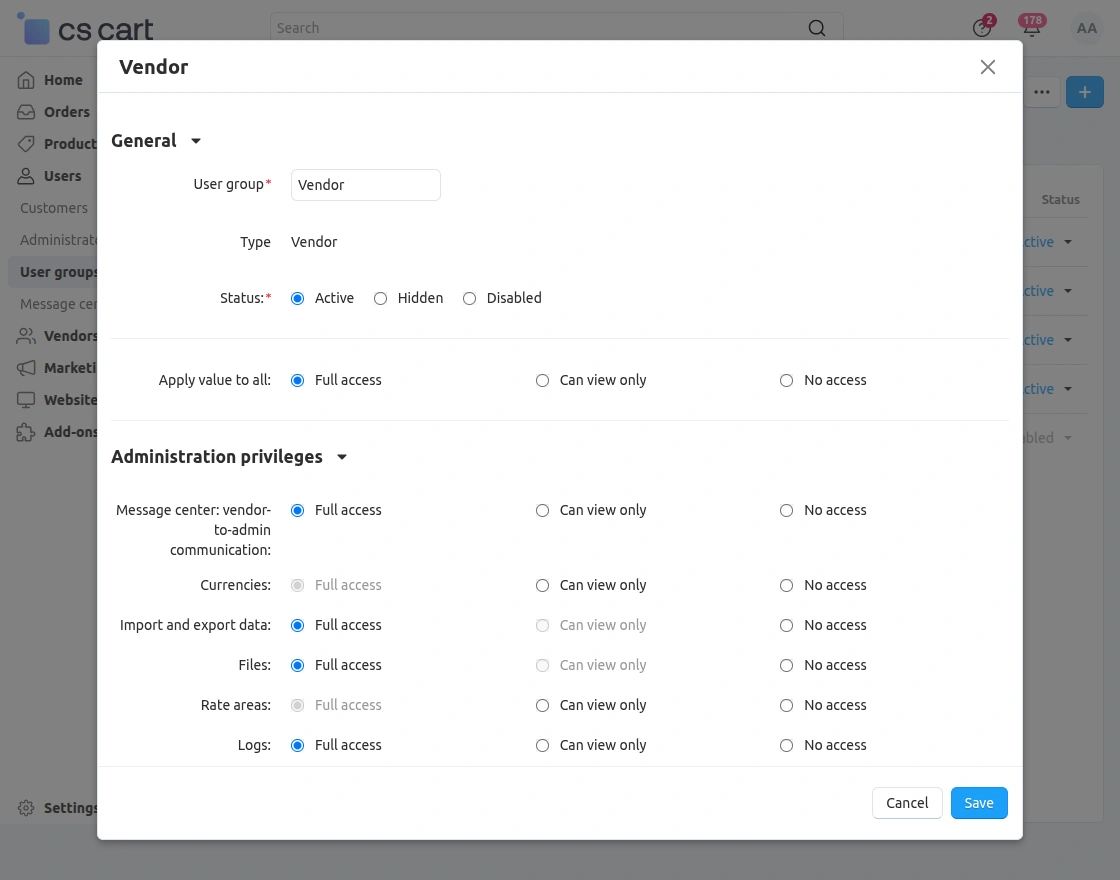
Once saved, the new Vendor User Group will appear in the User Groups list, as shown below.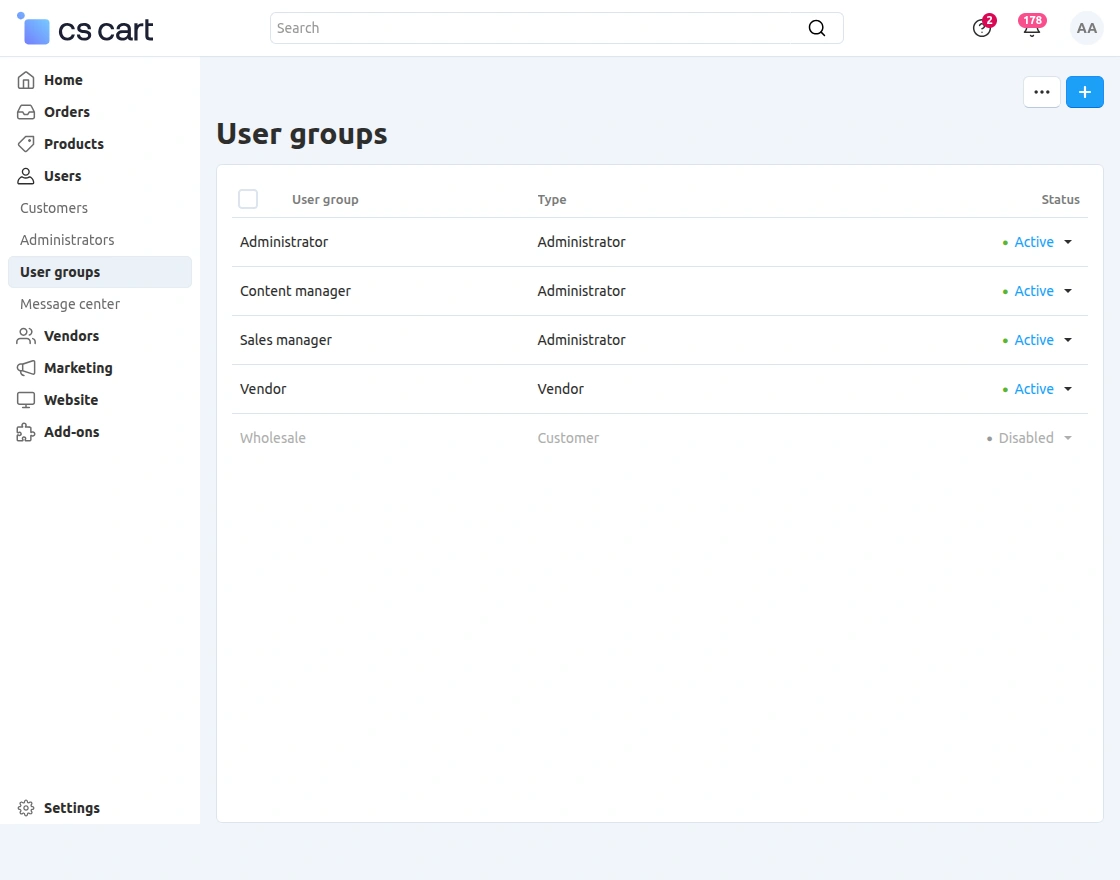
Assign Vendor User Group to Vendor Administrator
To allow vendors to access Web To Print features, the admin must assign the required Vendor User Group to the vendor administrator.
Go to:
Users → Vendors → Vendor Administrators, and open the required vendor administrator profile.
Navigate to the User groups tab and assign the appropriate Vendor User Group, as shown in the snapshot below.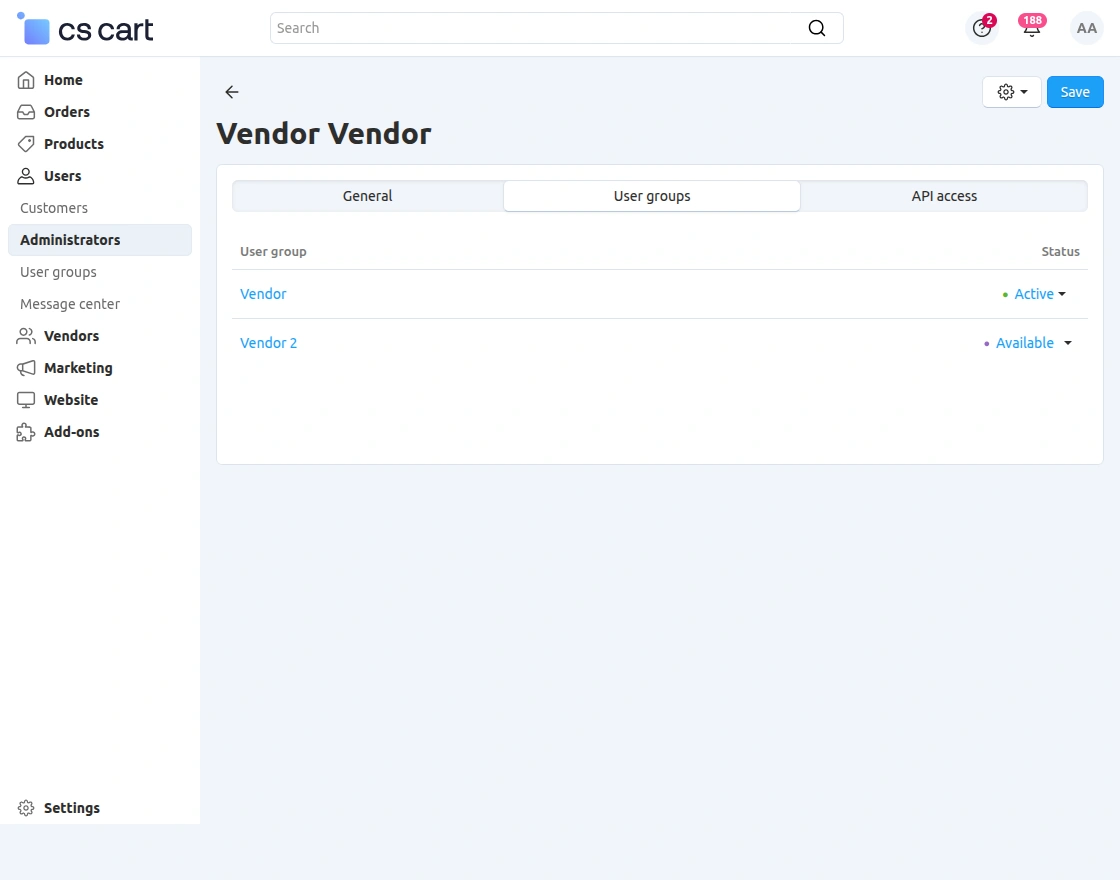
After assigning the user group, set the status to Active and click Save.
This ensures that the vendor gets the required permissions to access and manage Web To Print from the vendor panel.
CS-Cart Web To Print – Vendor End
After the admin assigns the required permissions, vendors can manage Web To Print features directly from their vendor panel.
The vendor can enable product customization and manage Web To Print settings for their products.
Enable Web To Print for Product
The vendor can enable Web To Print for their products from the vendor panel.
Go to:
Products → Products, open the required product, and enable the Web To Print option under the Add-ons section, as shown in the snapshot below.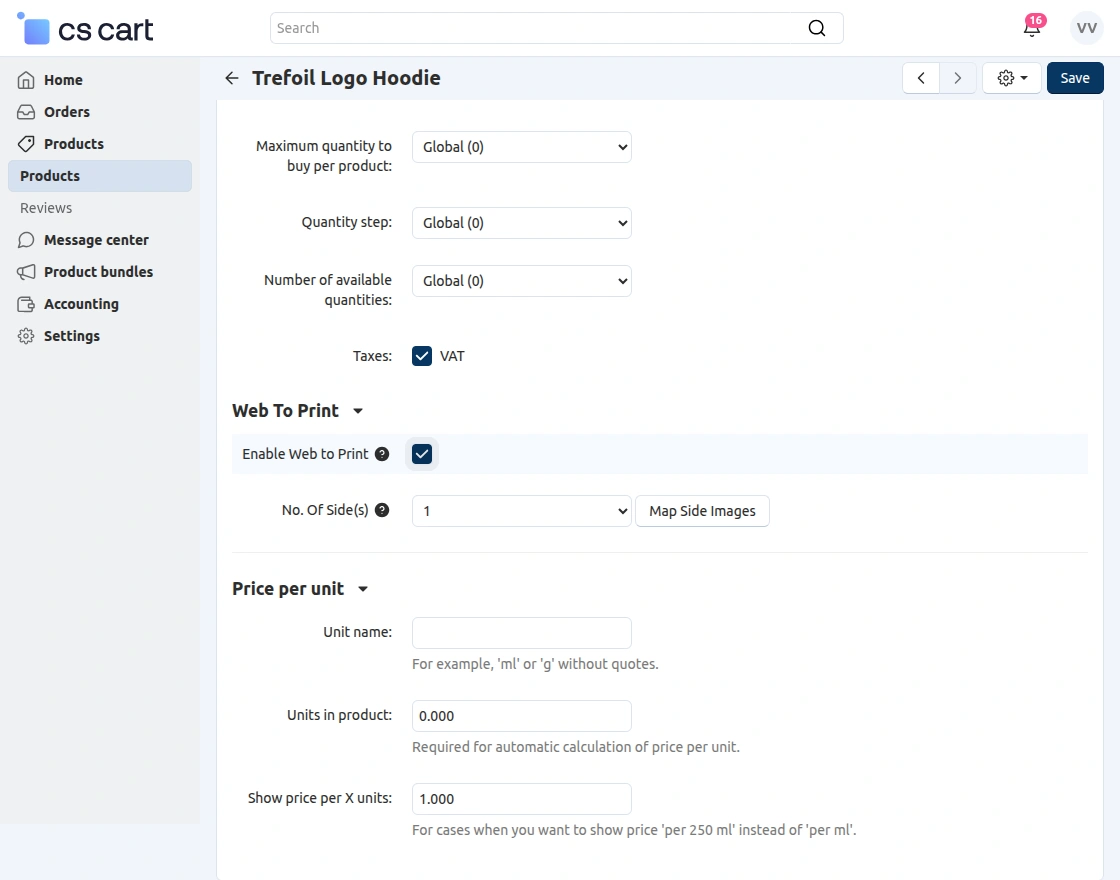
The vendor can also set the number of customizable sides and click Save to apply the changes.
Map Side Images
After enabling Web To Print for the product and setting the number of sides, the vendor can map images for each customizable side.
Click on Map Side Images to assign images to the respective product sides, as shown in the snapshot below.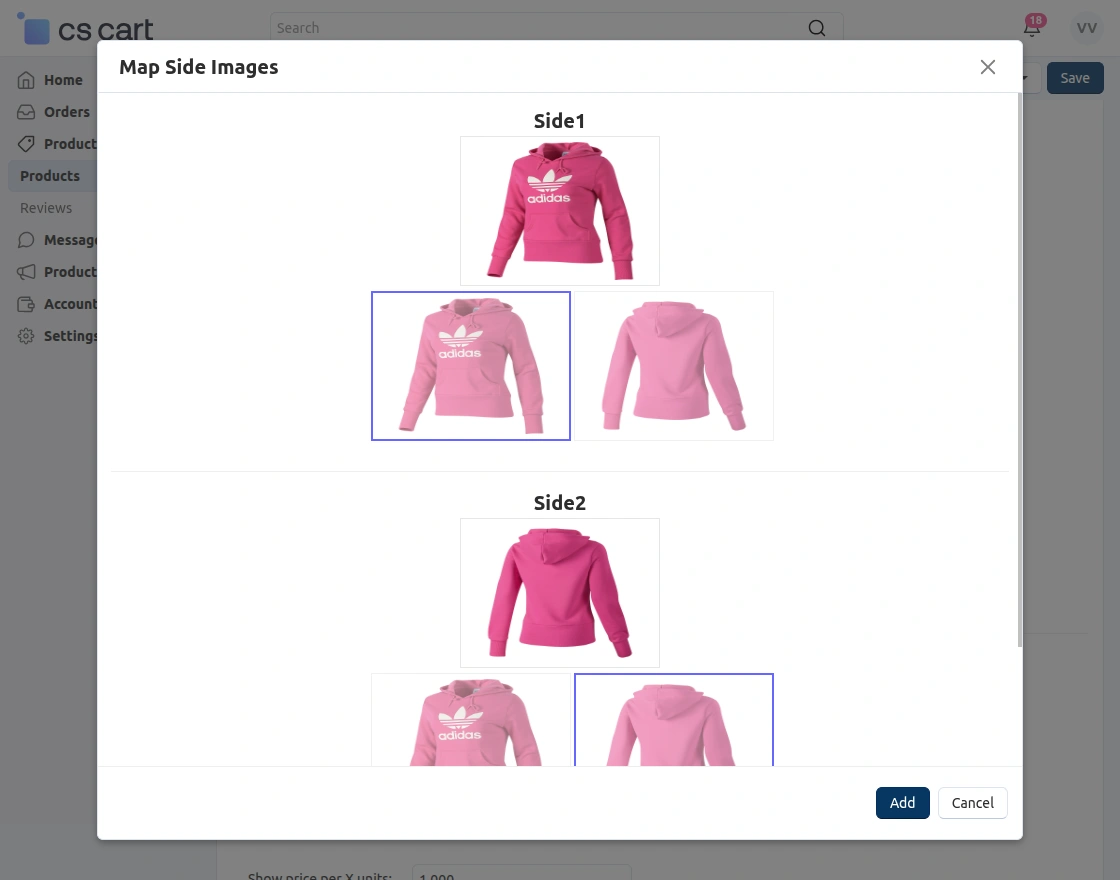
From this section, the vendor can select the appropriate image for each side and click Add to save the mapped side images.
Product Approval Notification
After saving the product with Web To Print configuration, the vendor may receive a notification if the store requires admin approval for product changes.
The notification informs the vendor that the product will be added to the catalog only after approval from the store administrator, as shown in the snapshot below.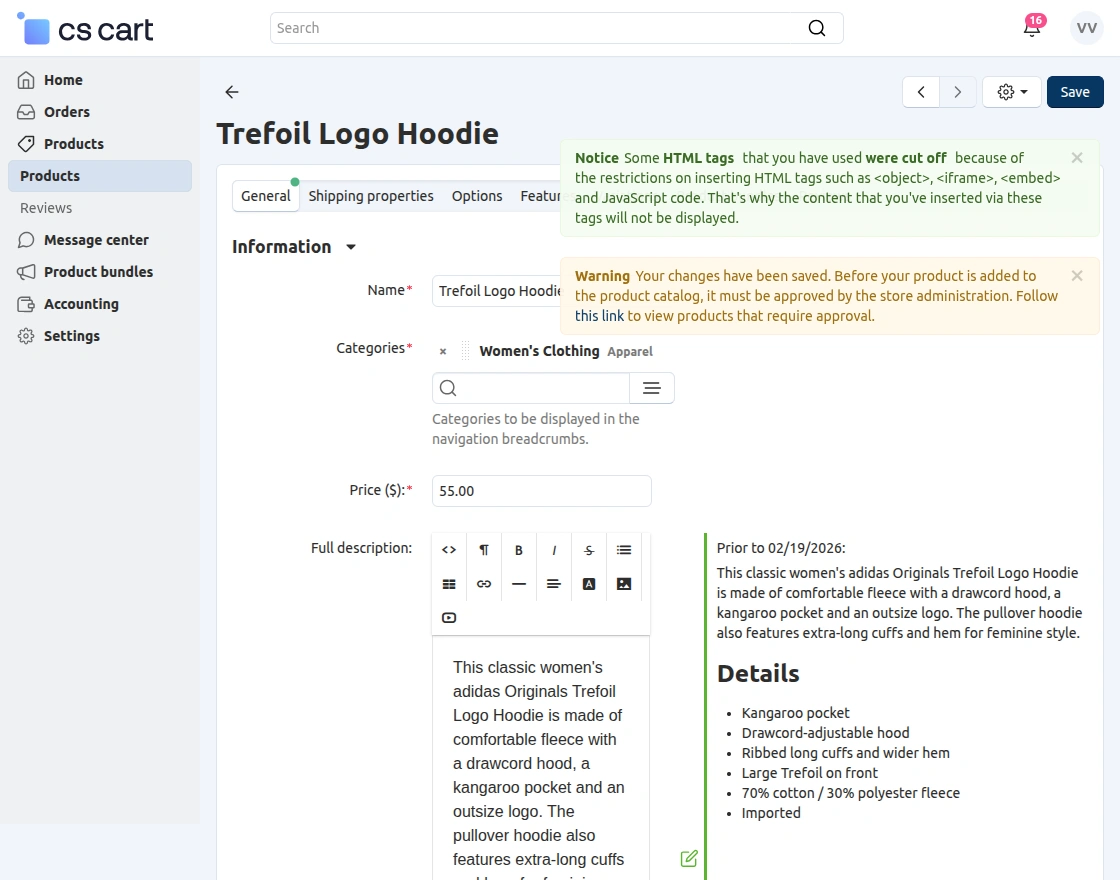
This ensures that all product updates and customization settings are reviewed and approved by the admin before becoming available on the storefront.
View Products on Moderation (Admin)
After the vendor updates or creates a product, the admin can review the changes from the moderation list.
To check the products pending approval, go to:
Products → Products → Products on moderation, as shown in the snapshot below.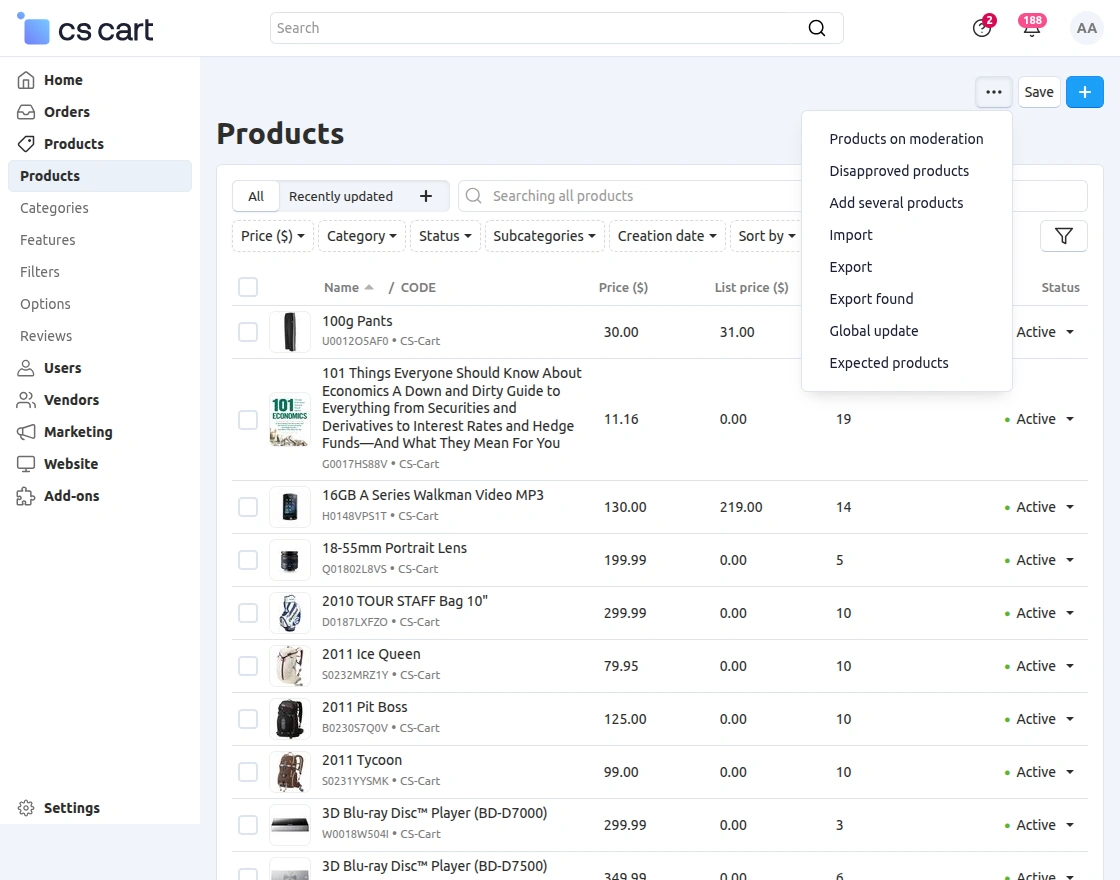
From this section, the admin can view all vendor products that require approval and take the necessary action before making them available on the storefront.
Approve or Disapprove Product (Admin)
From the Products on moderation section, the admin can review the vendor’s product updates and take the necessary action, as shown in the snapshot below.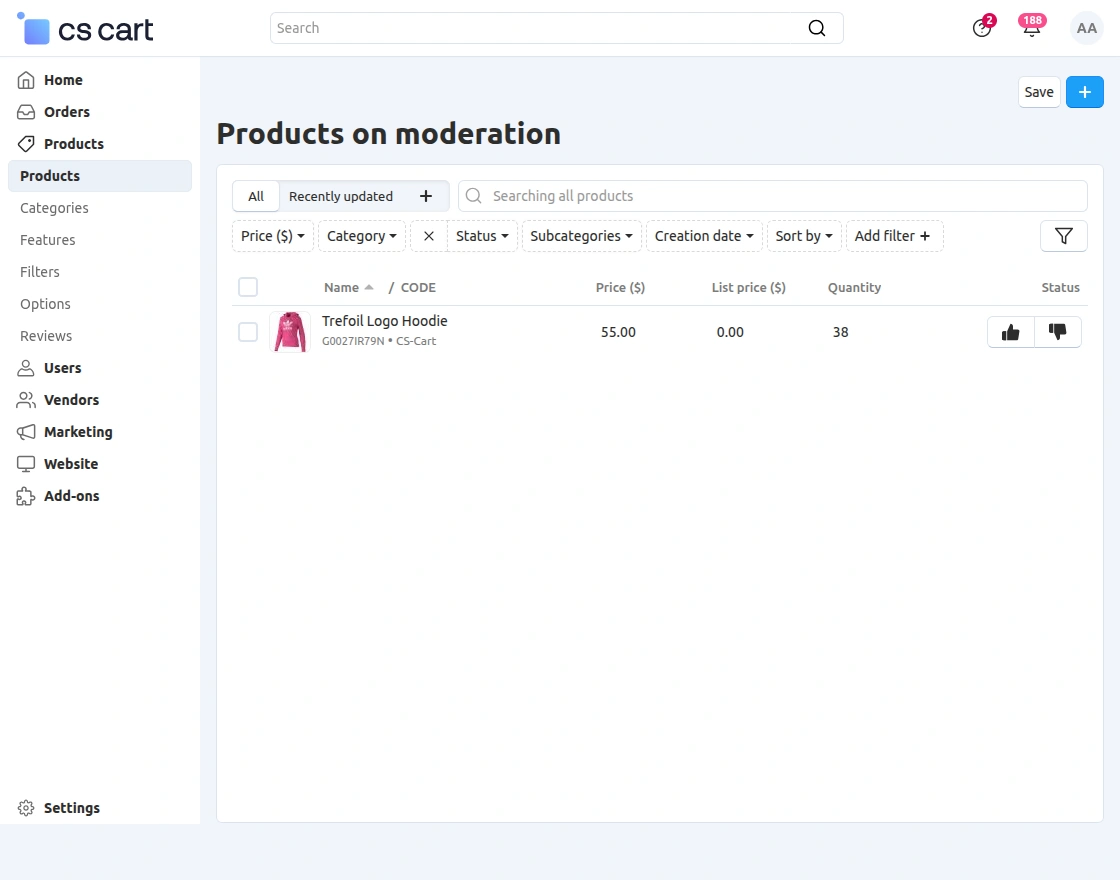
Here, the admin can:
-
Approve the product to make it available on the storefront
-
Disapprove the product if changes are required
This allows the admin to control and verify vendor product updates before they are published.
Manage Side Templates Option Available After Approval
Once the admin approves the product, the vendor can access the template management option from the product settings.
After approval, open the product and navigate to the Web To Print section. The Manage Side Templates option will be visible, as shown in the snapshot below.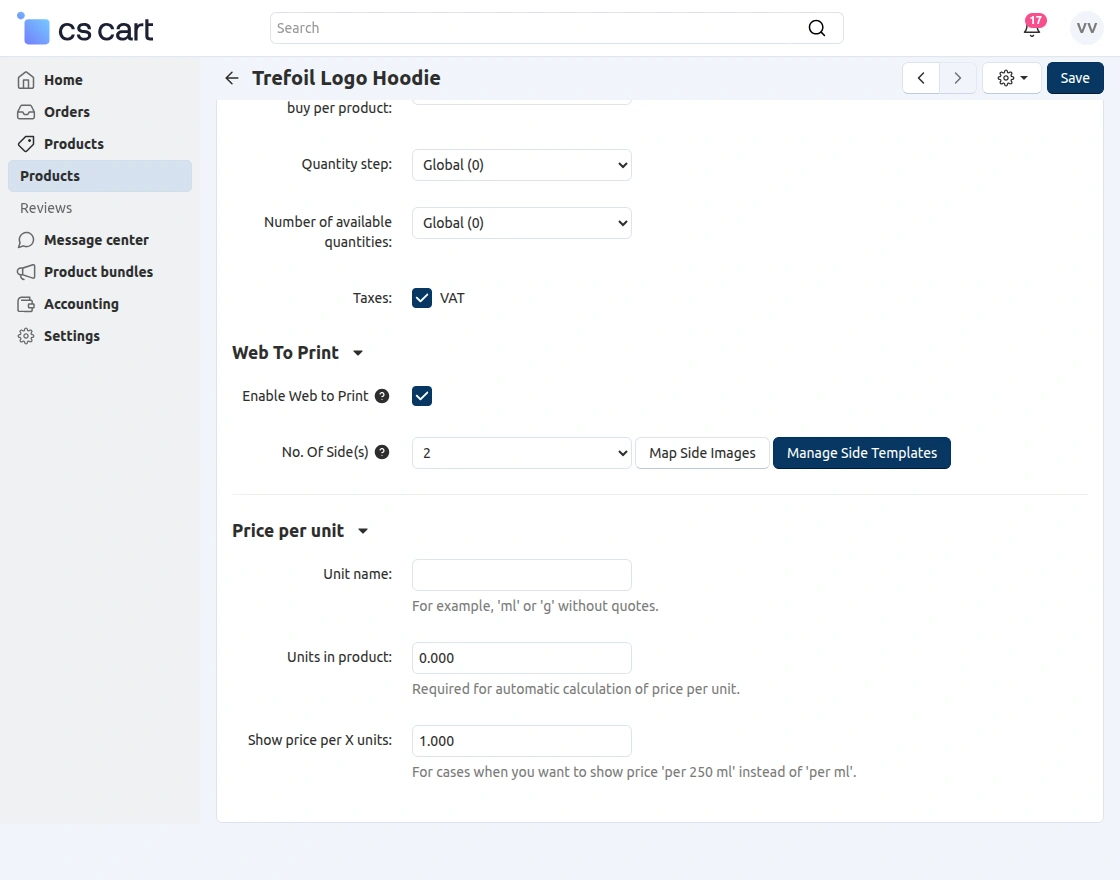
The vendor can click on Manage Side Templates to create and manage customization templates for the product sides.
View Web To Print Products
After the product is approved and Web To Print is enabled, the vendor can view all customizable products from the vendor panel.
To access the list, go to:
Web Print Products, as shown in the snapshot below.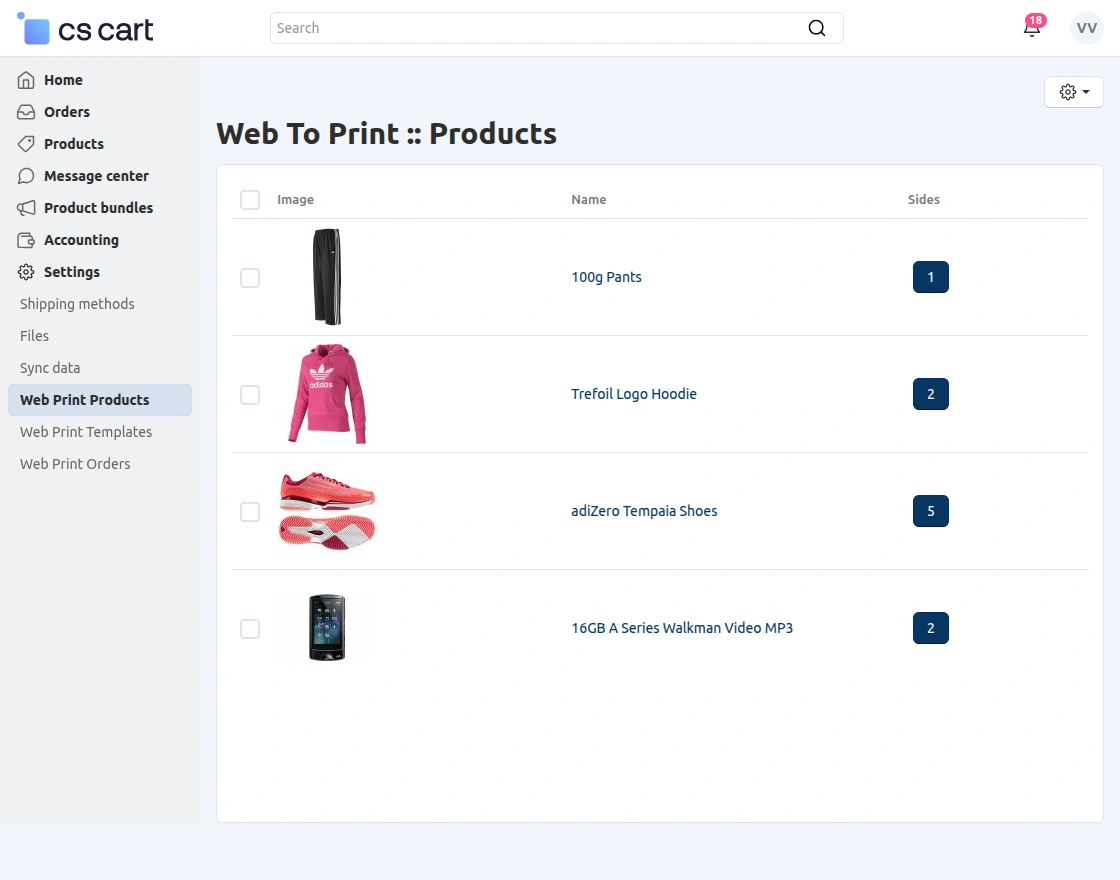
From this section, the vendor can view all products enabled for customization along with the number of customizable sides for each product.
Click on the number of sides to manage the product sides and templates.
View Web To Print Templates
The vendor can view and manage all created customization templates from the vendor panel.
To access the templates, go to:
Web Print Templates, as shown in the snapshot below.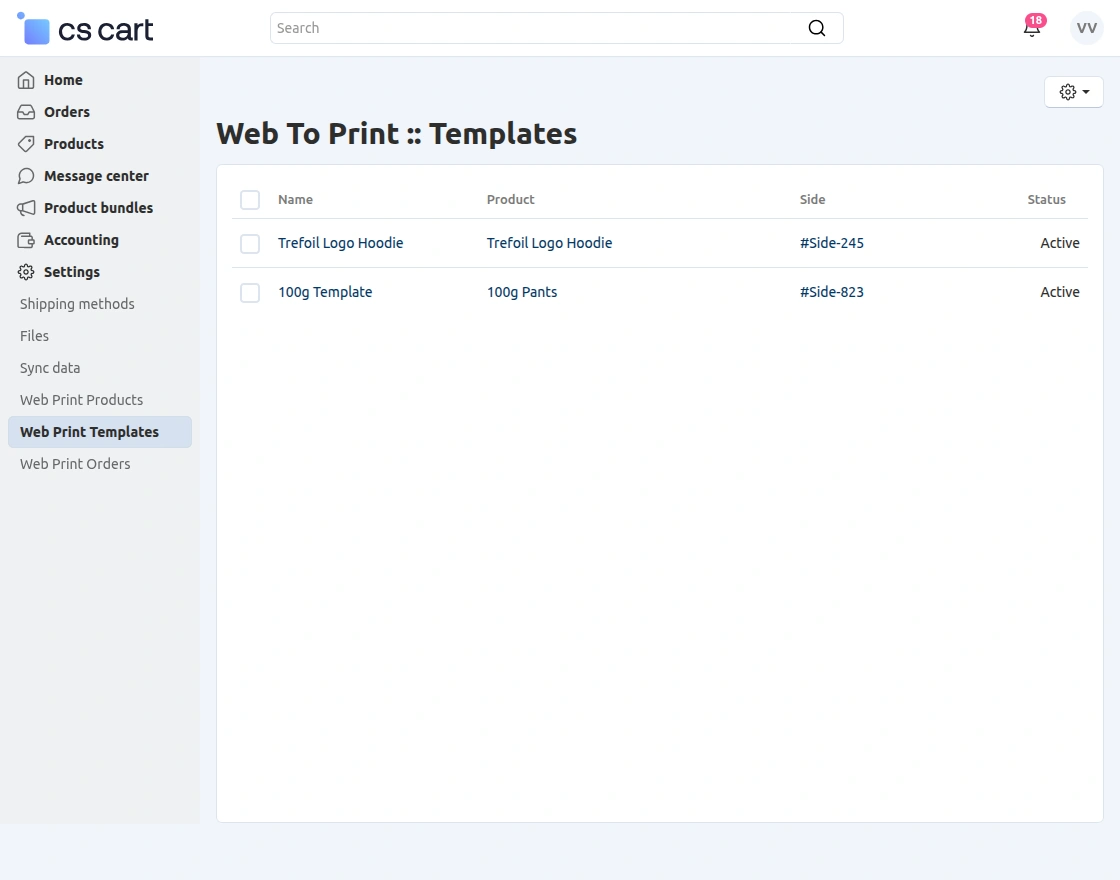
This section displays the list of templates along with the associated product, side, and status.
The vendor can manage these templates as required for product customization.
View Web To Print Orders
The vendor can view all orders placed for customizable products from the vendor panel.
To access the orders, go to:
Web Print Orders, as shown in the snapshot below.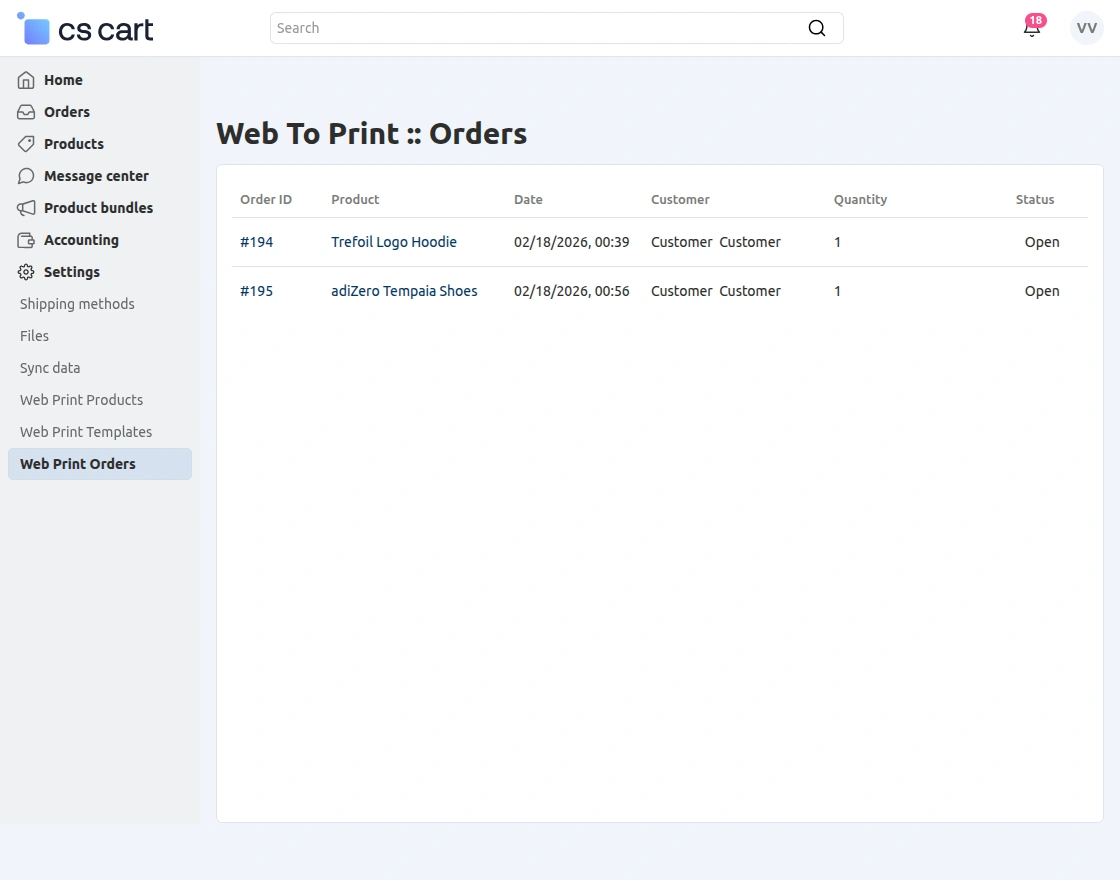
This section displays the list of Web To Print orders along with order ID, product name, date, customer details, quantity, and order status.
The vendor can review these orders to process the customized product accordingly.
CS-Cart Web To Print – Frontend
After the admin and vendor configure Web To Print for the product, customers can customize the product directly from the storefront before placing the order.
Customize Product from Storefront
Customers can visit the product page and click on the Customize button to personalize the product according to their requirements, as shown in the snapshot below.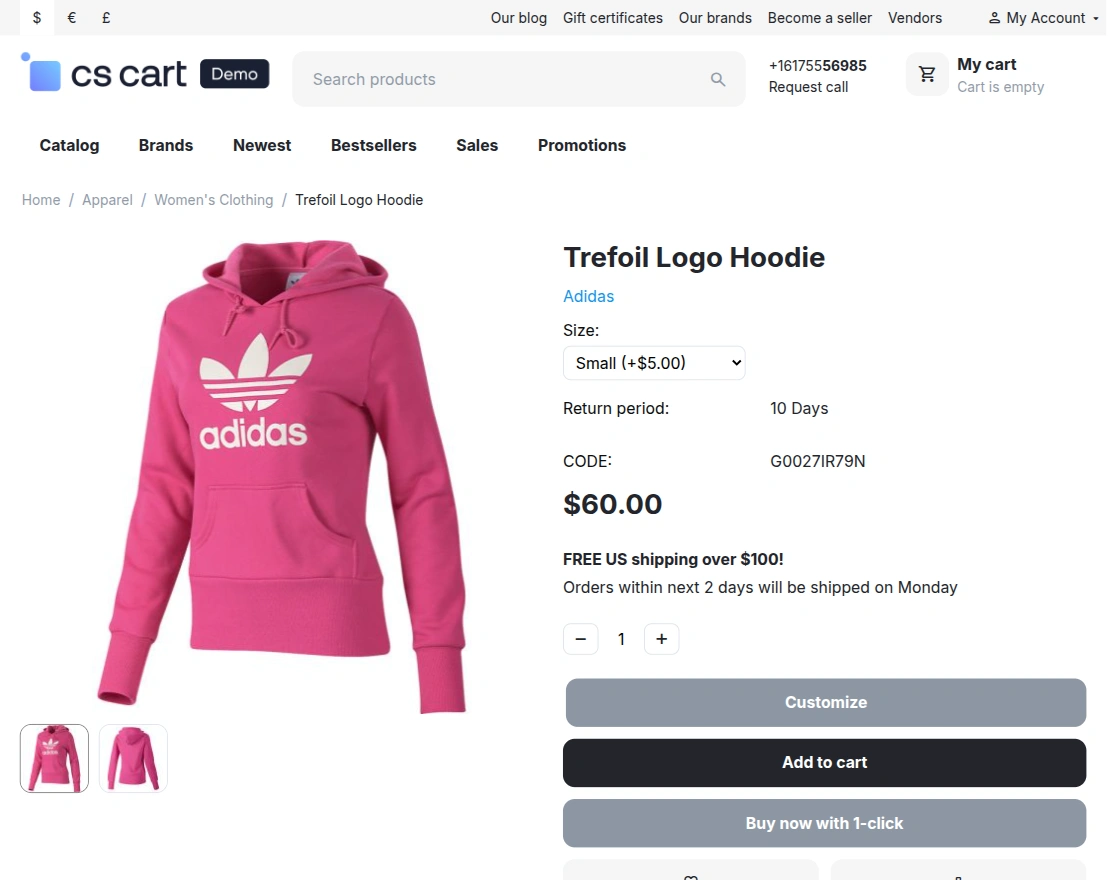
Using this option, customers can proceed to the design panel where they can modify the product before adding it to the cart.
Select Product Side for Customization
After clicking on the Customize button, customers can select the side of the product they want to personalize. All available sides configured by the admin/vendor will be displayed here.
Customers can click on Customize for the desired side and proceed further, as shown in the snapshot below.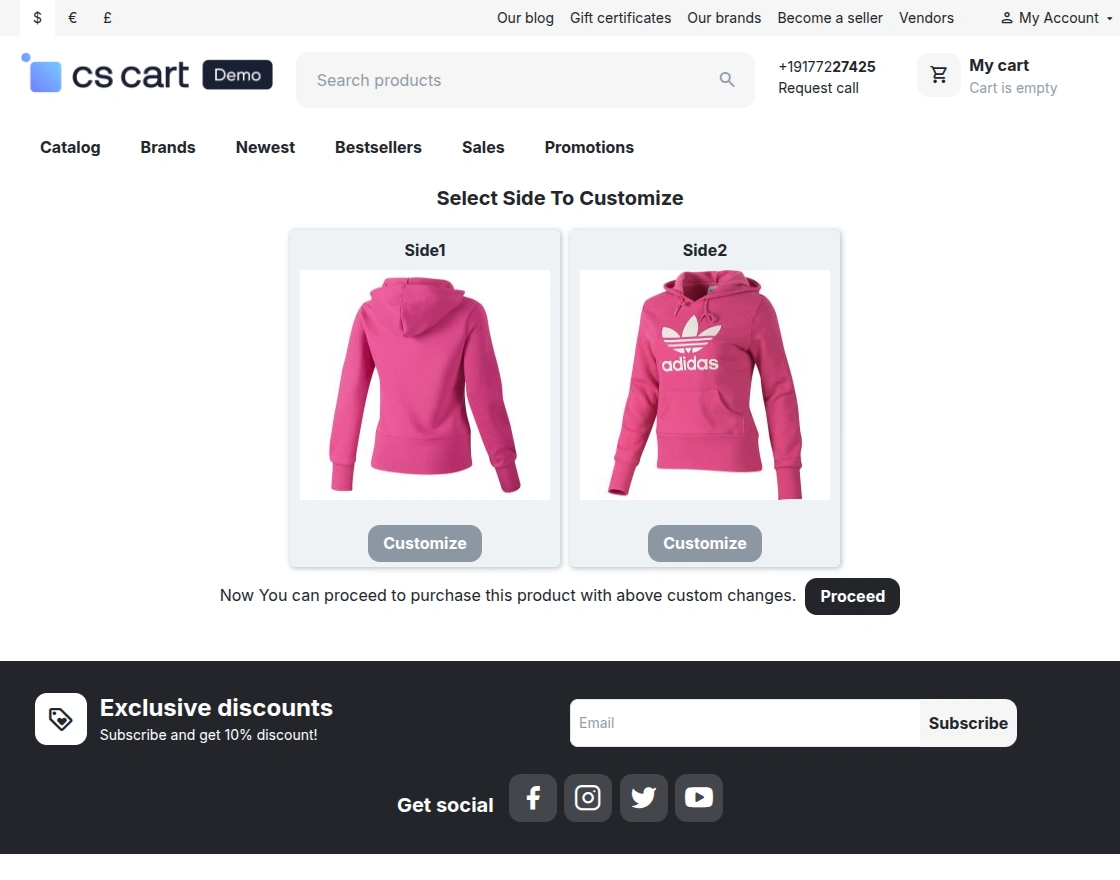
Customize Product Design
After selecting the product side, customers will be redirected to the customization panel. Here, they can personalize the product by adding Text, Images, or Clip Art as per their requirements.
Customers can also format the text, adjust its position, and manage design elements easily, as shown in the snapshot below.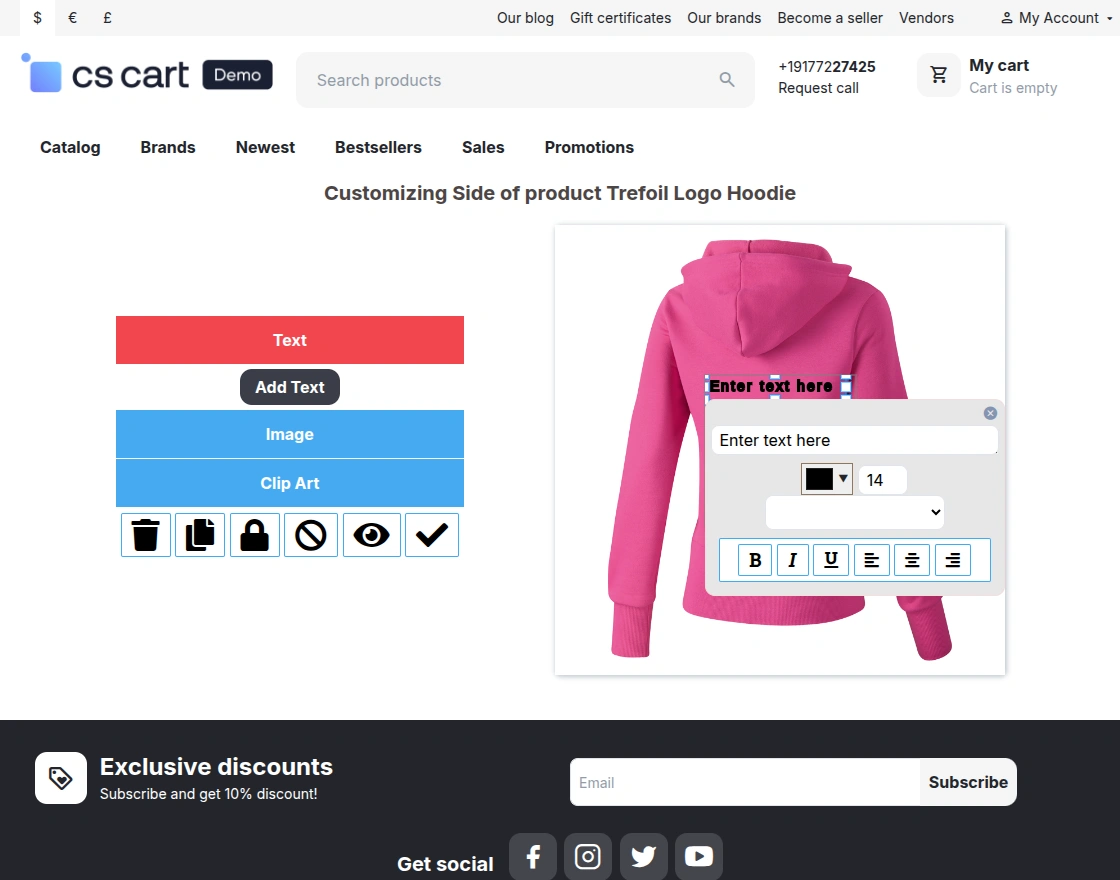
Finalize Customization
After completing the design, customers can review their customized product and click on Finalize and Proceed to save the changes and continue with the purchase process, as shown in the snapshot below.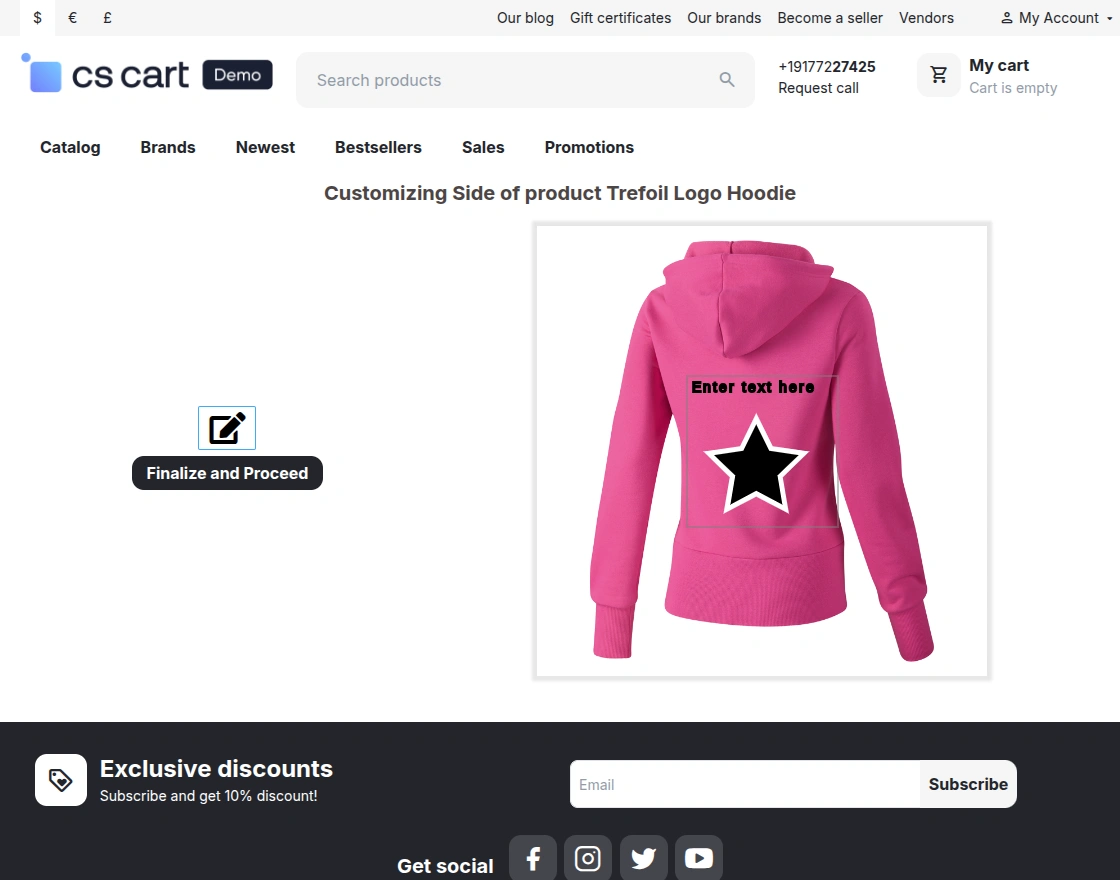
Re-Customize the Product
After finalizing the design, customers can view the customized side. If required, they can click on Re-Customize to modify the design again before proceeding with the purchase, as shown in the snapshot below.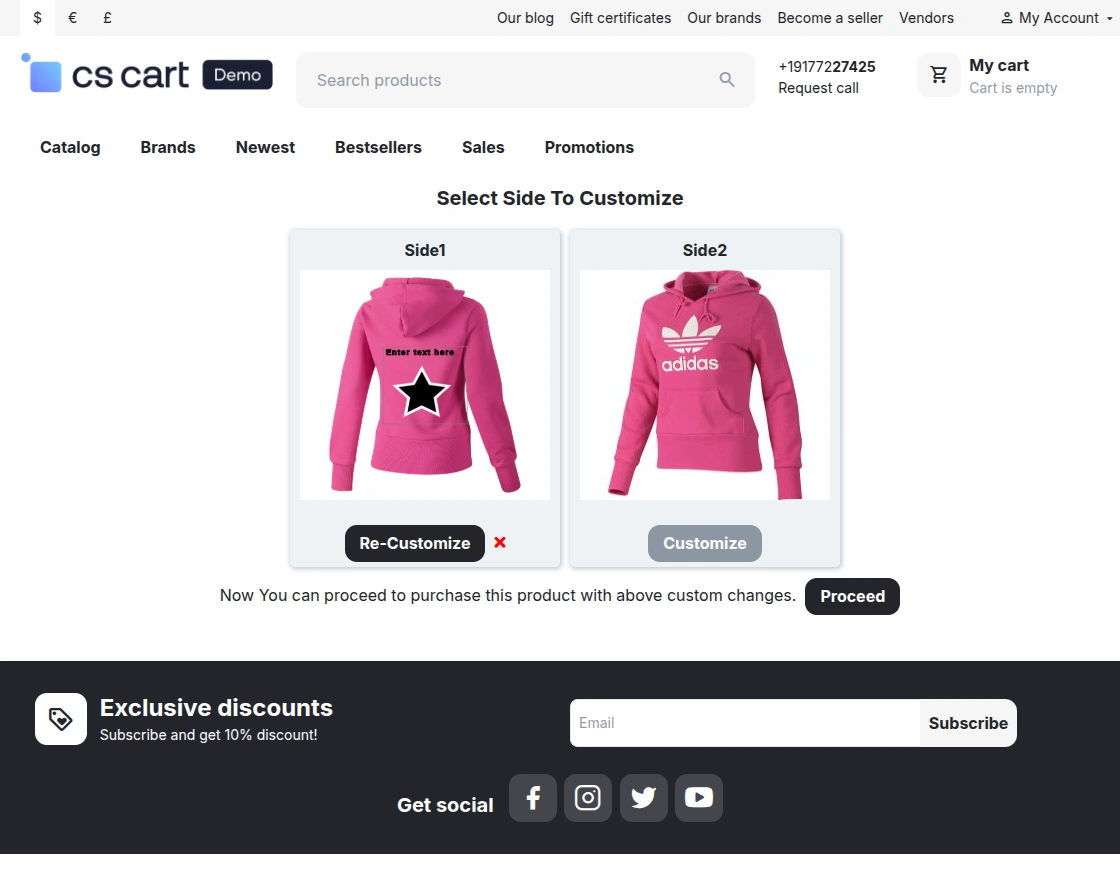
View Customized Product on Product Page
After customization, the updated design will be displayed on the product page, as shown in the snapshot below.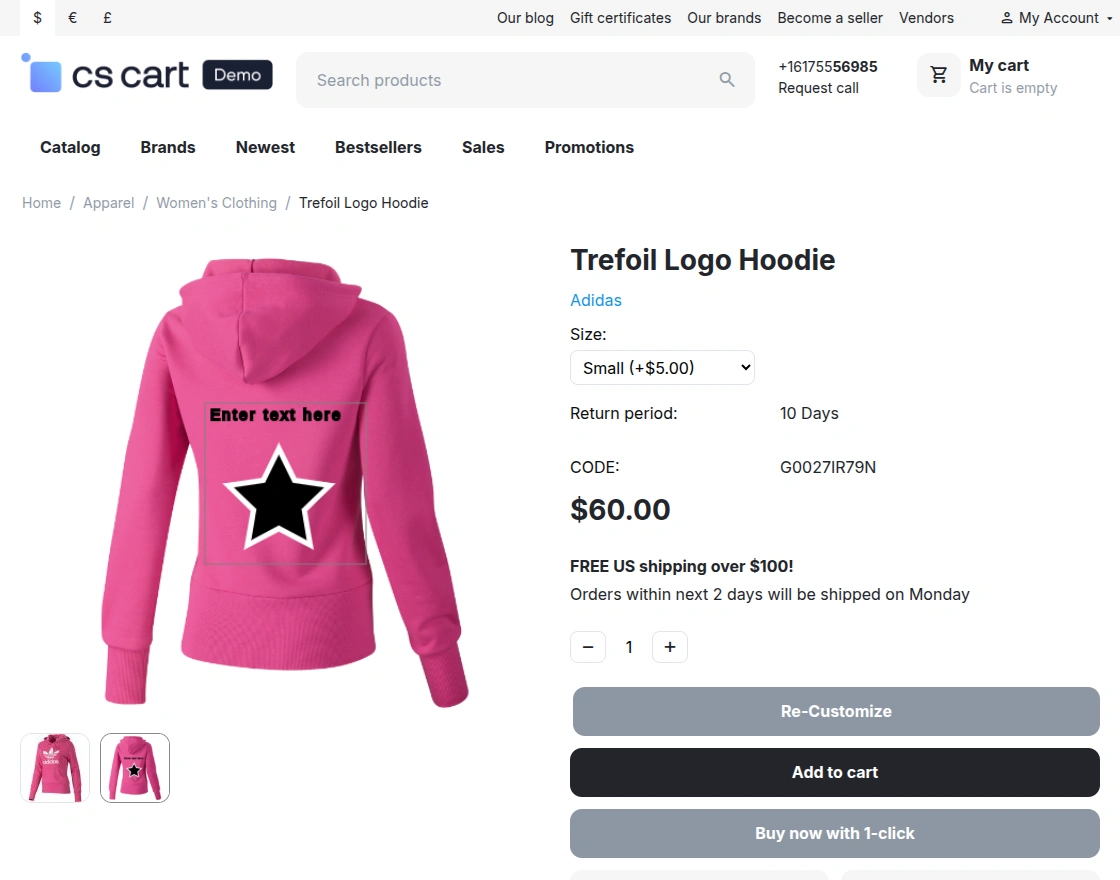
Customers can review the customized product before placing the order.
The Re-Customize option is also available if any changes are required.
Customers can click on Add to Cart to proceed with the purchase.
Download Customized File from Order Details
After placing the order, customers can view the order details from their account.
The customized product will be listed in the order, along with an option to Download Customized Files, as shown in the snapshot below.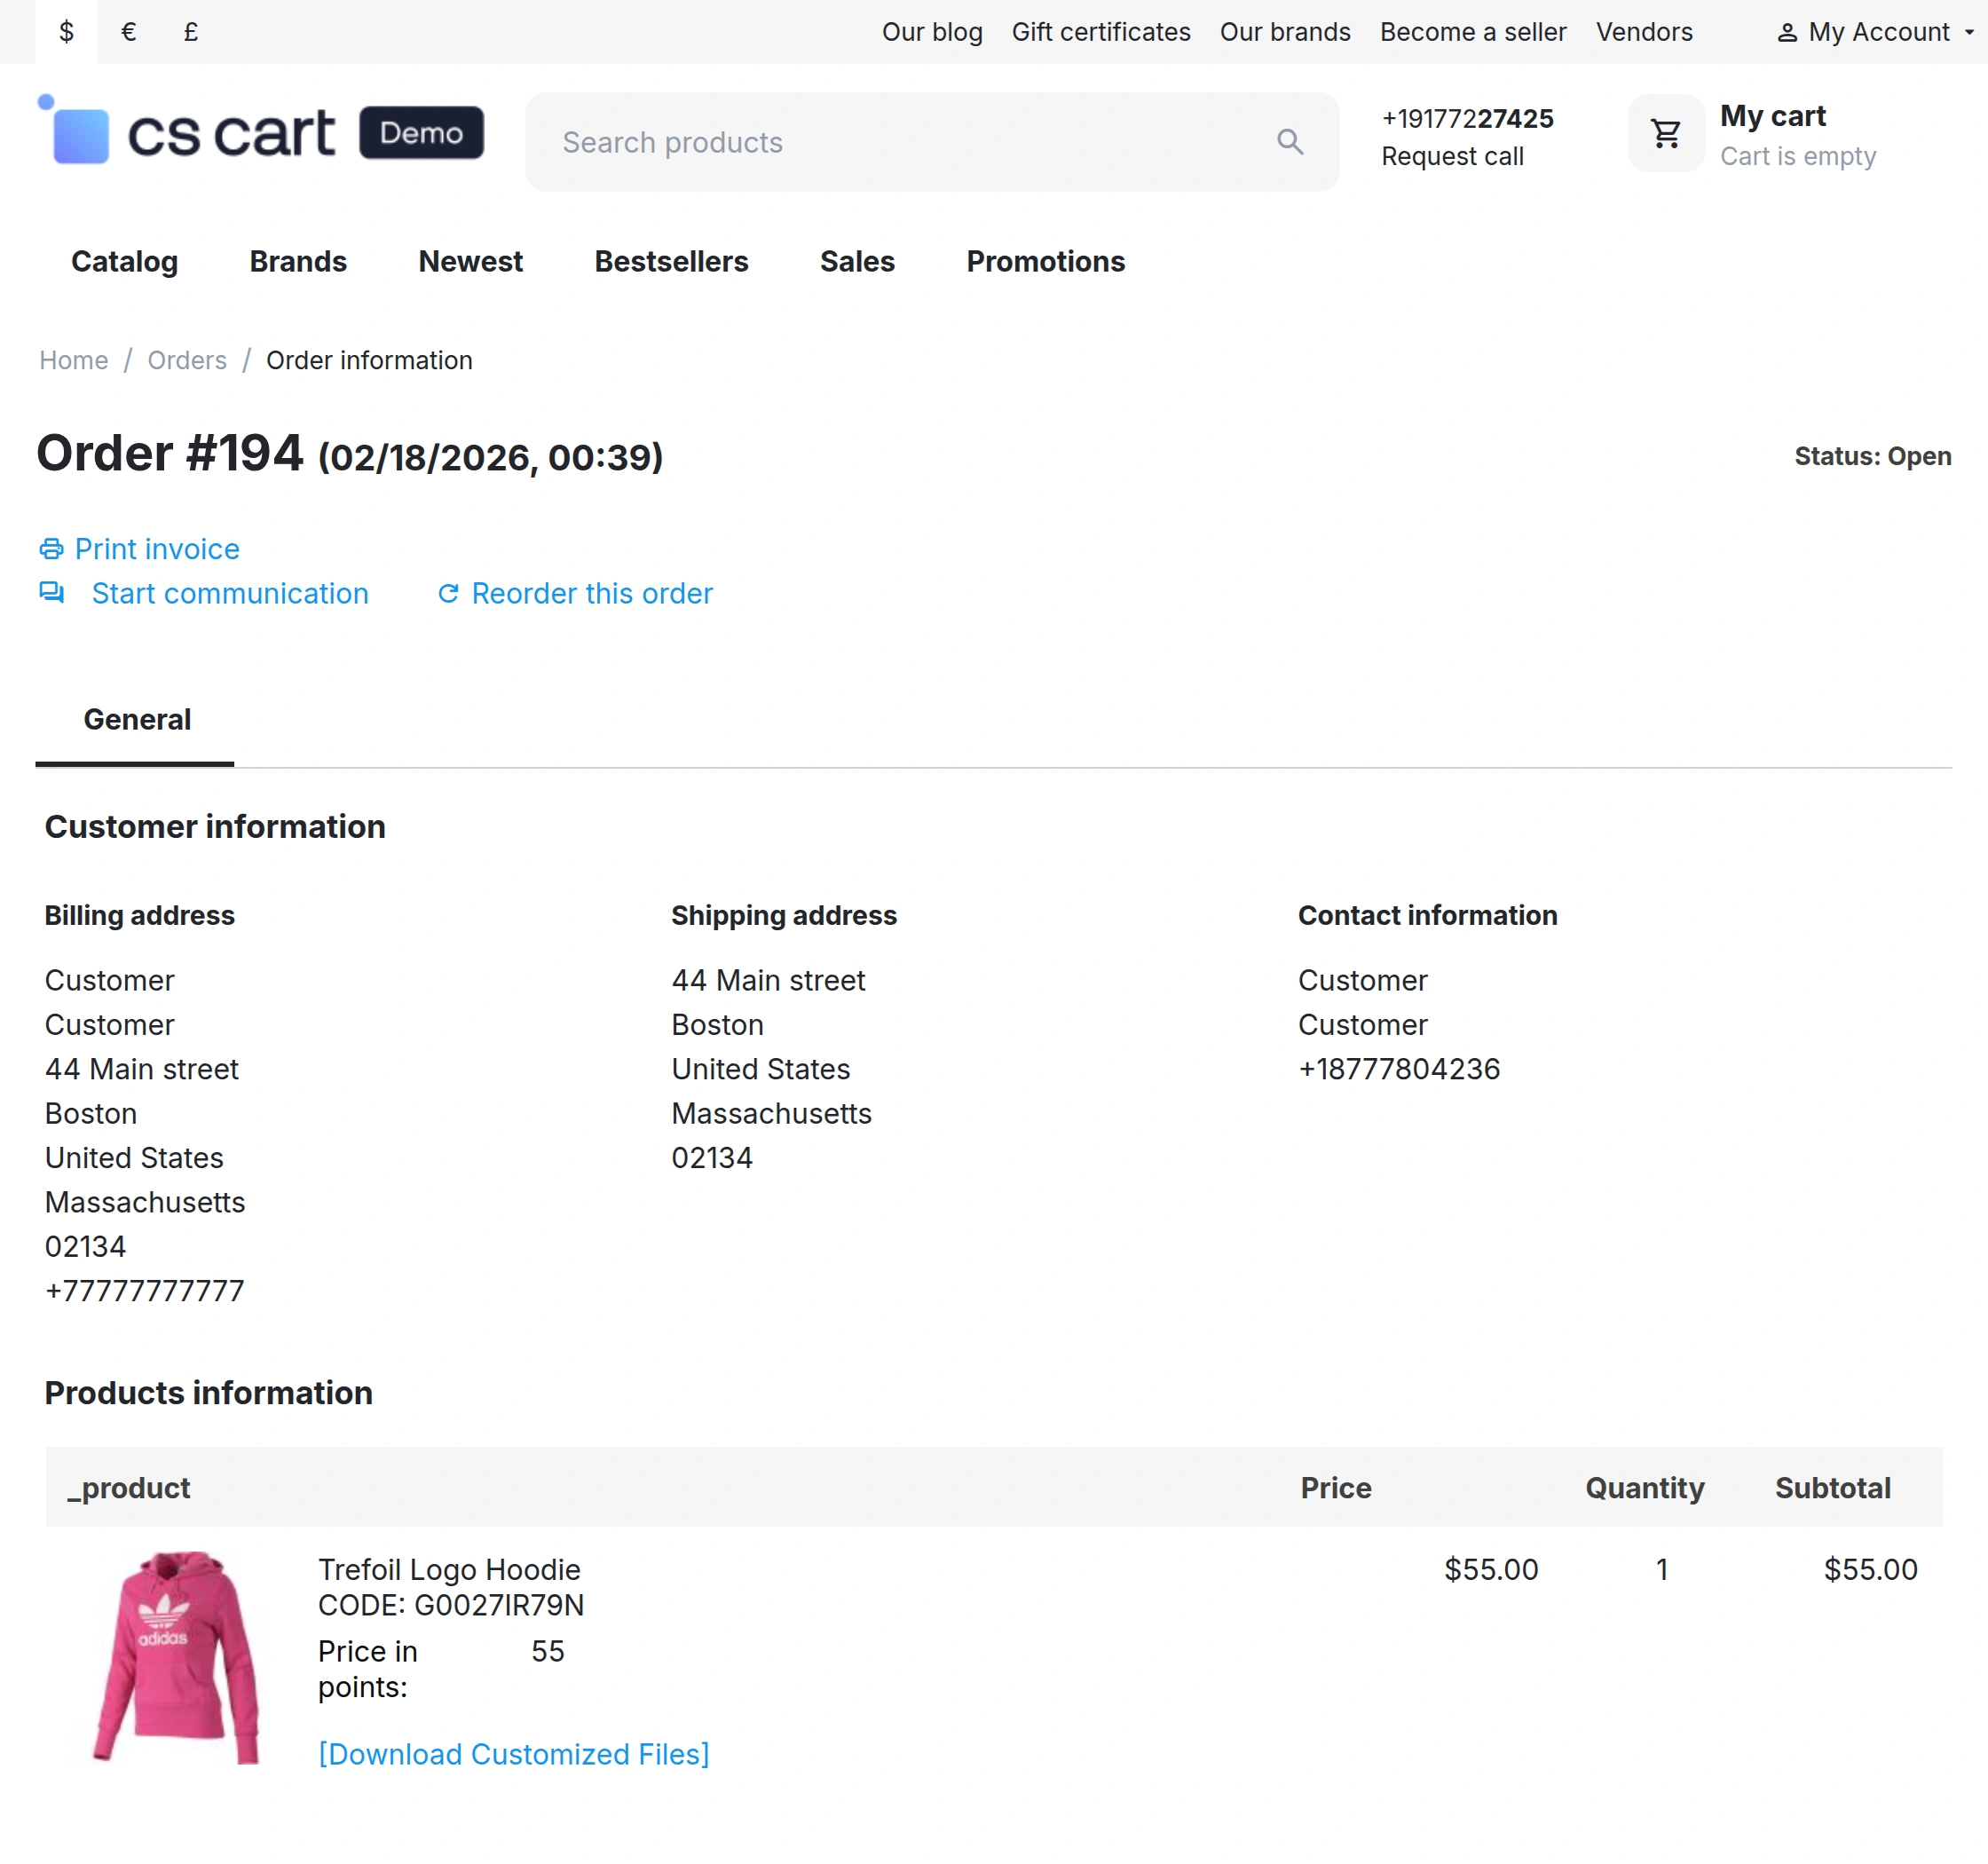
This allows customers to download the final customized design for reference.
View Downloaded Customized Design
After clicking Download Customized Files, the customized design is downloaded as an image file.
Customers can open the file to view the final design with all applied text, images, or clipart, as shown below.

Current Product Version - 2.0
Supported Framework Version - 4.16.x, 4.17.x, 4.18.x, 4.19.x

Be the first to comment.