Features
-
Seamlessly integrated with CS-Cart Multivendor.
-
Vendors can upload KYC documents.
-
Includes an automatic email trigger when a new vendor registers.
-
Moreover, it provides ready-to-use email templates for KYC upload requests, approval or rejection notifications, and request expiry alerts.
-
Allows the admin to send KYC upload requests to existing vendors.
-
Supports the resend request option for pending KYC uploads.
-
Easy to use and manage from the admin panel.
-
Admin can also create KYC types based on Storefront and Vendor User Group.
Video Tutorial
Installation
After downloading the CS-Cart Vendor KYC add-on, you’ll get one zip file, one install.txt file, and a relevant User Guide manual doc.
Also, read it carefully for proper configuration.
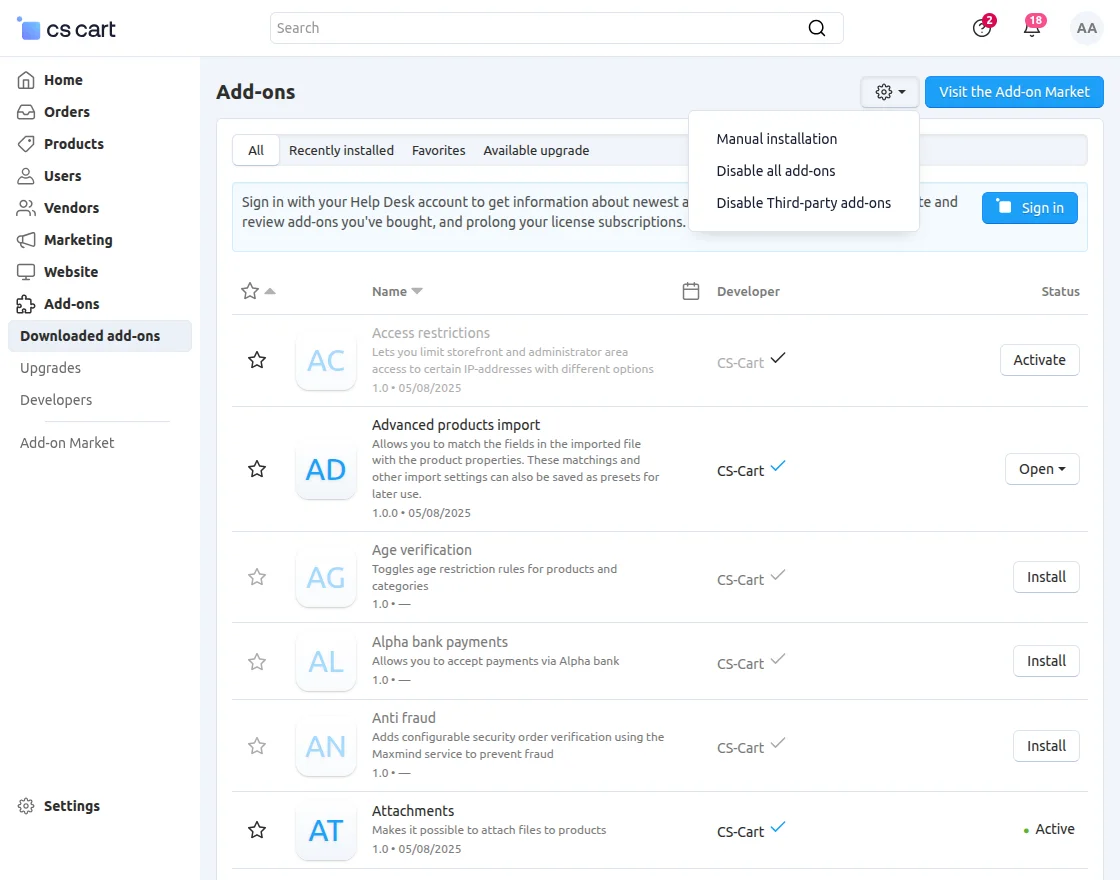
Go to Manage Add-ons, and click on “Manual Installation” as shown below in the snapshot.
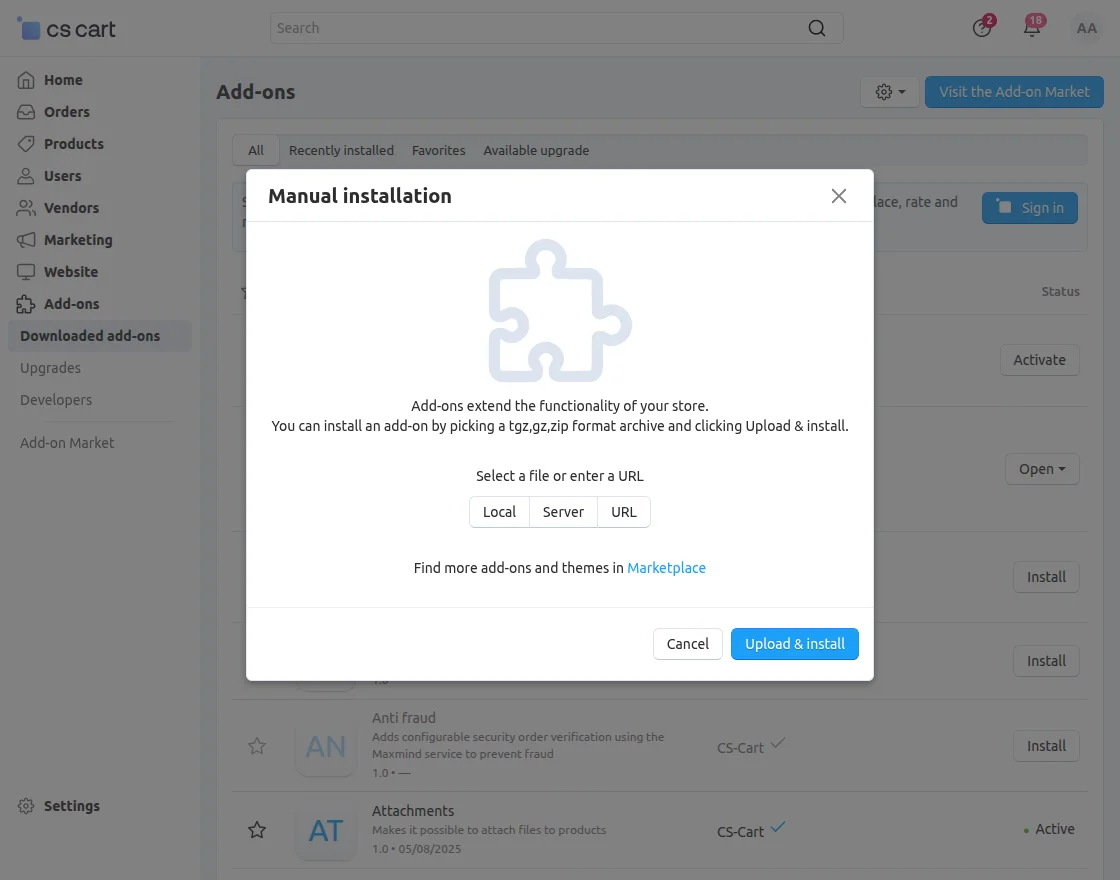
Click on “Local” to browse the zip file. Further, click on “Upload & Install” as shown below in the snapshot.
Module Configuration | Admin
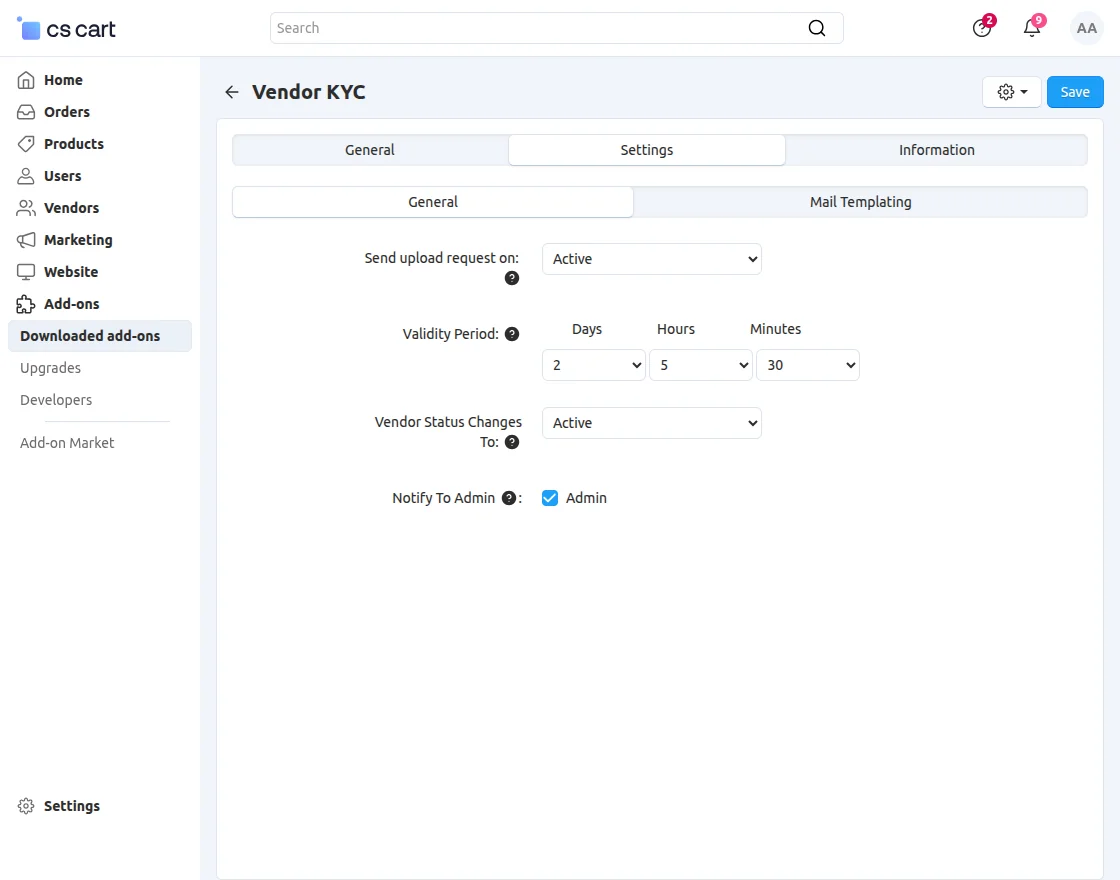
To configure the module, also go to the Add-Ons >> Developers >> Webkul Software Pvt Ltd. >> Vendor KYC >> Settings.
-
Send Upload Request On: Select the vendor status to trigger the KYC upload email.
-
Validity Period: Set how long the KYC upload request remains valid.
-
Vendor Status Changes To: Choose the status if KYC isn’t uploaded in time.
-
Notify Admin: Alert the admin when a new KYC is uploaded.
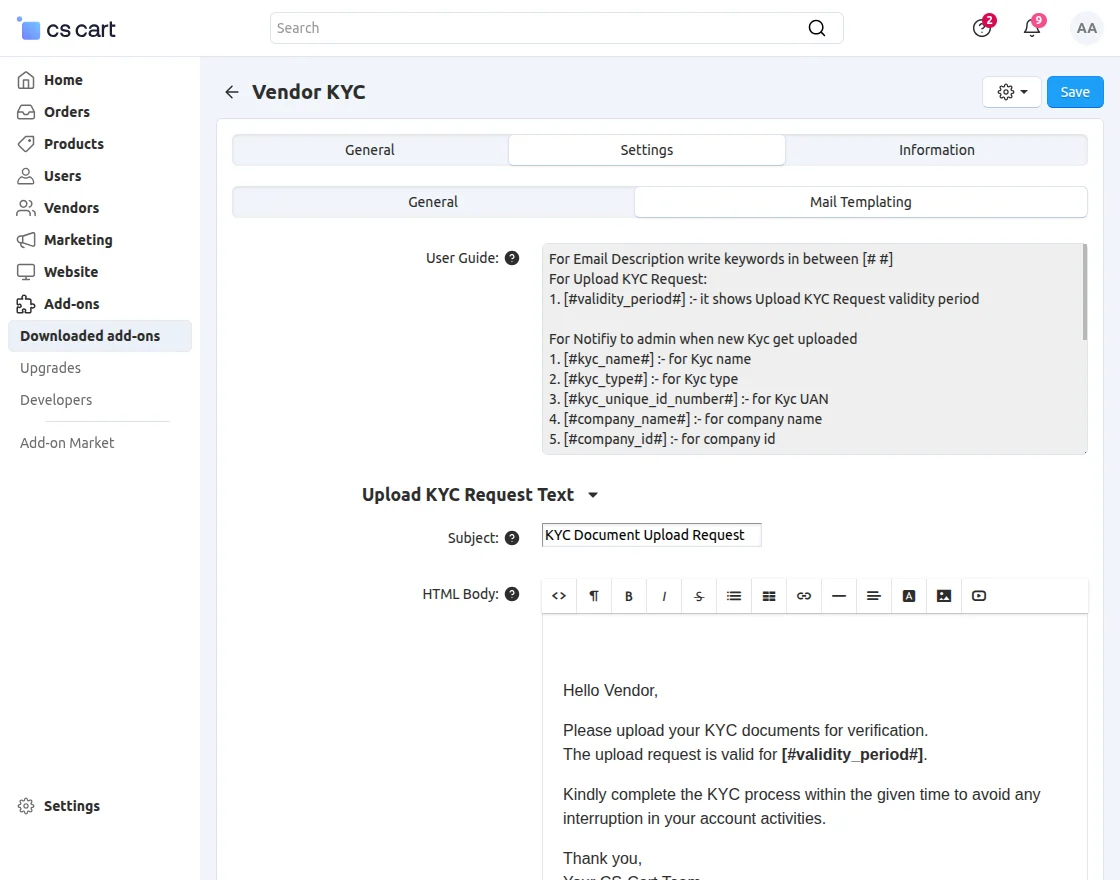
Mail Template
Customize the email templates for KYC upload requests, approvals, rejections, and expiry notifications.
KYC Types – Admin End
The admin can create and view the list of KYC types by navigating to Vendors >> Vendor KYC >> KYC Types.
The admin can add a new KYC type by clicking on Add KYC.
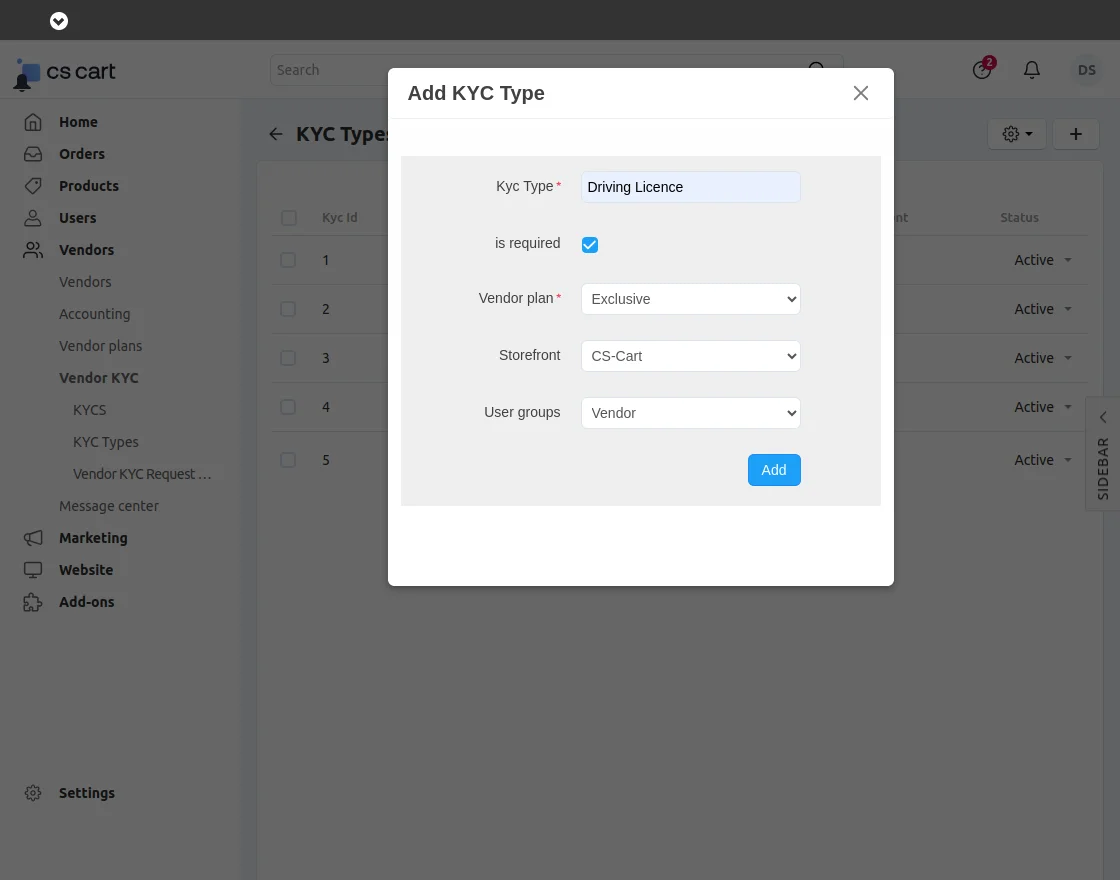
Note – The option to select user groups will be visible in the dropdown only after the vendor privilege addon is installed.
Upload KYC Request
The admin can send KYC Submission requests manually at the admin end by going to the Vendors->Vendors tab.
Also, select the vendors to whom the request needs to be sent & click on the button provided for sending KYC requests as shown below.
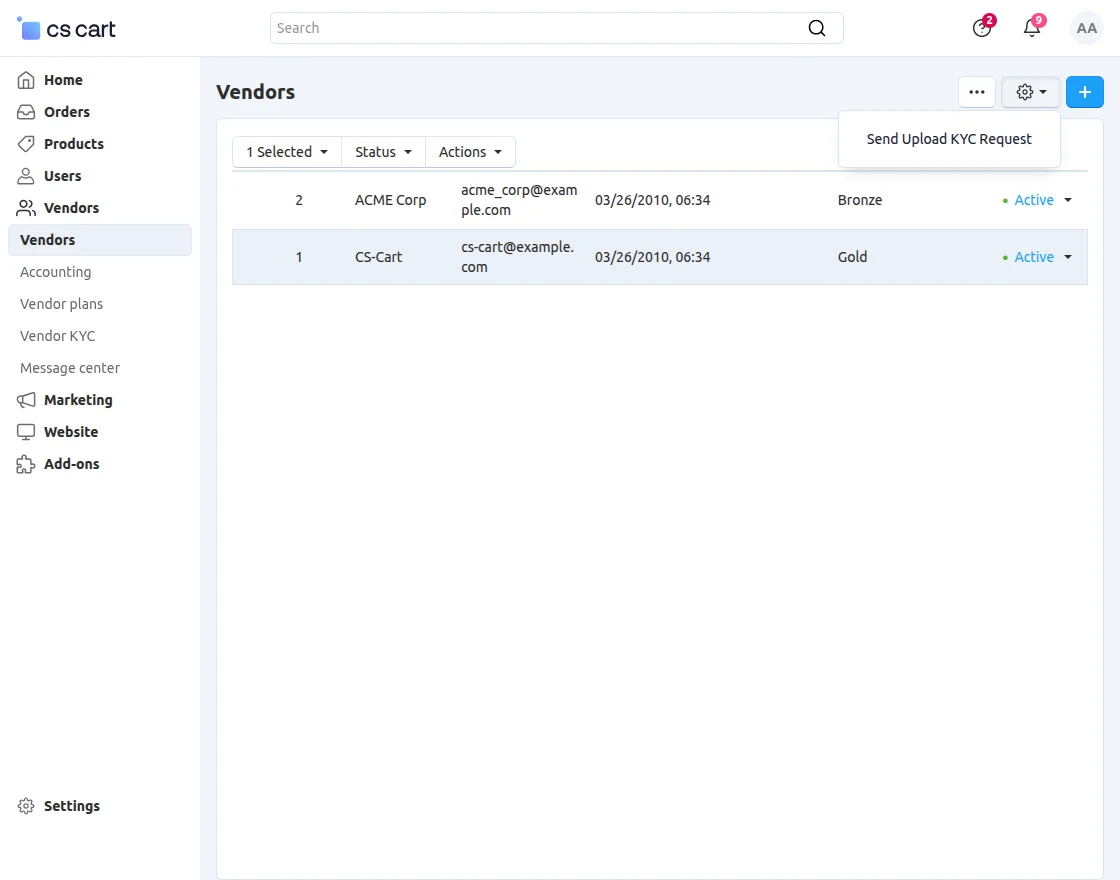
Now, the system sends the email according to the email configuration on the admin end.
KYC – Admin End
To manage KYC, go to Vendors >> Vendor KYC >> KYCs.
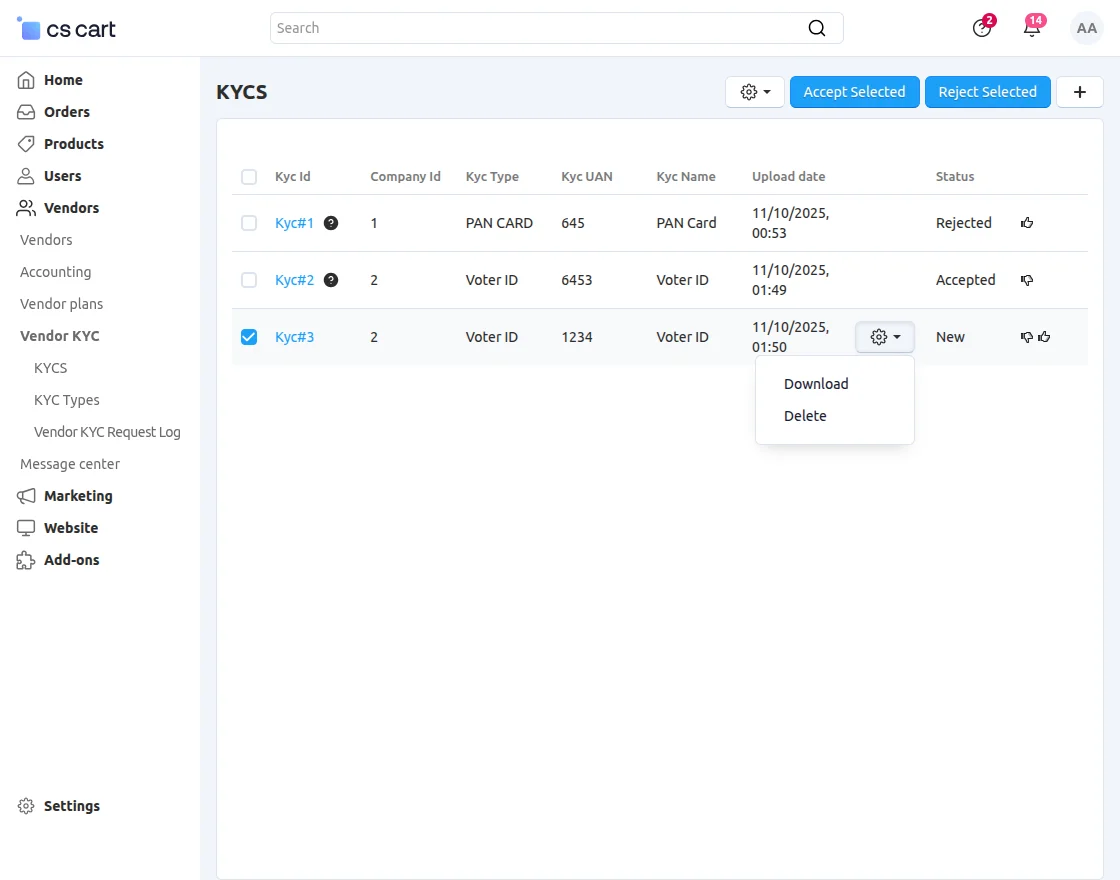
In this section, the admin can manage KYC requests by accepting, rejecting, or deleting them.
The admin can also add new KYC entries from this section.
Vendor KYC Request Log – Admin End
From this section, the admin can view the logs of all KYCs uploaded by vendors.
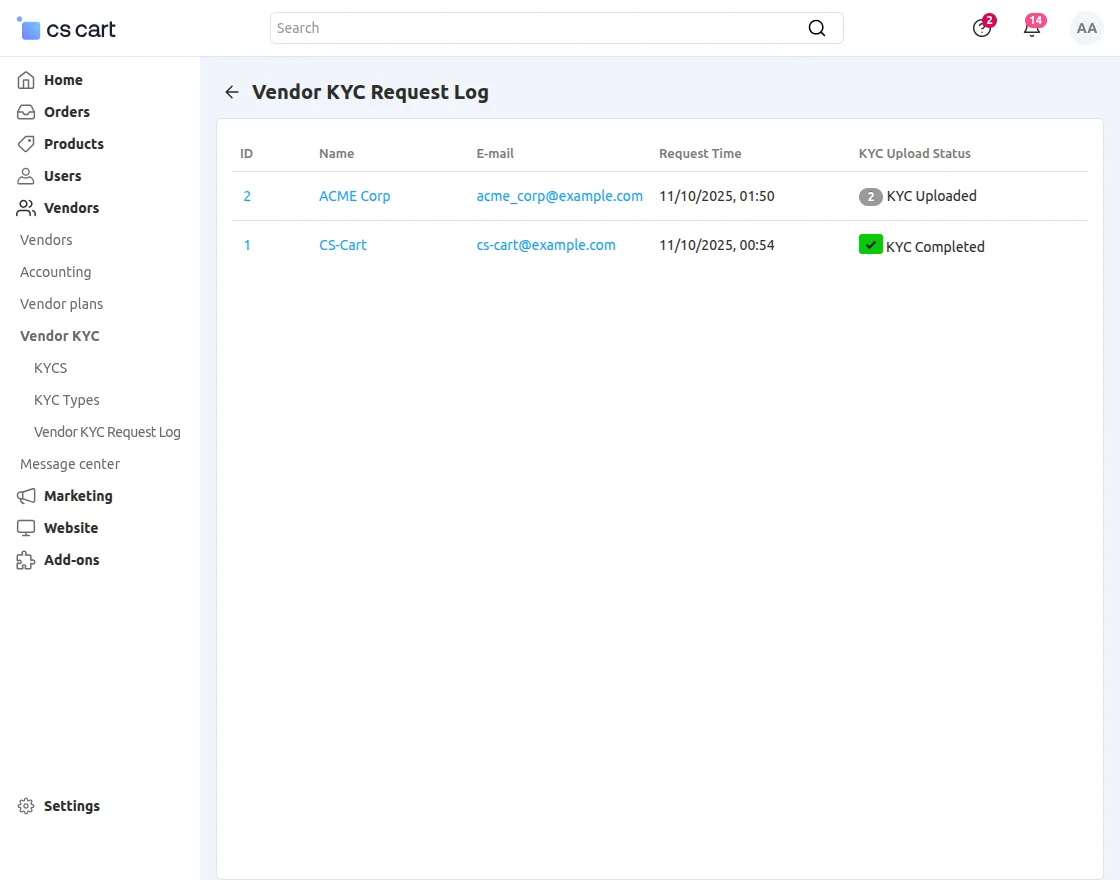
The admin can view the current status of all KYCs submitted by vendors.
Vendor End
Vendors can upload their KYC documents by navigating to Seller Tools >> Vendor KYC in the Vendor Panel.
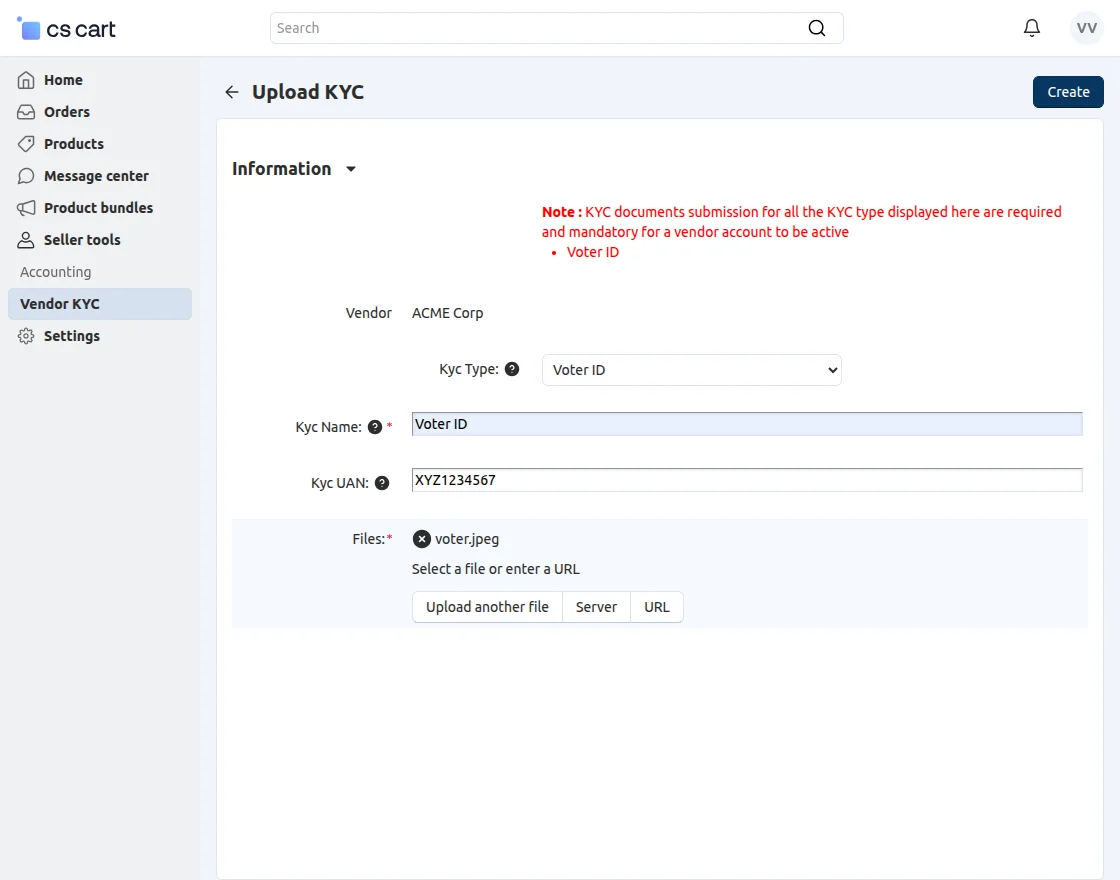
-
KYC Type: Select the type of KYC.
-
KYC Name: Enter the KYC name.
-
KYC UAN: Add the UAN number.
-
Files: Upload the required KYC file.
Click to create and save the KYC details.
Support
If you have any questions, suggestions, or customization requests, feel free to contact us at [email protected] or submit a ticket at webkul.uvdesk.com.
Explore our premium-quality CS Cart Extensions to enhance your store functionality.
You can also explore our CS-Cart Development Services and Quality CS-Cart add-ons.
Current Product Version - 2.3
Supported Framework Version - 4.16.x to 4.18.x

Be the first to comment.