CS-Cart Shopify Connector allows an admin to sync Shopify products & orders, and ship orders to your CS-Cart store. This allows you to connect and integrate Shopify data to your CS-Cart store.
In addition, it allows you to map categories and map shipping locations for products. Also, a merchant is able to create various accounts.
Check a brief overview of the plugin –
CS-Cart Shopify Connector Features:
- Well integrated with CS-Cart Multi-Vendor and Multi-Vendor Plus.
- Admin / Seller can import products from the Shopify store to the CS-Cart store with variations (Product Variation Add-on Required).
- The products get imported with Product name, Cost, Main image, Description, Code, Weight, and variations.
- Admin can import products by collection using both collection smart and custom.
- Product updates in your CS-Cart store, like price, quantity, name, and other details in real-time.
- Admin/Seller can map the Shopify categories with CS-Cart categories.
- Order gets synced to Shopify in real-time when created in your CS-Cart store.
- Admin / Seller can import orders from Shopify to CS-Cart.
- Admin / Seller can handle multiple store accounts from the CS-Cart Panel.
- Additionally, the admin / Seller can draft the Shopify products as Active/Disabled/hidden from CS-Cart.
- Admin / Seller has access to set types of variations before importing the products.
- While adding a Shopify Account in CS-Cart, the Admin / Seller can add an API key/Token and a Password/custom.
- Admins and Sellers can now add the Shopify add-on using the Shopify Developer Dashboard by entering the Client ID, Client Secret, and store domain name.
- Close/cancel/update and delete orders on Shopify when initiated on the CS-Cart store.
- Real-time sync of Shopify orders to CS-Cart store.
- The store status will be shown on the store edit page.
- Added a new order status mapping tab and also added an option to select the default order status.
- Option to change hook setting for product update, a product created, order update, order created, etc.
- The domain has been added to the store management page.
- Option to export product from the product detail page.
- Option to export categories from the categories detail page.
- Admin and seller can export new products on the Shopify store from the CS-Cart admin panel.
- The admin can export multiple products to their Shopify account.
- The admin/seller can import a large number of products from Shopify to Cs-Cart with the help of RabbitMQ.
Flow Of Installation And Configuration:
Step1:
When you download the “CS-Cart Shopify Connector”, you’ll get one zip file and the install.txt file. Read it carefully and follow it. After that, install the zip file.
Navigate to Add-ons > Downloaded add-ons and click on the settings icon, from here you can manually install the zip file as shown below:
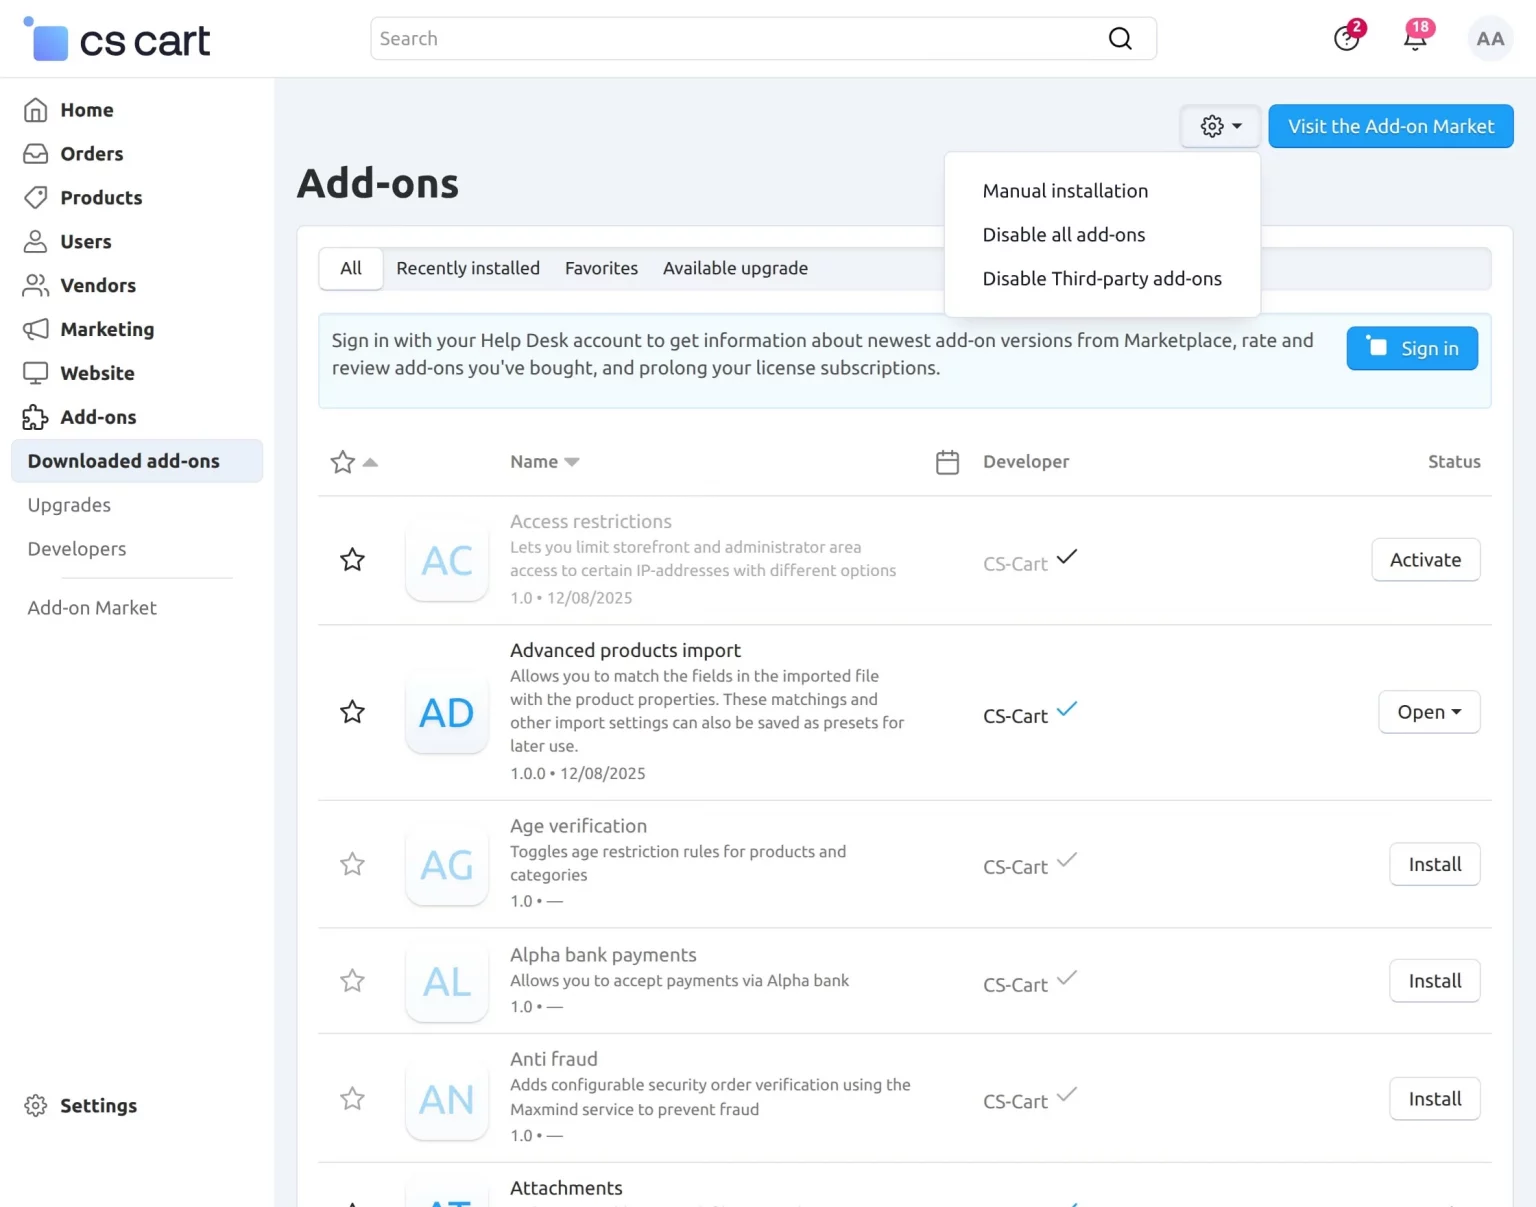
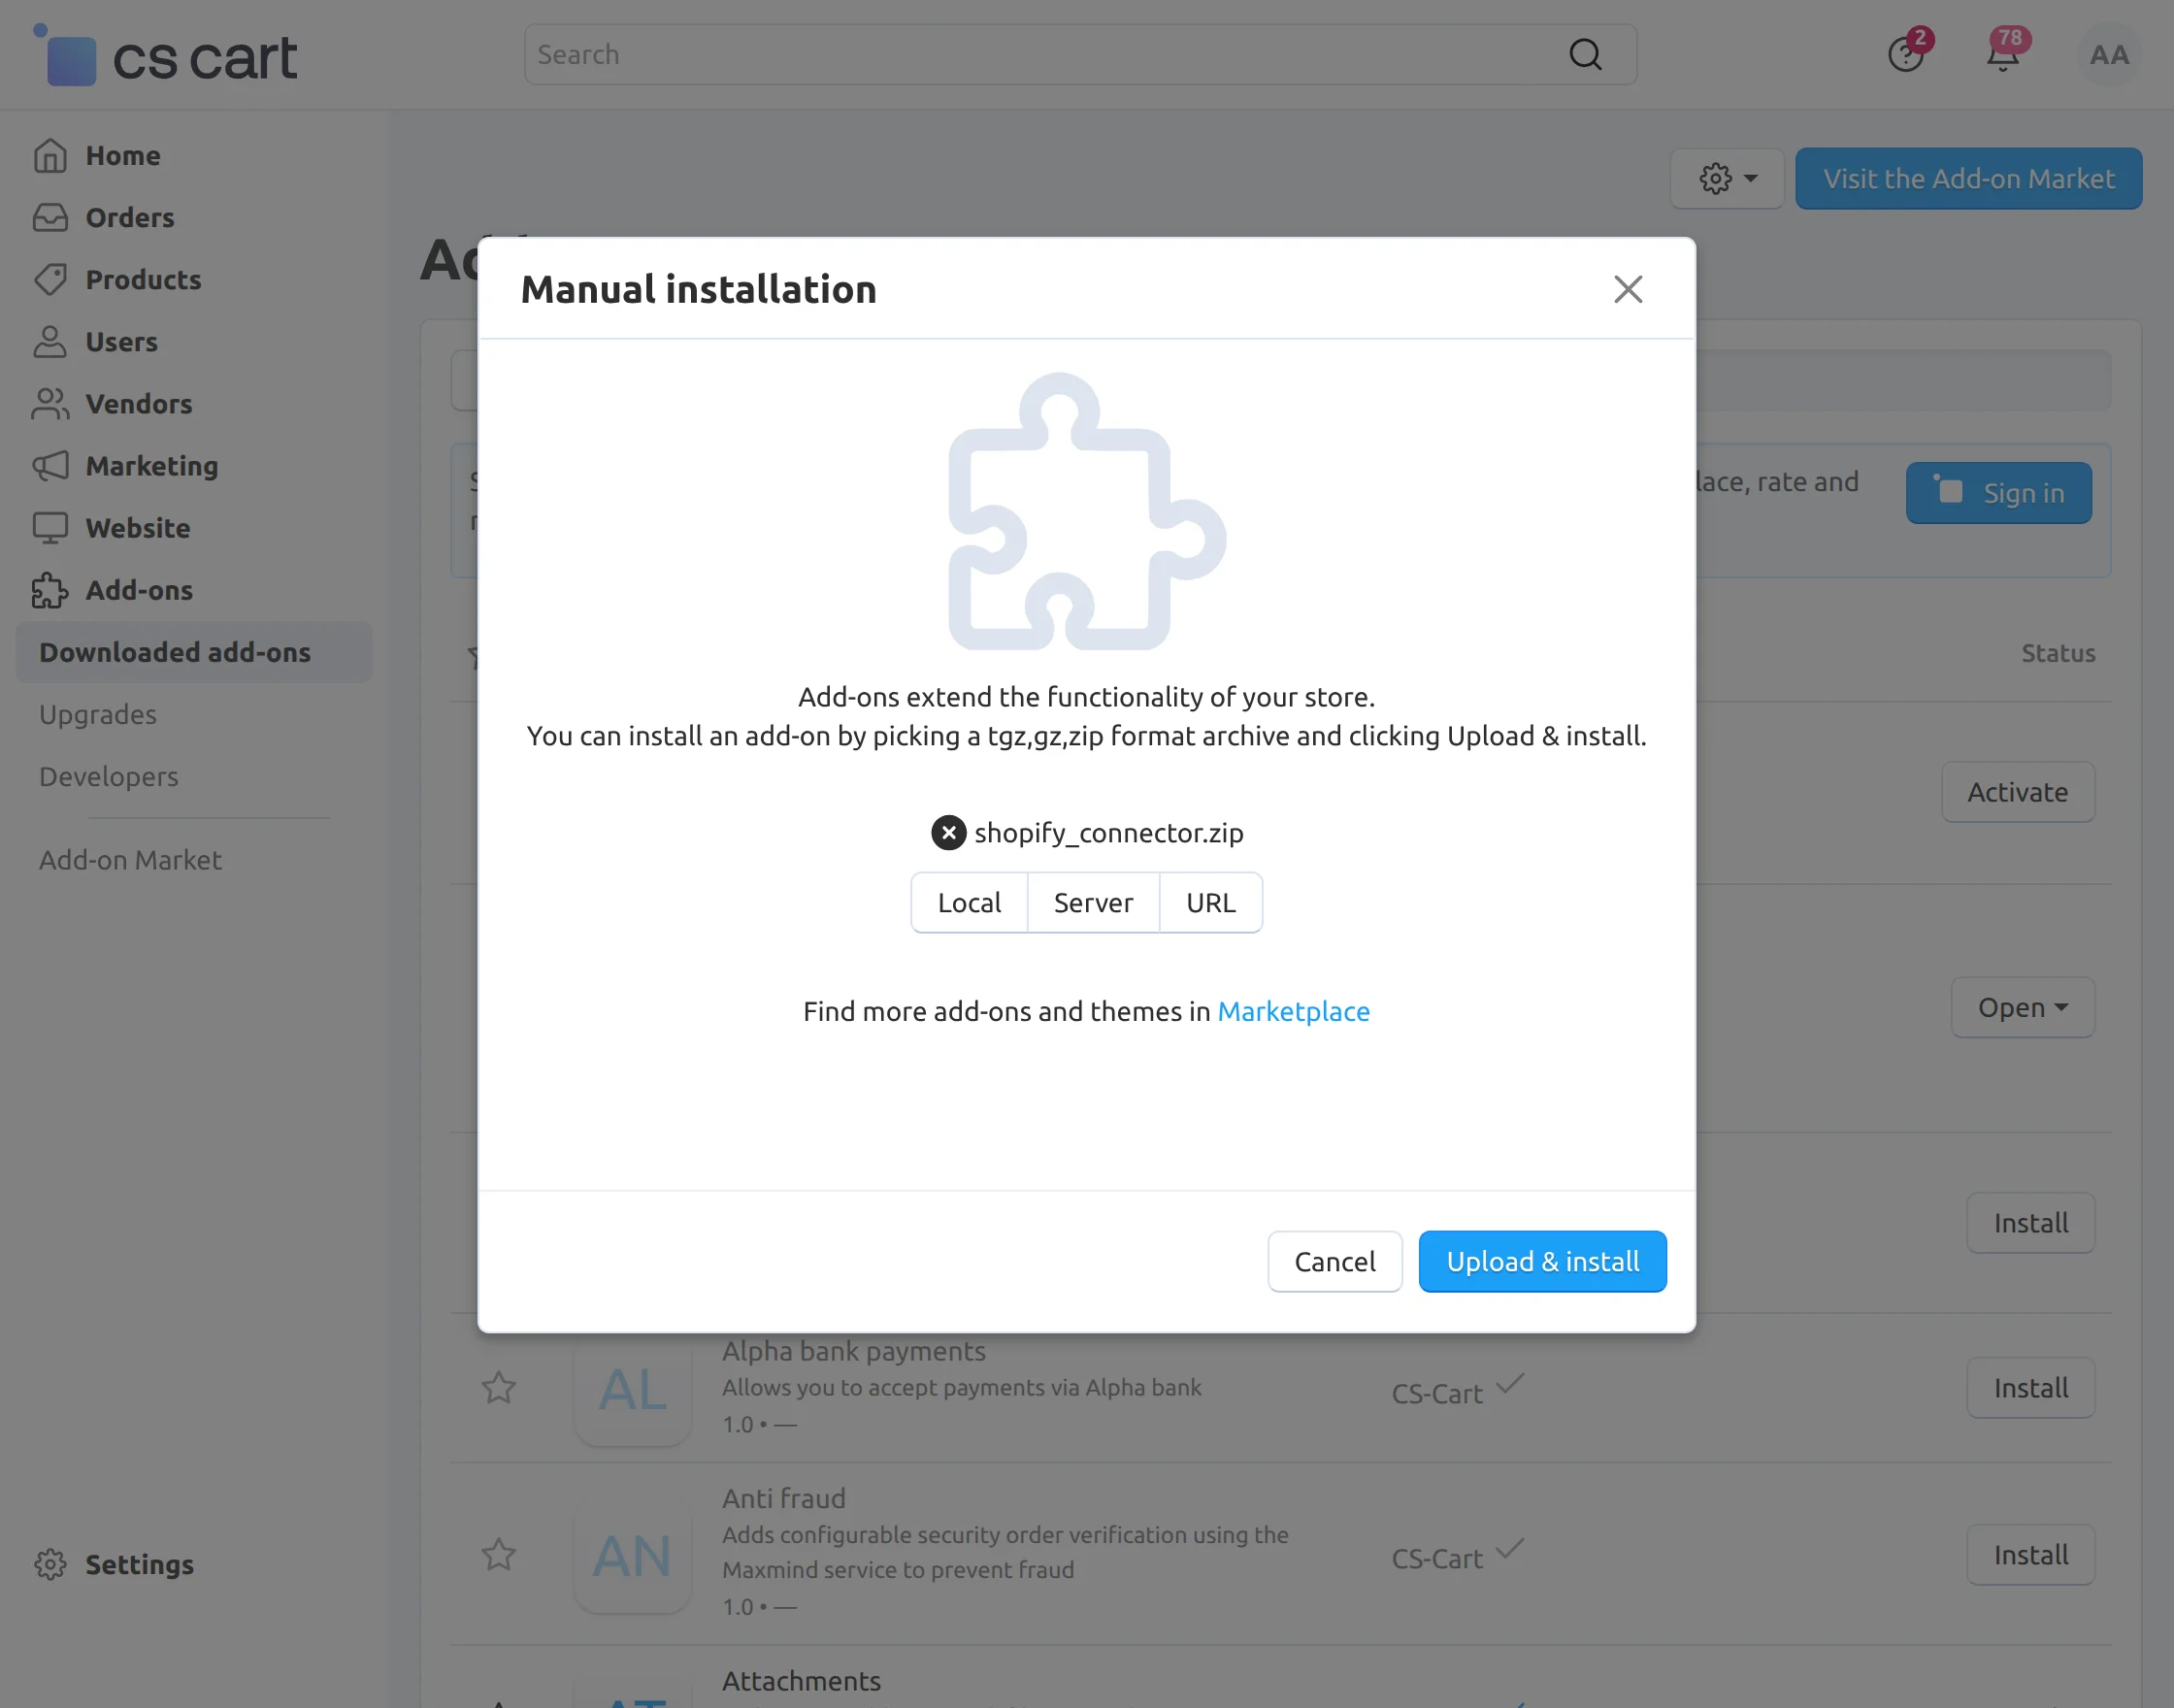
Click on “Local” to browse the zip file and then click on “Upload & Install” as shown below in the snapshot.
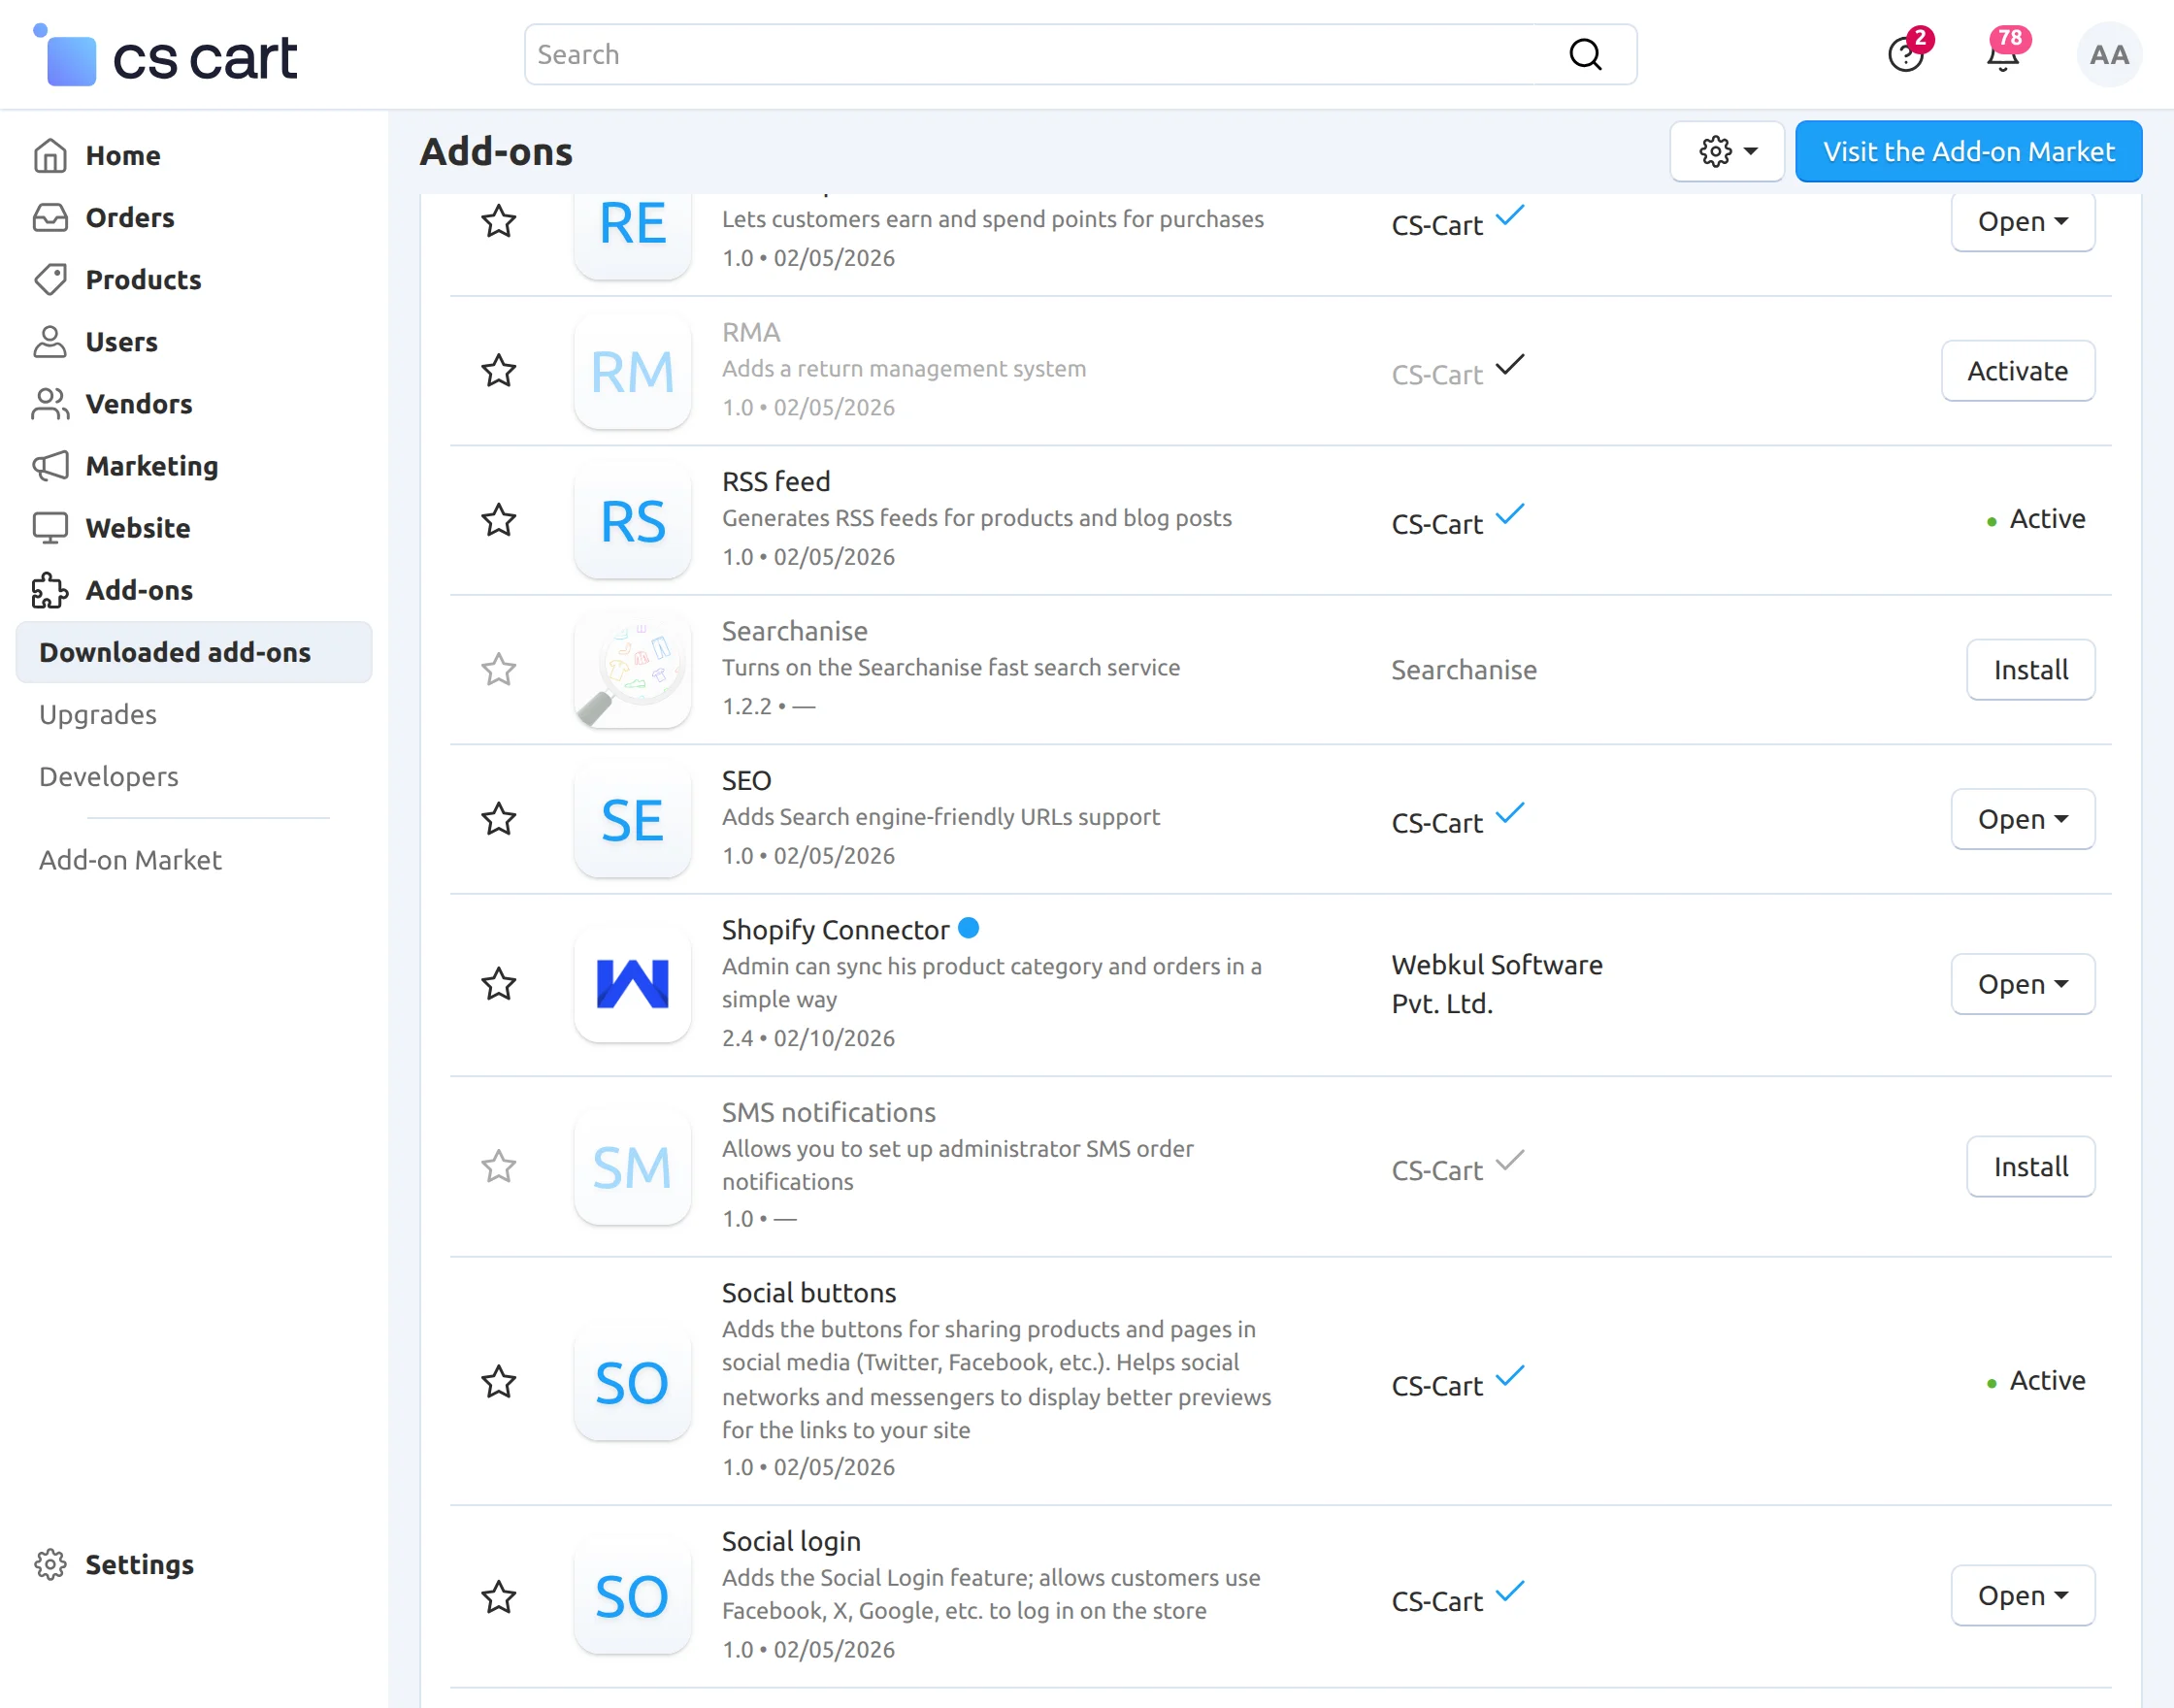
Activate Add-on
Once you install and activate the CS-Cart Shopify add-on, you can begin configuring its settings.
Configure the Add-on Settings
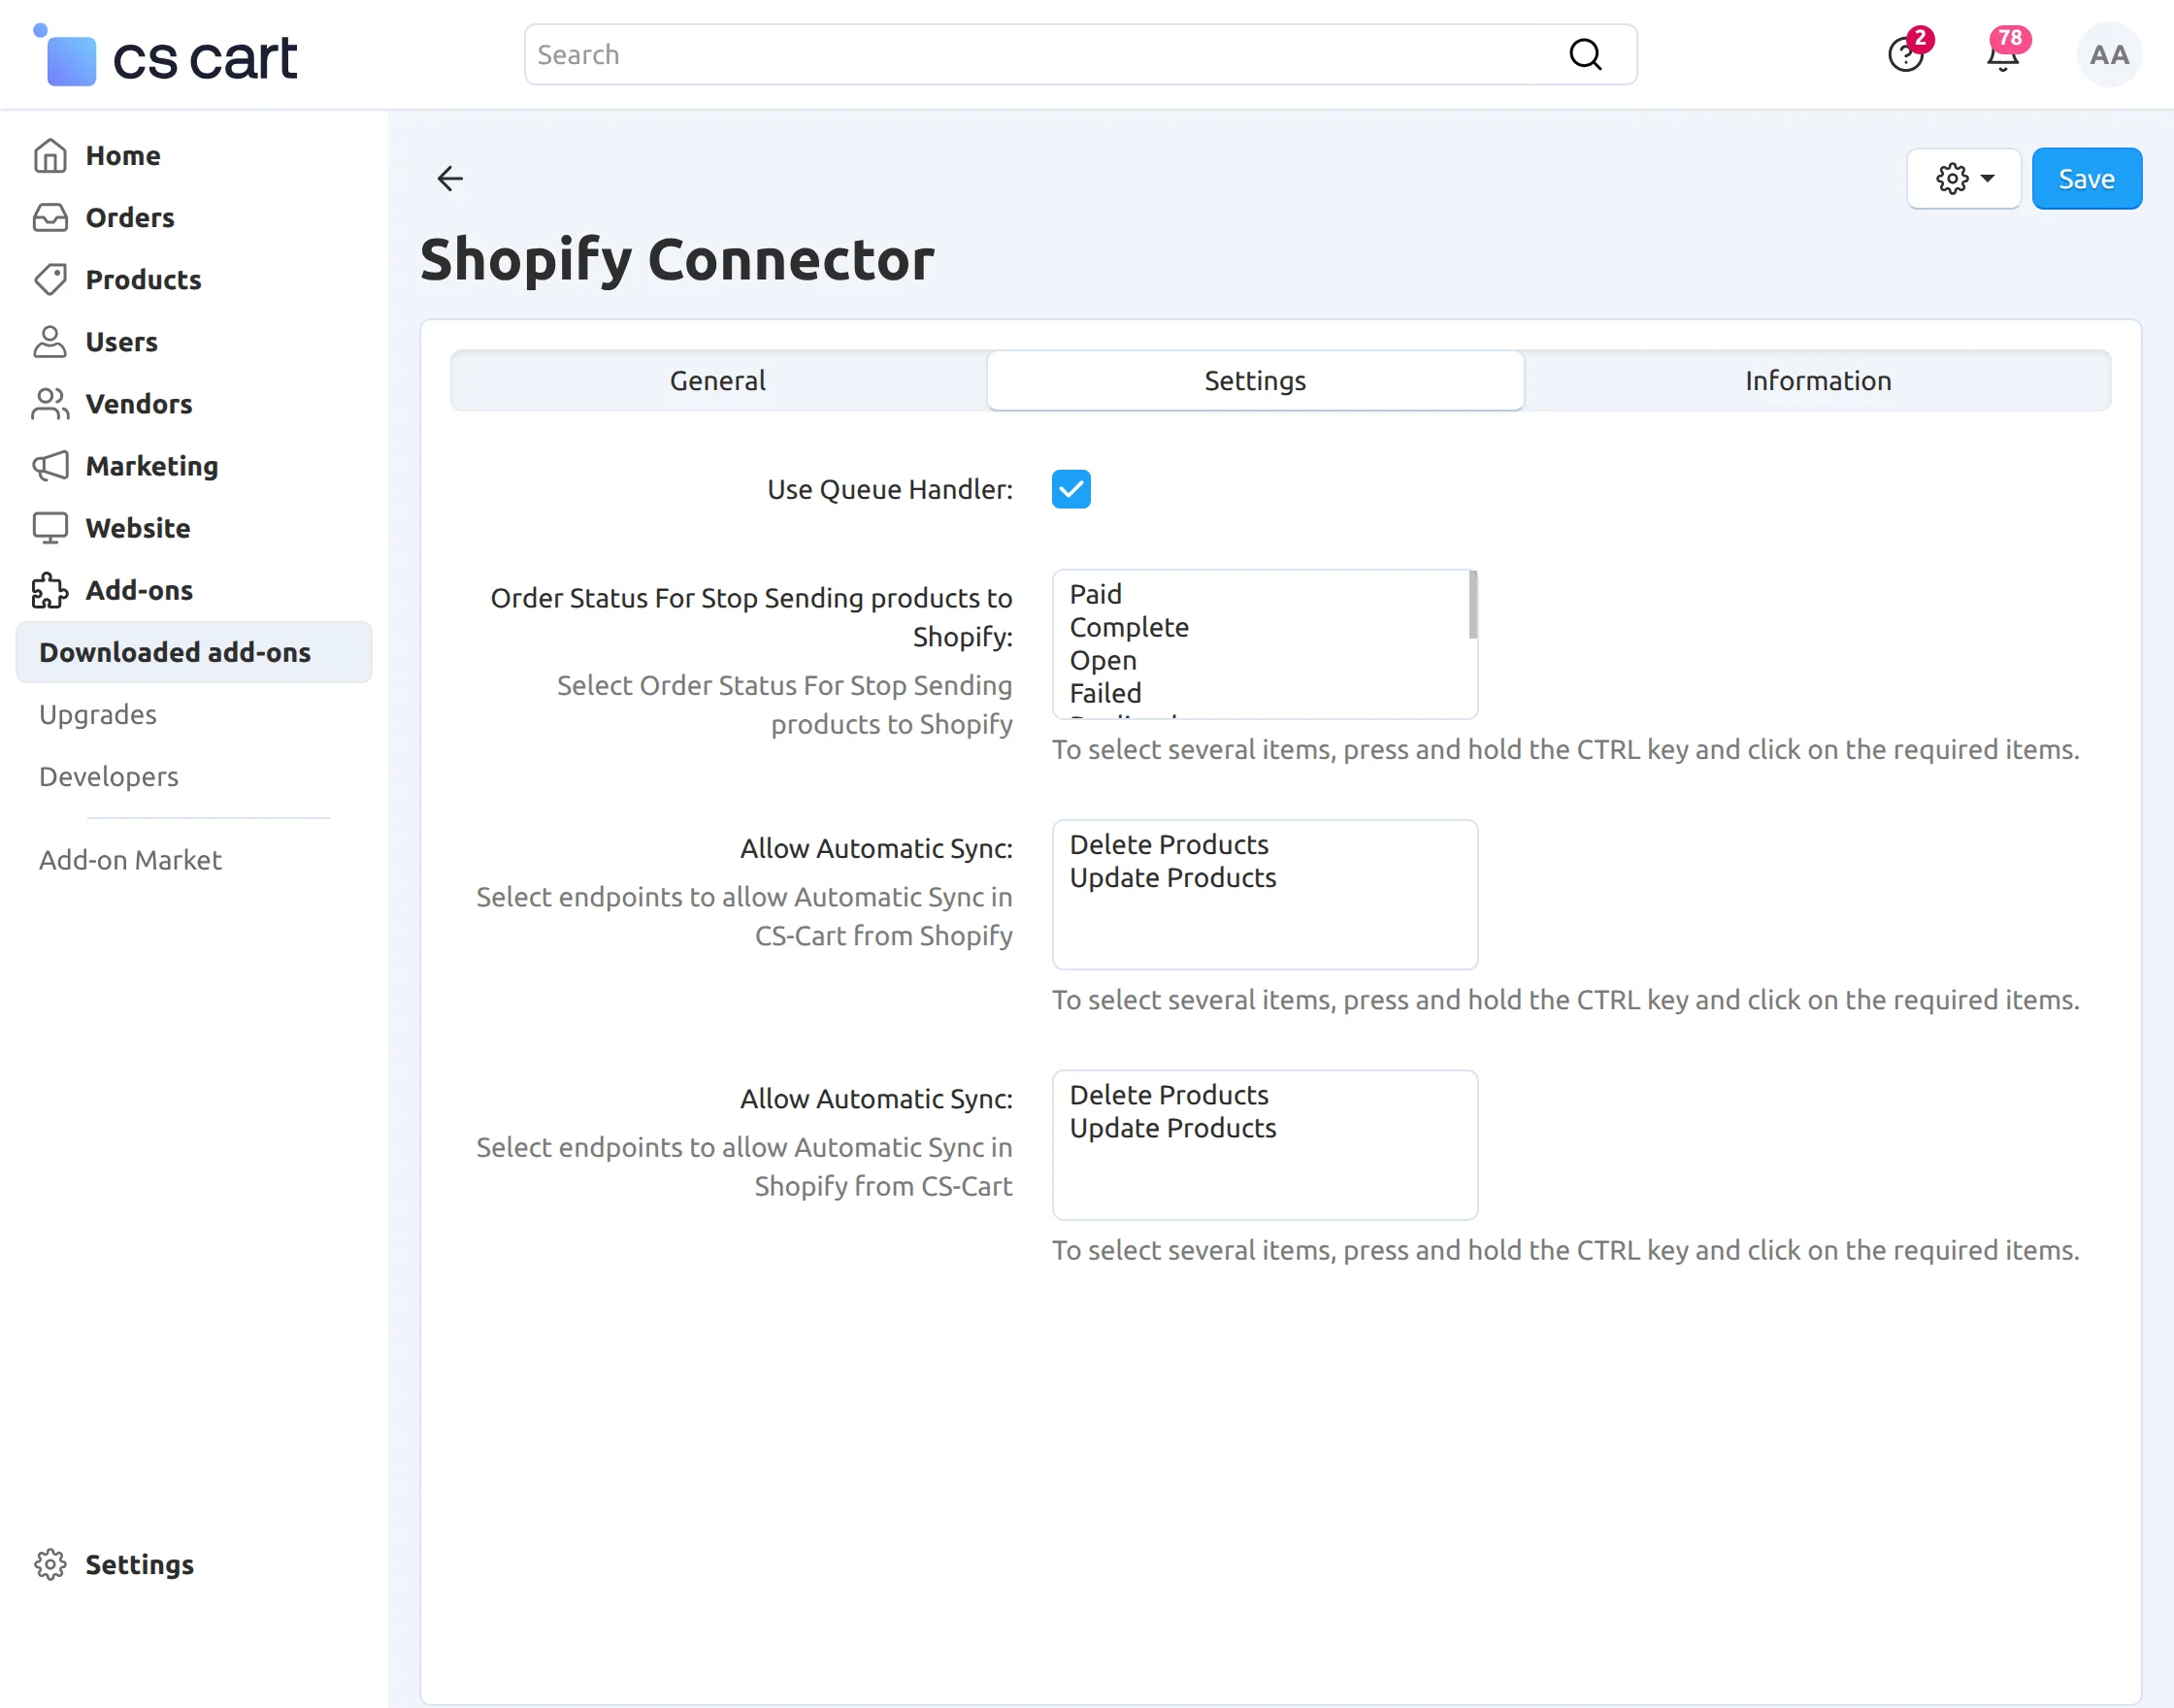
Go to Add-ons → Settings and configure the options based on your requirements.
- Use Queue Handler: Enable this option for bulk operations. The queue handler is recommended when syncing a large number of products or orders.
Note: The Queue Handler must be installed and running to ensure smooth module functionality.
- Order Status to Stop Sending Products to Shopify: Select the order status that should not be sent to Shopify.
For example, if you select Paid, then all orders with the Paid status will not be sent to Shopify.
- Allow Automatic Sync (CS-Cart → Shopify): Choose Update, Delete, or Both to allow product synchronization from CS-Cart to Shopify. If no option is selected, products will not sync.
- Allow Automatic Sync (Shopify → CS-Cart): Choose Update, Delete, or Both to allow product synchronization from Shopify to CS-Cart. If no option is selected, products will not sync.
Note: Product synchronization can be enabled in only one direction at a time.
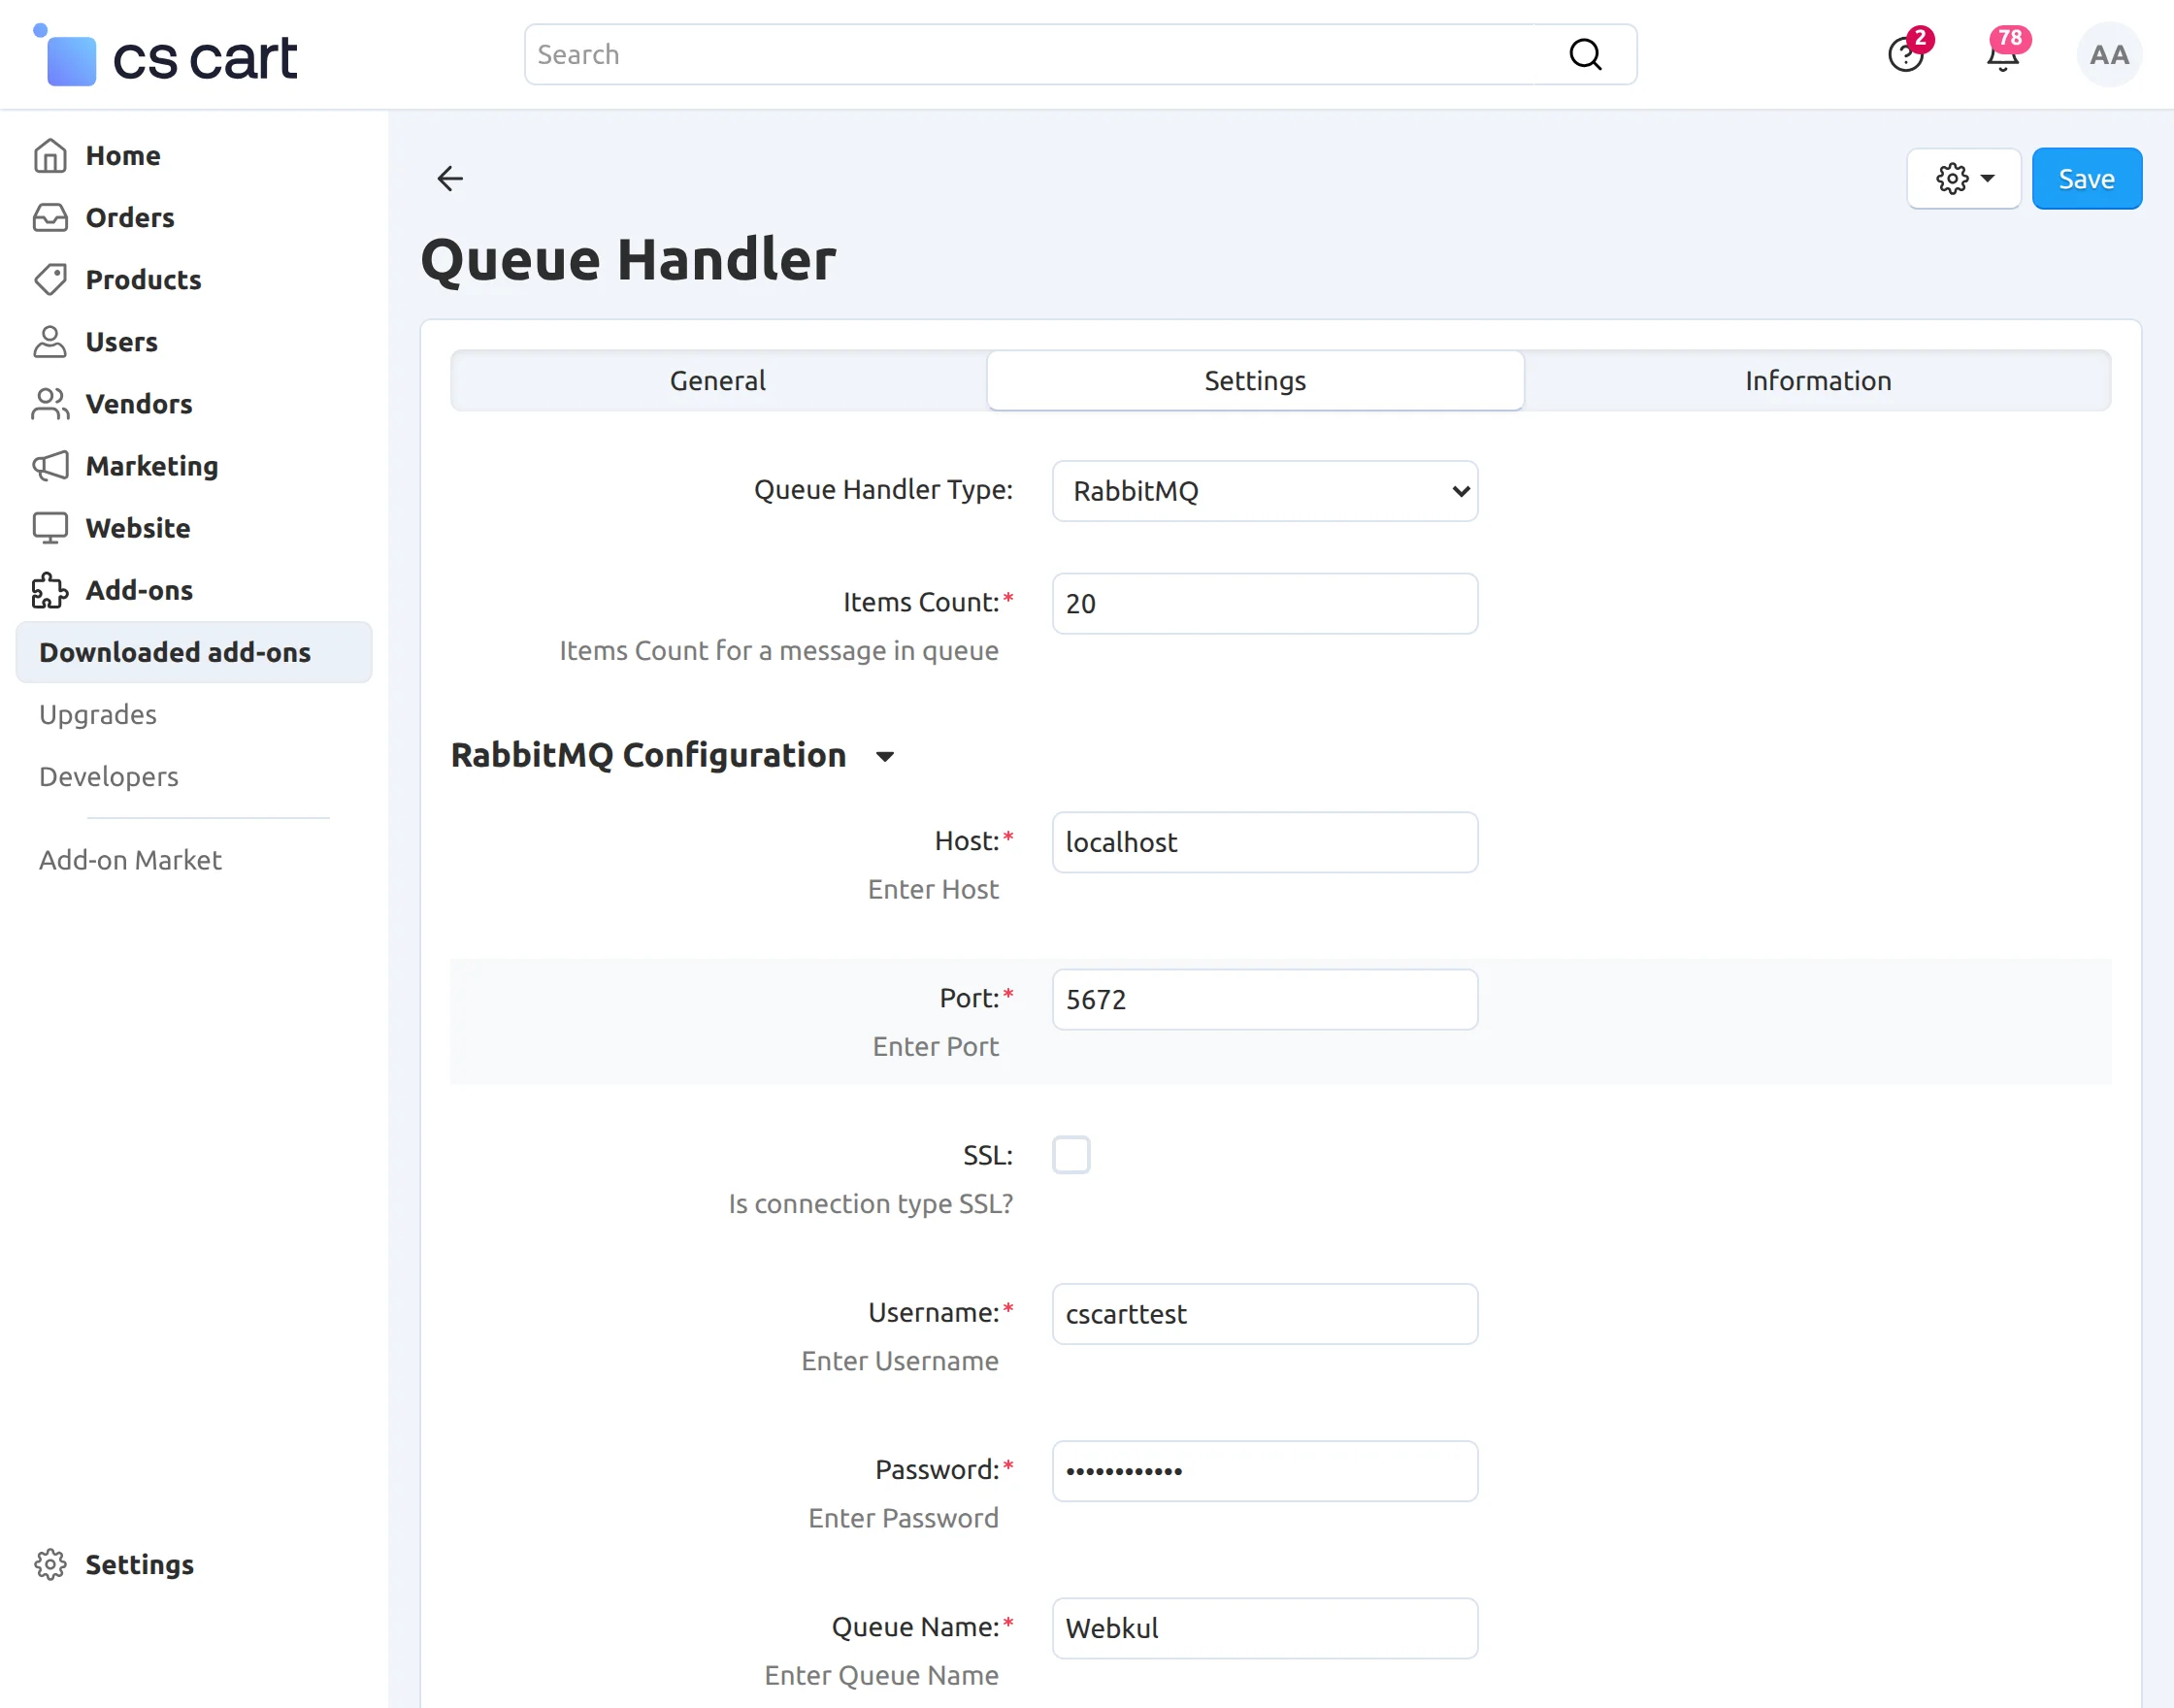
RabbitMQ Configuration
Note: To configure RabbitMQ properly, make sure the CS-Cart Queue Handler is installed and set up. You can refer to the official documentation here:
https://docs.cs-cart.com/latest/developer_guide/core/queue.html
In this section, you need to configure the RabbitMQ settings to enable queue-based processing.
-
Host: Enter the RabbitMQ host details.
-
Port: Enter the RabbitMQ port number.
-
Username: Provide the RabbitMQ username.
-
Password: Enter the RabbitMQ password.
-
Queue Name: Specify the RabbitMQ queue name.
Step2:
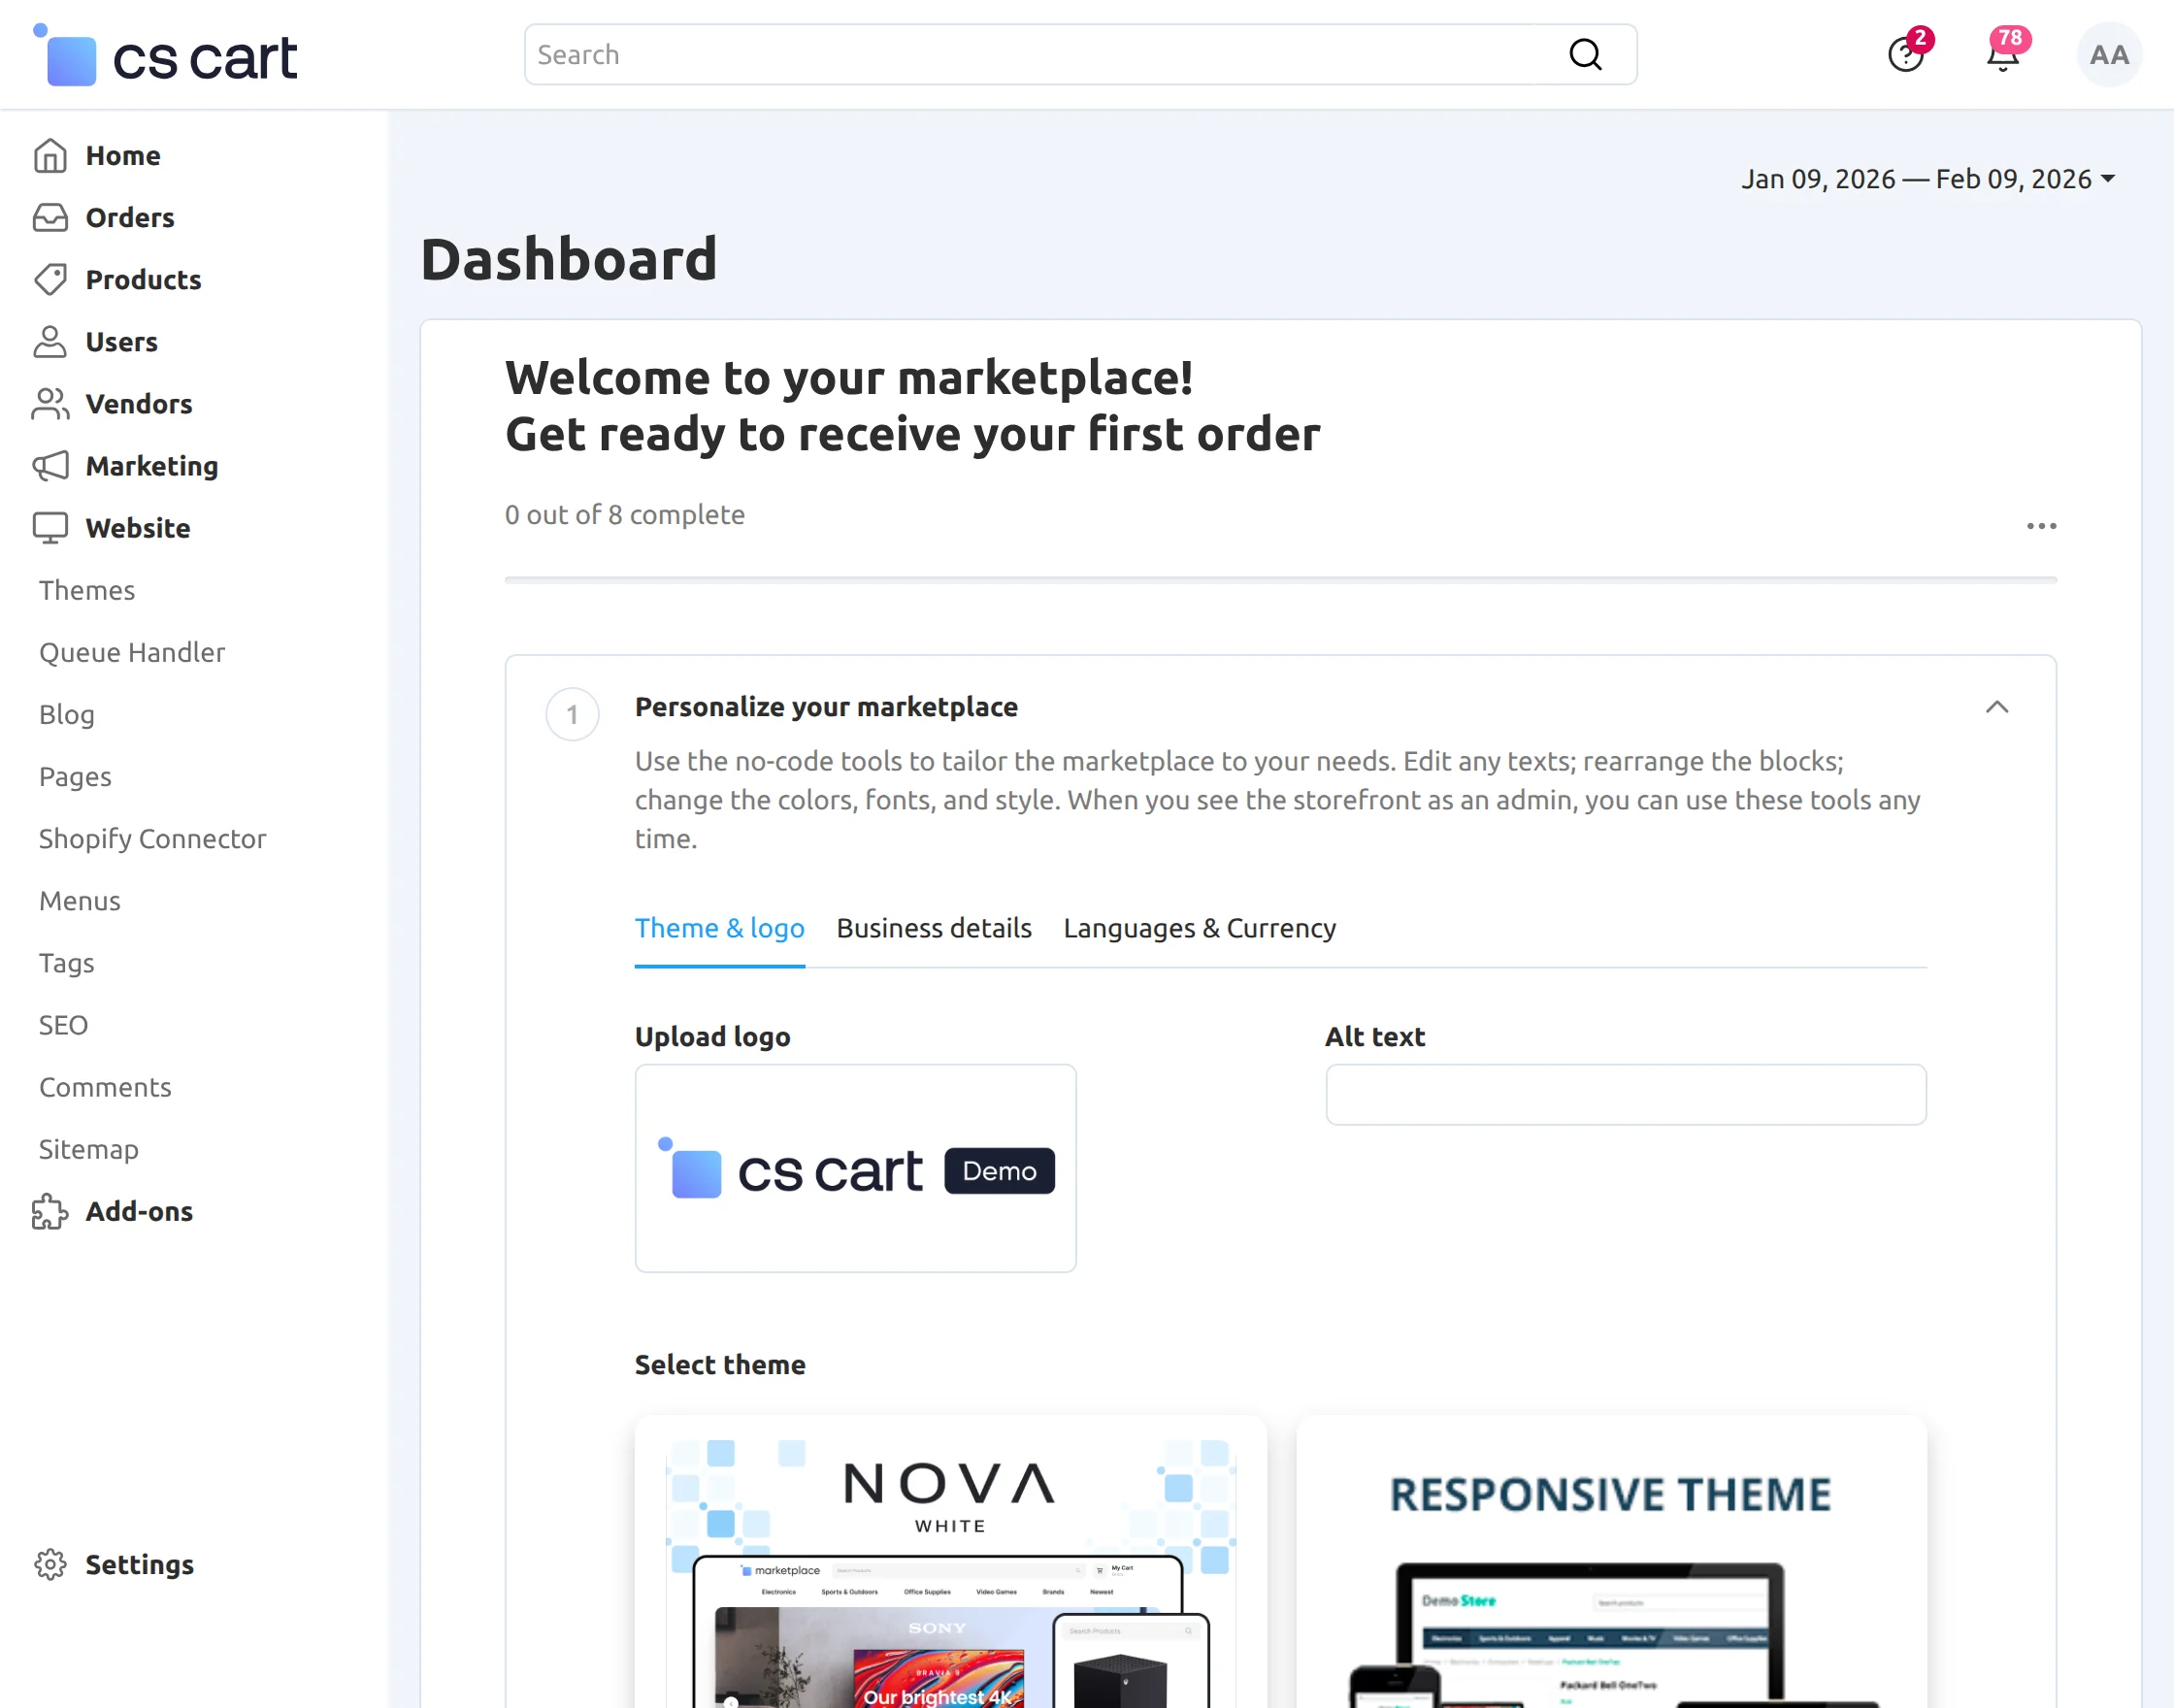
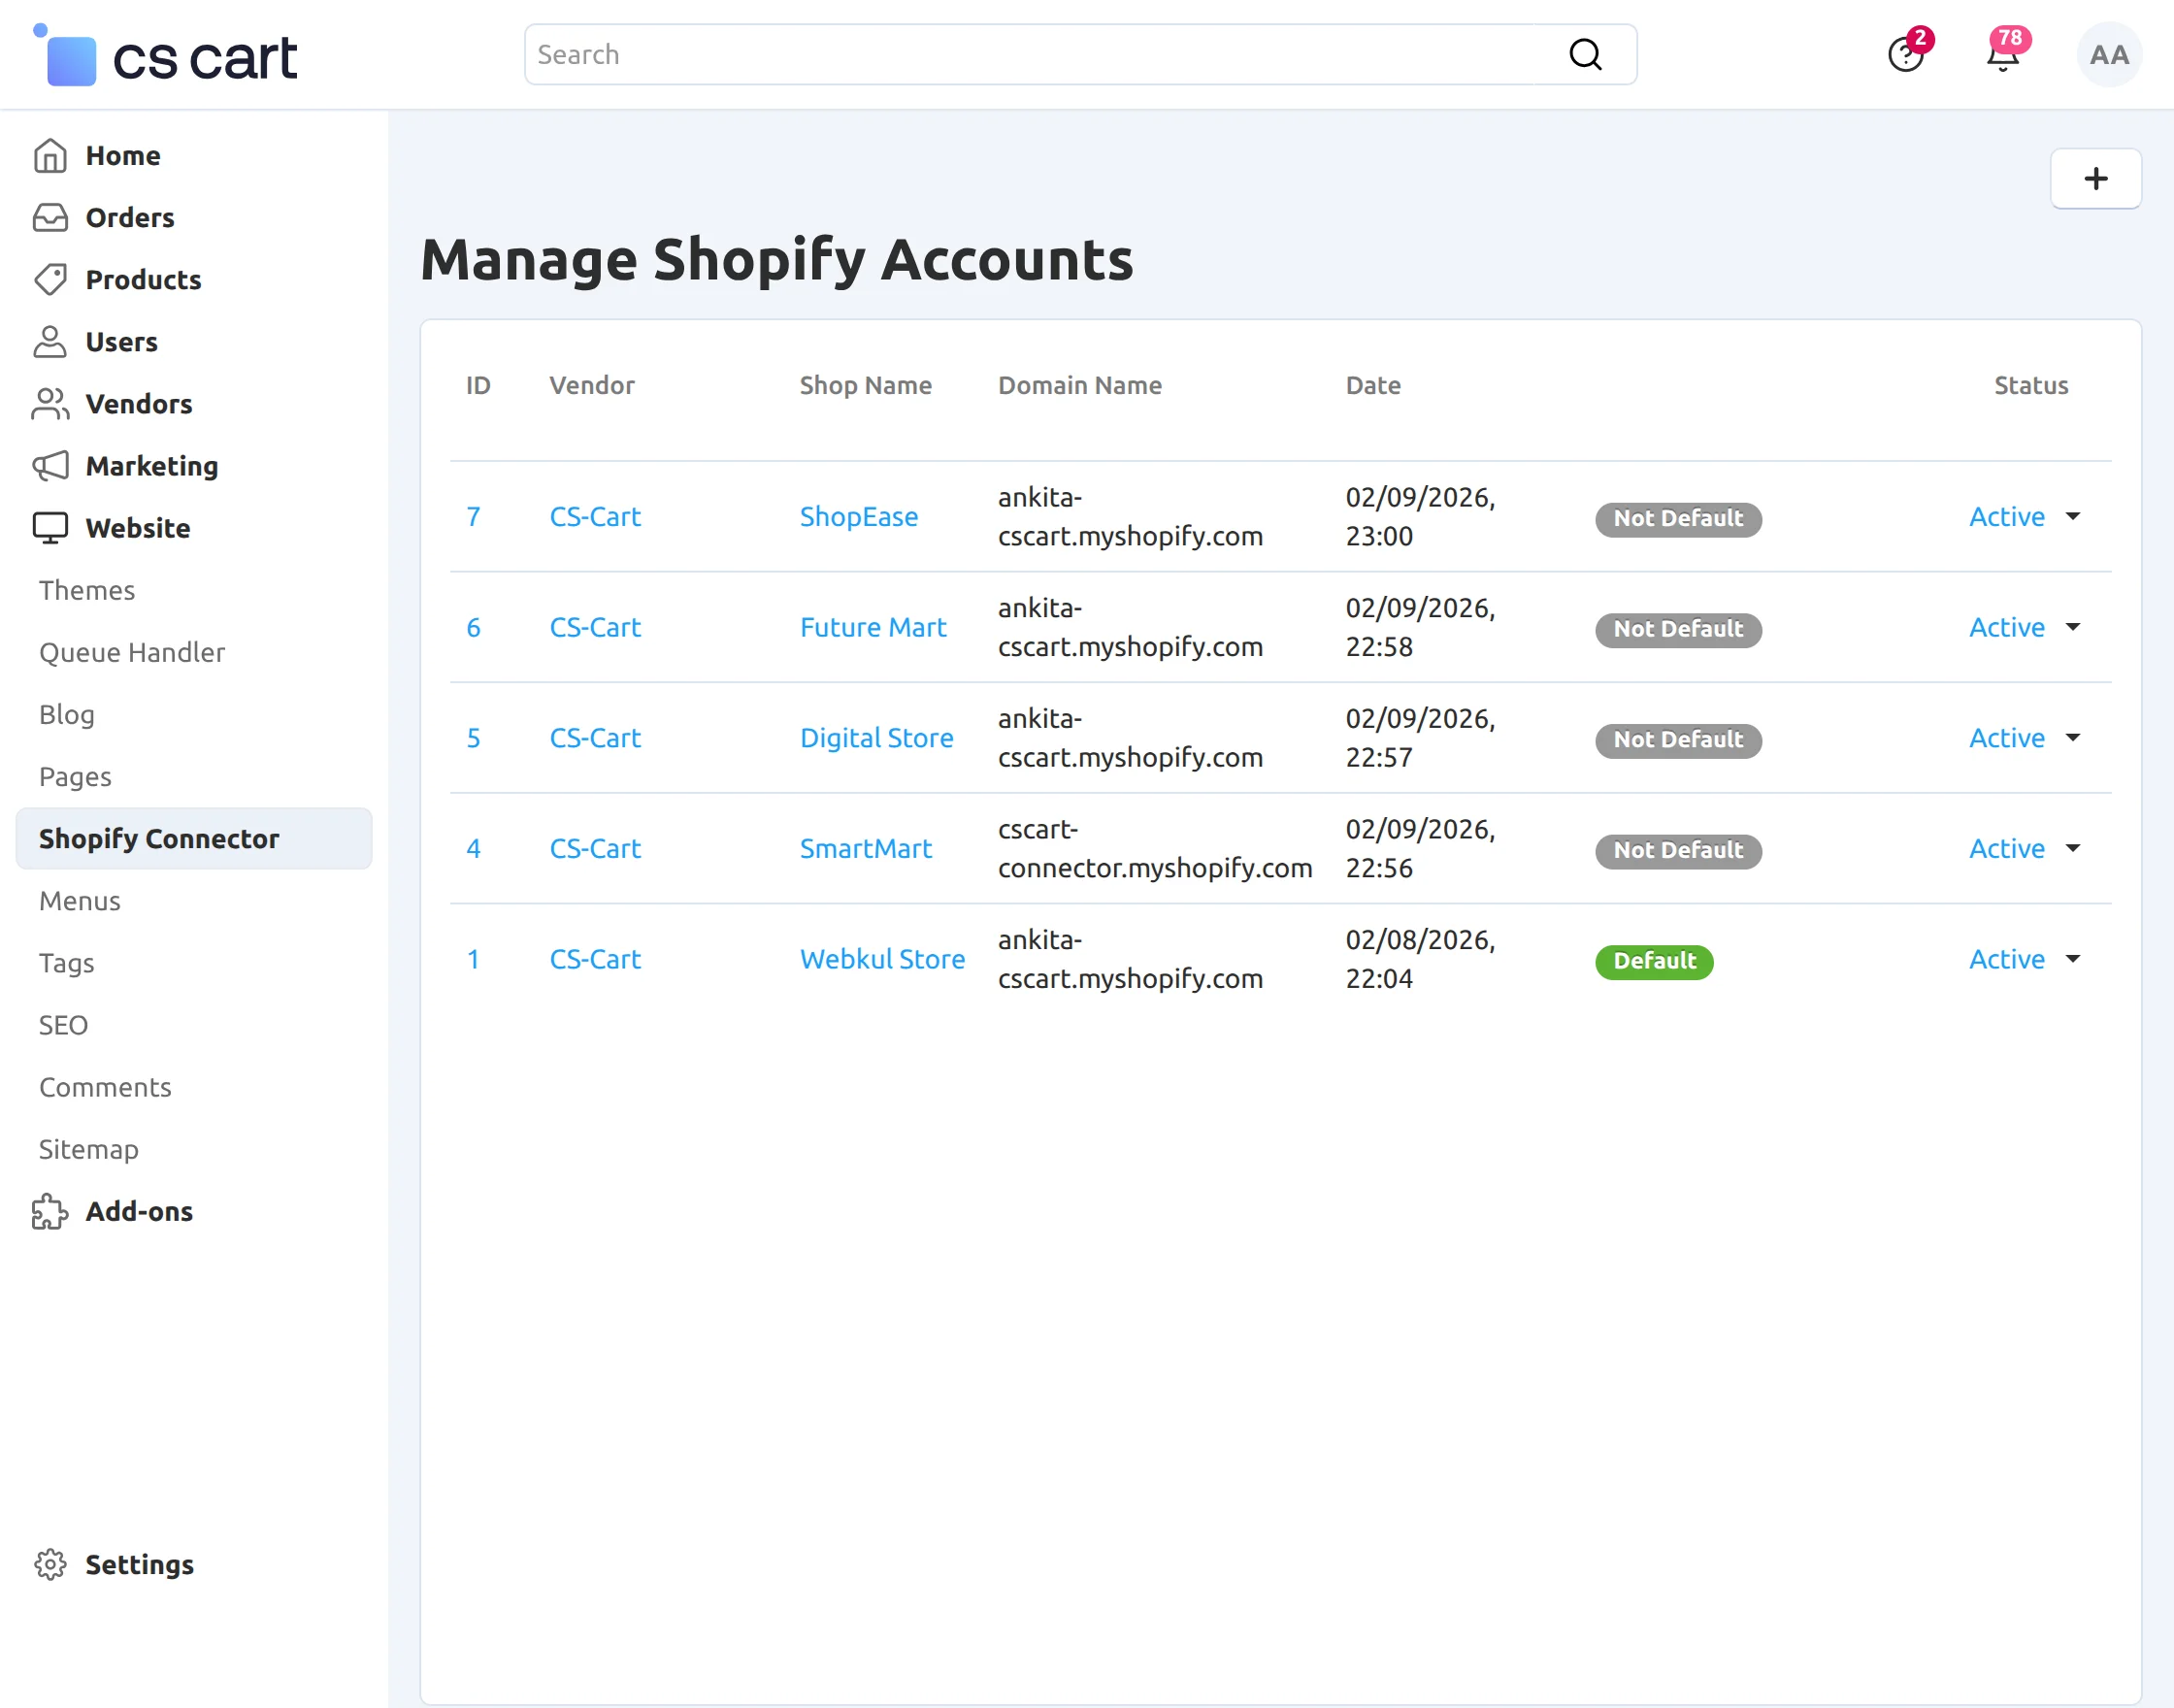
Go to the website and click on the Shopify Connector to manage and configure your Shopify account settings.
After that, click on the plus icon to add a new Shopify account.
Step3:
First, you have to log in to the Shopify account, if you don’t have the account. You can create the account by clicking here
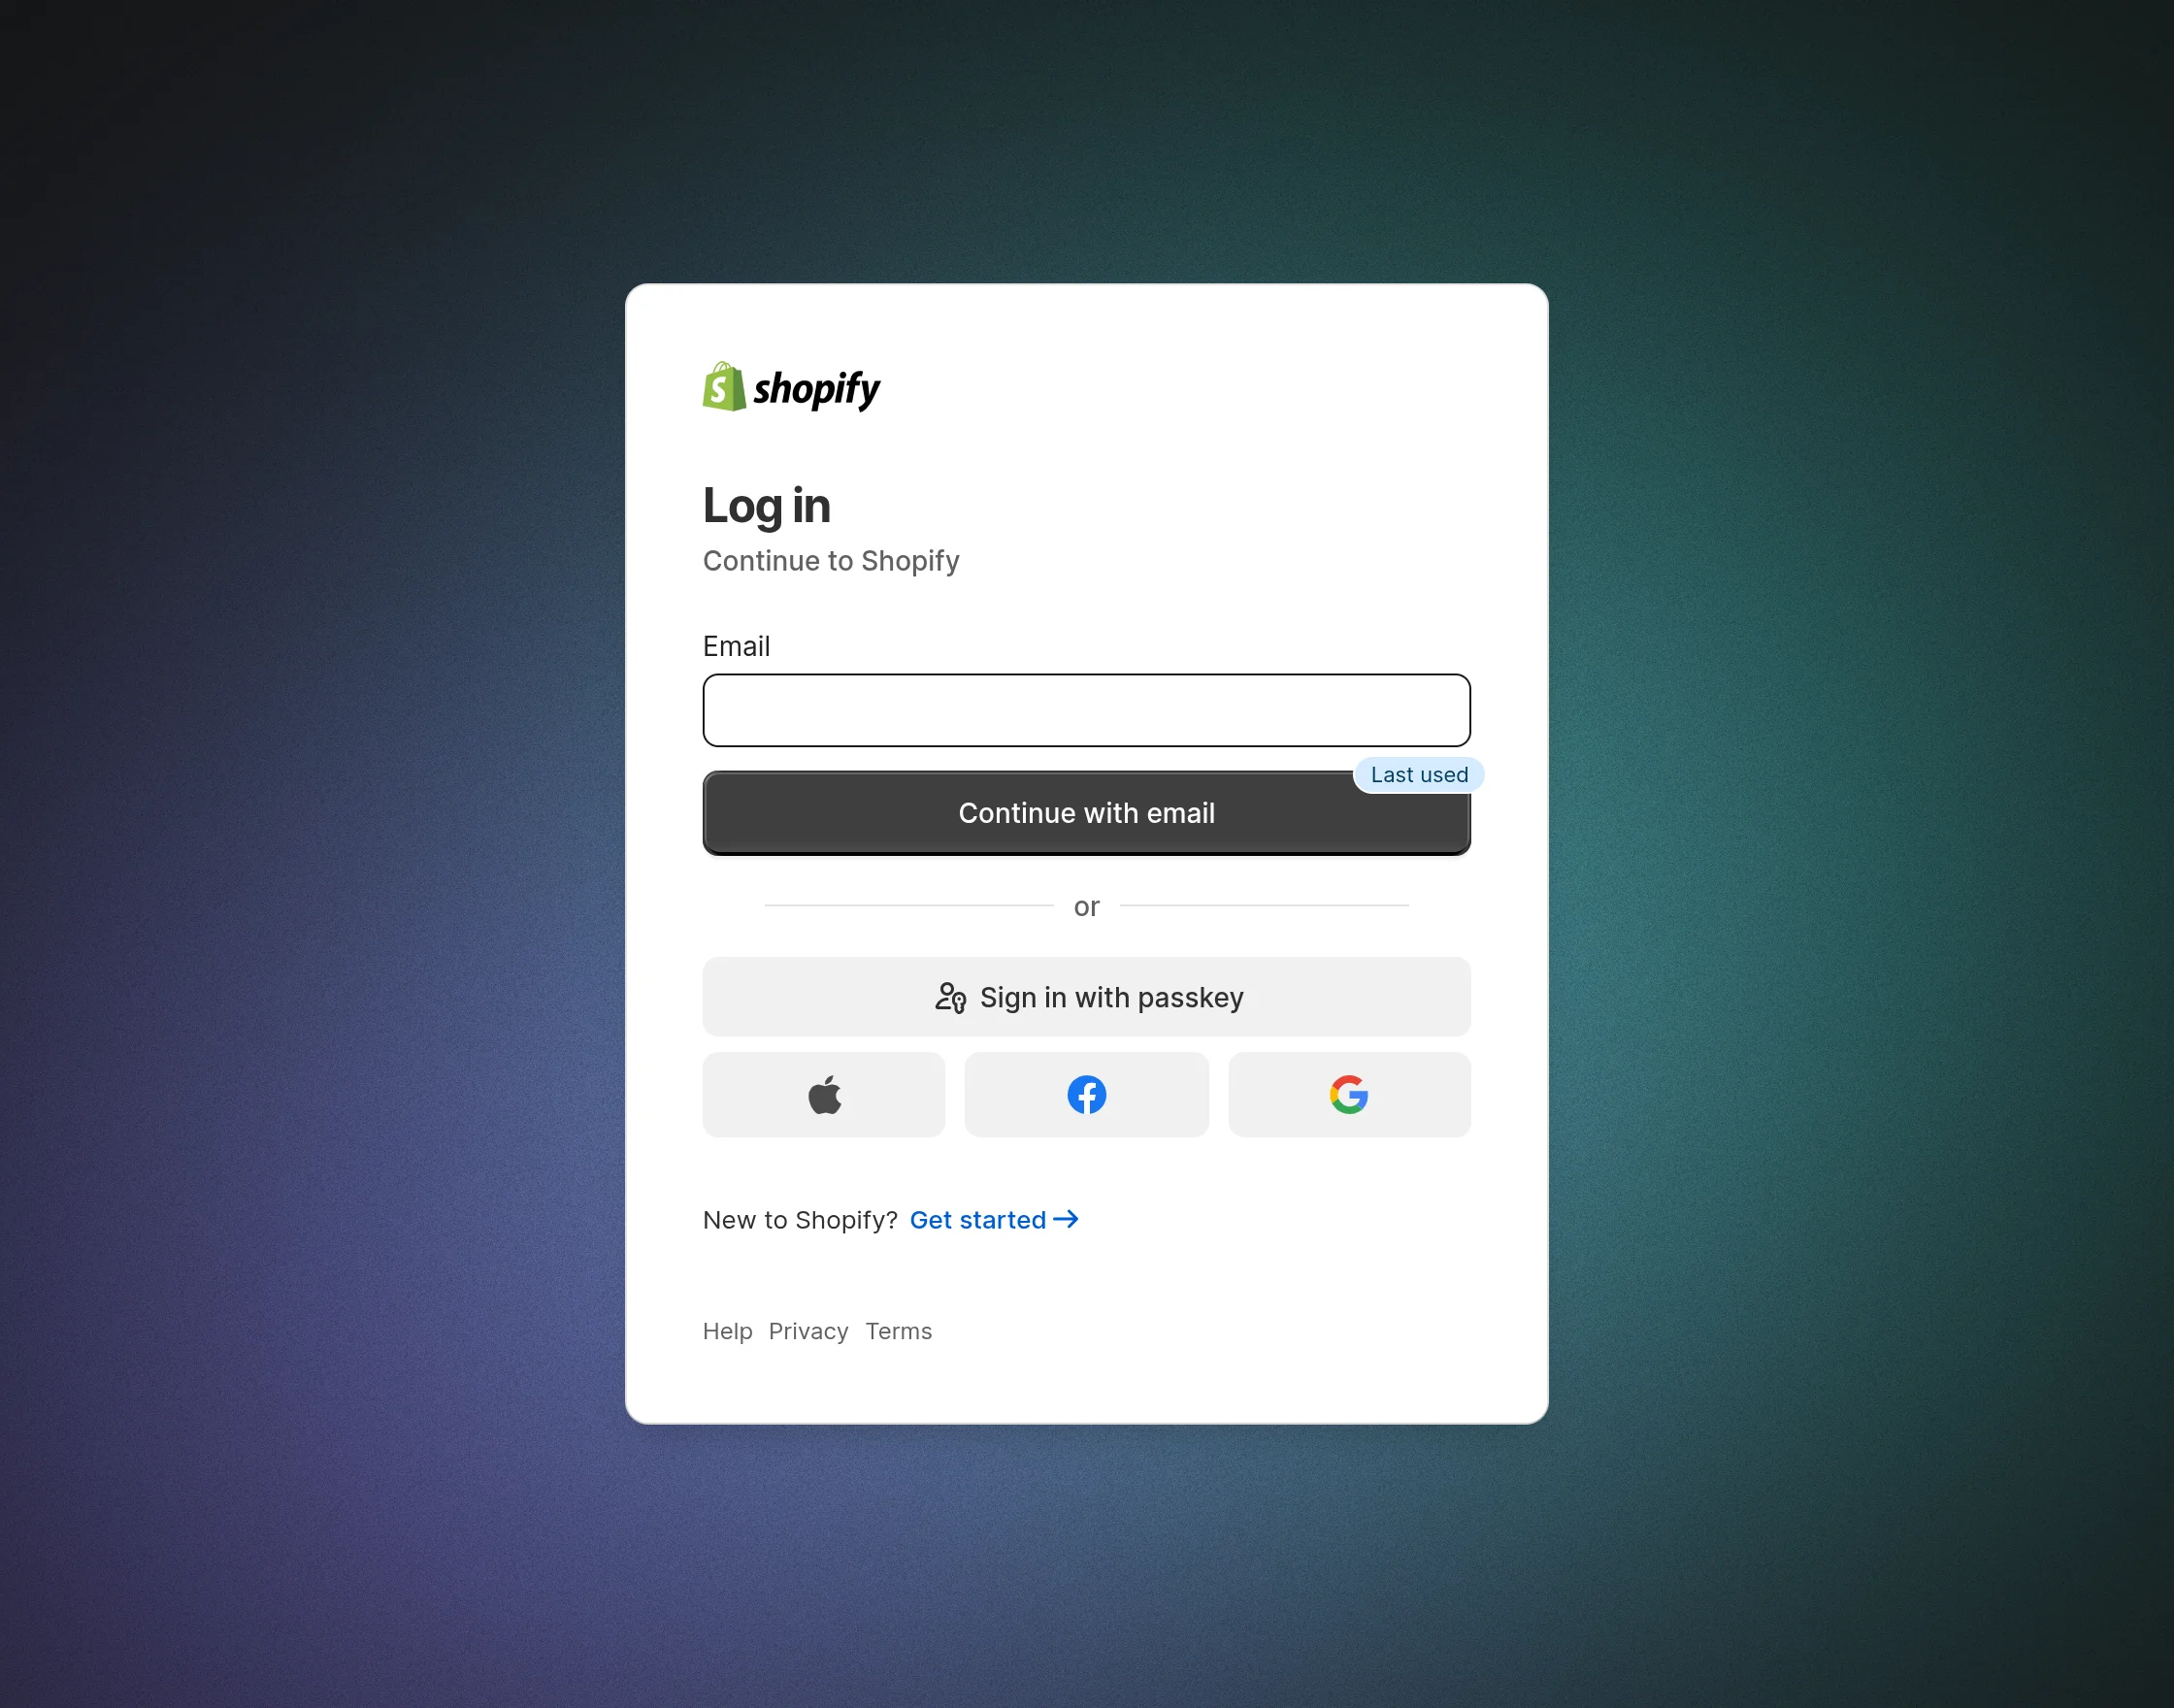
You have to log in with your email, Apple ID, Facebook id, or email id. If you enter your email, then you have to fill in all the details as shown below:
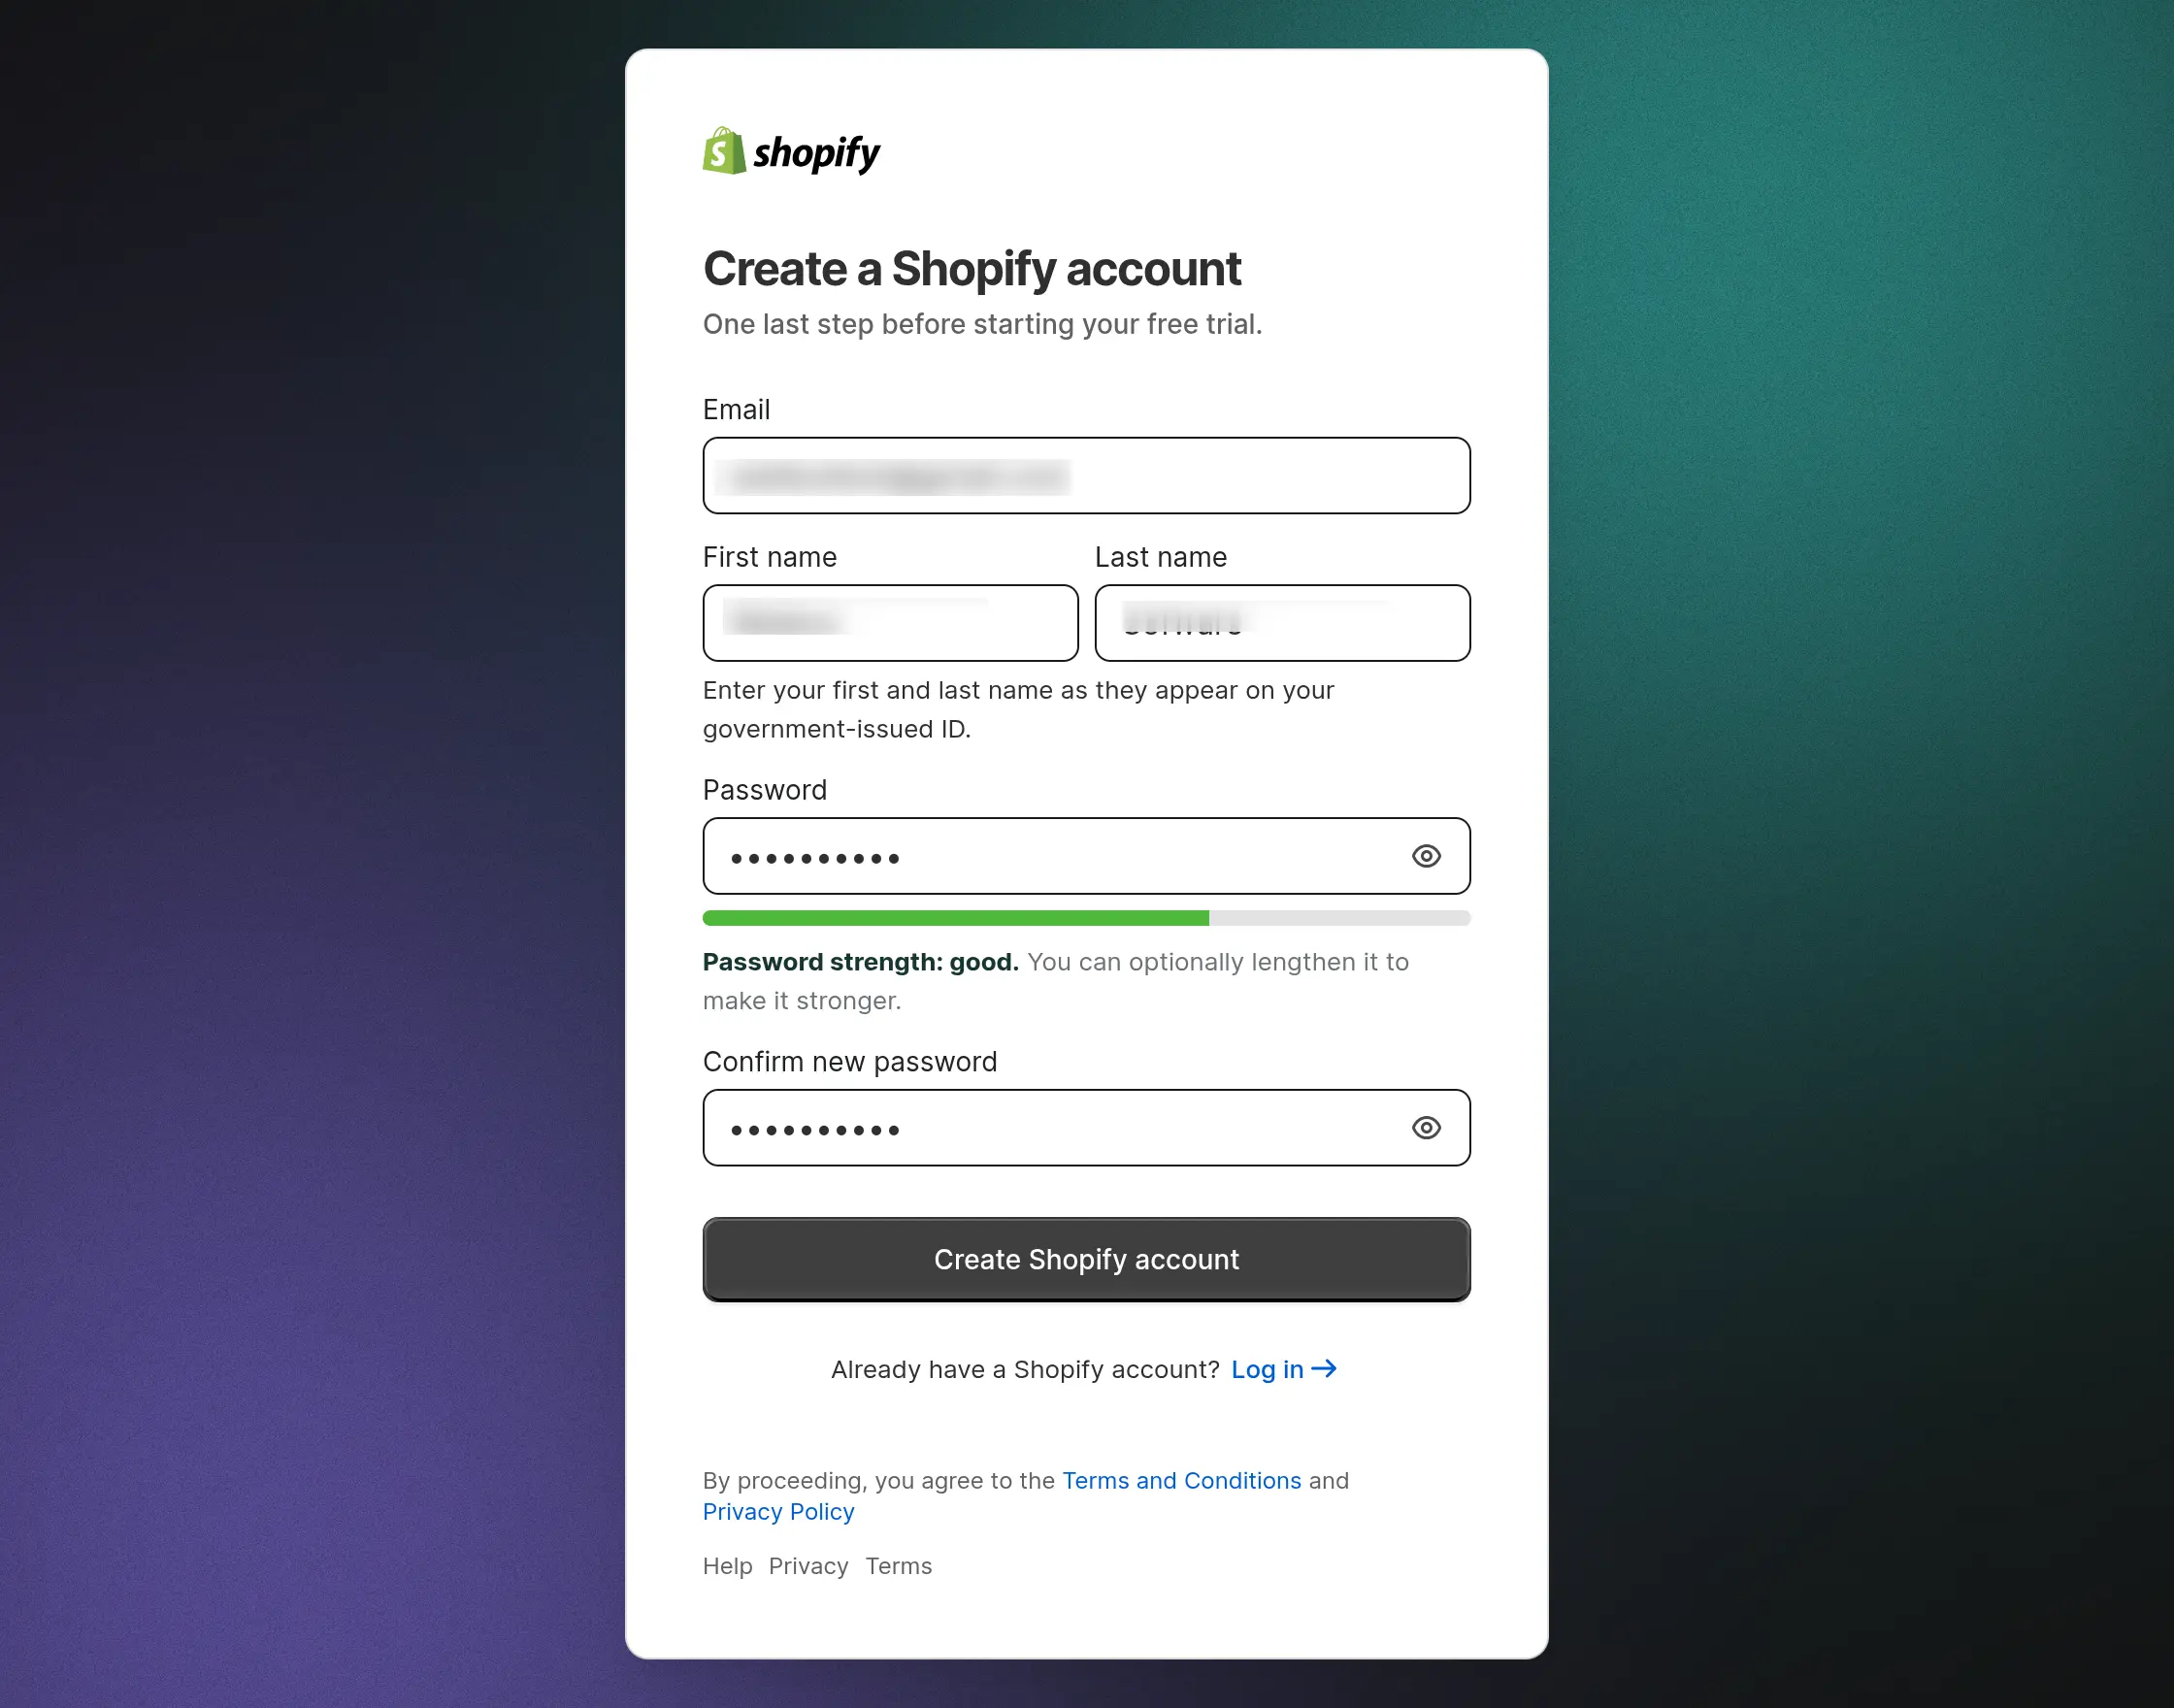
After you have filled in the details, you have to click on the Create Store button as shown below.

You have to select the country from the drop-down list.

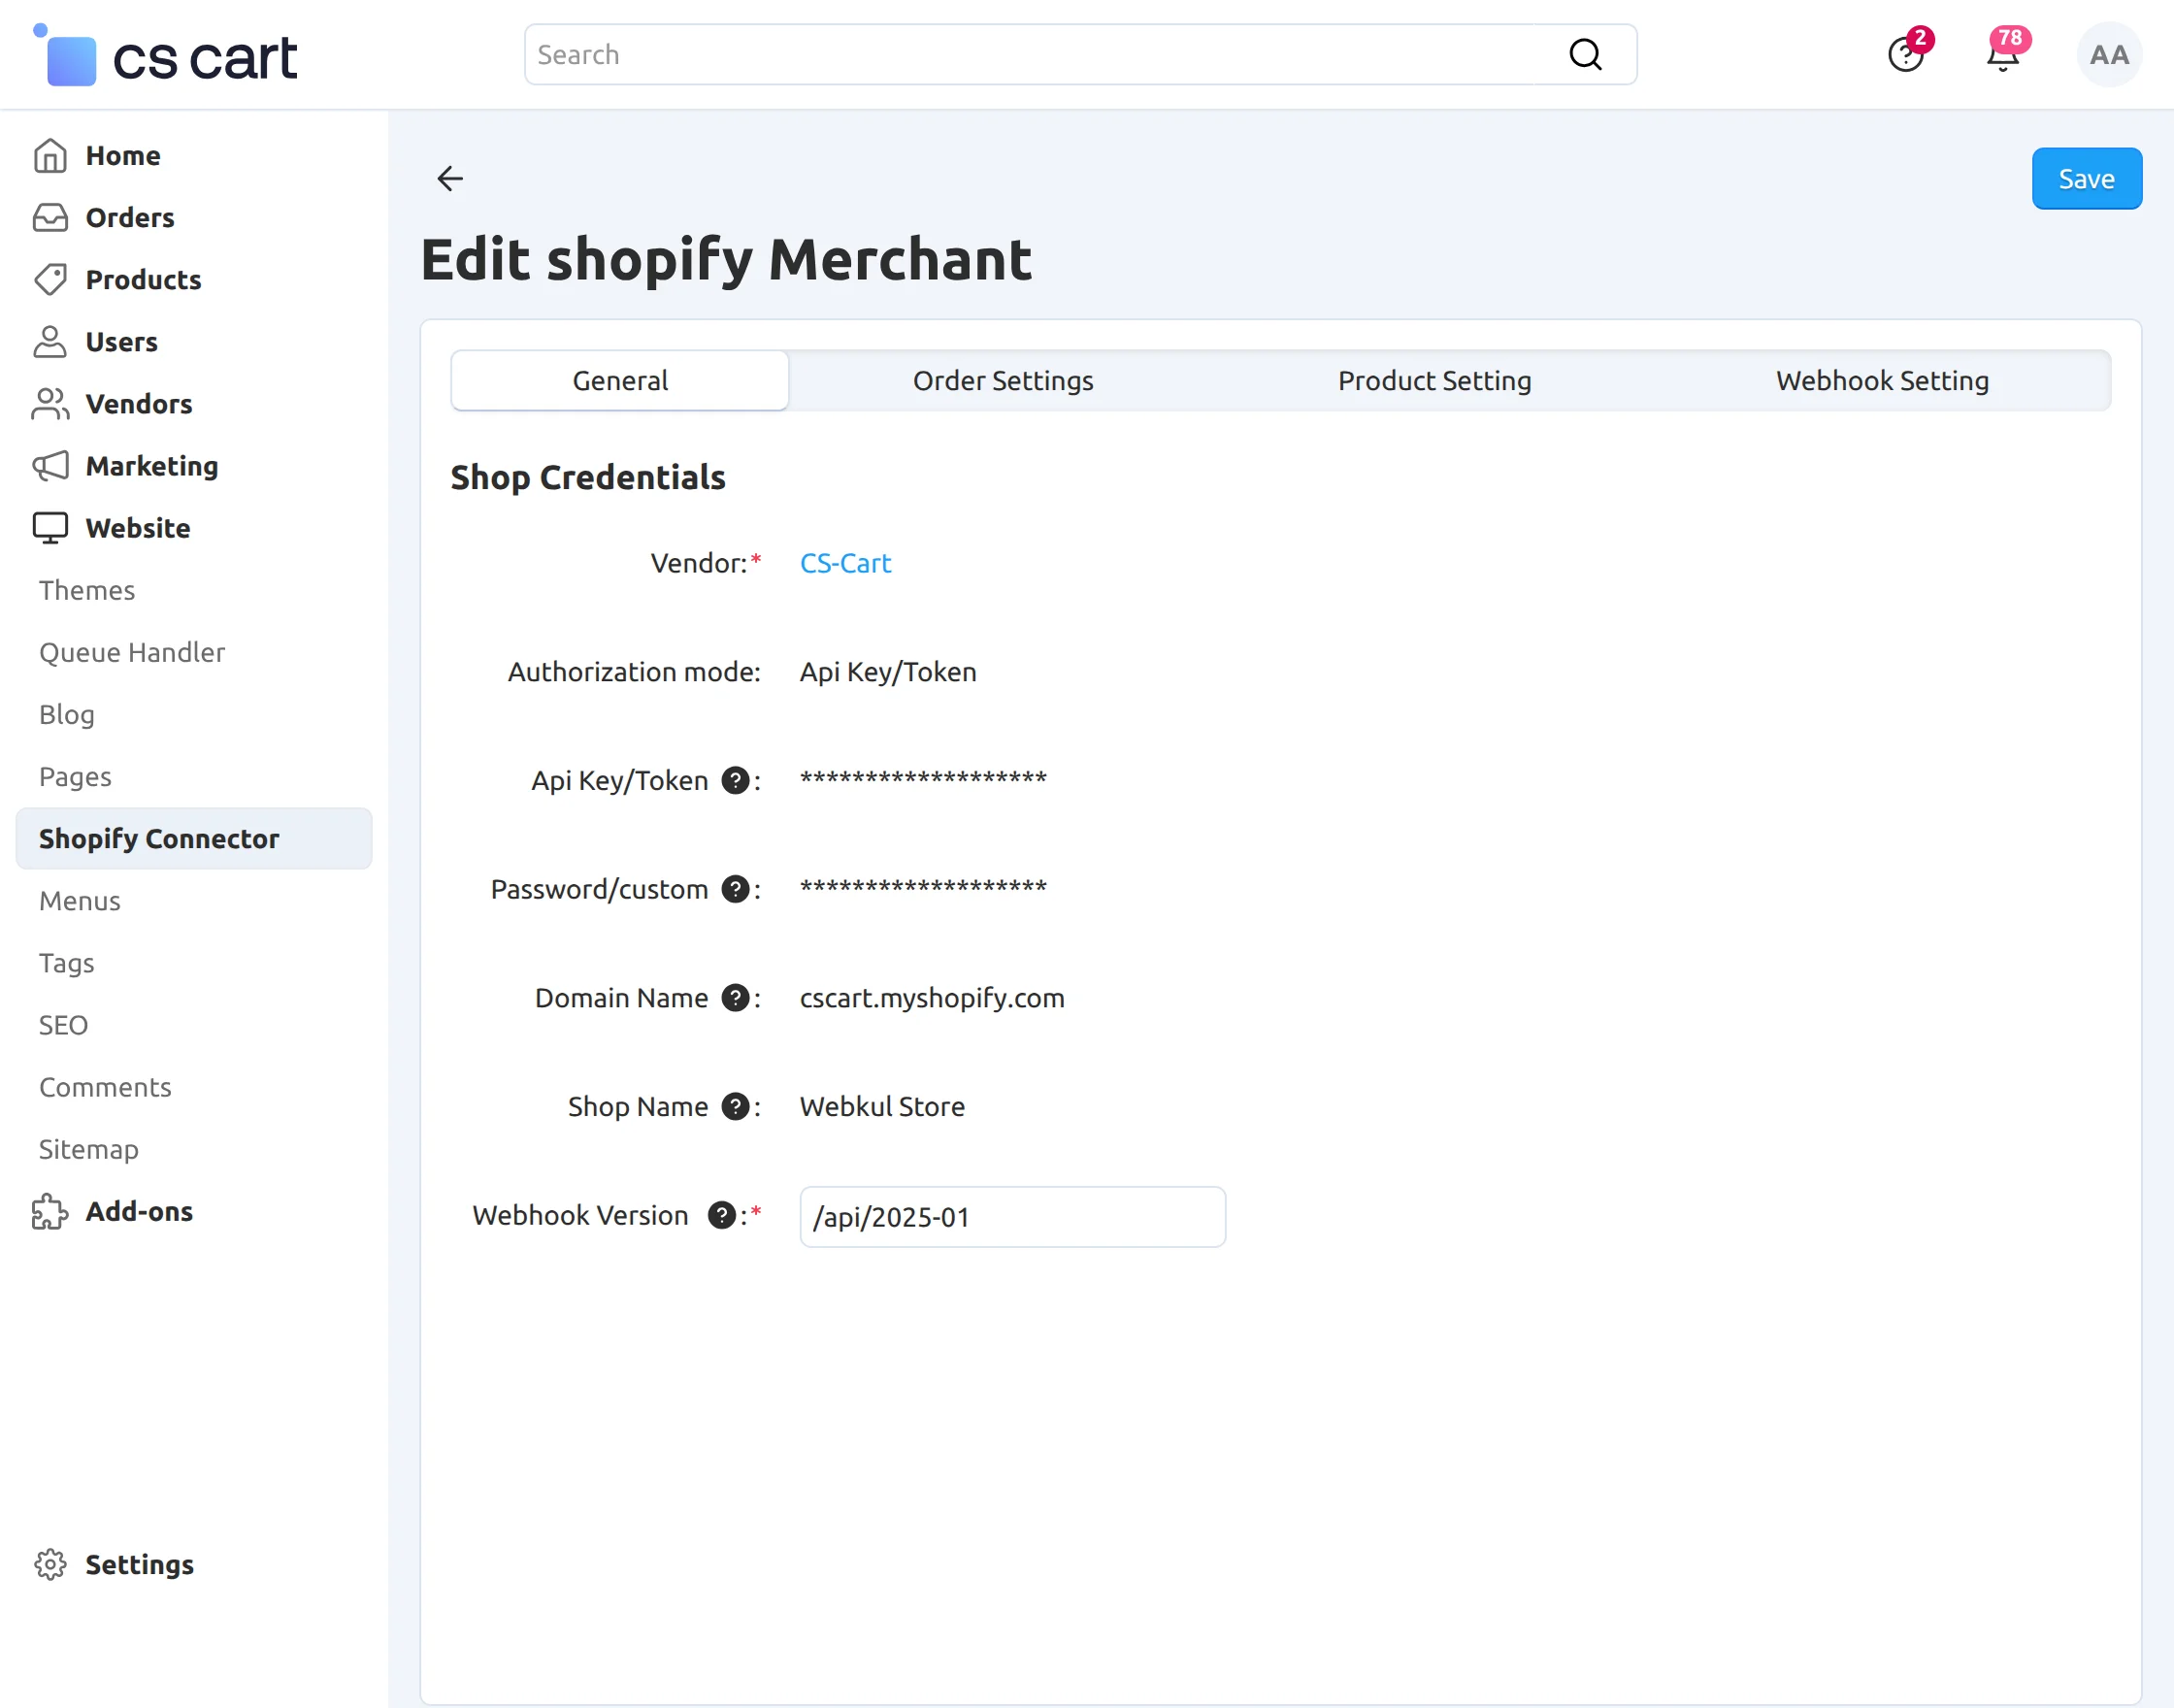
Create Account Using API Key / Token
In General Settings, select the Authorization Mode as API key/token, then enter the API key/token, password/custom, store domain name, and shop name from your Shopify account.
How to get Shopify Credentials:
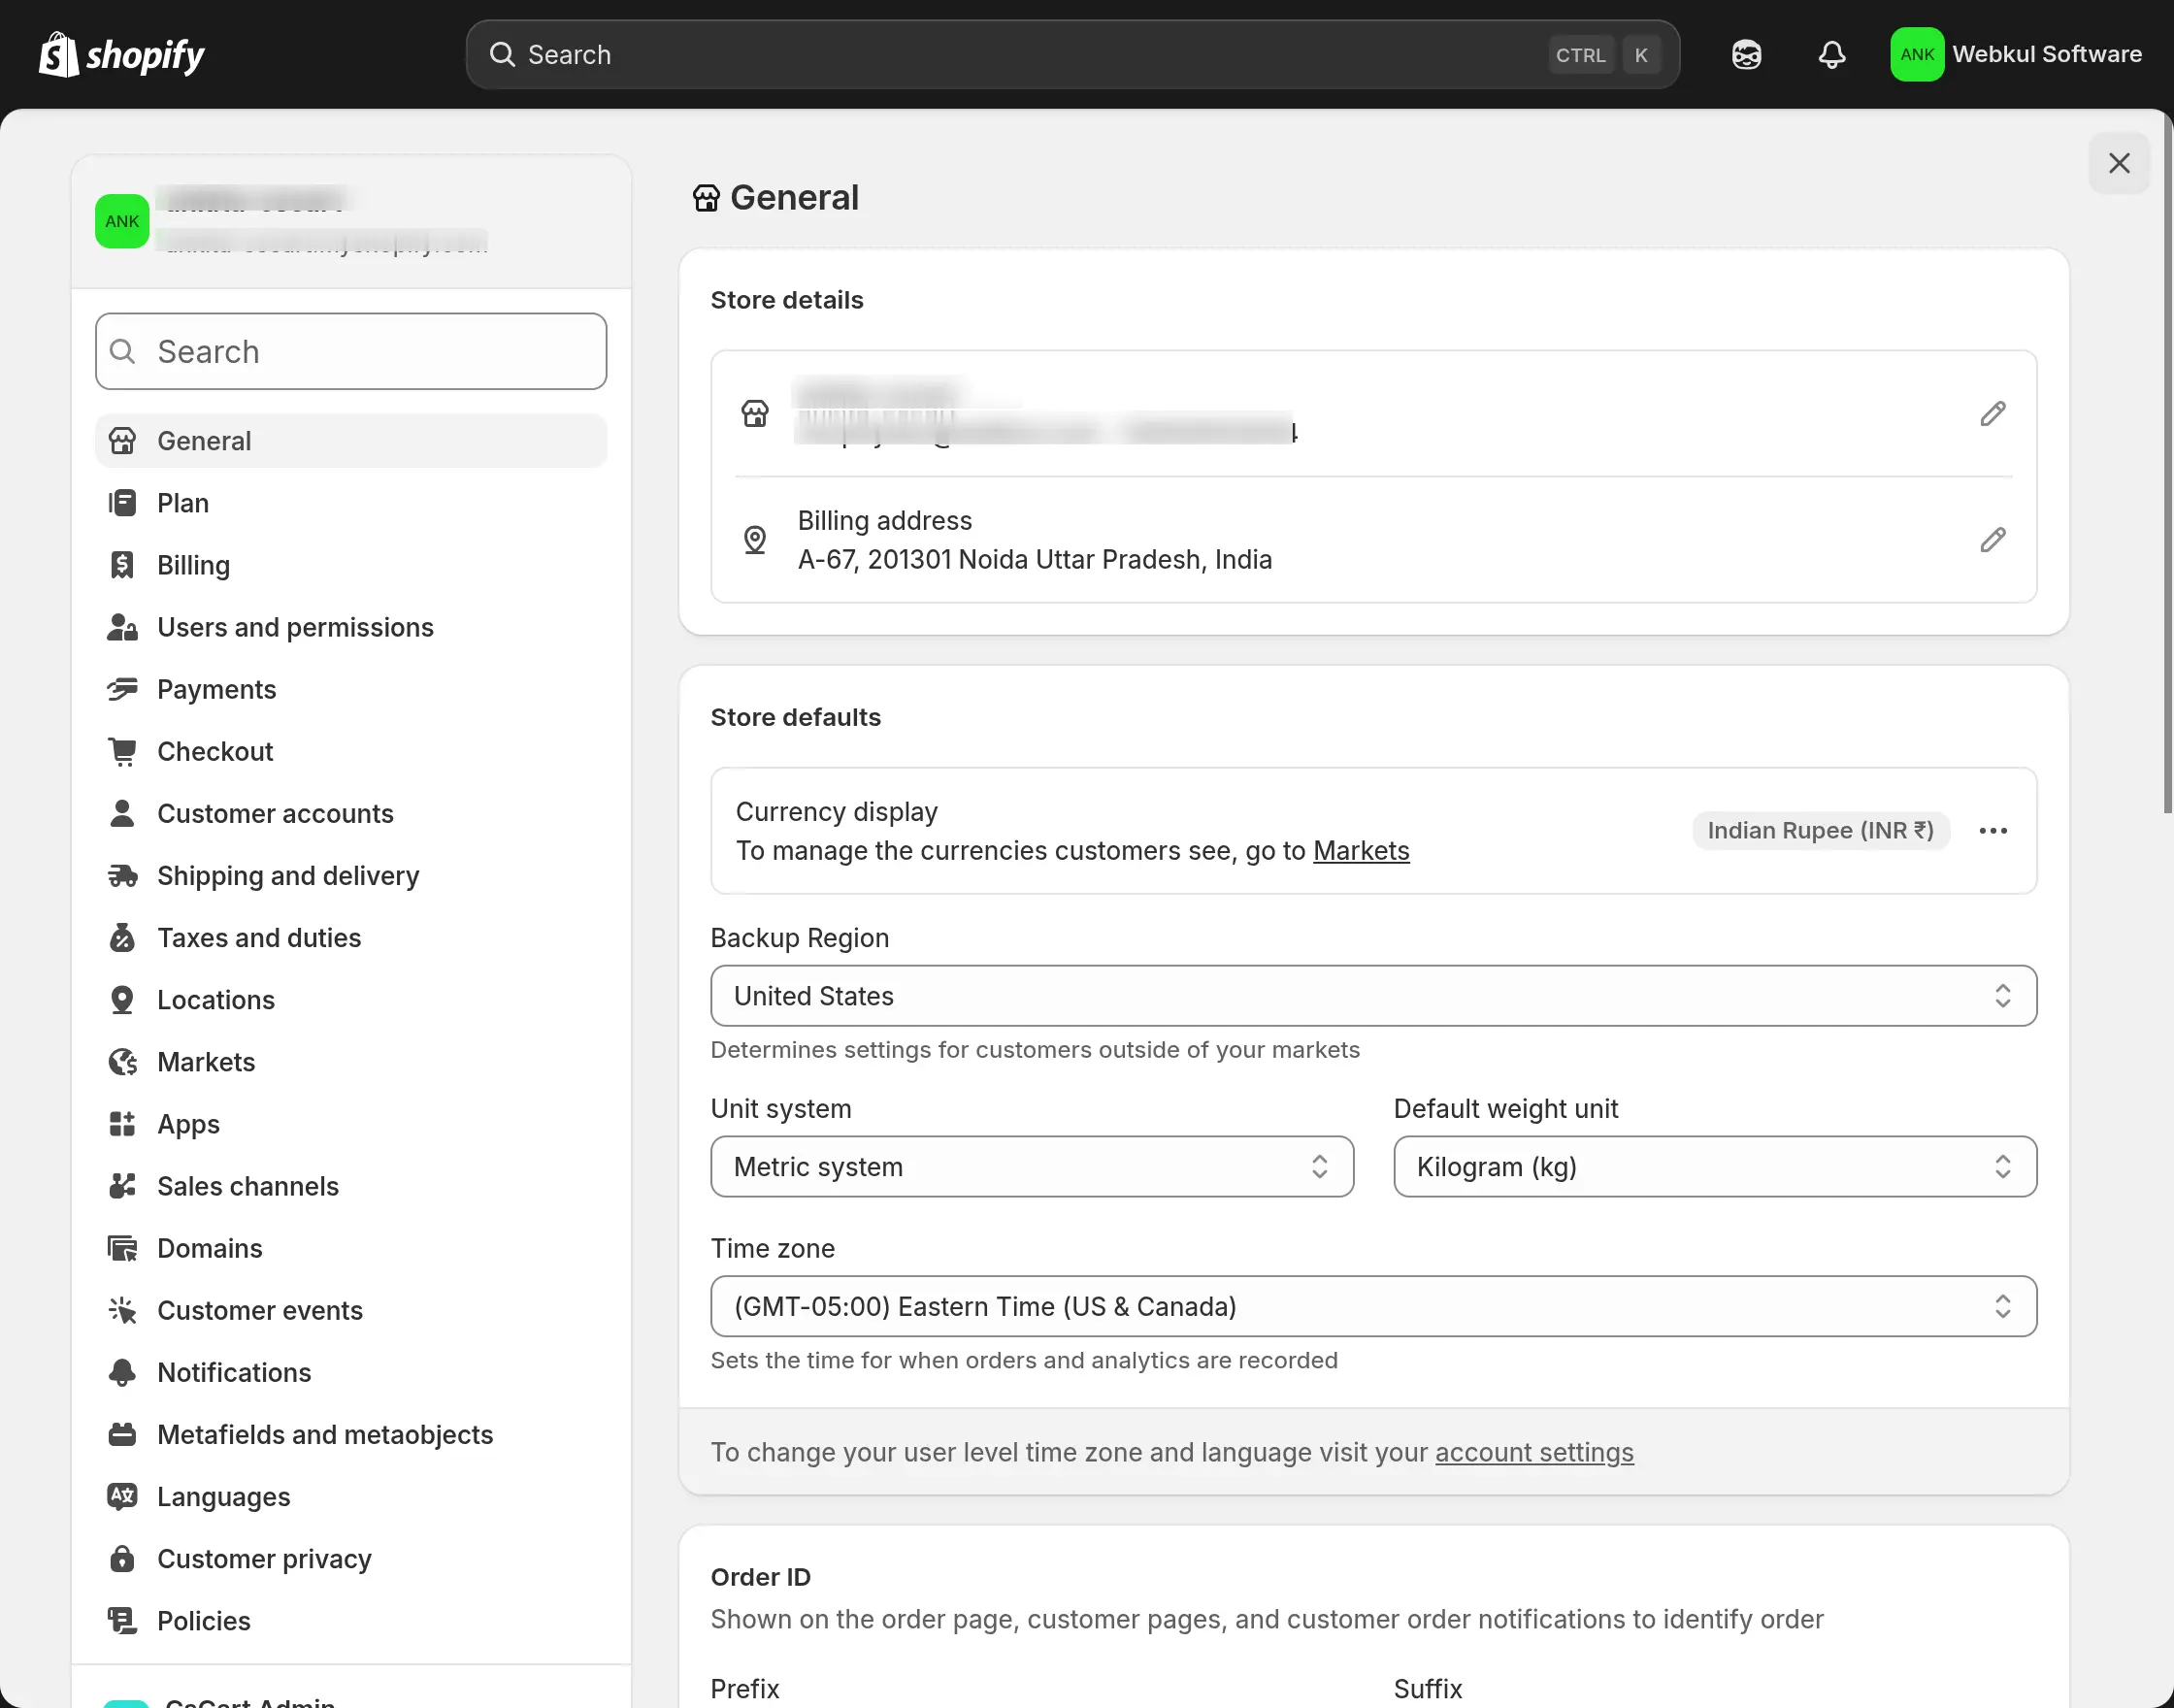
Here are the steps for generating the credentials. After creating the store on Shopify, you have to click on the Settings option on the left side of the screen.

After opening the settings option, click on Apps.
Now, click on the option Develop Apps on the top right of the screen.

Click on Create an App.

You have to enter the name of the app and select the developer name from the drop-down list.

After this, you have to click on Configuration> Configure Admin API scope.

Now, you have to give permission according to your needs by clicking on the check mark option in the Access Scopes section.

After this, you have to click on the API Credentials. You have to click on the Install app option.


After doing all this, you will get the API credentials of Shopify.

Copy them and paste them into the CS-Cart settings for the configuration of the module.
Create Account Using Dev Dashboard
In General Settings, select the Authorization Mode as Dev Dashboard, then enter the Client ID, Client Secret, store domain name, and shop name from your Shopify account.
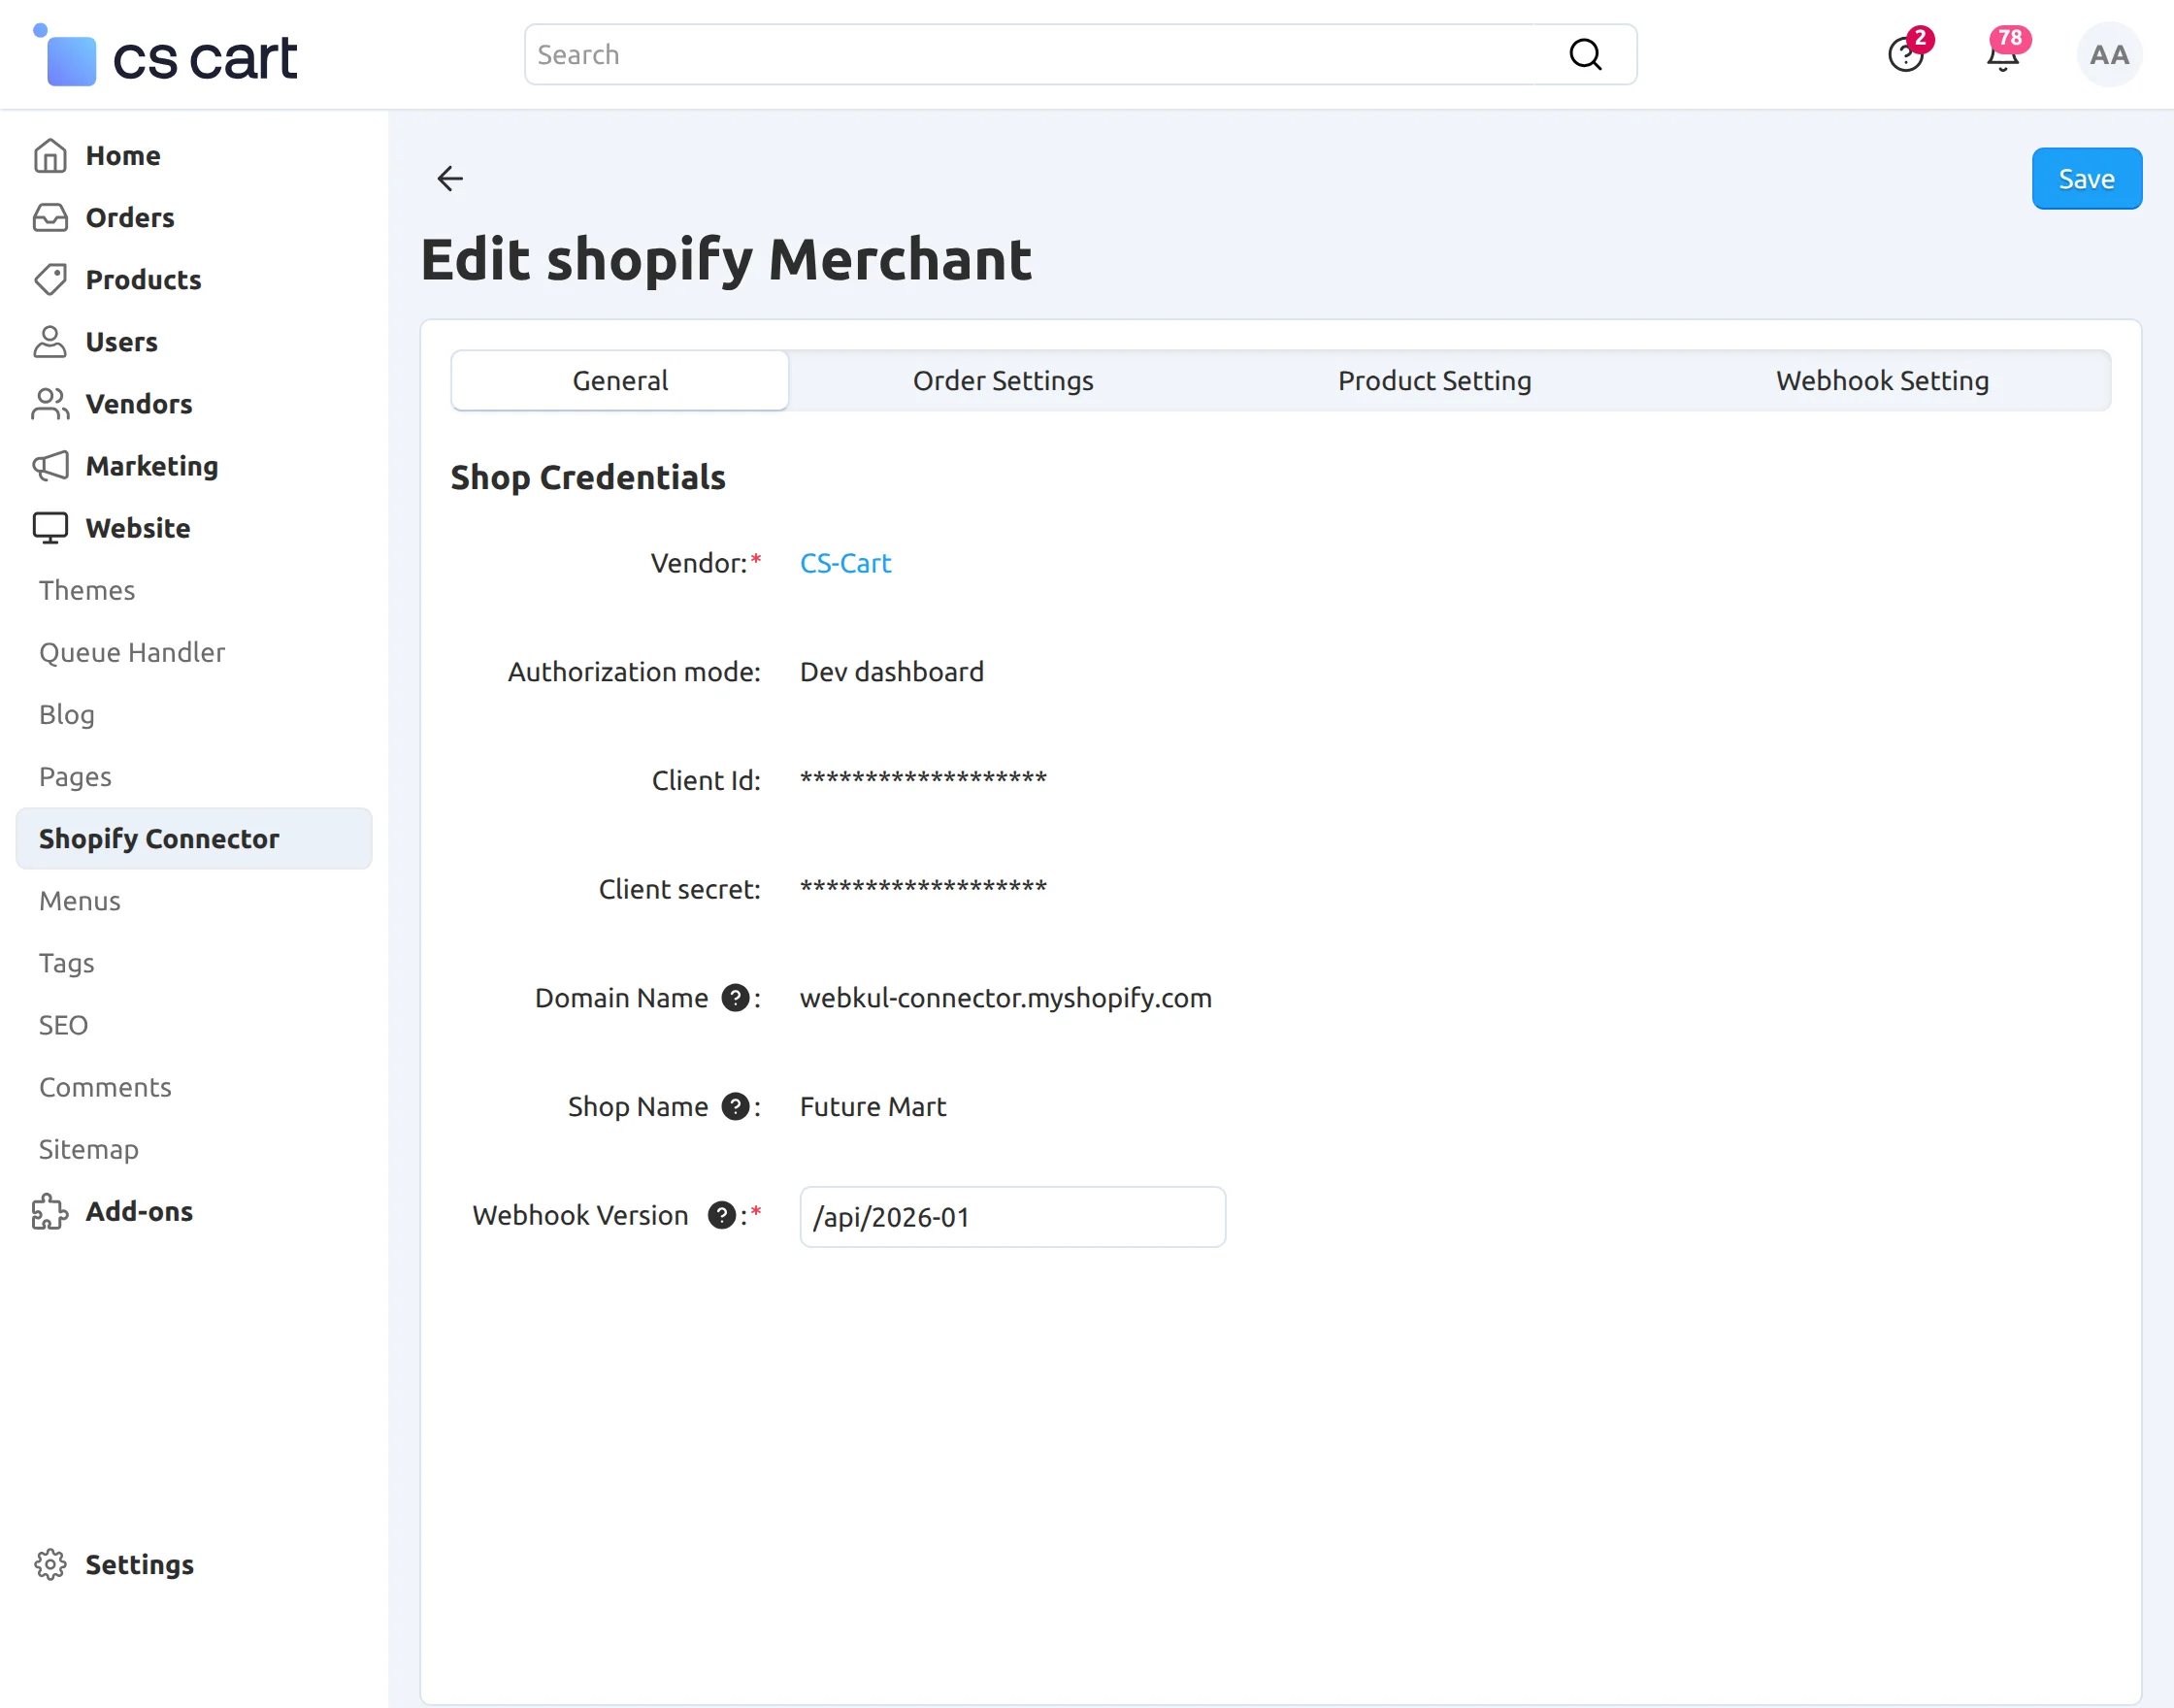
How to get Dev Dashboard Credentials
After logging into your Shopify account, open the Developer Dashboard and click on Add Dev Store.
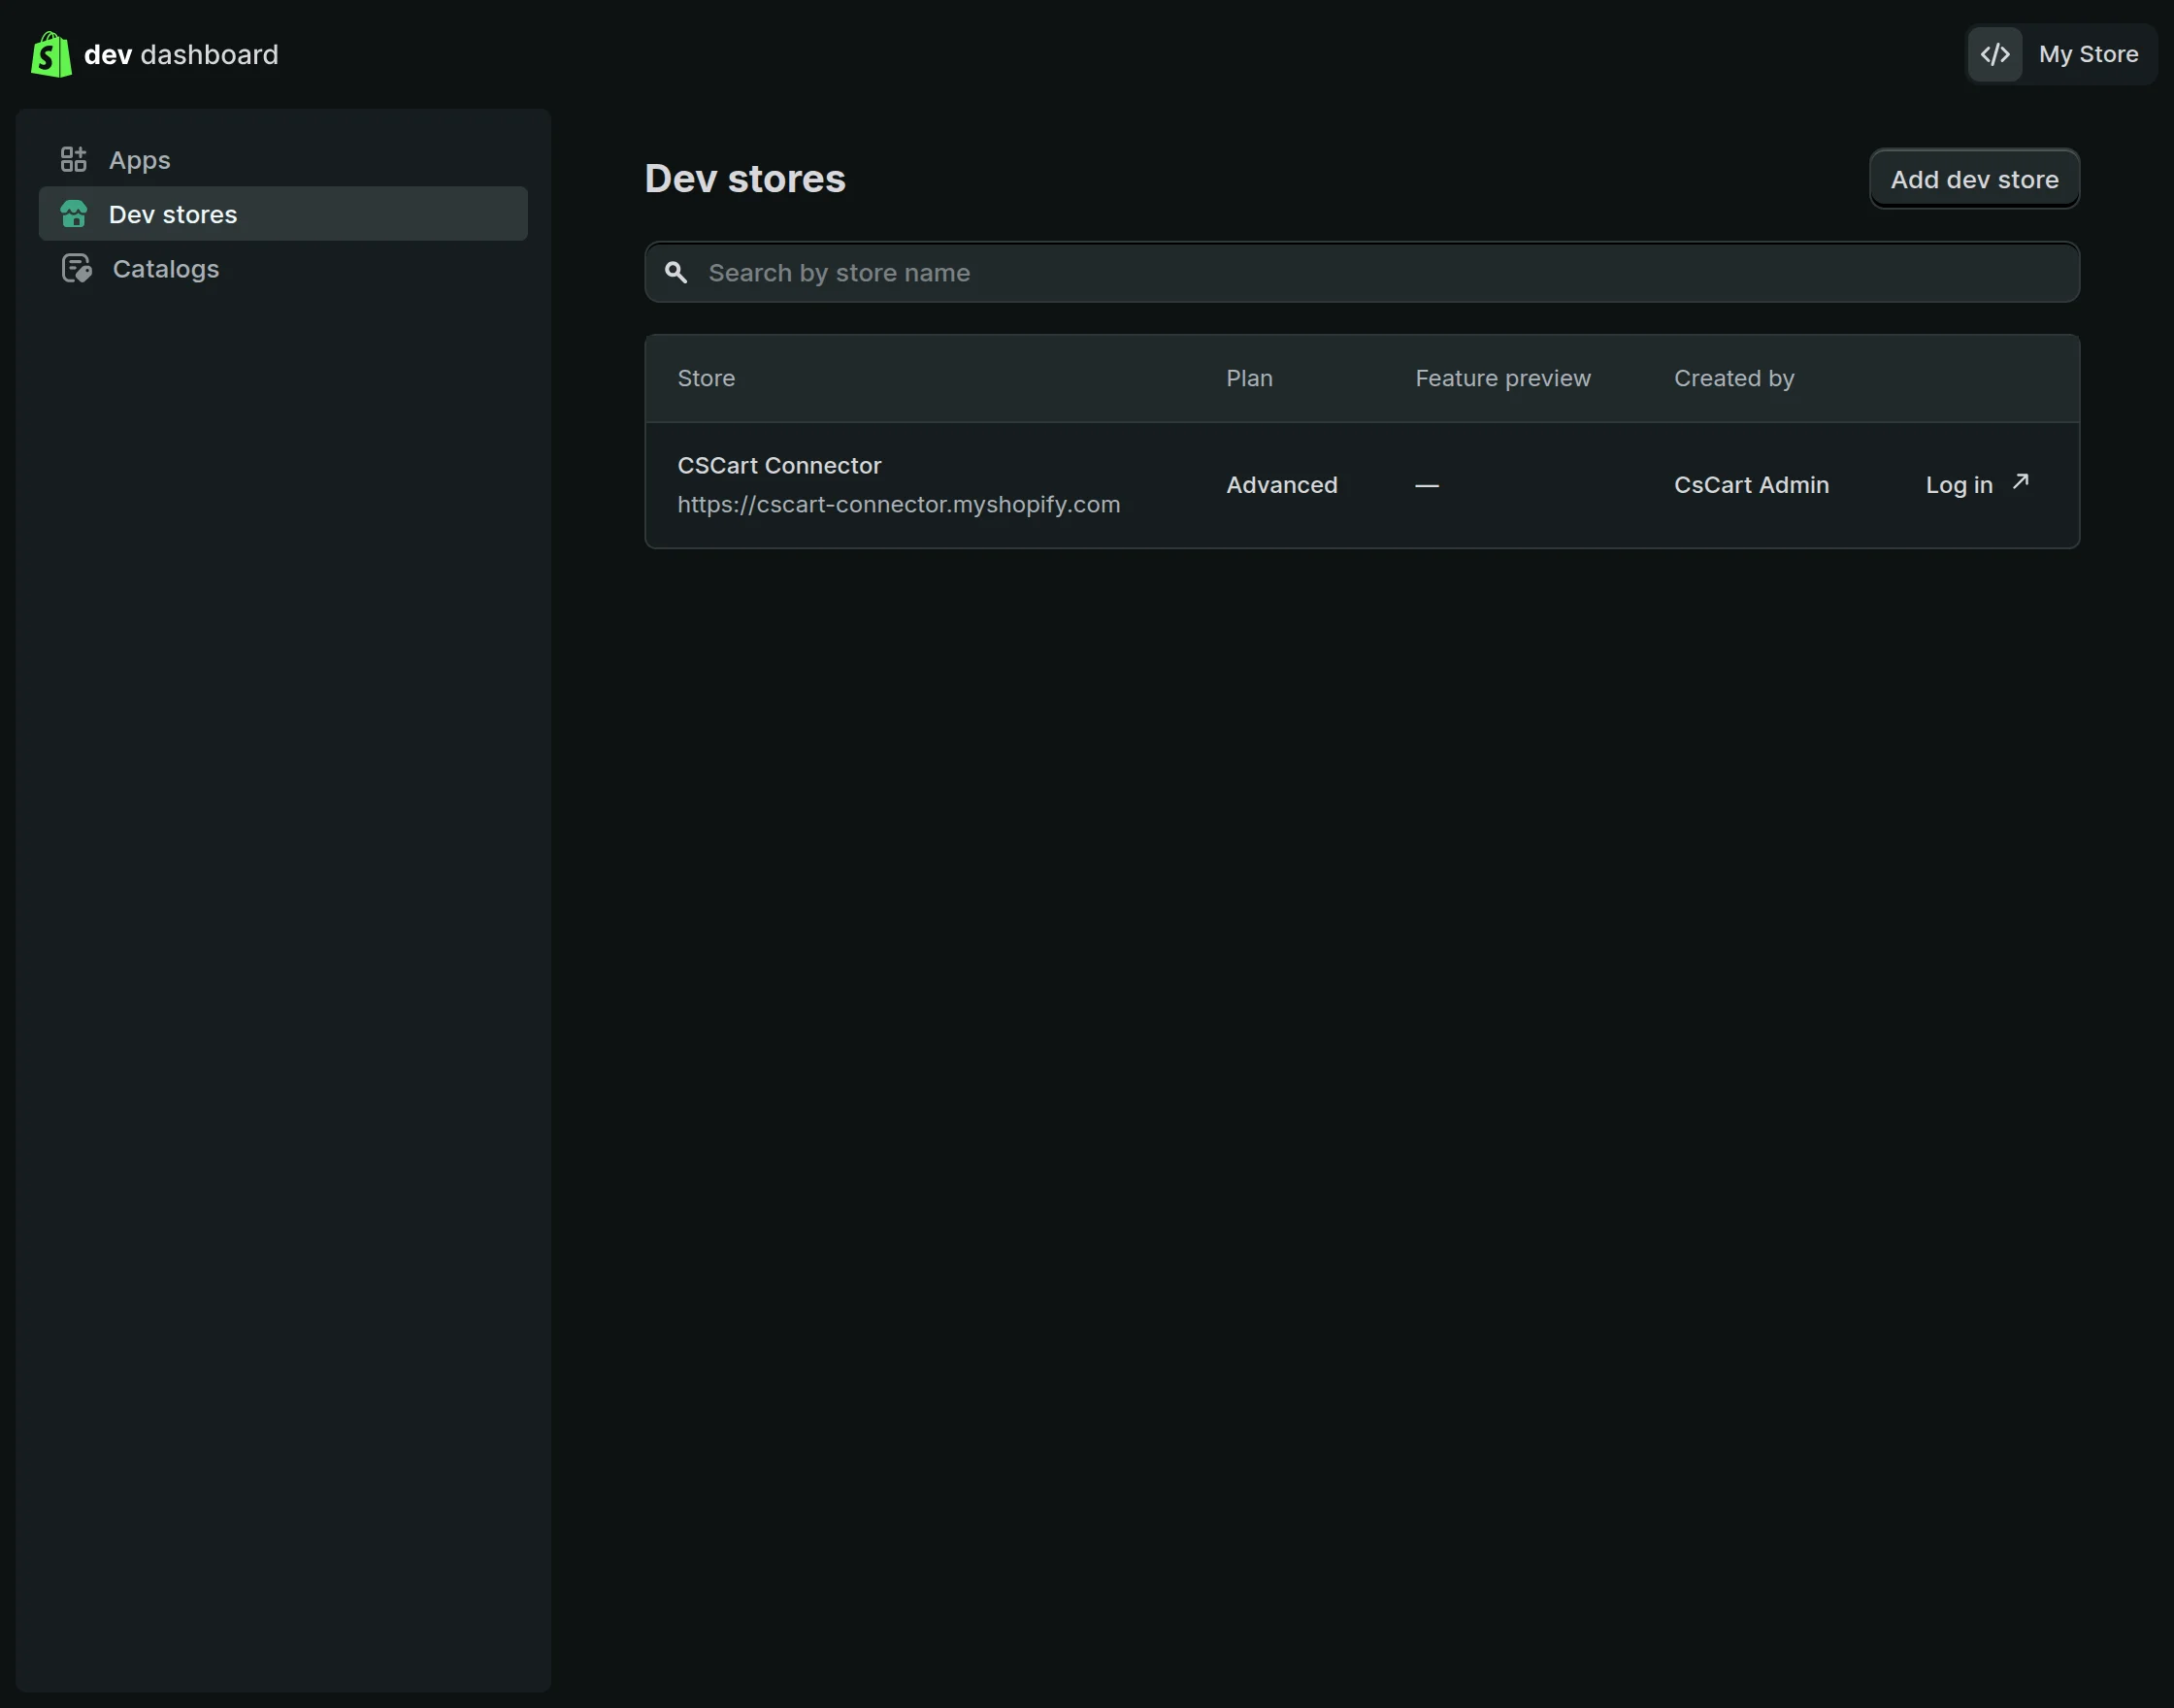
You will be redirected to the Create Dev Store pop-up, where you can enter the store name, select a plan, and click Create Store.

After that, click on the Create App button.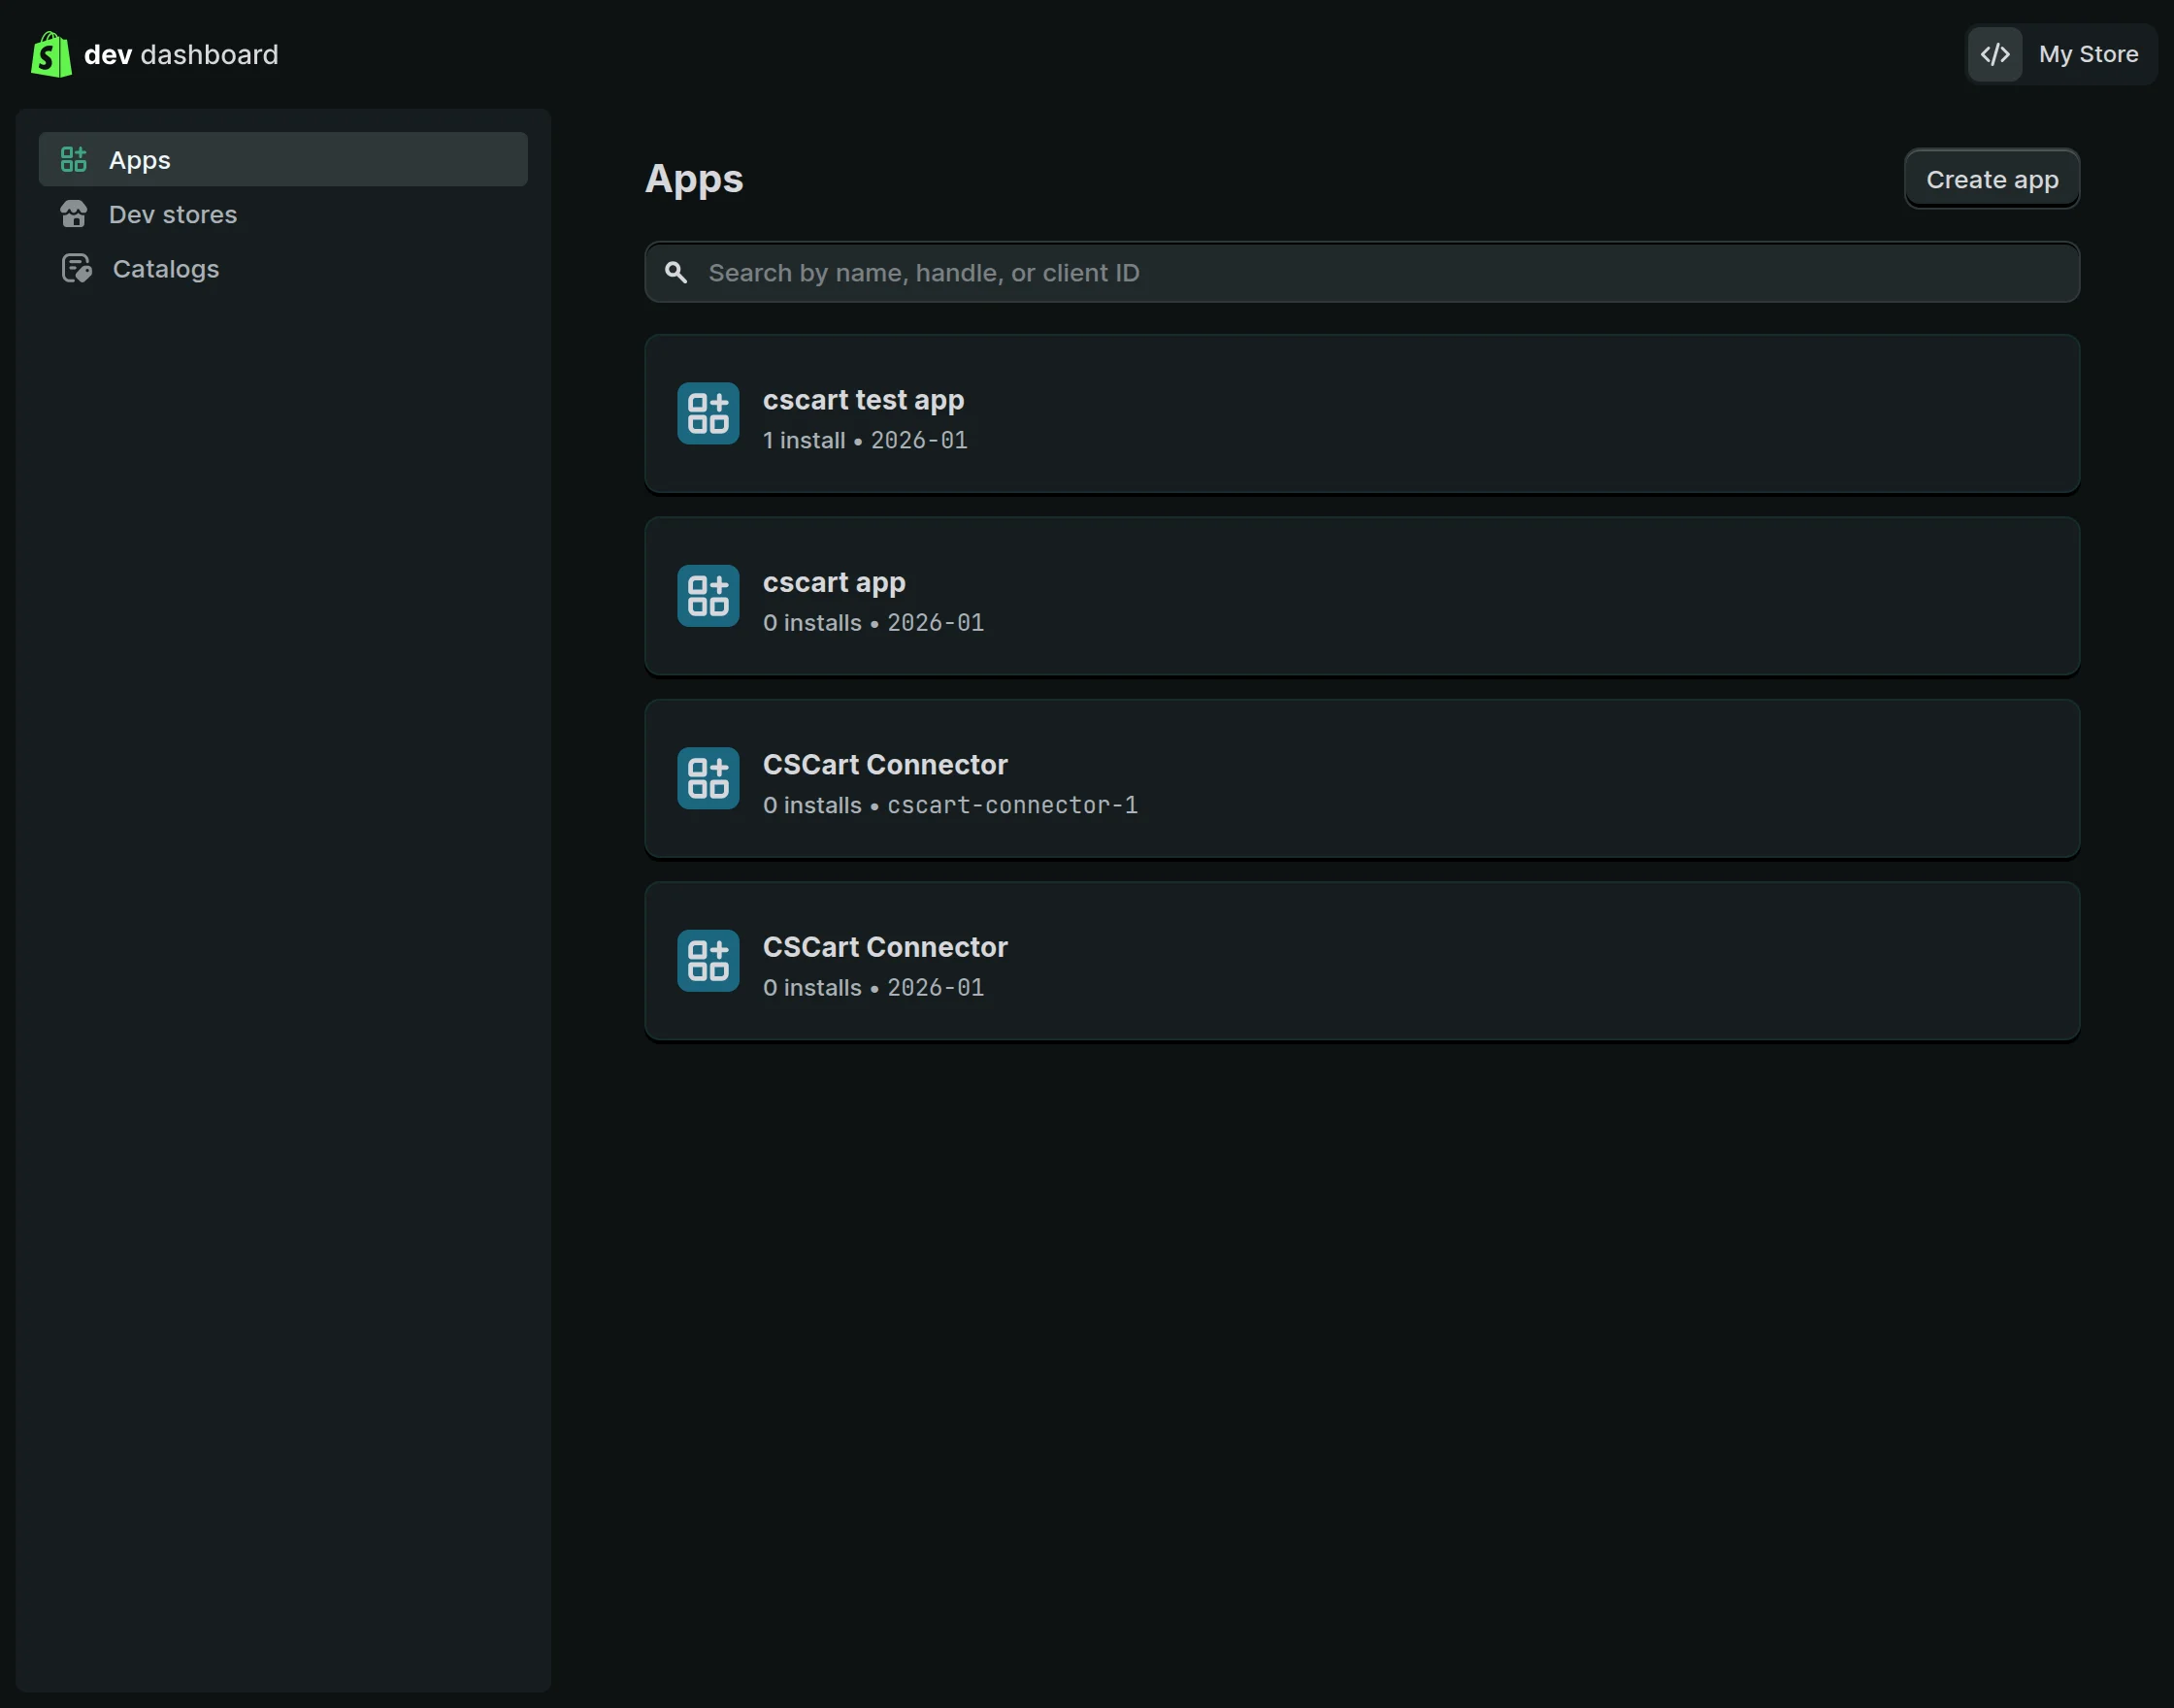
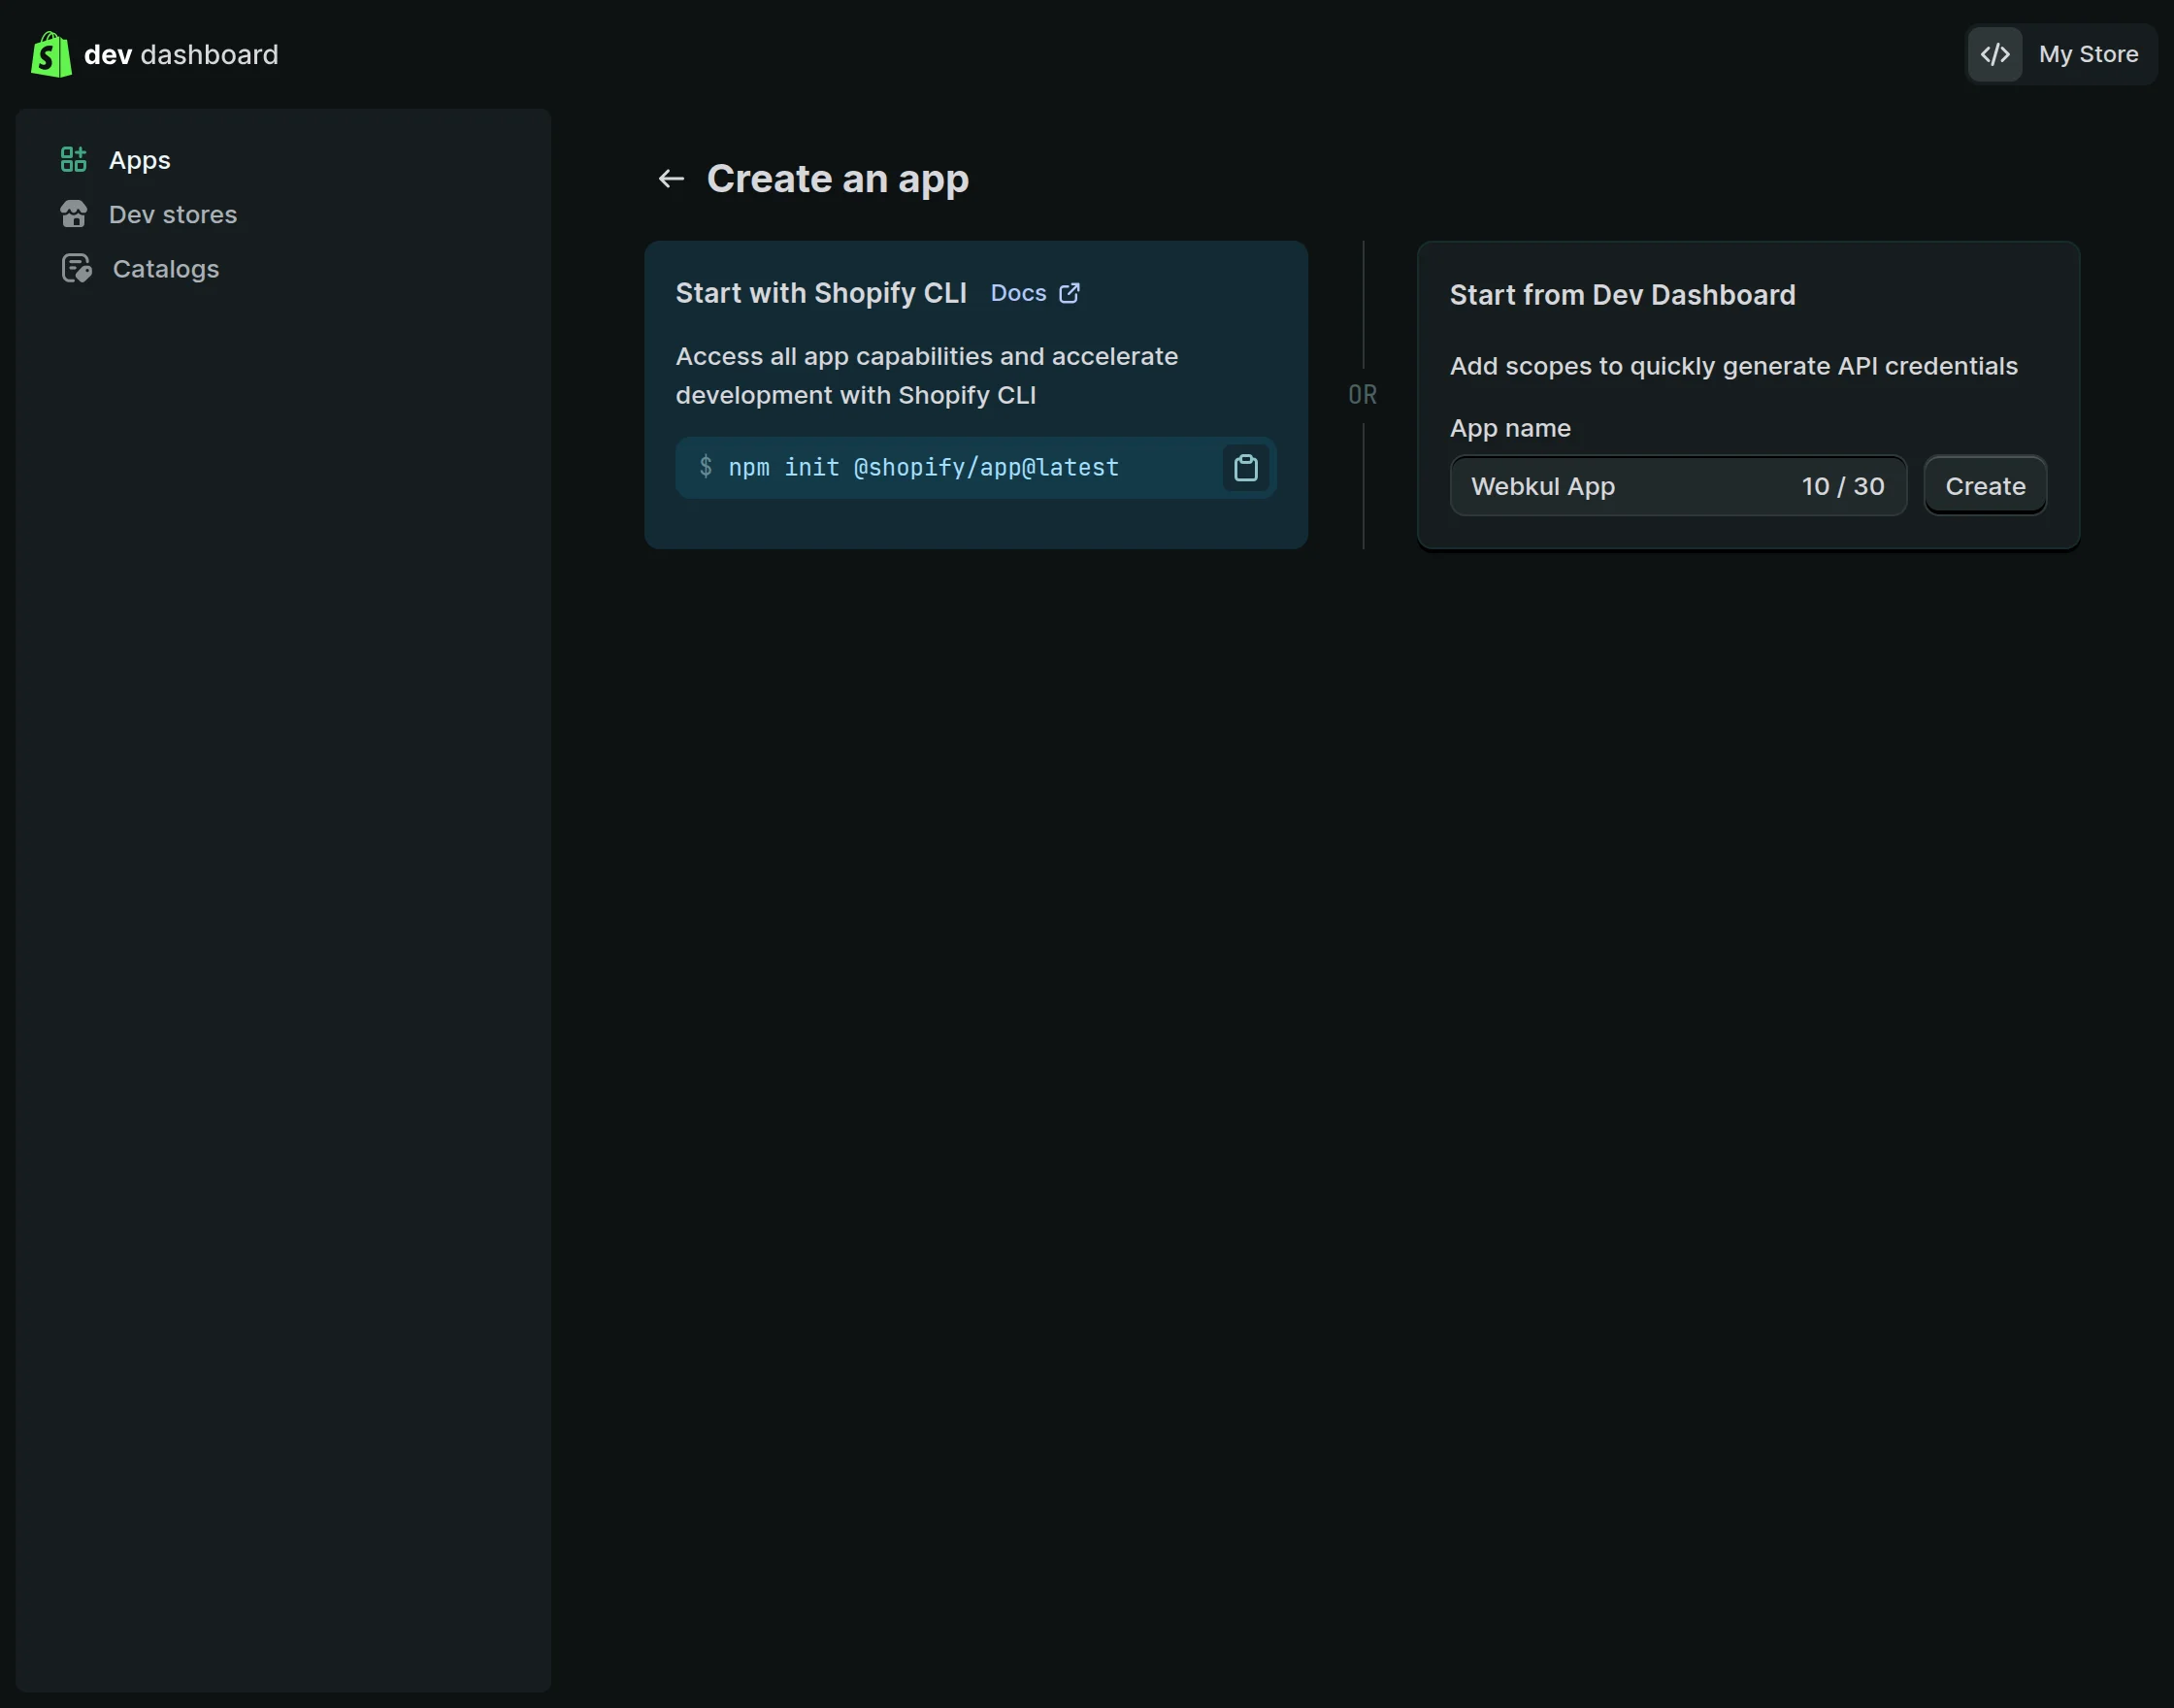
Enter the app name, then click the Create button to create the app.
After the app is created, you need to add access scopes to define the required permissions.
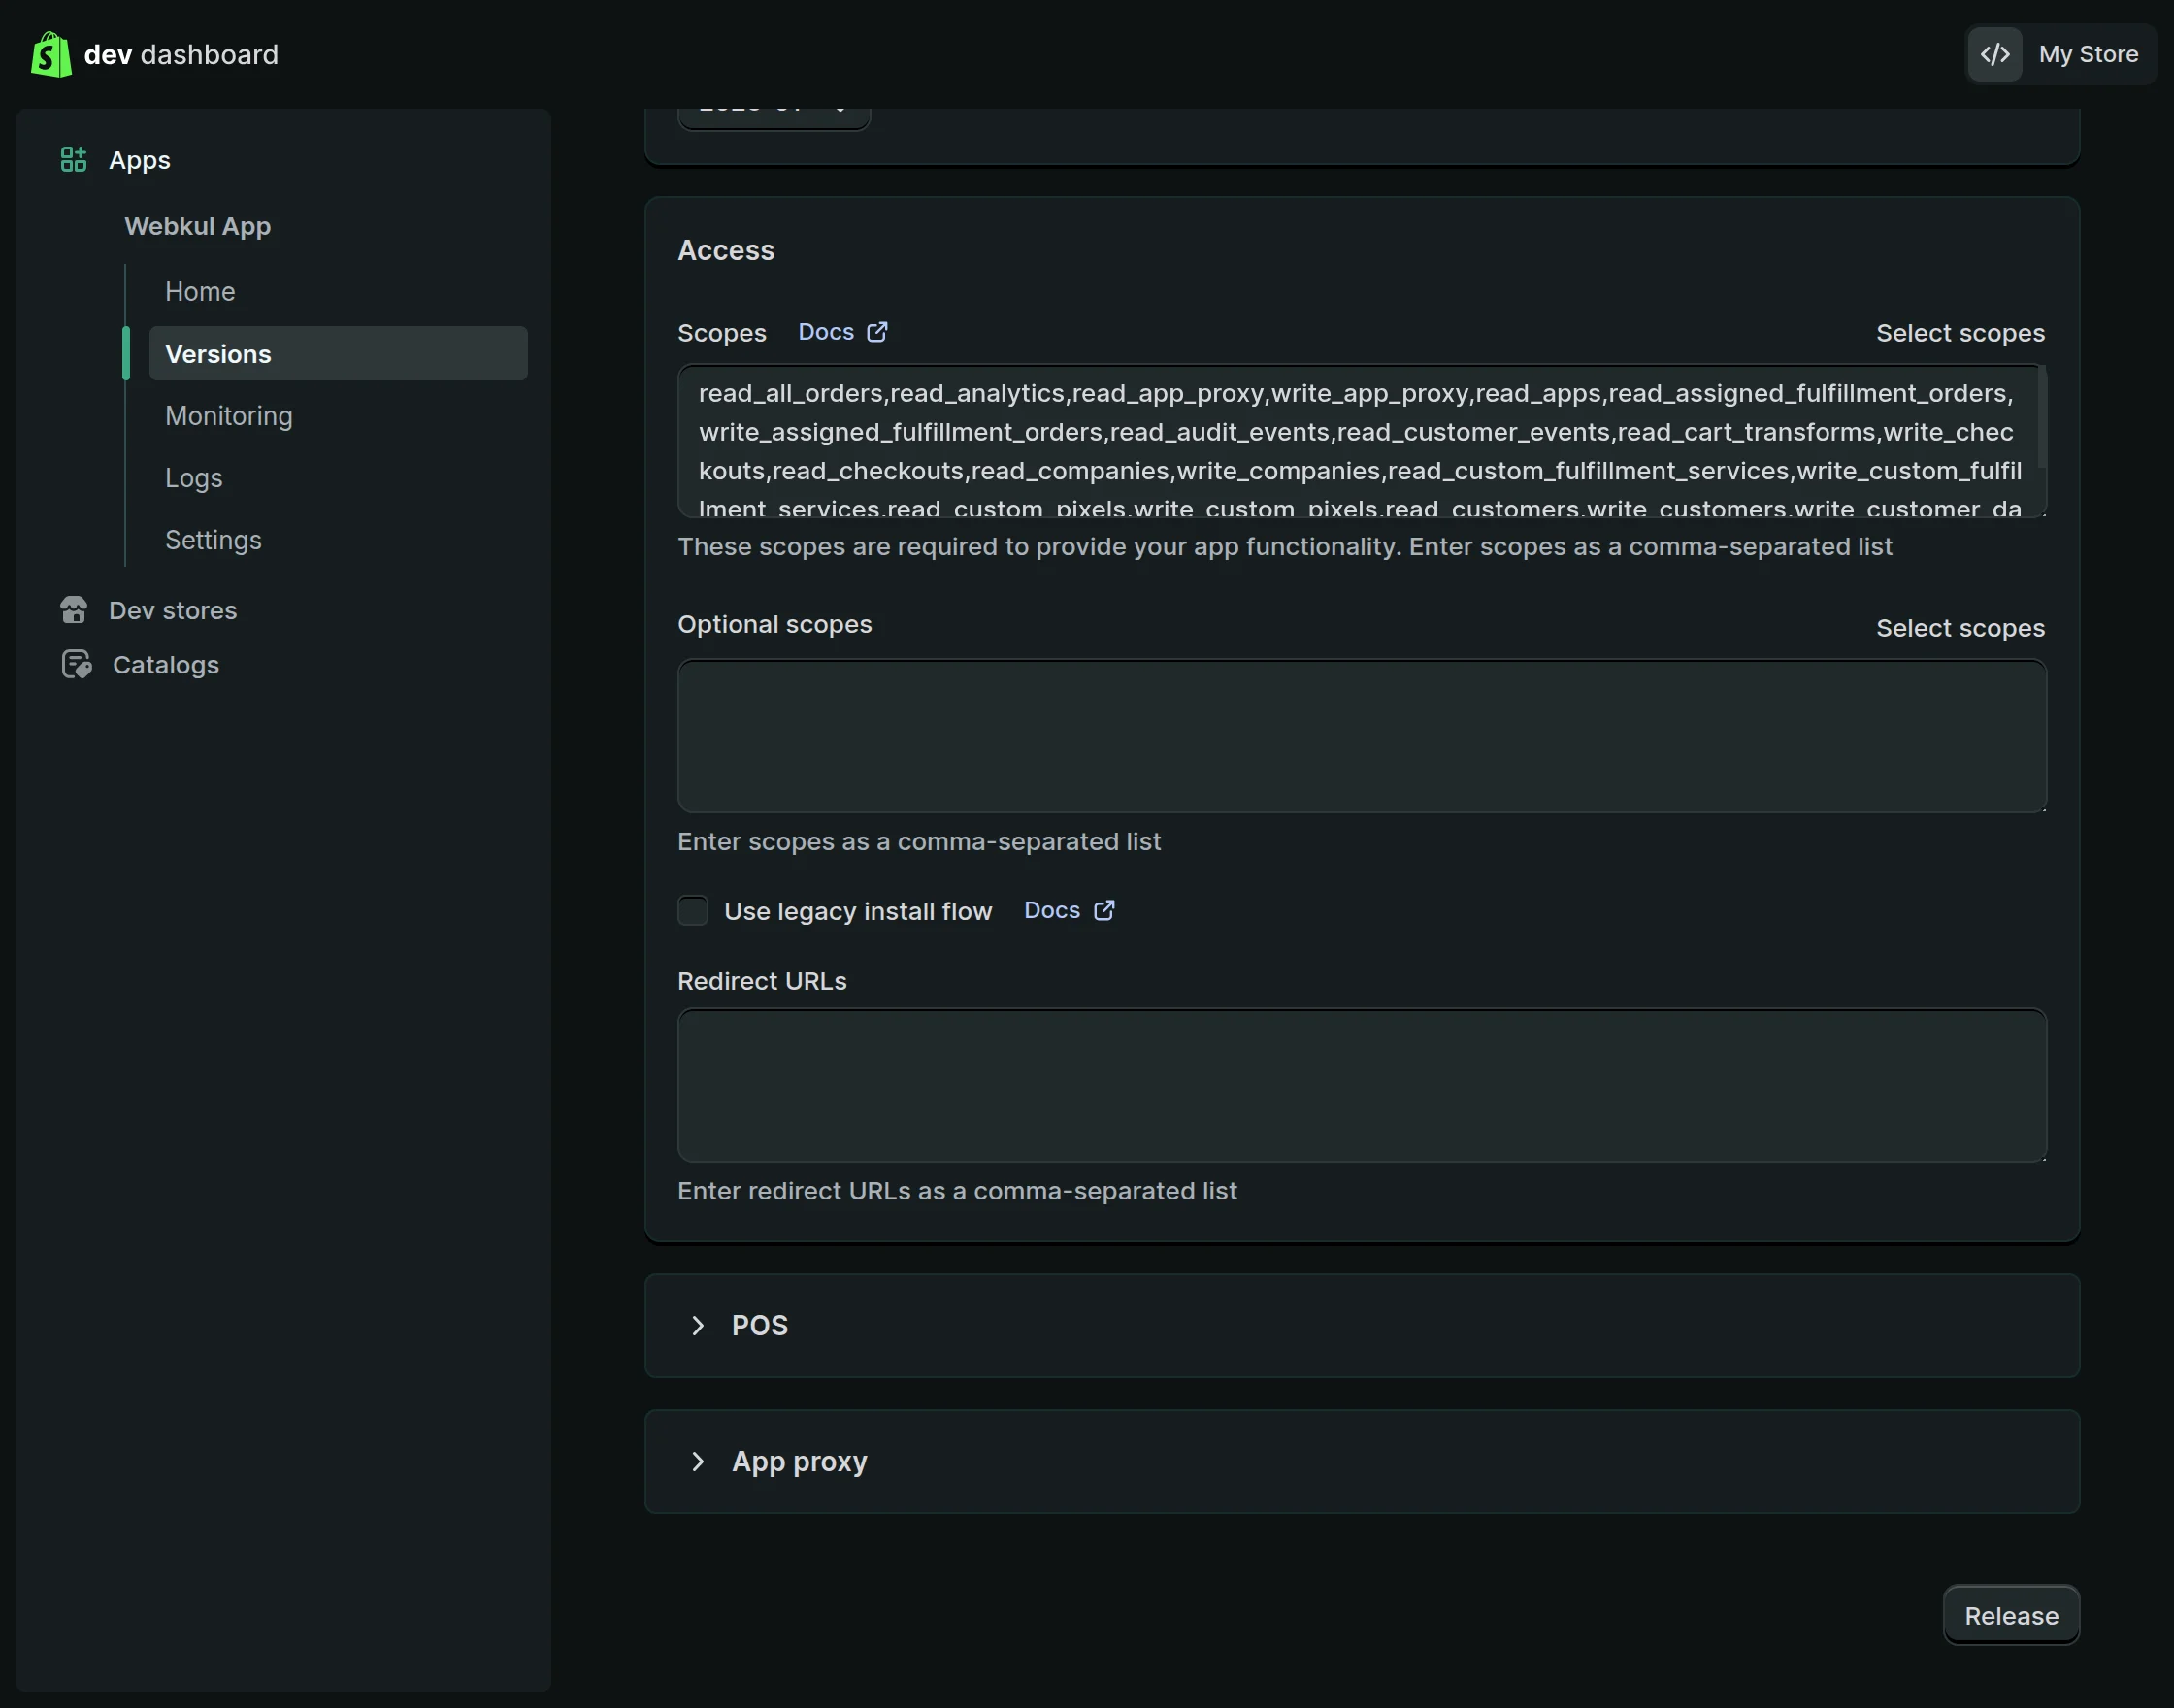
Set Up Admin API Permissions
Now, you need to configure the required API permissions for your Shopify app.
Fill in the following details:
App URL – Enter the URL where your app is hosted, or the URL Shopify should redirect to after the app is installed or accessed.
After that, assign the necessary permissions to your app:
-
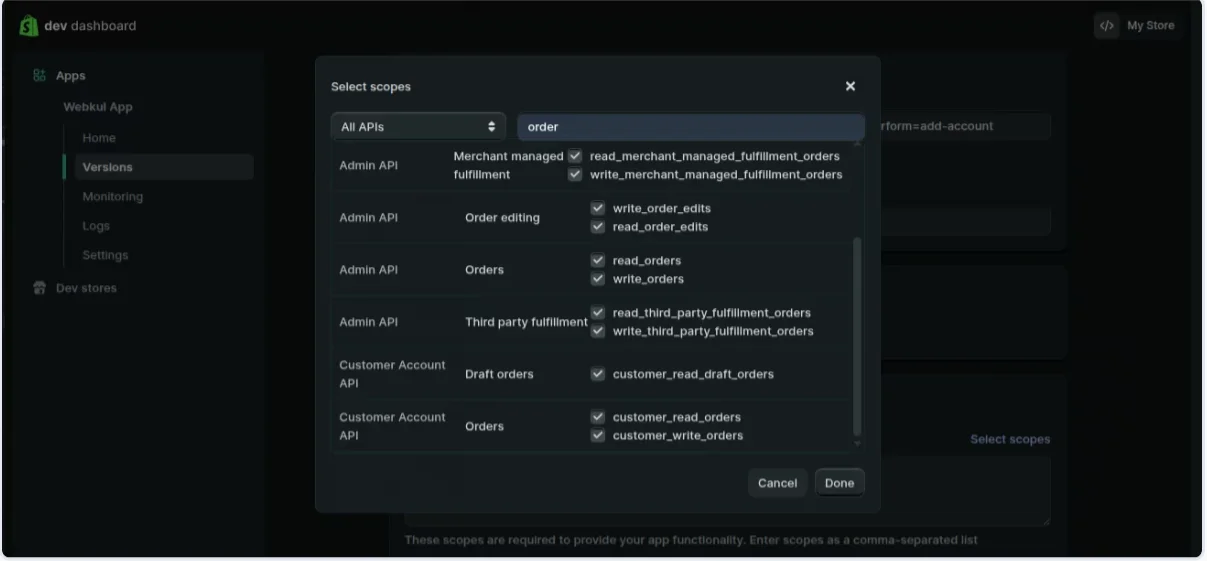
Navigate to the Access Scopes section.
-
Select the required API scopes based on the connector requirements (such as Products, Orders, Inventory, Customers, etc.).
Make sure to enable Read and Write access for the following:
-
Customer information and customer groups
-
Inventory management
-
Orders, transactions, fulfillment details
-
Product data including products, variants, and collections
-
Locations
-
Shipping rates
-
Discounts
-
Online Store pages access through the GraphQL API
Note: While configuring webhook subscriptions, ensure that you select the latest available Event Version.
Once all the necessary permissions are selected, click on Release. This will generate a new version of your app, as shown in the image below.
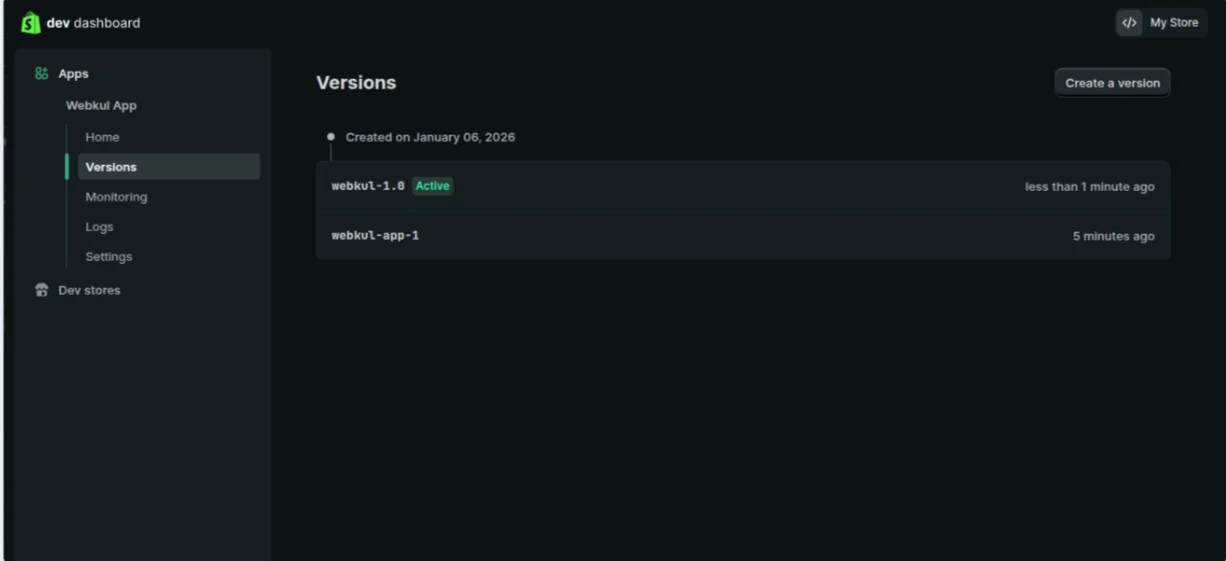
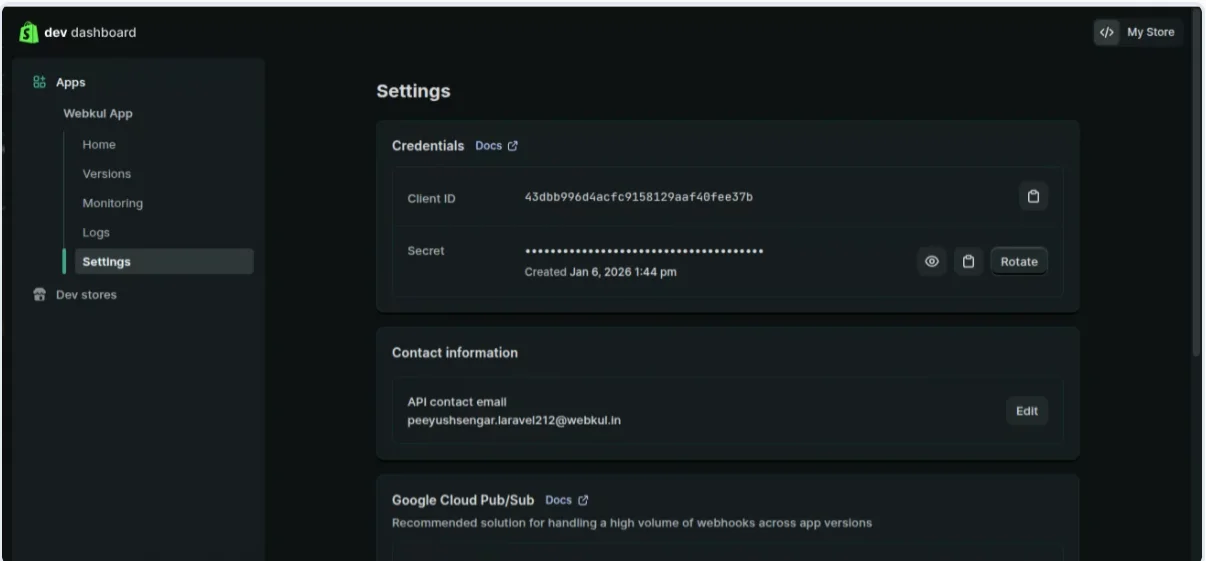
Retrieve Your API Credentials
Once the app version has been released, navigate to the API Credentials section within your app dashboard. Here, Shopify provides the authentication keys required for integration.
You will be able to find the following details:
-
Client ID (API Key)
-
Client Secret Key
To view the secret key, click on Reveal.
Make sure to copy both credentials carefully and store them securely, as these values will be required during the module configuration.
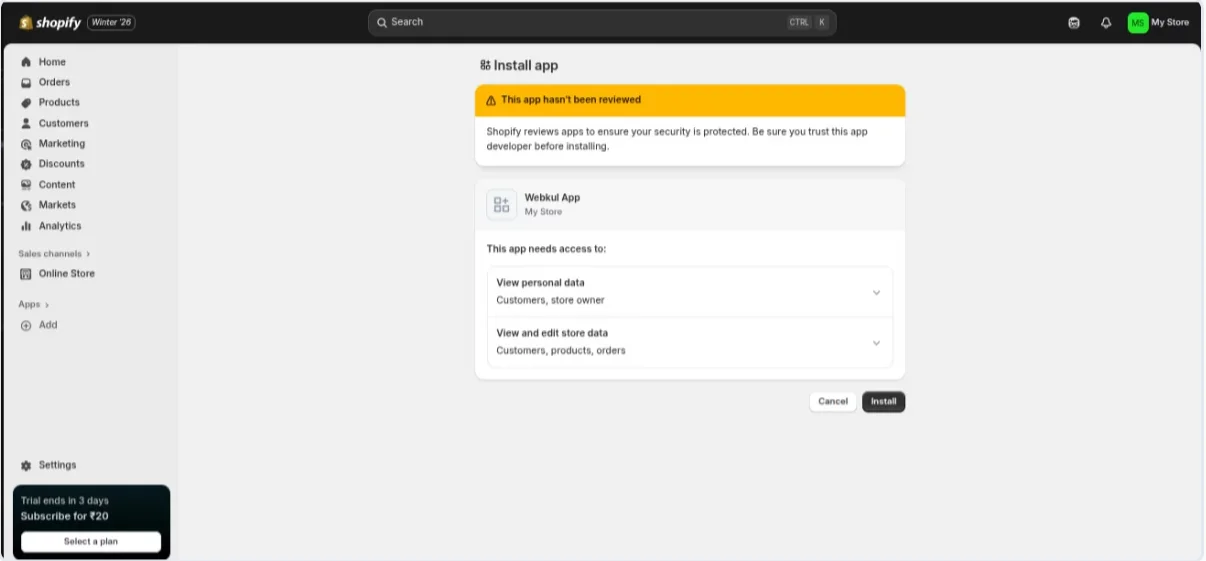
Install the App
After configuring the required API scopes, the next step is to install the app in order to enable API access.
-
Click on Install App from the app dashboard.
-
Confirm the installation when prompted.
Once installed, Shopify will activate the app and generate the OAuth credentials required for completing the integration.
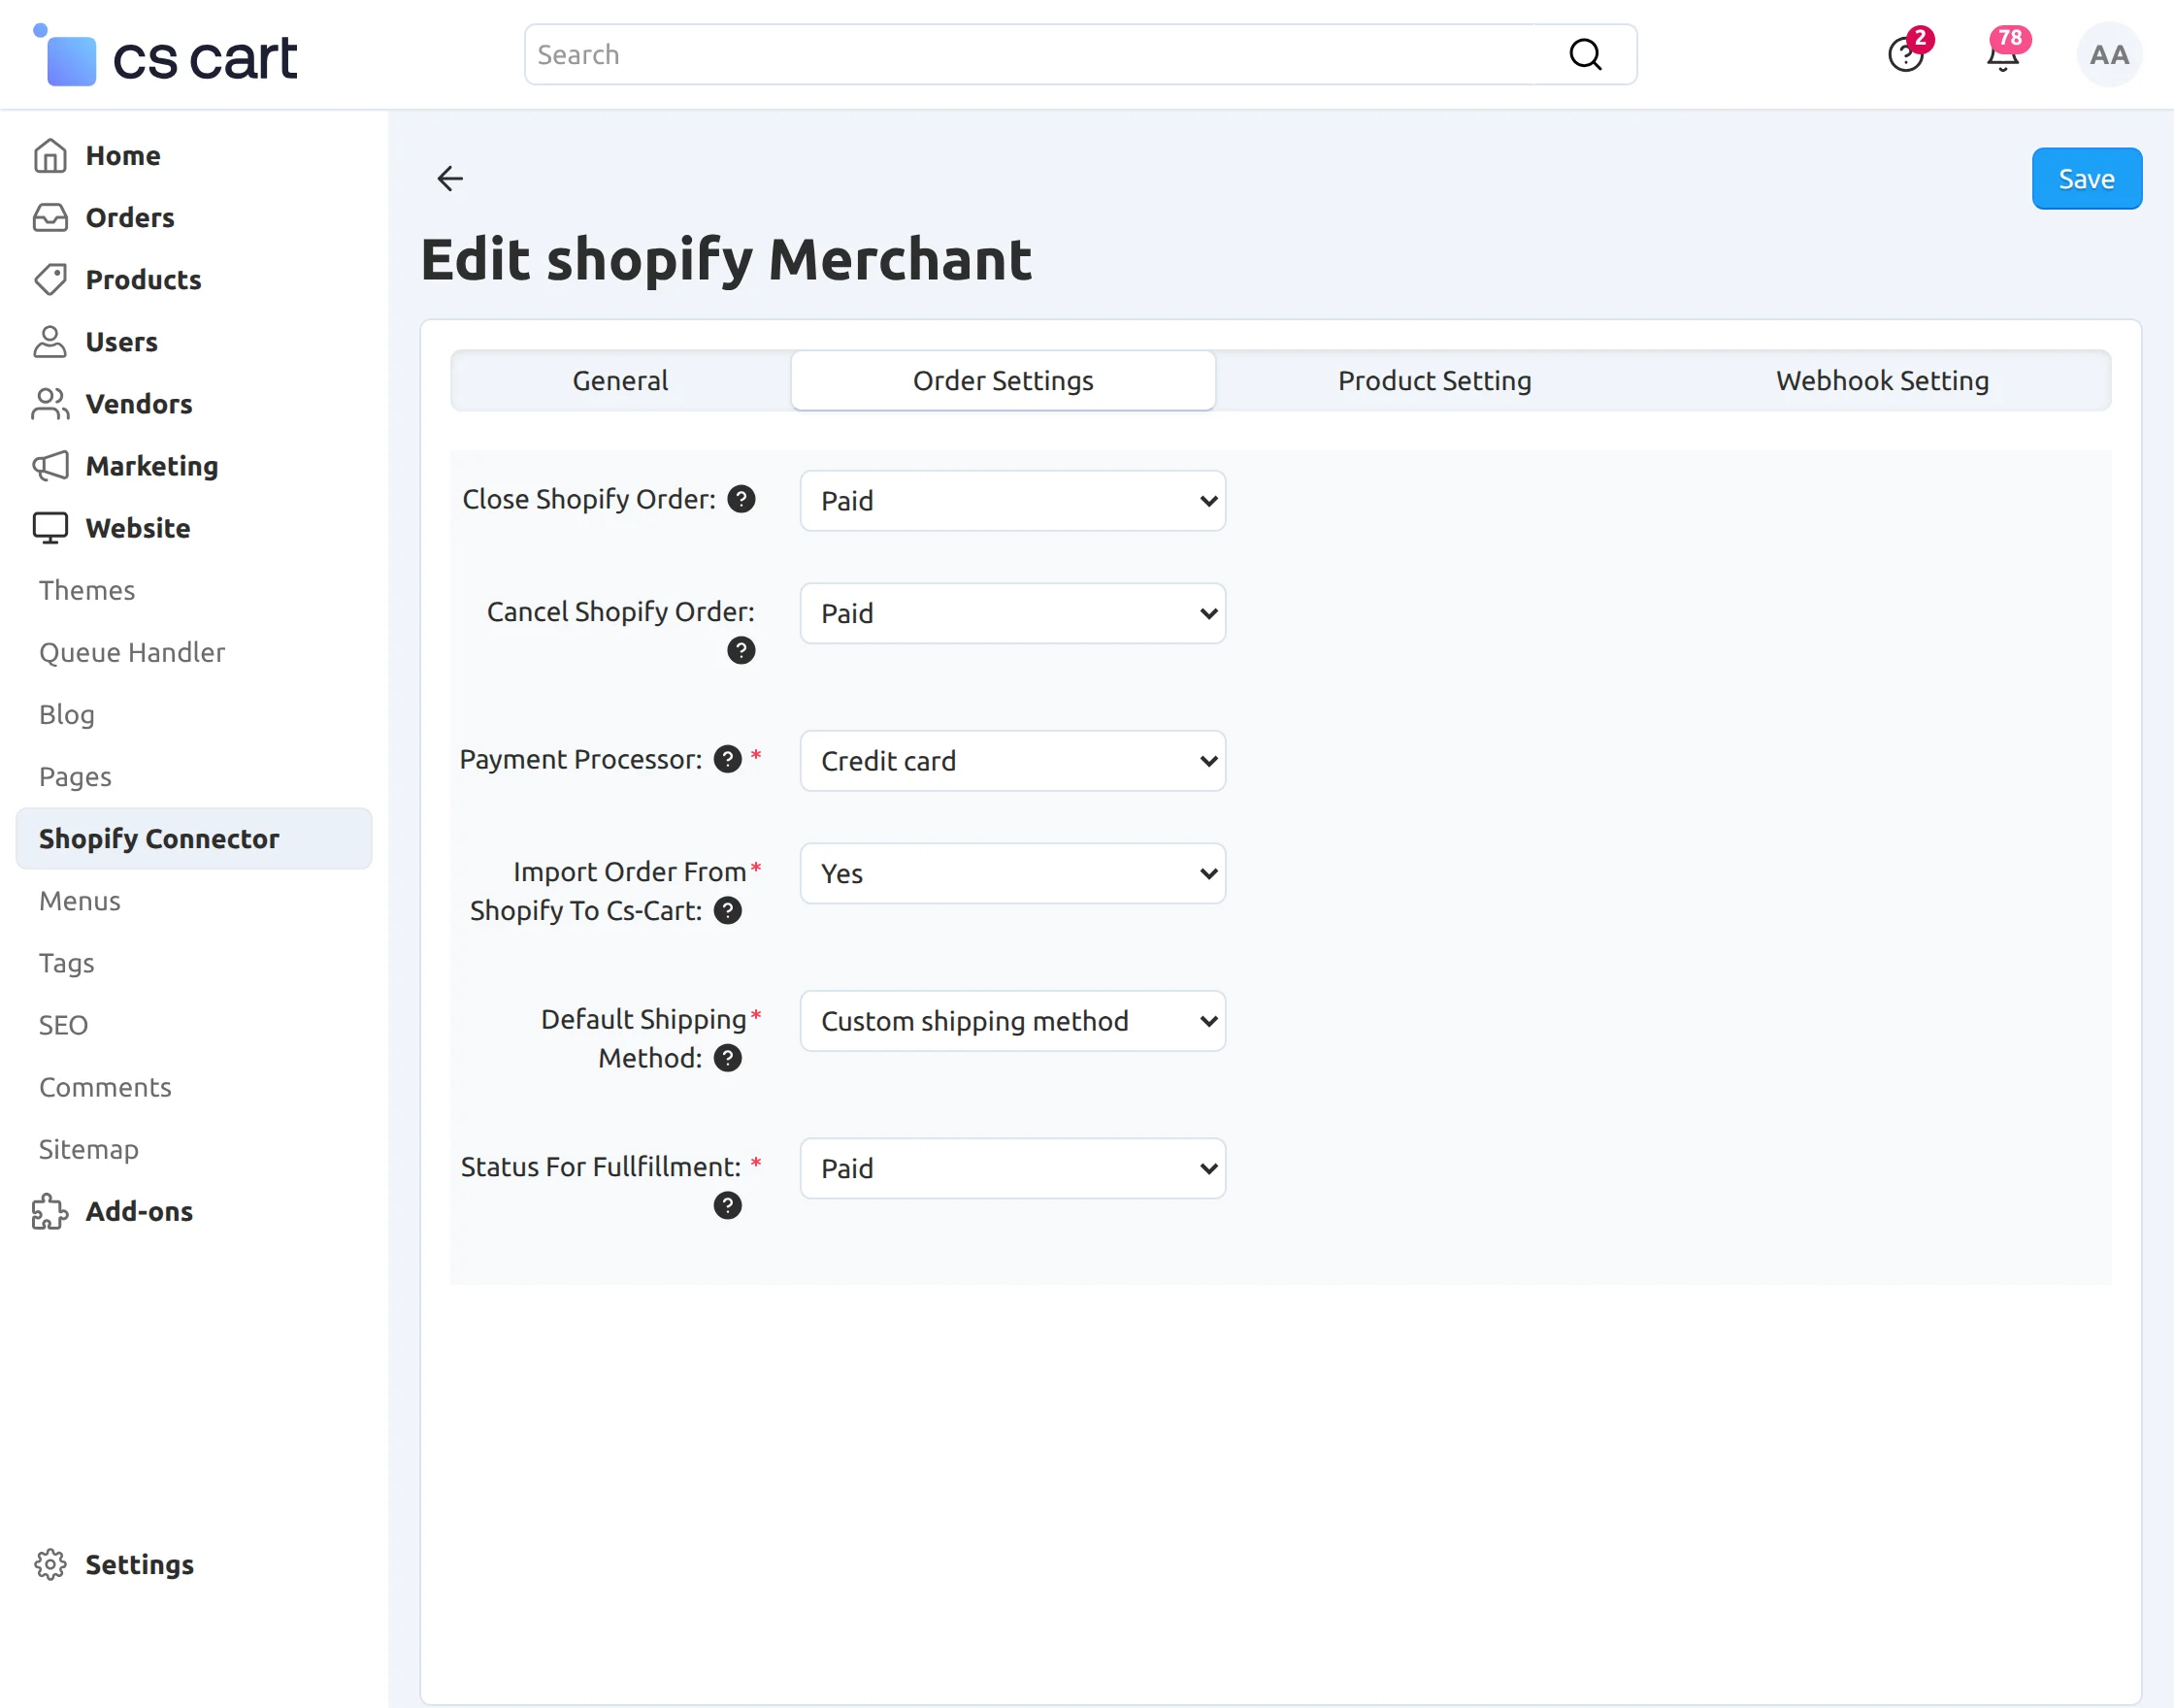
Step4:
After that, in order settings, select Close Shopify orders, Cancel Shopify Order, Payment Processor, Import order from Shopify to CS-cart, default shipping method, and status for fulfillment.
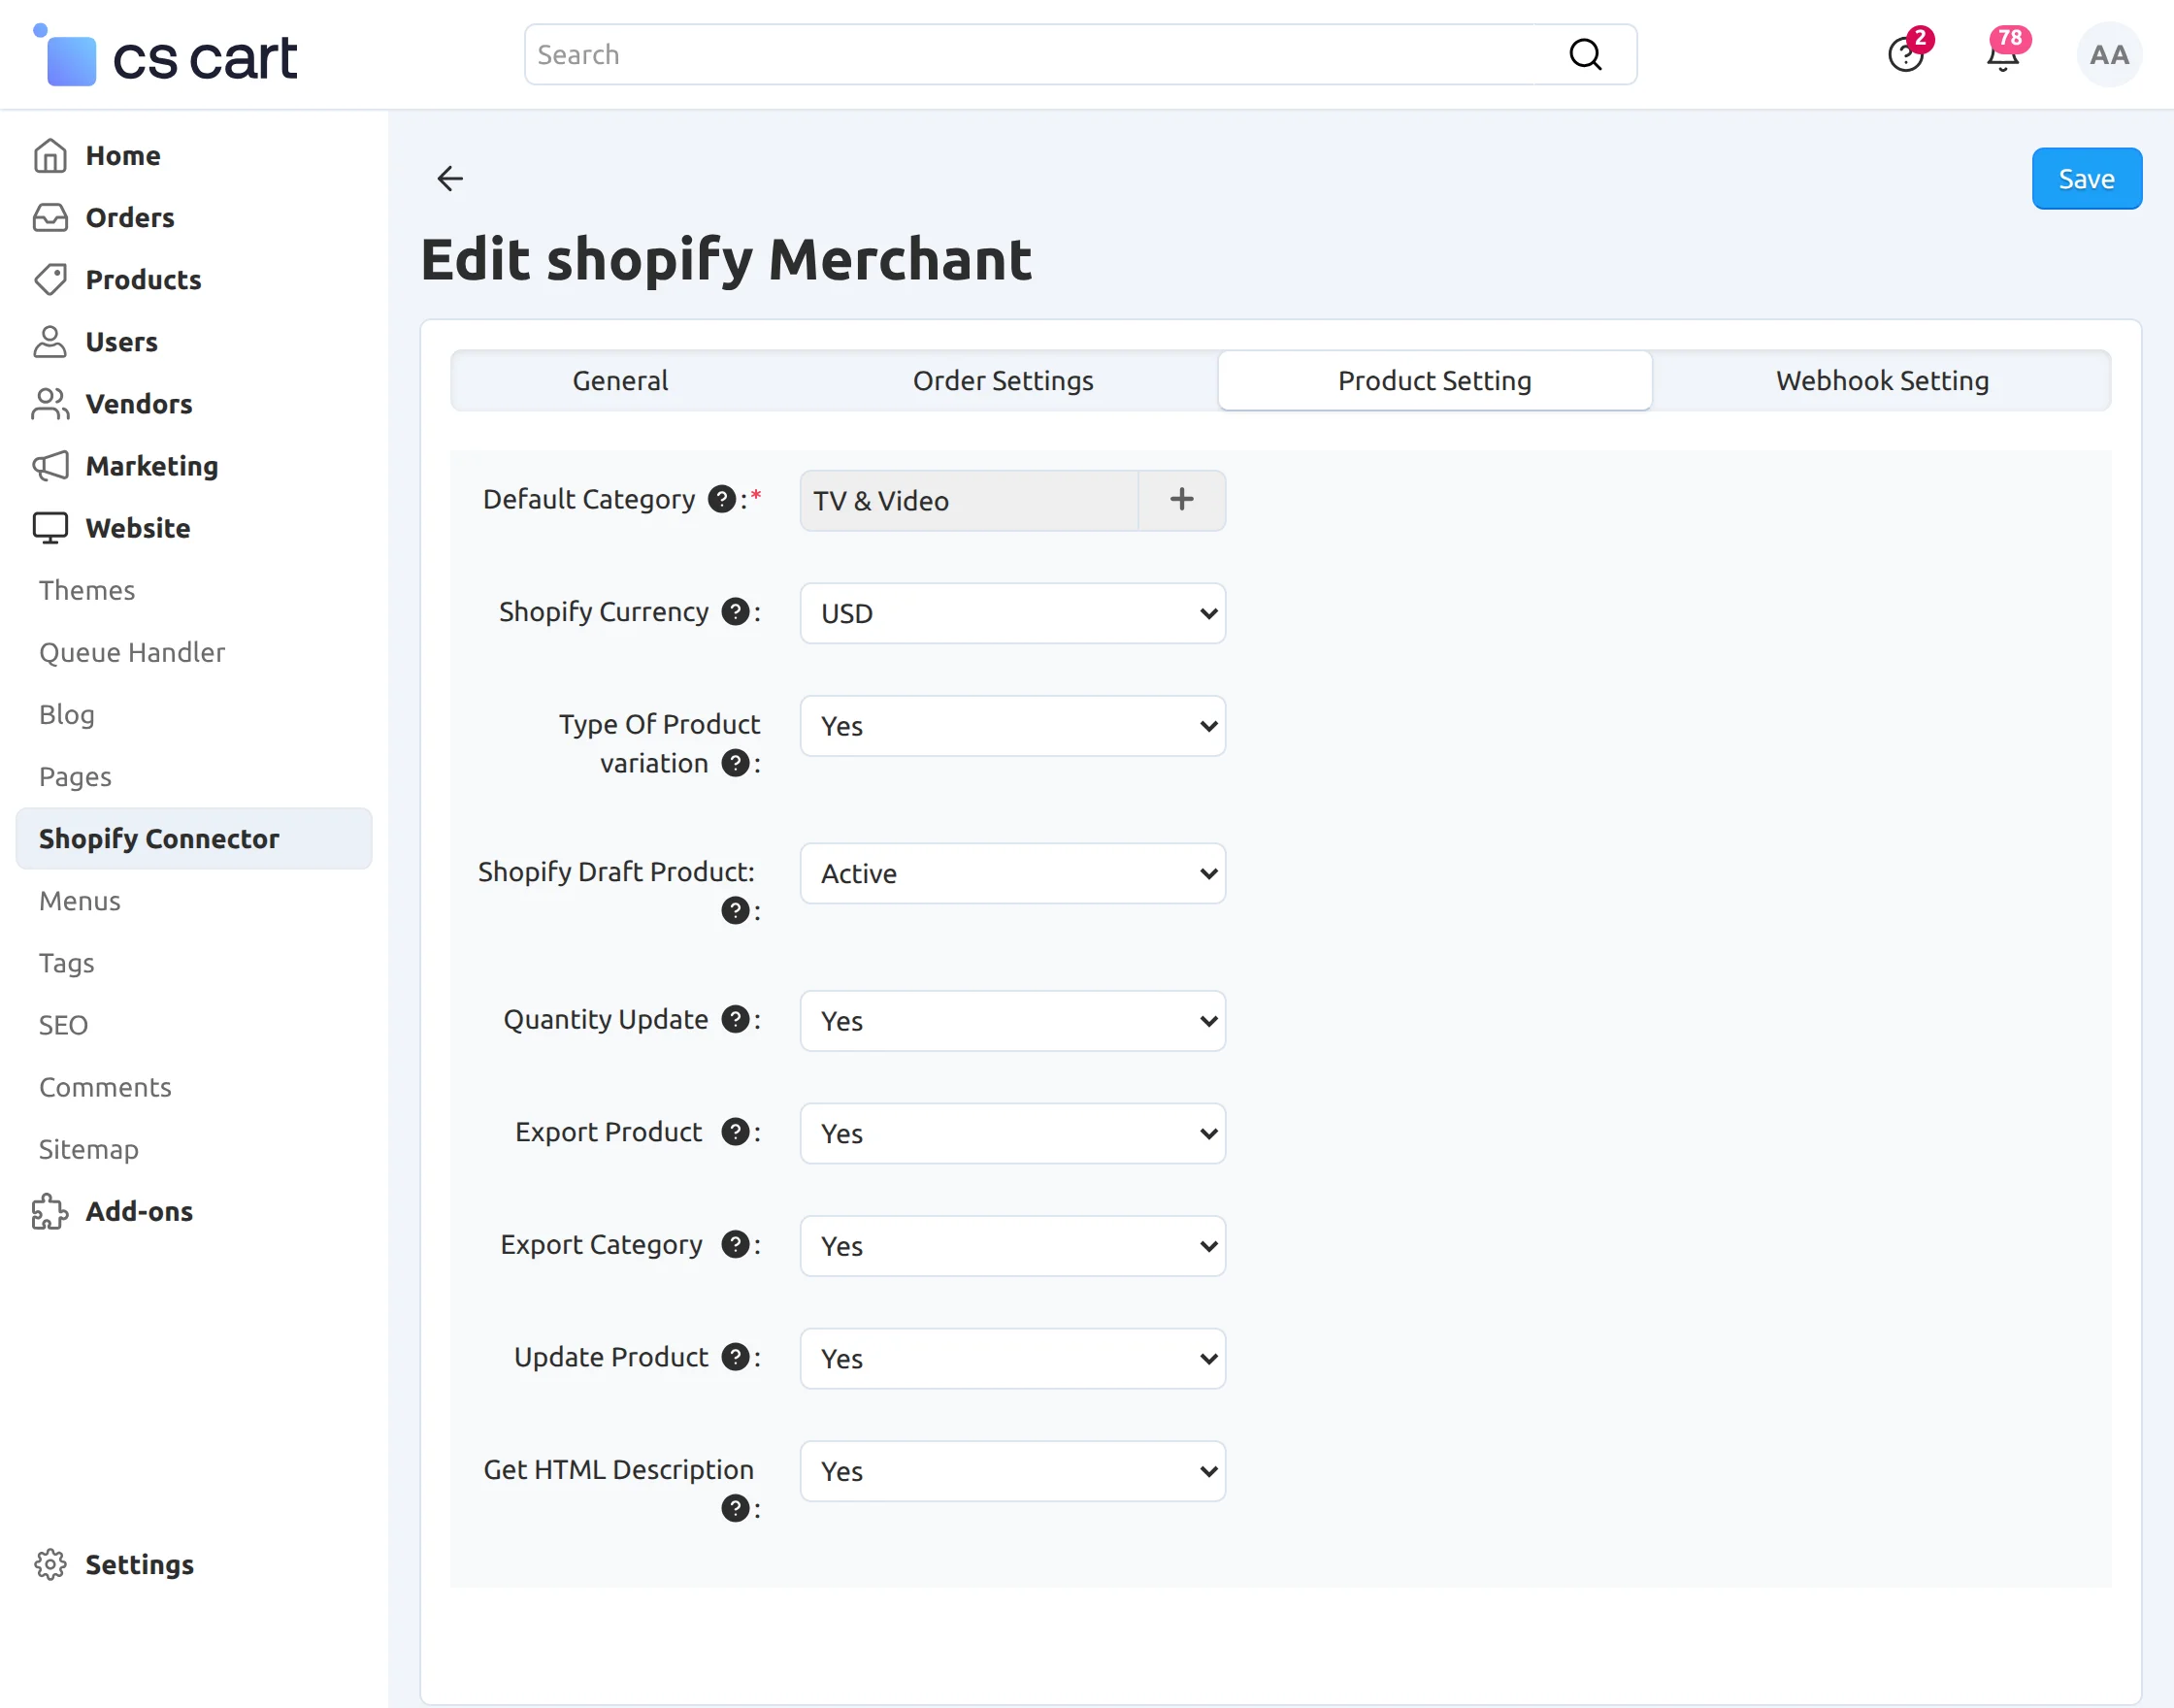
Step5:
Therefore, for product setting, select the desired category to which Shopify products get imported and the currency. Click on the plus icon to select the CS-Cart category.
- Default category– You can click on the plus icon to choose the category.
- Shopify Currency– Select the Shopify currency.
- Type of Product variation– Please select yes if you want to create (Variations as one product) and select no for (Variations as separate products).
- Please select the given option to import the Shopify draft product into the Cs-Cart site with the given status.
- Quantity Update- Update the quantity.
- Update Product- Update the product.
- Type of product import- Choose the particular type of product to import.
- Get HTML description– Choose the HTML description.
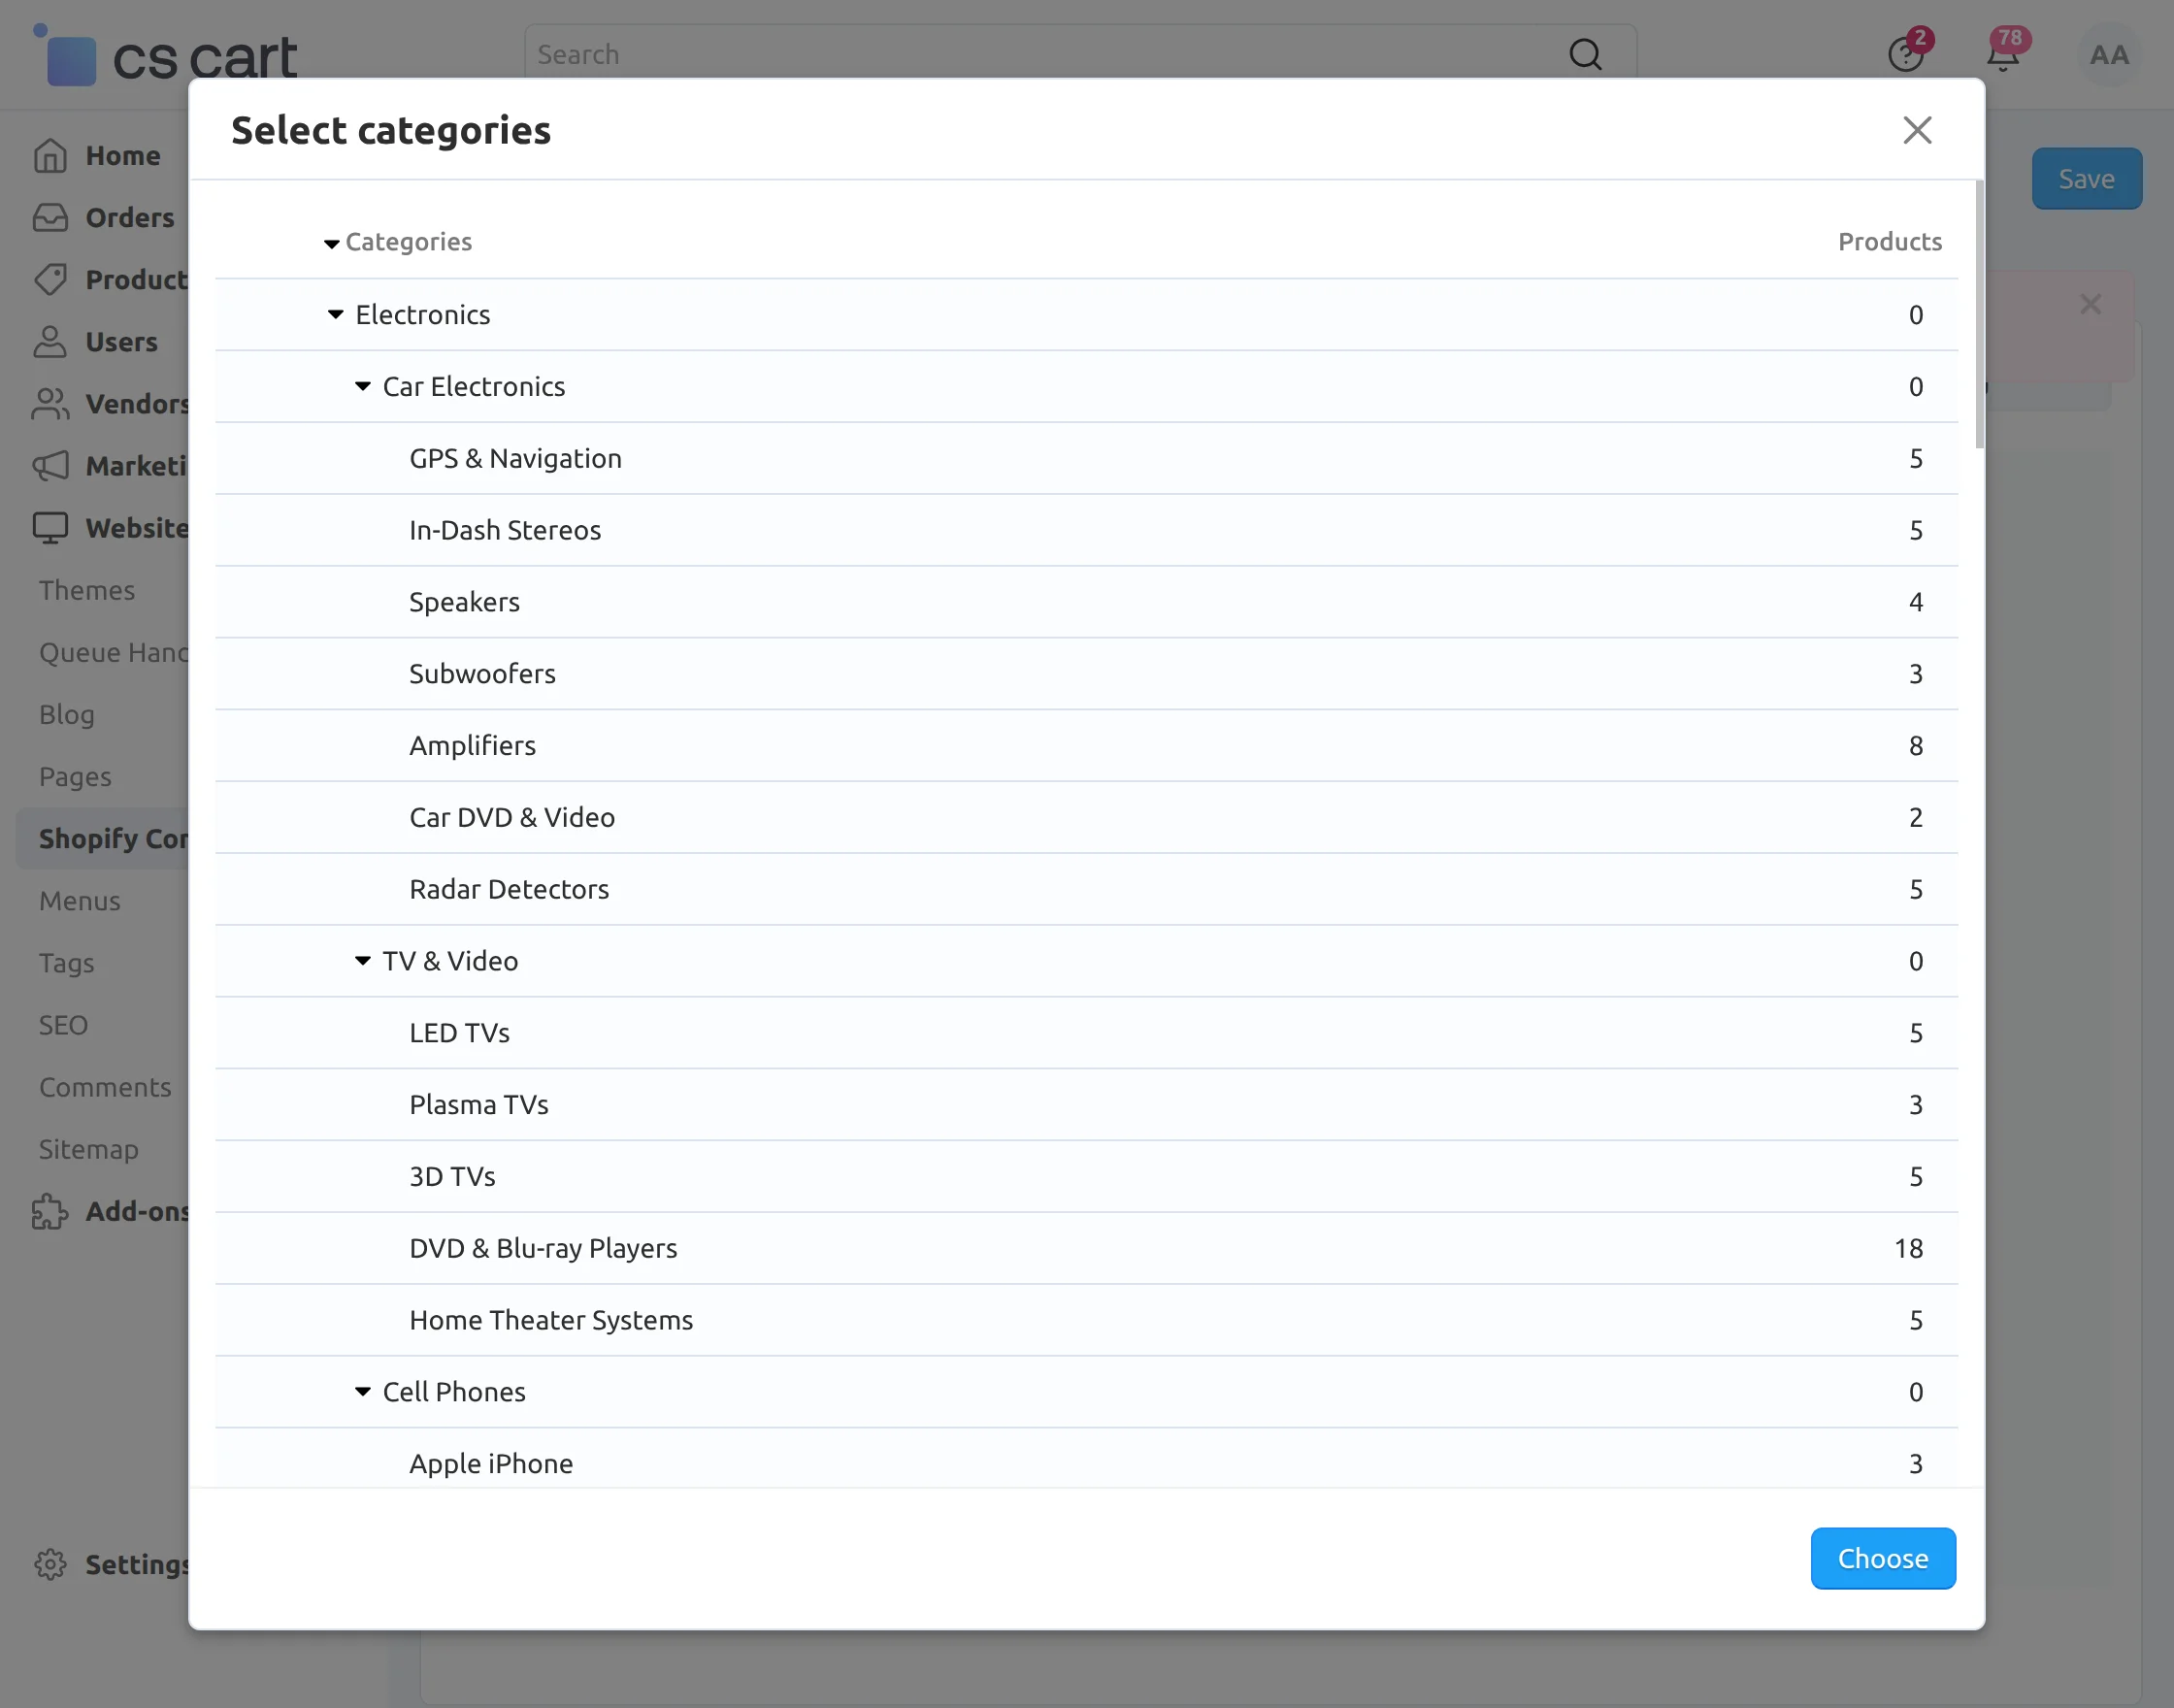
Furthermore, when you click on the plus icon, a new pop-up of the CS-Cart category will open. Select the category and click “Choose”.
Step6:
In Webhook settings, a webhook is created for products updated in real-time. After configuring various settings, click on Save.
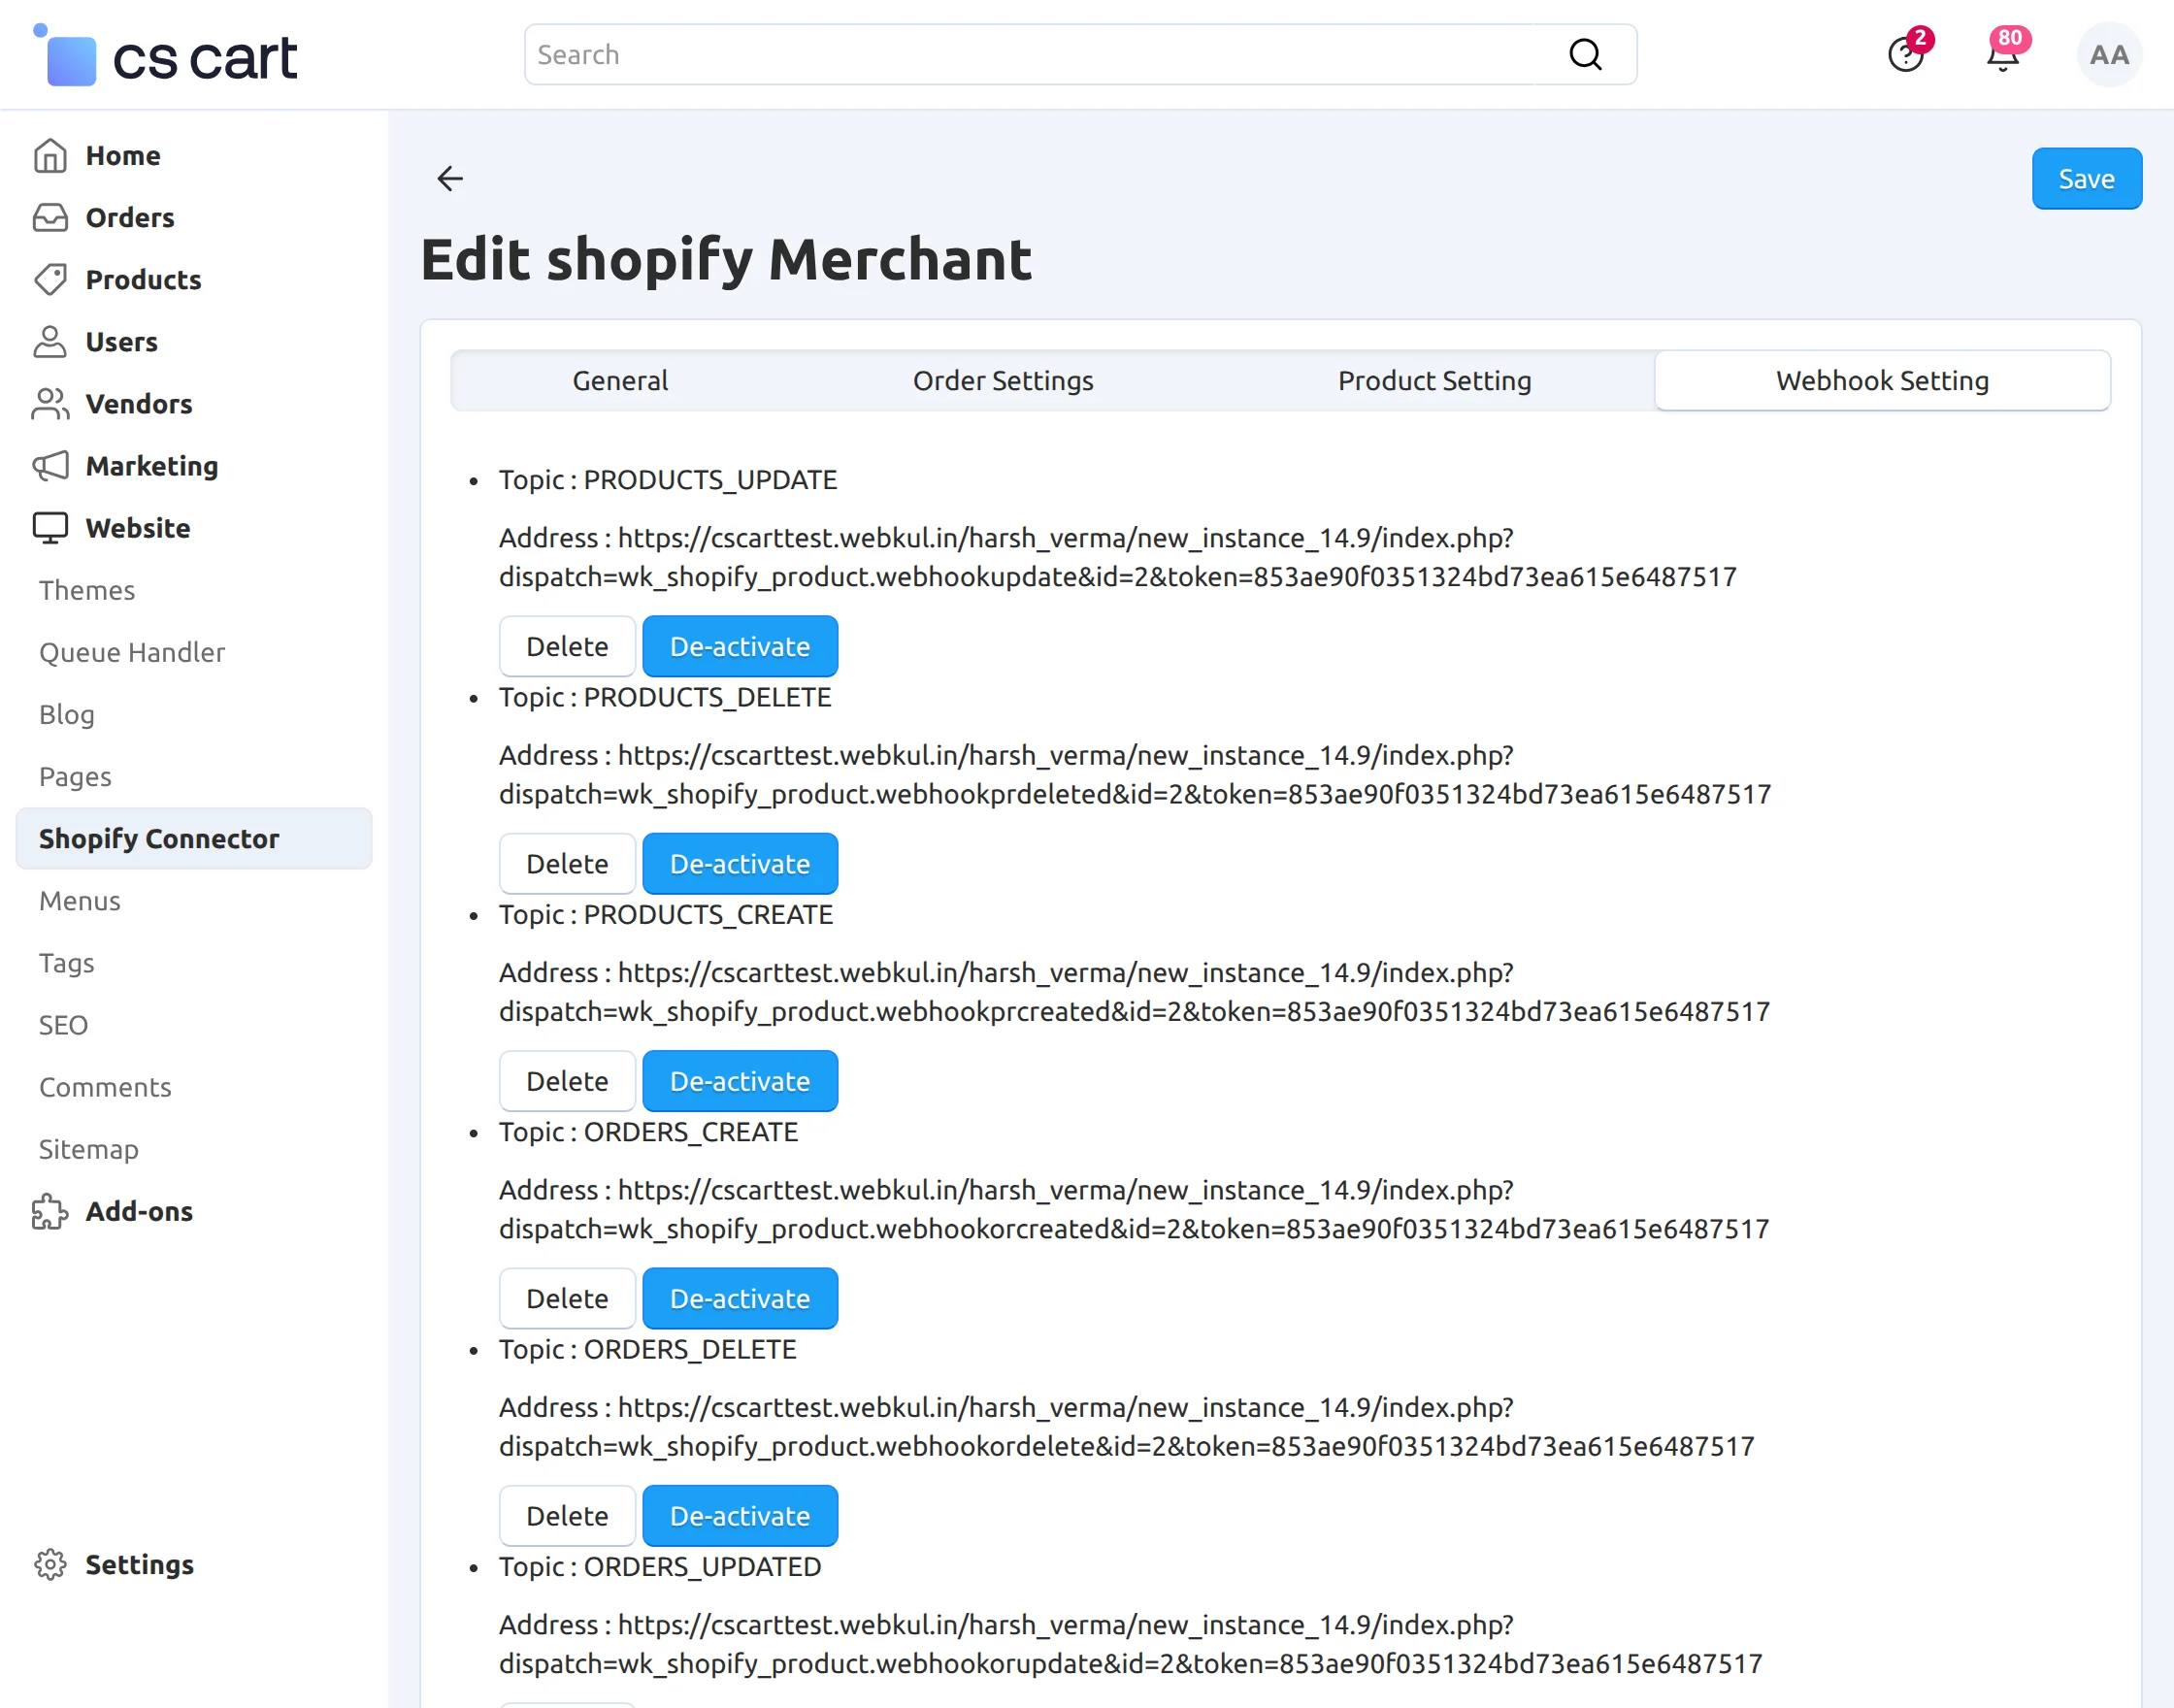
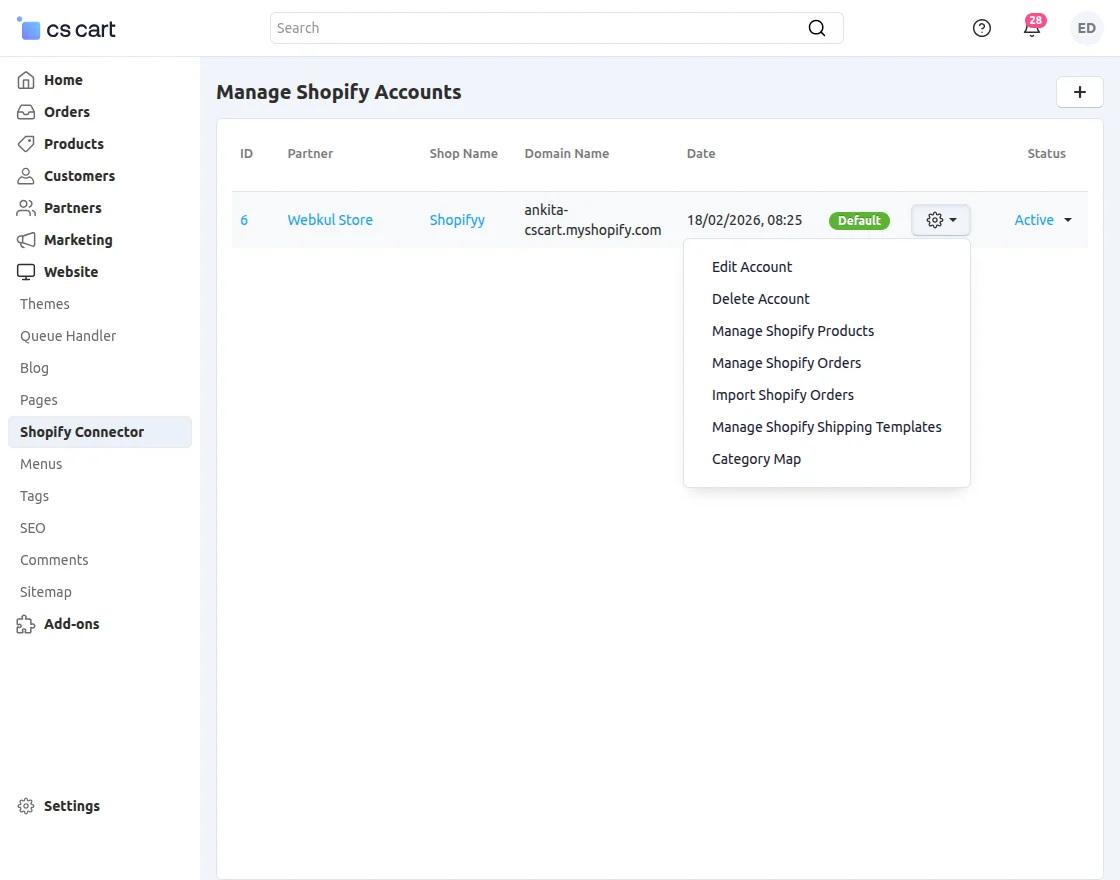
Therefore, when an admin creates an account, they can perform various processes from the Shopify store to the CS-Cart store.
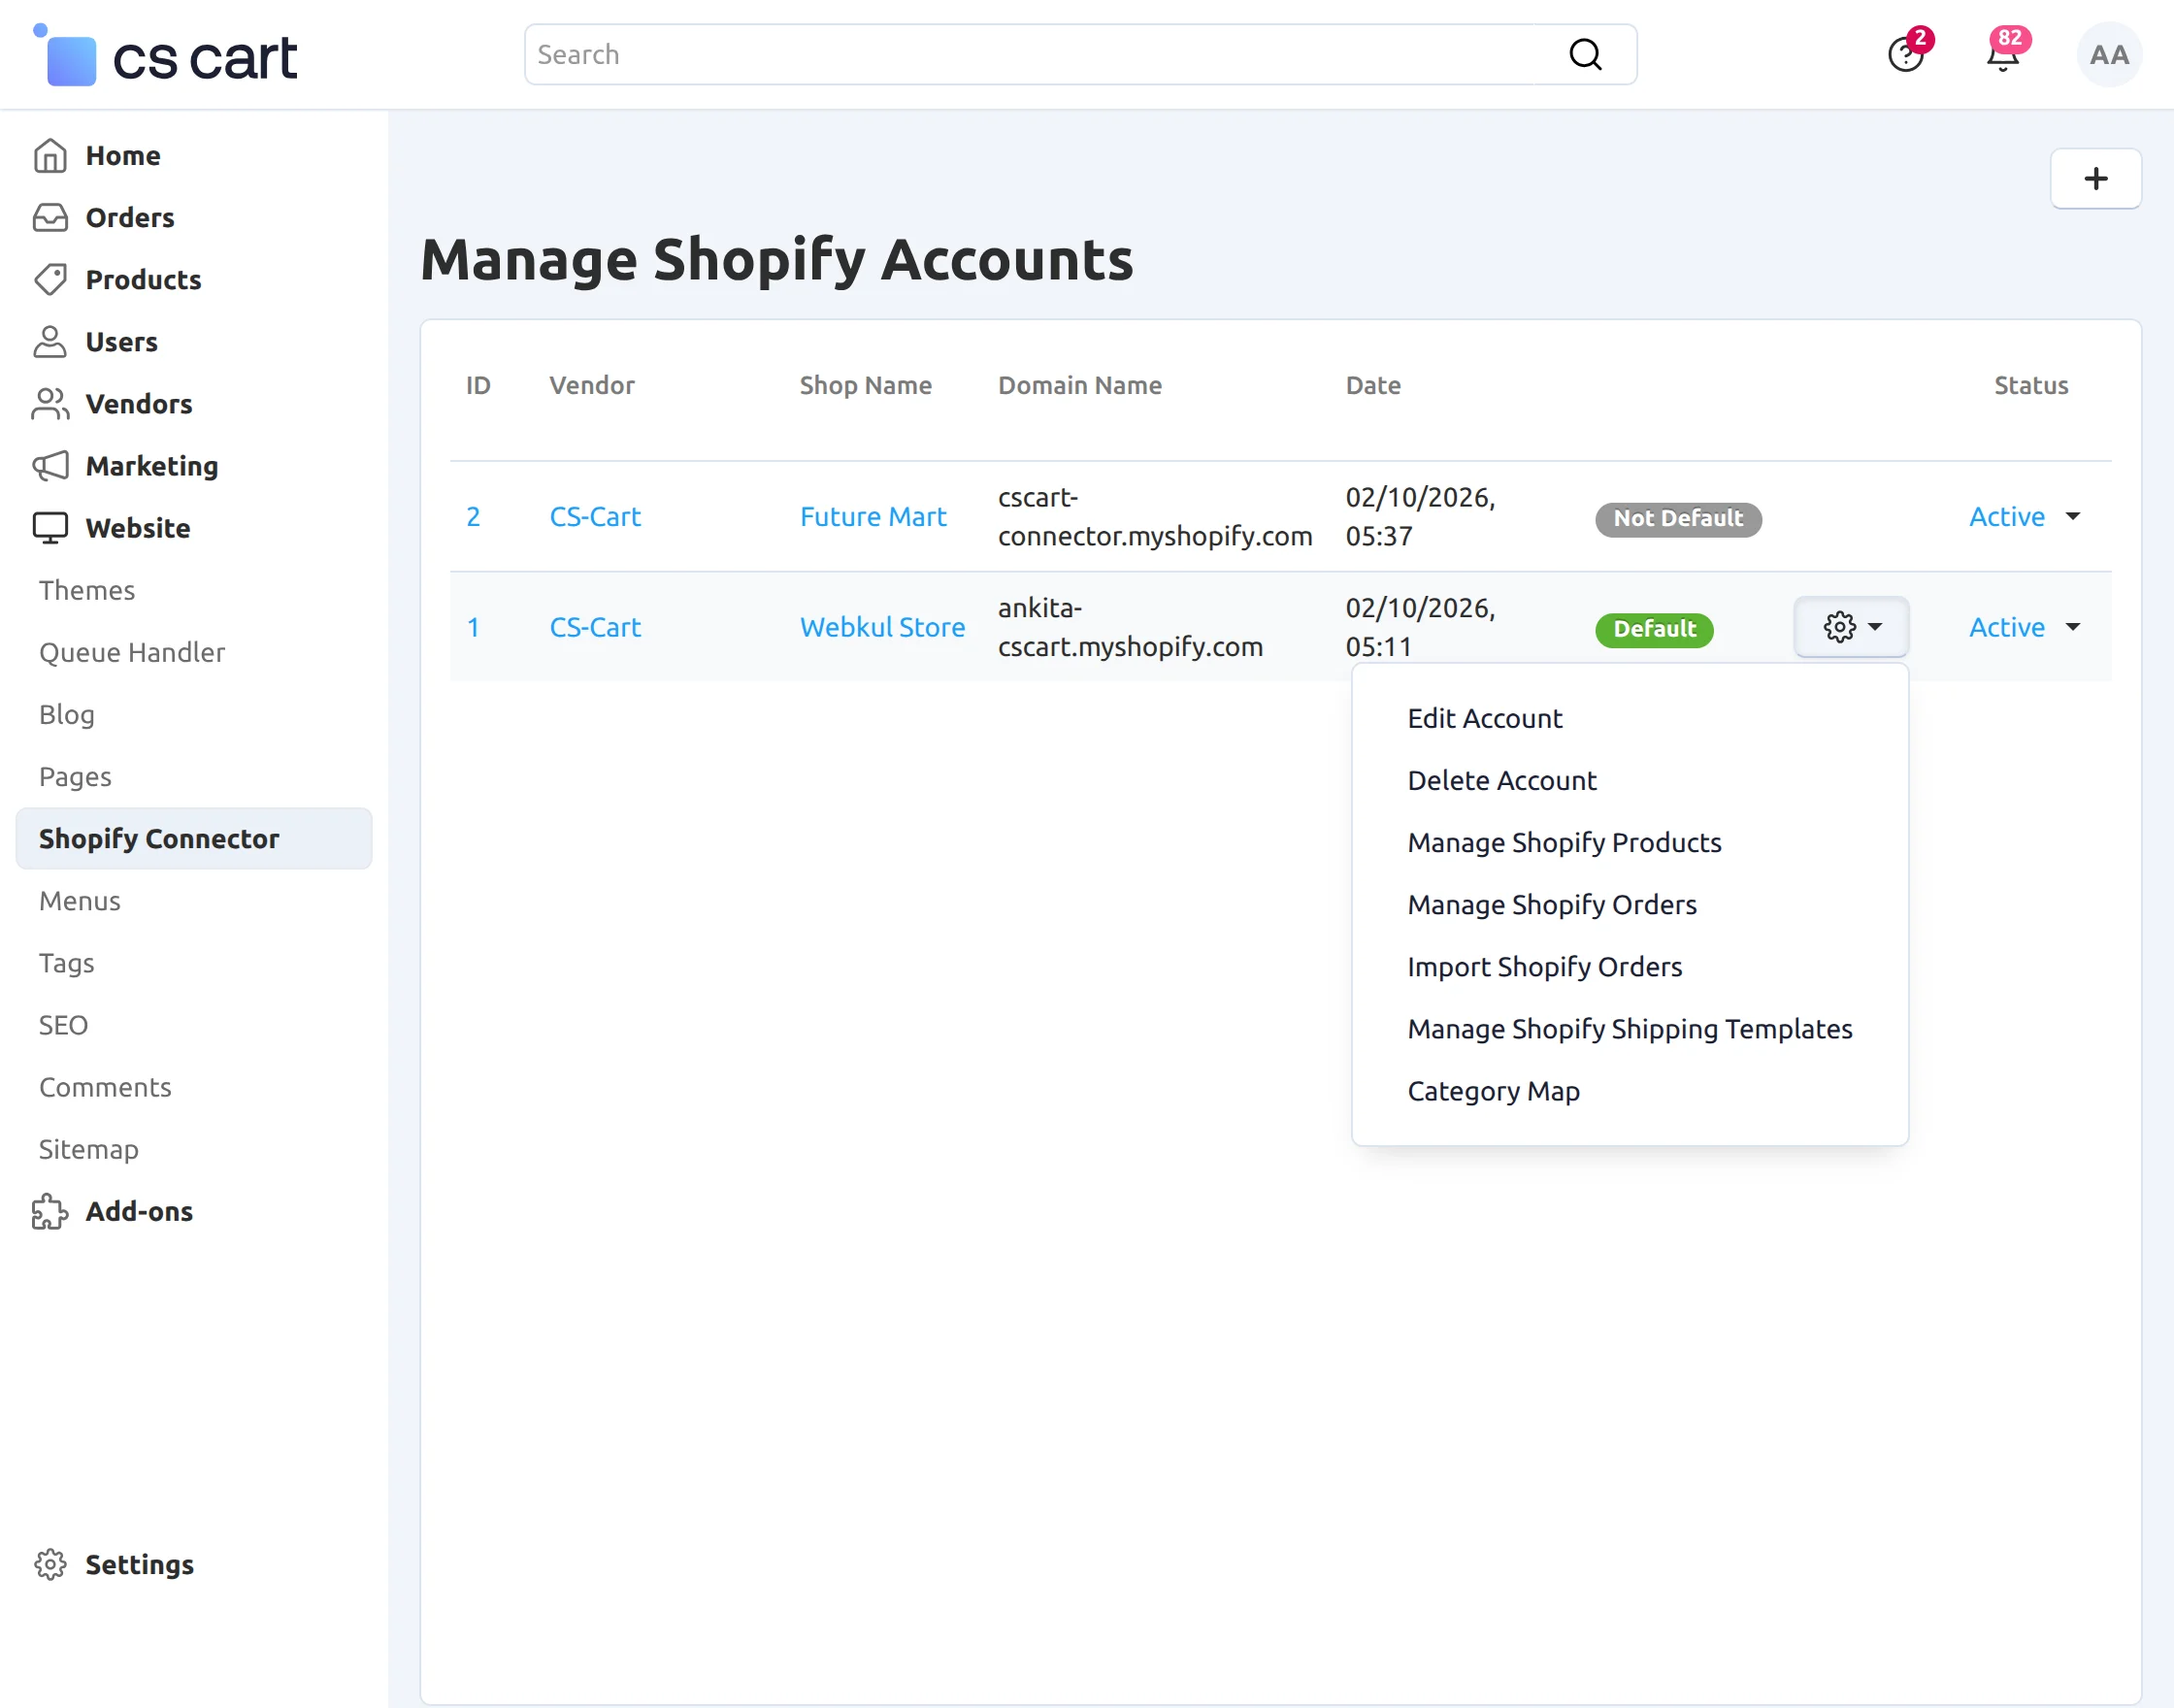
Admin can Map Category, Manage Shopify Shipping Templates, Import Orders, Manage Shopify Products, Manage Shopify Orders, Edit and Delete Accounts.
Given below is the step by step processes from Shopify store to CS-Cart:
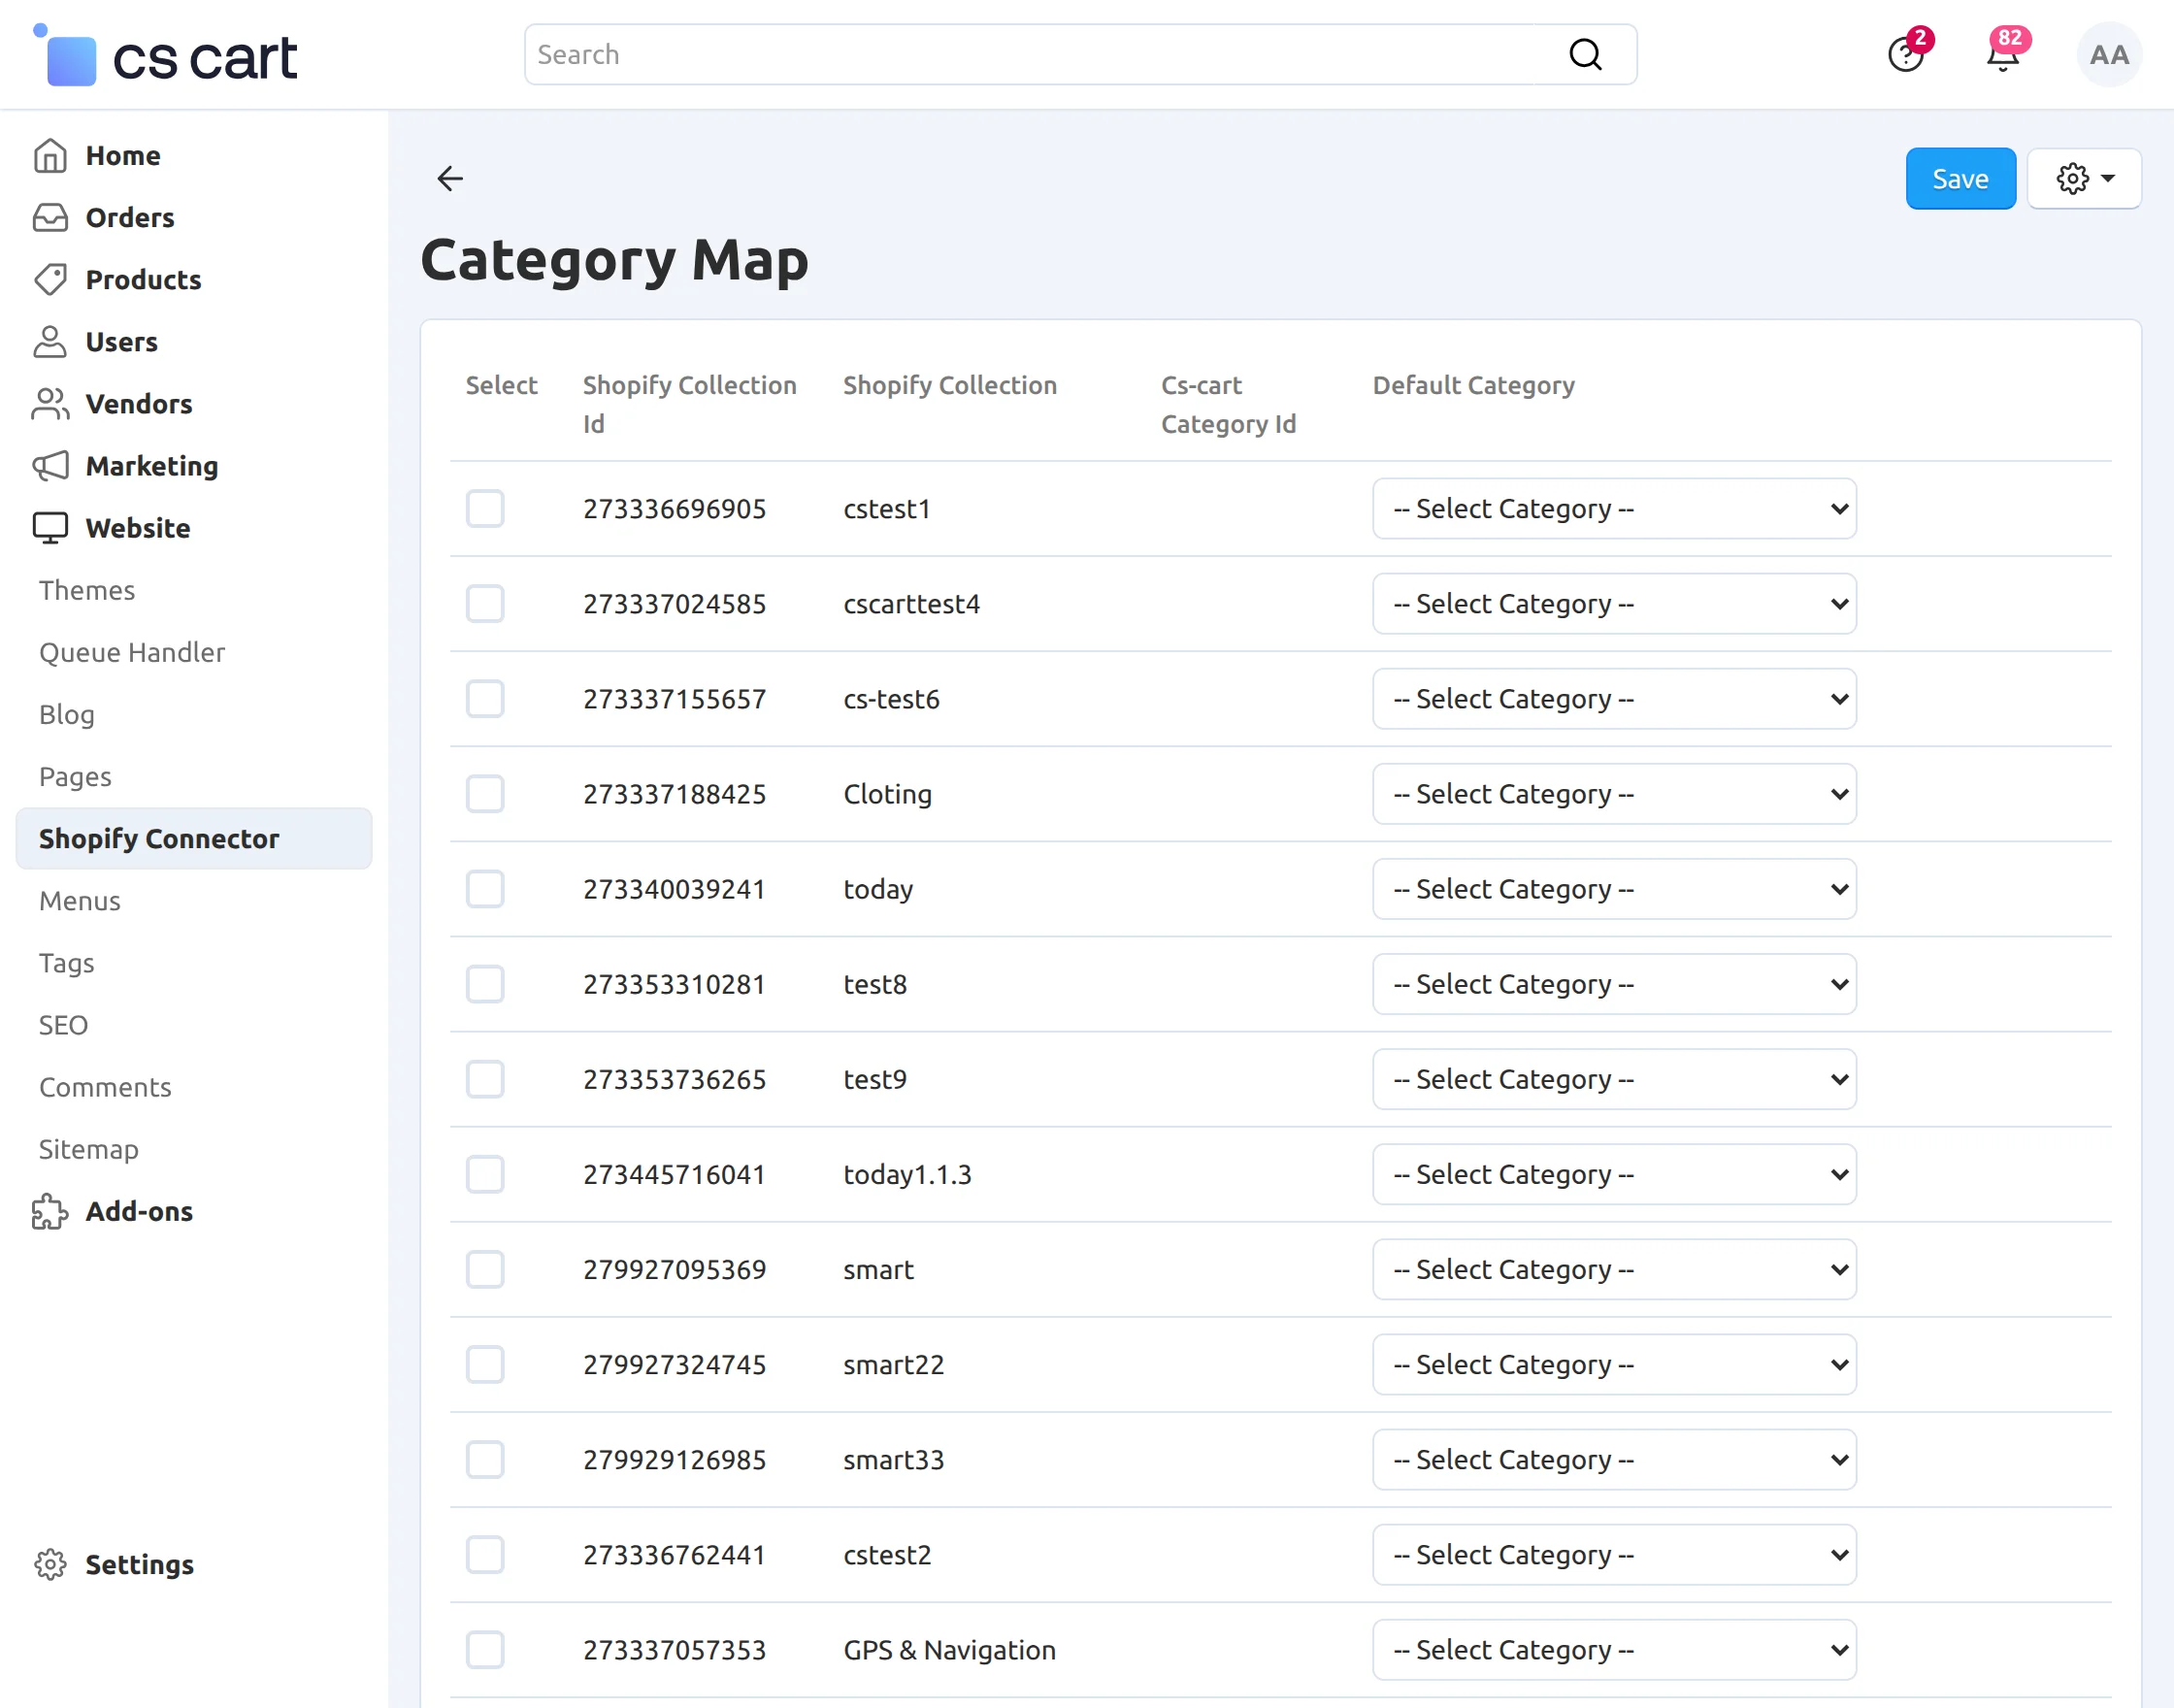
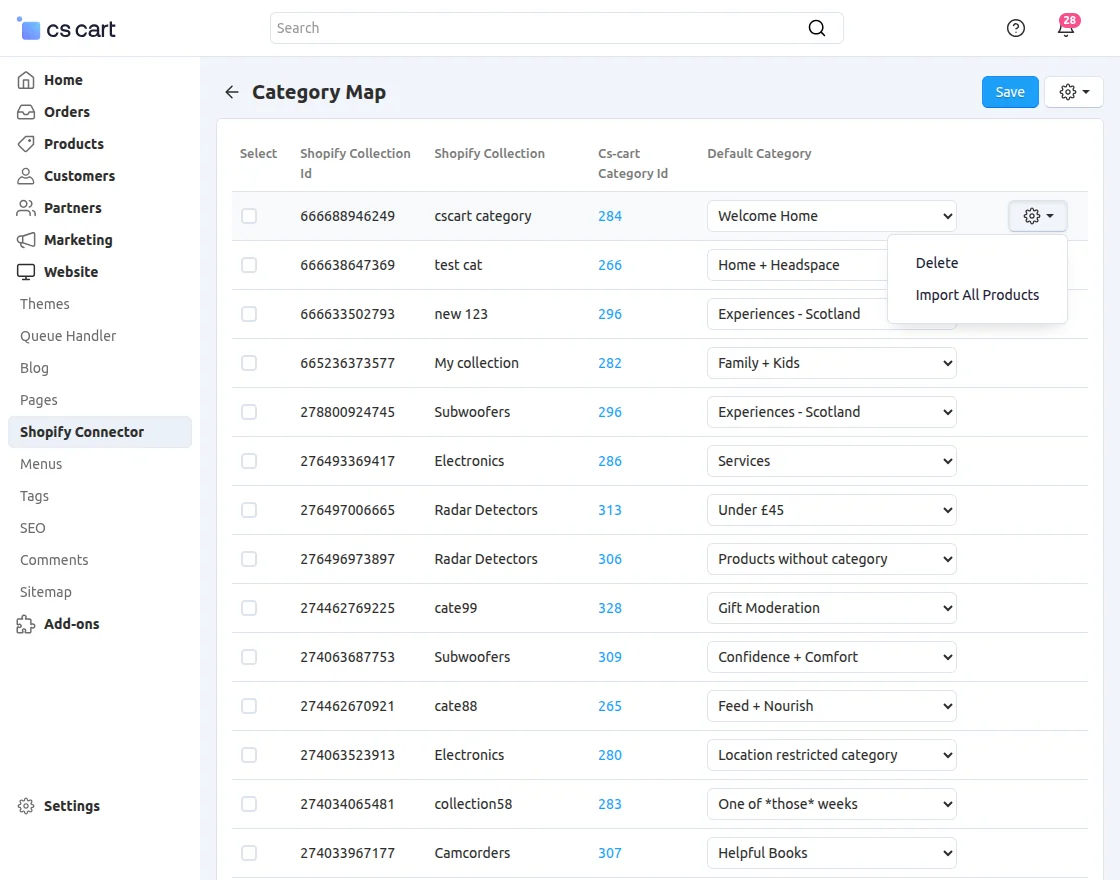
1. Category Map:
Now, in the category map, the admin/seller can map the Shopify category with the CS-Cart category to import products respectively.
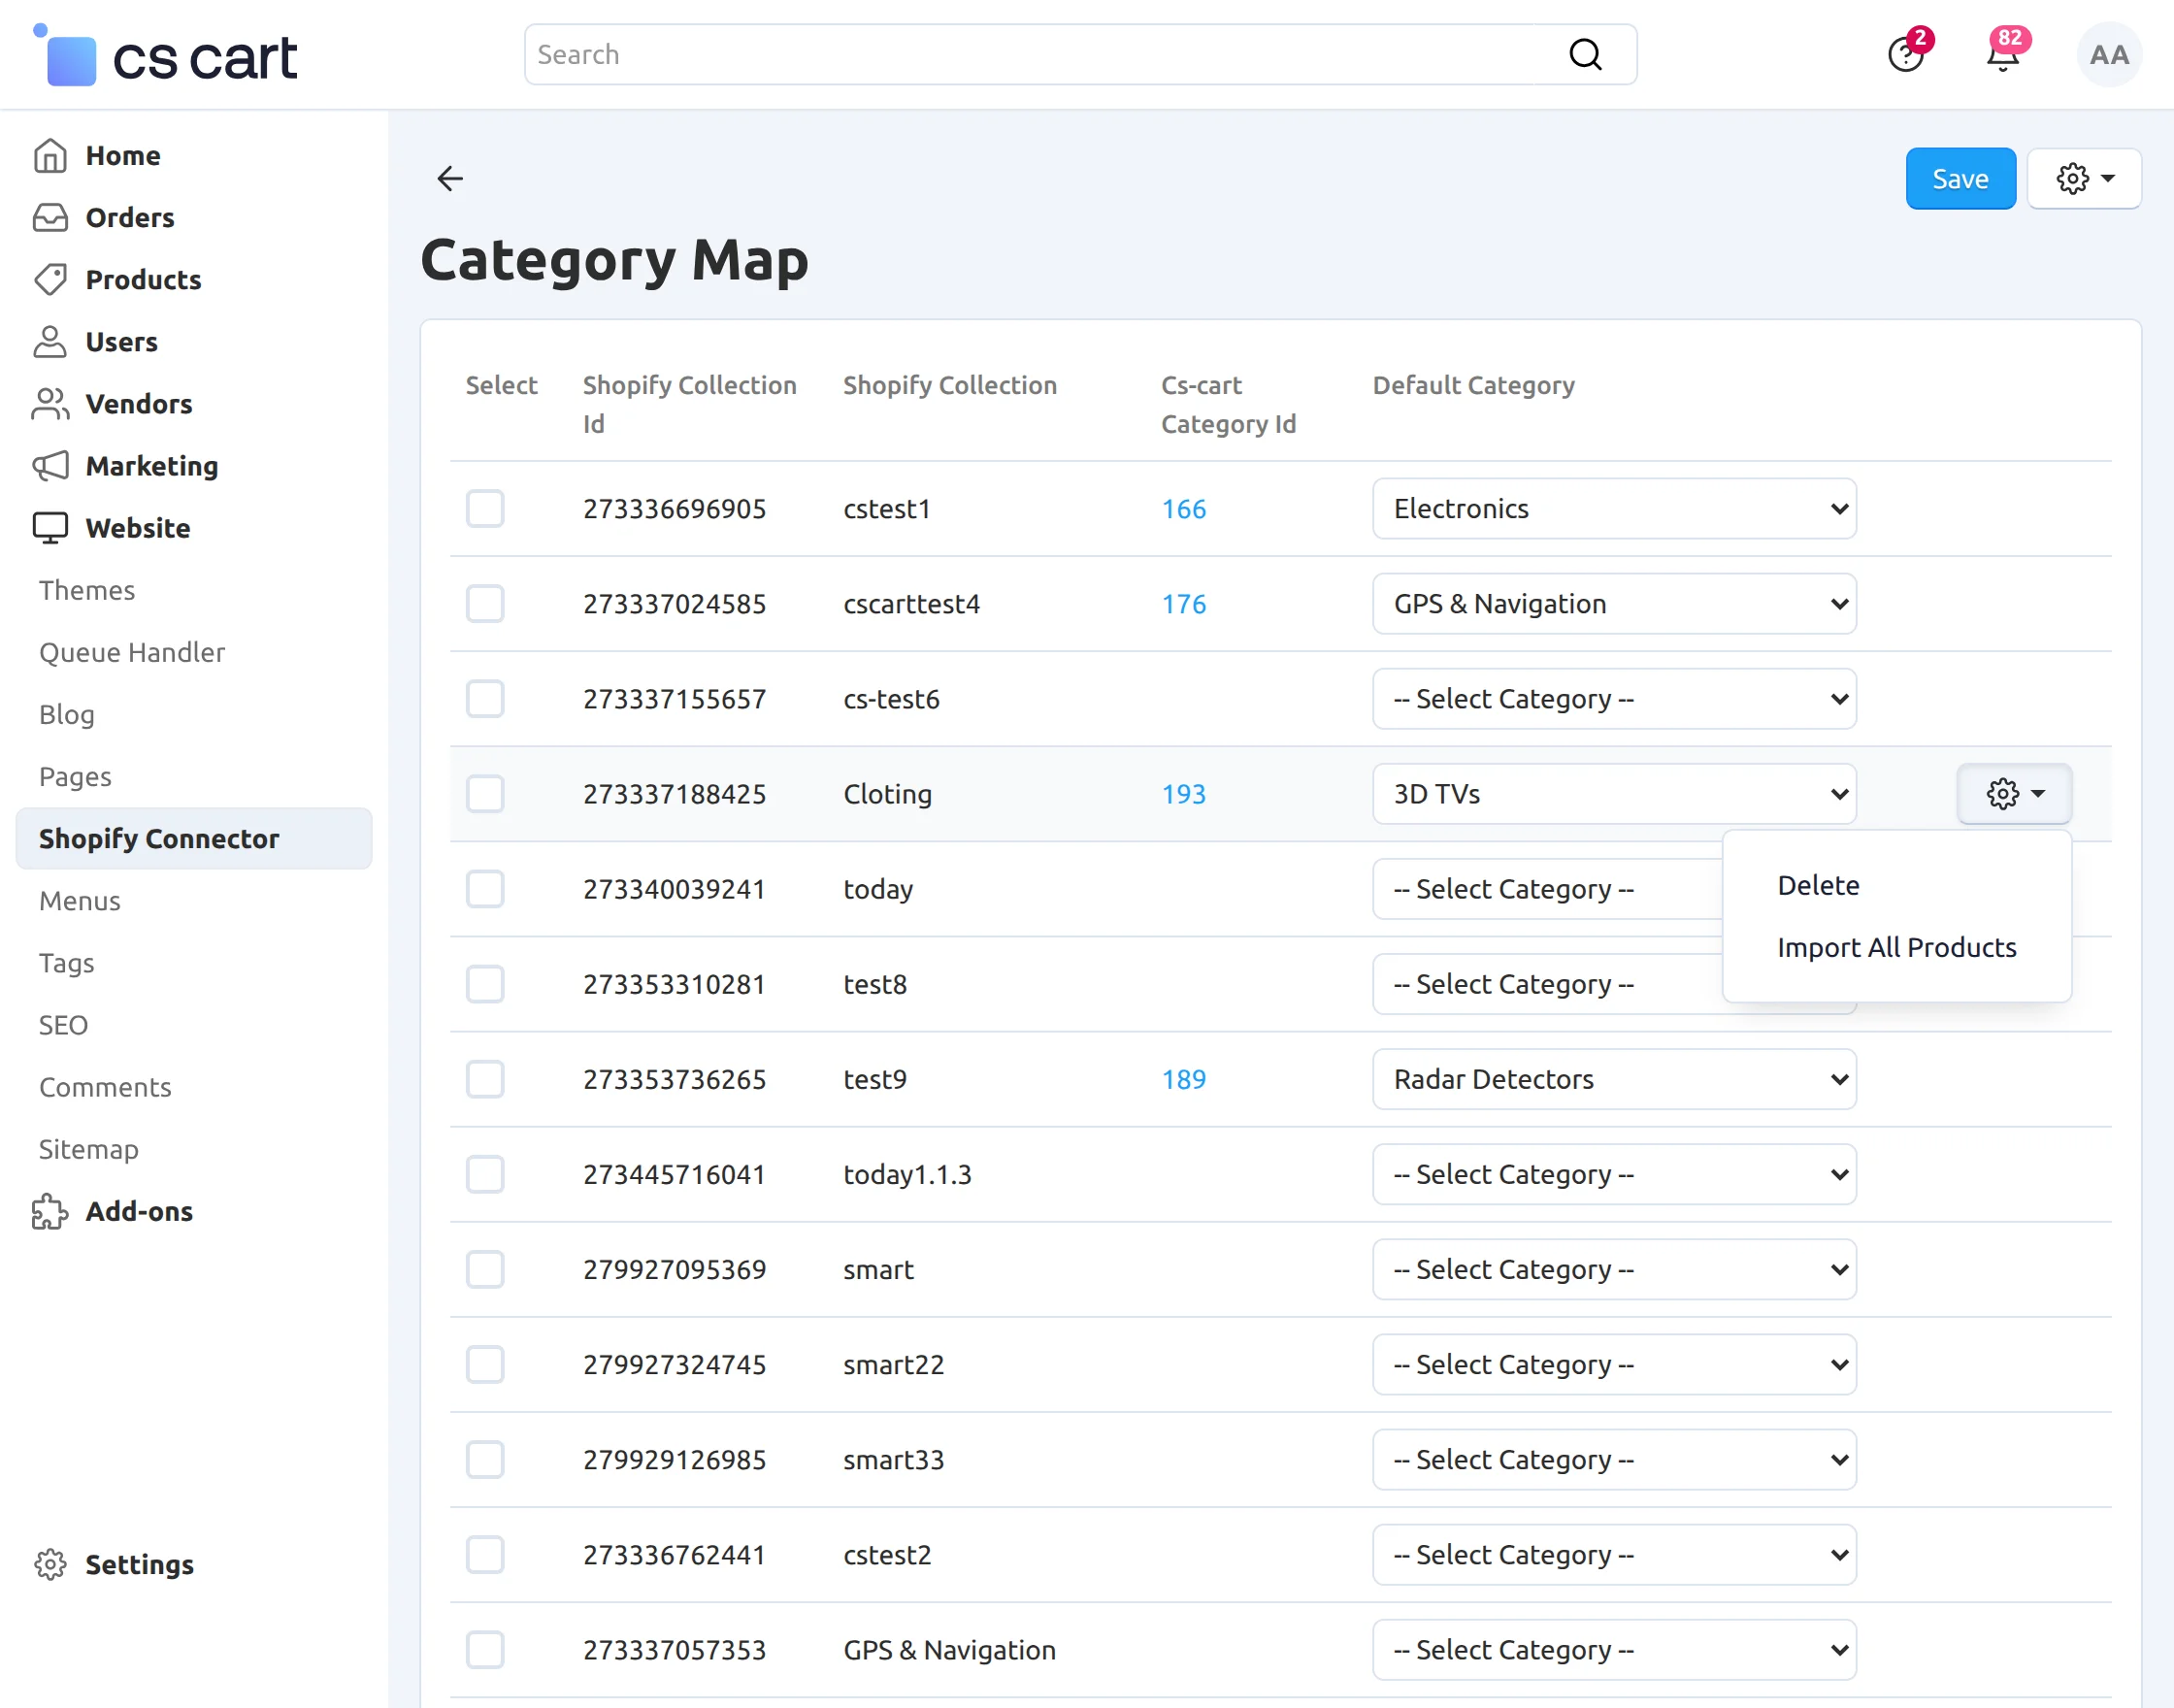
After mapping the categories, you can see the list of mapped categories.
2. Manage Shopify Shipping Template:
In this section, the admin can map the shipping zone of Shopify to the shipping location of CS-Cart. Given below is the shipping zone that we can map to CS-Cart.
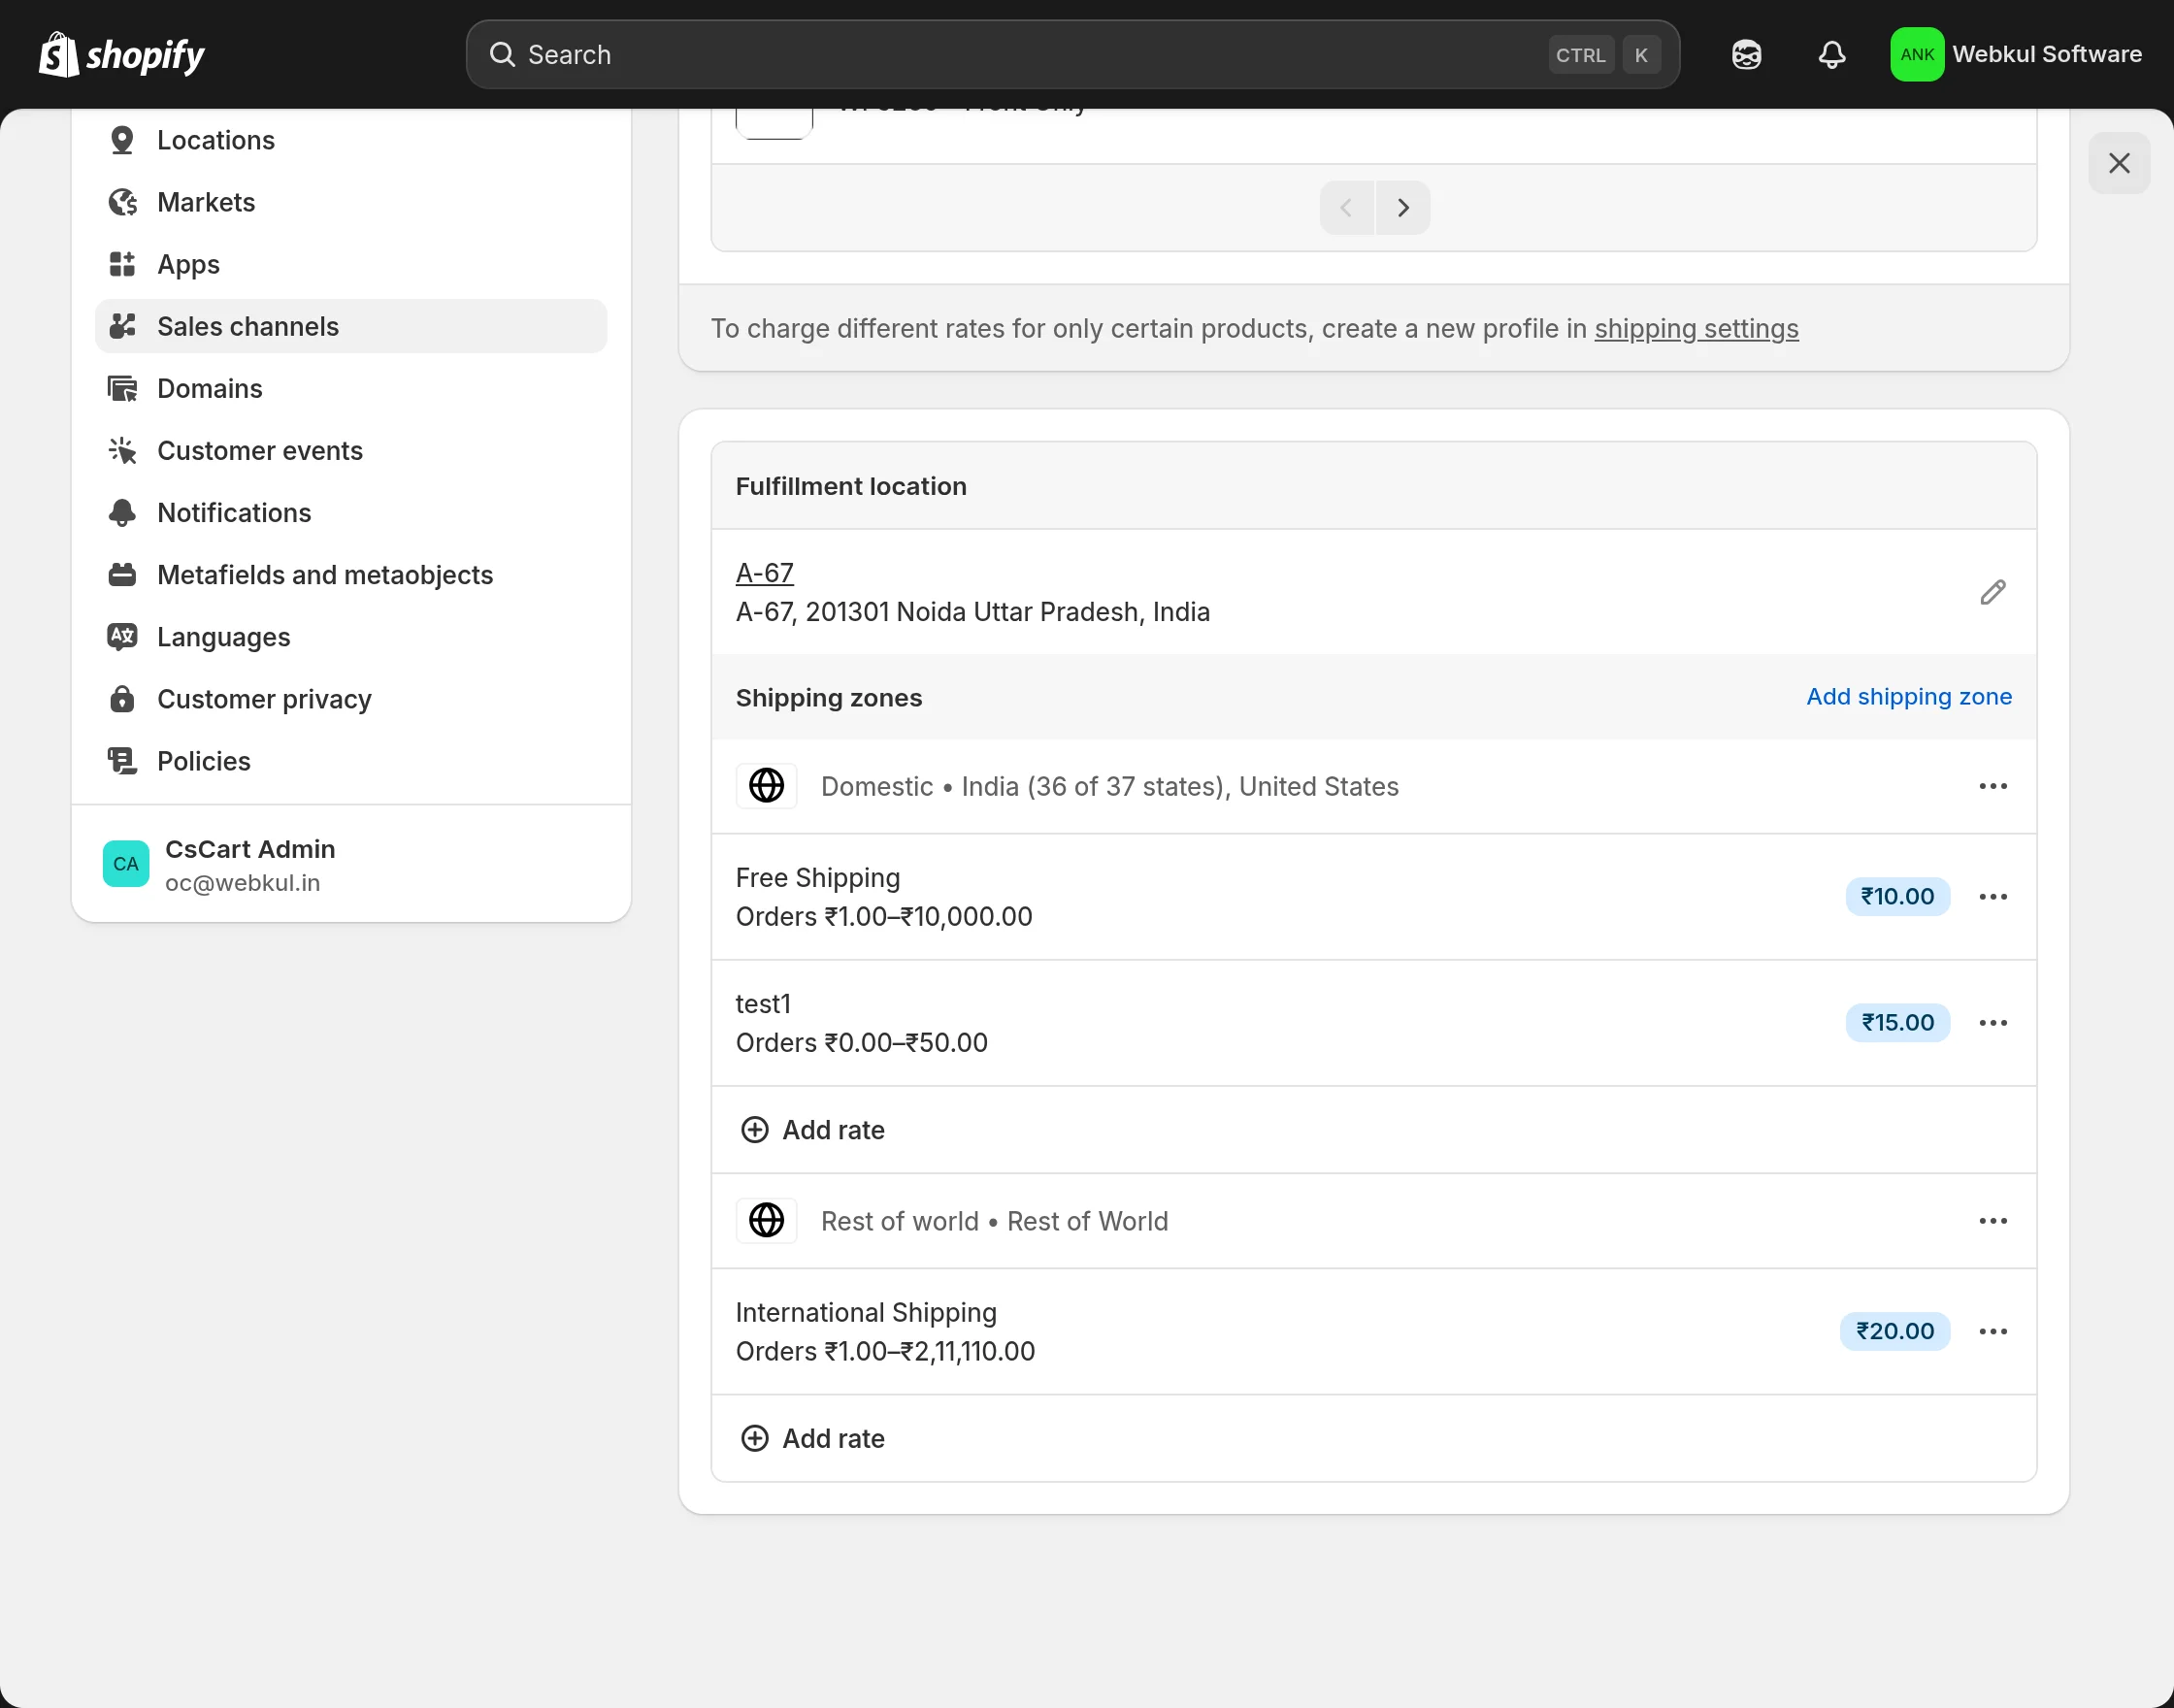
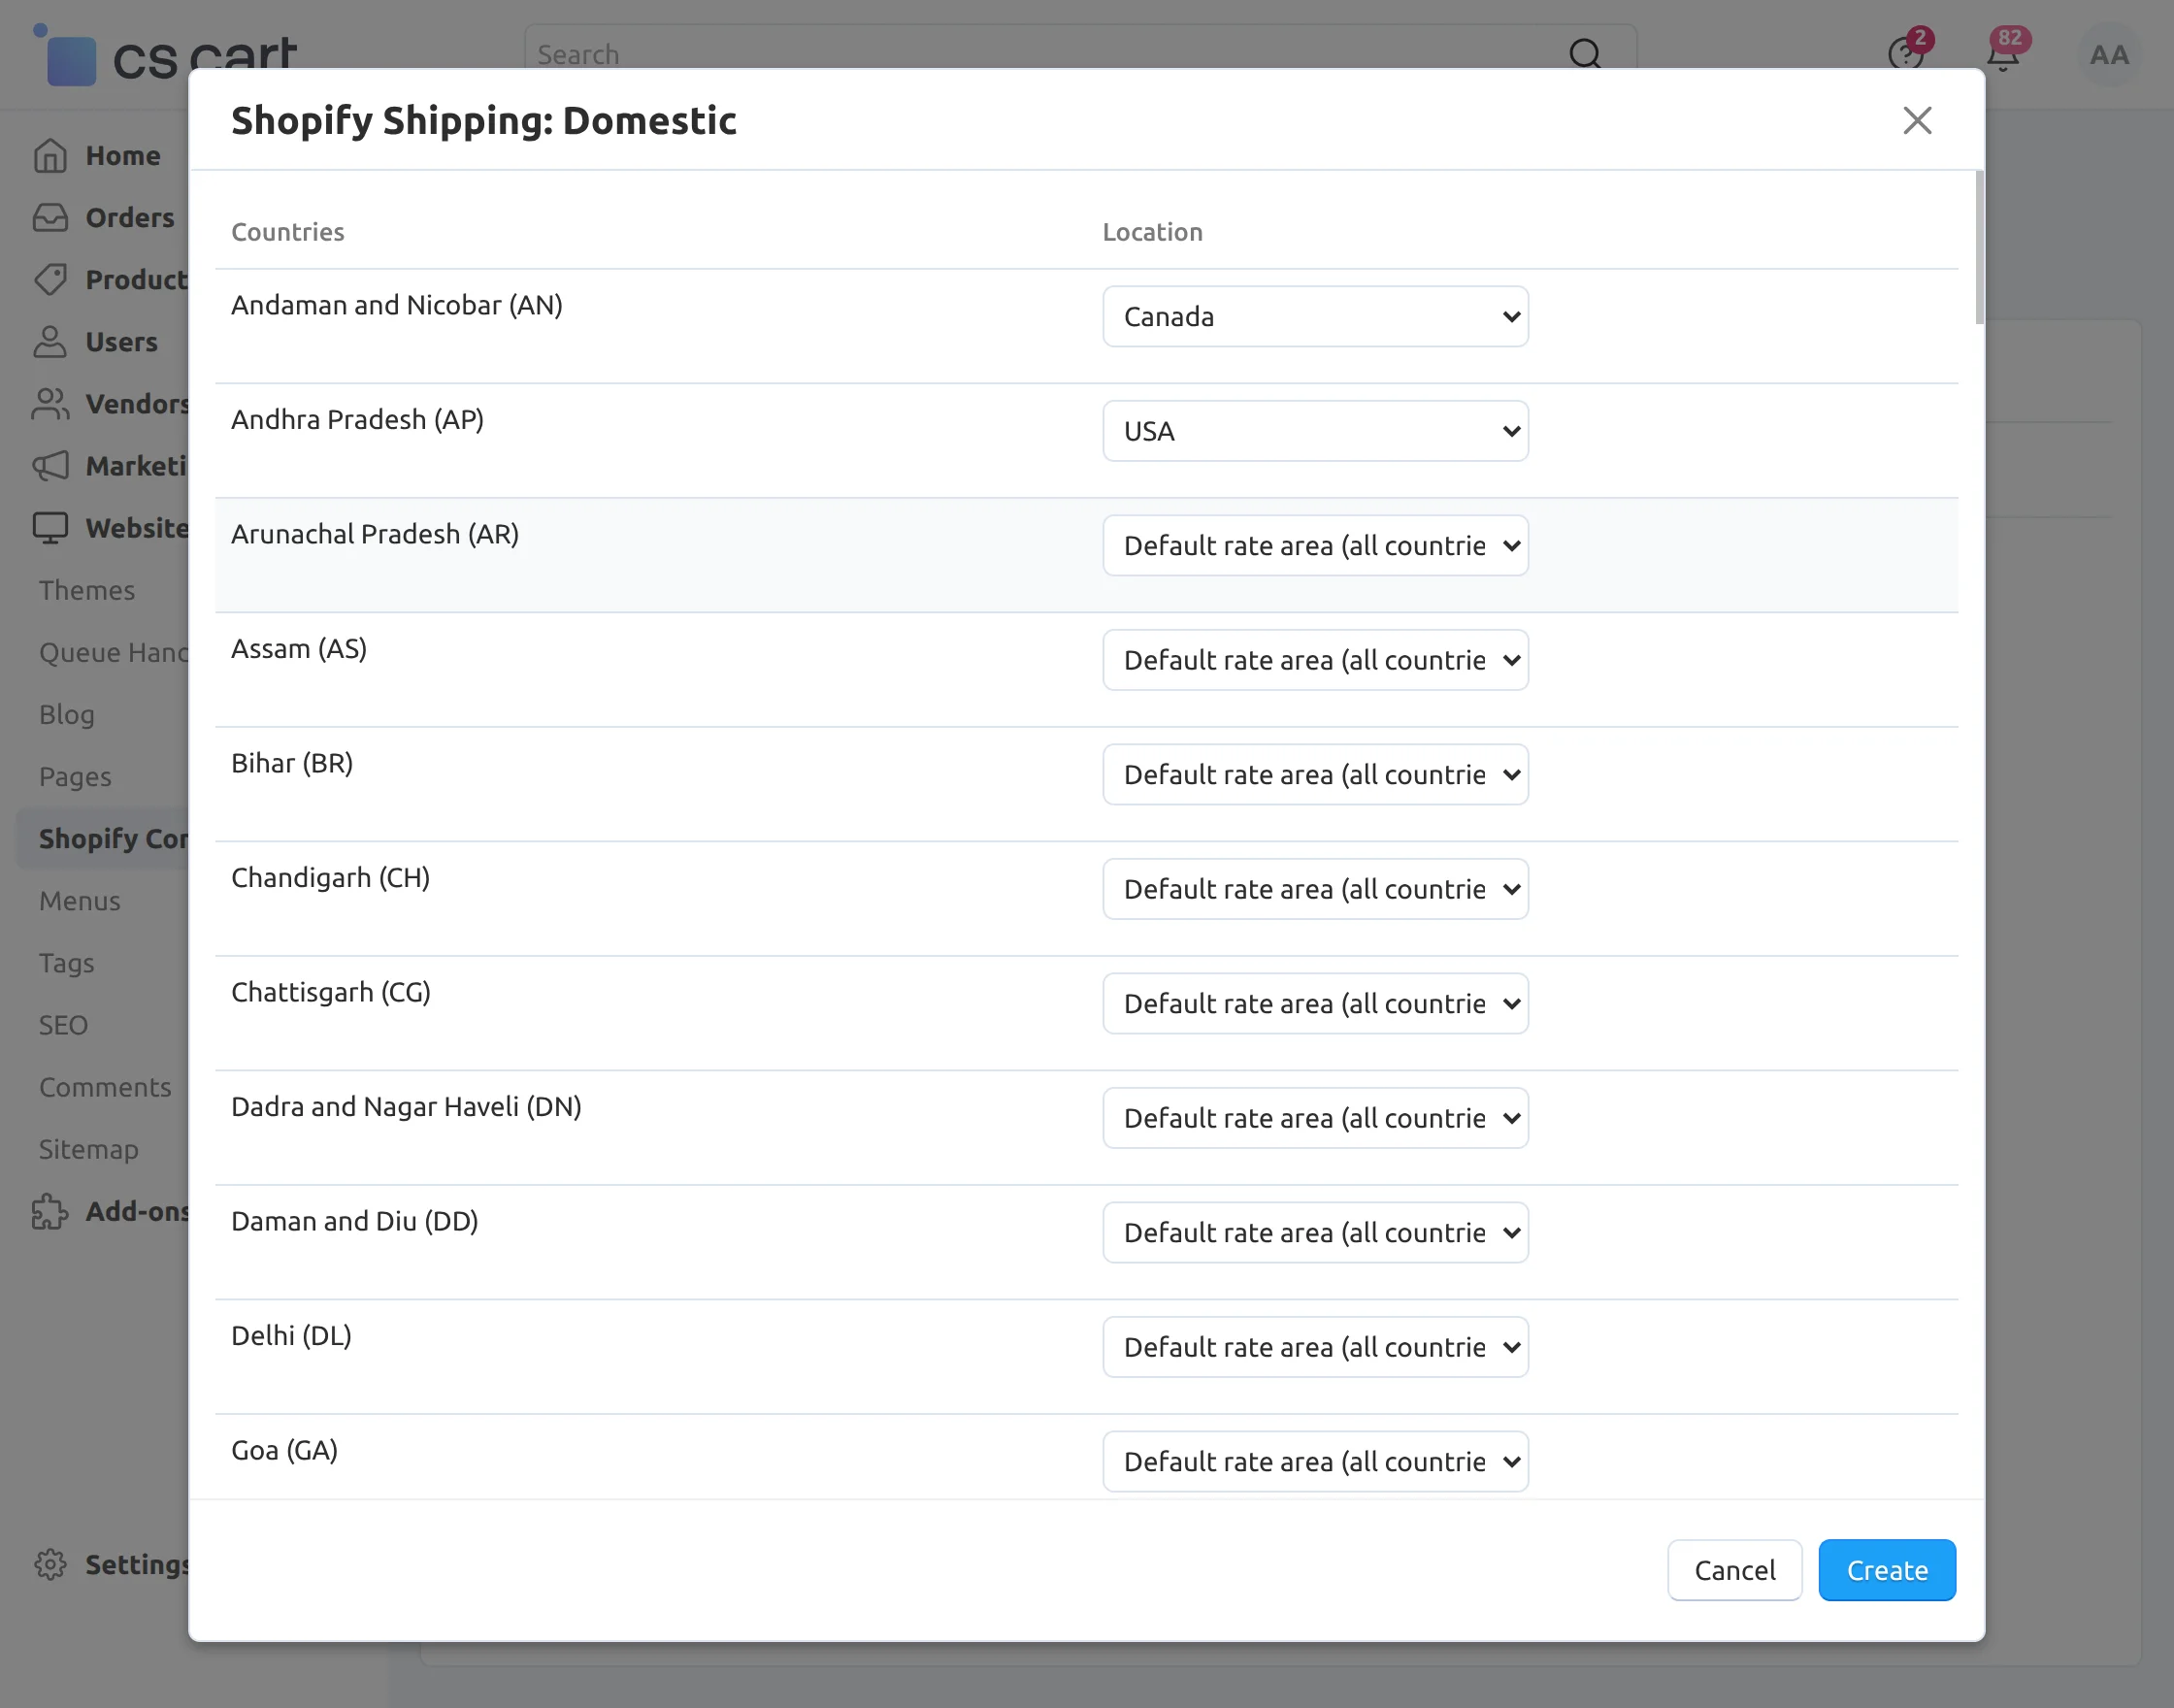
After that, to map shipping locations, go to “Manage Shopify shipping Template”, click on the desired shipping zone to map the shipping location.
Now select the shipping location for the respective shipping zone for mapping.

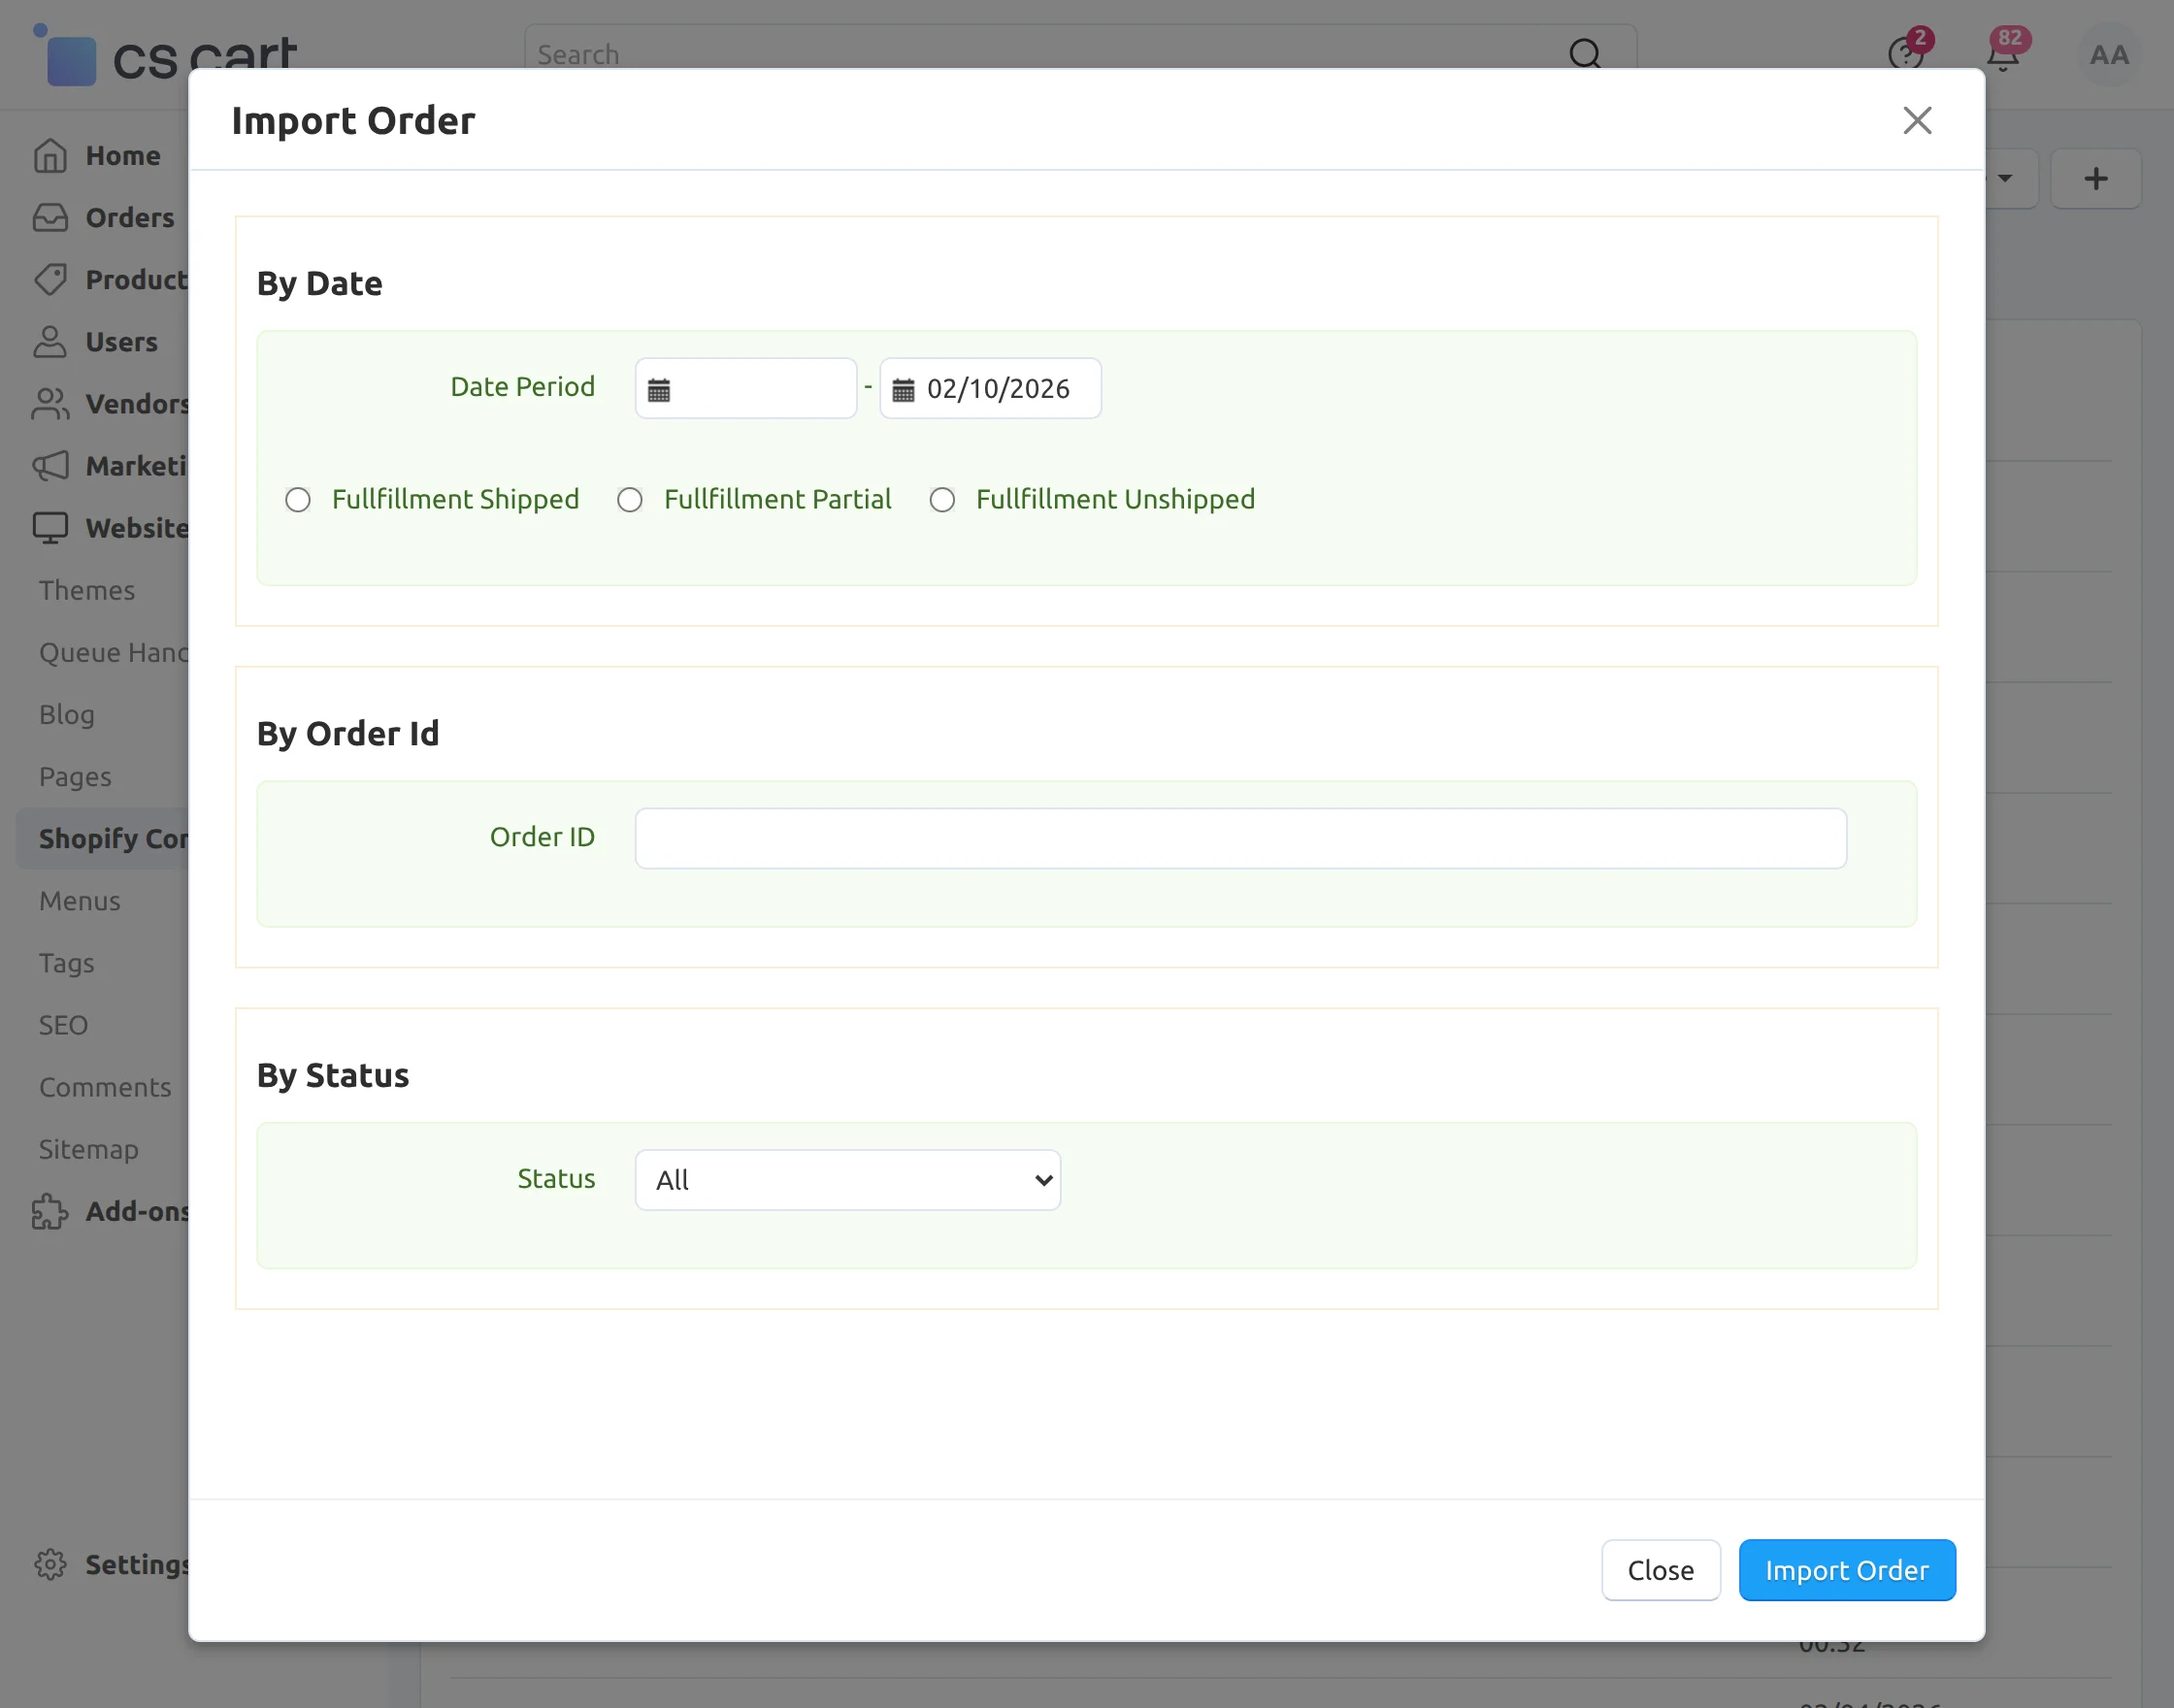
3. Import Orders:
Admin can import orders from Shopify by clicking on the plus icon.
Here, an admin can import products with respect to the selected “Date period” and “Fulfillment status”, by “Order Id” and “Order status”.
After the date and order status, click on “Import Order”.
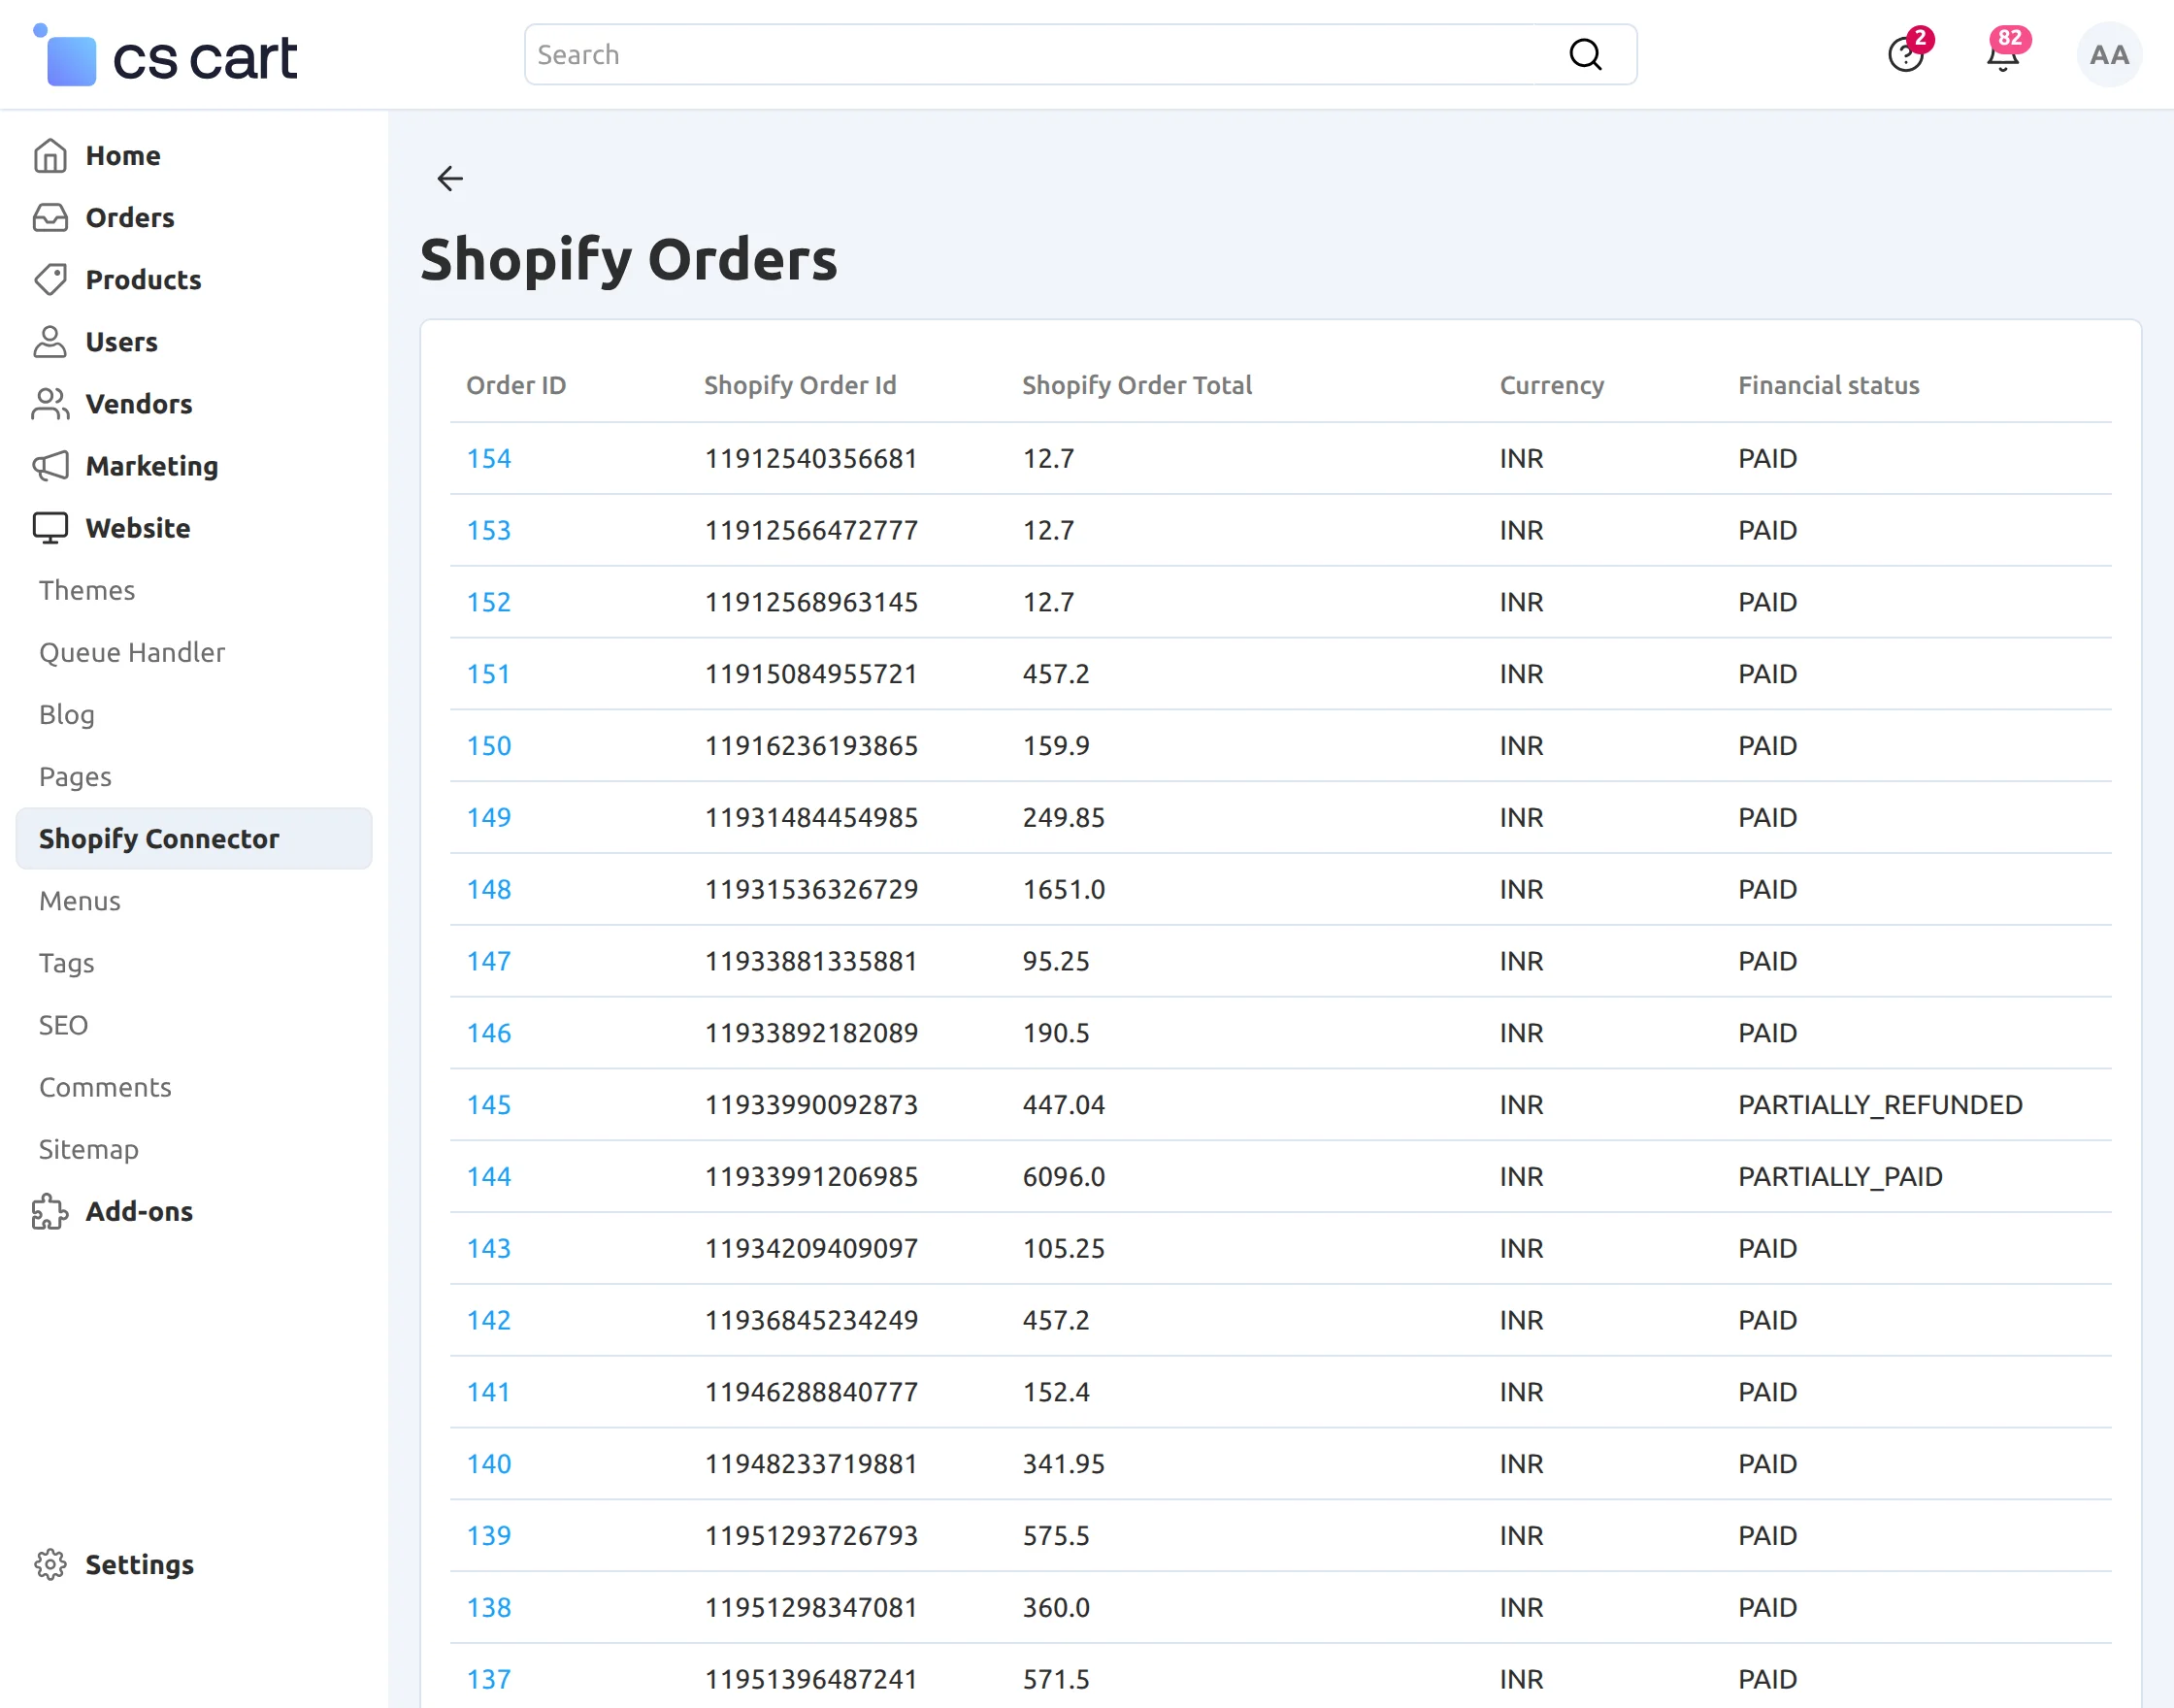
Furthermore, below is the list of the Shopify orders based on your selection. From here, you can import orders to the CS-Cart store.

4. Manage Shopify Orders:
After that, in this section, you can view the exported Shopify orders.
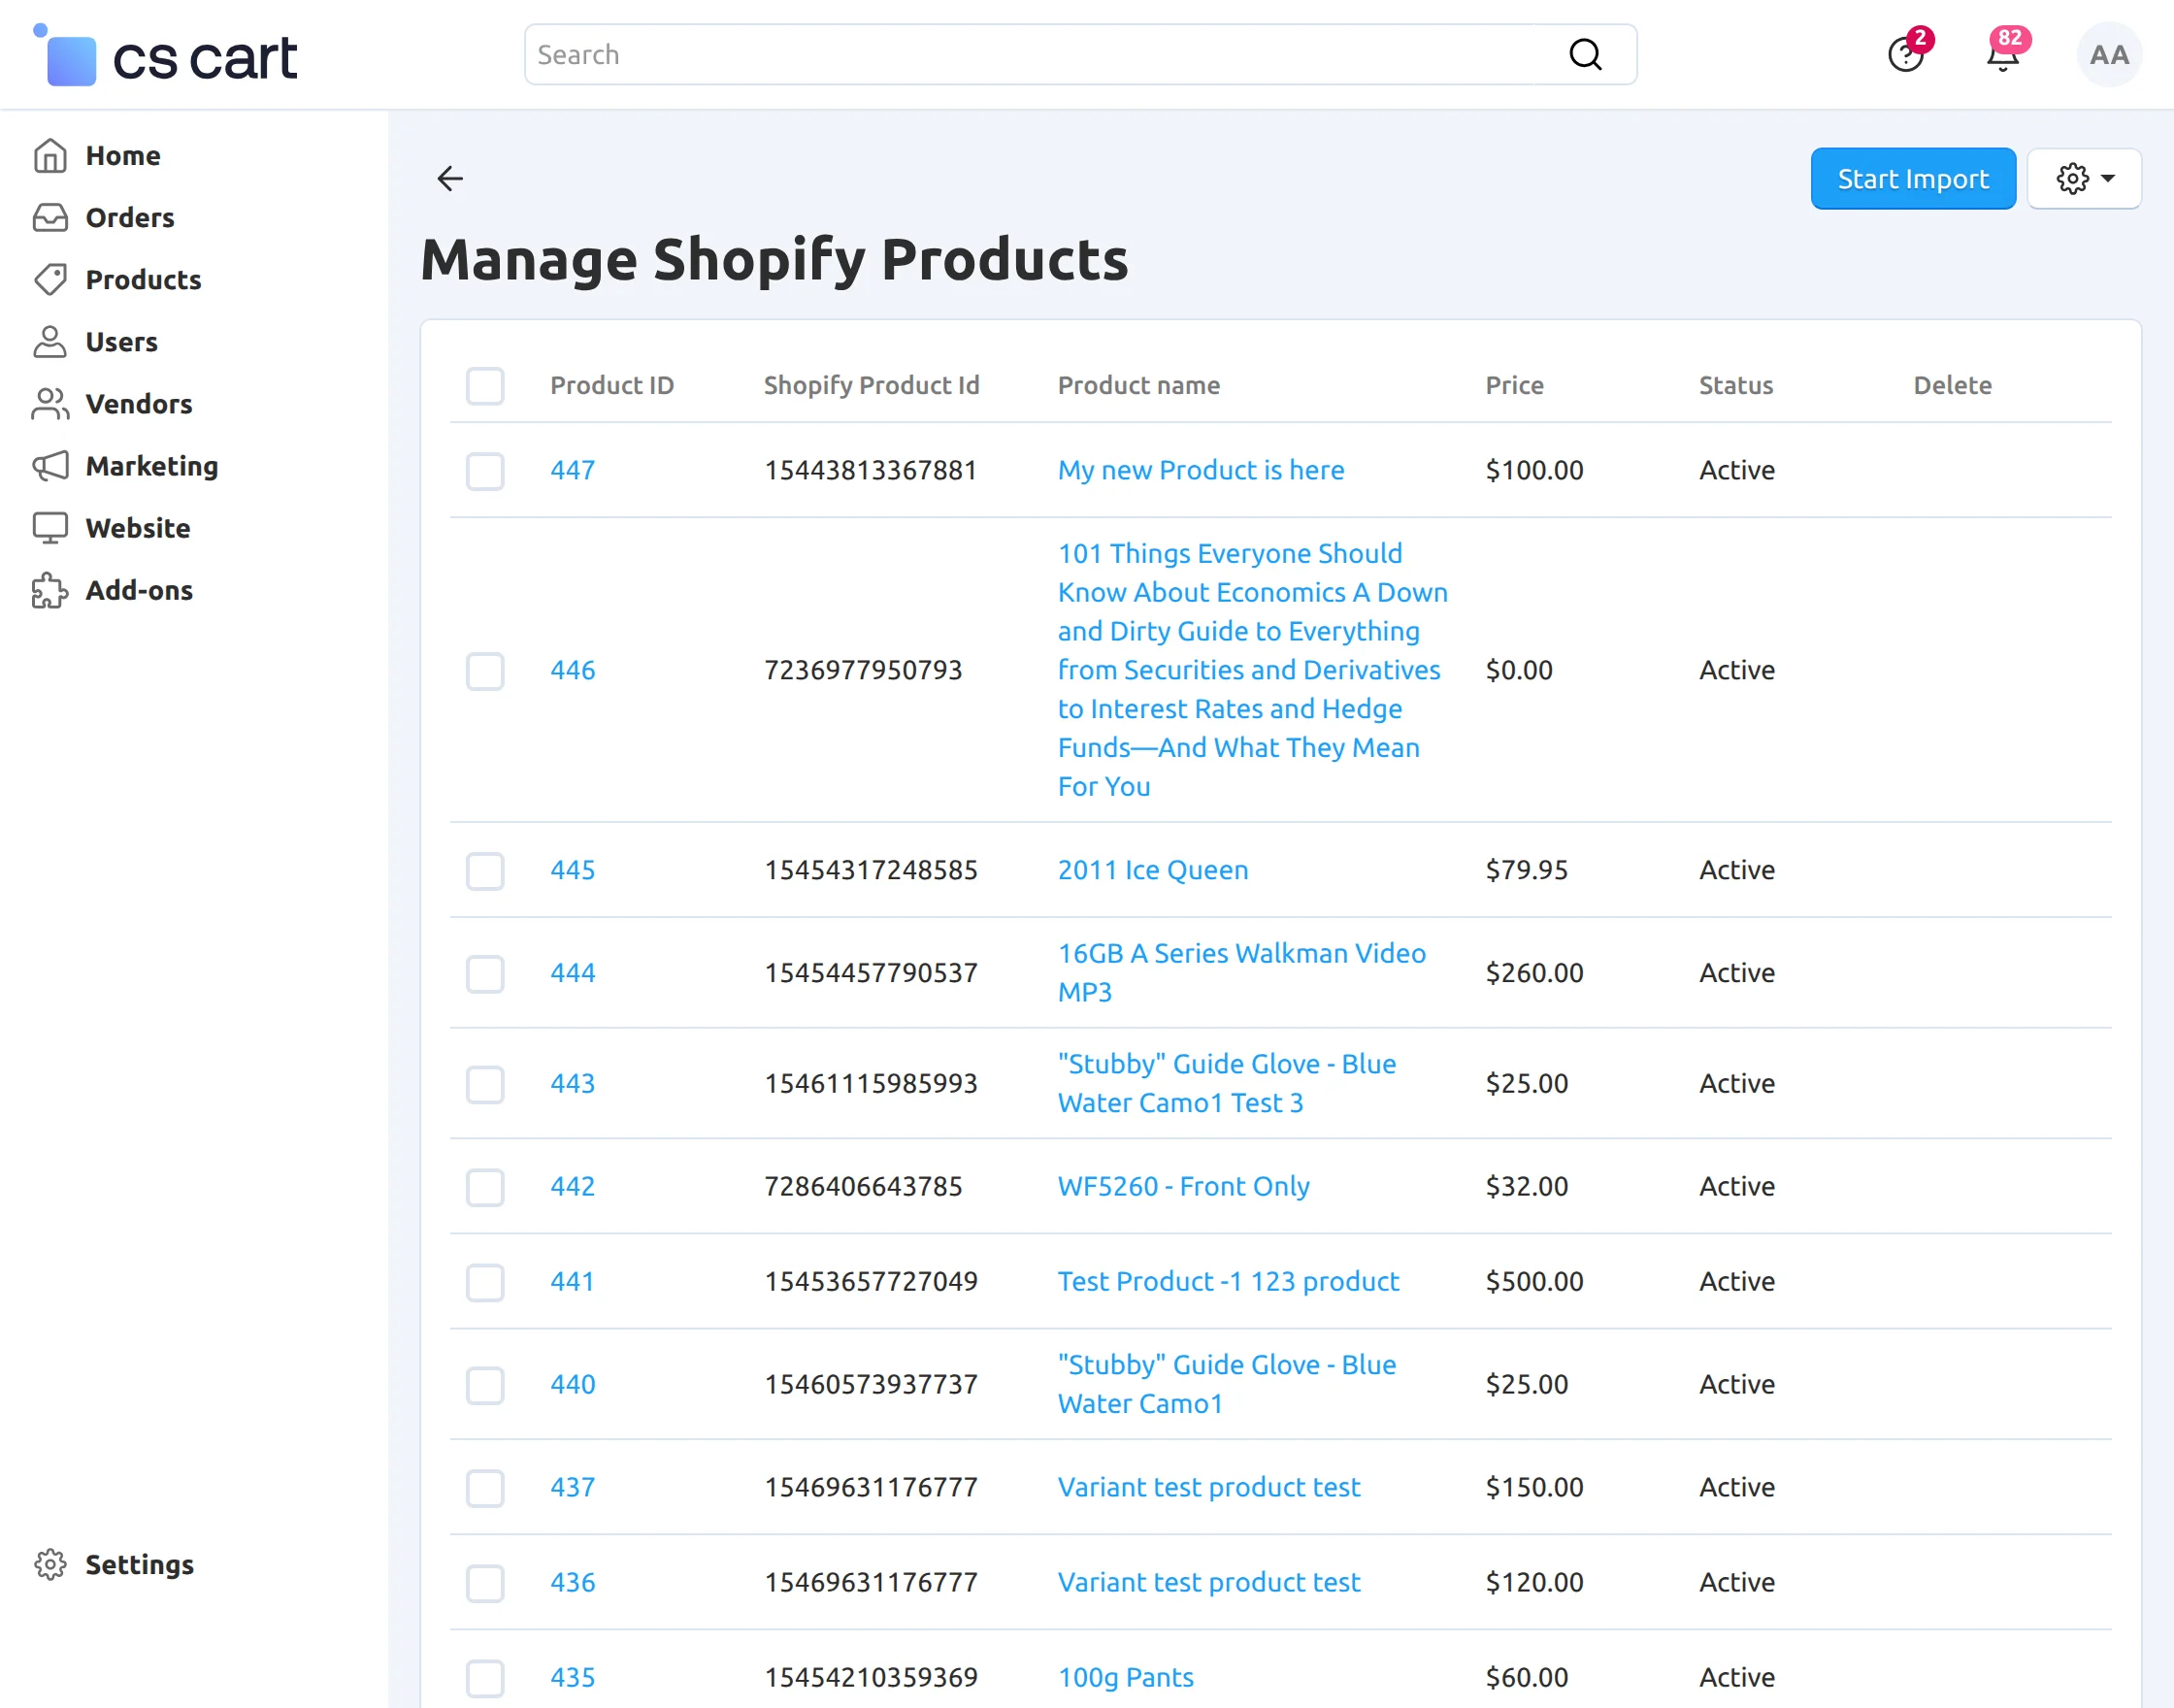
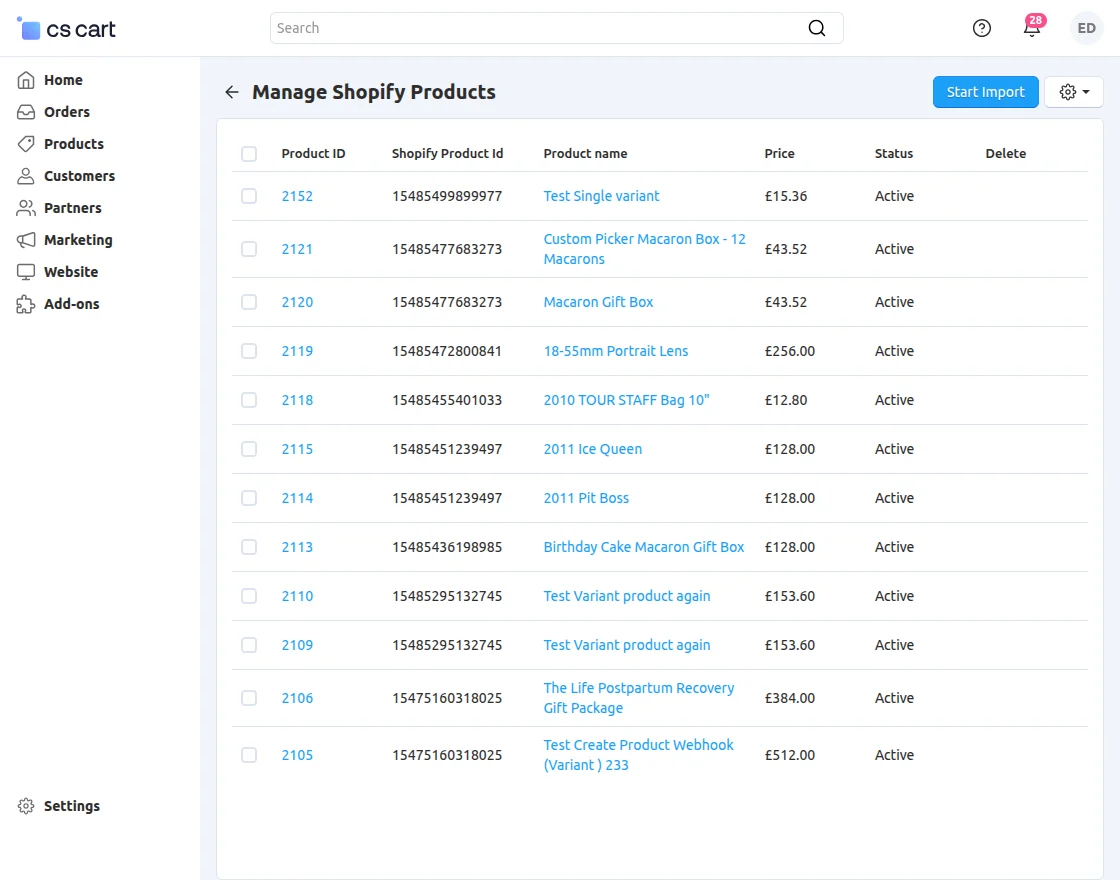
5. Manage Shopify Products:
Furthermore, in this section, to import products from Shopify, click on “Start Import”.
After clicking, a new pop-up will open. Here admin can import products by collection using both collection smart and custom.
In the screenshot below, by choosing the Collection Id, the admin can map products through Smart Collection.
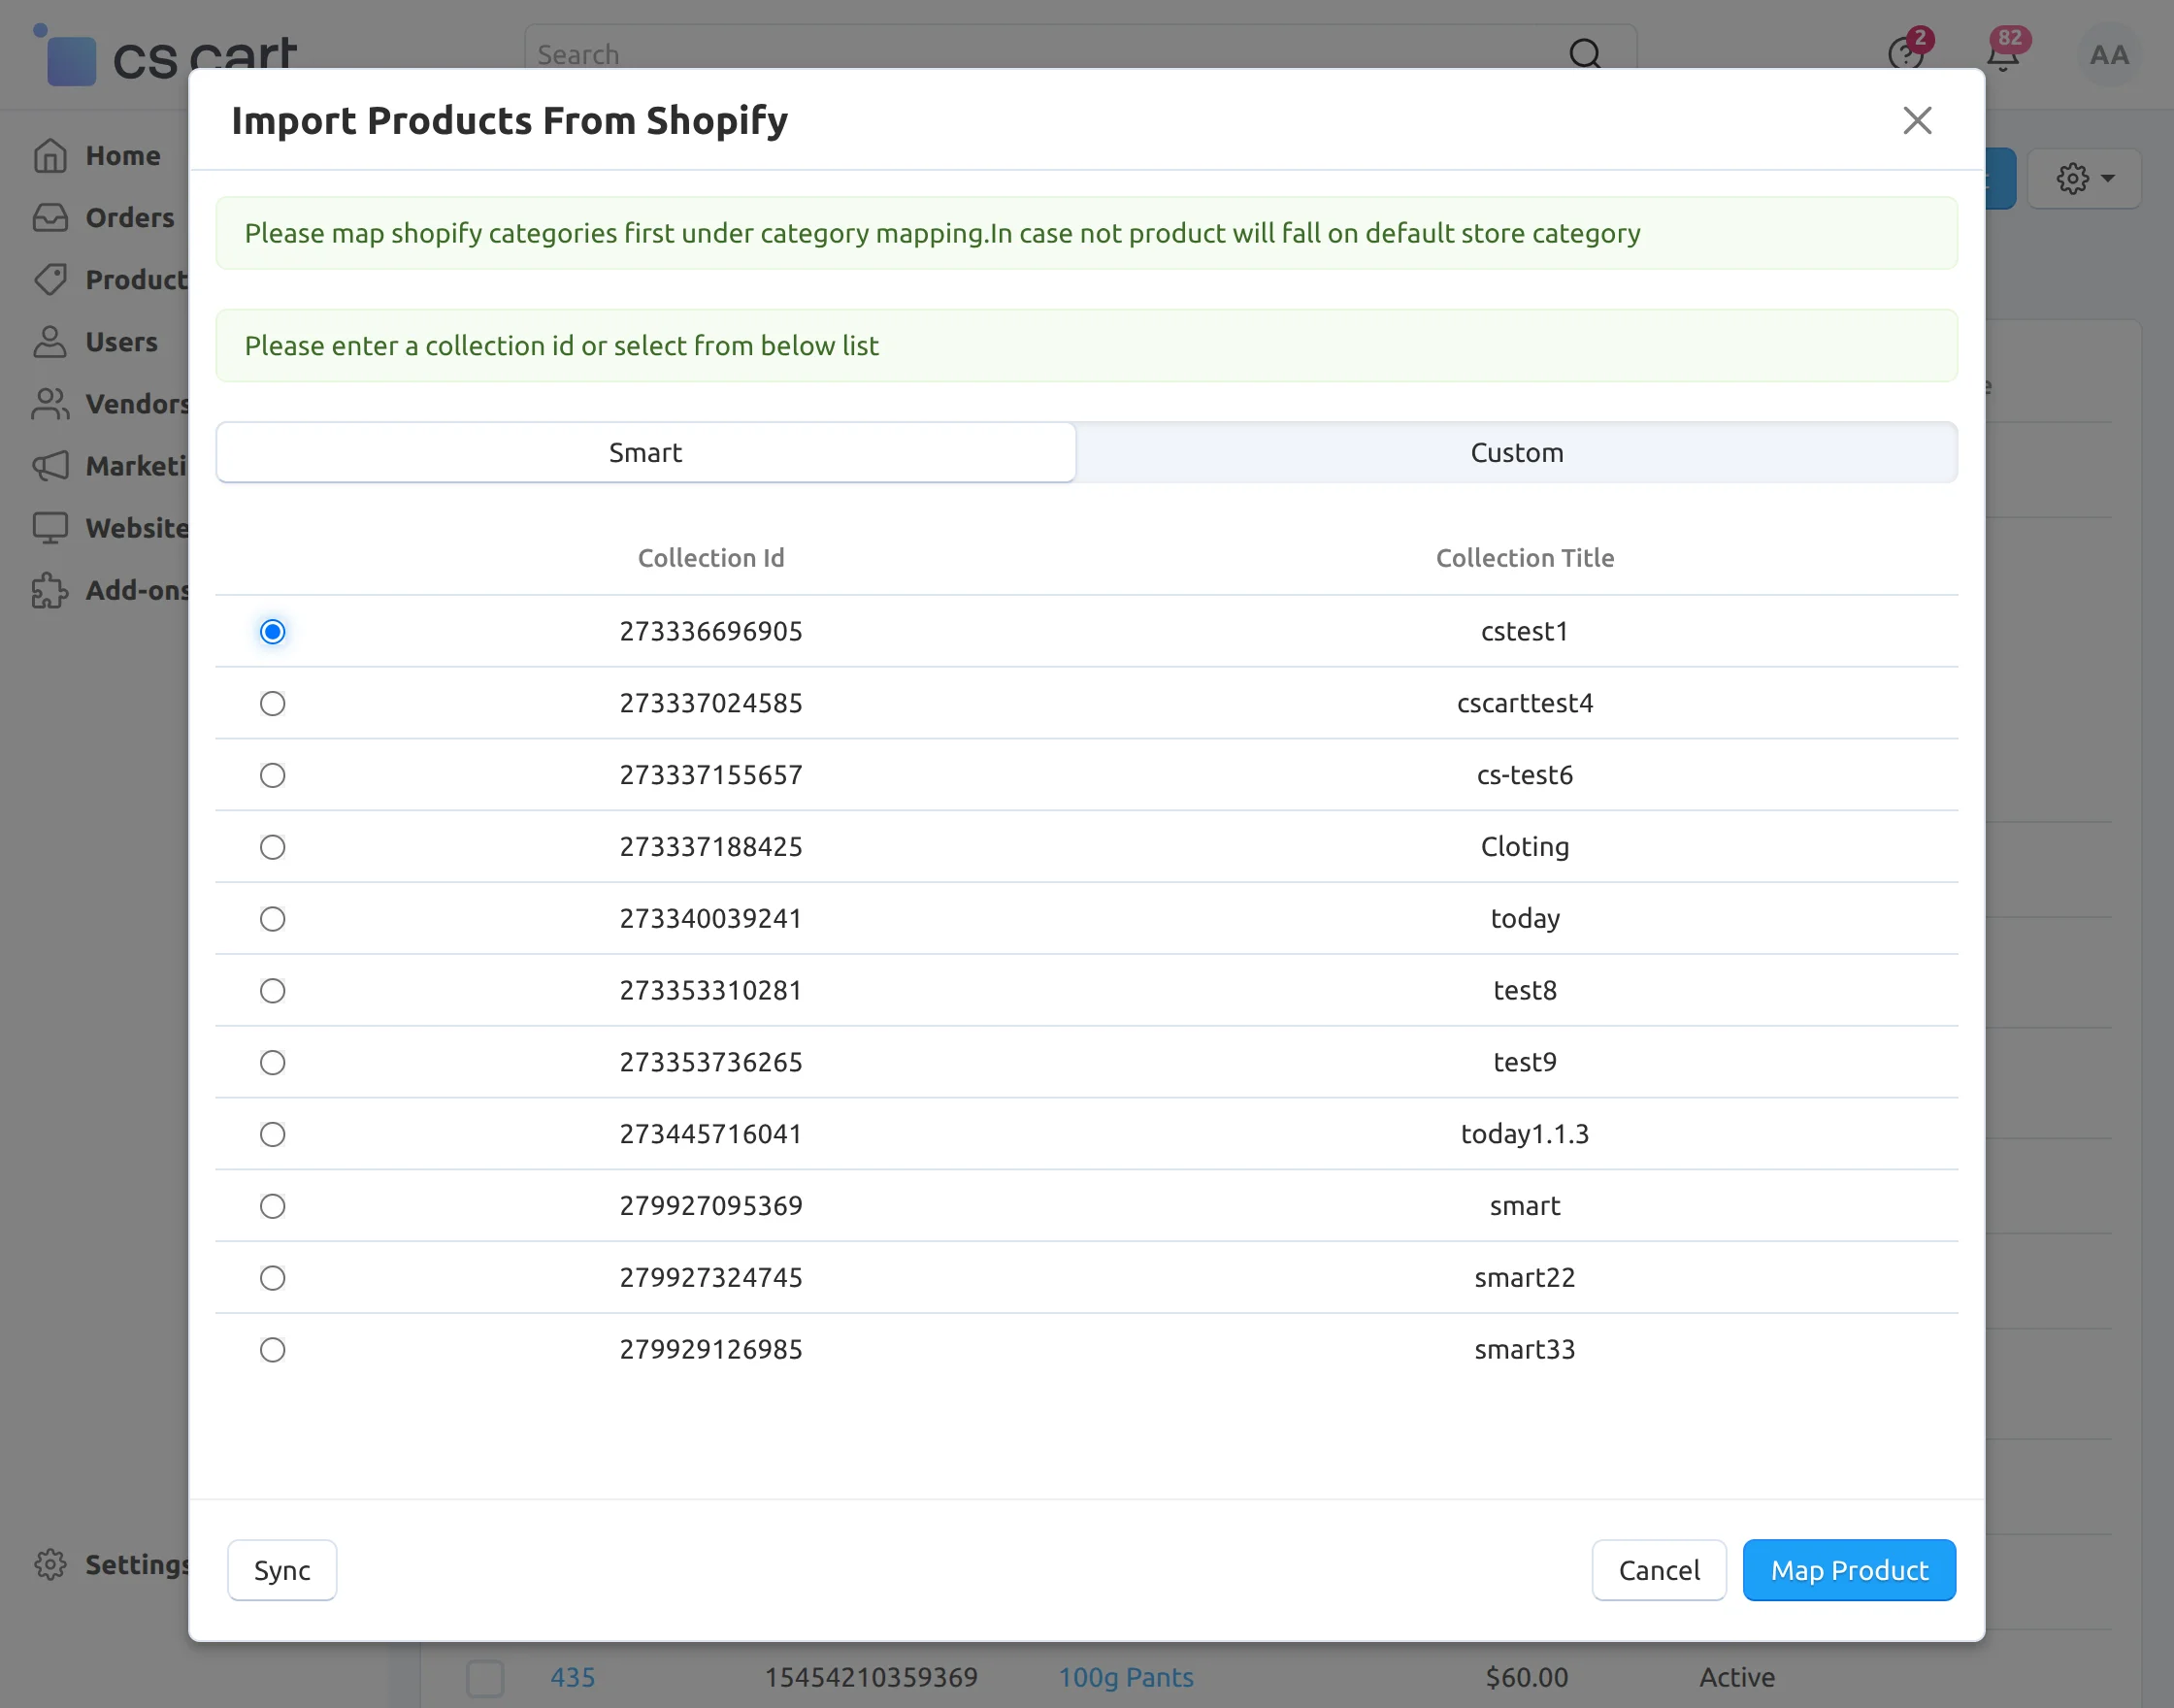
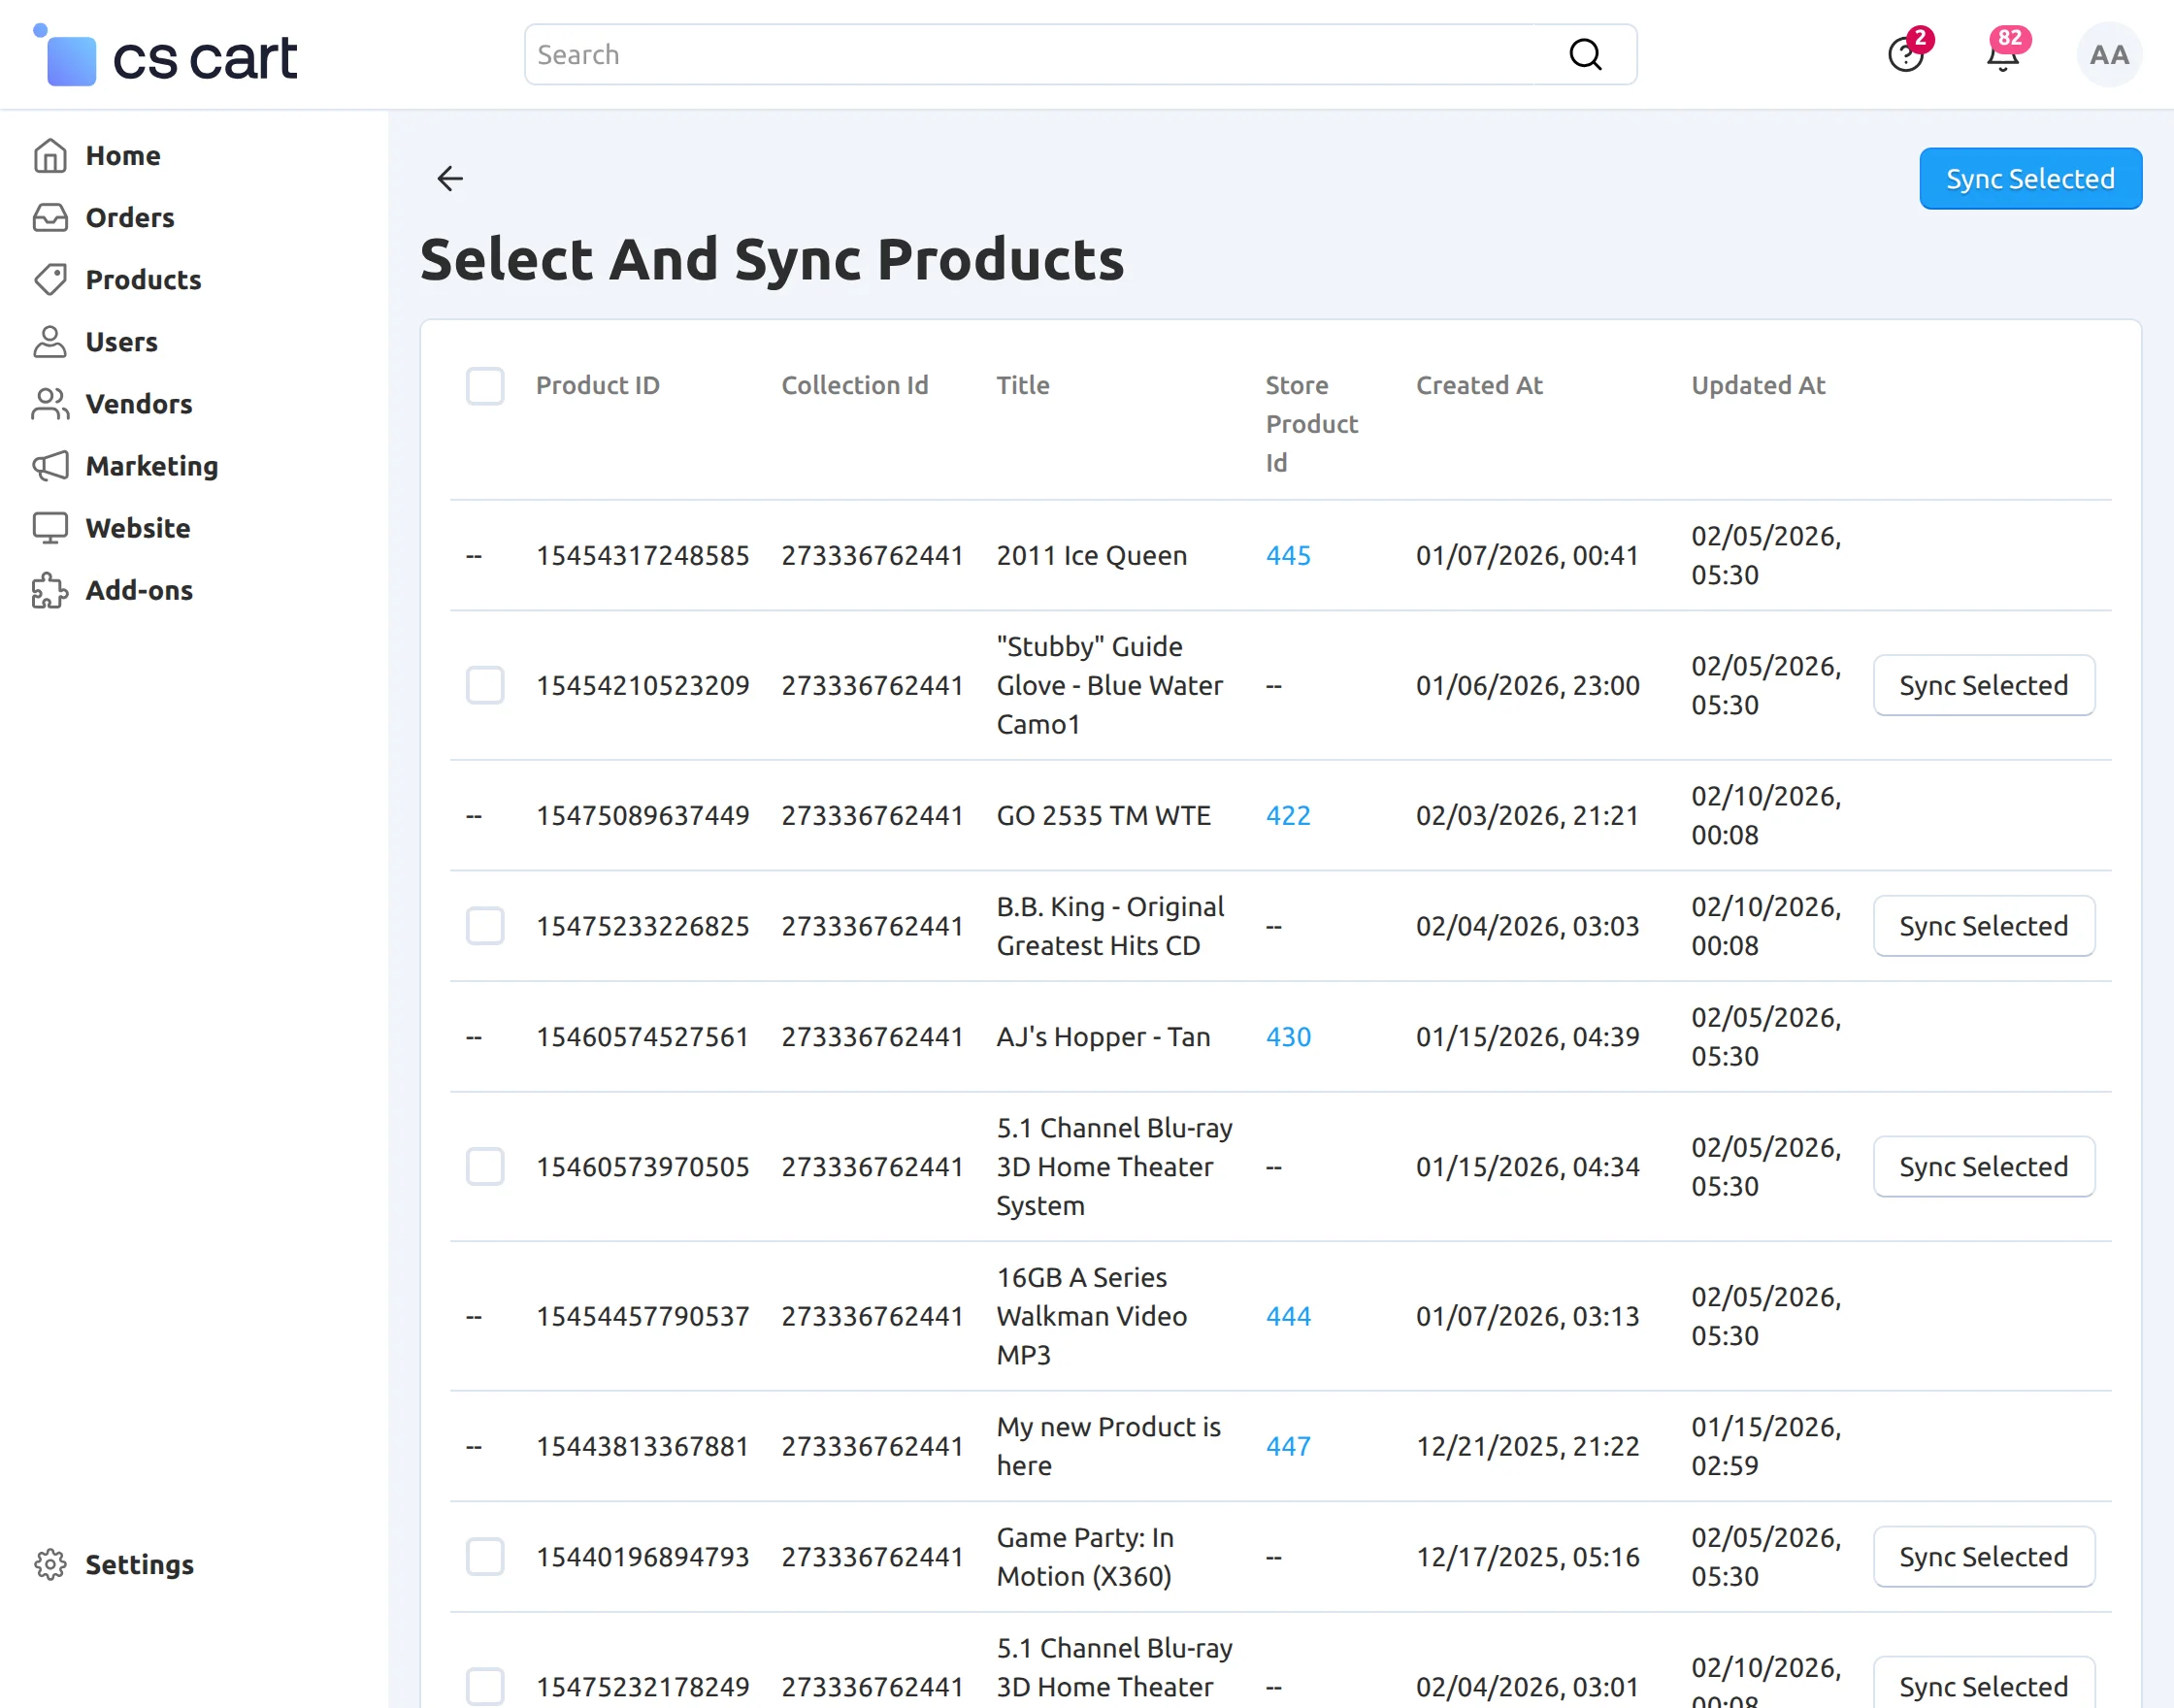
Furthermore, once clicked on “Map Product”, you will find the list of the products imported from Shopify. To synchronize Shopify products, click on “Sync Product”.

An admin can also import products by collection using custom. In the screenshot below, by choosing the Collection Id, the admin can map products through a custom Collection.
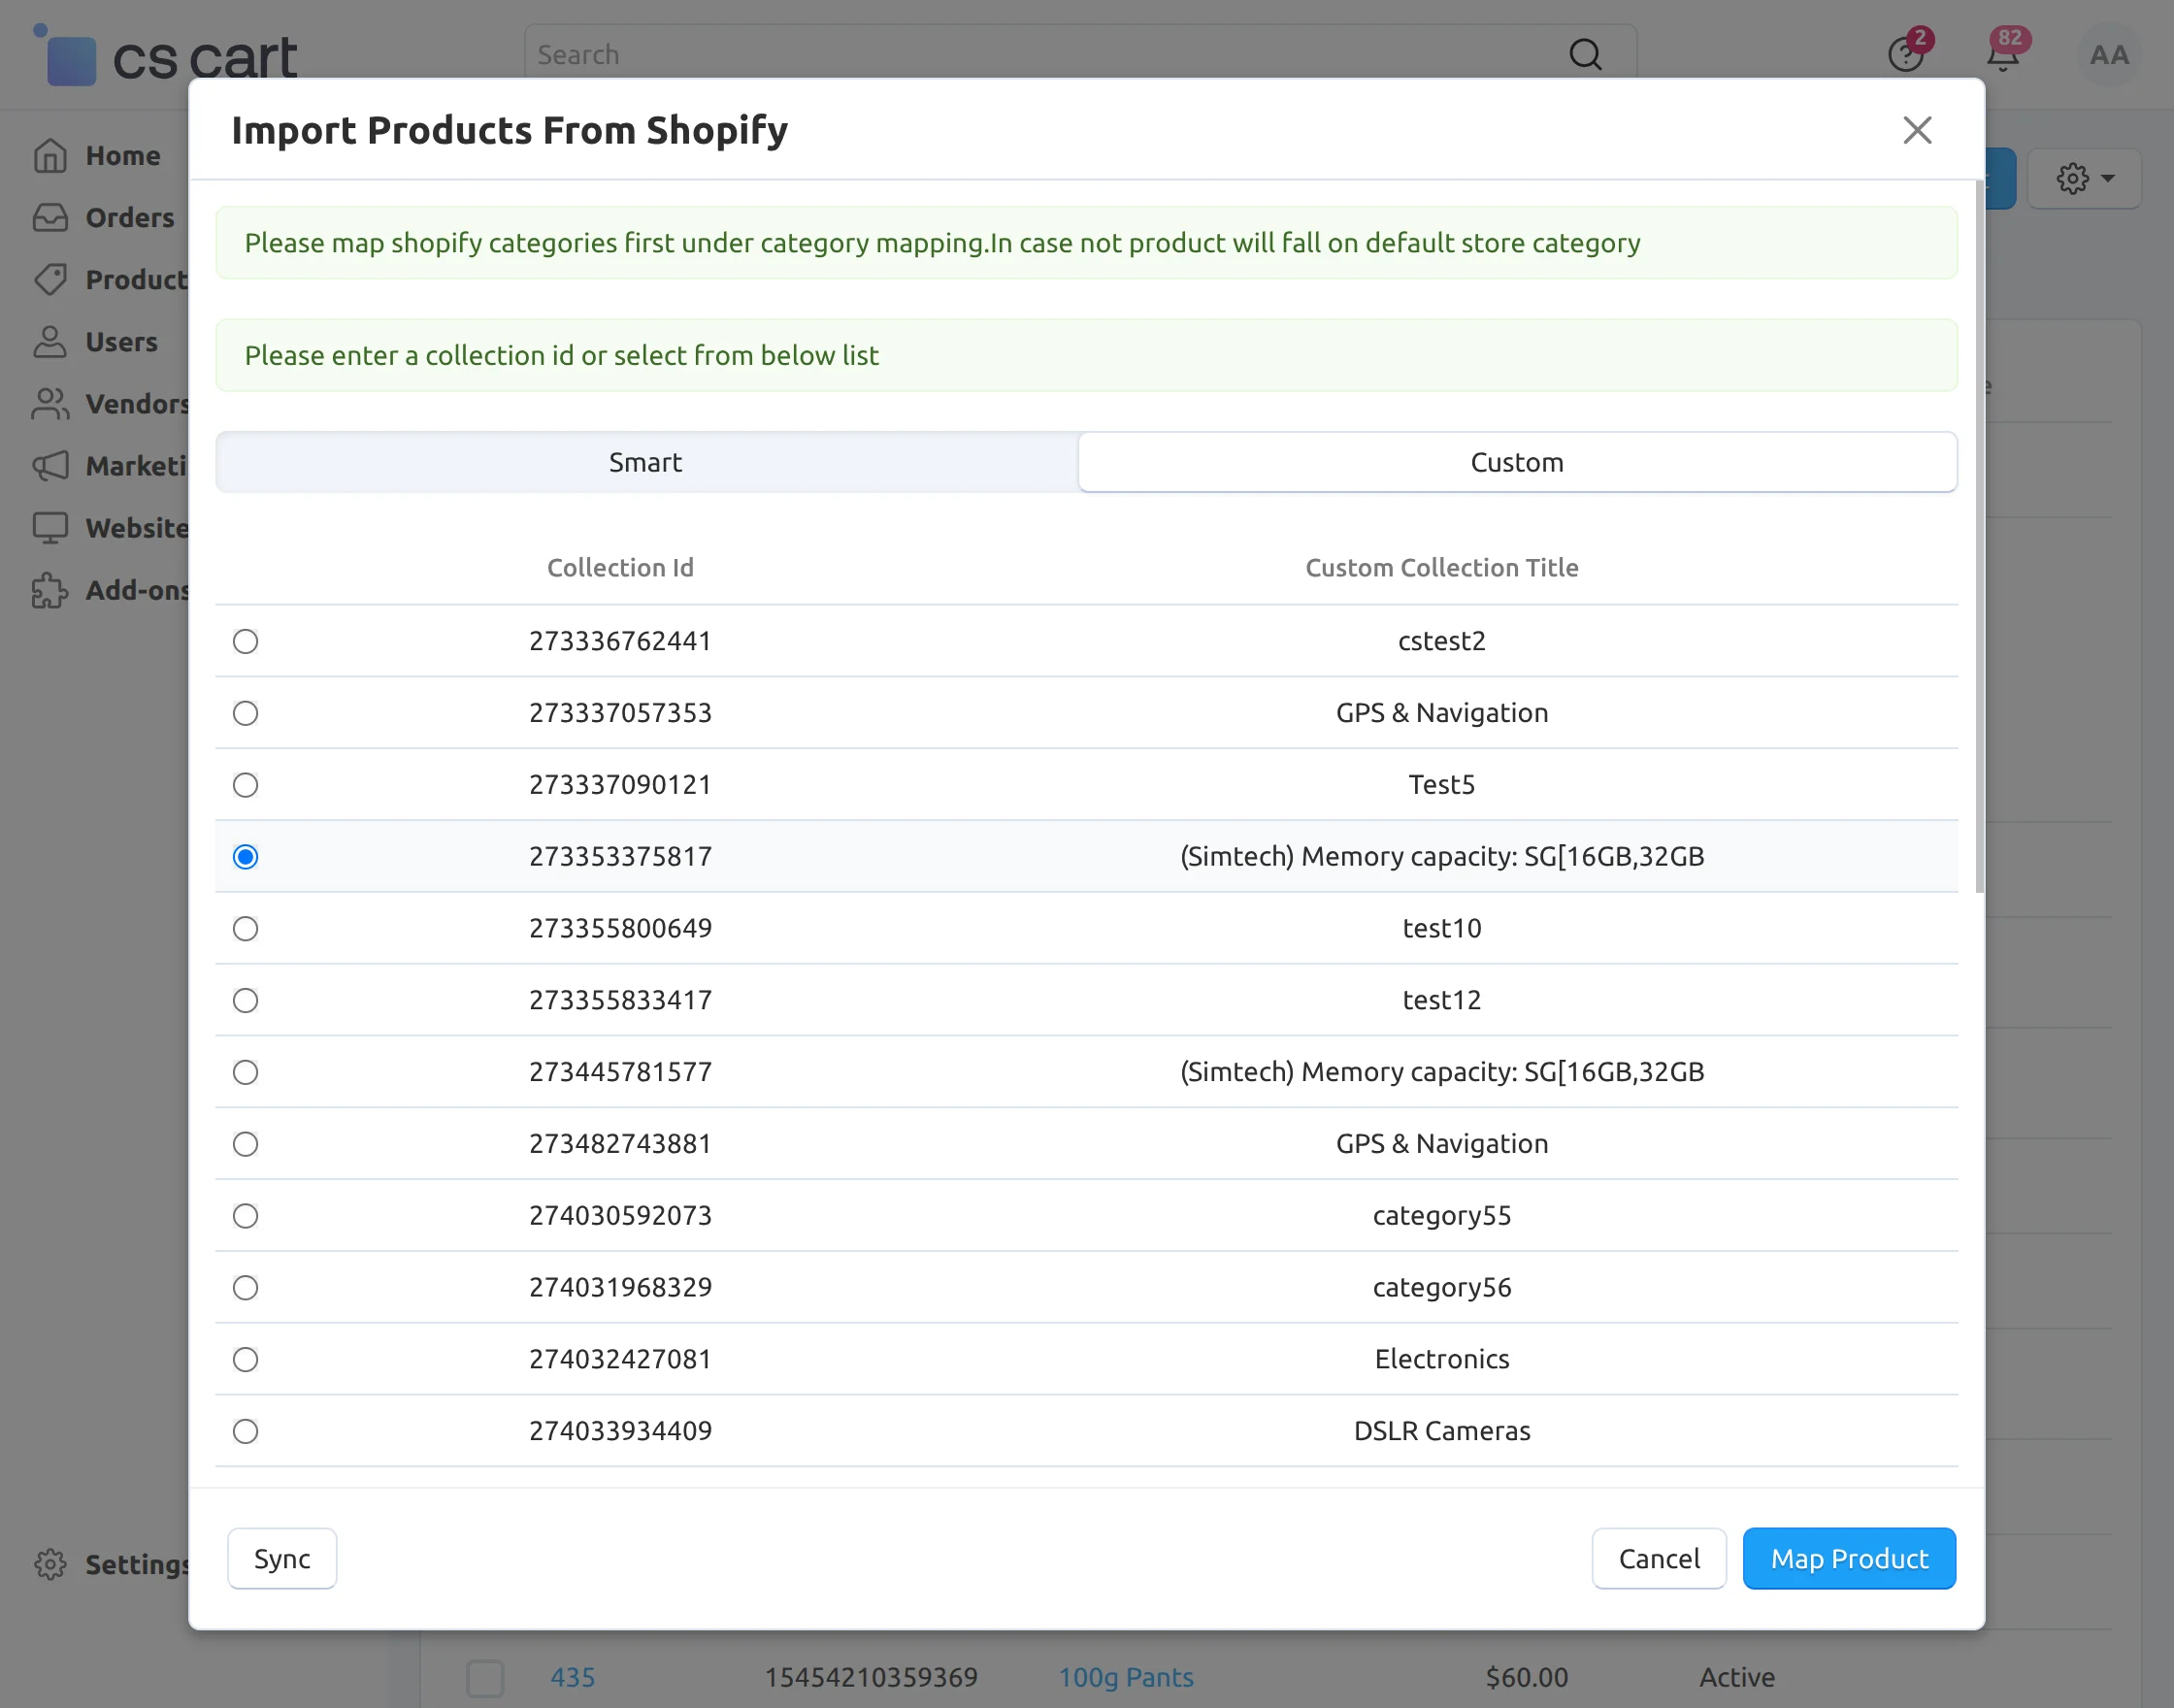
Additionally, once click on “Map Product”, you will find the list of the products imported from Shopify through custom. To synchronize Shopify products, click on “Sync Product”.
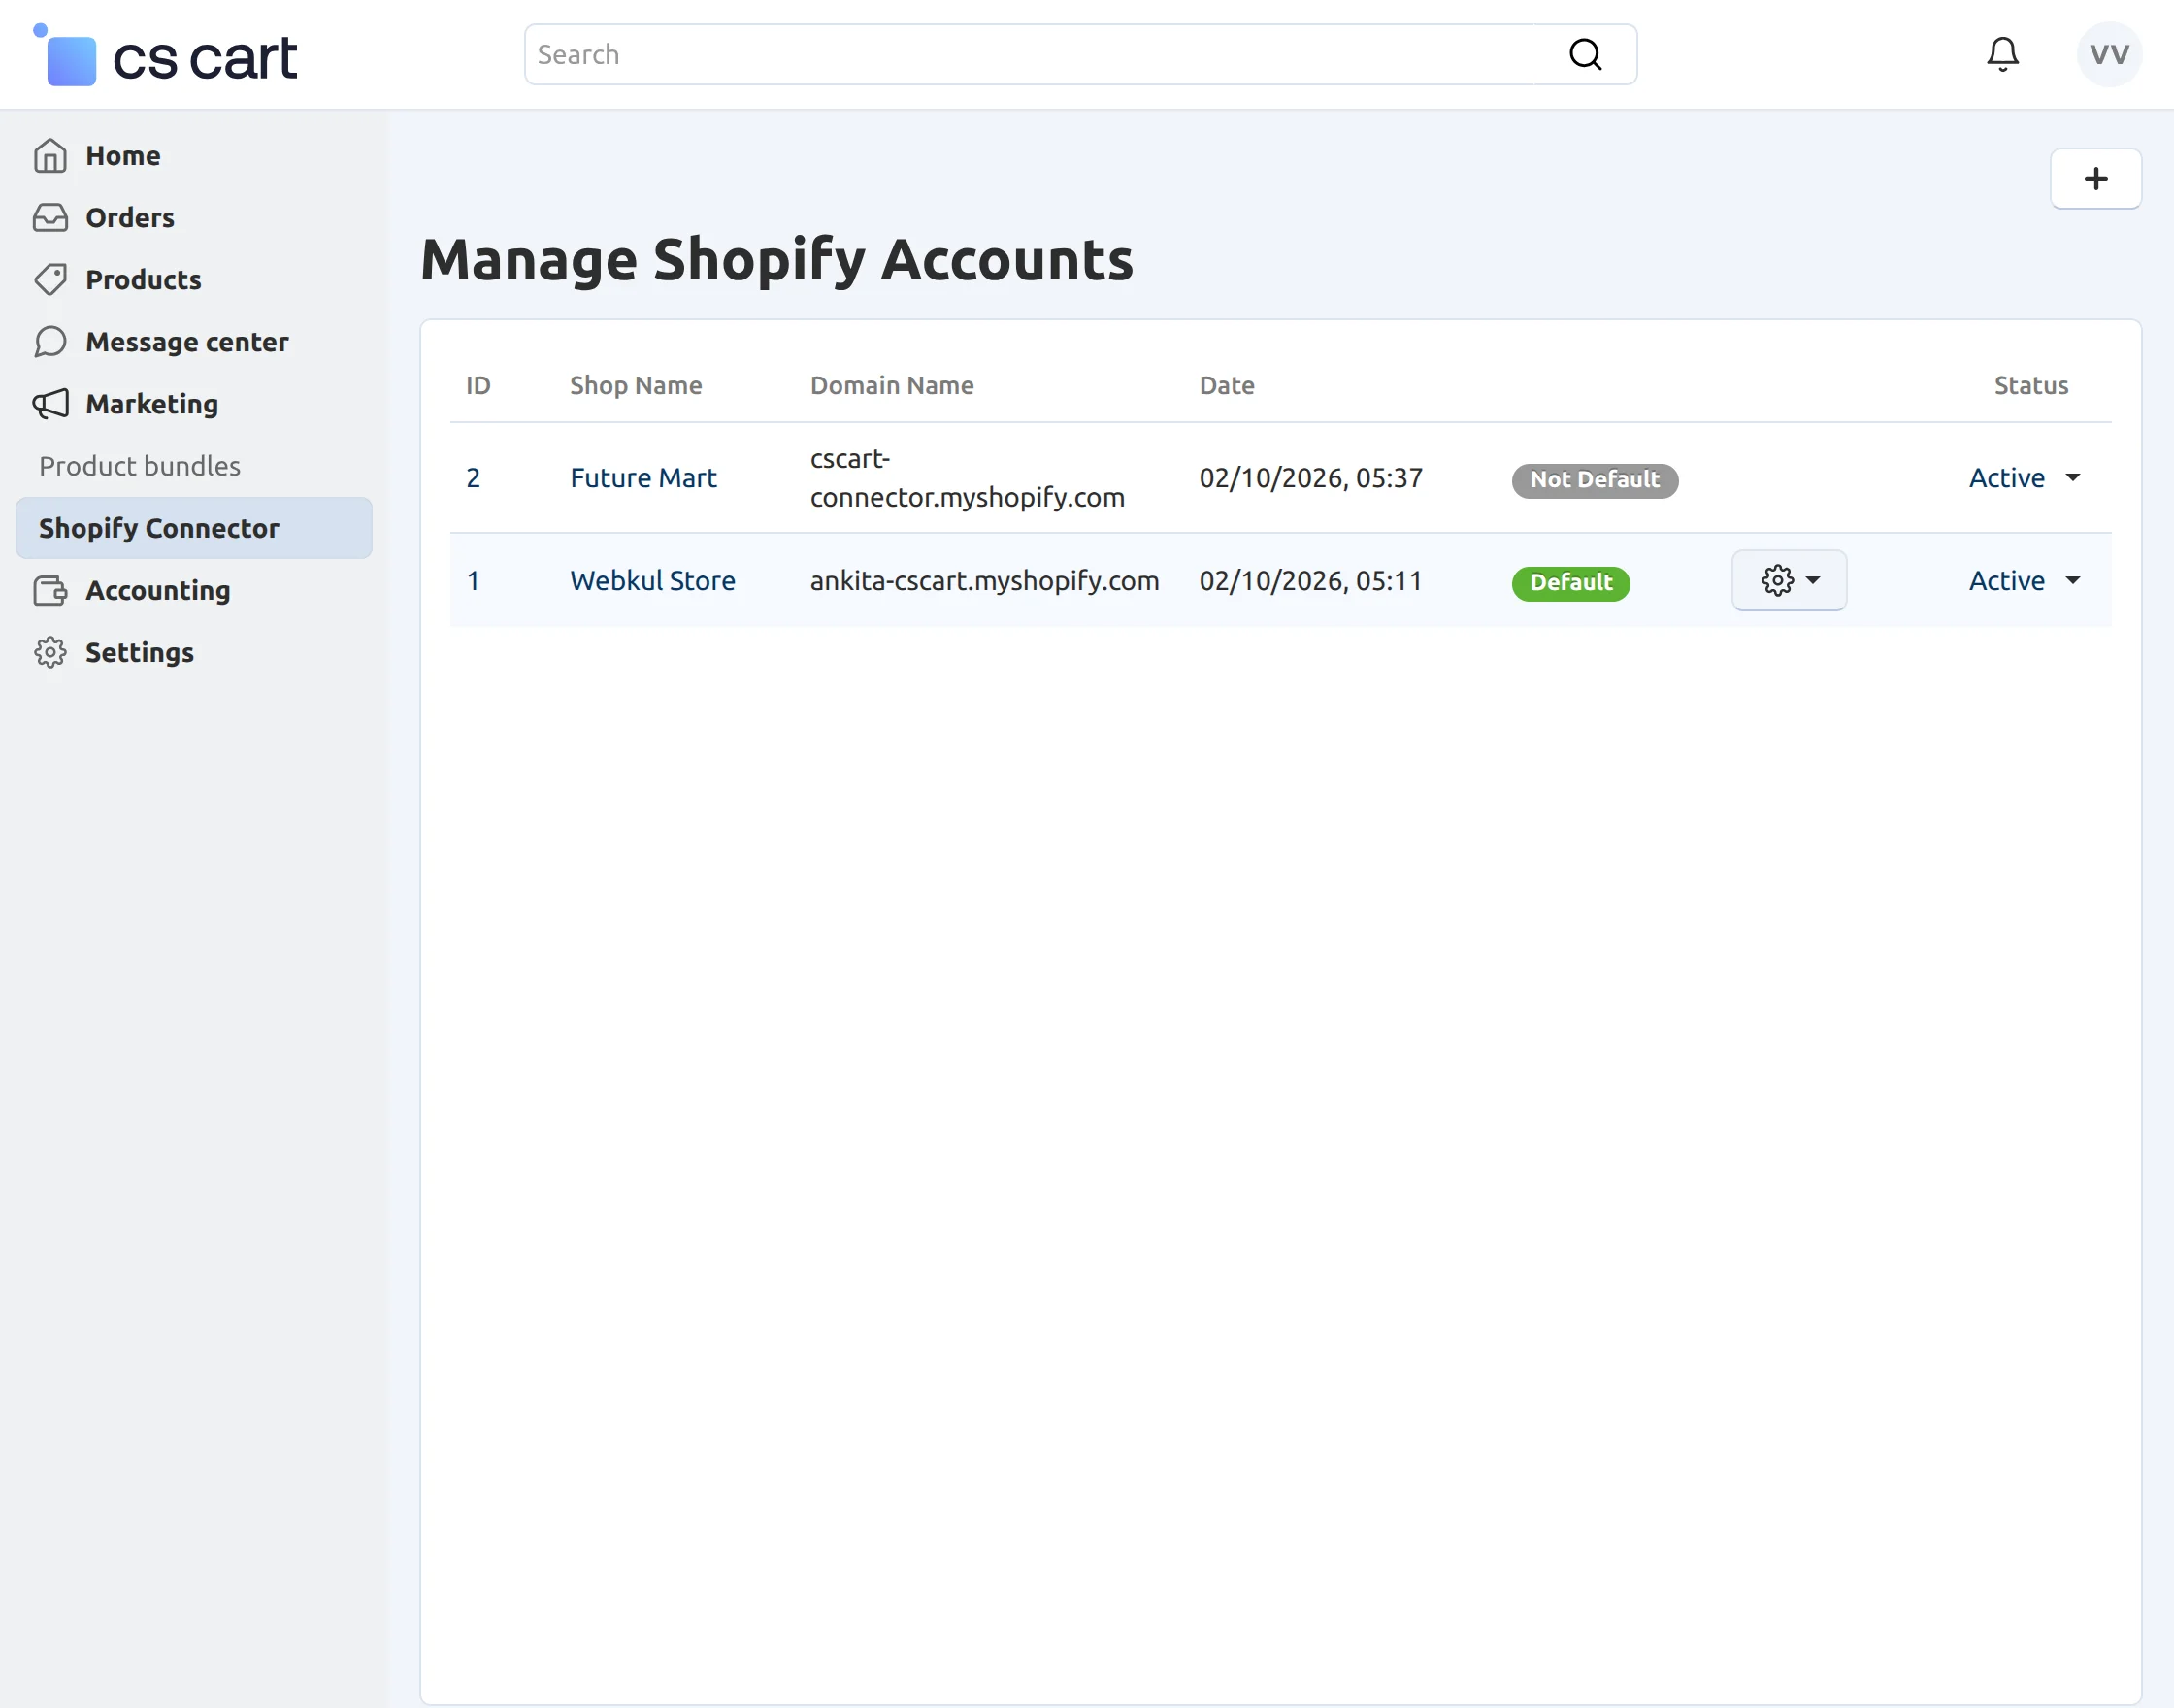
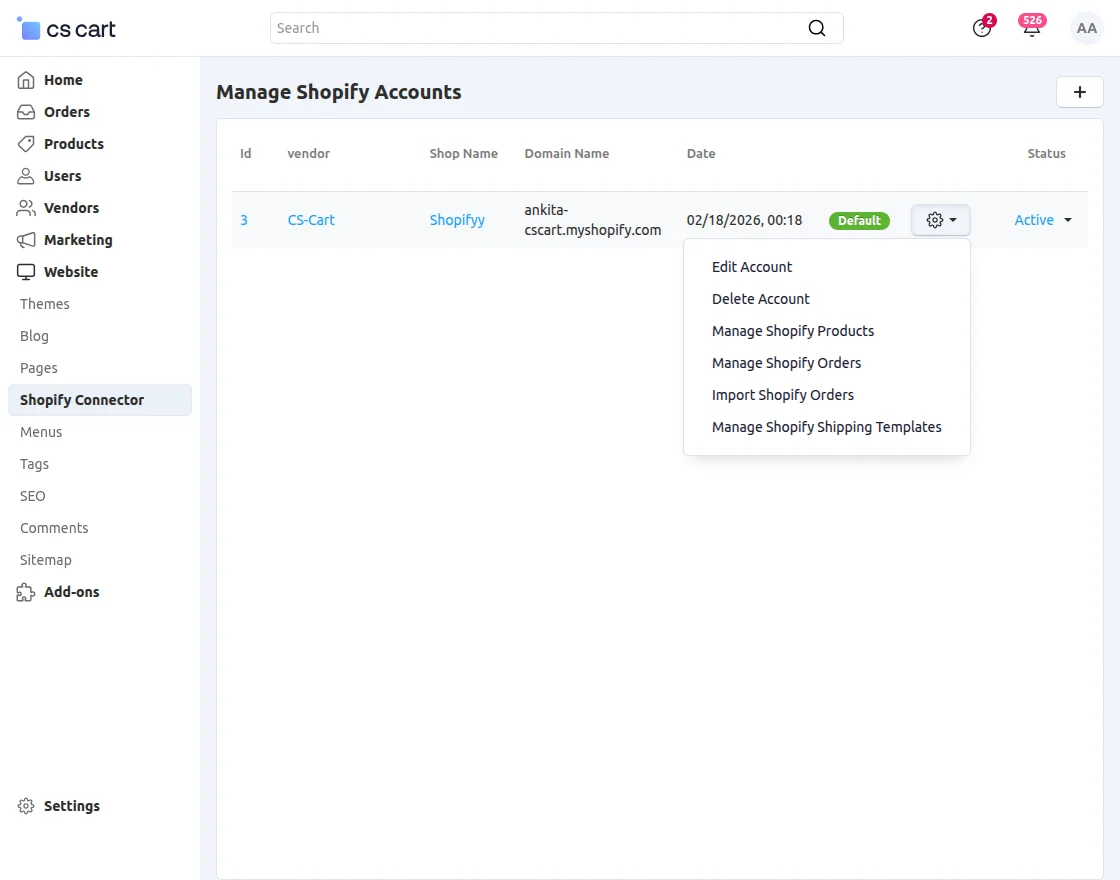
6. Managing Shopify Accounts:
After that, in this section, the admin can delete/Edit his account.

Therefore, the vendor can maintain and create a new Shopify connector at the vendor panel.
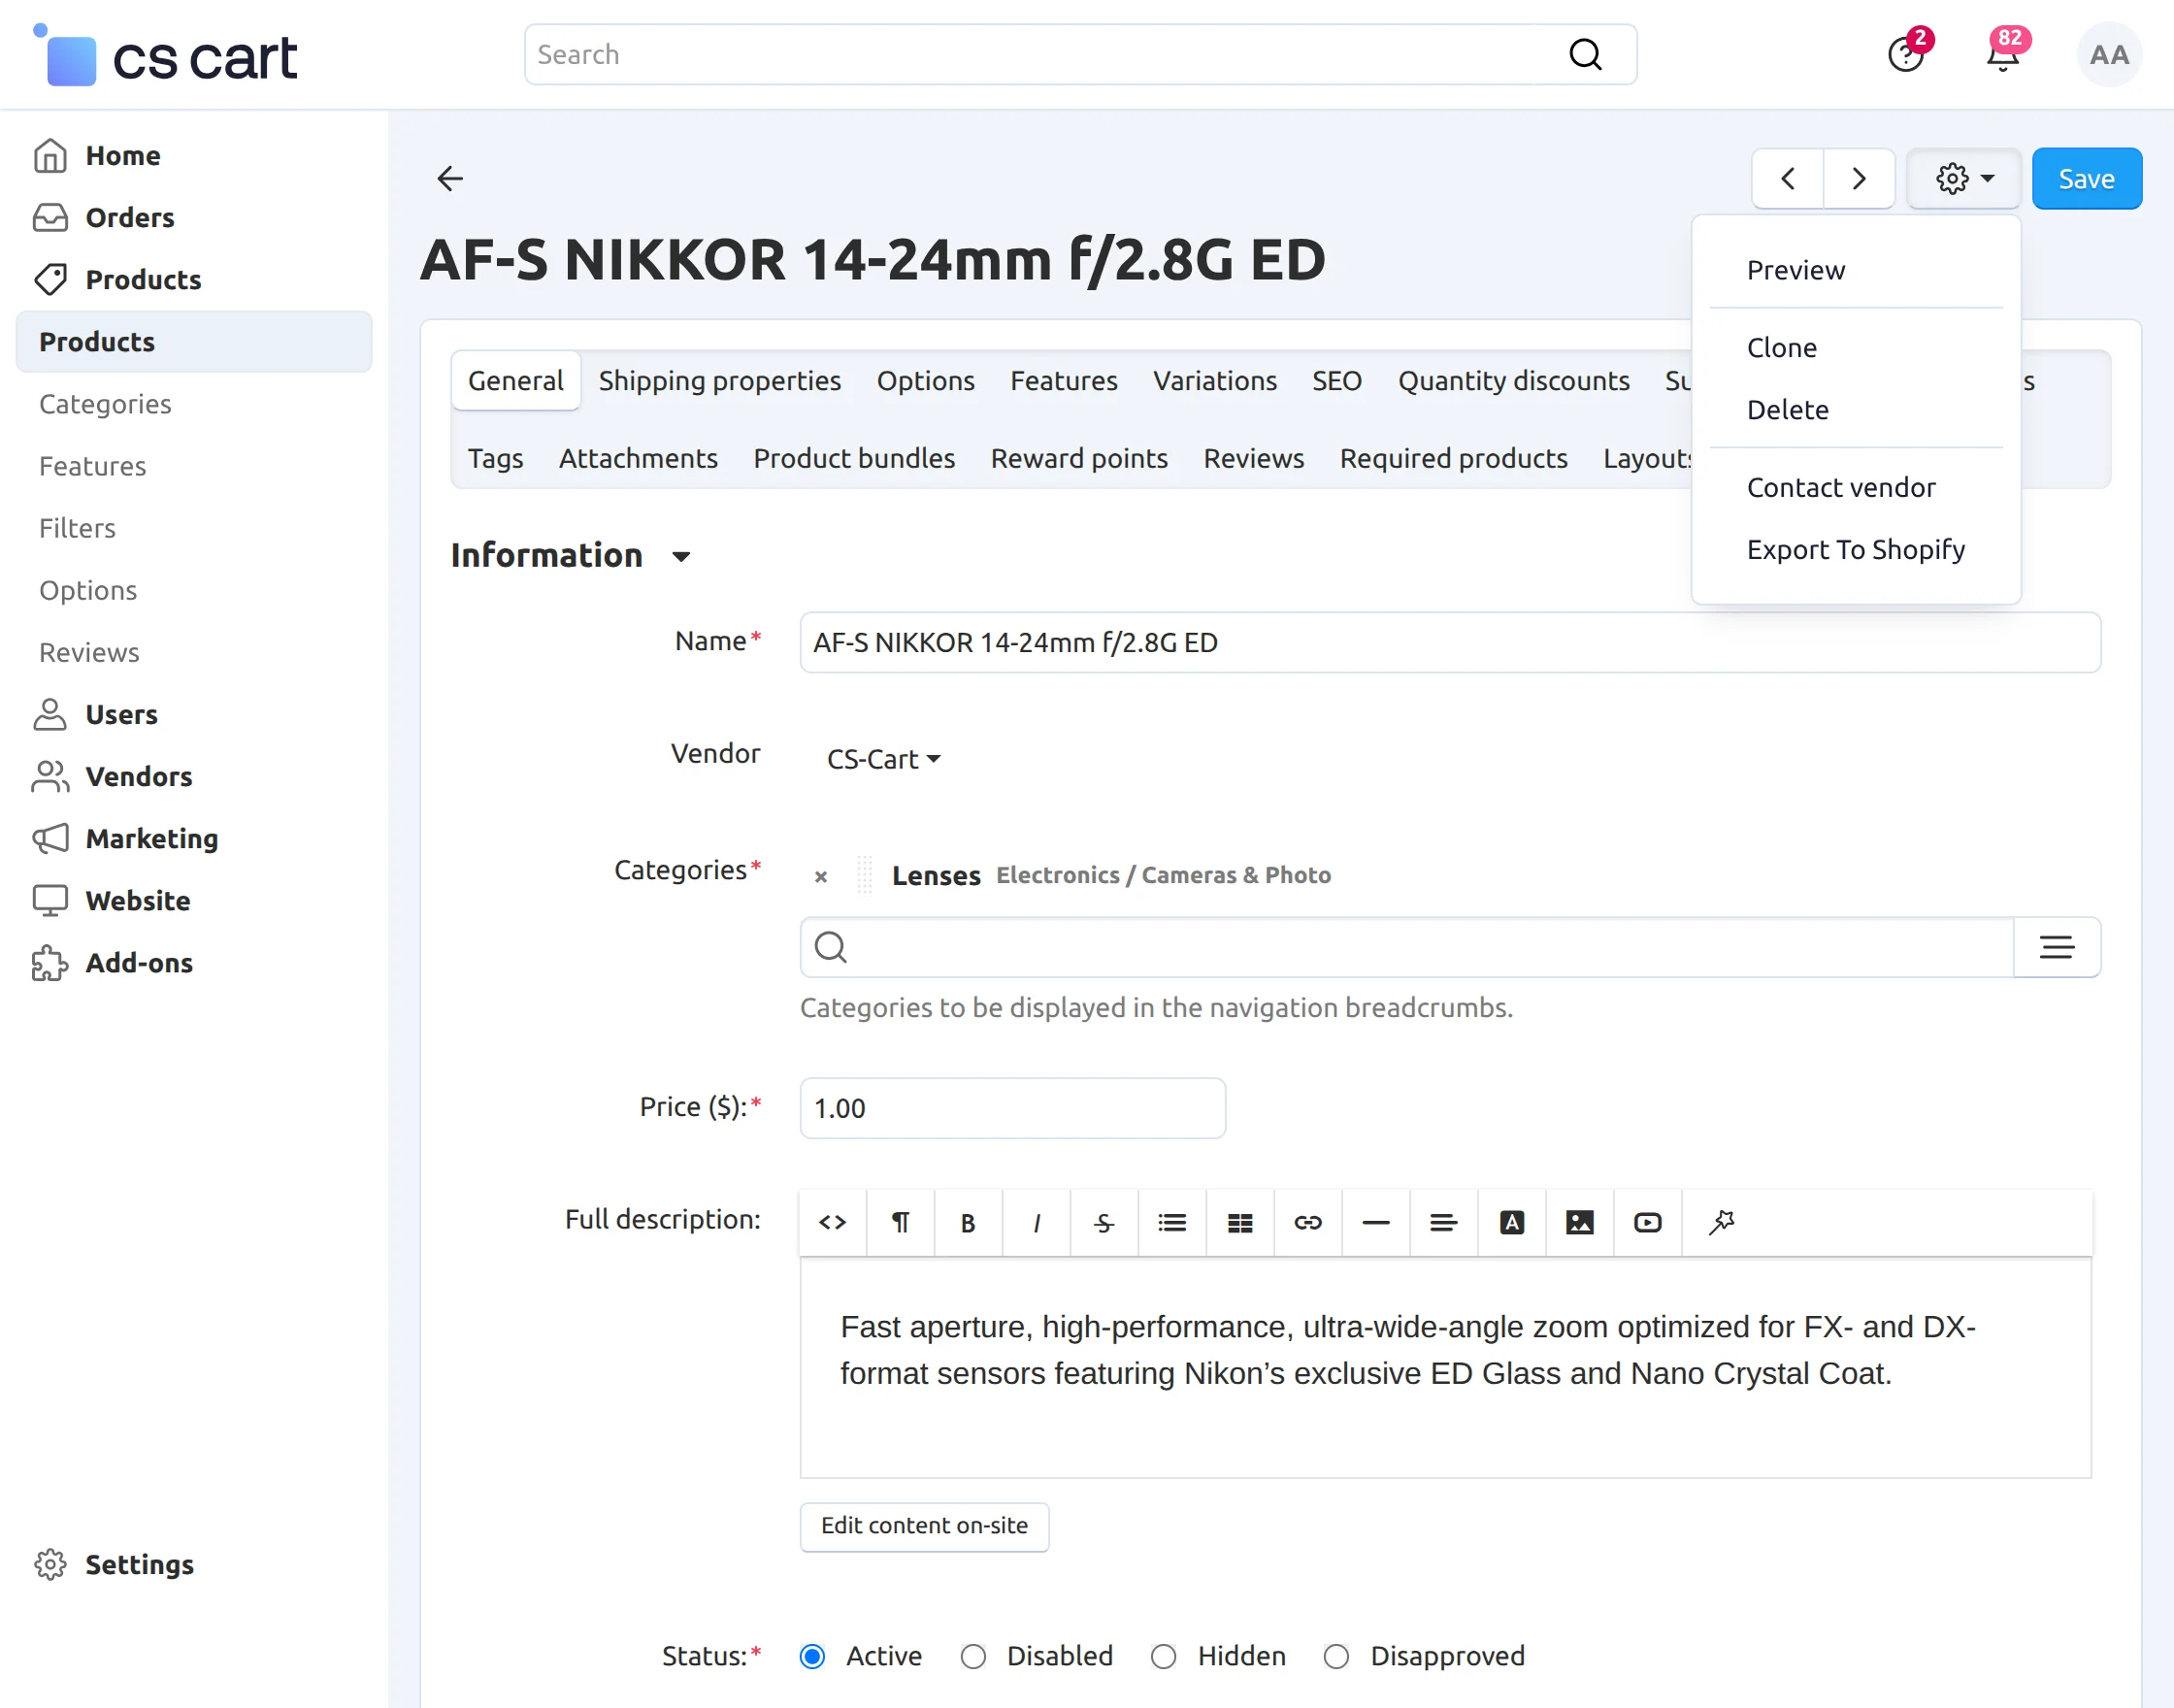
7. Export Products to Shopify Accounts:
The admin can go to the product page and select the setting option to export the product to the Shopify account, as shown in the image:
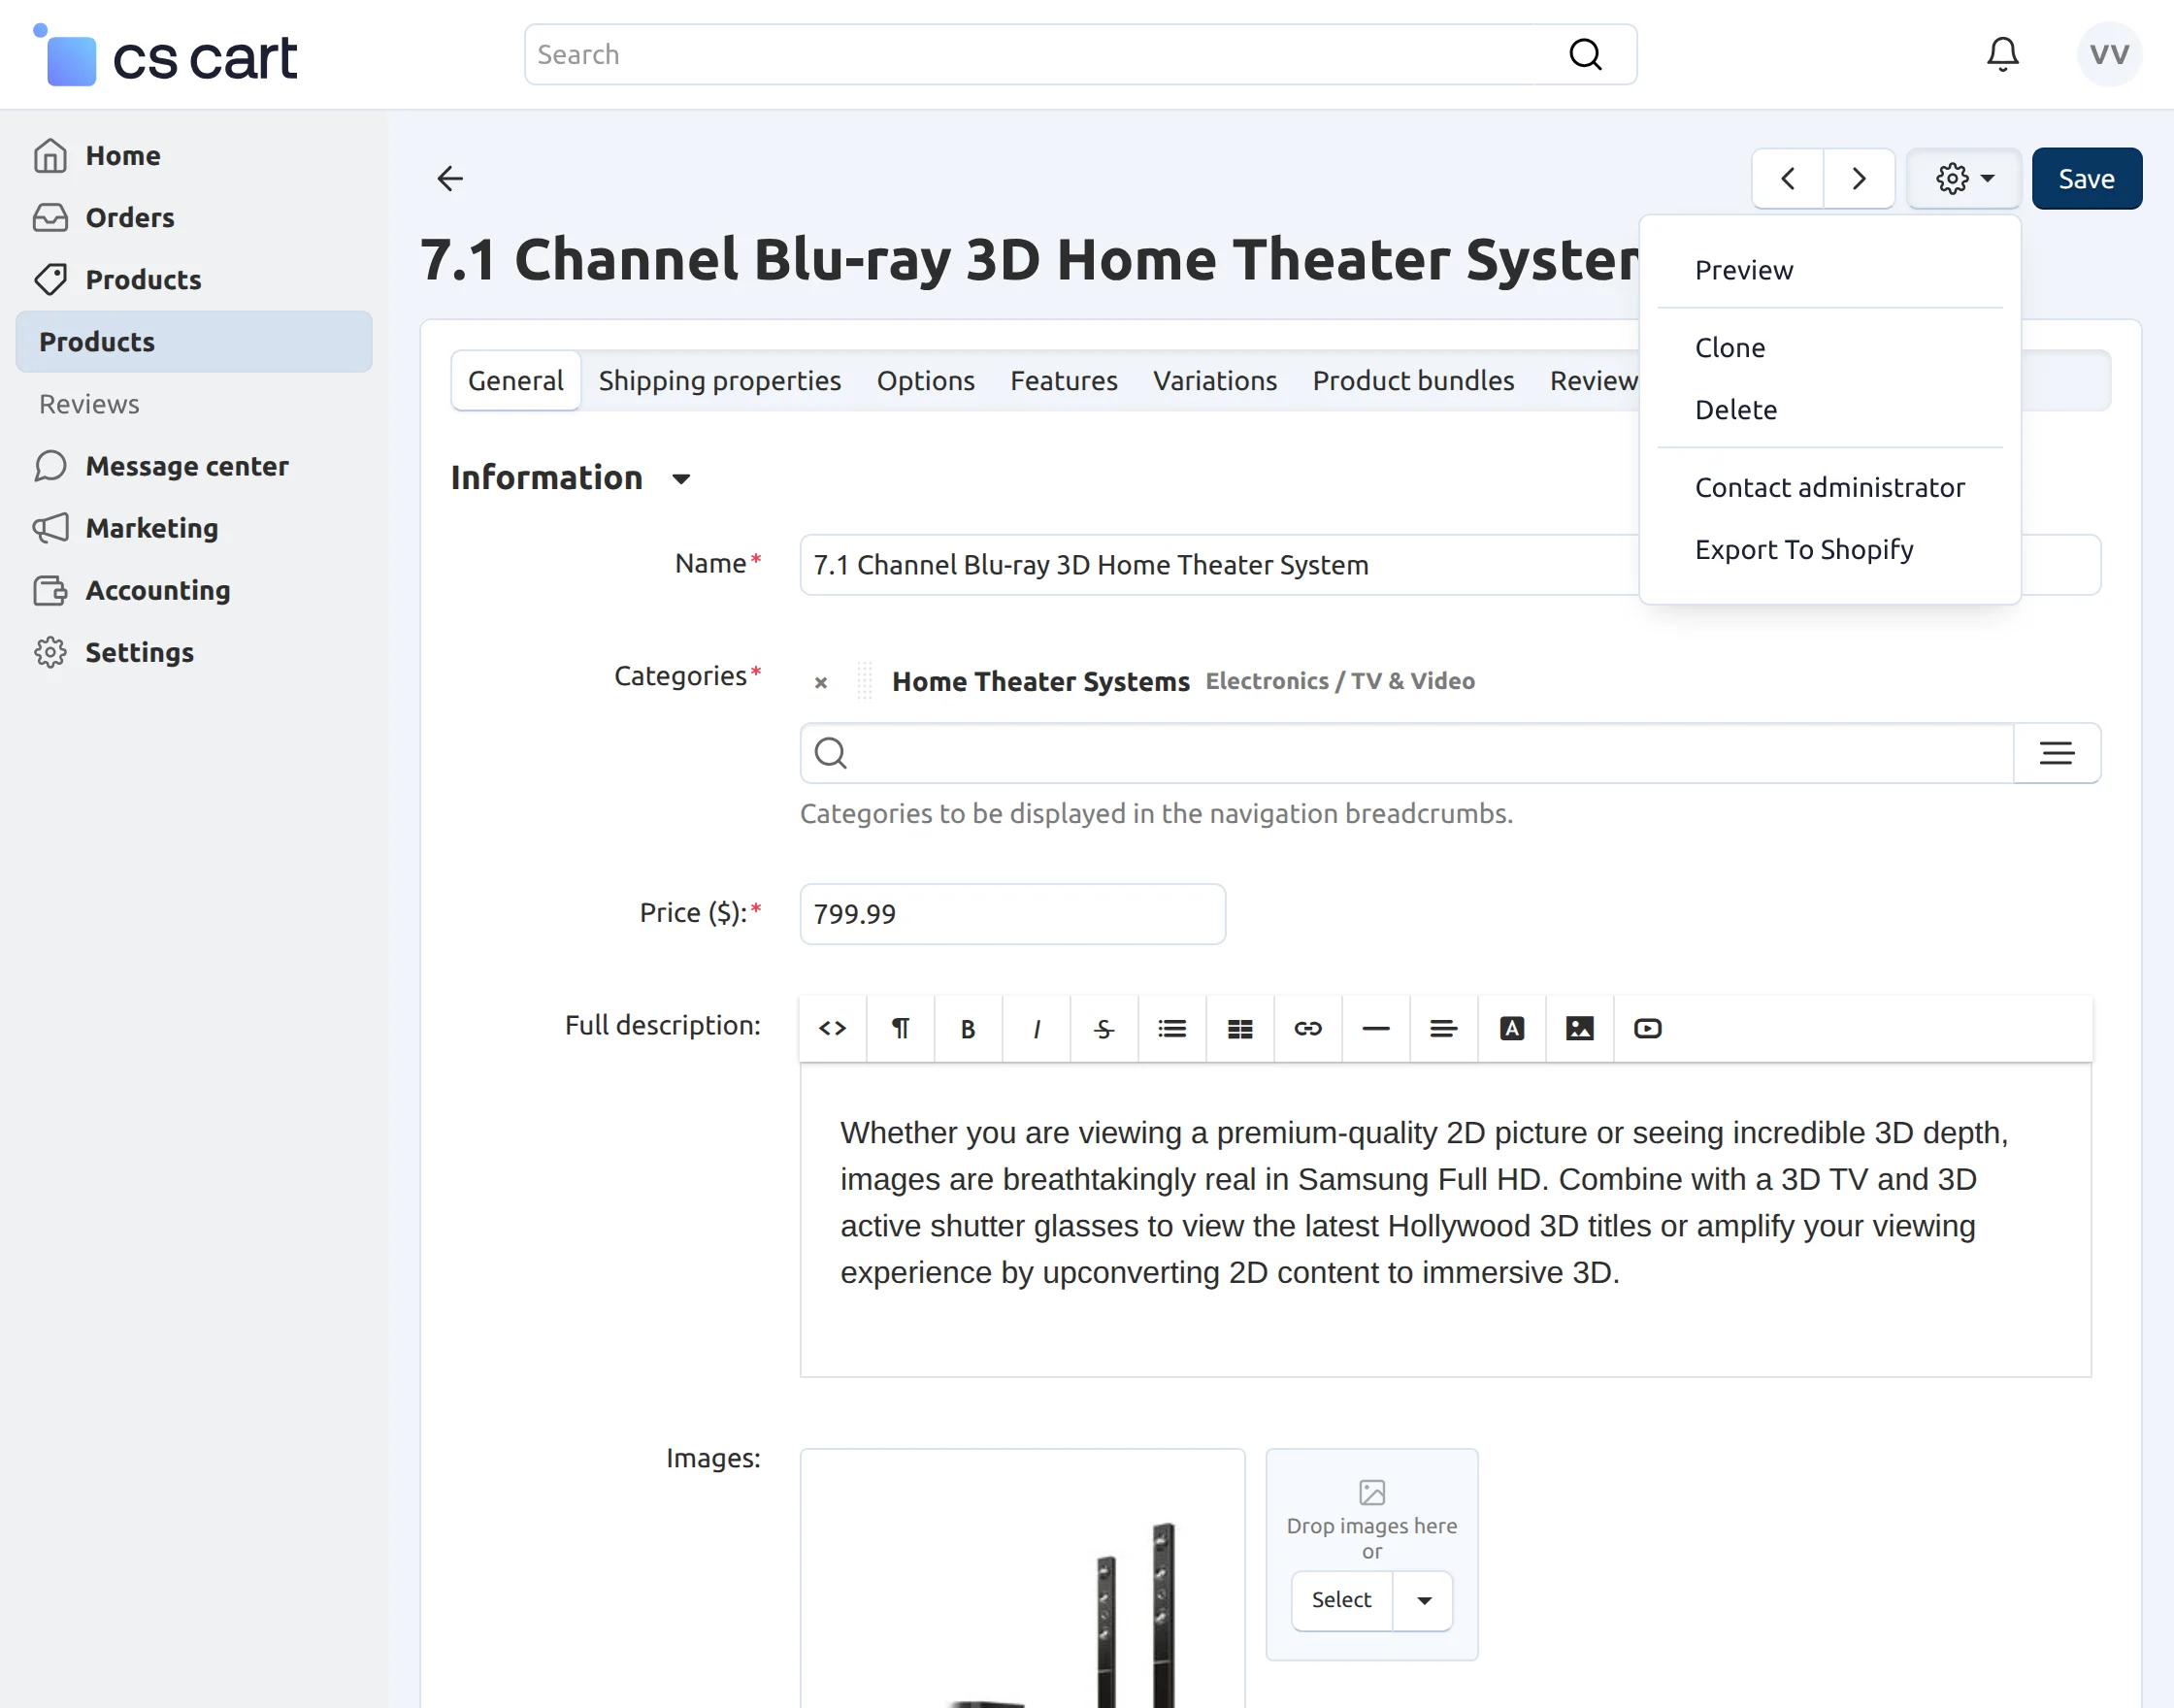
The vendor can also export the products to the Shopify account after clicking on the product page and selecting the setting option from the seller account, as shown in the image:
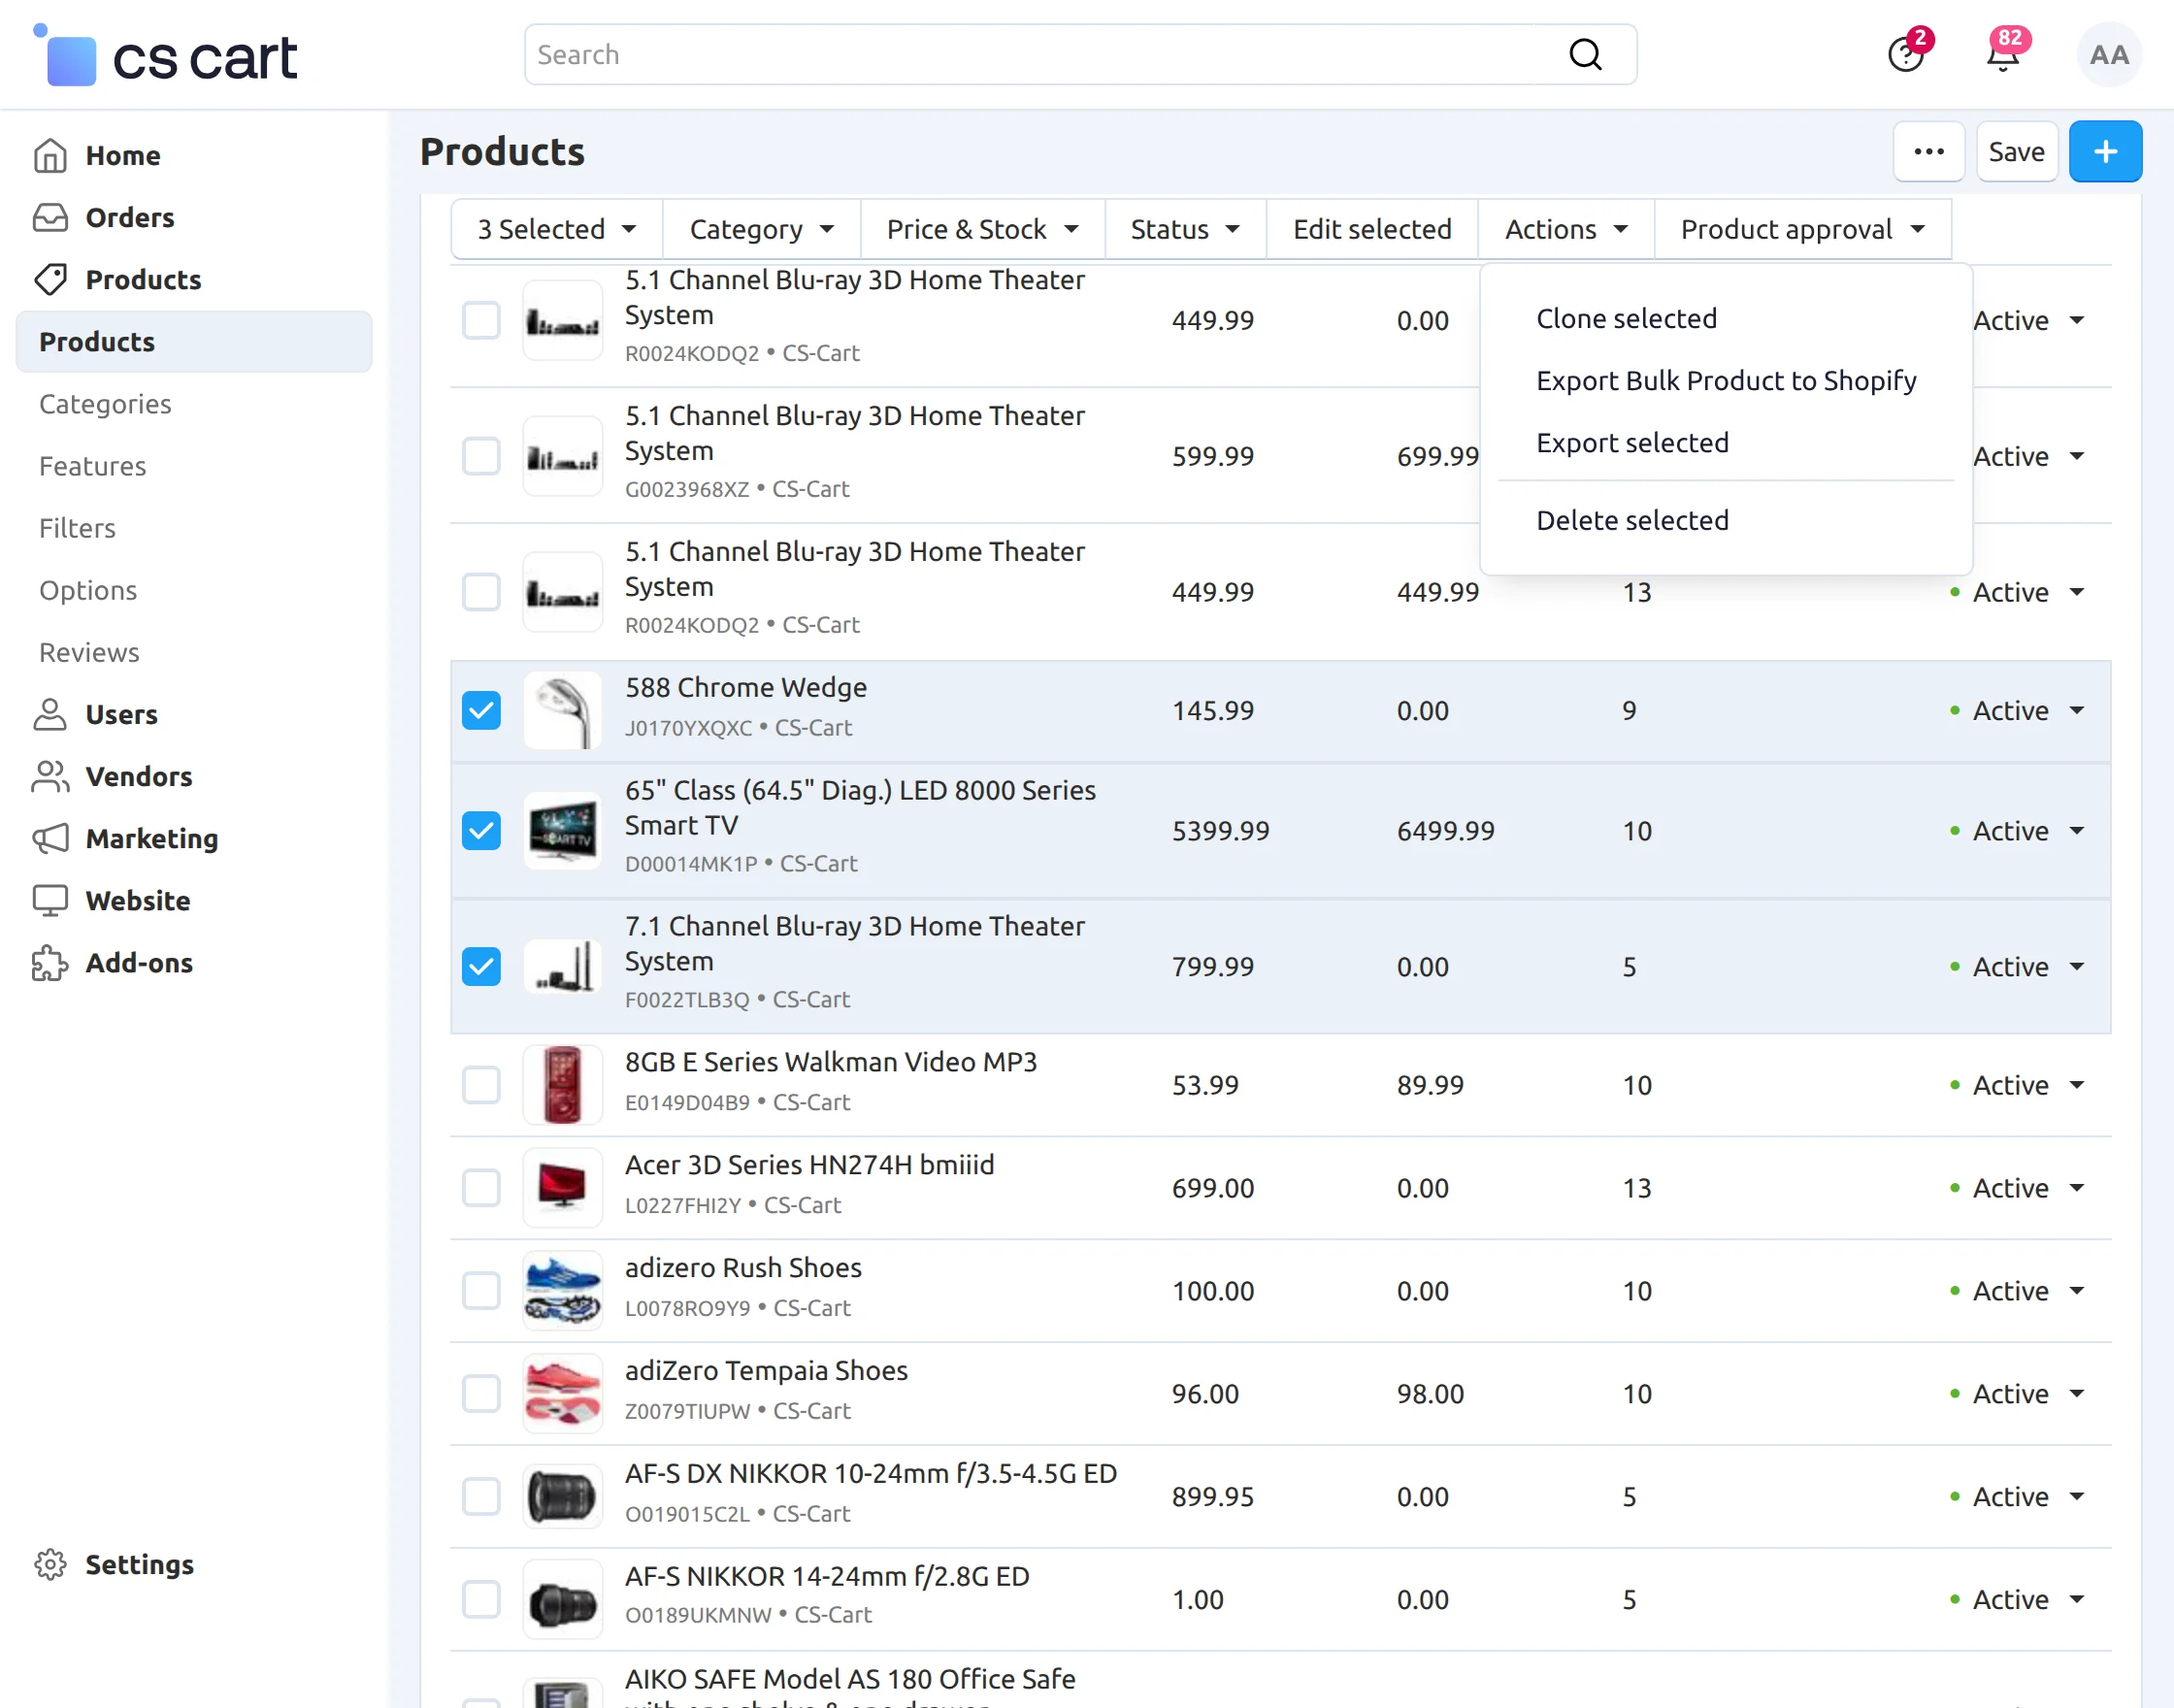
Export Multiple Products To Shopify Account: Admin can also export multiple products to their Shopify account by selecting products in bulk, as shown in the given image.
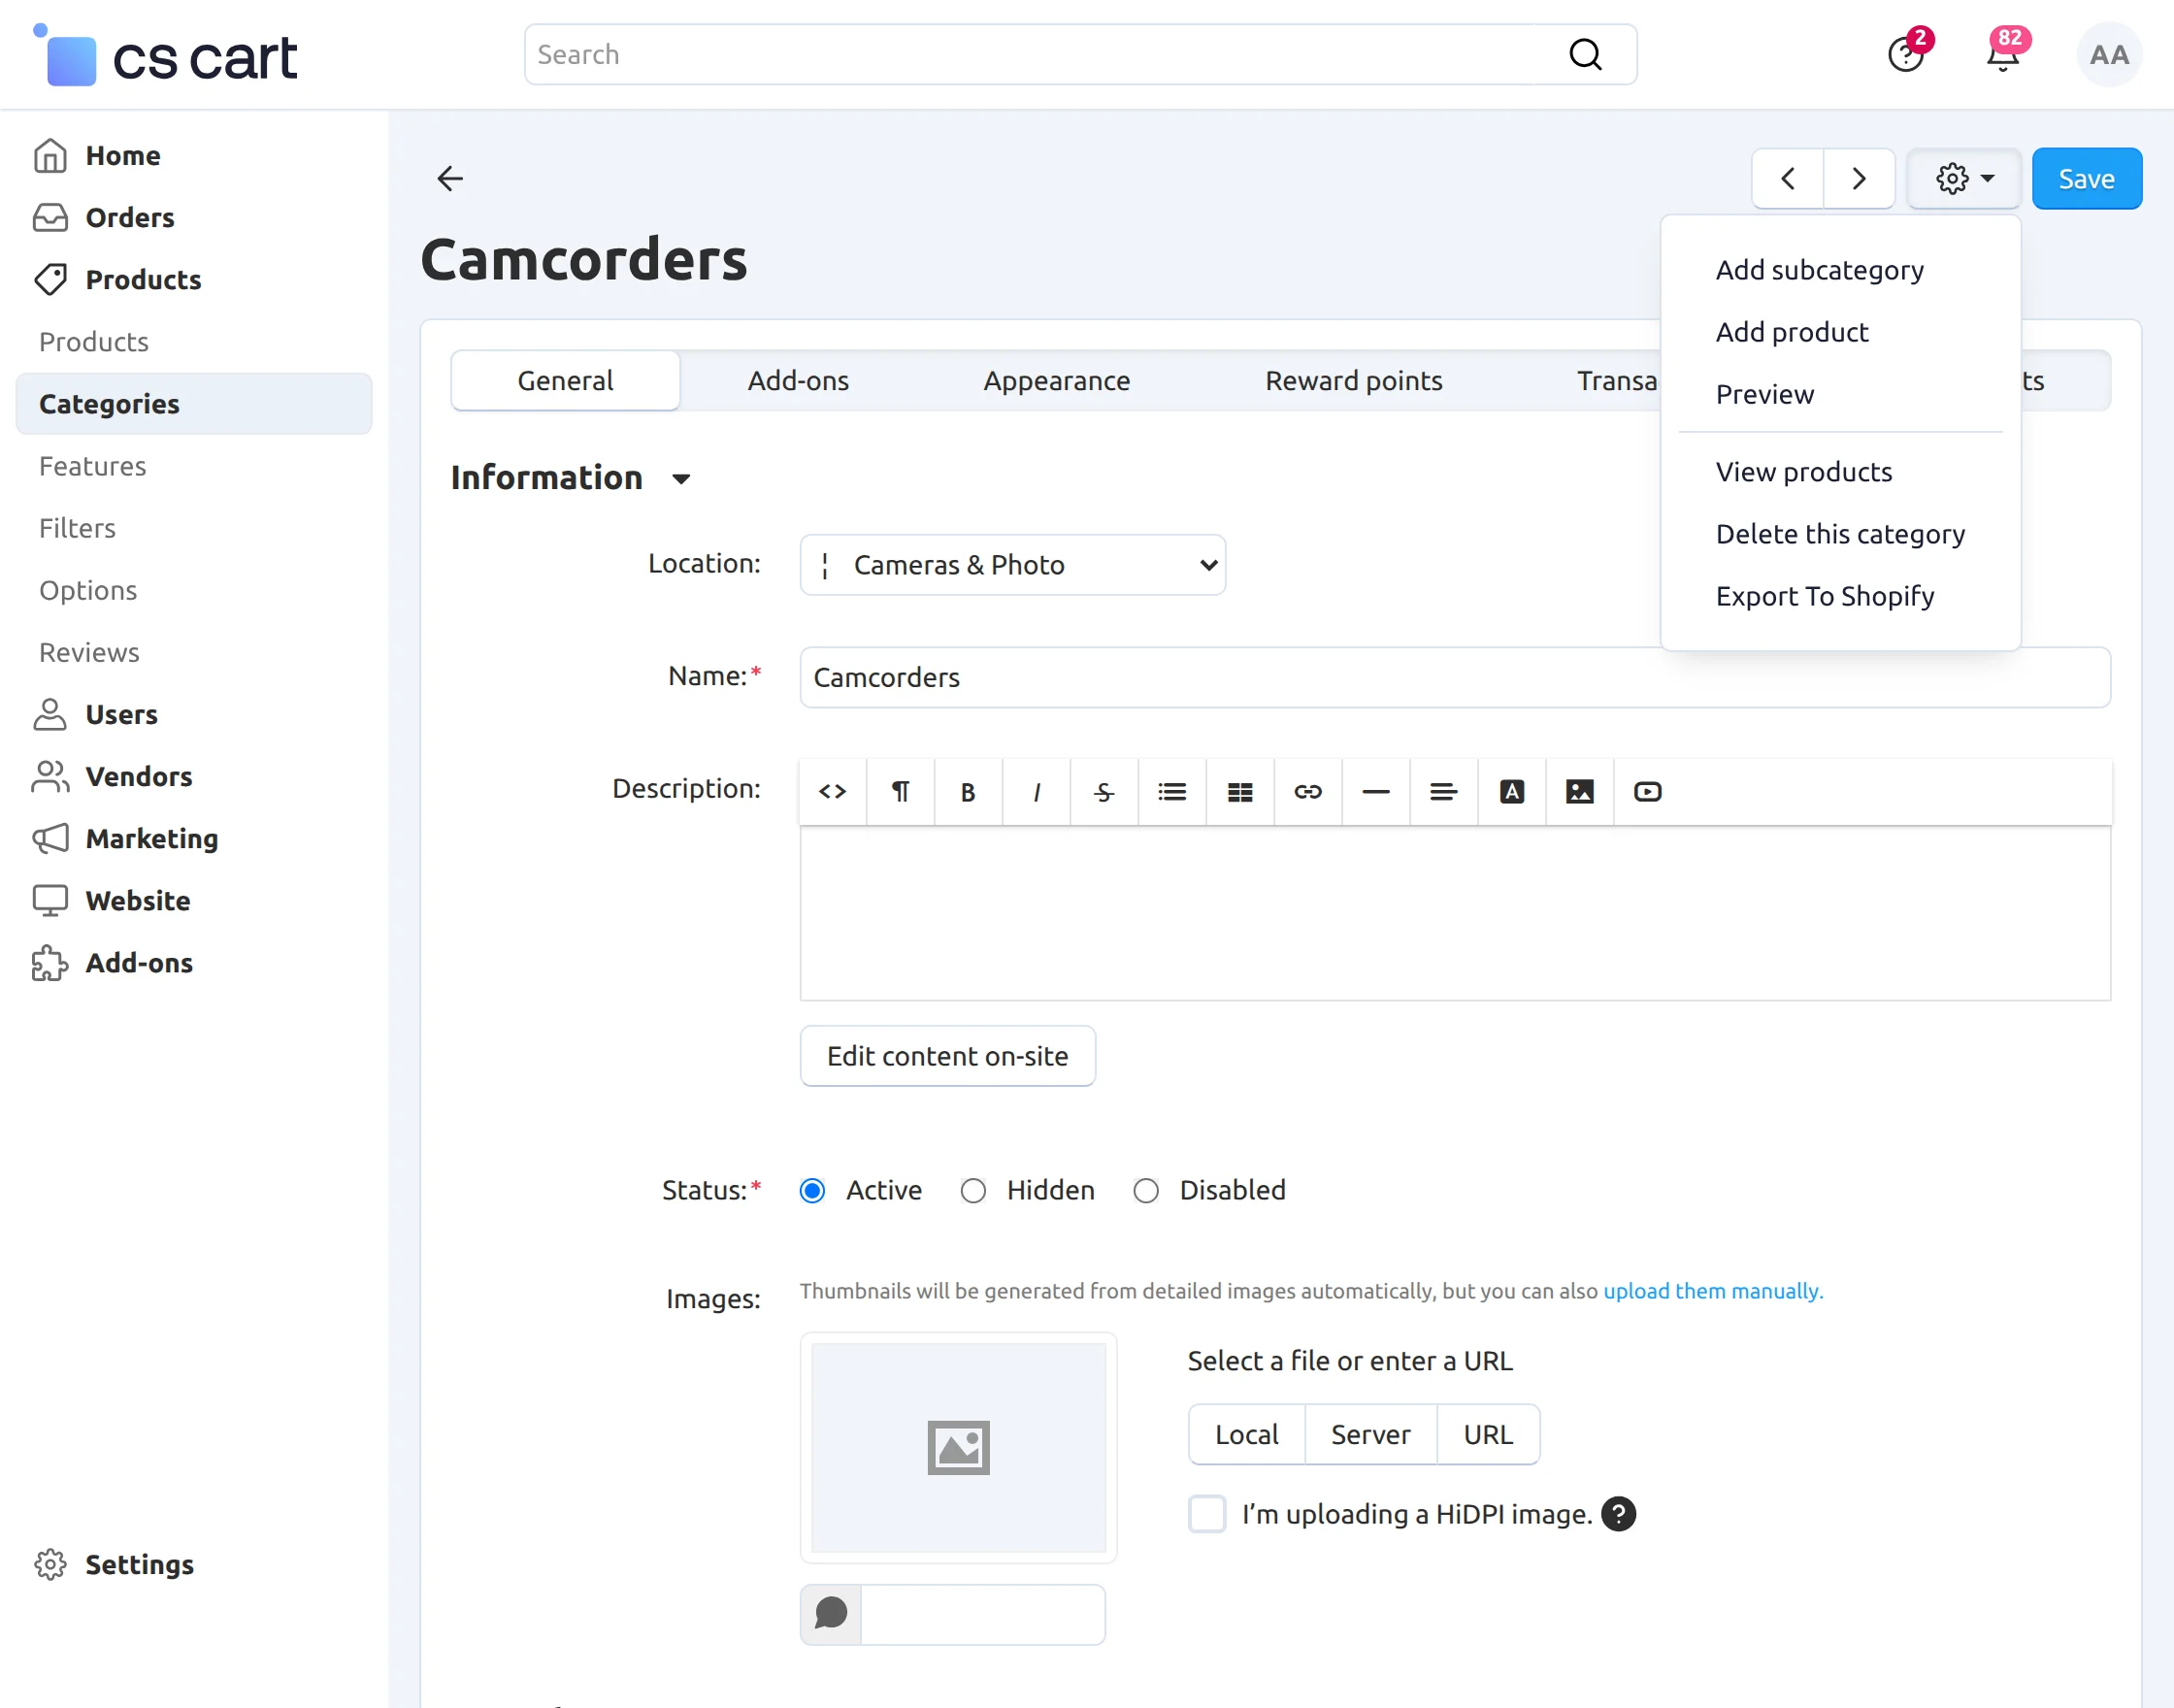
8. Export categories to Shopify Accounts:
The admin can export the categories to the Shopify account by clicking on Products>Categories and then clicking on setting option from the admin panel.
How to use RabbitMQ
First of all, log in to your RabbitMQ account by using your username and password.

After successfully logging in, you will see the RabbitMQ dashboard.

How to import products from Shopify to RabbitMQ
The following are the steps that will help you to import the products to RabbitMQ.
Step1: Category Map
The admin/seller will map the Shopify category with the CS-Cart category to import products. For mapping, go to your Shopify account -> settings button ->category map.
Step 2: After mapping, you will see that the tab Import All Products will be activated. Now, click on the Import All Products tab to start importing products to the RabbitMQ.
Step 3: Now, go the your RabbitMQ account, you can see that the connection is building up and the status of the state is running means importing all the products.

Step 4: When the products are imported to the Rabbitmq it generates multiple queues. Each queue has a maximum of 250 products.
In the below snapshot, you can see the ready queue value is 40 which means there are total of 40 queues have been generated.
As many products are imported, the number of queues will be unacked and it will keep updating until the value of the queue is 0.

Now, you can see that all the products are imported to the RabbitMQ of the respective category.
How to import products from RabbitMQ to CS-cart
For this, you have to run a command in the terminal.
curl -k --location --request GET '(url)/index.php?dispatch=wk_shopify_product.list_collection_products'

The log will be created for each of the importing products. In this way, all the products are imported successfully to the CS-Cart.
You can check the imported product from RabbitMQ to Cs-Cart as shown in the below snapshot.
Also, to import products from any other category, once the “curl” command was executed previously, they do not need to be executed again as they are already running and processing in the background.
The logs will be created for the importing products automatically as per the snapshot below,

In this way, all the products of the newly imported category will be imported successfully to CS-Cart.
Note: The RabbitMQ feature is not available within the live demo. However, you can use and test the RabbitMQ feature at your end.
Support:
If you have any questions, suggestions, or customization requests, feel free to contact us at [email protected] or submit a ticket at webkul.uvdesk.com.
Explore our premium-quality CS Cart Extensions to enhance your store functionality.
You can also explore our CS-Cart Development Services and Quality CS-Cart add-ons.
Current Product Version - 2.4
Supported Framework Version - (4.16.x , 4.17.x, 4.18.x, 4.19.x)
Are you satisfied about this connector between cs-cart multivendor and the Shopify stores? And need the Shopify sellers buy this addons too? Thanks