INTRODUCTION
Nextcloud Odoo Integration enables you to manage files remotely!!
Securing your business data on cloud storage is a challenge. You require a robust and leakproof system that can safeguard file(s) during transit and while on cloud storage. Moreover, cloud storage is accessible remotely from any device so you can check data as per your requirements.
Nextcloud is one of the trusted open-source cloud storage that secures data during transit and keeps it secure on the cloud as well. And when you integrate Nextcloud with your Odoo, you can store files securely on the cloud and increase your storage as well.
Nextcloud Odoo Integration lets you stay in control and access the file(s) and folder(s) at your convenience. Moreover, you can share files securely with Nextcloud encryption.
NOTE: Nextcloud Odoo Integration works in conjunction with the following module:
First, you must install this module in your system for the Nextcloud Odoo Integration to work correctly.
FEATURES
- Nextcloud Odoo Integration allows you to manage attachment type and size in the Nextcloud Cloud Storage.
- Create folder(s) and file(s) in the cloud.
- Manually export file(s) and folder(s) in the Nextcloud.
- Manage all the file(s) properly in the cloud.
- Use the scheduler to export file(s) to Nextcloud in real-time.
- Set a limit to the number of files allowed to export at a time.
- Create root folder(s) in Odoo to manage all file(s) and folder(s) inside it.
- Export root folder(s) directly to Nextcloud.
- Advance filters to differentiate the same object into different folder(s) in Odoo.
- You can easily import file(s) or folder(s) of a specific folder to Odoo.
- Additionally, you can import data to Odoo in bulk and store all the attachments in a specific object (the directory should be mapped properly).
- Dynamically sync data model-wise or record-wise from Odoo to the cloud.
- Odoo backend records each synchronization history.
- Dynamic dashboard to track data of Nextcloud in Odoo.
- Directly import or export data from the dynamic dashboard.
- Clickable data cards to view grouped file(s) and folder(s) for easy tracking.
INSTALLATION
- Once you purchase the App from Webkul store, you will receive the link to download the zip file of the module.
- Extract the file on your system after the download finishes. You will be able to see a folder named- ‘nextcloud_odoo_integration.’
- Copy and paste this folder inside your Odoo Add-Ons path.
- Now, open the Odoo App and click on the Settings menu. Here, click on Activate the Developer Mode.
- Then, open the Apps menu and click on ‘Update Modules List.’
- In the search bar, remove all the filters and search ‘nextcloud_odoo_integration.’
- You will be able to see the module in the search result. Click on ‘Install’ to install it.
WORKFLOW
Let’s see how to configure and use the Nextcloud Odoo Integration module.
CONFIGURATION
1. Firstly, Log in to the Odoo backend and locate ‘Cloud Storage Integration> Connection> Cloud Connections> Create.’

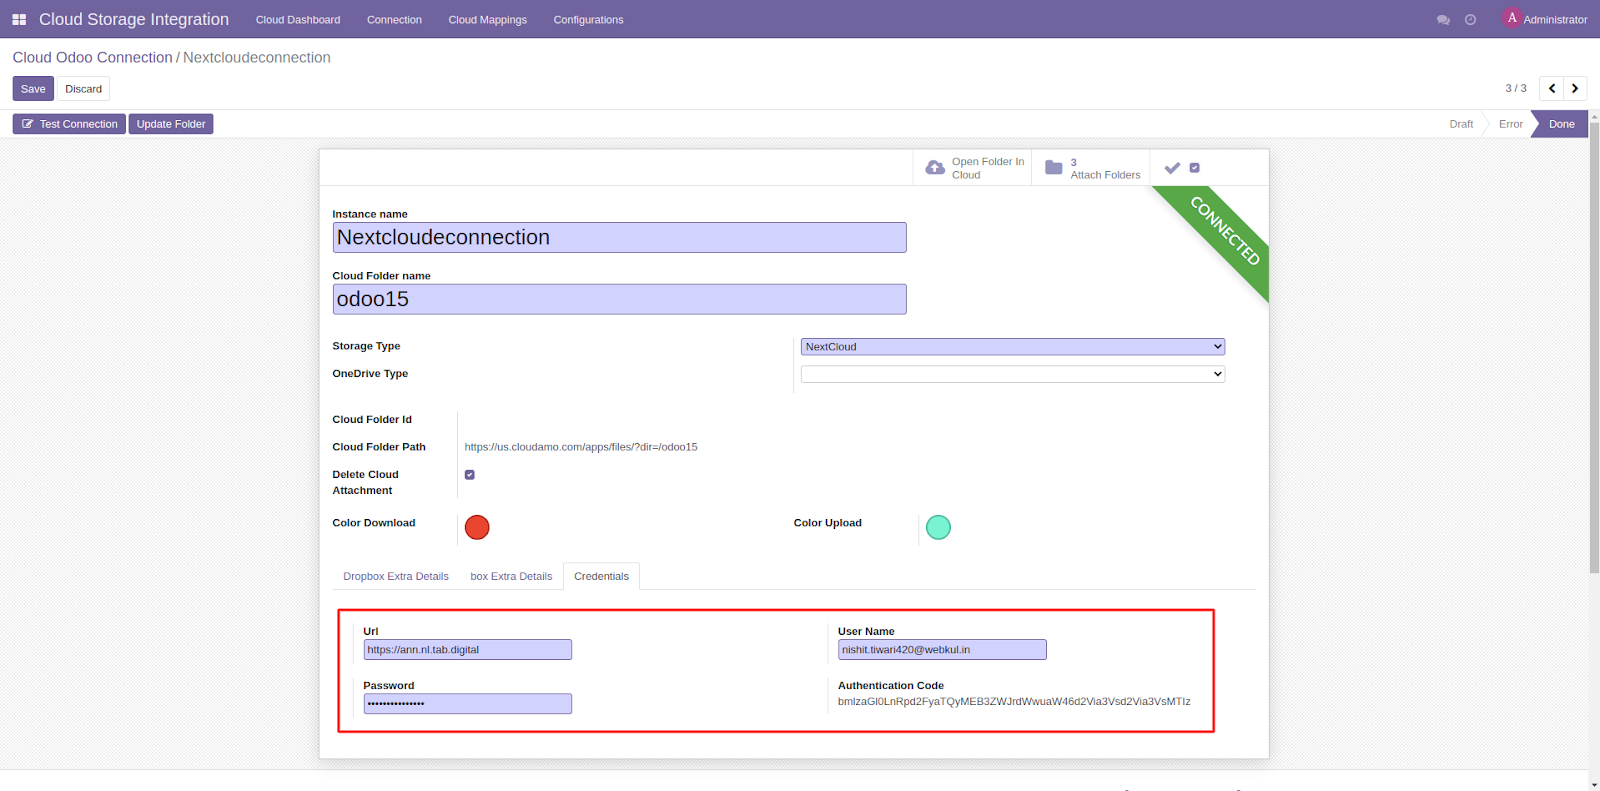
2. In the form, fill in the following details as follows:
Instance name- The connection instance name you want to display on Odoo.
Cloud Folder Name- This will be the folder that Odoo will create at the Nextcloud end for storing data.
Cloud Folder Path- This path will be automatically created once the connection establishes between Odoo and Nextcoud.
Delete Cloud Attachment- Ticking this box will allow you to delete the attachment from Odoo.

3. After filling in the path and details, enter the details in the ‘Credentials’ Tab below, which will let you connect Nextcloud with Odoo. It includes:
URL: Here, you need to enter your account URL of Nextcloud.
User Name: Enter your Nextcloud username by which you use the Nextcloud Account.
Password: Enter your Nextcoud password in this box.
Authentication Code: This code will be auto-generated upon saving the connection details.
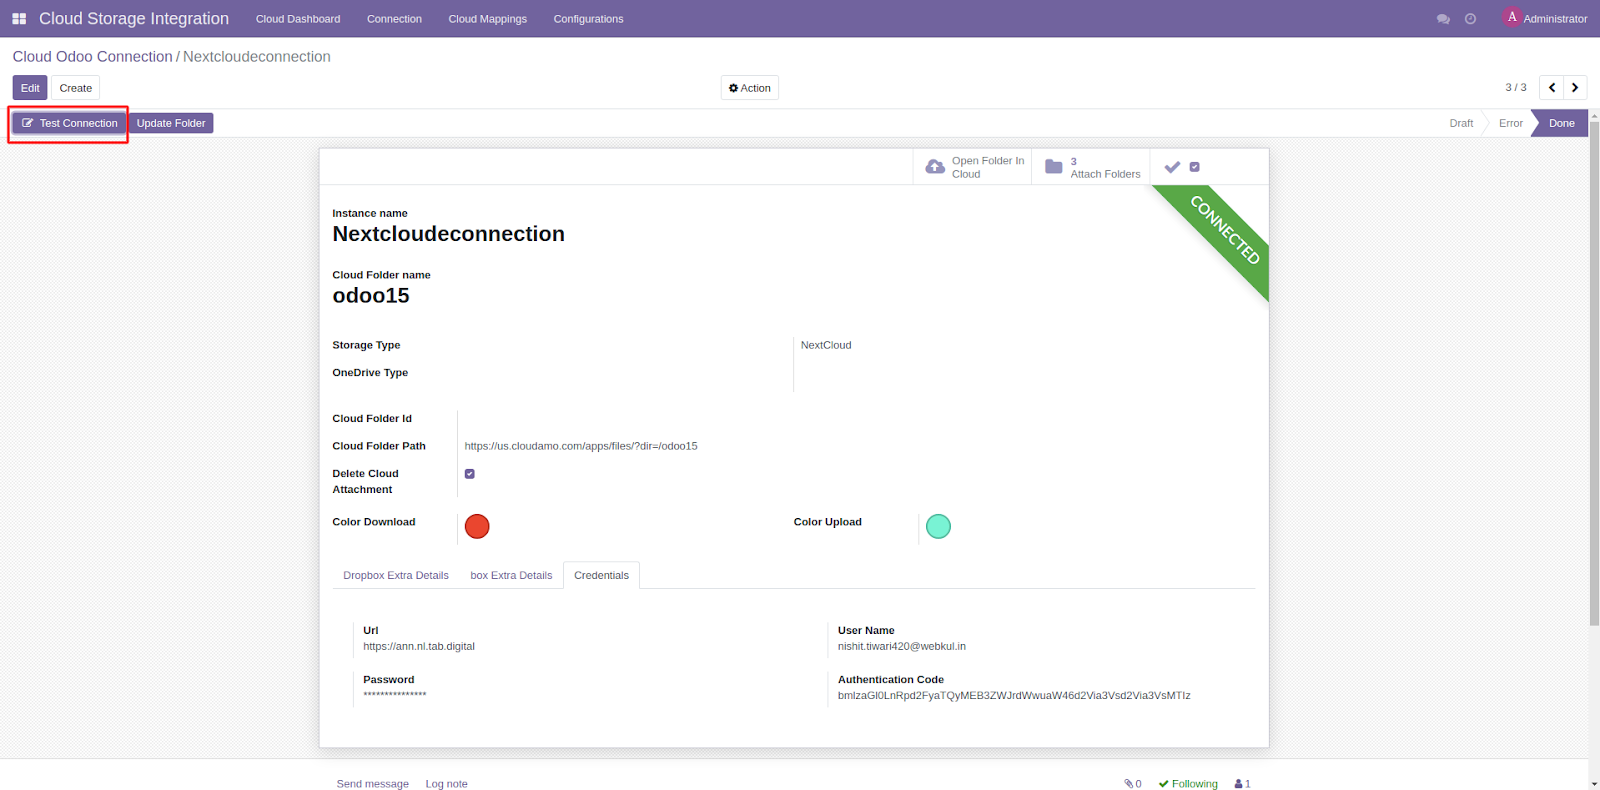
4. After saving, you can test the connection with the ‘Test Connection’ button.
5. After that, go to ‘Settings> Odoo Cloud Storage’ and configure the cloud storage settings.
Cloud Connection: Select the connection to which you want to export the attachment in Real Time.
Create Odoo Attachment: Ticking this box will create an attachment folder in Odoo.
Read File From Cloud: By ticking this box, you will allow Odoo to read files from Odoo.
Export Attachment Real Time: Ticking this box will let you export attachments to Nextcloud in real-time.
Bulk Export Attachment Limit: In this box, enter the number of attachments you export to the Nextcloud storage.
Once done, click the ‘Save’ button to save the changes.

CREATING A FOLDER AND MAPPING ON THE CLOUD
6. Go to ‘Cloud Mappings> Folder> Create.’

7. Now, fill in the following details:
Folder Name: Here, fill in the name by which you want to create a folder on Nextcloud.
Cloud Structure: This will display the cloud folder structure (such as Odoo/Sales/Sales Order).
Parent Folder: If the folder you are creating is part of any parent folder, then select that product from the dropdown.
Is Default: Ticking this box will make this folder the default folder for the selected Model.
Model Name: This will allow you to select the model for which you want to create a folder in Nextcloud.
Parent Folder Id Val: If you add a parent folder then in this field you have to provide its folder ID value.

8. In the Filter domain, you can add a model domain. For this, you have to select the ID, Value (Contains, does not contain, etc.), and number.
Once done, click the ‘Save’ button to save the data.

9. After saving, click the ‘Create Folder’ button to create a folder on Nextcloud.

9.1 On successful folder creation at Nextcloud, the system will show a popup with a message informing about the folder creation.

CREATING ACTION FOR UPLOAD AND DOWNLOAD, UPDATE FOLDER, AND EXPORT ATTACHMENT
10. Through the ‘Action for Upload and Action for Download,’ you can add an export and import option in that particular model.

10.1. You can view the ‘Export/Update Attachments and Import Attachments’ option available in that particular module after creation.

10.2. With the ‘Update Folder’ button, you can update any change in the folder. And the ‘Export Attachment’ button allows you to export attachments to Nextcloud.
FILE MAPPINGS IN ODOO
11. After creating and mapping the folder, move to ‘Cloud Mappings> File’ and open any of the mapped file data.

11.1. On the page, you can view the data displayed in the screenshot below.

IMPORTING AND EXPORTING DATA
12. From the Cloud storage dashboard, you can import files and folders by clicking on the ‘Import’ button.
Similarly, the ‘Export’ button allows you to export files and folders from Nextcloud to Odoo. The ‘Add’ button enables you to add a new cloud connection to Odoo.
In addition, on the dashboard, you can view stats of different data via the available charts and graphs.

13. On clicking the Import or Export button, a pop-up will appear on the screen where you have to select ‘Cloud Connection’ if you have multiple clouds configured.
Select Folded: This will show you all the created folders from where you can import or export data.
Action: This will be a fixed field based on your export/import selection.
Once done, click the ‘Action Now’ button to perform the import or export function.

OTHER ODOO INTEGRATION MODULES
- Odoo OneDrive Integration
- Odoo Twilio Whatsapp Integration
- Google Drive Integration
- Odoo Social Catalog Integration
- Odoo DHL Shipping Integration
- Aramex Shipping Integration
NEED HELP?
Hope you find this guide helpful! Please feel free to share your feedback in the comments below.
If you still have any issues/queries regarding the module, please raise a ticket at https://webkul.uvdesk.com/en/customer/create-ticket/.
Also, please explore our Odoo development services & an extensive range of quality Odoo Apps.
For any doubt, contact us at [email protected].
Thanks for paying attention!!
Current Product Version - 1.0.0
Supported Framework Version - V15, V14, V13, V12

Be the first to comment.