INTRODUCTION
Odoo Hotel Management System is an easy solution to manage hotel bookings, rooms, and guest services. Consequently, it helps hotels run smoothly with less effort.
Odoo Hotel Management System allows staff to manage reservations, check-ins, check-outs, billing, and housekeeping. All tasks can be done quickly in one place.
Additionally, Hotel owners can manage many properties in a single system. They can also track occupancy using dashboards and Kanban views.
FEATURES
- The module provides multiple dashboards, including Front Desk Dashboard, Owner Dashboard, and Room Dashboard, allowing you to easily view and analyze details as per your role and requirements.
- You can create and assign housekeeping tasks, track their progress, and once the task is complete, mark the housekeeping task as done.
- You can add and manage multiple rooms efficiently without any hassle.
- With the Allotted Services option, you can create and assign services, which can be set as either paid or unpaid based on requirements.
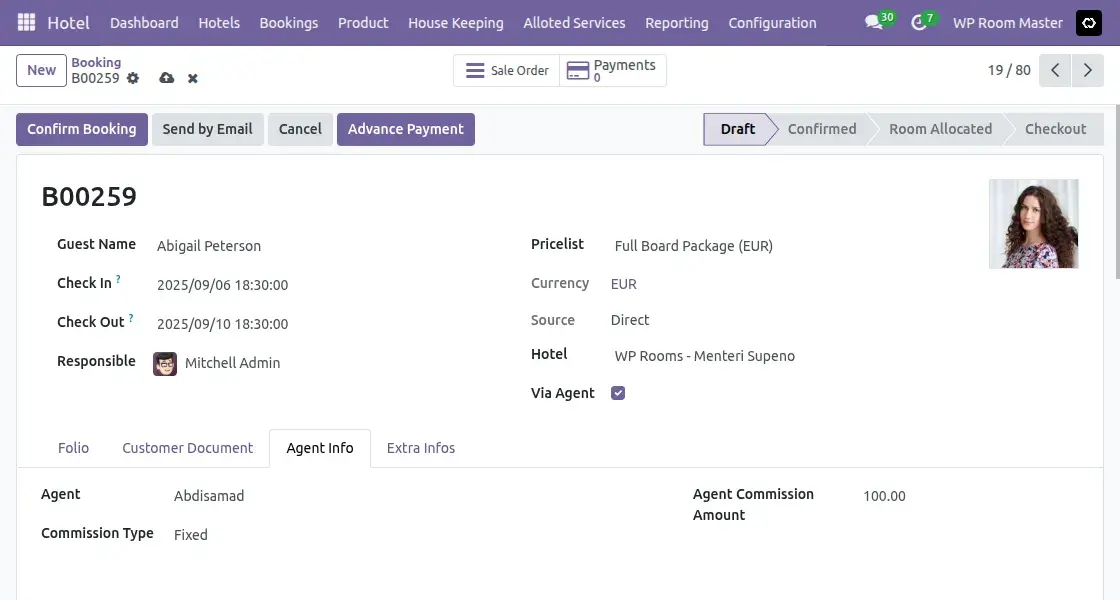
- Bookings coming through agents can be marked as via agent, and the commission can be set either as a fixed amount or a percentage for clear and transparent calculation.
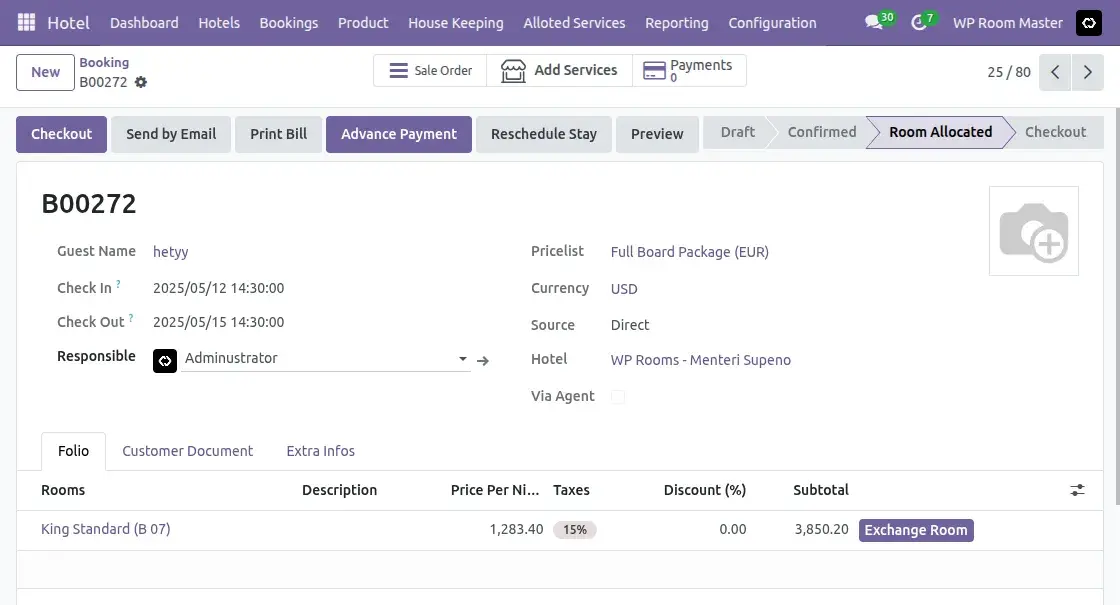
- Room exchange option available even after check-in, with updated charges and smooth booking adjustment.
- Easily check real-time room availability to manage bookings as well as occupancy efficiently.
- Customers can give ratings and comments after checkout, which admins can view and manage by hotel or order.
- Advance Payment lets hotels collect a pre-payment to confirm bookings. It’s configurable per hotel and auto-linked to the booking.
- Bookings can also be created for customers directly from the backend.
INSTALLATION
- Once you purchase the App from Webkul store, you will receive a link to download module’s zip file.
- Extract the file on your system after download finishes. As a result, you will be able to see a folder named- ‘hotel_management_system’
- Copy and paste this folder inside your Odoo Add-Ons path.
- Now, open Odoo App and click on the Settings menu. Here, click on Activate Developer Mode.
- Then, open Apps menu and click on ‘Update Modules List.’
- In the search bar, remove all the filters and search ‘hotel_management_system’
- You will be able to see module in the search results. Click on ‘Activate’ button to install it.
WORKFLOW
Admin View
After installing Odoo Hotel Management System, you’ll see
1. Dashboards overview
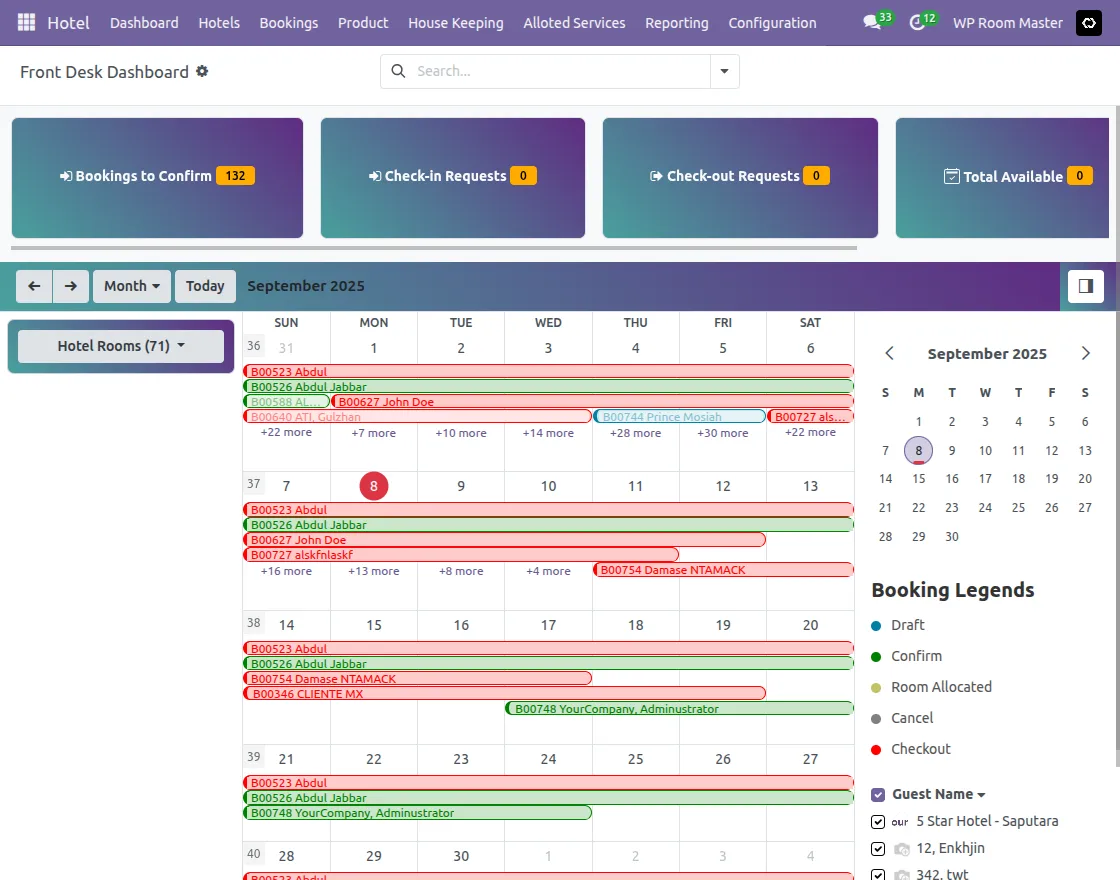
- Front Desk Dashboard
Gives a quick overview of bookings to confirm, check-in and checkout requests, total available rooms, and occupancy status.
Also, with a built-in calendar and booking legends, staff can track room allocations and manage daily operations in real time.
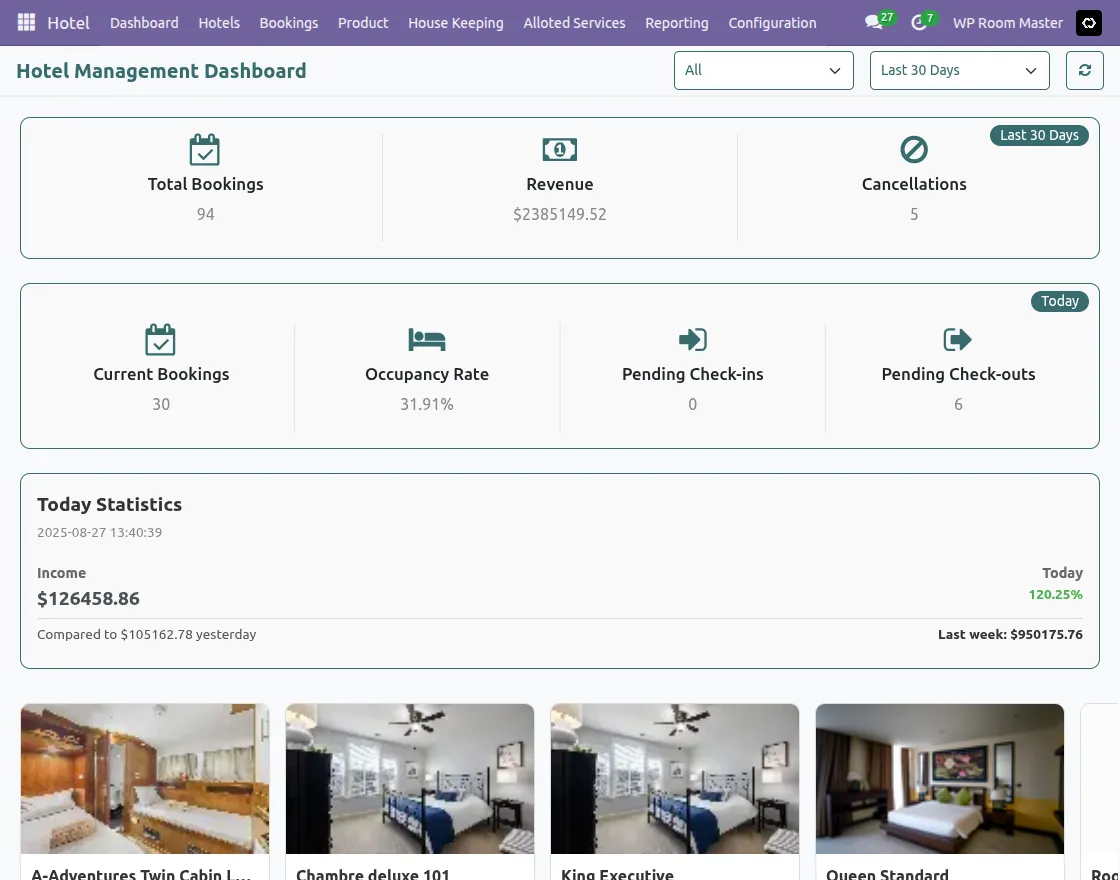
- Owner’s Dashboard
Displays key hotel metrics such as total bookings, revenue, cancellations, occupancy rate, pending check-ins/checkouts, and income trends over different periods. Also helps hotel owners analyze performance at a glance.
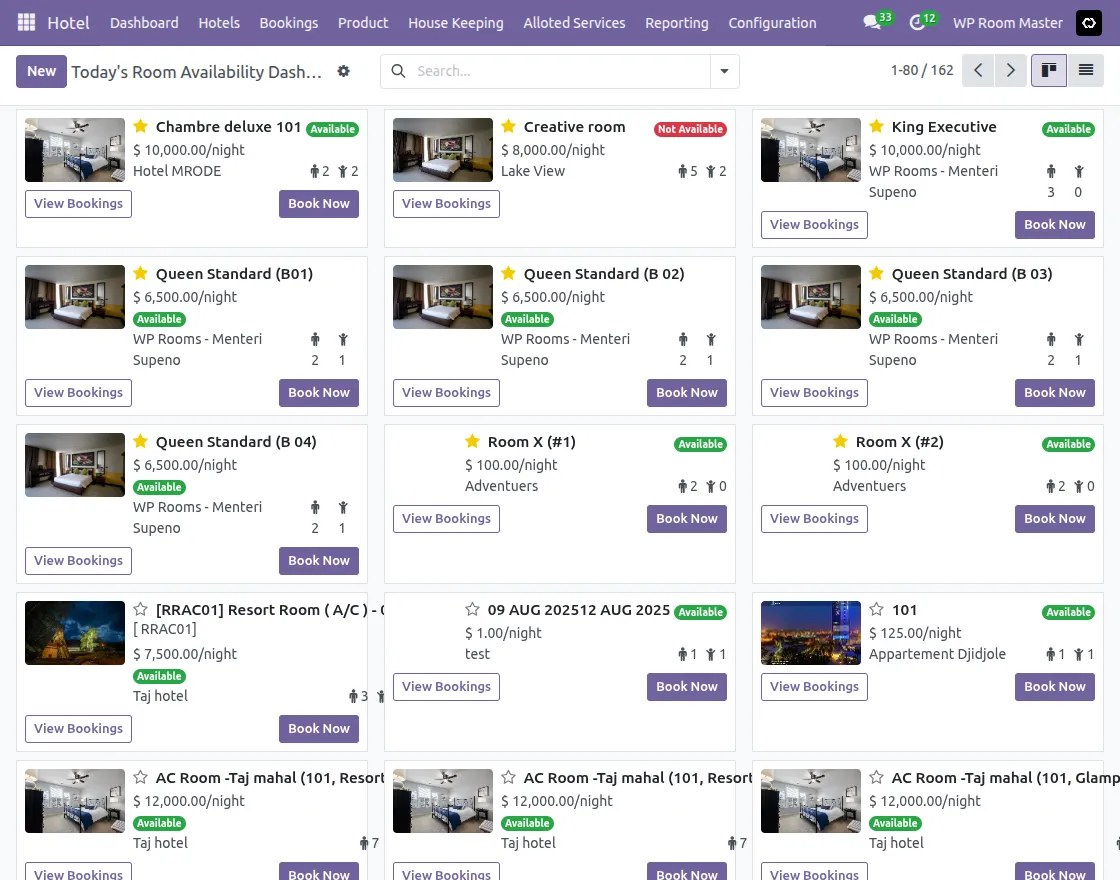
- Room Dashboard
Shows all available rooms with live status, pricing per night, and occupancy capacity. Additionally, Staff can view bookings, check availability, and manage reservations directly from this dashboard.
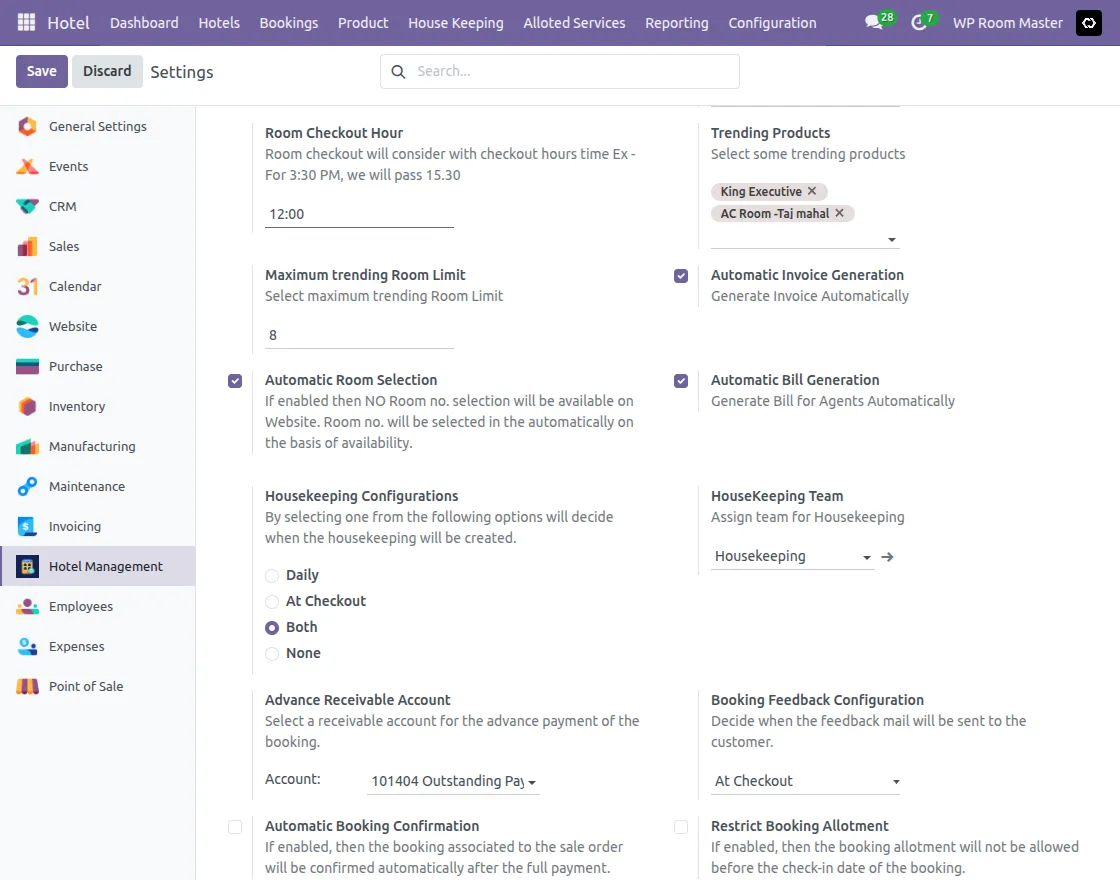
2. Set Hotel Configuration
Thereafter, to set the hotel configuration, navigate to Hotel → Configuration → Settings → Hotel Configuration. Here, set hotel details and assign housekeeping teams as needed.
3. Manage Hotels
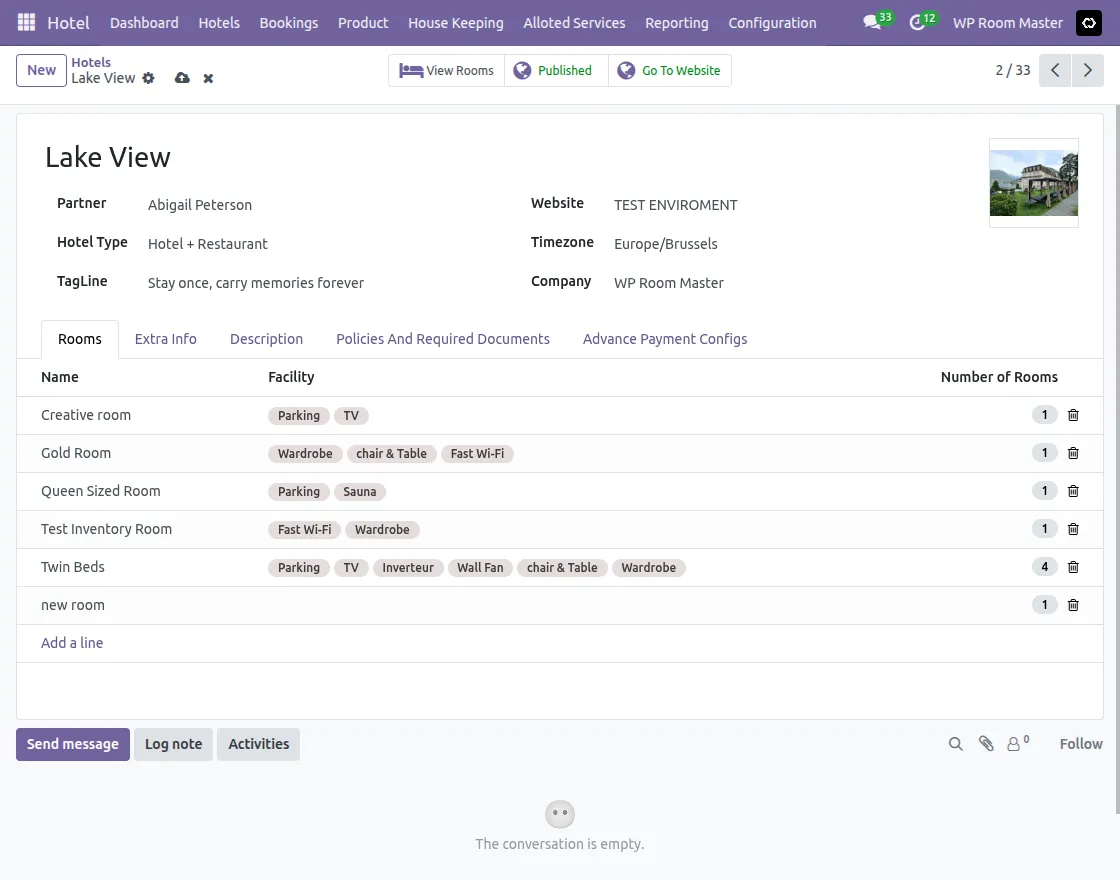
- Create Room
Add the room name along with description, as well as extra information. Then configure details like pricing, room category, and other essential information for smooth management.
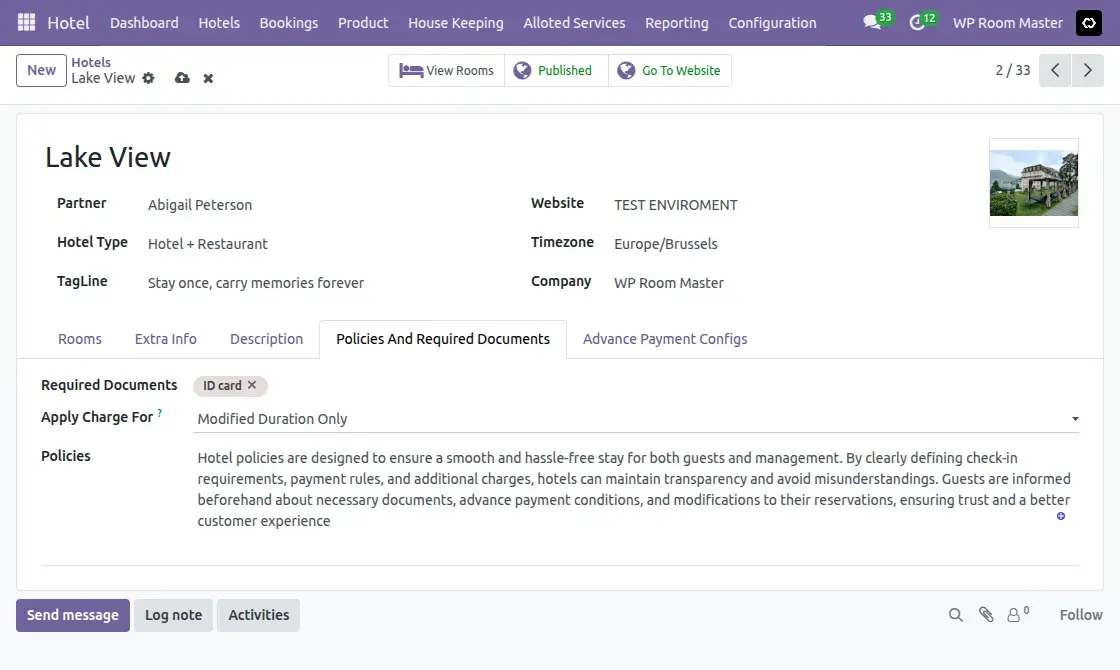
- Policies and Required Documents
Define policies such as required ID proof, cancellation rules, or modified duration charges. This ensures compliance as well as smooth handling of guest check-ins and stays.
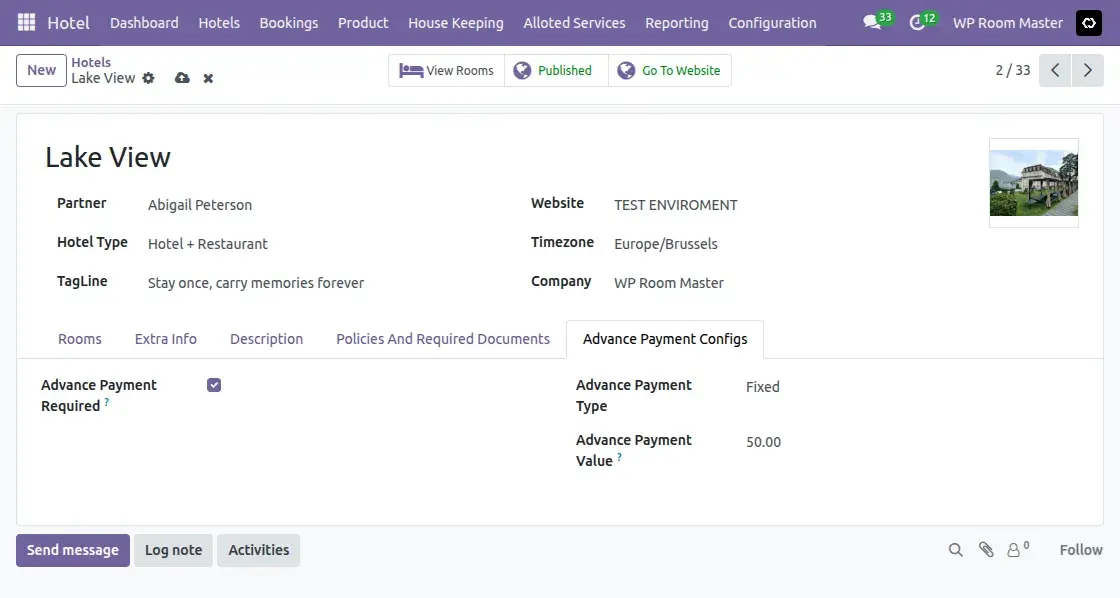
- Advance Payment Configuration
Set up advance payment rules by specifying whether advance is mandatory, the type (fixed/percentage), and value. This helps manage secure and transparent bookings.
4. Manage Hotel Rooms
Under Hotels tab → Hotel Rooms, view all rooms with details or create a new room by clicking New and filling in the configuration.
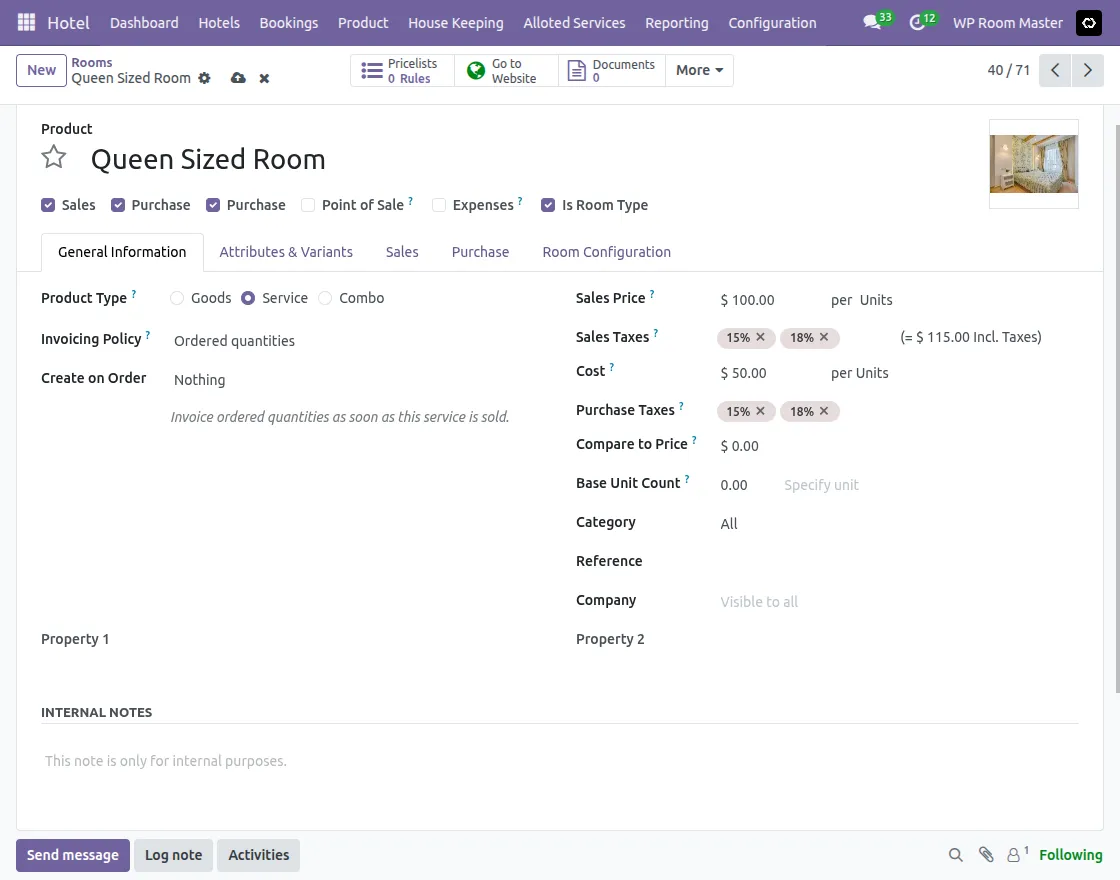
- General Information
Enter room name, sales price, taxes, and invoicing policy. Check Is Room Type and update sections like Attributes & Variants, Sales, Purchase, and Inventory if needed.
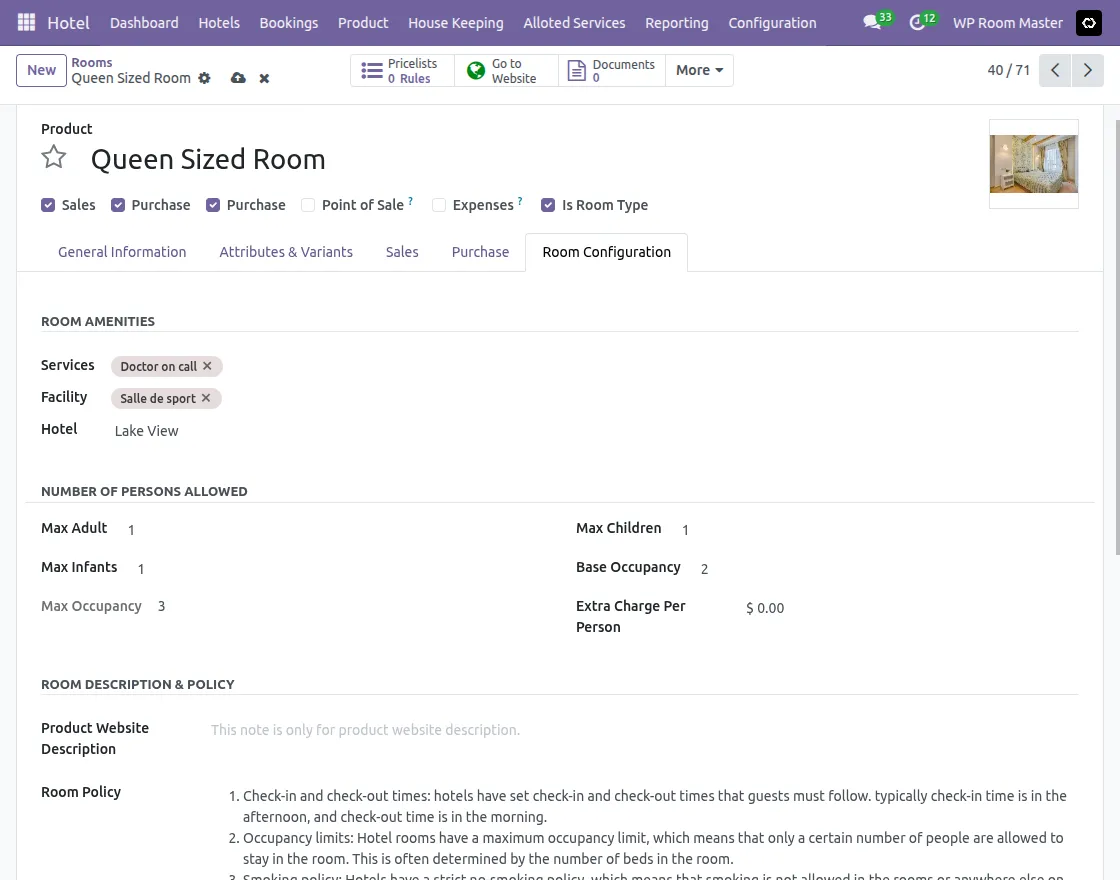
- Room Configuration
Add room services and facilities (e.g., doctor on call, gym). Thereafter, set occupancy limits for adults, children, and infants, along with base occupancy and any extra charges per person.
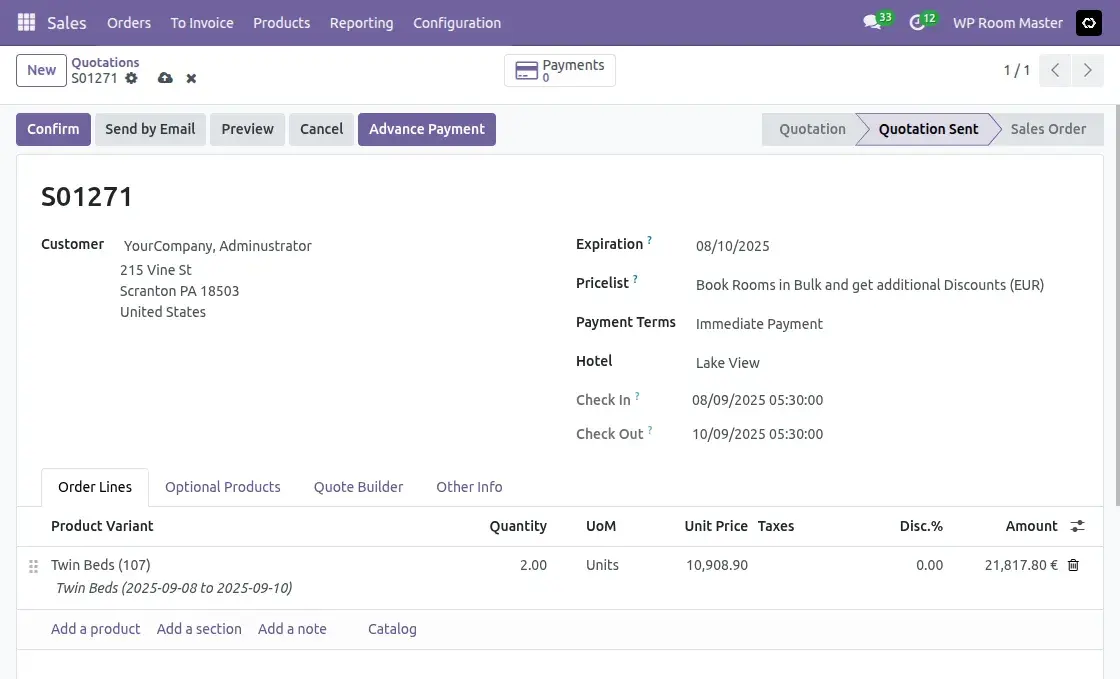
5. View and Create Bookings
Go to Bookings tab to see all customer bookings. And also create new bookings by entering check-in, check-out, number of guests, and customer details.
6. Booking via Agent
Enable the Via Agent option if booking is through an agent. Then, add agent details, commission type (Fixed or Percentage), and commission amount.
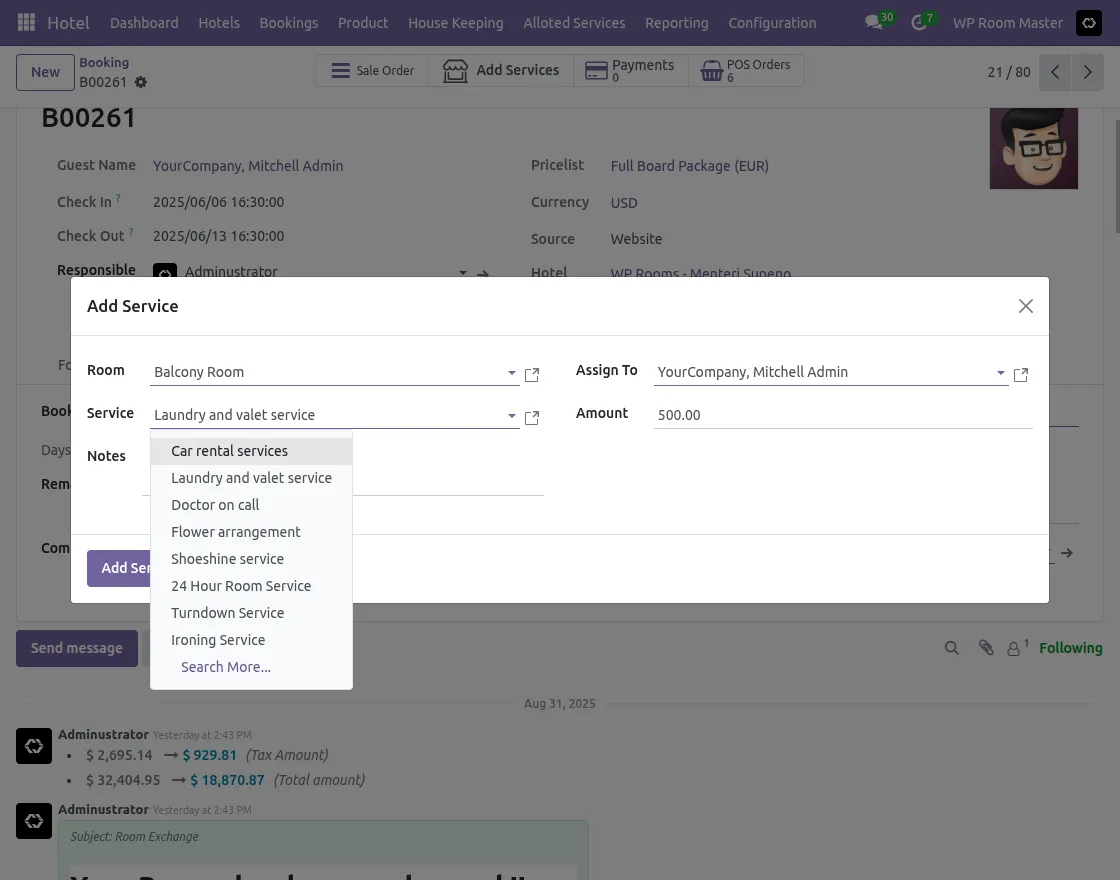
7. Add Room Services
After assigning a room, add extra services for guests under the Services tab.
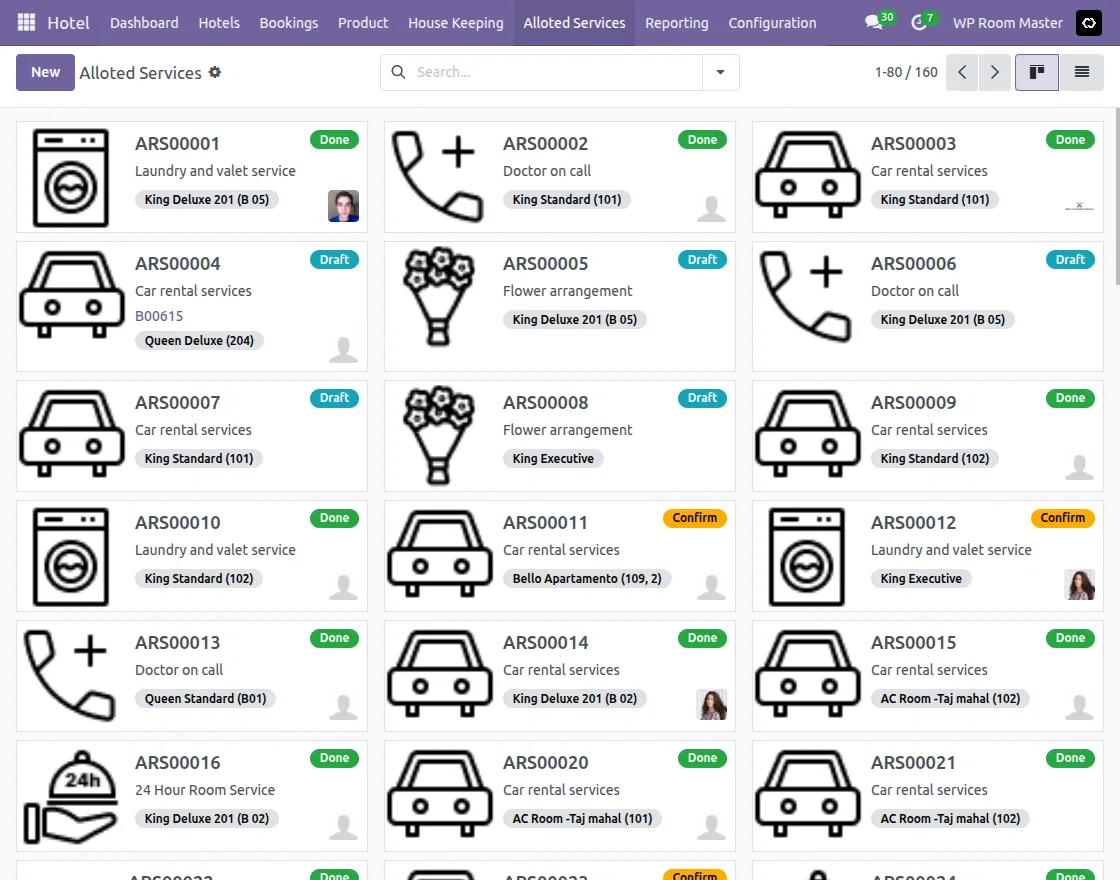
8. Allocated Services Tracking
Use Allotted Services to track service orders raised against a booking/room. Additionally, each record shows the service, related booking room, assignee, and status (Draft/Confirm/Done) for easy follow-up.
Both paid and unpaid services can be created and managed under Configuration → Services.
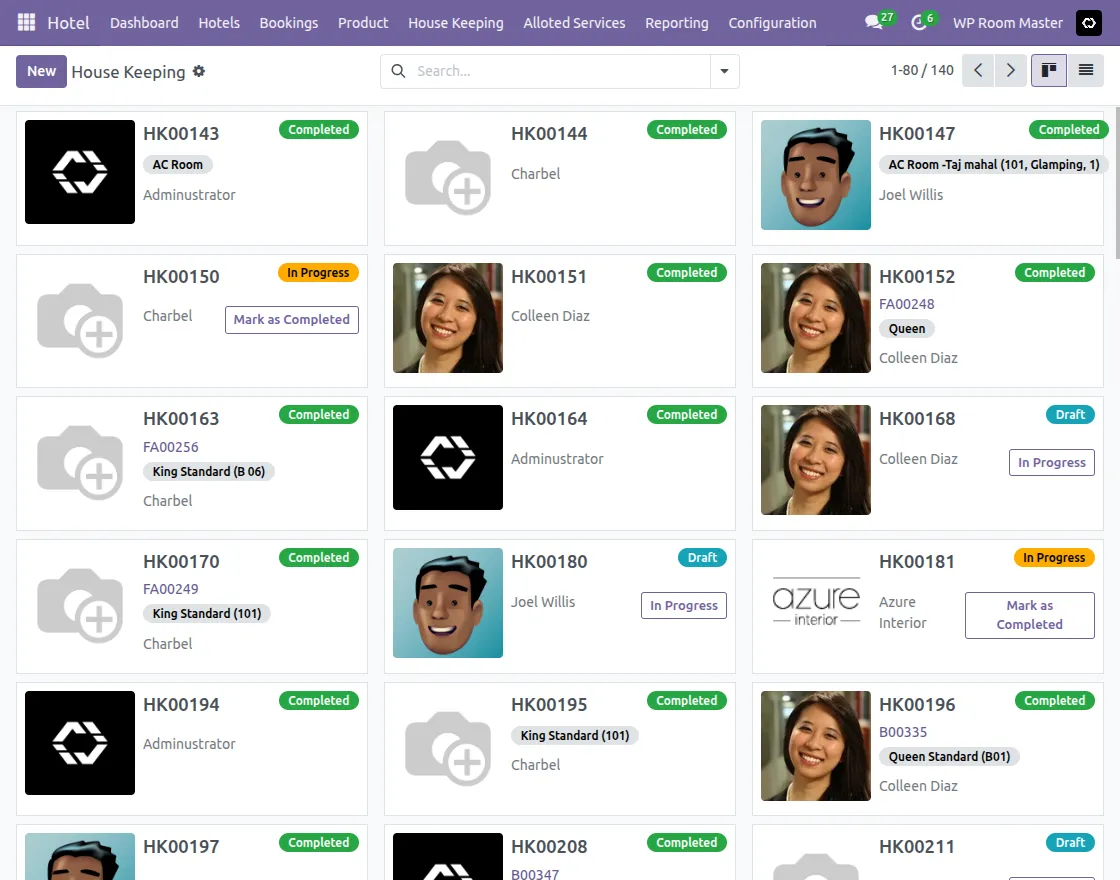
9. Housekeeping Records
Open the Housekeeping tab to track and manage housekeeping activities completed after guest checkout.
Website View
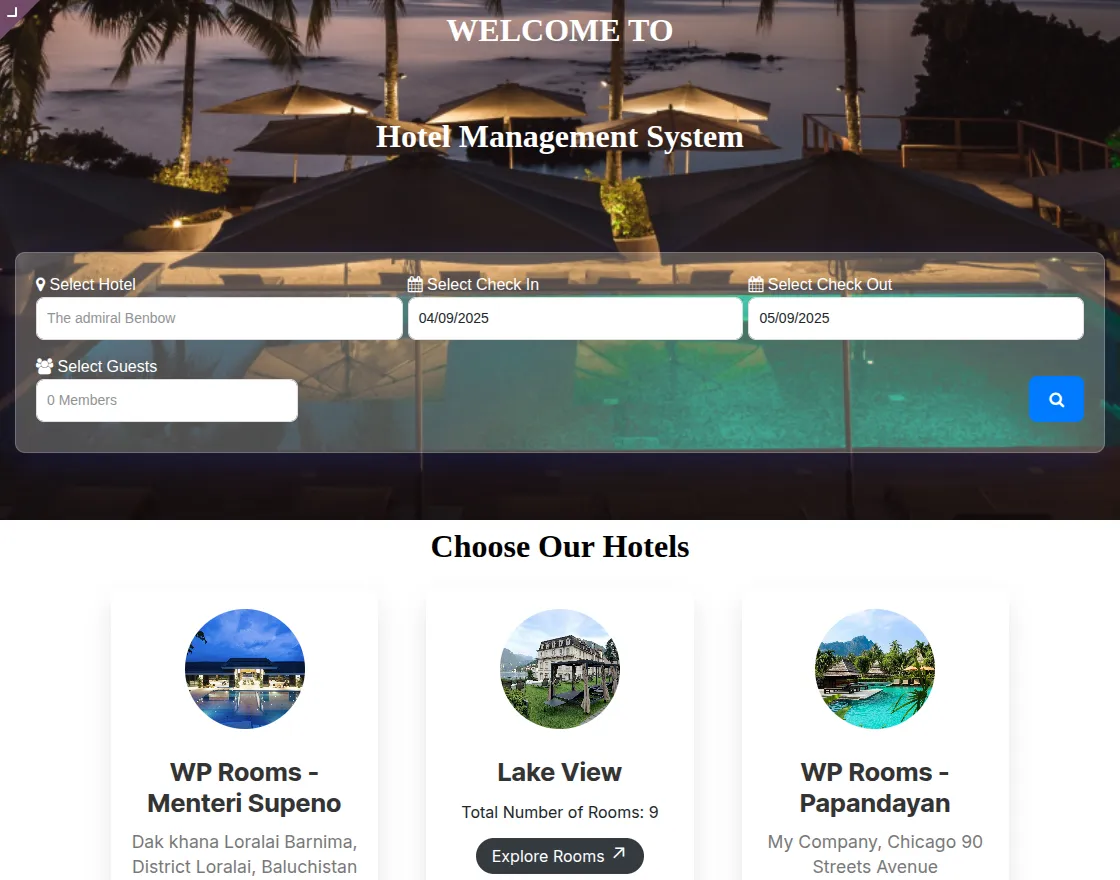
10. Book from Website
On the website homepage, customers can enter their check-in and check-out dates and select the number of guests to check availability.
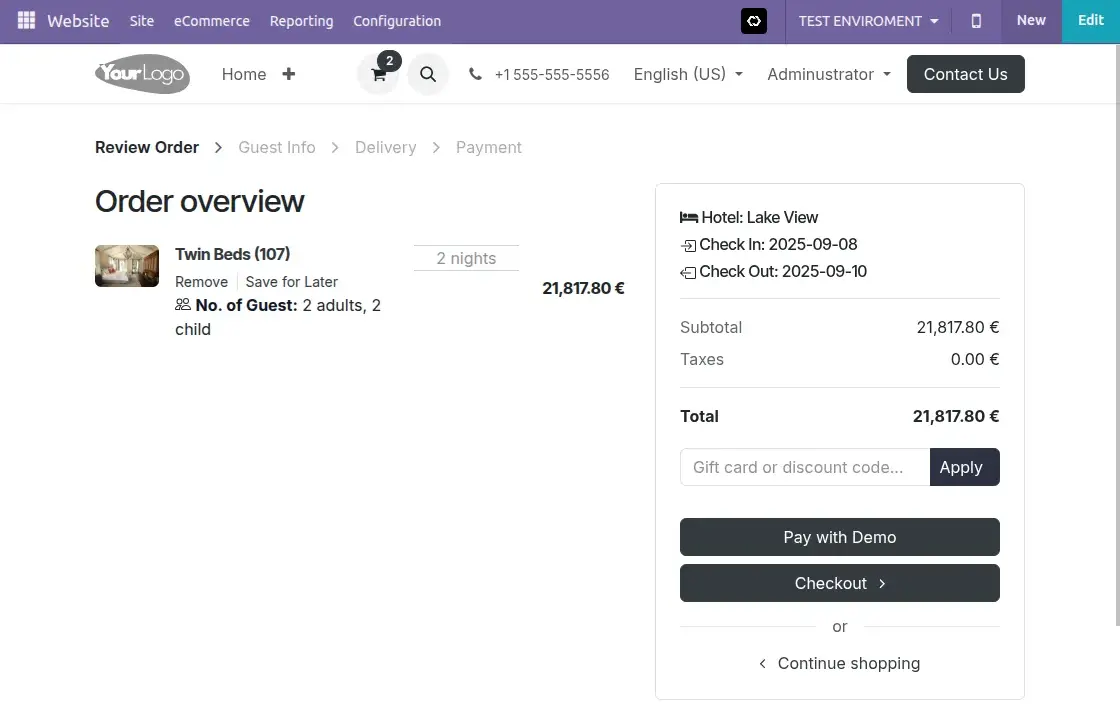
11. Add to Cart and Checkout
Selected room will be shown as a product in the cart. Guests can proceed with the checkout process to complete their room booking.
12. Confirm Bookings at Backend
At the backend, hotel staff can confirm customer’s booking from the bookings tab. Once confirmed, reservation will be ready for room allocation.
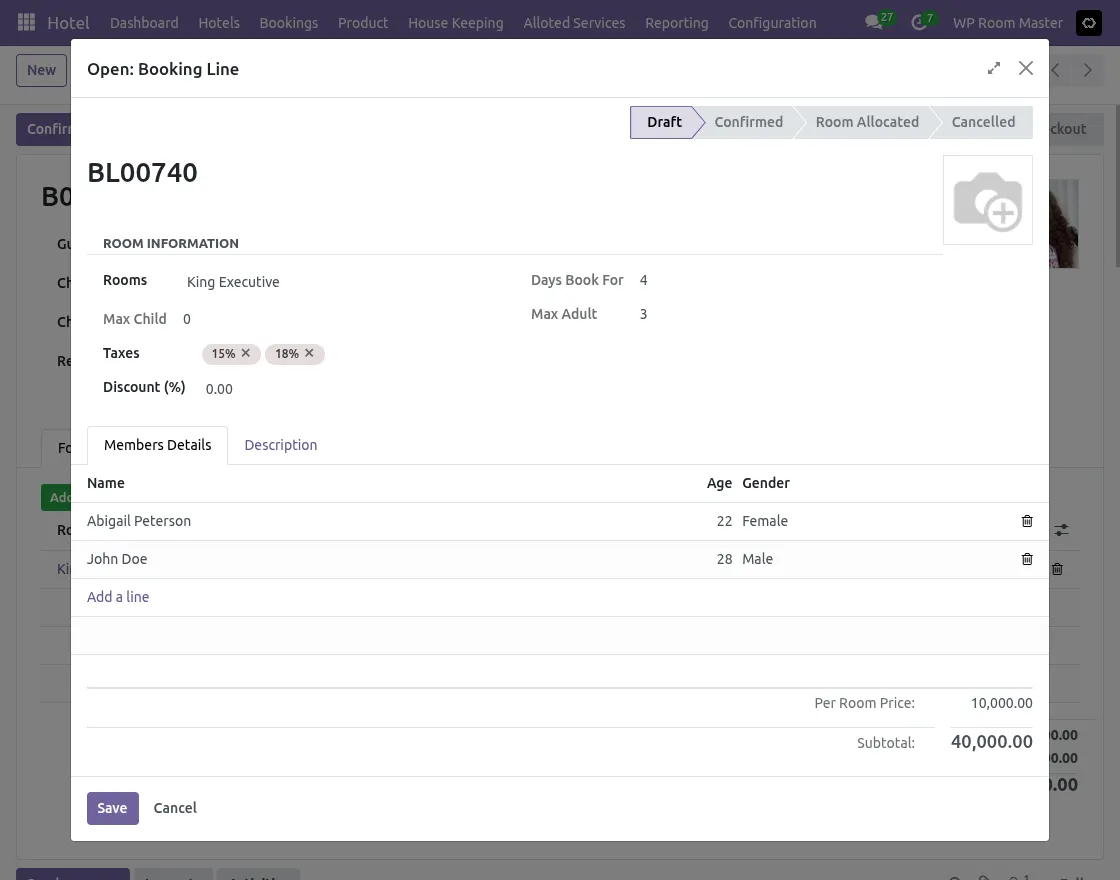
13. Allot Room from Backend
Once booking is confirmed, staff can allocate a specific room to the customer from backend. This links reservation to the selected room.
Click the Add room button, complete all required fields on the form that appears, including Room Information and all Members Details (Name, Age, Gender), and then click Save to confirm details and allot room.
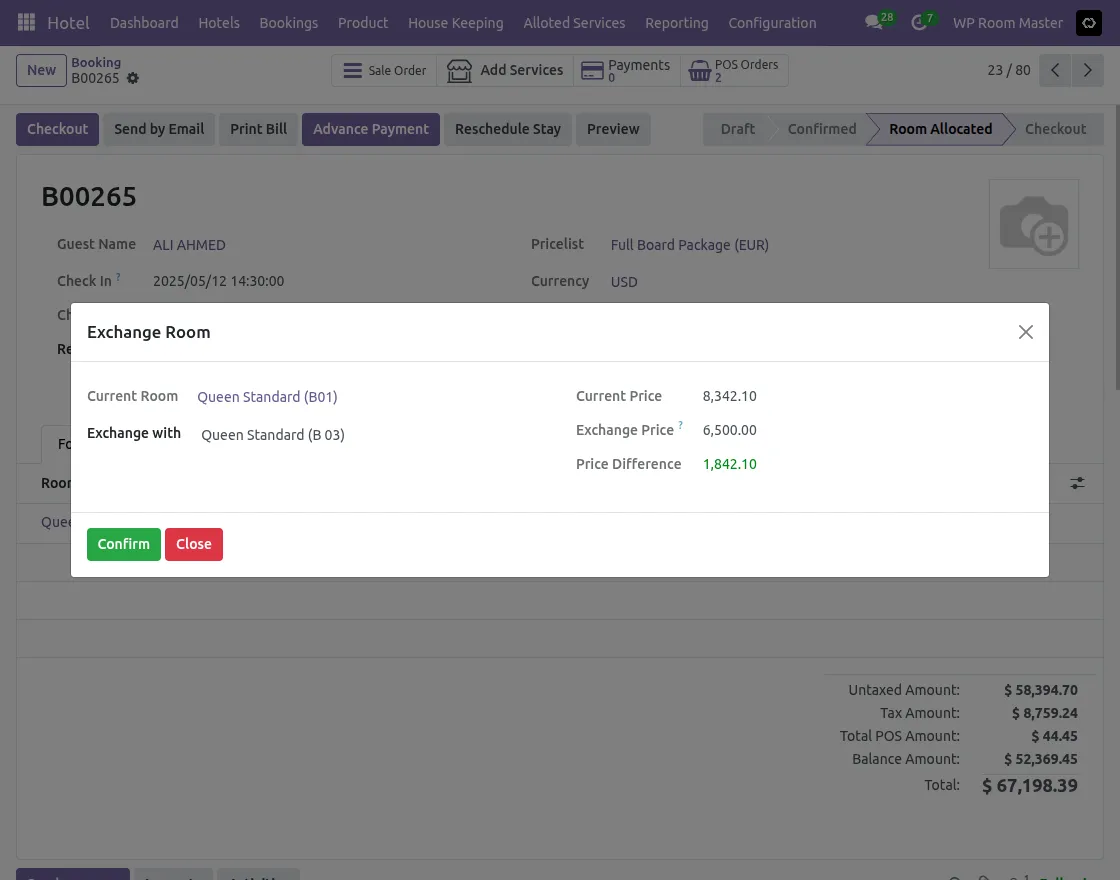
14. Exchange Room Option
After room allocation, staff can exchange assigned rooms if required. The system also supports room exchange even after the guest has checked in.
15. Reschedule Stay Option
If a guest wishes to extend or shorten their stay, staff can use the Reschedule Stay option.
System automatically adjusts booking dates, room availability, and billing details.
The payment method can be configured as either Modified Duration or Entire Duration, depending on the Hotel Configuration.

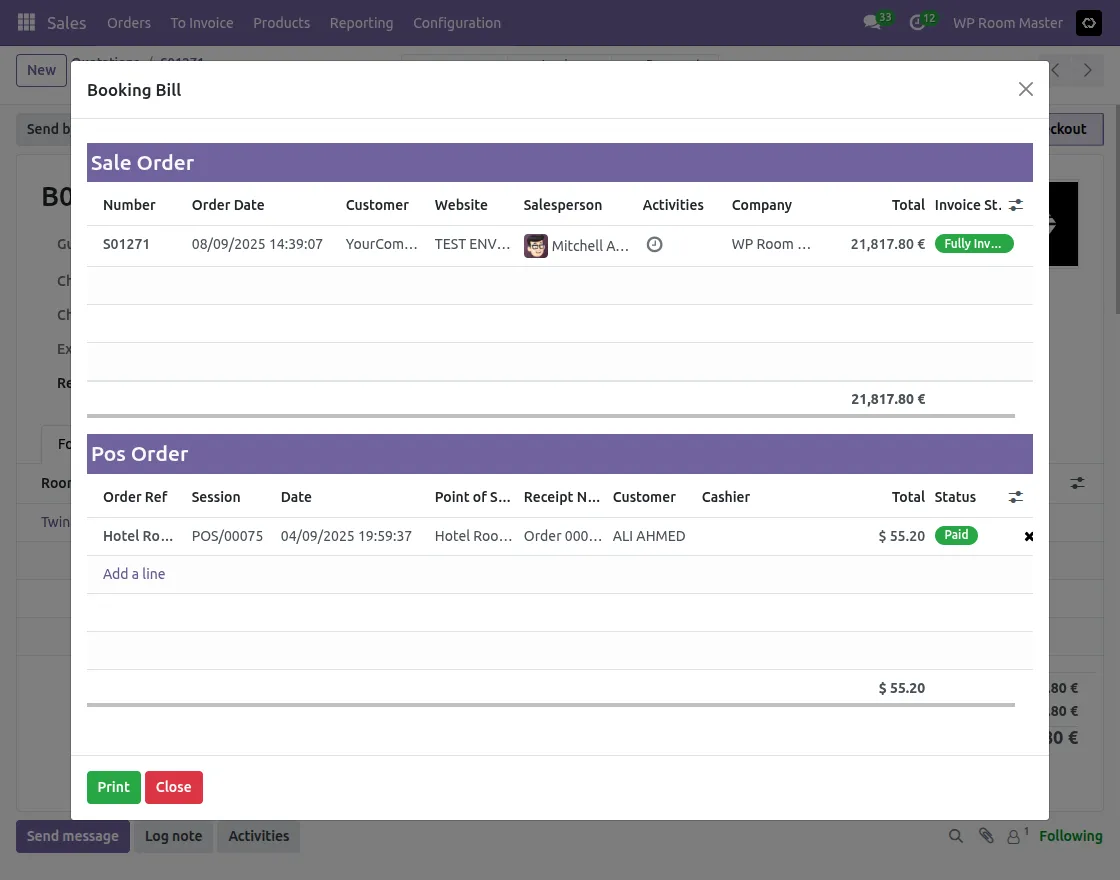
16. Compute the Bill at Checkout
At the time of customer checkout, the system automatically computes final bill, including room charges and any extra services used. A detailed folio and receipt can also be generated and printed for guest.
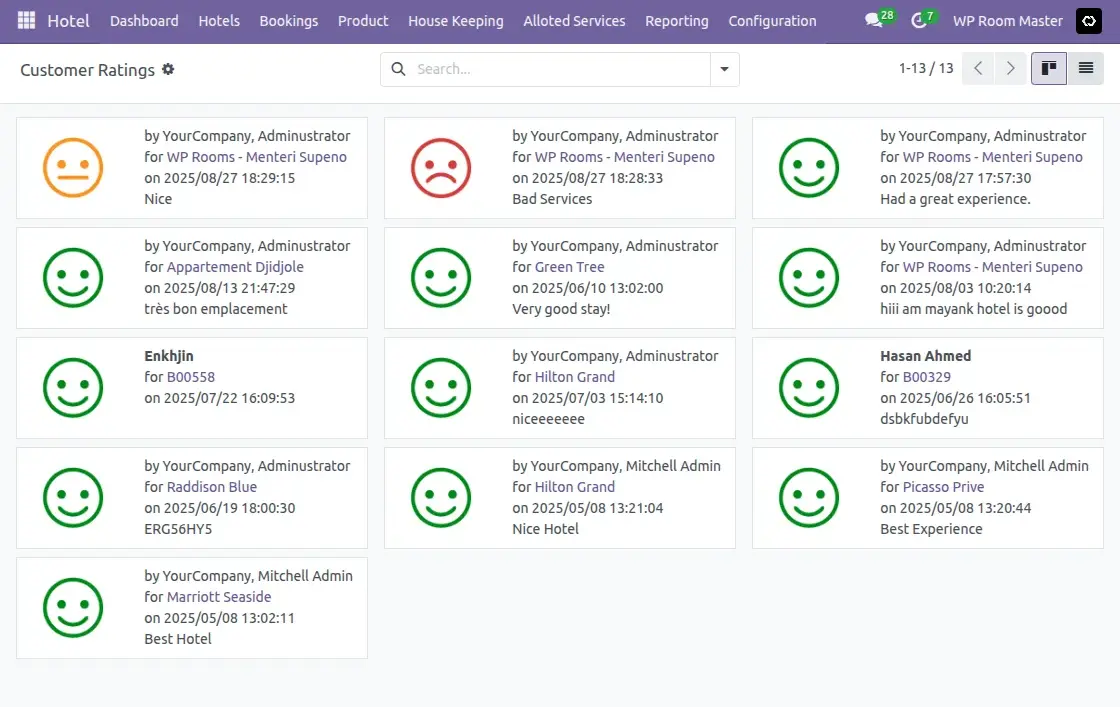
17. Customer Ratings
After checkout, guests can also submit ratings and feedback on their stay experience directly through the website.
Hence, these ratings help hotel management monitor service quality and improve guest satisfaction.
Need Help?
Hope you find the guide helpful! Please feel free to share your feedback in the comments below.
If you still have any issues/queries regarding the same, please raise a ticket at the UV Desk.
I hope this helps. In case of any further queries, contact us at our support mail.
Thanks for paying attention!!
Current Product Version - 1.2.3
Supported Framework Version - Odoo 14.0, 15.0, 16.0, 17.0, 18.0, 19.0

Is it possible to customize the payment method by myself? or what degree of customization I can do myself?