Magento 2 Xtremo Responsive Theme (Adobe Commerce) store and Multi-Vendor Marketplace.
The Xtremo Adobe Commerce Multi Vendor Theme is responsive, beautiful, and customizable.
Xtremo theme is suitable for any type of store including the Webkul Marketplace.
The Xtremo theme includes several built-in features such as a mega menu, banner slider, and four types of product carousels.
It also offers custom header links, footer social media links, popular categories, a marketplace banner, and more
Xtremo theme looks amazing on any type of device – desktop, laptop, tablet, or mobile.
Because of its responsive nature, the theme will adjust itself to any device resolution.
Please Note – Xtremo theme is fully compatible with Magento 2 Multi Vendor Module.
You can also go through the below video to get to know the functionality,
Features
- Responsive to every device resolution.
- Show the multi-image banner slider with embedded URL.
- Product carousels – featured, discount & sale, top- rated, tailored.
- Customizable header menu links.
- Mega Menu for categories.
- Add mega menu category background image.
- Select categories for product search.
- Add social media links in the footer.
- Popular categories images on the homepage.
- Retina based product zooming.
- Show accepted payment options in the footer.
- Upload default placeholder image for the category.
- Customize homepage using various CMS blocks and widgets.
- Works very well with Adobe Commerce Marketplace.
- The module source code is open for customization.
- Supports multiple languages translations.
- XtremoRTL theme is available for selection.
Installation
To install this extension, please follow each and every step carefully as follows:
Step 1: Upload Theme-files
Firstly, after extracting the downloaded zip file go to src>Theme-files and upload app folder to the Magento root directory.

Step 2: Upload Marketplace-patch
Secondly, if you have installed Adobe Commerce Cloud Multi-Vendor Marketplace extension, then follow this step otherwise skip it.
(a) For Marketplace version 2.0.9 and below, open Marketplace-patch folder and move the app folder into your Magento root directory.
(b) For Marketplace version 2.0.10, open Marketplace-patch(2.0.10) folder and move the app folder into your Magento root directory.
(c) For Marketplace version 2.1.x or newer, open Marketplace-patch(2.1.x) folder, and move the app folder to your Magento root directory.

Step 3: Run Commands
Now, after copying the app folder, please make sure that your Adobe Commerce mode is in Developer or Default mode. To enable developer mode use the following command.
php bin/magento deploy:mode:set developer
After that run the following commands:
php bin/magento setup:upgarde
php bin/magento setup:di:compile
php bin/magento setup:static-content:deploy
php bin/magento indexer:reindex
php bin/magento cache:flush
Multi-Lingual Configuration
Moreover, for Multilingual support, please navigate. Store>Configuration>General >Locale Options. And select your desired language from the Locale option.
Language Translation
In addition, if you need to do the module translation, please navigate the following path in your system. app/code/Webkul/Xtremo/i18n.
After that open the file named en_US.CSV for editing as shown in the below screenshot.

Once you have opened the file for editing. Replace the words after the comma (,) on the right with your translated words.

After editing the CSV file, save it and then upload it to the same folder. Now your module translation is finally complete.

Module Configuration
Now, after the module installation, the admin needs to go to the Xtremo configuration. Go to Stores>Configuration>Xtremo Configuration. The following options will appear.
Header Settings
Phone Number – Enter the store phone number to show on the header menu.
Select CMS Pages – Select which store pages link to show on the header.
Display Category Drop-Down Search Bar – Select Yes to allow customers to search according to the categories.
Select Categories for Top Search – Select which categories will appear in the drop-down search menu.

Footer Settings
Add social network links at the footer.
The store owner can add external links to social network sites, for example – Twitter, Google Plus, Facebook, Linked In, and Instagram.
Also, can show accepted payment options such as – Paypal, Visa card, Discover, Master Card, and Maestro card.

Homepage Settings
Category Placeholder Image – Upload default placeholder image for the categories which have no image.

Applying Theme
After installation, the Xtremo theme will be set as the default theme of the store.
However, to apply any other store theme, please go to
Content>Configuration, the following page will appear showing all the stores and store views.
Click Edit for whichever store or store view you want to apply the theme to. Further, to apply global view click the Edit.

After clicking Edit, select any theme option from the Applied Theme drop-down list.

Choose RTL Theme – XtremoRTL
To choose the XtremoRTL theme you have to navigate through Content -> Configuration -> Click Edit for whichever store view you want to apply the theme to.
After clicking Edit, select the XtremoRTL from the Applied Theme drop-down list option.

After applying the RTL Xtremo theme, the theme is changed for the respective store view.

Category Listing View:

Product Page View:

CMS Content Settings
Blocks
The admin can customize the homepage and footer content of the theme using the following blocks. First, go to Content>Blocks, and then select and edit the block as visible in the screenshot.

Footer Links Block
In order to edit footer section links, title, and text, select and edit Footer Links Block. Then, click Show/Hide Editor and edit the HTML.

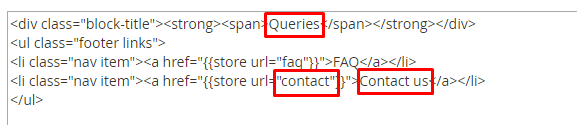
Edit the block title, set URL Key and label for nav item.
<div class="block-title"><strong><span>Queries</span></strong></div>
<ul class="footer links">
<li class="nav item"><a href="{{store url="faq"}}">FAQ</a></li>
<li class="nav item"><a href="{{store url="contact"}}">Contact us</a></li>
</ul>
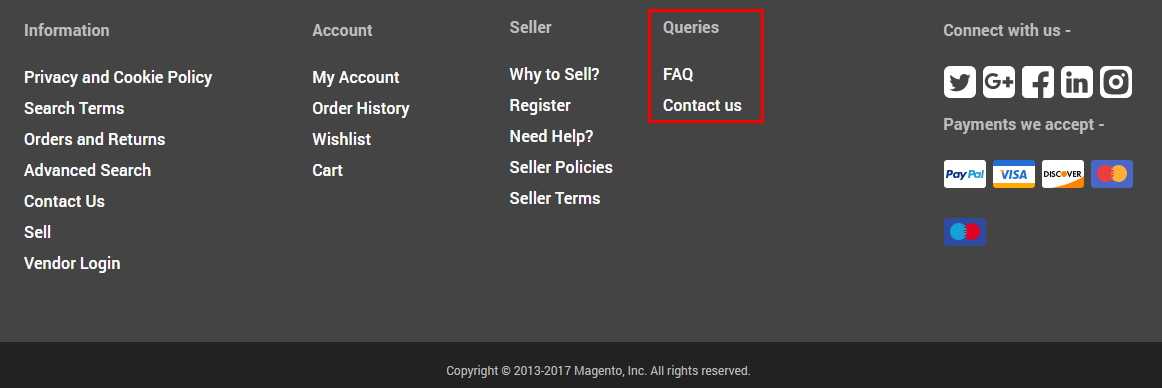
Storefront View
Once you have made changes, clear the cache and see the changes in the storefront,
Footer Links Seller Block
For editing the URLs, title, text of Footer Links Seller Block select and edit this block. Click Show/Hide Editor and edit the HTML code.
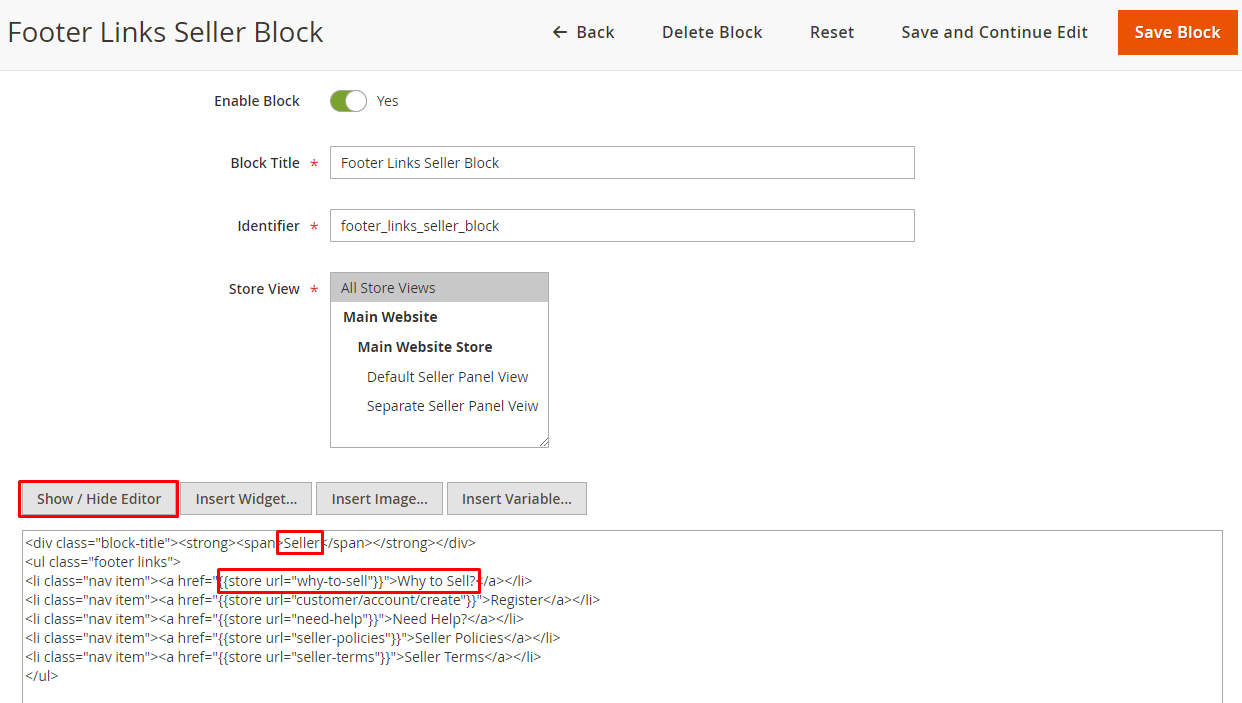
In the store URL enter CMS page URL Key and enter the frontend label. Please see the example below:
<div class="block-title"><strong><span>Seller</span></strong></div>
<ul class="footer links">
<li class="nav item"><a href="{{store url="why-to-sell"}}">Why to Sell?</a></li>
<li class="nav item"><a href="{{store url="customer/account/create"}}">Register</a></li>
<li class="nav item"><a href="{{store url="need-help"}}">Need Help?</a></li>
<li class="nav item"><a href="{{store url="seller-policies"}}">Seller Policies</a></li>
<li class="nav item"><a href="{{store url="seller-terms"}}">Seller Terms</a></li>
</ul>
Once you have made the changes, you can see the seller footer block section updated.

Xtremo Homepage Sidebar Block
In case you are using the Xtremo theme with Adobe Commerce Multi-Vendor Marketplace, then you can see the Xtremo Homepage Sidebar Block on top. Here you can show any links to CMS pages.

Moreover, for editing the Xtremo Homepage Sidebar Block, go to Content>Block>Xtremo Homepage Sidebar Block. Select, Edit, click Show/Hide Editor and make changes in the HTML.
Similarly, in the store url, enter CMS page URL Key and enter frontend label. Please see the example below:
<p><link href="{{view url="css/static/homepage.css"}}" rel="stylesheet" type="text/css" /></p>
<div>
<ul>
<li class="support"><a href="{{store url="customer-service"}}">Support</a></li>
<li class="daily-deal"><a href="{{store url="sale.html"}}">Daily Deals</a></li>
<li class="sell-with-us"><a href="{{store url="marketplace"}}">Sell with us</a></li>
</ul>
</div>

Xtremo Homepage Banners
Under the product carousel, you can display three static banners (1 large and 2 small) on the Xtremo homepage. As explained above, you can also customize the banner labels and add URLs as well.

Now, for editing the Xtremo Homepage Banners block, go to Content>Blocks>Select and Edit ‘Xtremo Homepage Banners’. Then, edit the following HTML code.
Here, you need to edit the store url, label, and enter image url for banner 1, banner 2, and banner 3. Please see the below example:
<div class="xtremo-banner-cat">
<div class="left-banner">
<div class="banner-1"><a href="{{store url=men/tops-men/jackets-men.html}}"> <span>Shop for Coolest Winter Collection</span> <img src="{{view url="images/Winter-Collection-Banner.png"}}" alt="" /> </a></div>
</div>
<div class="right-banner">
<div class="banner-2"><a href="{{store url=gear/bags.html}}"> <span>Luxurious Leather Bags</span> <img src="{{view url="images/Collection-1.png"}}" alt="" /> </a></div>
<div class="banner-3"><a href="{{store url=sale.html}}"> <span>50% OFF - Sale is On</span> <img src="{{view url="images/Collection-2.png"}}" alt="" /> </a></div>
</div>
</div>

Xtremo Homepage Carousel Images
Now coming to the homepage, you can see the banner slider with the ‘Buy Now’ button.
Further, you can use this space for displaying multiple banner images.
Besides that, you can also customize the banner using the title and some text below.

Now, for editing the Xtremo homepage slideshow, please go to
Content>Blocks>Xtremo Homepage Carousel Images
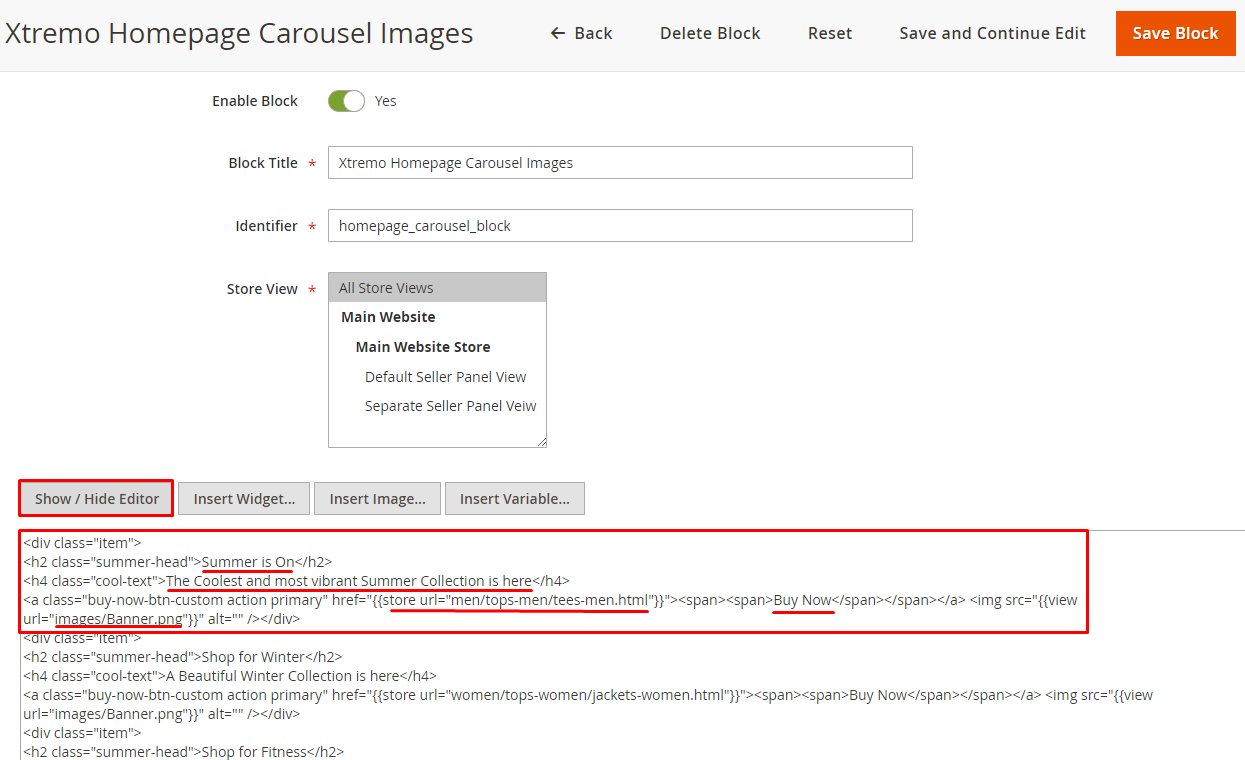
And then edit the HTML. First, set h2 title, enter text in h4, add store URL for Buy Now button.
Then, set Buy Now label (optional) and enter image url with alt information.
Please see the below example:
<div class="item">
<h2 class="summer-head">Summer is On</h2>
<h4 class="cool-text">The Coolest and most vibrant Summer Collection is here</h4>
<a class="buy-now-btn-custom action primary" href="{{store url="men/tops-men/tees-men.html"}}"><span><span>Buy Now</span></span></a> <img src="{{view url="images/Banner.png"}}" alt="" /></div>
<div class="item">
<h2 class="summer-head">Shop for Winter</h2>
<h4 class="cool-text">A Beautiful Winter Collection is here</h4>
<a class="buy-now-btn-custom action primary" href="{{store url="women/tops-women/jackets-women.html"}}"><span><span>Buy Now</span></span></a> <img src="{{view url="images/Banner.png"}}" alt="" /></div>
<div class="item">
<h2 class="summer-head">Shop for Fitness</h2>
<h4 class="cool-text">Stylish & Cool Fitness Collection is here</h4>
<a class="buy-now-btn-custom action primary" href="{{store url="gear/fitness-equipment.html"}}"><span><span>Buy Now</span></span></a> <img src="{{view url="images/Banner.png"}}" alt="" /></div>
Xtremo Homepage Marketplace Block
If you are using Adobe Commerce Cloud Multi-Vendor Marketplace, you will see the Xtremo Homepage Marketplace Block on the storefront.
Widgets
To customize the widgets of the Xtremo theme, go to Content>Widgets and edit the following widgets.

Product Carousel
Go to Catalog > Products, select, and Edit any product. The following options will be visible, select Yes to include the product in the carousel, else select No.

Category Settings
After installation, this module automatically selects and enables five random categories as default popular categories.
The admin can enable/disable these popular categories by setting the Is Popular Category? option to Yes/No by navigating to Products>Categories.

Popular Category Images
For uploading popular category images go to Products>Categories open any category find the Popular Category Image option in the Content section.

Menu Category Background Images
To manage the background images for the Mega Menu, please go to Xtremo>Manage Category Banner Images>Add Image for Banner.
The admin can use the Actions to change to image status as enabled, disabled or delete the image.

After clicking the Add Image for Banner button, the following page will open. Enter the title, upload image file, select the category, and then select status as – enabled/disabled.

Front-End View
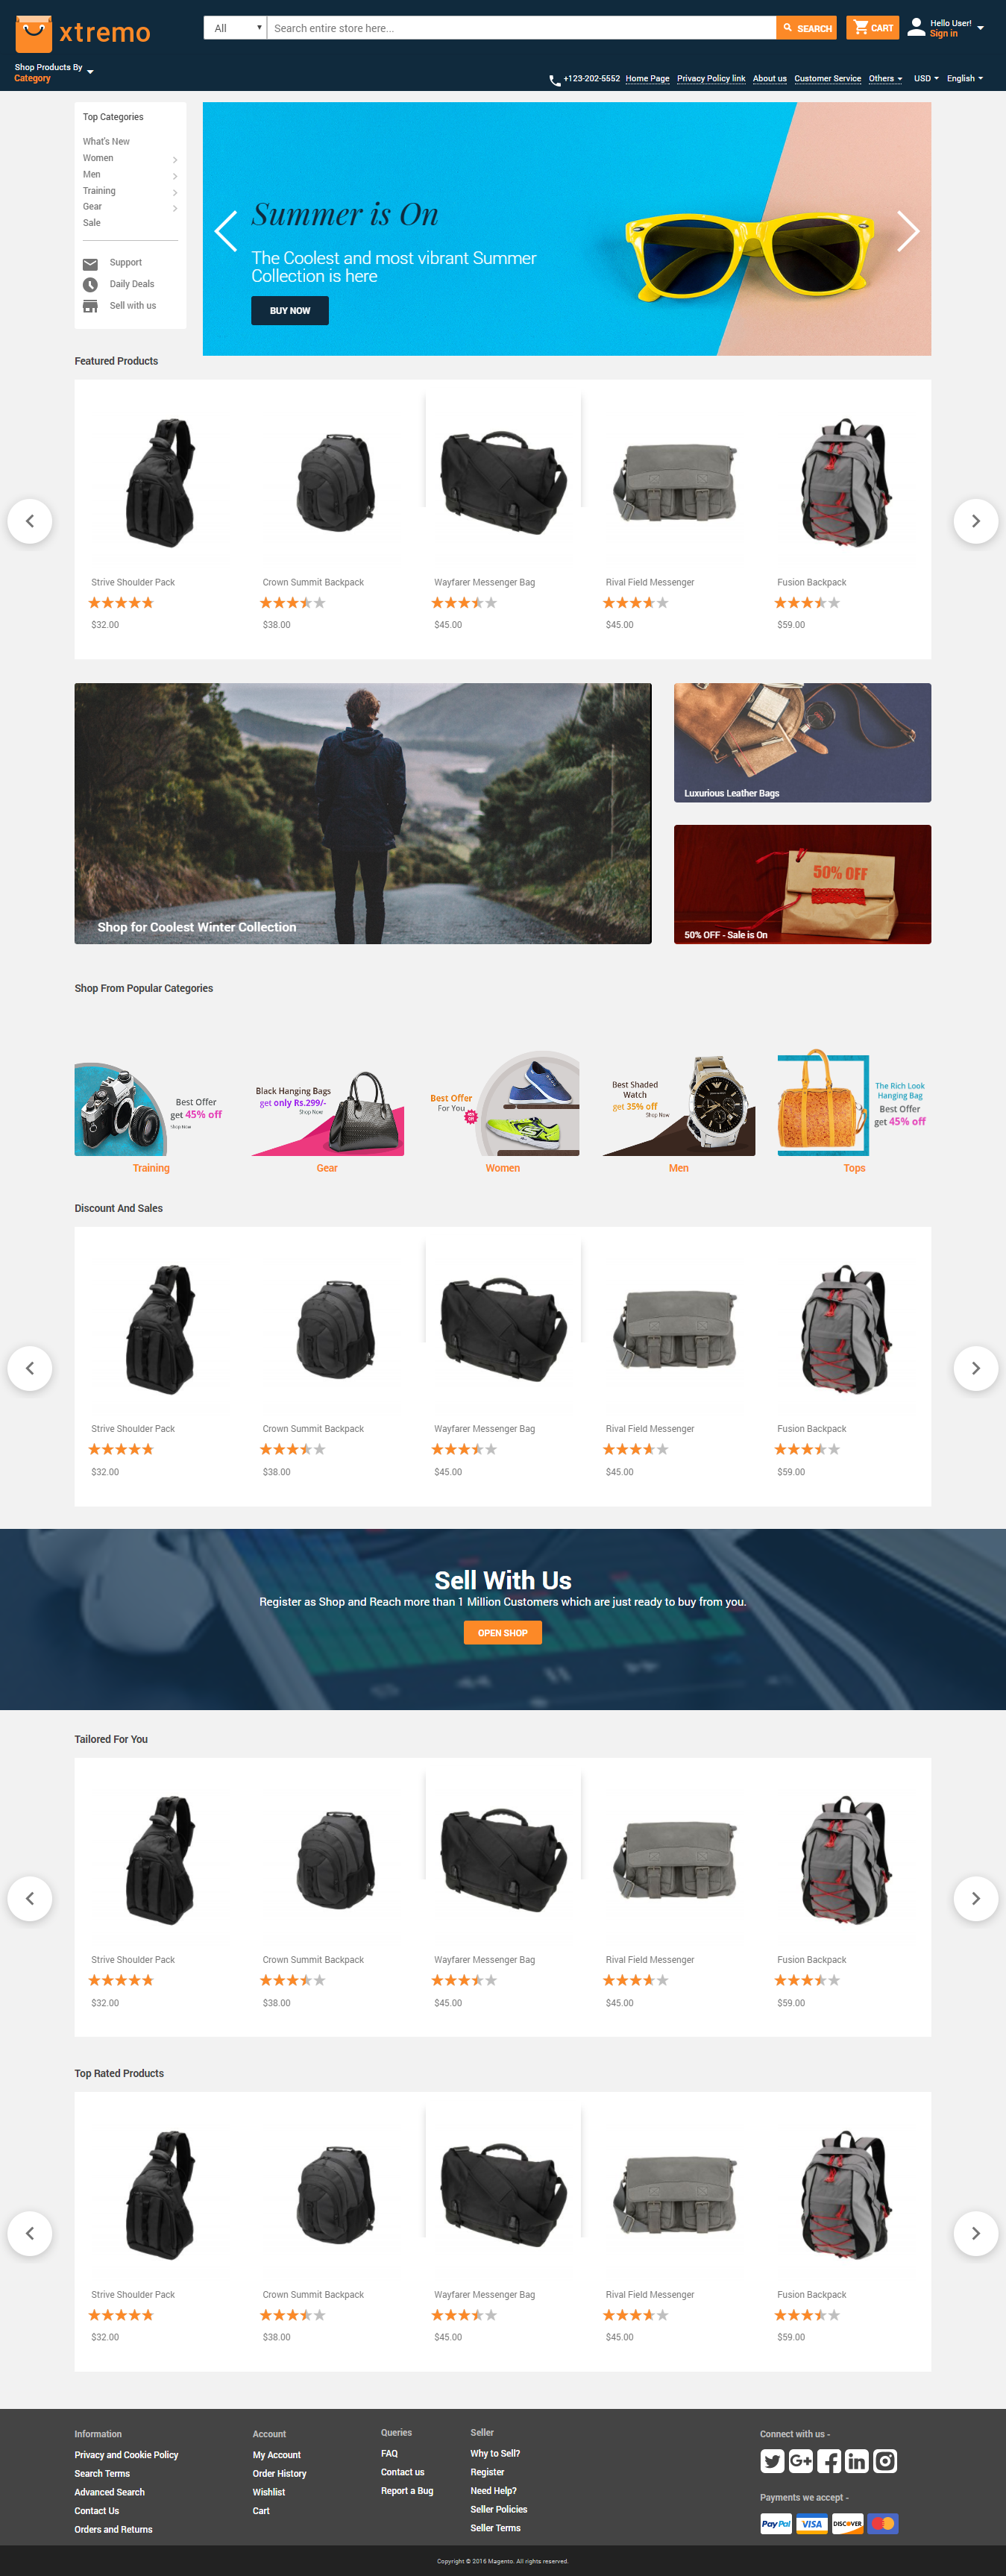
Home Page View
This is how the homepage will appear on the front-end. The homepage will show the banner slider, header links, category menu, various product carousels, and popular categories of the store.
Mega Menu
The customers can browse the categories using the amazing mega menu. Just hover the mouse cursor and it displays the sub-menus. All the parent category will have an image also.

Banner Slider
Show multiple images using the responsive banner slider. Each image can have an embedded URL for visiting a page.
The customers can use the arrows for viewing all the banner images. The banner slider adjusts its size according to the resolution.

Product Carousel
Xtremo theme includes 4 types of product carousels. Display featured products, top-rated products, discount & sale products, and tailored products on the homepage.

Category Page (Grid View)
The category page showing various products in grid view layout.
The customers can use filters and sort by options for searching the products. Advanced layered navigation allows the customers to find products easily.

Category Page (List View)
The customers can view the category in list layout for more detailed product information.

Product Page View
The product page is completely redesigned, the customers can view product information, reviews, images, and, ratings.

Product Compare Page View
The customers can do the comparison between the two or more products of the store. Following is the product comparison page.

My Wishlist Page View
Here’s the customer wishlist page, the customer can edit the quantity, add the product to cart, update wish list, and share the wish list with friends.
The customers can also add a comment for their wish list products.

Shopping Cart View
After adding products to cart, the customers can click the cart button from any page and view the item details. The cart button also shows the number of products added to cart.

Shopping Cart Page View
The shopping cart page of the store showing summary for shipping and tax.

Login and Sign Up Page View
Here is the Login and Sign Up page will appear for the customers.

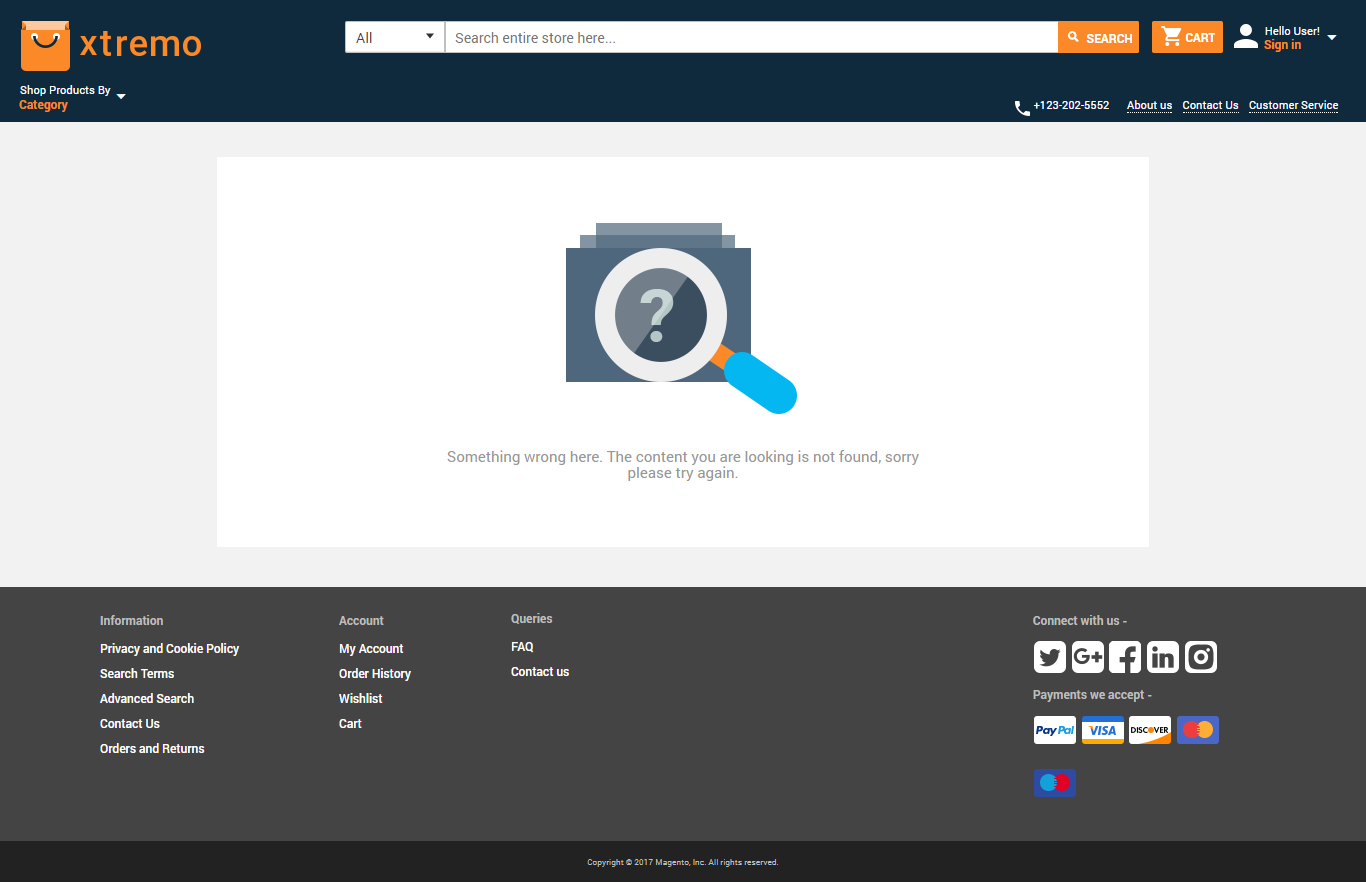
No Result Page
When a customer searches for anything on the store and nothing comes up the following page will appear.
404 Error Page
This is how 404 error page will appear when any web page is not able on your website.

Xtremo Marketplace – Adobe Commerce Multi Vendor Theme
The Xtremo theme for Magento 2 works very well with the Adobe Commerce Cloud Multi-Vendor Marketplace. Please view the following screenshots to see how the marketplace will appear in Xtremo theme.
Important Note – Make sure you have uploaded the Marketplace-patch in the Adobe Commerce root directory. Please refer to Step 2 of the installation.
Seller Profile Page View
The seller profile page showing lots of details about the seller.

Seller Collection Page View
The seller collection page is there for viewing all the products of a seller at one page.

Marketplace Dashboard Page View
Amazing looking marketplace dashboard page for the sellers showing all the basic information about their store.

Mobile View
The Xtremo theme is compatible with all devices’ resolutions. The layout, banners, carousels, menu, and everything adjust themselves according to the viewing user device.
Homepage View

Product Page

Category Grid View

Category List View

Sort By Options

Filter Options

Login Page
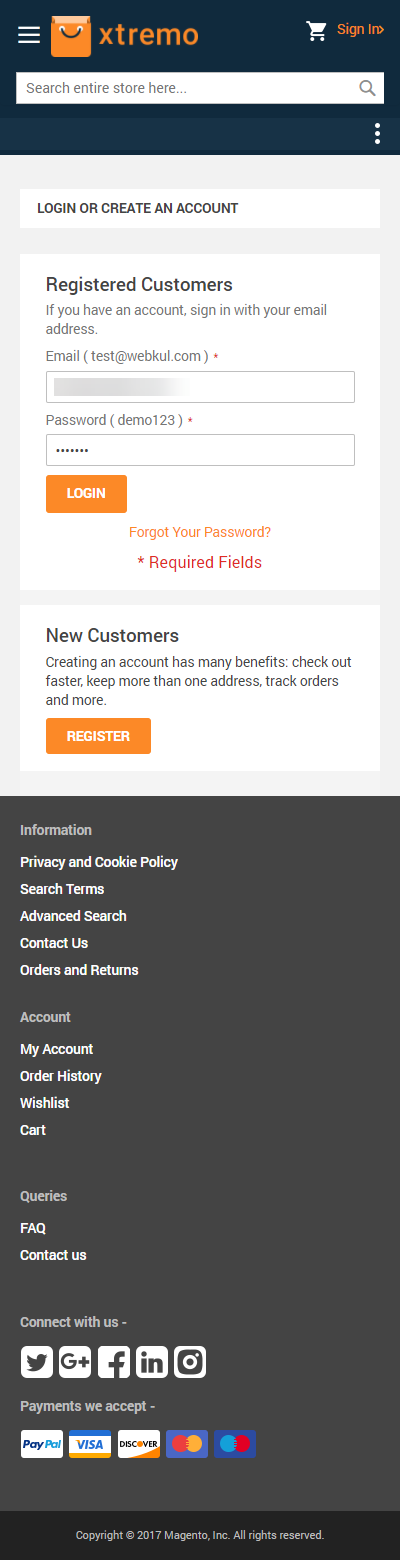
Sign Up Page

Header Menu

Account Menu

Category Menu

Shopping Cart View

My Wishlist

Thank you for viewing this Xtremo Magento 2 Multi Vendor Theme blog.
Moreover, if you have any query or need more information, please back to us at our HelpDesk System.
You may also browse other Adobe Commerce marketplace addons and our quality Adobe Commerce Cloud extensions.
Current Product Version - 5.0.4
Supported Framework Version - Magento 2.0.x, 2.1.x, 2.2.x,2.3.x, 2.4.x

But on admin while selecting any shipping method I am getting error as
1 exception(s):
Exception #0 (InvalidArgumentException): Webkul_Mpxtremo composer.json error: Unable to unserialize value.
Exception #0 (InvalidArgumentException): Webkul_Mpxtremo composer.json error: Unable to unserialize value.
P.S : There is no other third party extension is installed