SalesforceIQ Connector For Magento2 : This impressive extension integrates Magento2 with SalesforceIQ, a CRM platform that makes enterprise-level intelligence affordable for growing businesses. It is the next generation extension revamping the features of eCommerce and CRM platform.This connector lets you get new marketing prospects into your sales team’s hands instantly. By pulling Magento2 user’s information into your SalesforceIQ list, you’ll arm your sales teams to qualify prospects faster and smarter than ever before.
Features and Benefits
- Is acting as bridge between Magento2 and SalesforceIQ .
- Provides real-time synchronization of customers.
- Provides synchronization of customers in lists at SalesforceIQ end.
- Automatically captures your interactions with customers, and analyzes it to improve your relationships.
- Interactive design with brilliant user experience .
- Any number of data can be imported from Magento2 to SalesforceIQ .
- Boost revenue of online marketers .
- Easy to use and manage at admin end.
Installation – SalesforceIQ Connector For Magento2
Customers will get a zip folder and they have to extract the contents of this zip folder on their system. The extracted folder has an src folder, inside the src folder you have the app folder. You need to transfer this app folder into the Magento2 root directory on the server as shown below.

After the successful installation, you have to run these commands in the Magento2 root directory.
First command- php bin/magento setup:upgrade

Second Command – php bin/magento setup:di:compile

Third Command – php bin/magento setup:static-content:deploy

After running the commands, you have to flush the cache from Magento2 admin panel by navigating through->System->Cache management as shown below.

Multi-Lingual Configuration
For Multilingual support, please navigate to Store>Configuration>General >Locale Options. And select your desired language from the Locale option.
Language Translation
If you need to do the module translation, please navigate to the following path in your system app/code/Webkul/Eshopsync/i18n.
Open the file named en_US.CSV for editing as shown in the below screenshot.

Once you have opened the file for editing. Replace the words after the†comma(,)†on the right with your translated words.

After editing and translating the CSV file, you need to save the translated file name according to your region language and country code such as – de_DE.CSV. Then upload the translated file to the same folder from where you have obtained it. Now your module translation is complete.

Configuration
For configuring the settings of Salesforce Connector For Magento2, admin has to go to Stores > Configuration > Webkul > SalesforceIQ Connector.
Set the below mentioned parameters :
- Enter SalesforceIQ Integration keys. To know How To Create Custom Integration In SalesforceIQ please follow the steps as explained here How To Create New Custom Integration In SalesforceIQ
- Click on Test Connection button to build connection between Magento2 and SalesforceIQ.
 For default configuration settings :
- Select SalesforceIQ List and Account from dropdown.
- Select Yes for real time synchronization of contacts.
- Click Reset all mapping data button to reset SalesforceIQ Mapping.
- Click on Save Config to save the settings.

View At Magento2 end
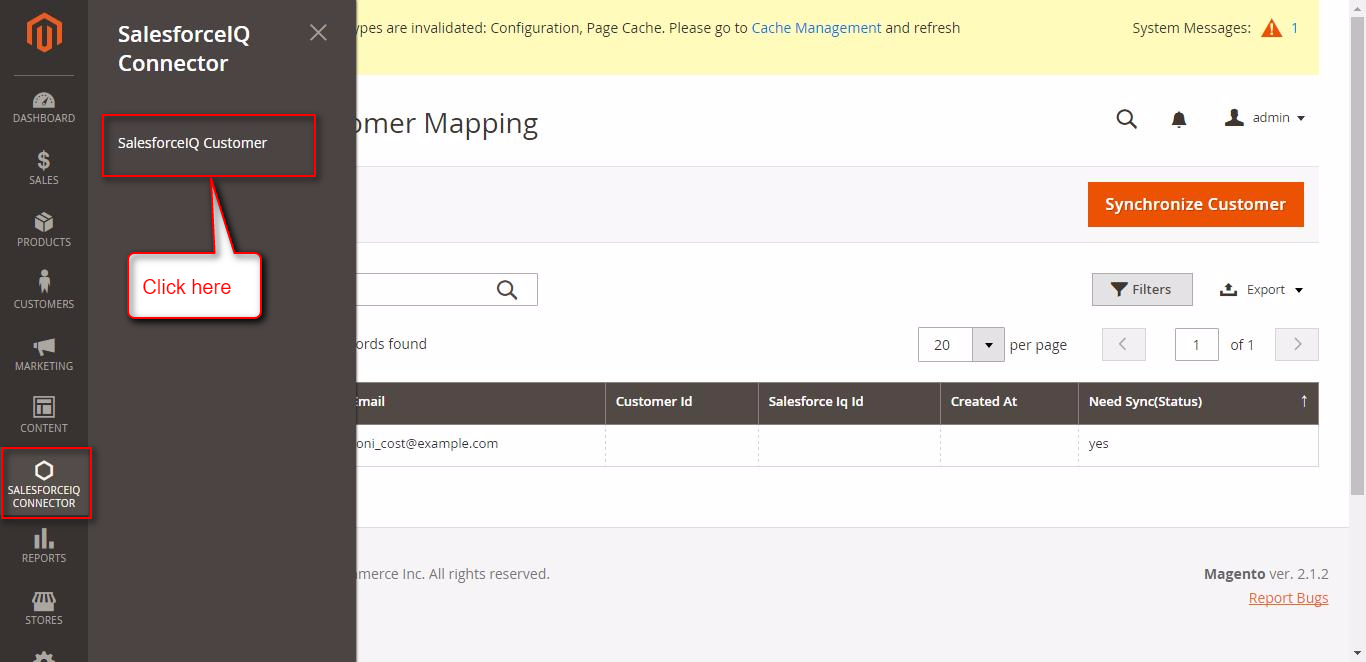
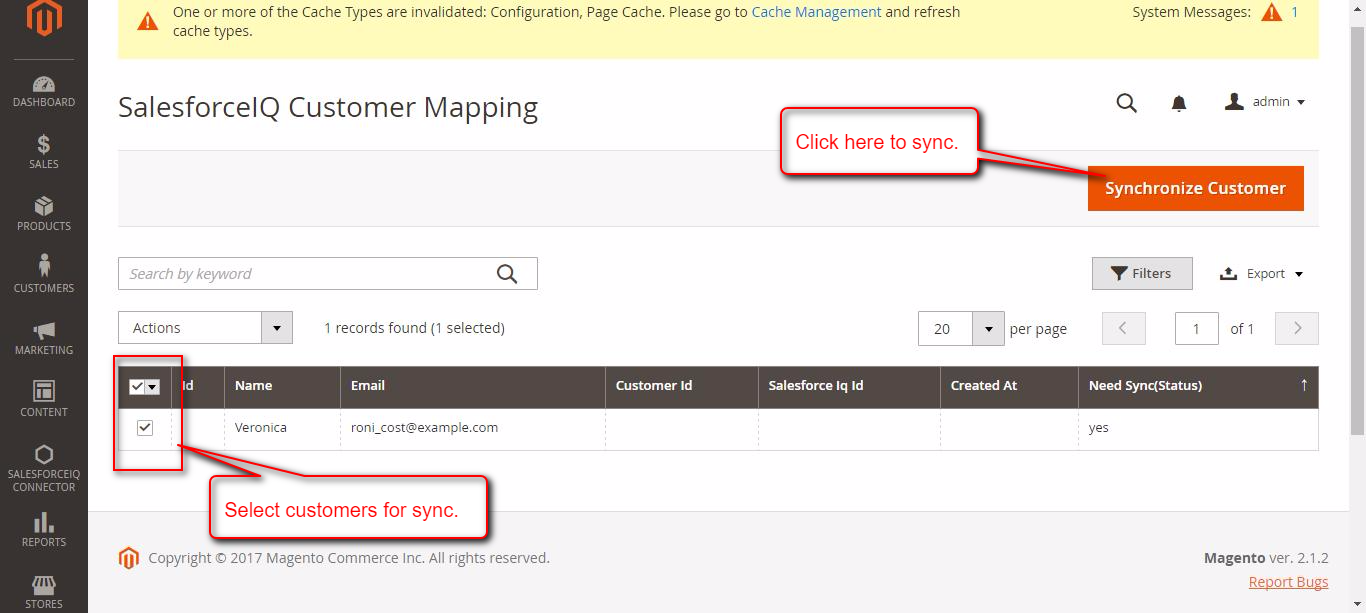
Admin can manage all the SalesforceIQ connector option by going to SalesforceIQ Connector. Here admin will see SalesforceIQ Customer.
When automatic Customer Synchronisation is disabled, then admin can synchronise the Customer details manually in a single click by clicking on “Synchronize Customer “.
View At SalesforceIQ End
Login to your SalesforceIQ account and click on Contacts as shown below. Here you can view Magento2 synchronized contacts.

View of synchronised contacts in account based list selected at eCommerce end.

View of synchronised contacts in contact based list selected at eCommerce end.

Support
Current Product Version - 1.0
Supported Framework Version - Magento 2.0.x, 2.1.x, 2.2.x,2.3.x, 2.4.x

Be the first to comment.