INTRODUCTION
Manage Magento’s multi-stores conveniently with Multishop MOB Extension!!
Managing multiple Magento stores can be a hectic job. You constantly have to give tedious efforts, money, and time to operate the multi-stores. Moreover, you have to monitor the inventory, orders, and much more.
Most importantly, if you have already integrated your Magento with Odoo with the help of Odoo Bridge for Magento or, you want to manage your Multiple Magento stores from Odoo, then “MOB Multishop,” extension of Odoo Bridge For Magento is an apt solution for you.
By synchronizing the Multiple Magento stores to the Odoo end, you can use Odoo directly for backend operations to manage your Multiple Magento stores.
Note: Multishop MOB Extension For Magento Module works in conjunction with the following module:
You would require to install the above module first for Multishop MOB Extension For Magento to work perfectly.
FEATURES
- You can manage different Magento store Orders effectively in a single Odoo.
- Further, you can map every website with the Odoo price lists.
- On product synchronization, the product price on the Magento website also syncs to the corresponding Odoo price lists.
- Odoo manages the price as per the Magento shops, from where the user has placed the order.
- Manage multiple orders at the Odoo end for every Magento shop.
INSTALLATION
- Once you purchase the App from Webkul store, you will receive the link to download the zip file of the module.
- Extract the file on your system after the download finishes. You will be able to see a folder named- ‘odoo_magento_multishop.’
- Copy and paste this folder inside your Odoo Add-Ons path.
- Now, open the Odoo App and click on the Settings menu. Here, click on Activate the Developer Mode.
- Then, open the Apps menu and click on ‘Update Modules List.’
- In the search bar, remove all the filters and search ‘odoo_magento_multishop.’
- You will be able to see the module in the search result. Click on ‘Install’ to install it.
WORKFLOW CONFIGURATION
AT THE ODOO END
1. Firstly, open the Odoo Backend, go to Settings and scroll to the bottom of the page and locate “Activate the Developer Mode.”
MAGENTO STORES SYNC TO ODOO
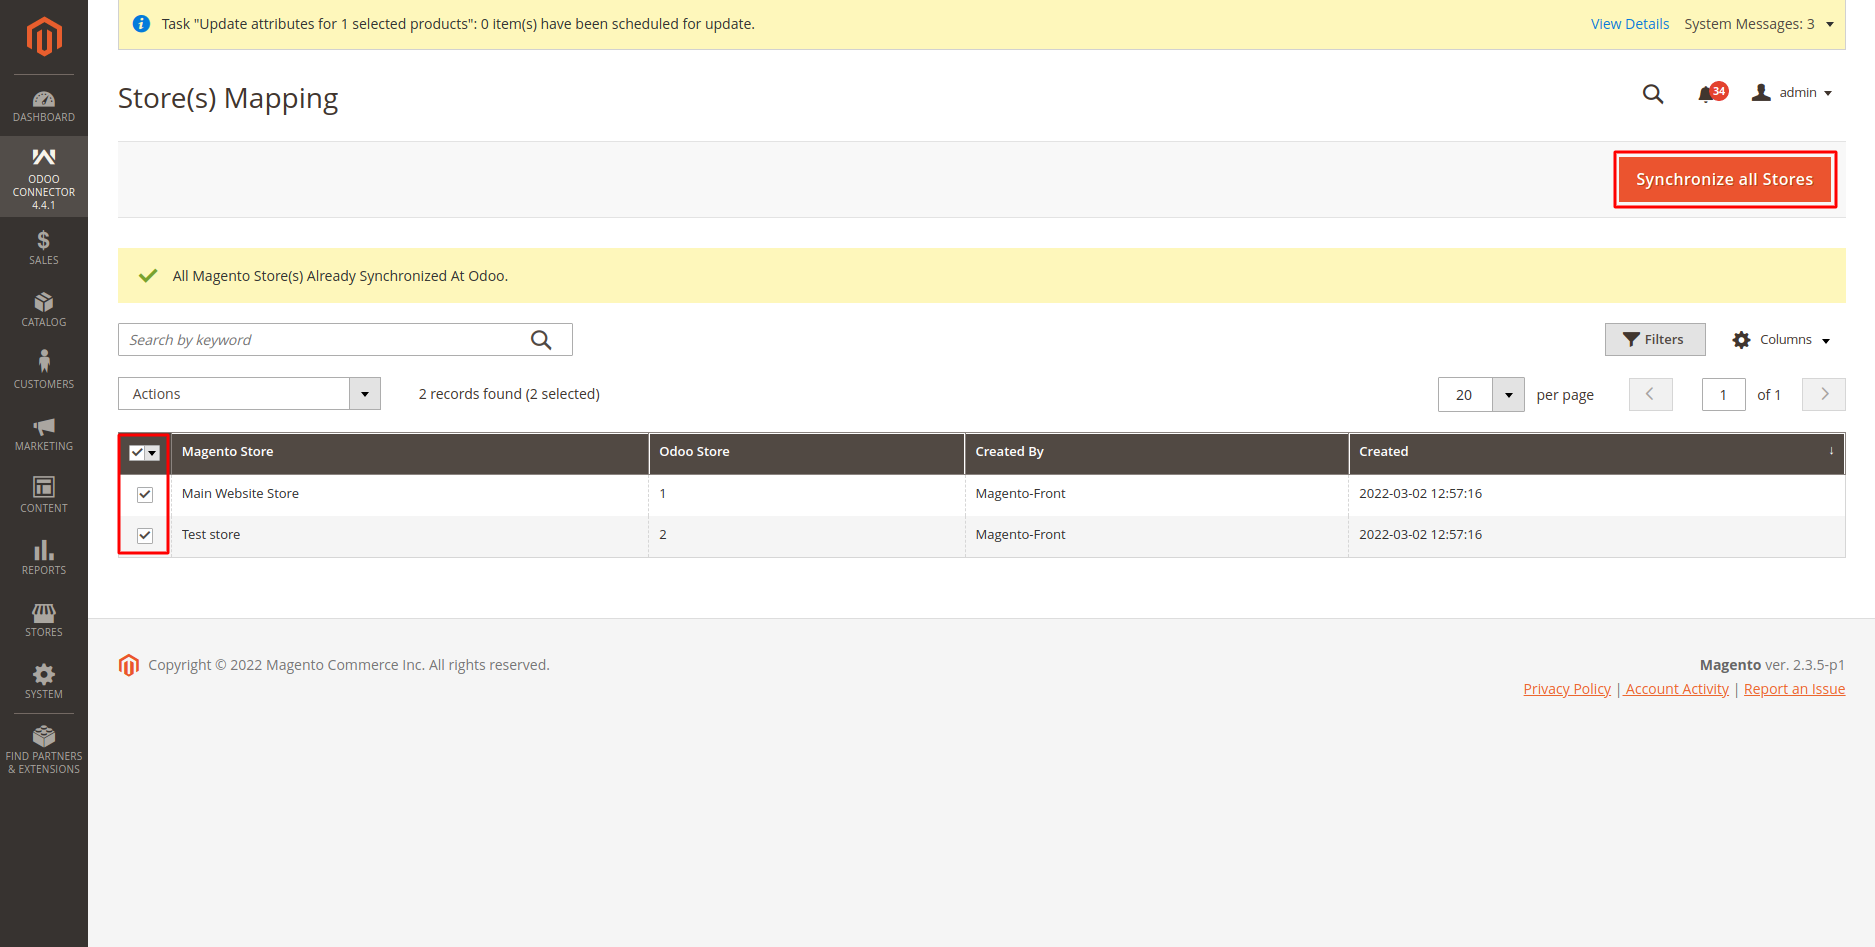
2. Log in to your Magento Admin, click on “Odoo Connector> Magento Store,” select the stores you want to sync, and click the “Synchronize All Store” to sync the Magento Store with Odoo.
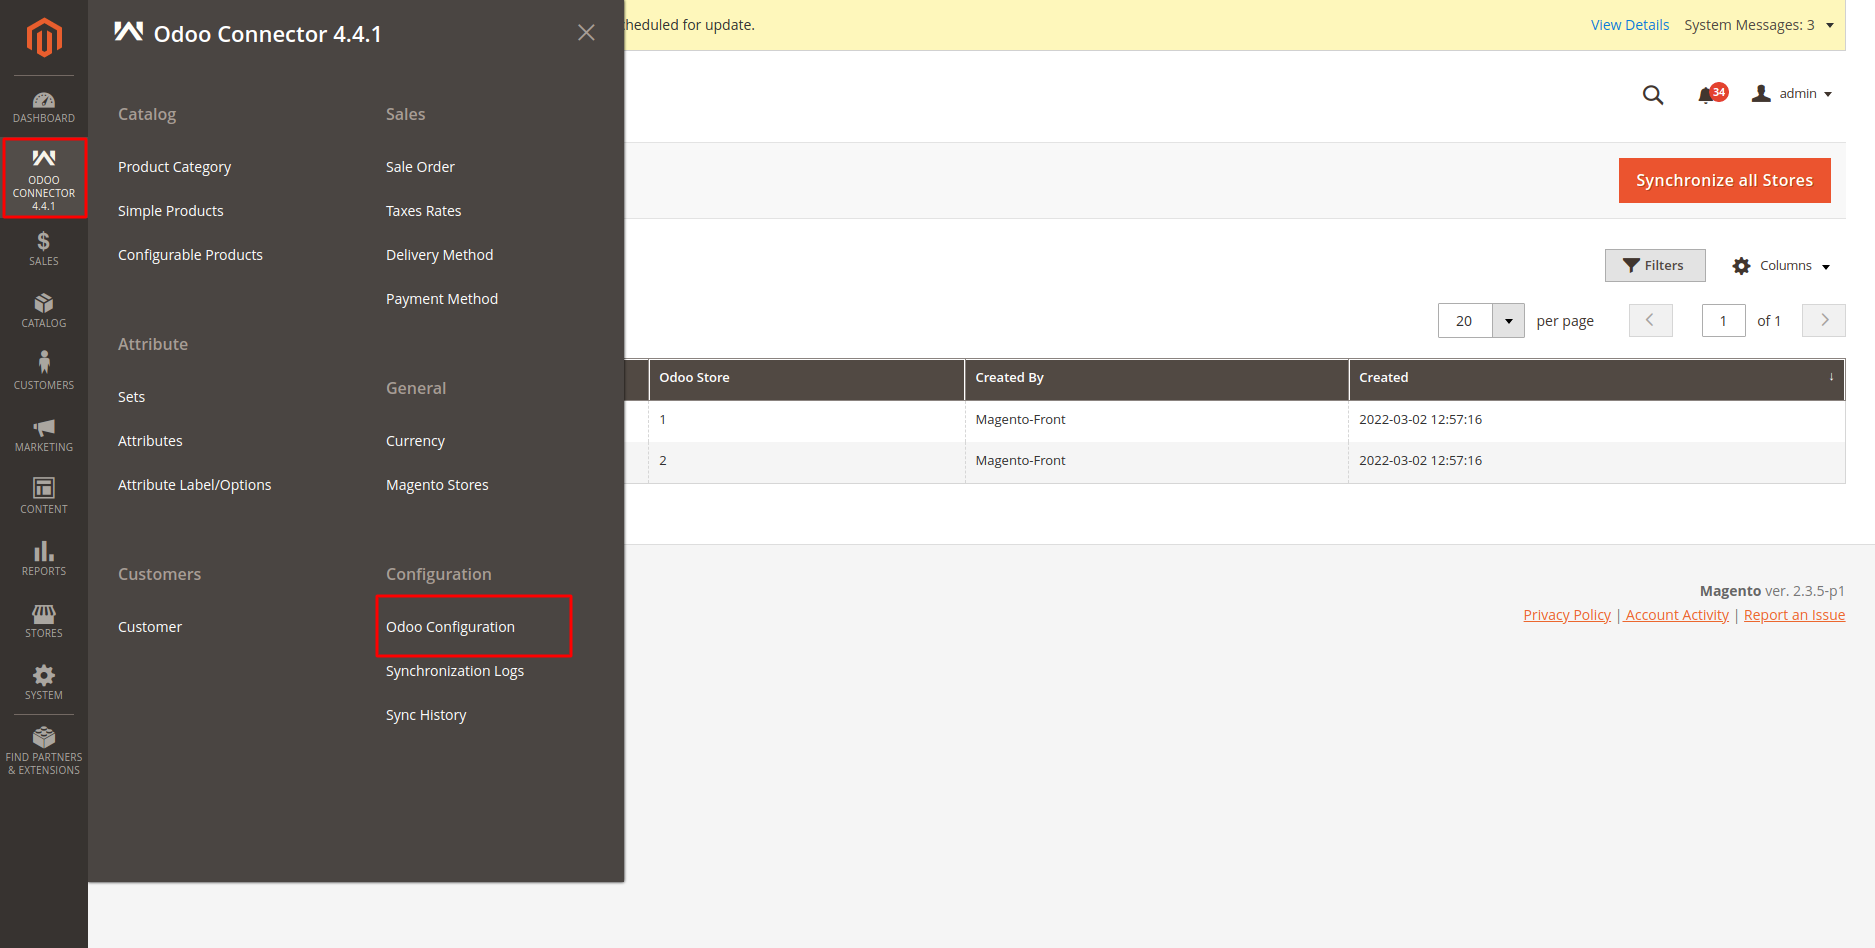
3. Move further, go to “Odoo Connector>Odoo Configuration.”
4. On product synchronization, the product price on the Magento website also syncs to the corresponding Odoo price lists.
5. In the “Odoo Configuration,” click the “Multishop Settings” and set “Auto Pricelist Generation” and “Auto Special Pricelist Generation.”
6. Moreover, at the Odoo end, you can also view the Magento website mapping. Click “Configuration> Magento Website” to view the website mapping.
7. The Product prices will get synchronized to the Odoo end according to Magento Websites.
At the Odoo end, there will be a separate price list for each Magento Website price management.
The Special product prices will also get synchronized to the Odoo end as per the Magento Websites.
Additionally, there will be a separate special product price list for each Magento Website to manage special prices at the Odoo end.
NOTE: Special price synchronization is only available in Odoo v15 and is not available in old Odoo versions.
MAGENTO STORES AT ODOO END
8. Next, open the “Ecomm Odoo Bridge” and go to “Magento Store” under “Configuration” to view all the Magento store mapping. Click and open any store mapping to view all the data.
SYNCHRONIZING ORDERS FROM RESPECTIVE MAGENTO STORE TO THE ODOO END
9. Now, go to “Sales>Quotations” and open any quotation. Here, you can see the “Magento Store,” which will display the website, store, and store view from where the order has arrived.
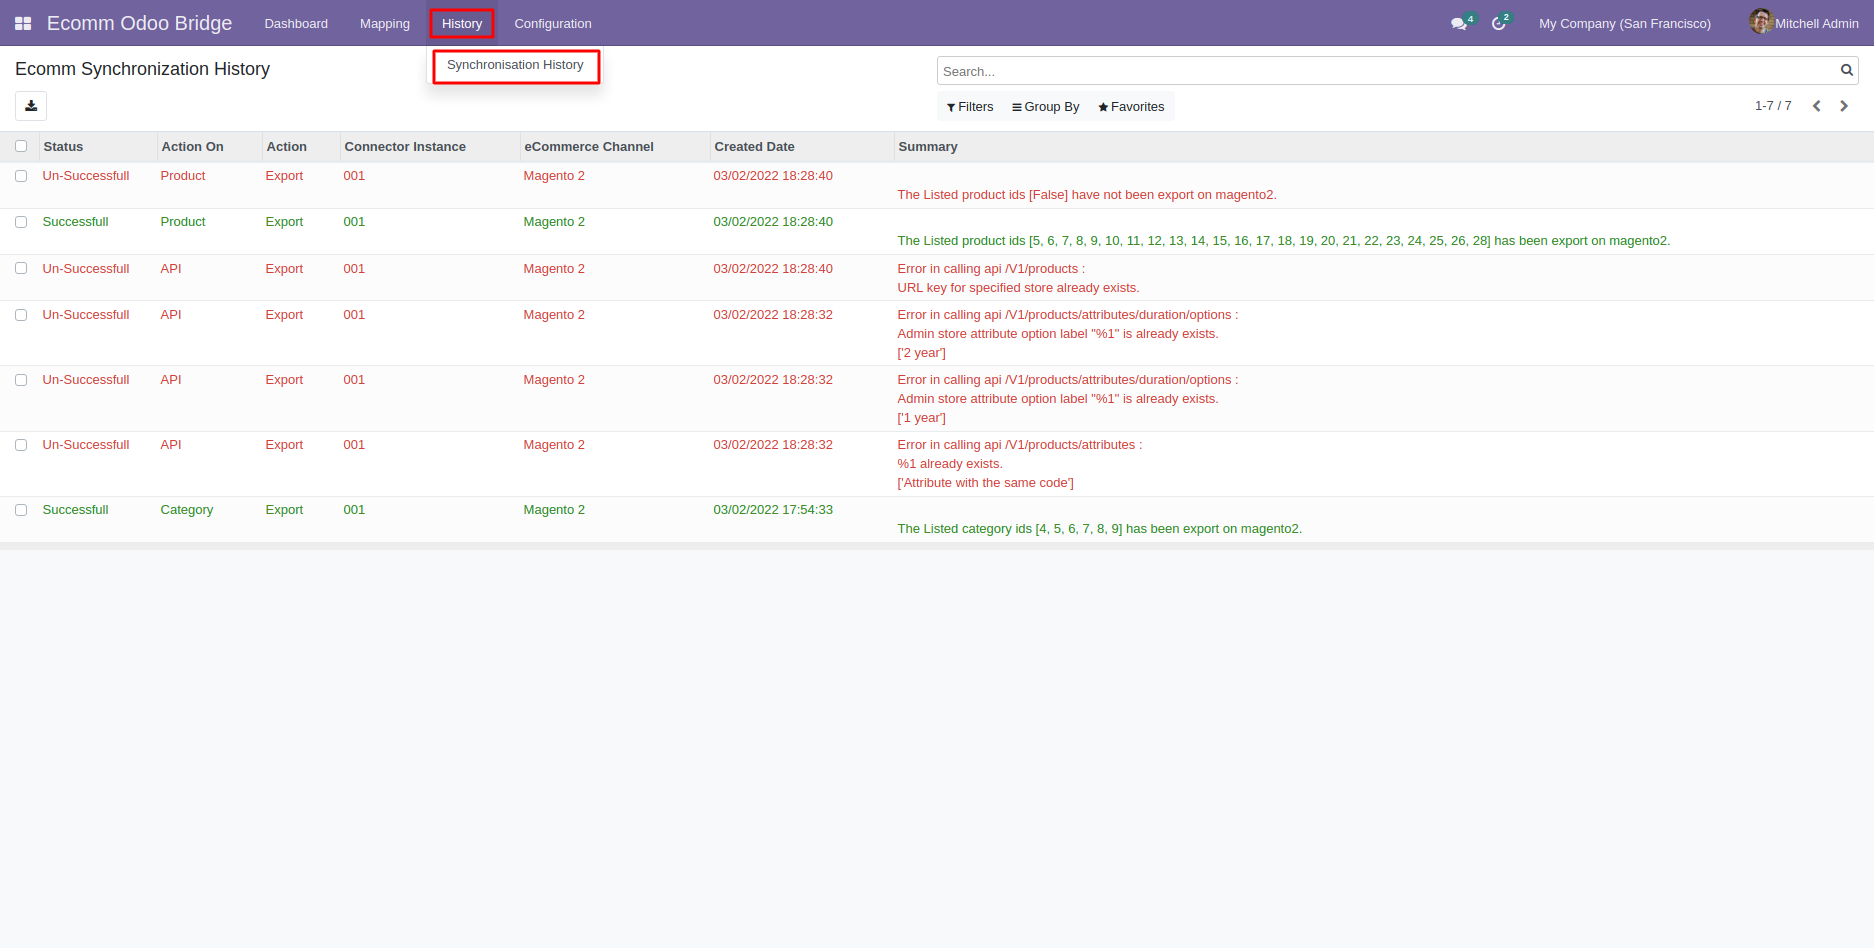
10. In addition, view the entire export history by clicking on the “History>Synchronization History.”
11. Moreover, you can view the mapping of category, attribute, attribute value, etc., from the “Mapping” menu.
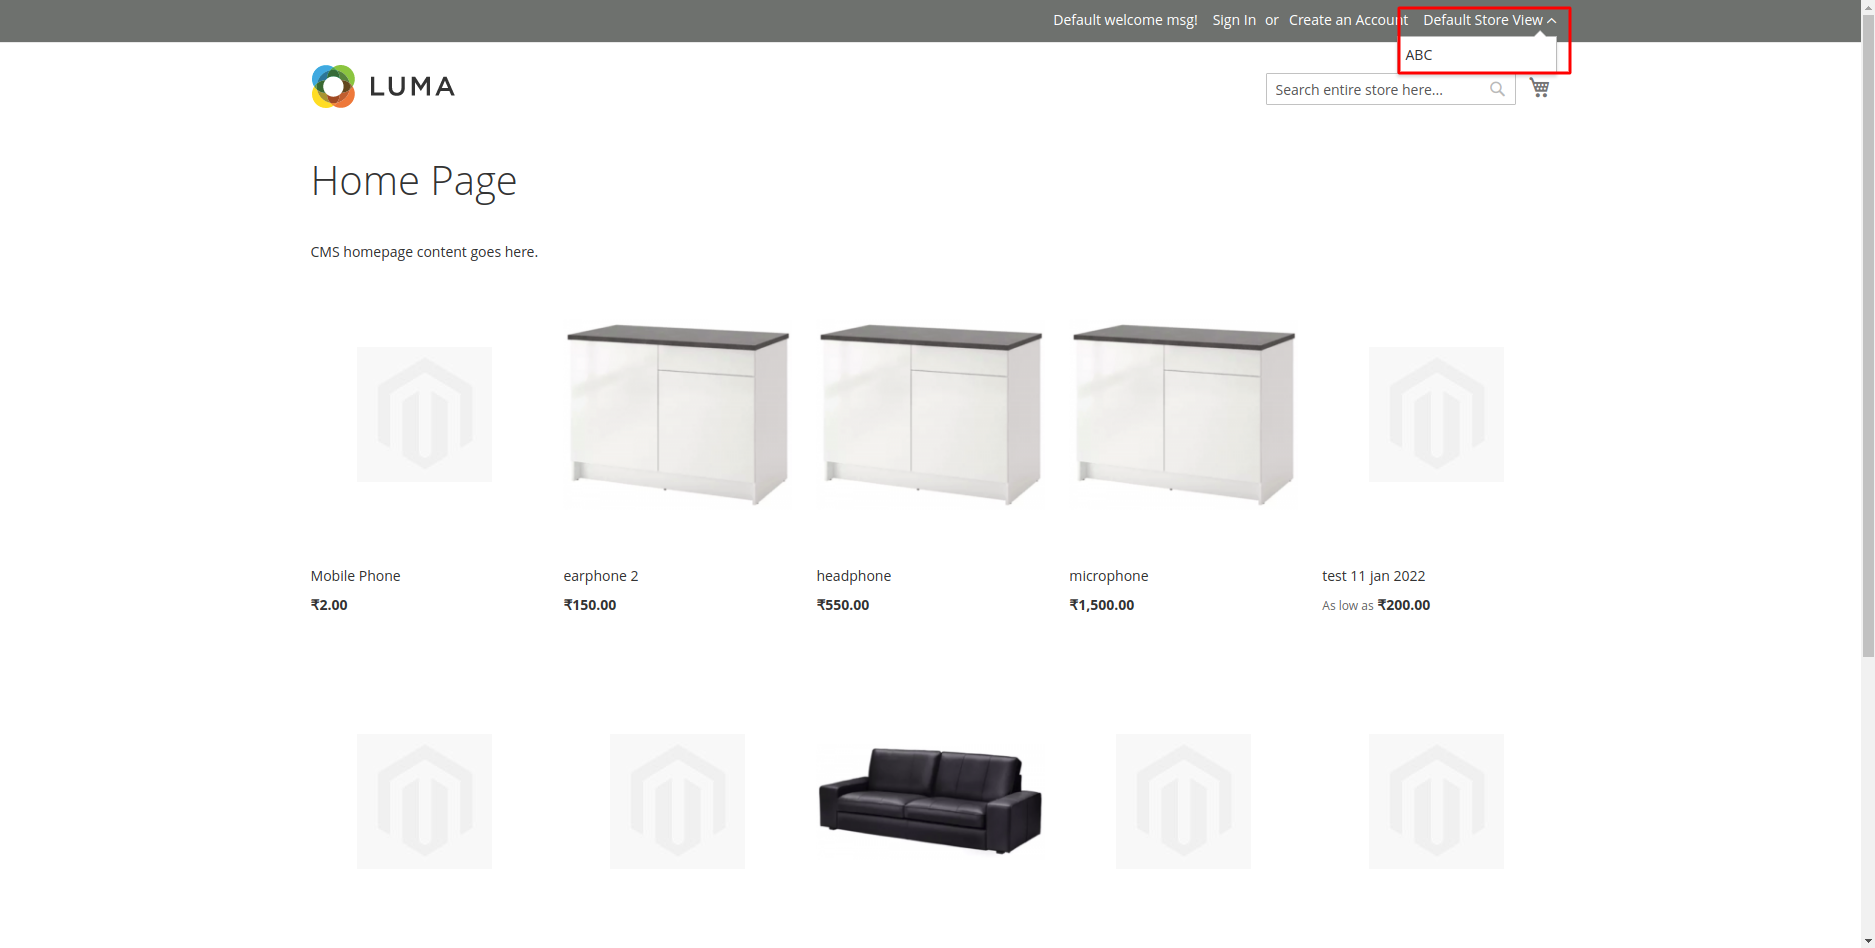
12. Lastly, select the “Customer View” to open the website on which you can view and choose from the different store views.
OTHER ODOO MODULES
NEED HELP?
Hope you find the guide helpful! Please feel free to share your feedback in the comments below.
If you still have any issues/queries regarding the module, please raise a ticket at https://webkul.uvdesk.com/en/customer/create-ticket/.
Also, please explore our Odoo development services & an extensive range of quality Odoo Apps.
For any doubt, contact us at [email protected].
Thanks for paying attention!!
Current Product Version - 1.0.0
Supported Framework Version - Magento 2.0.x, 2.1.x, 2.2.x, 2.3.x, 2.4.x & Odoo V15, V14, V13, V12, V11, V10, V9, V8, V7


Be the first to comment.