CS-Cart Make An Offer is an add-on that grants users transparency to negotiate the price of their desired product with the store admin.
The extension is ideal for stores providing custom services or specific to stores that would benefit from the customer being able to place a custom quote.
Once by selecting “Make An Offer” on the product detail page, the user can enter and submit a new price as per the quantity of their choice.
Admin receives the offer via mail, and an offer is generated. The offer can be accepted, rejected, or countered based on the quotation.
Therefore, the admin and user can encounter and continue to negotiate via the discussion panel provided.
When the offer gets accepted, the customer gets notified via email, and the sales go on.
Check a brief overview of the plugin –
Features
- Well integrated with CS-Cart/Multivendor.
- Request for an offer from the frontend.
- Create and customize make an offer form page.
- The offer is restricted to a single product based on price as well as quantity.
- Option to view the list of offers with all recent estimate requests sent in the “offer” page of the registered user.
- A separate section of the discussion panel is provided to both admins and users where they can haggle related to the offer.
- Redirect users who accept quotes to the CS-Cart checkout page via the reference link/promotion code provided by mail.
- Manage offers with expiration dates.
- Option to disable the communication tab at the admin end accordingly.
- Option to re-create and manage quote requests from the admin end against the response of an offer.
- Rejected offers can be accepted in the future if the admin changes their mind.
- The option of reCAPTCHA is provided to ensure that spammers cannot overload the server.
- Ajax base process ensures the user cannot place multiple offers for the same product simultaneously.
- An email is sent to the admin each time a user makes an offer.
- Email sent to users who made offers when it get accepted/rejected or countered.
- Once an order is generated in response to the offer accepted then further it can not be rejected.
- Auto promotion code/link creation upon accepting an offer.
Features Added in Version 1.1
- Admin can enable the option for making an offer for selected categories.
- Functionality to allow vendors to manage offers at their end.
- Admin can make an offer option for selected Features and Variants only.
- Admin can disable a particular product for the customer from making an offer.
- Option to display the offer form in a product tab at the front end.
- Admin can enable/disable the offer handling process at the vendor end.
New Added Features in Version 2.0
- Functionality to enable/disable the offer for a particular product.
- Option to enable/disable the offer for any particular category.
- Functionality to enable/disable the offer option for all the products of a particular vendor on the basis of the vendor plan.
- The functionality to enable Google reCAPTCHA for verification is provided.
Added Features in Version 3.4
- The admin can configure make an offer price limit and duration for the offer.
- The customer can request to make an offer on any product and the admin can check that request.
- On ending the offer, the customer will get an email notification before 1 day.
- Creating new make an offer on products by the admin, all registered customers will get an email notification.
- Make an offer time duration will be visible on the product page.
- The admin and customer can view all make-an-offer product lists.
- The admin can allow the make an offer option for all the products.
Note: This add-on is compatible with the Google reCAPTCHA add-on.
Please check the below-listed cases for different offer configurations:
- Enable/disable the make an offer option from the configuration page, if set to None means the offer is not applicable to this product.
- It will further check the corresponding category of the product and will update the customer offer accordingly.
- If in the category, it is also set to None, then it will update the make an offer option as per the vendor plan opted by the vendor (In case of Multi-vendor only).
- If all set to “None,” it means the offer is not applicable.
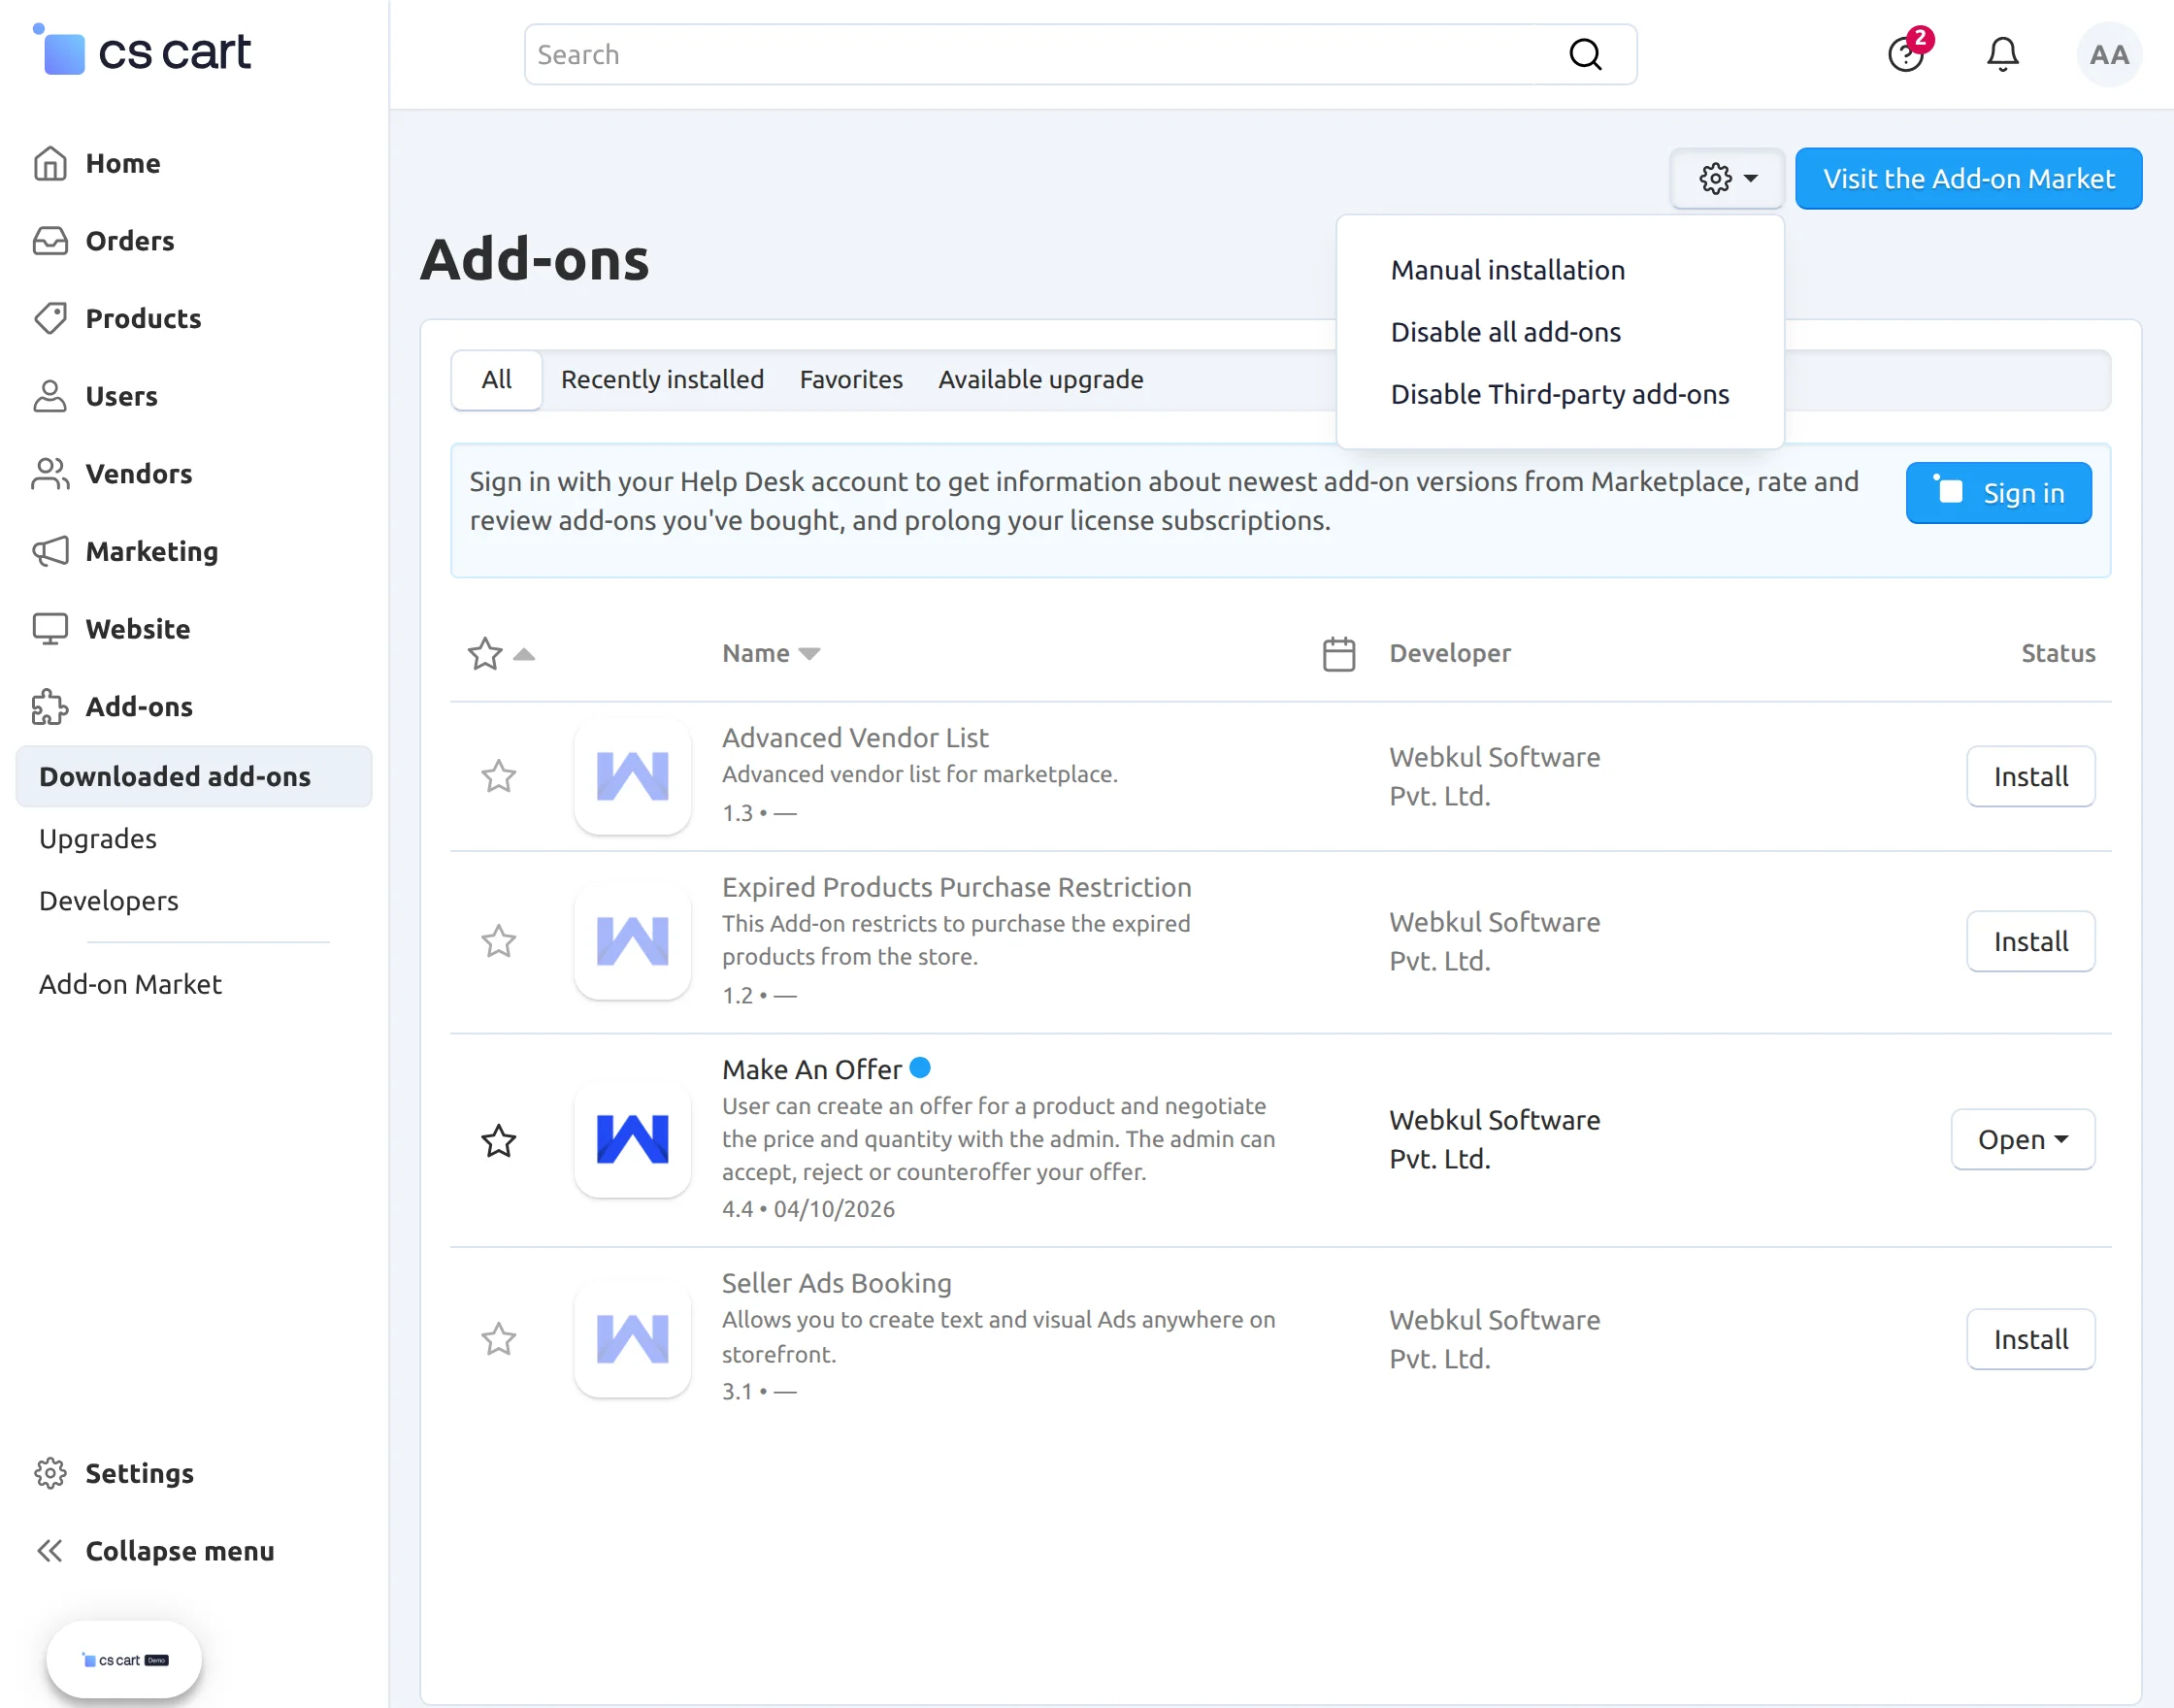
How To Upload And Install The Add-on
Click on “Local” to browse the zip file, and then click on “Upload & Install” as shown below in the snapshot.
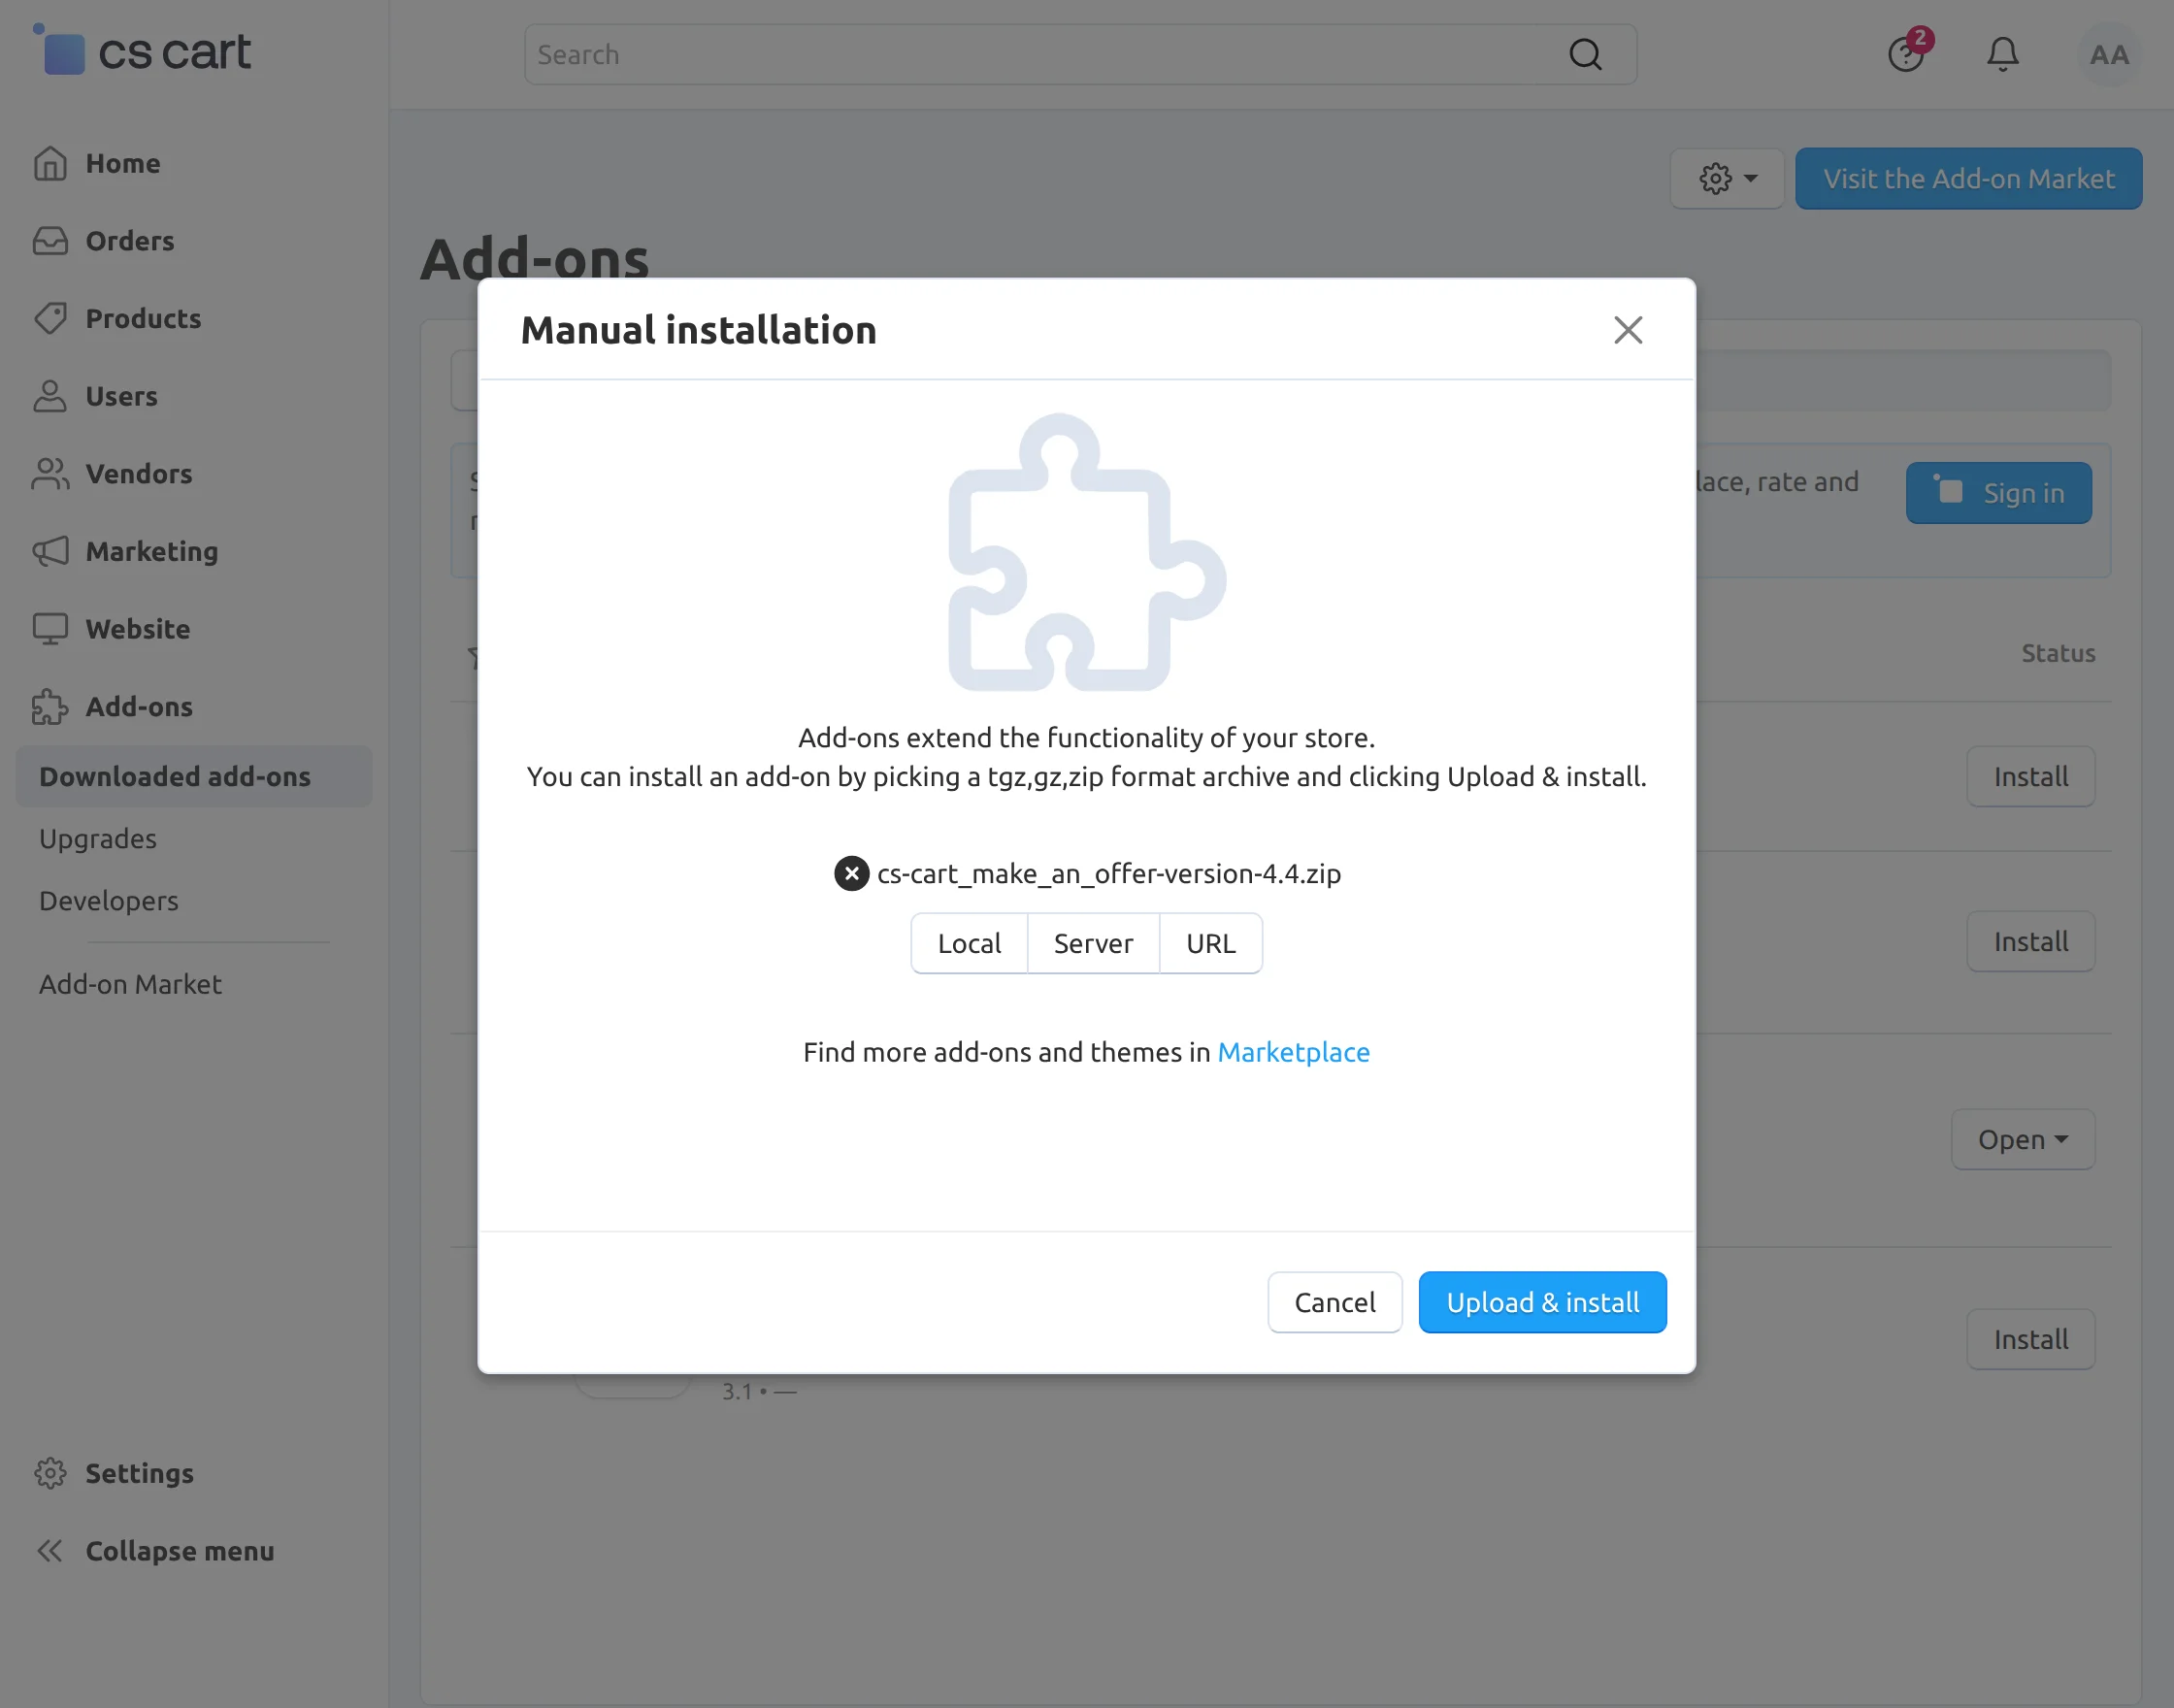
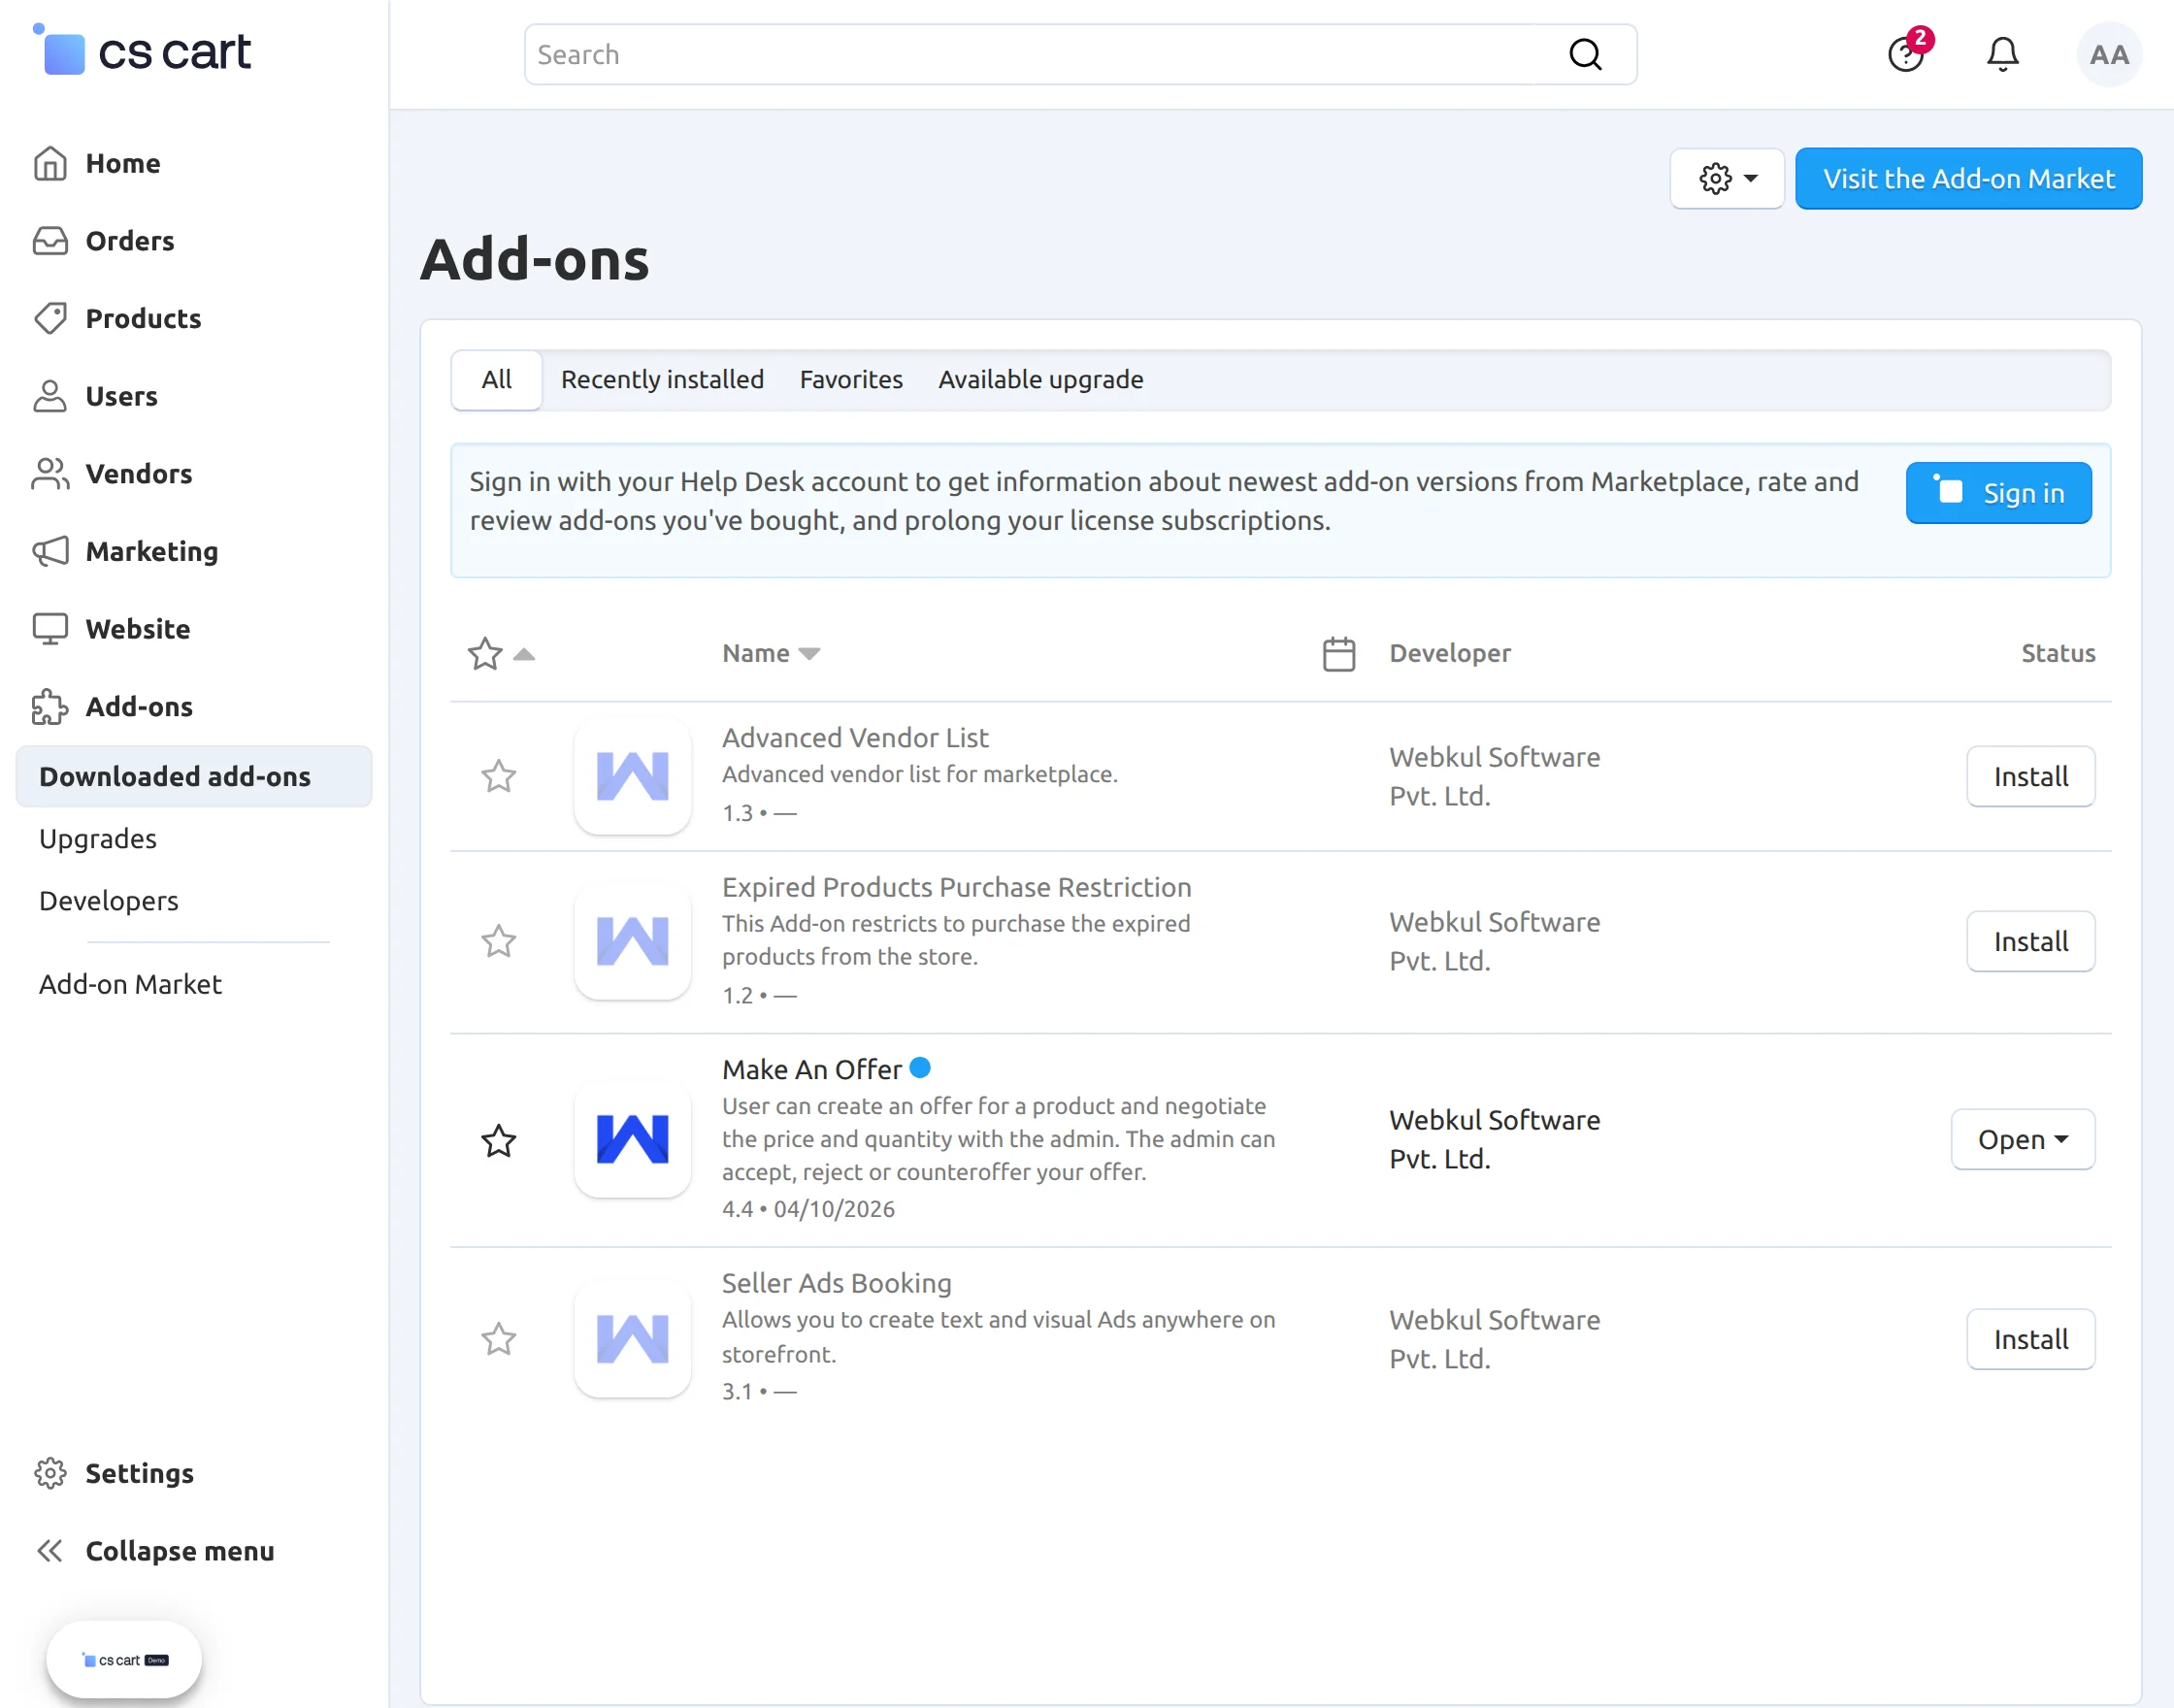
Thus, the add-on will be installed successfully!
Configuration
After installation, click on the name of the add-on “make an offer” to configure.
Set the parameters as shown below in the snapshot
- Click to display the product name and image on the offer form at frontend.
- Check the box to display the product price on offer form.
- Click to allow registration of guest user who creates an offer.
- Allow image verification for the registered user and the guest user.
- Click to allow discussion for the rejected and accepted offers.
- Click delete/disable to take actions for user promo codes.
- Click the checkbox to allow the make an offer option for all the products.
Note: If the admin will not click on Enable Offer For All Products Again, then also can select any particular category to apply the make an offer for that category product.
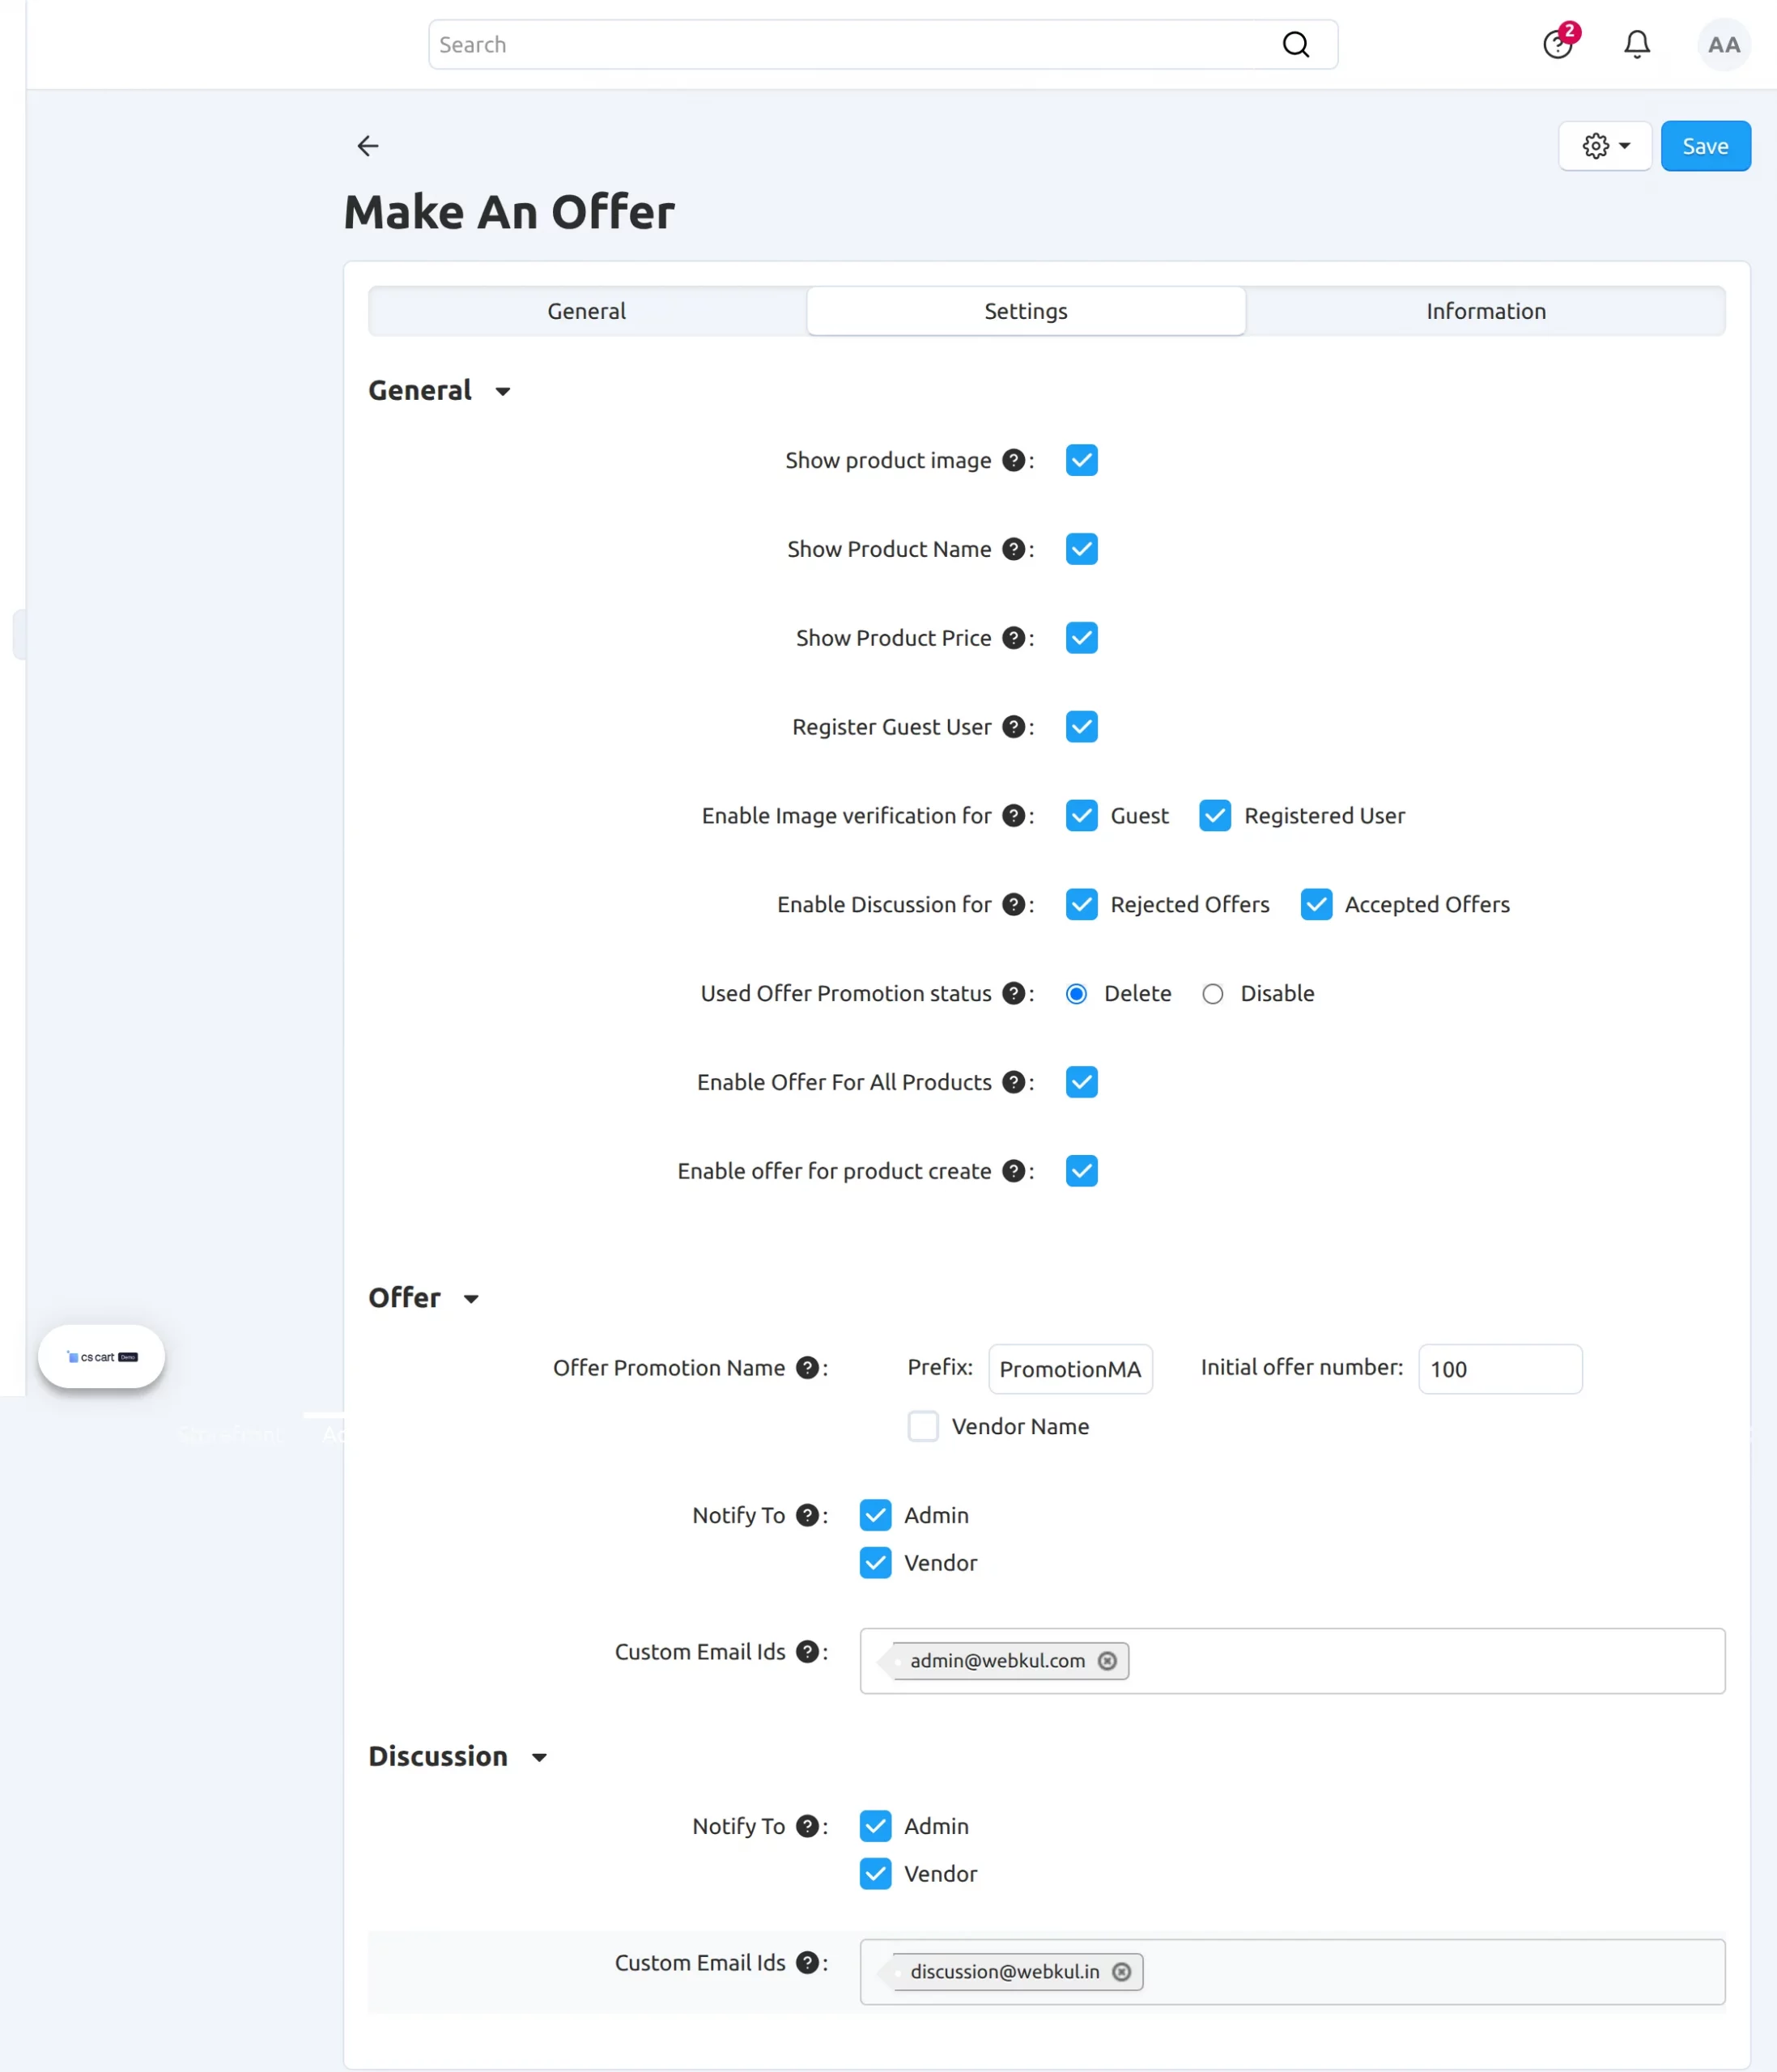
Further, there are some settings for discussion and offer. Please set the below parameters accordingly & save.
- Add the prefix and initial order number or vendor name for creating the offer promotion name.
- Click to notify the admin or vendor or both whenever a new offer is created or an offer gets accepted, rejected, or reopened by the admin.
- Enter the custom email ids for sending the offer notifications.
- Under the discussion section, click to notify the admin/vendor when any new comment is posted on the discussion panel either by the customer or by admin/vendor.
- Enter the custom email ids for sending the notification whenever a new comment is added to the discussion panel of the offer.
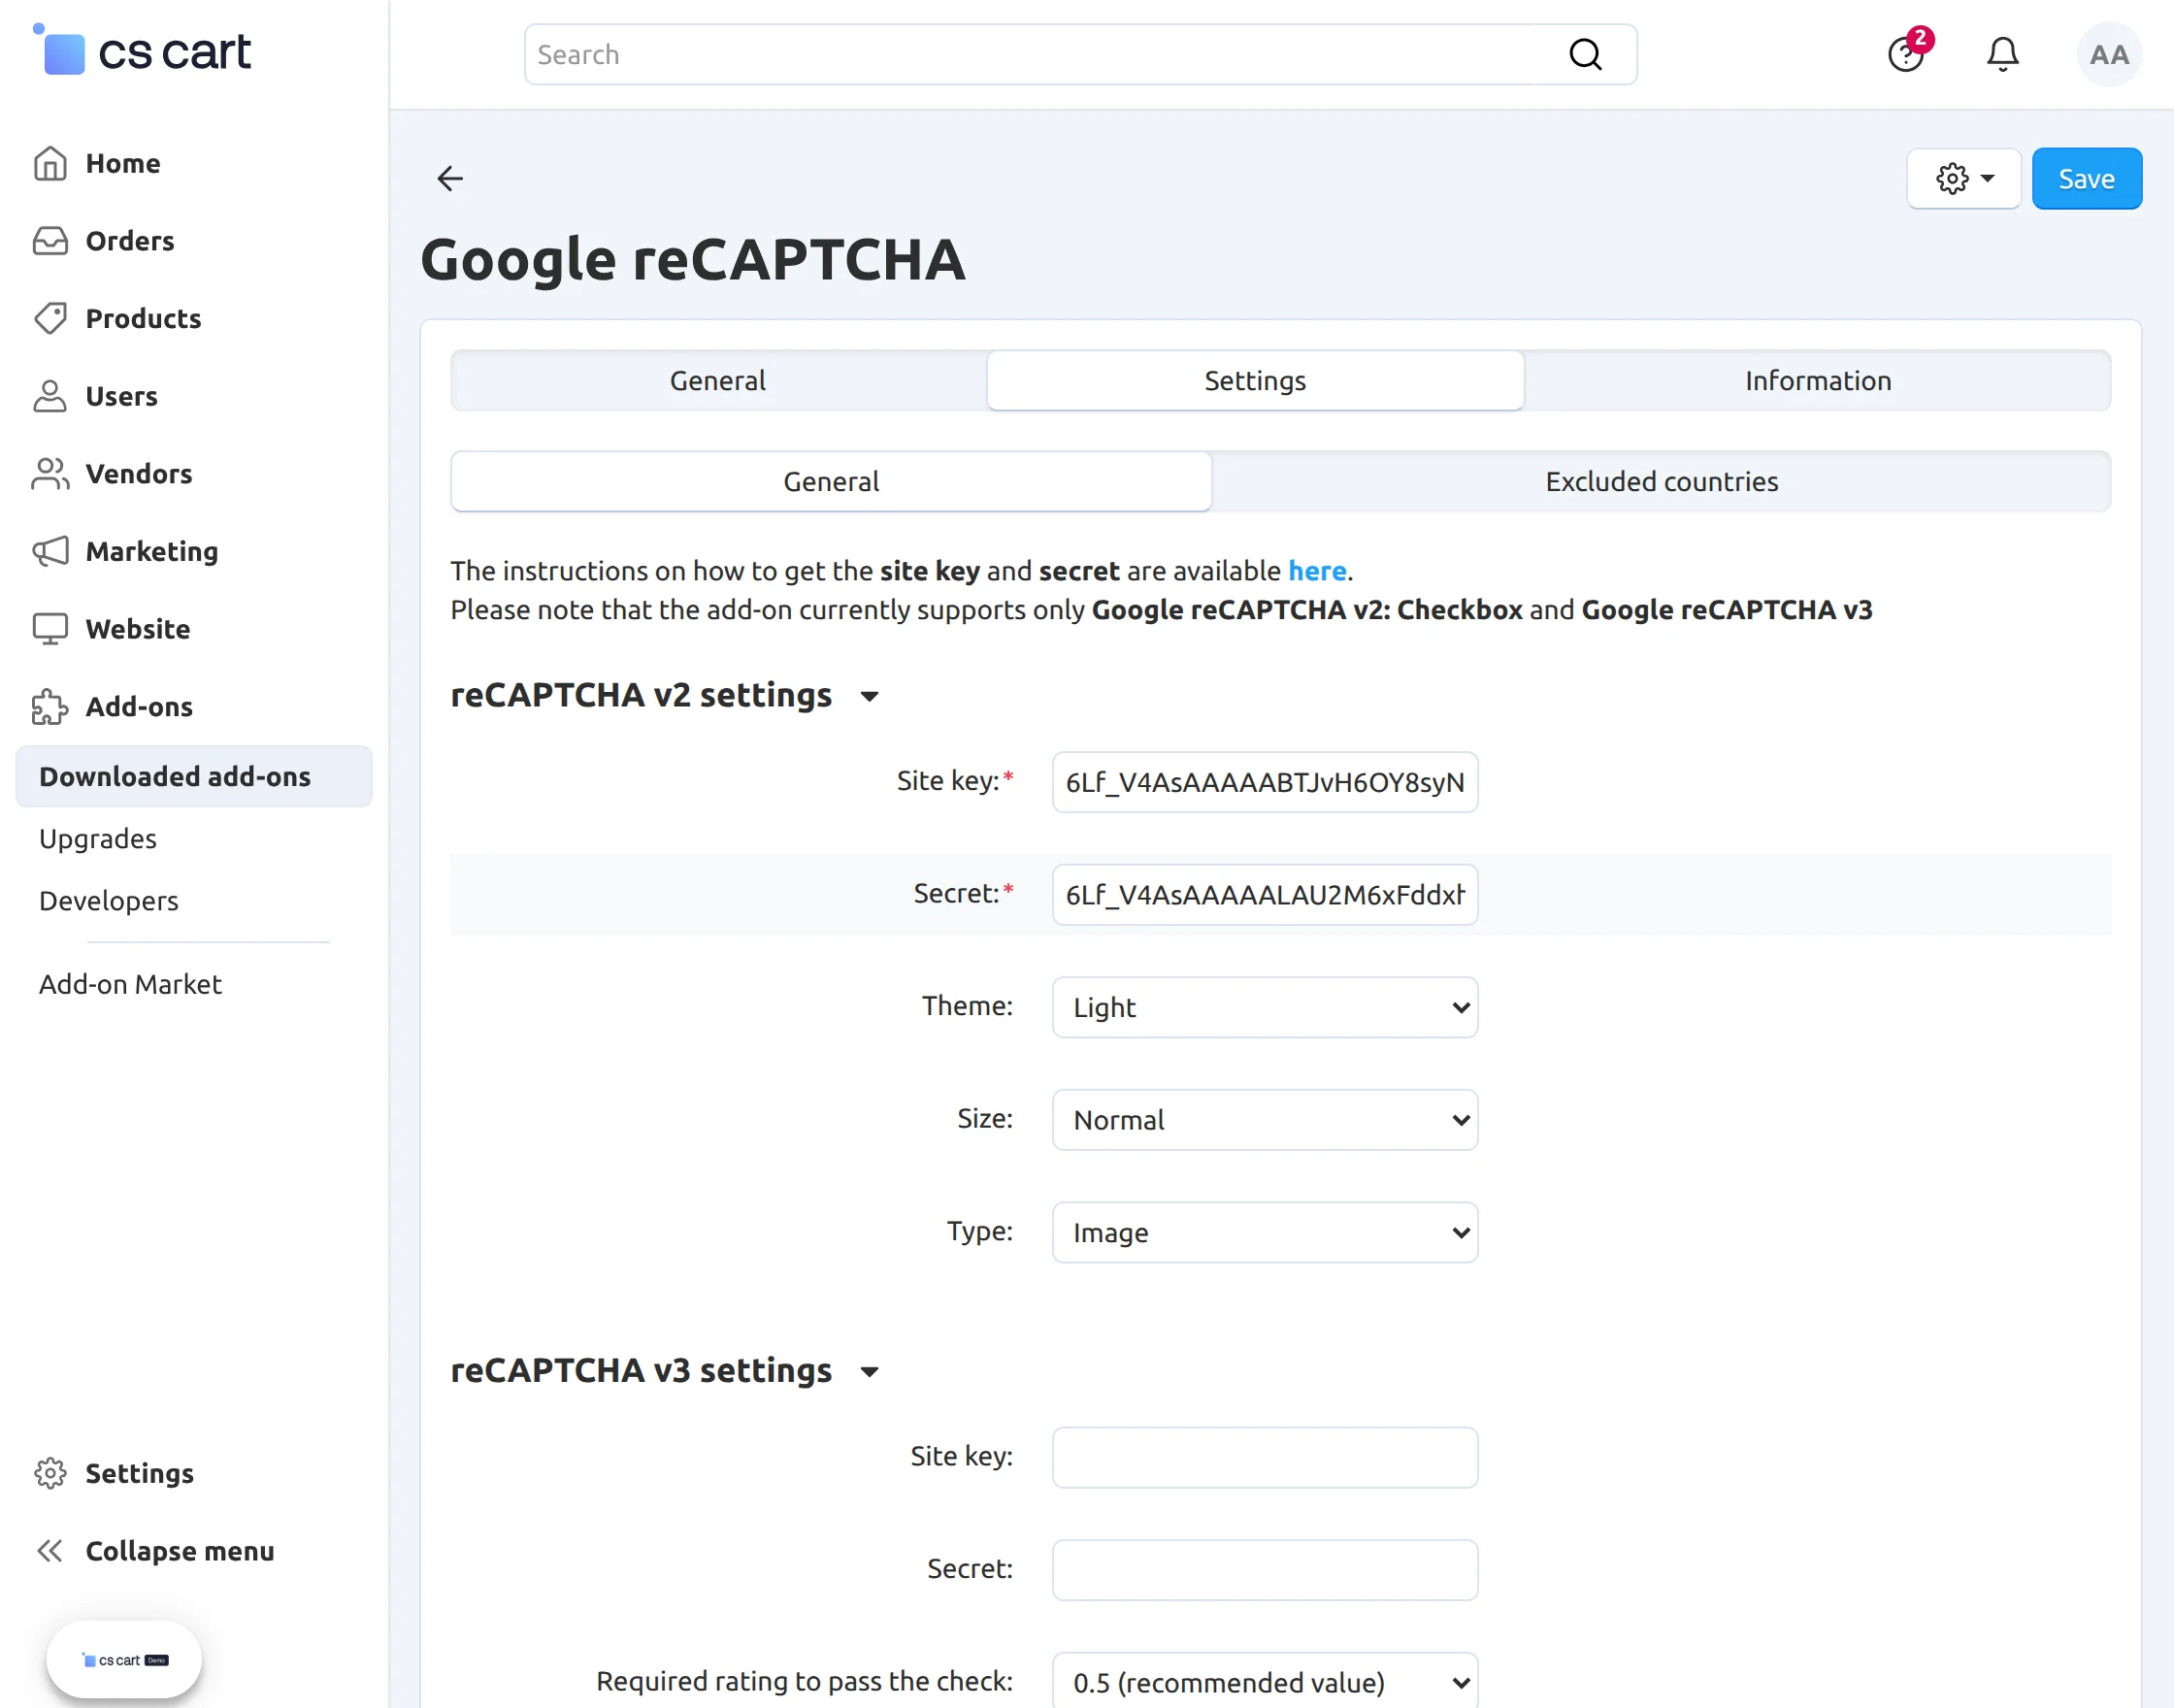
How to configure Google reCAPTCHA at the Backend:
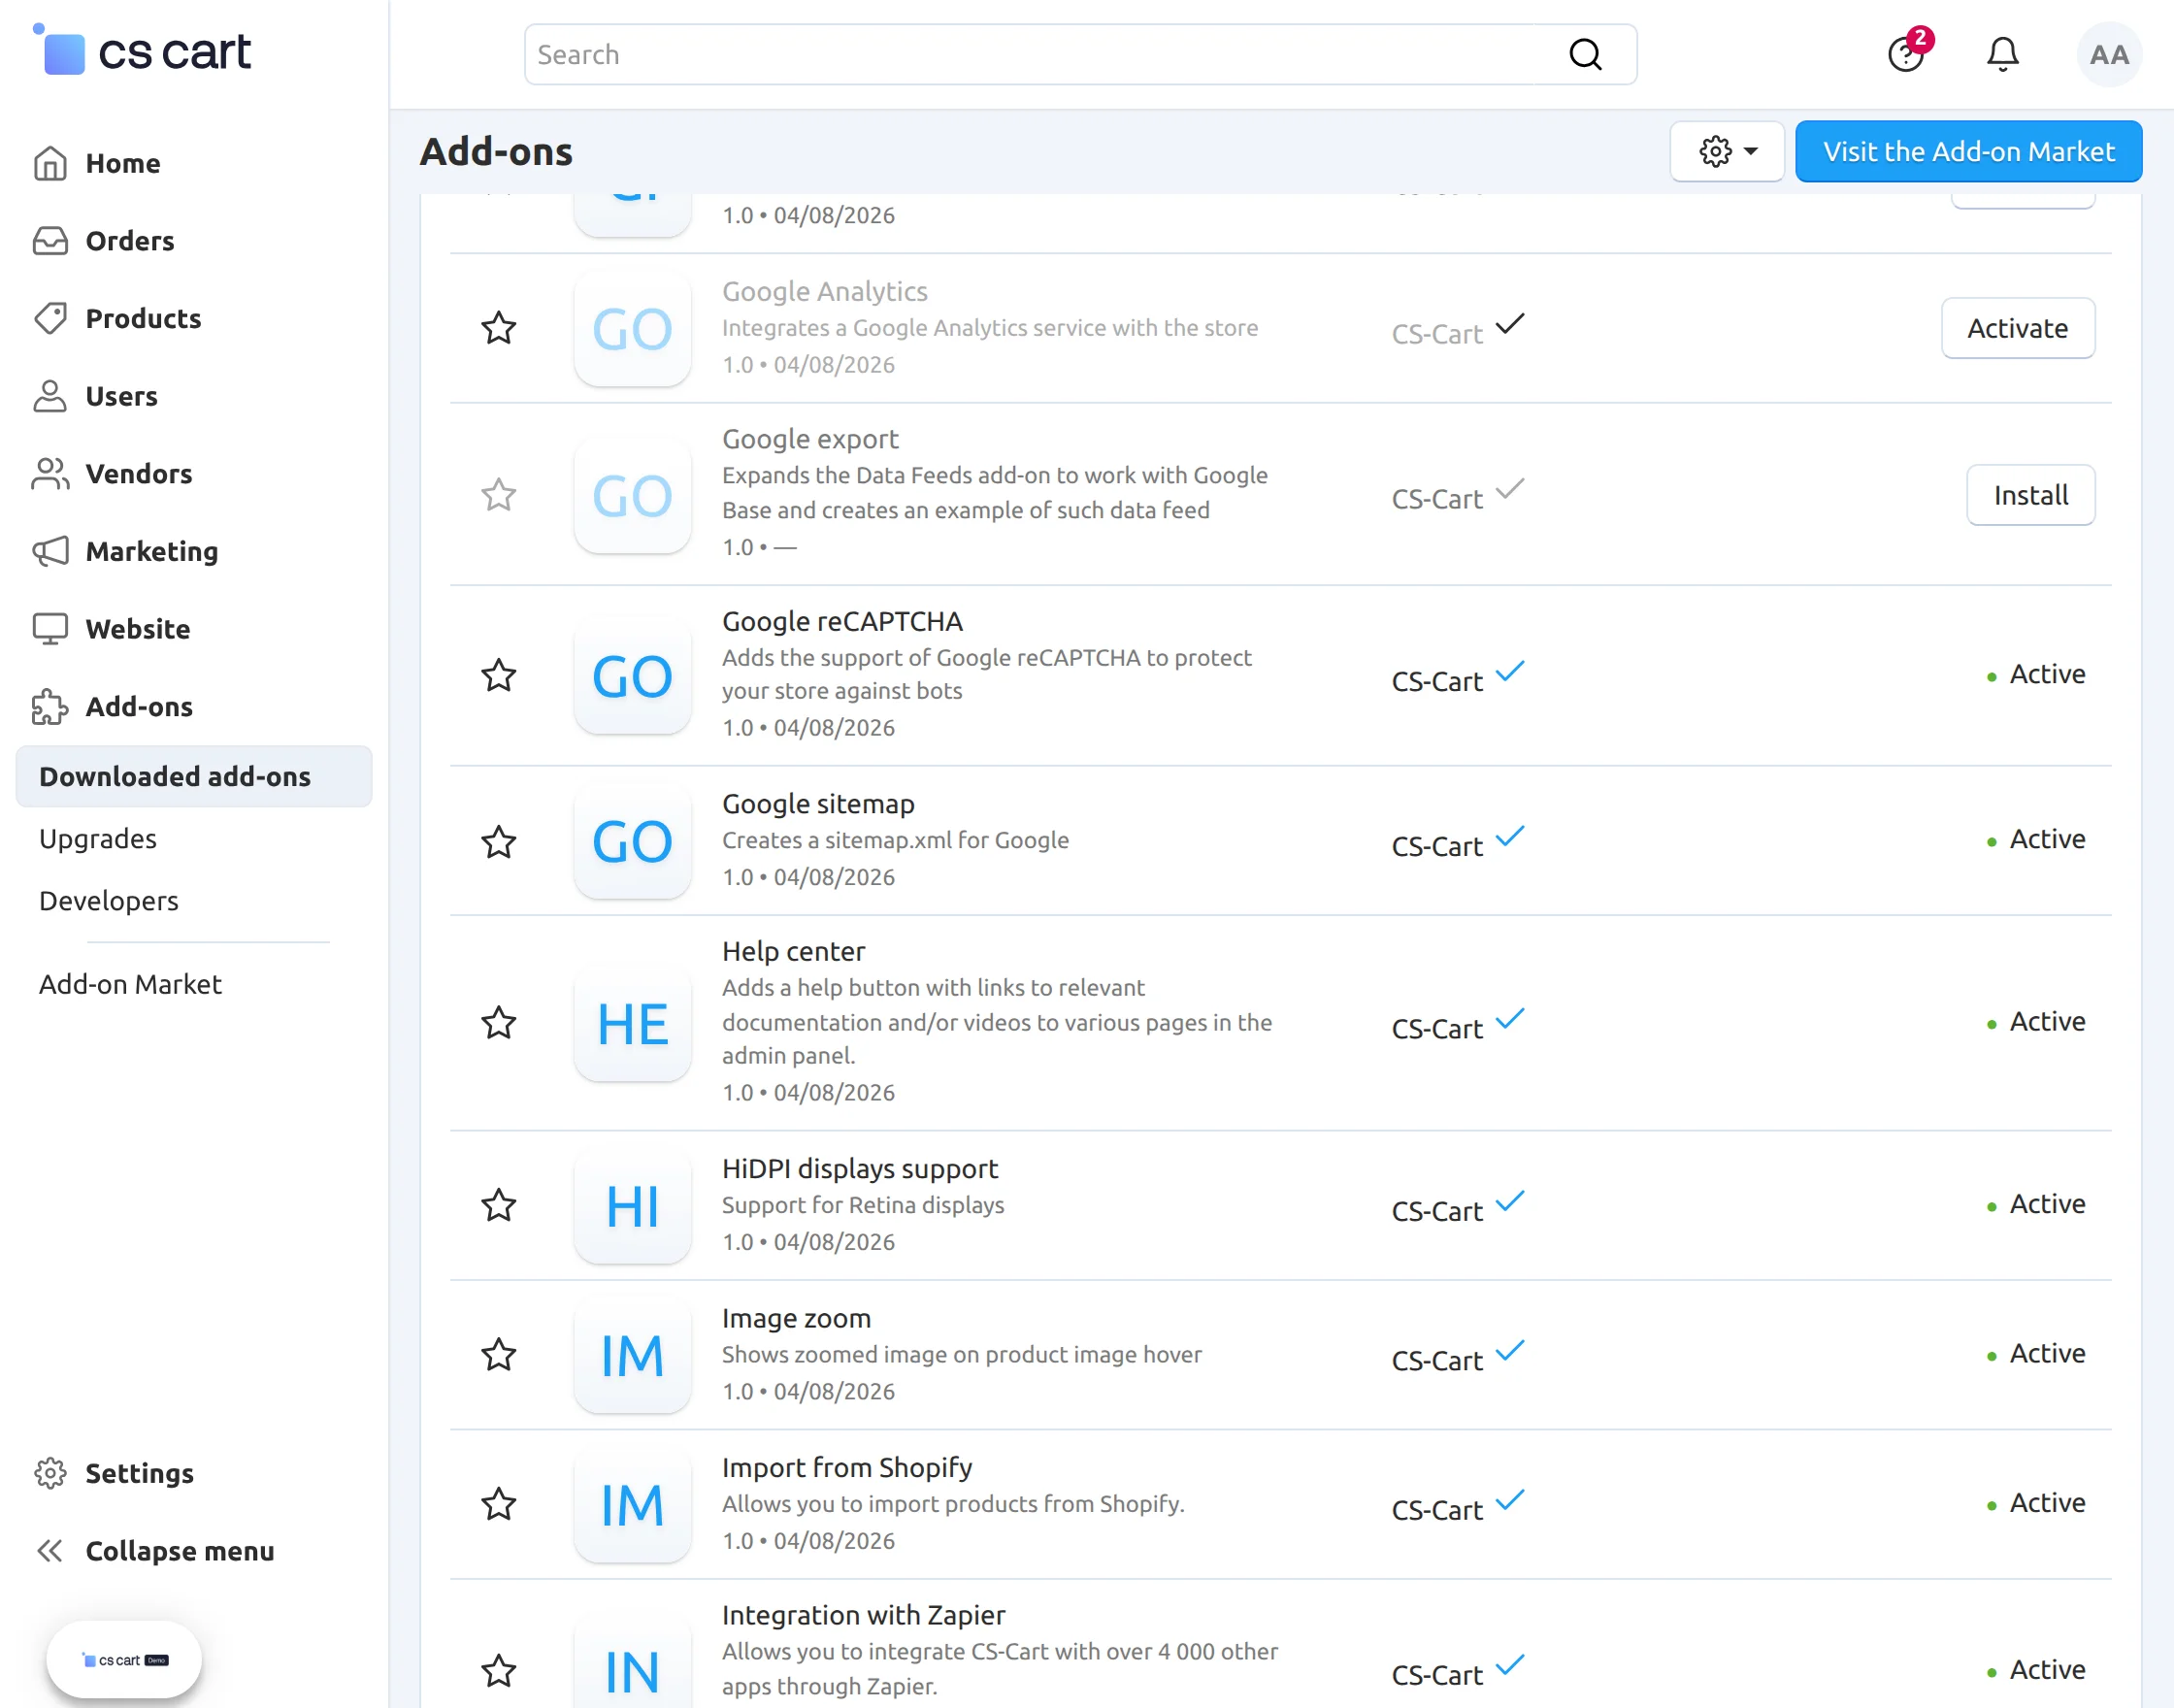
Go to “Manage add-ons” and find the “Google reCAPTCHA” add-on. Click on this add-on to configure its settings.
Enter the Site key and Secret key to activate Google reCAPTCHA to your site. After that select the “Theme”, “Size”, and “Type” for Google reCAPTCHA.
Now, check the various events for which you want to allow Google reCAPTCHA.
(Note: To get the Google reCAPTCHA secret key, you need to sign up for an API key pair for your site.
Firstly, choose the type of reCAPTCHA and then fill in the authorized domain names.
After you accept the terms of service, you can click the Register button to get a new API key pair.)
Make an offer- Category product
Note: If the admin enables the offer for all products then on the front end customer can select make an offer for all the products.
And if the admin does not select the option to enable the offer for all the products. Then the admin can select the make an offer for all the products for a particular category.
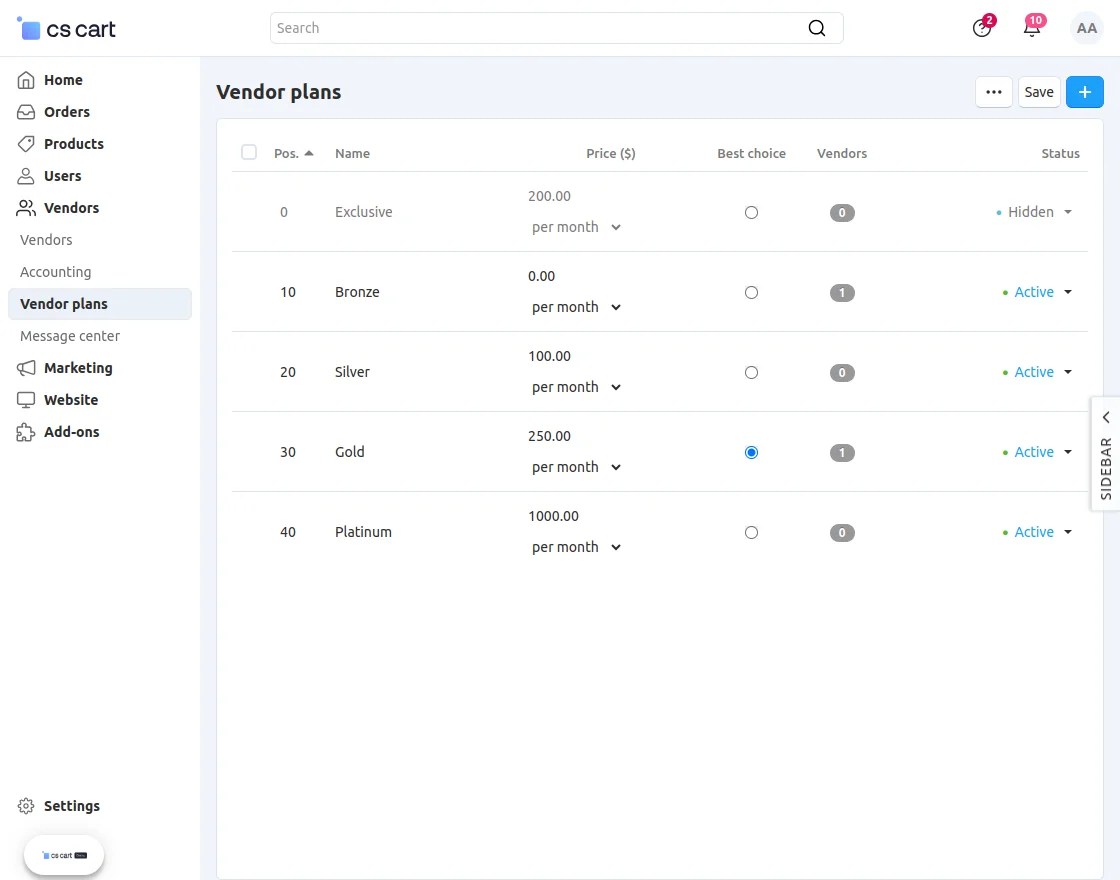
For that admin needs to go to Vendors>Vendor Plan, then the admin can select any of the vendor plans from the list as shown in the screenshot.
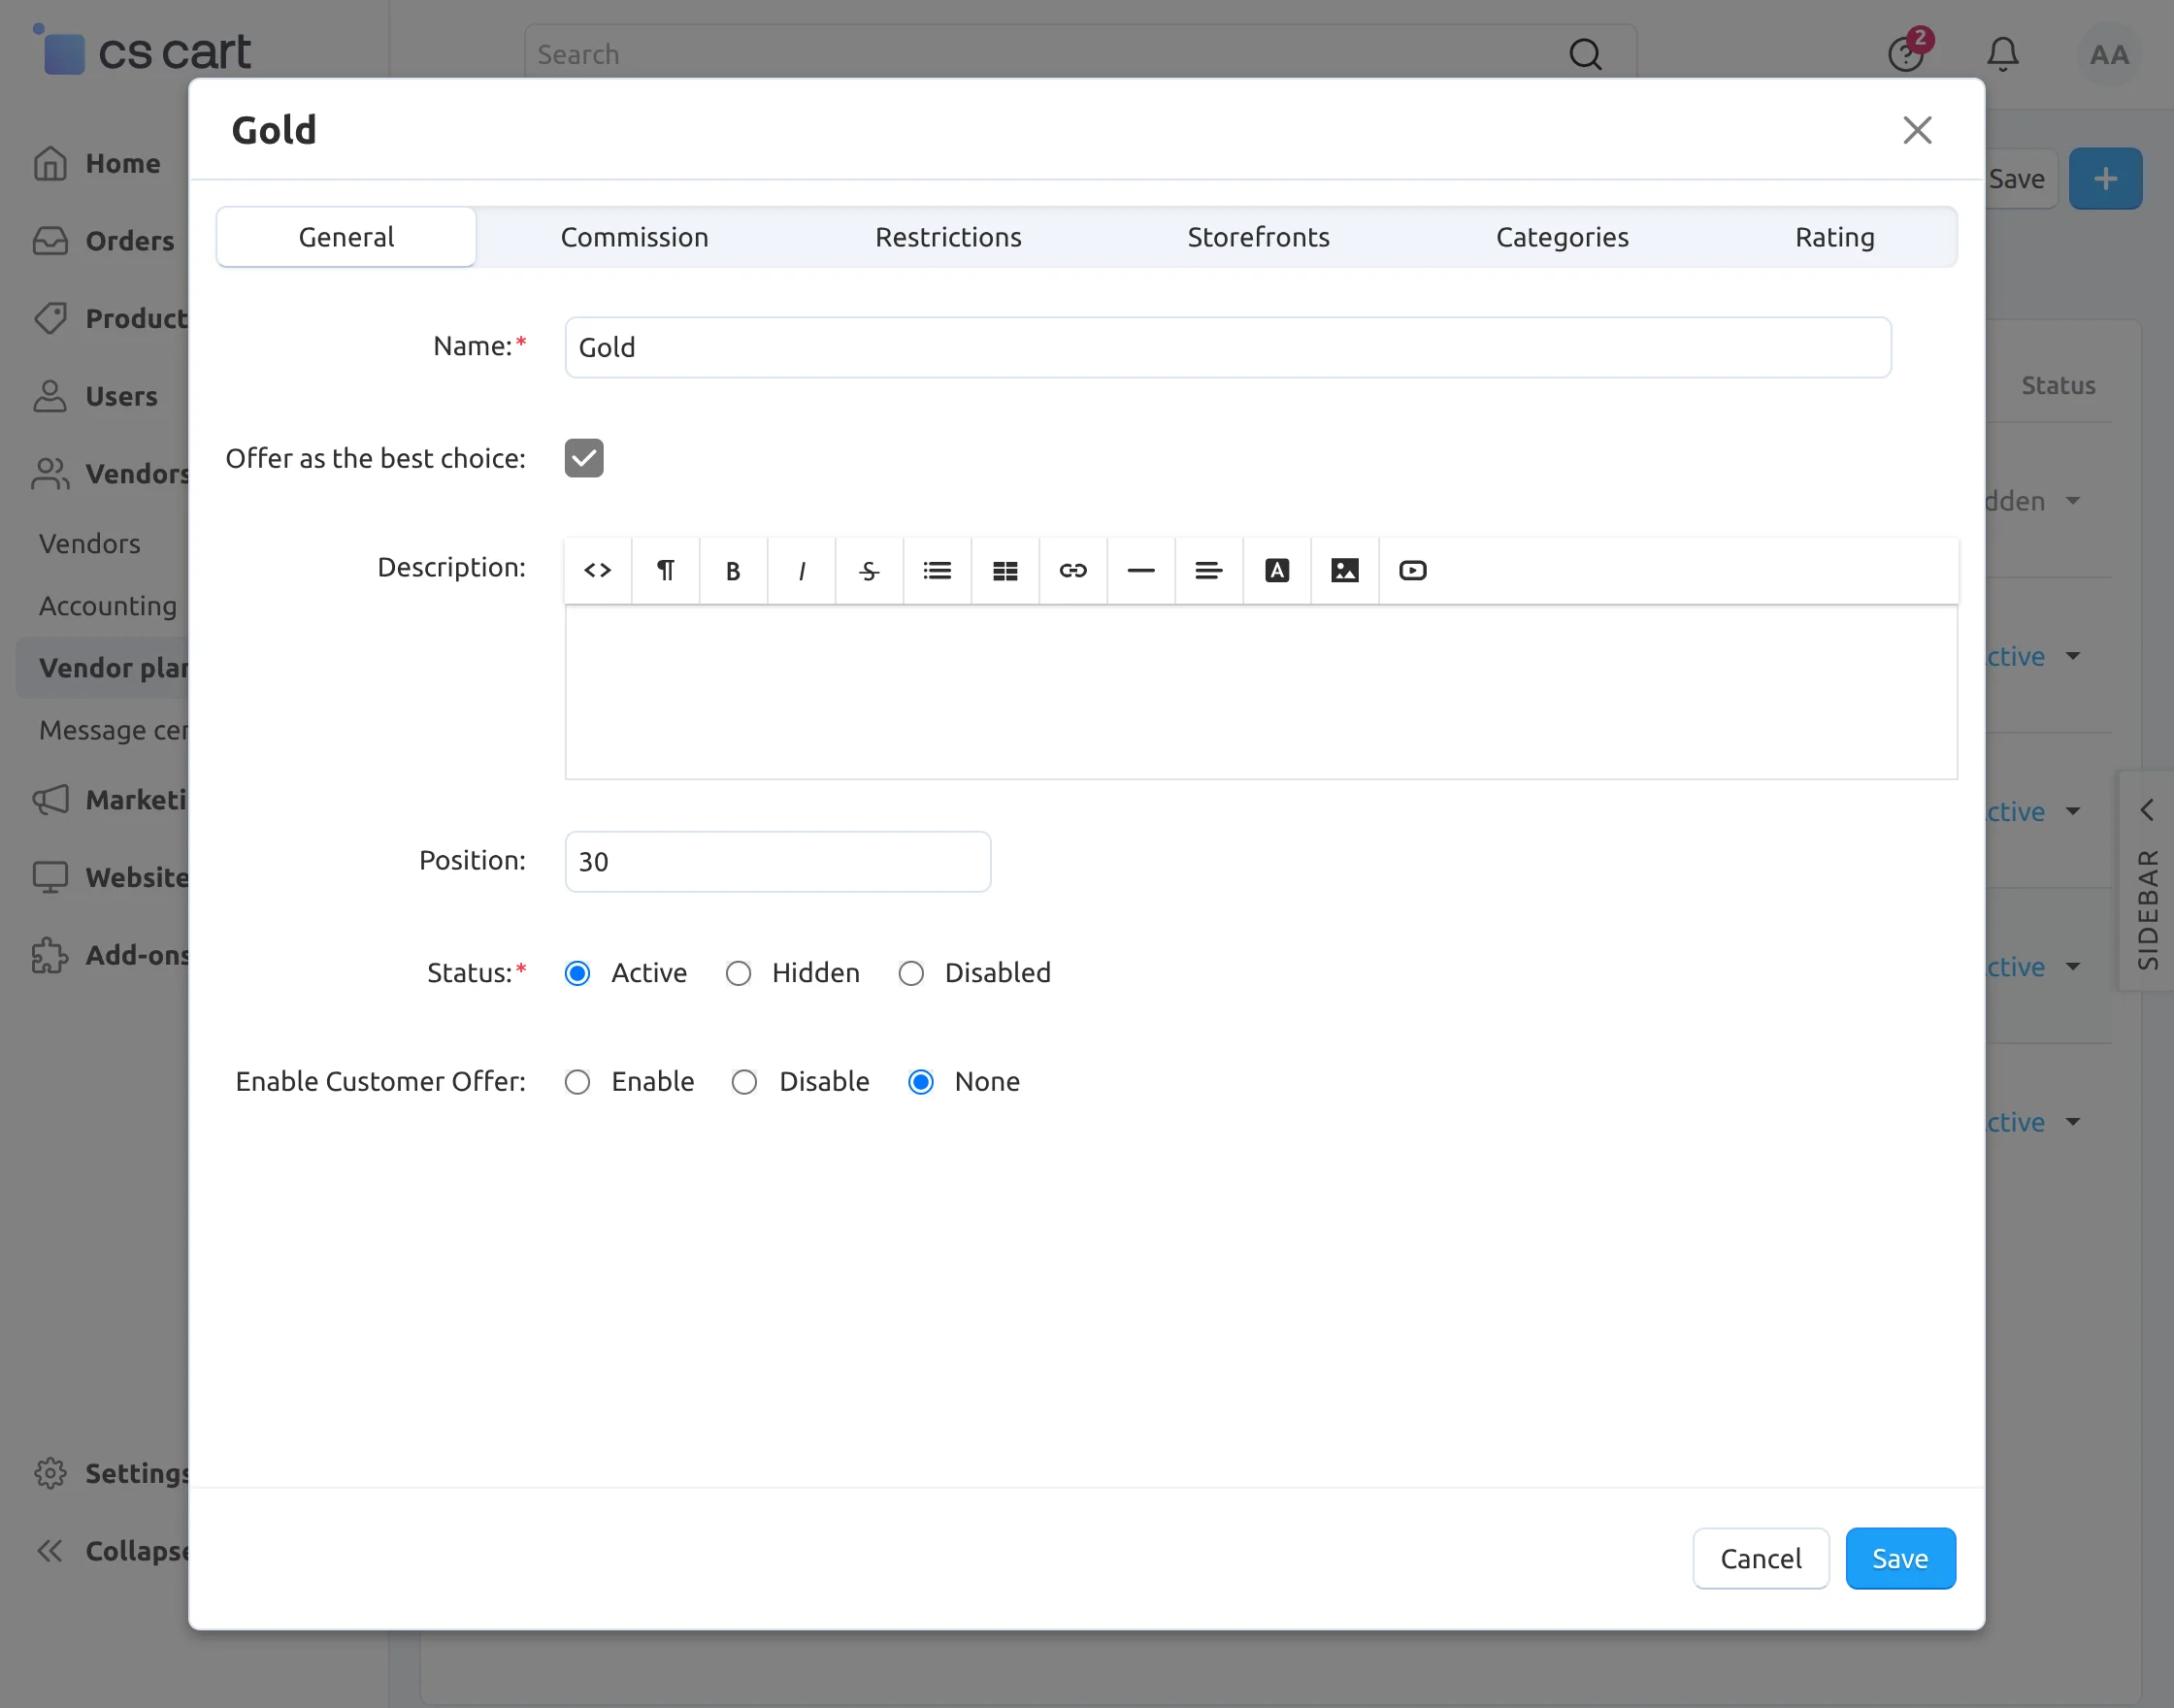
The admin needs to enable the customer offer option and click on the save button.
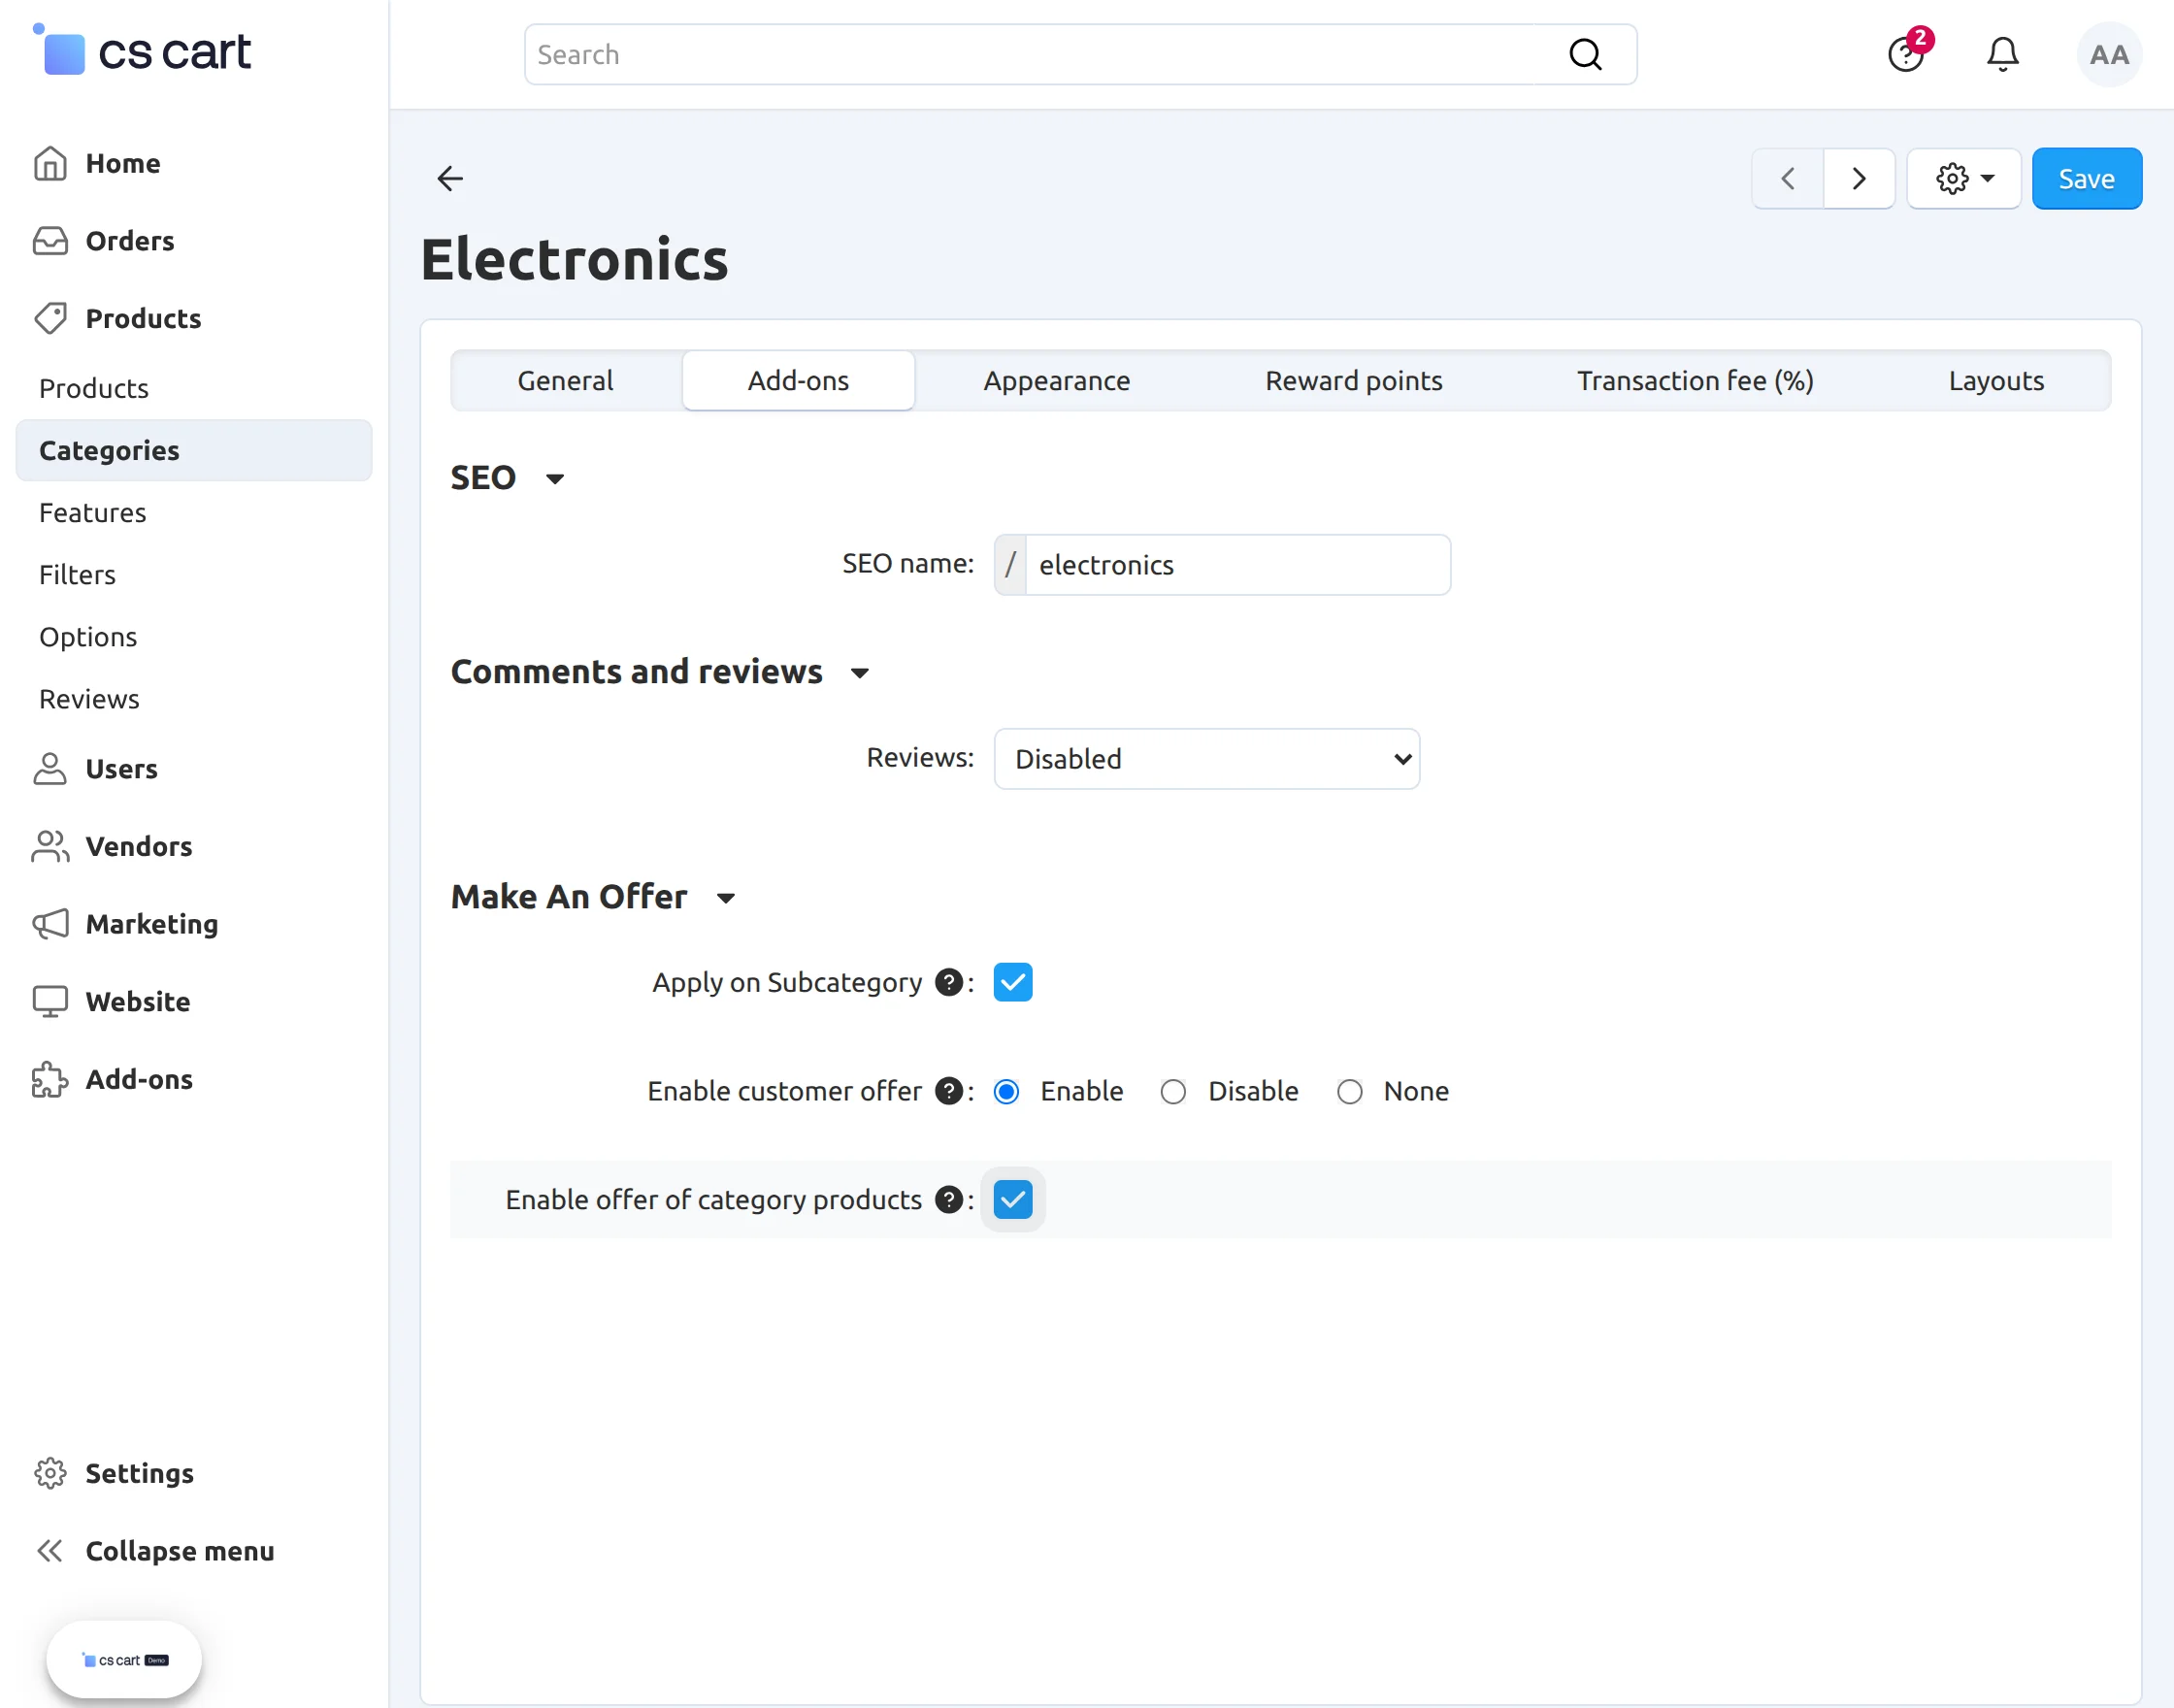
Now, to select any categories, the admin needs to go to products>categories.
After selecting the category, the admin needs to click on the Add-ons tab and click the checkbox for Apply on Subcategory and Enable offer of category products.
Click on the save button as shown in the screenshots below.
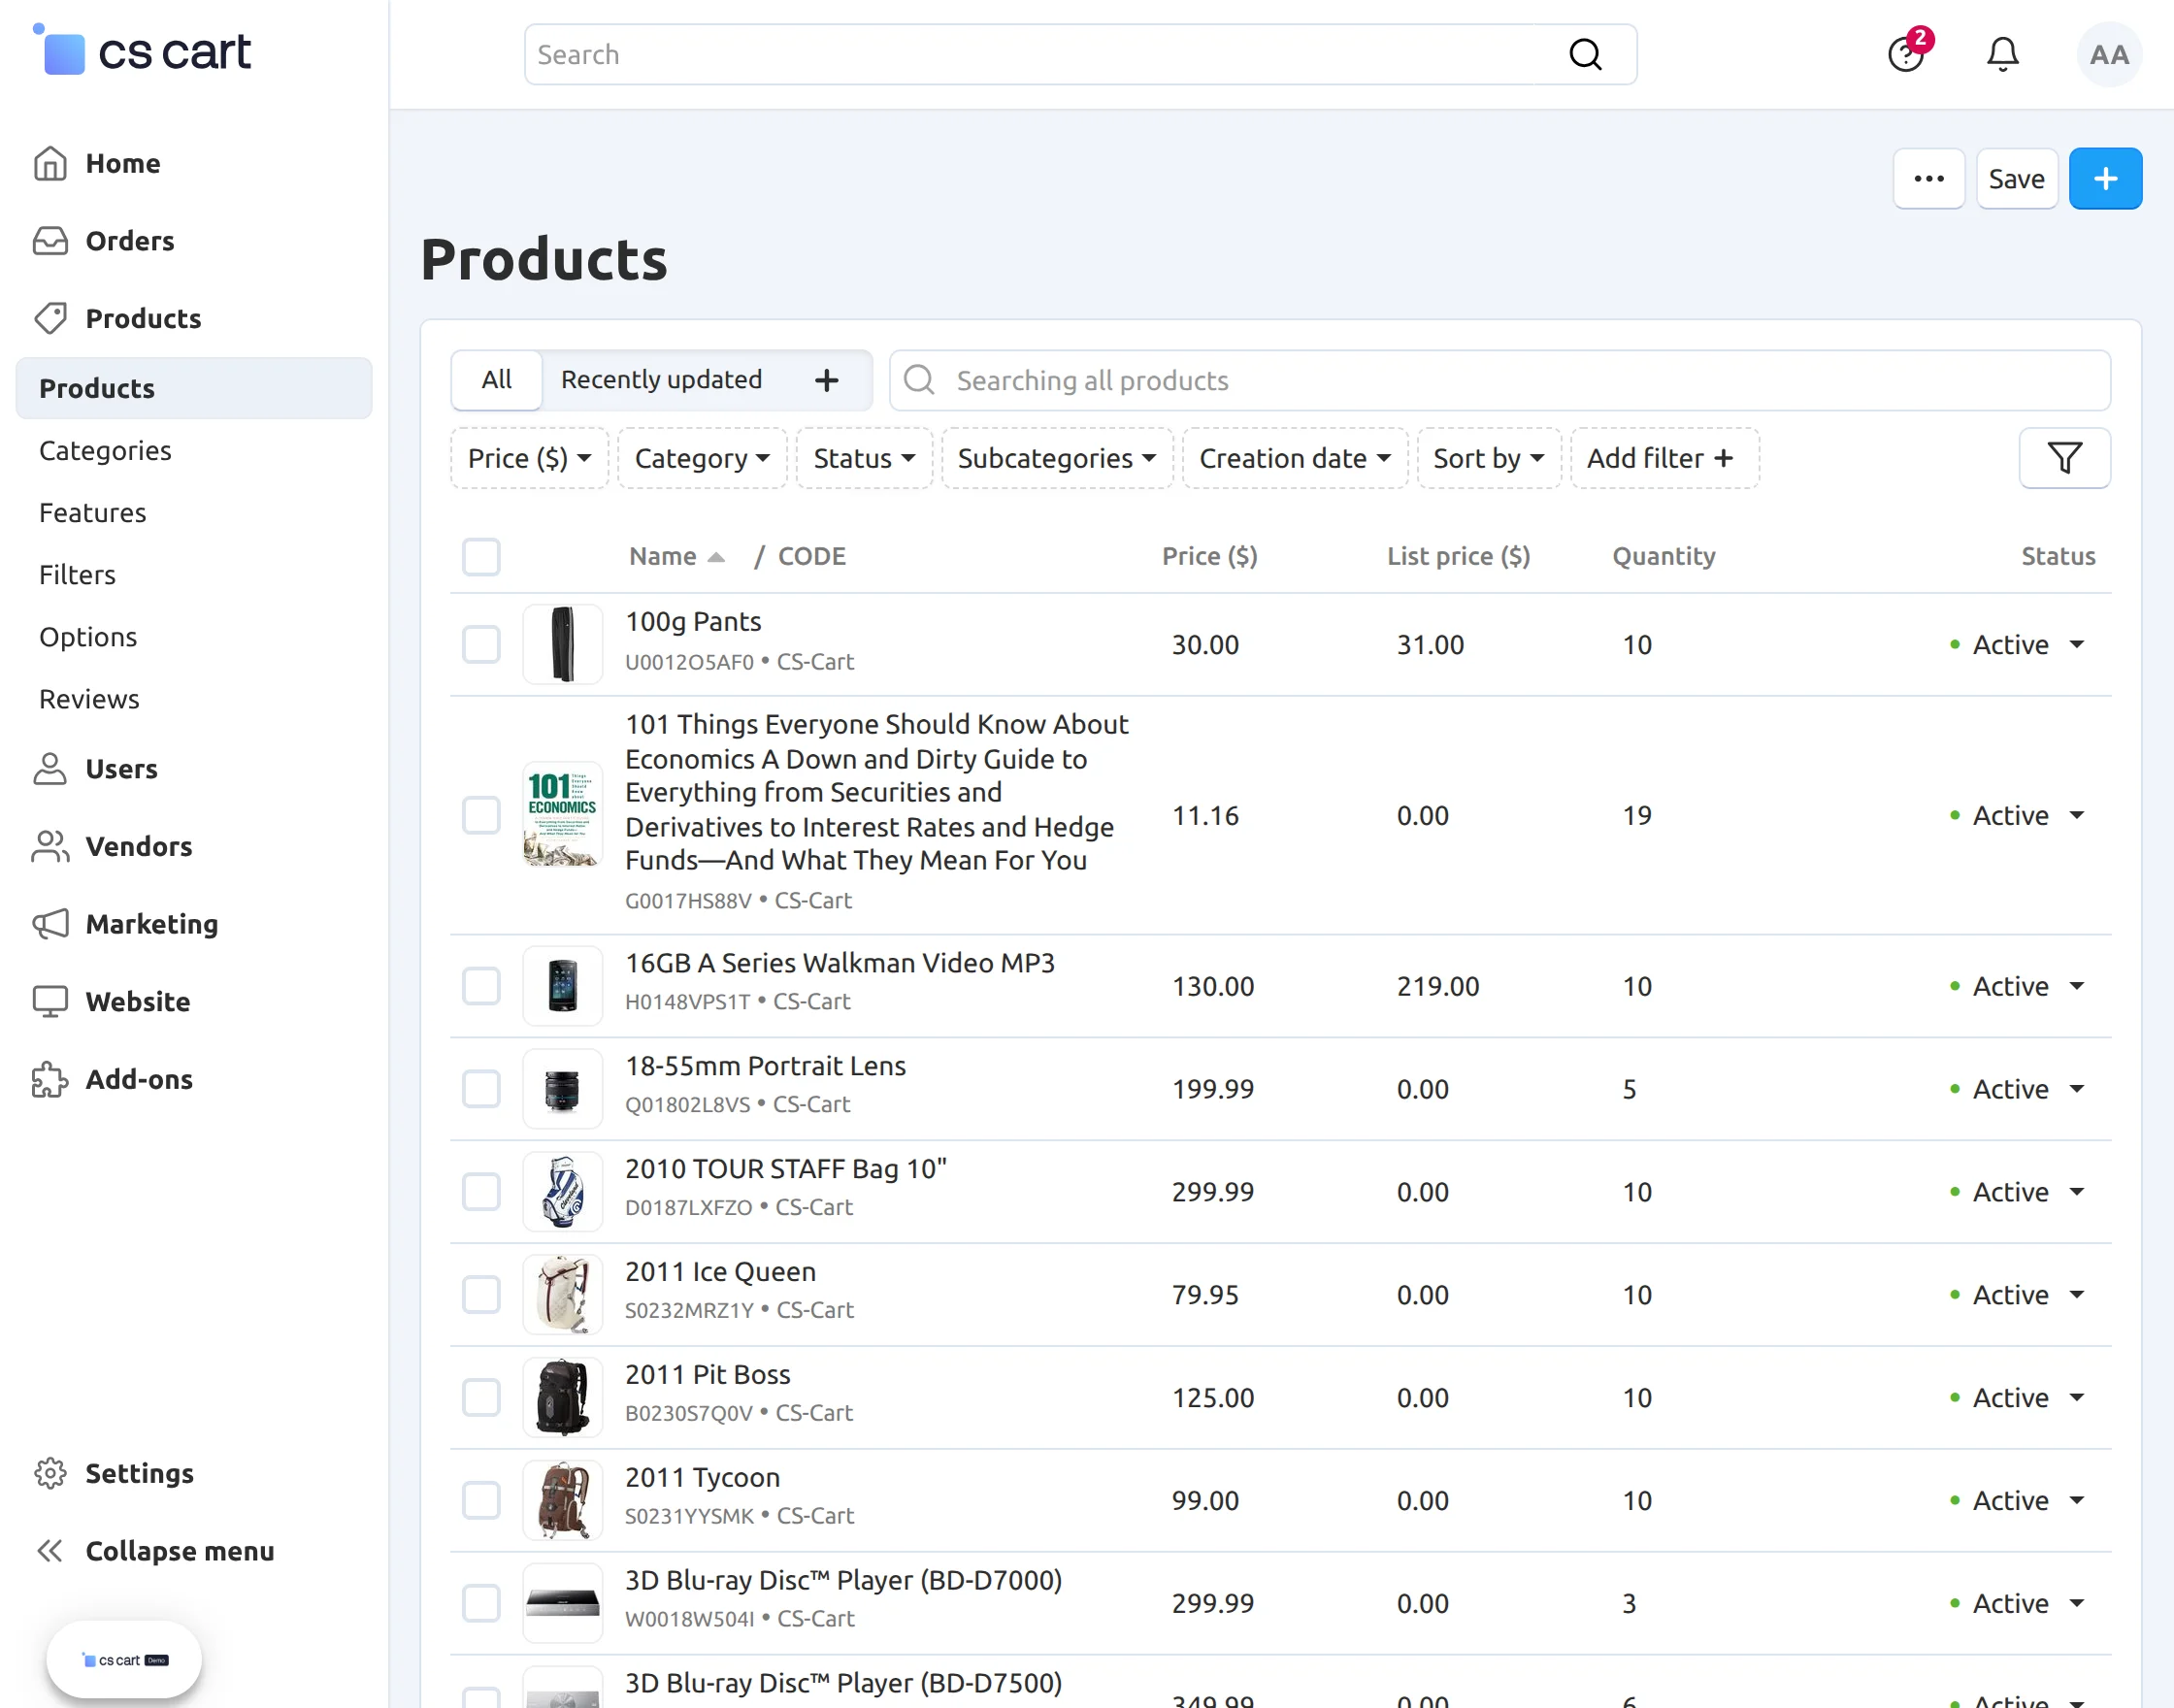
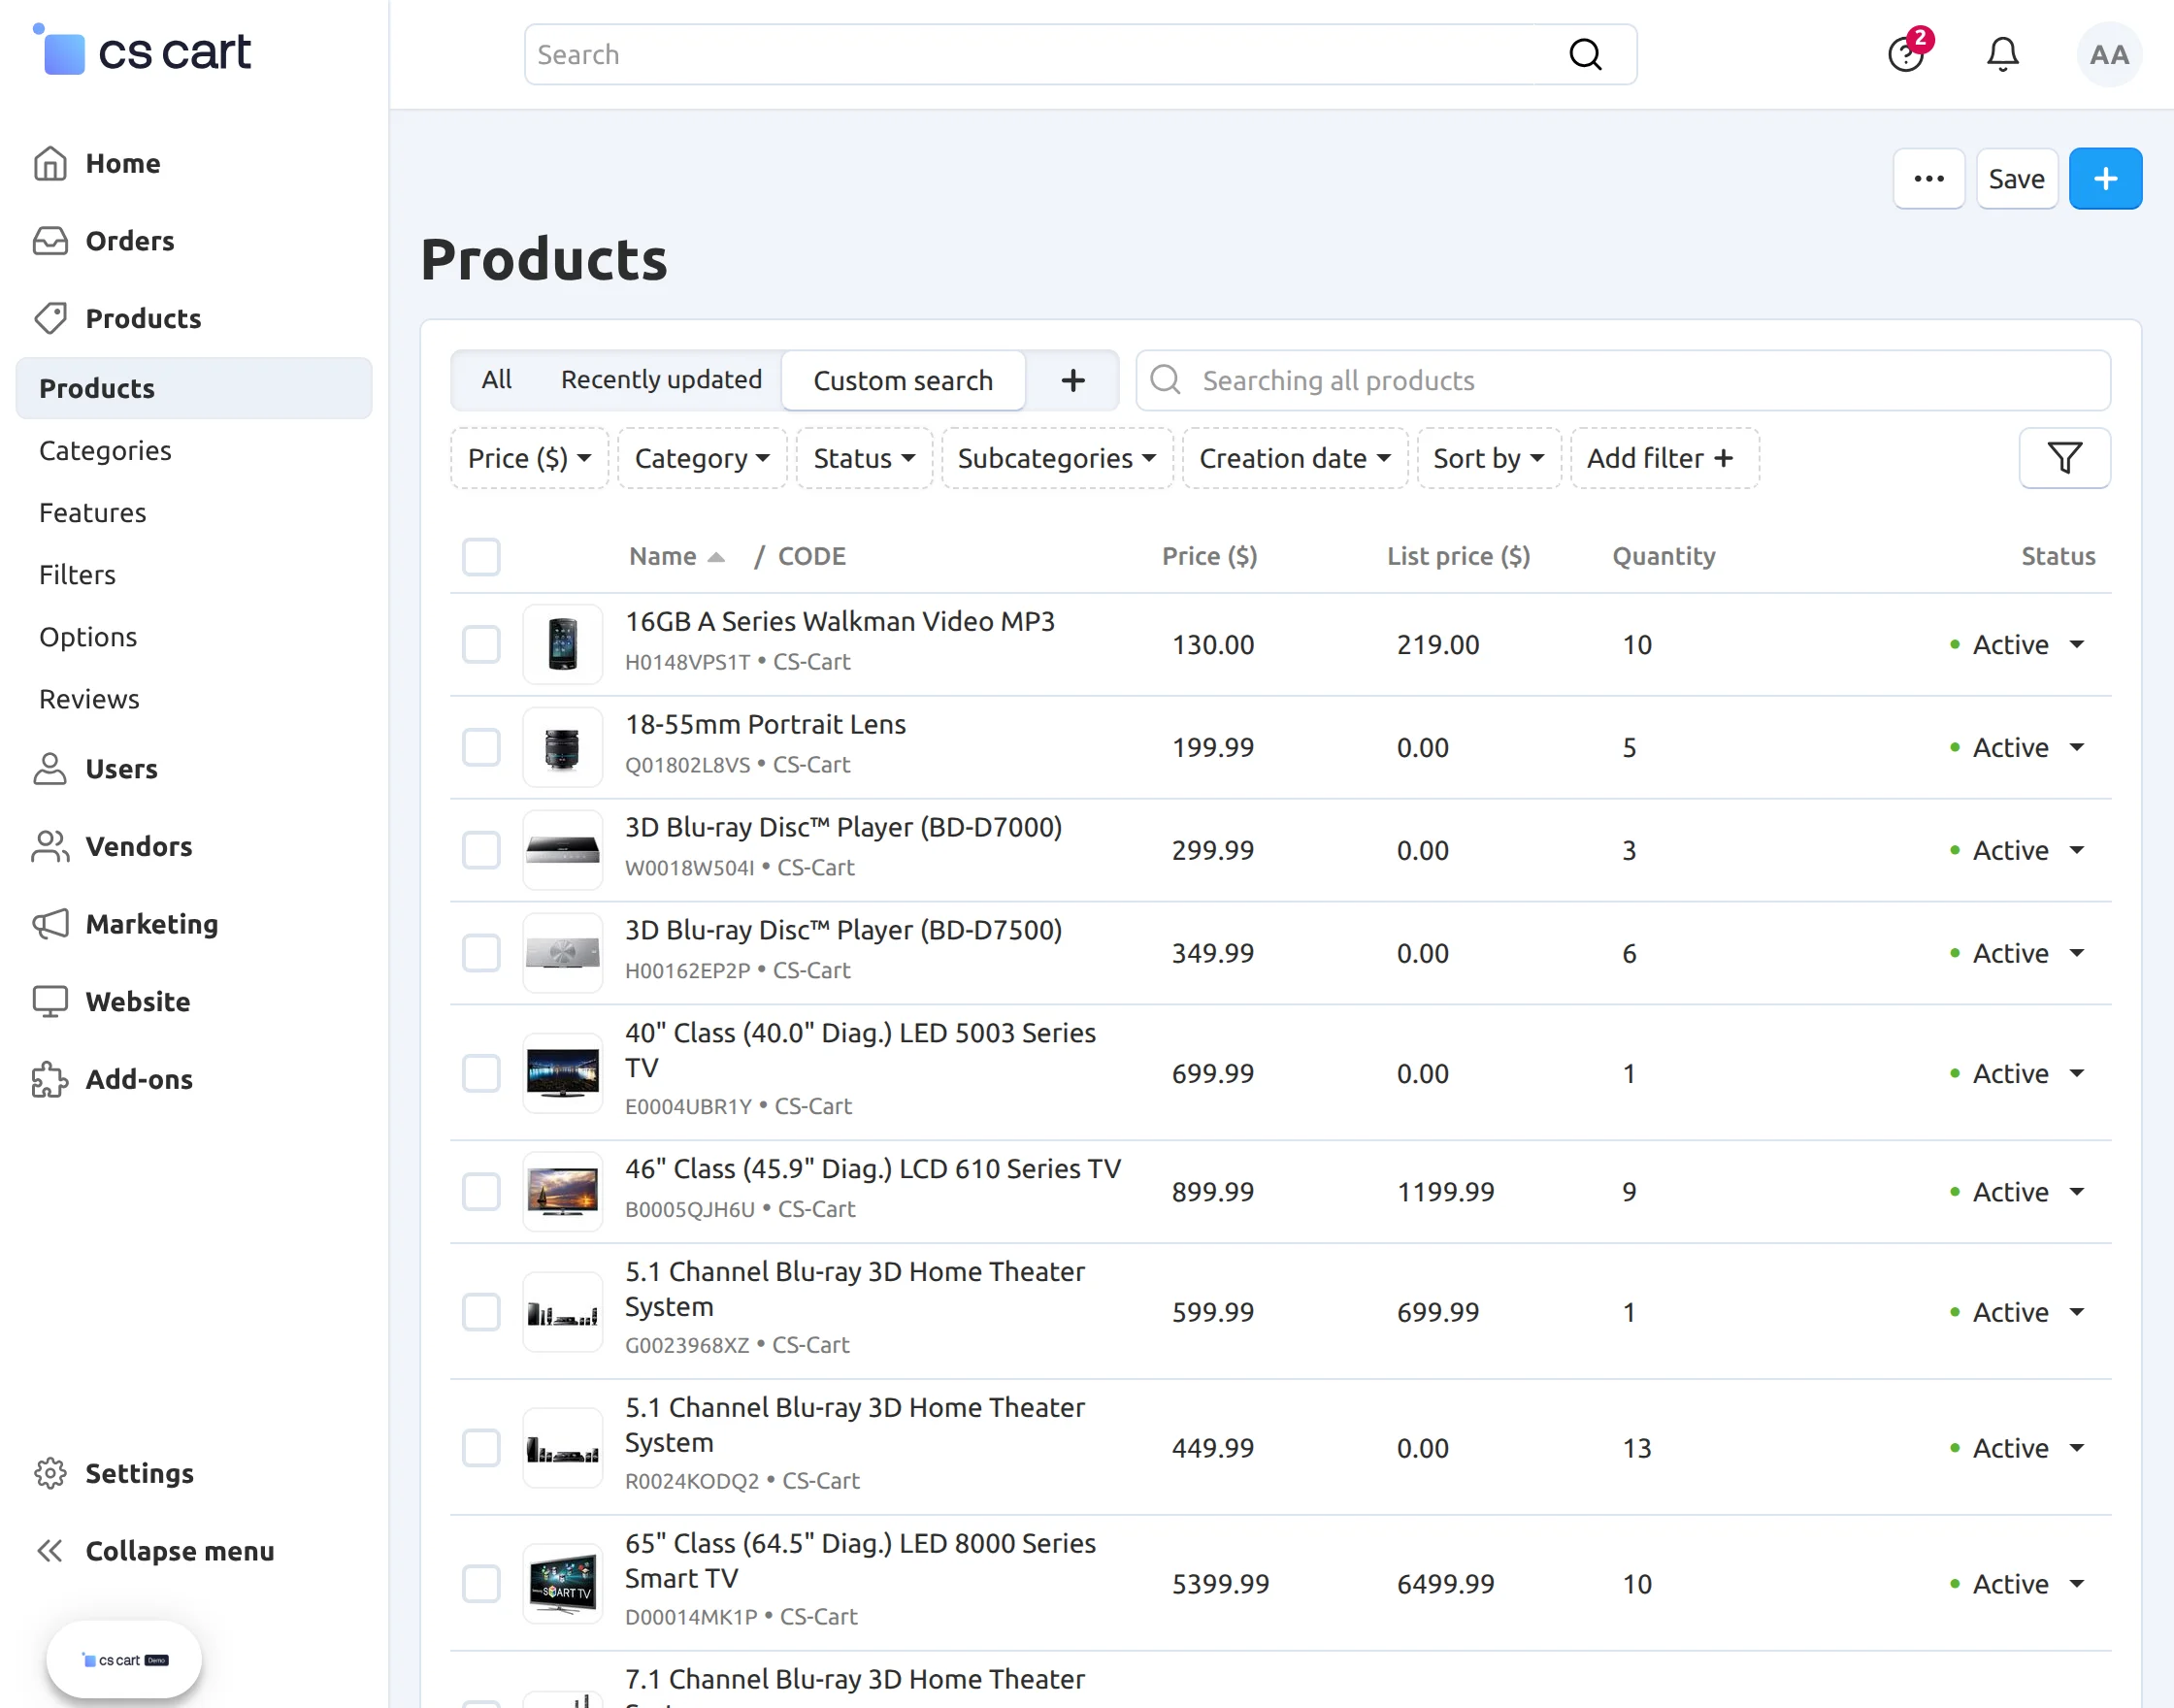
Now, make an offer to enable all products for that particular category. And then the admin needs to click on a particular category of products.
Here, the product list will be shown for the category. And the admin can select any of the products from the list.
The admin clicks on the Add-ons tab and needs to enable the option for customer offers as shown in the screenshot.
Set Make an Offer Price Limit and Duration
Now the admin can set make an offer price limit and day duration for the offer.
The admin needs to click on “Product” and then click on “Add-On” and then need to scroll down.

Make an Offer- Customer View
In the front end, when customers select the product from the selected category.
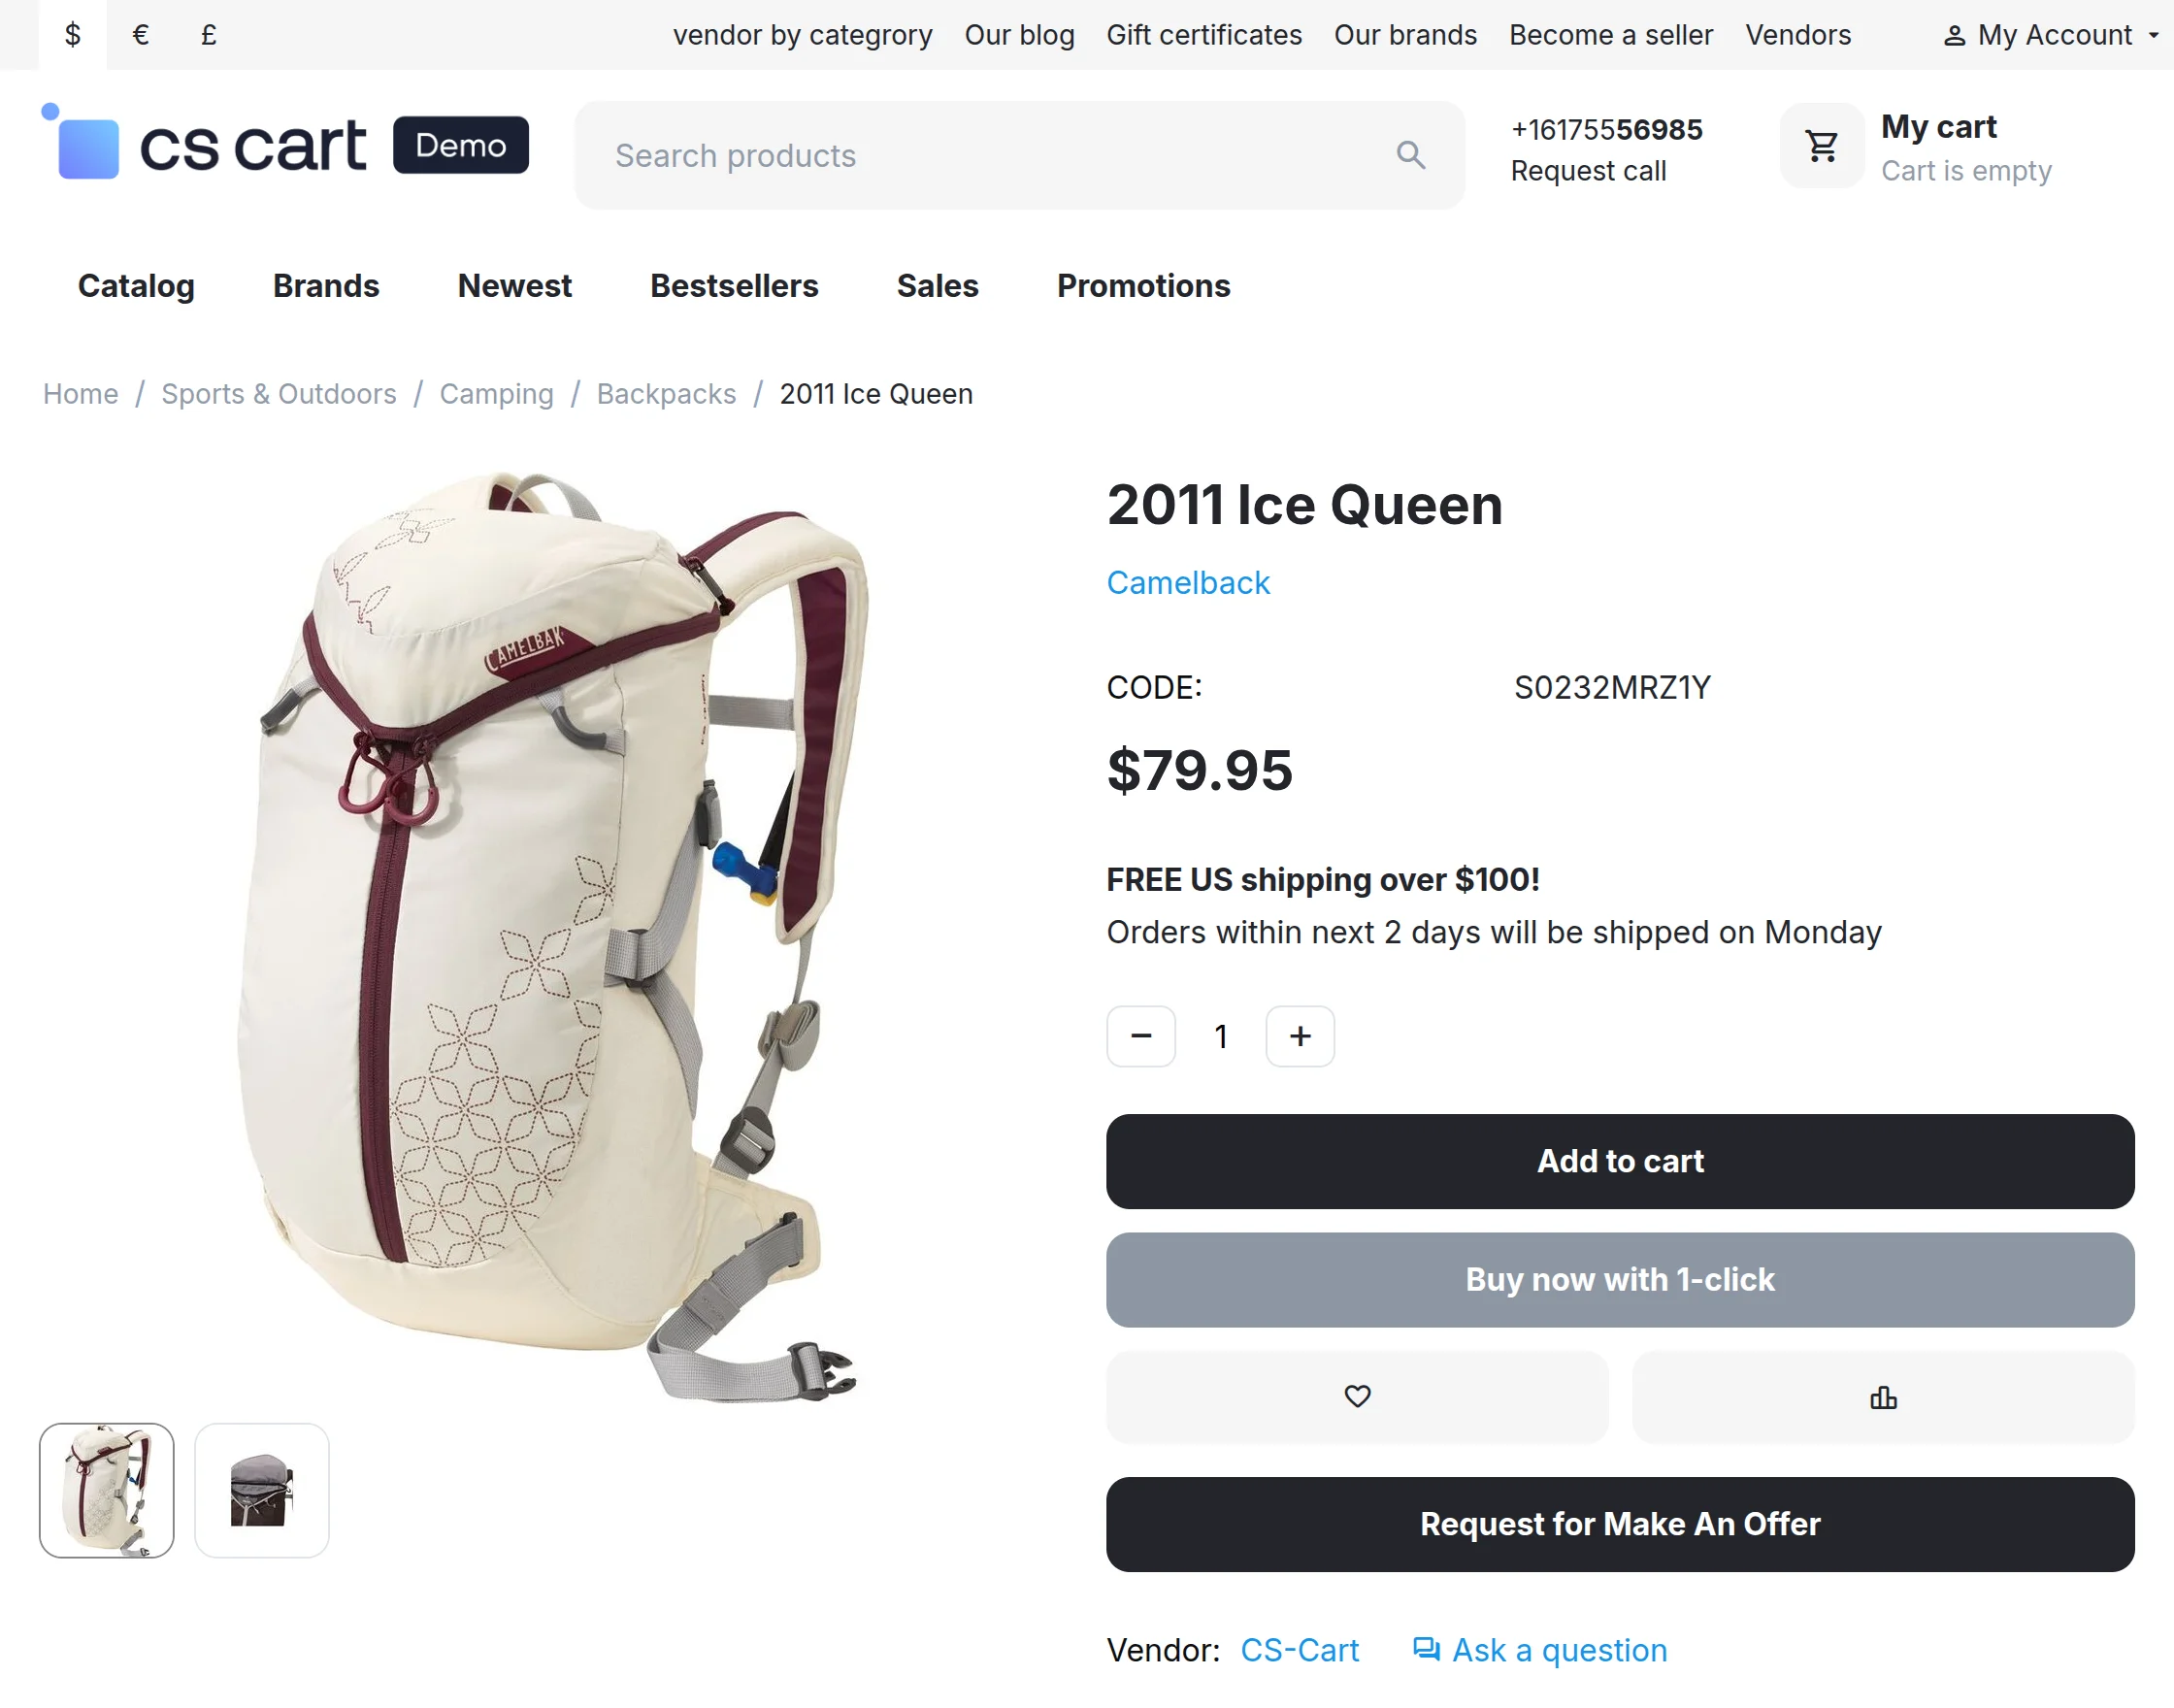
Now the customer can send a request message to the store owner.
Back End View
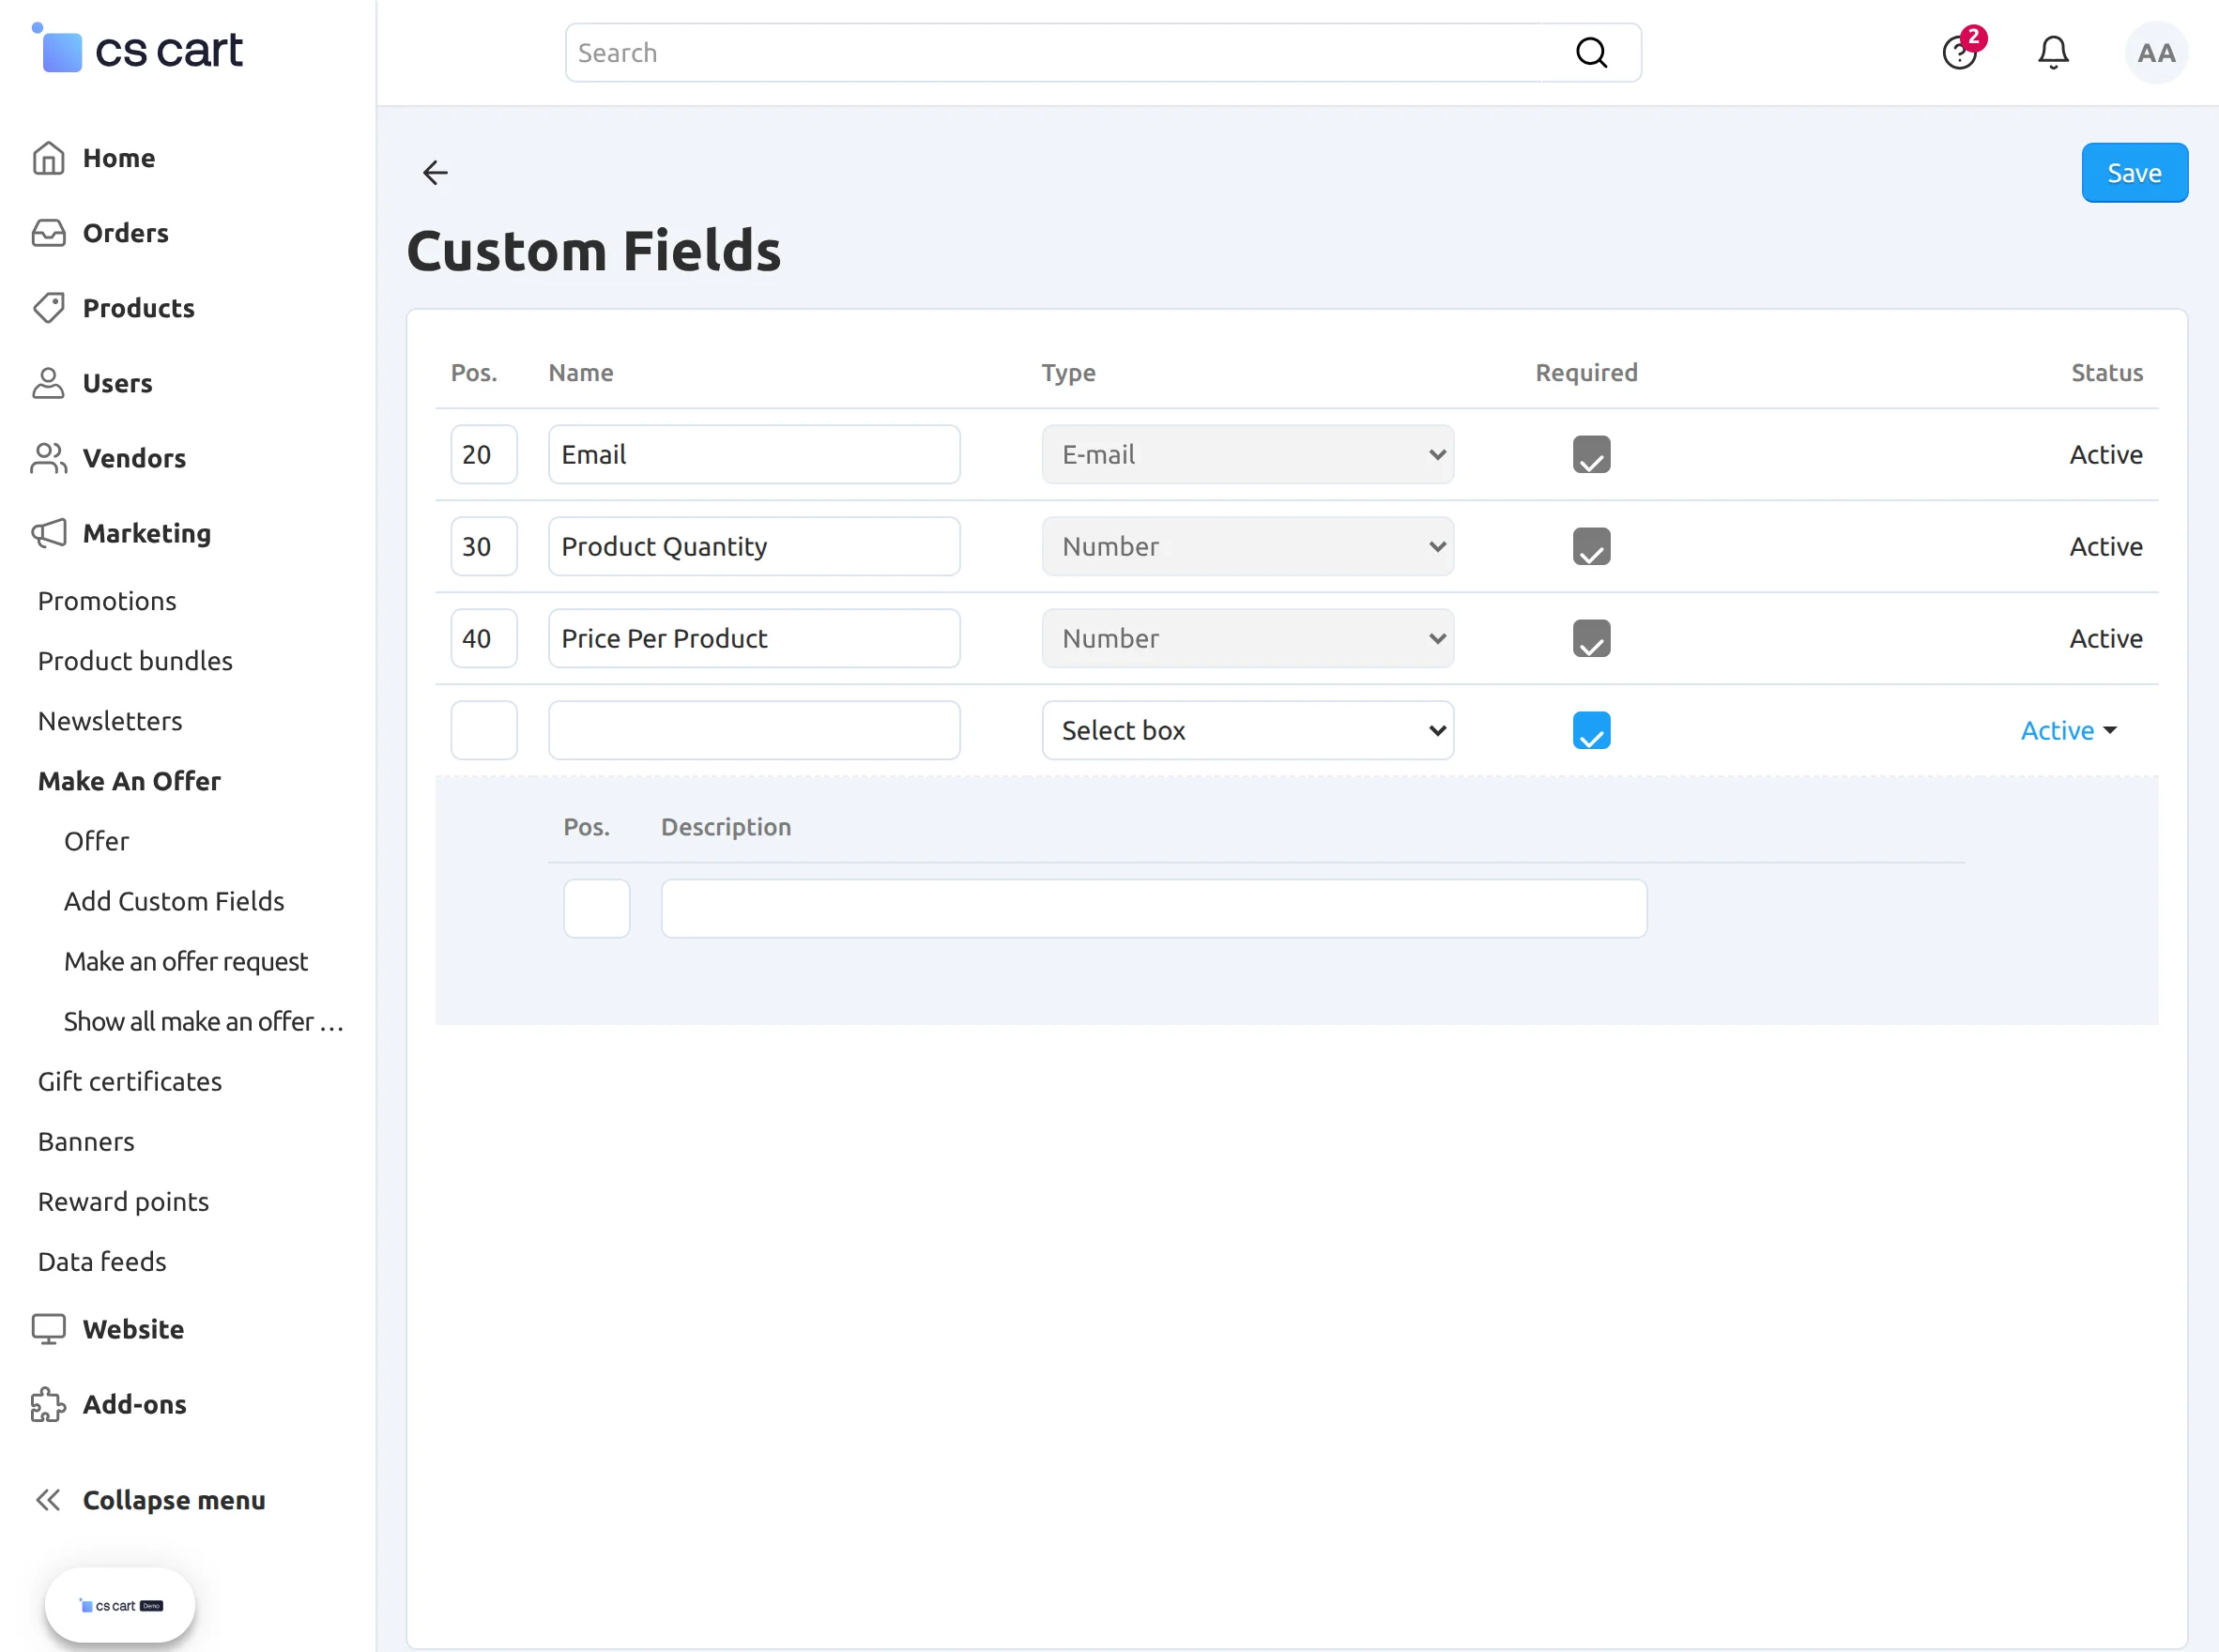
Then, Go to the “Marketing” tab & click on “Make an offer”, then need to click on “Add custom fields. Hence, set the fields as per the snapshot below.
- The email, product quantity, and price per product fields are mandatory fields.
- To add any other custom field admin need to set the name, position, and type of the field from the drop-down.
Check Make An Offer Product Request
The admin can check make an offer of the products request list.
The admin needs to click “Marketing” and need to select “Make an offer” and click on “Make an offer request”.

Frontend View
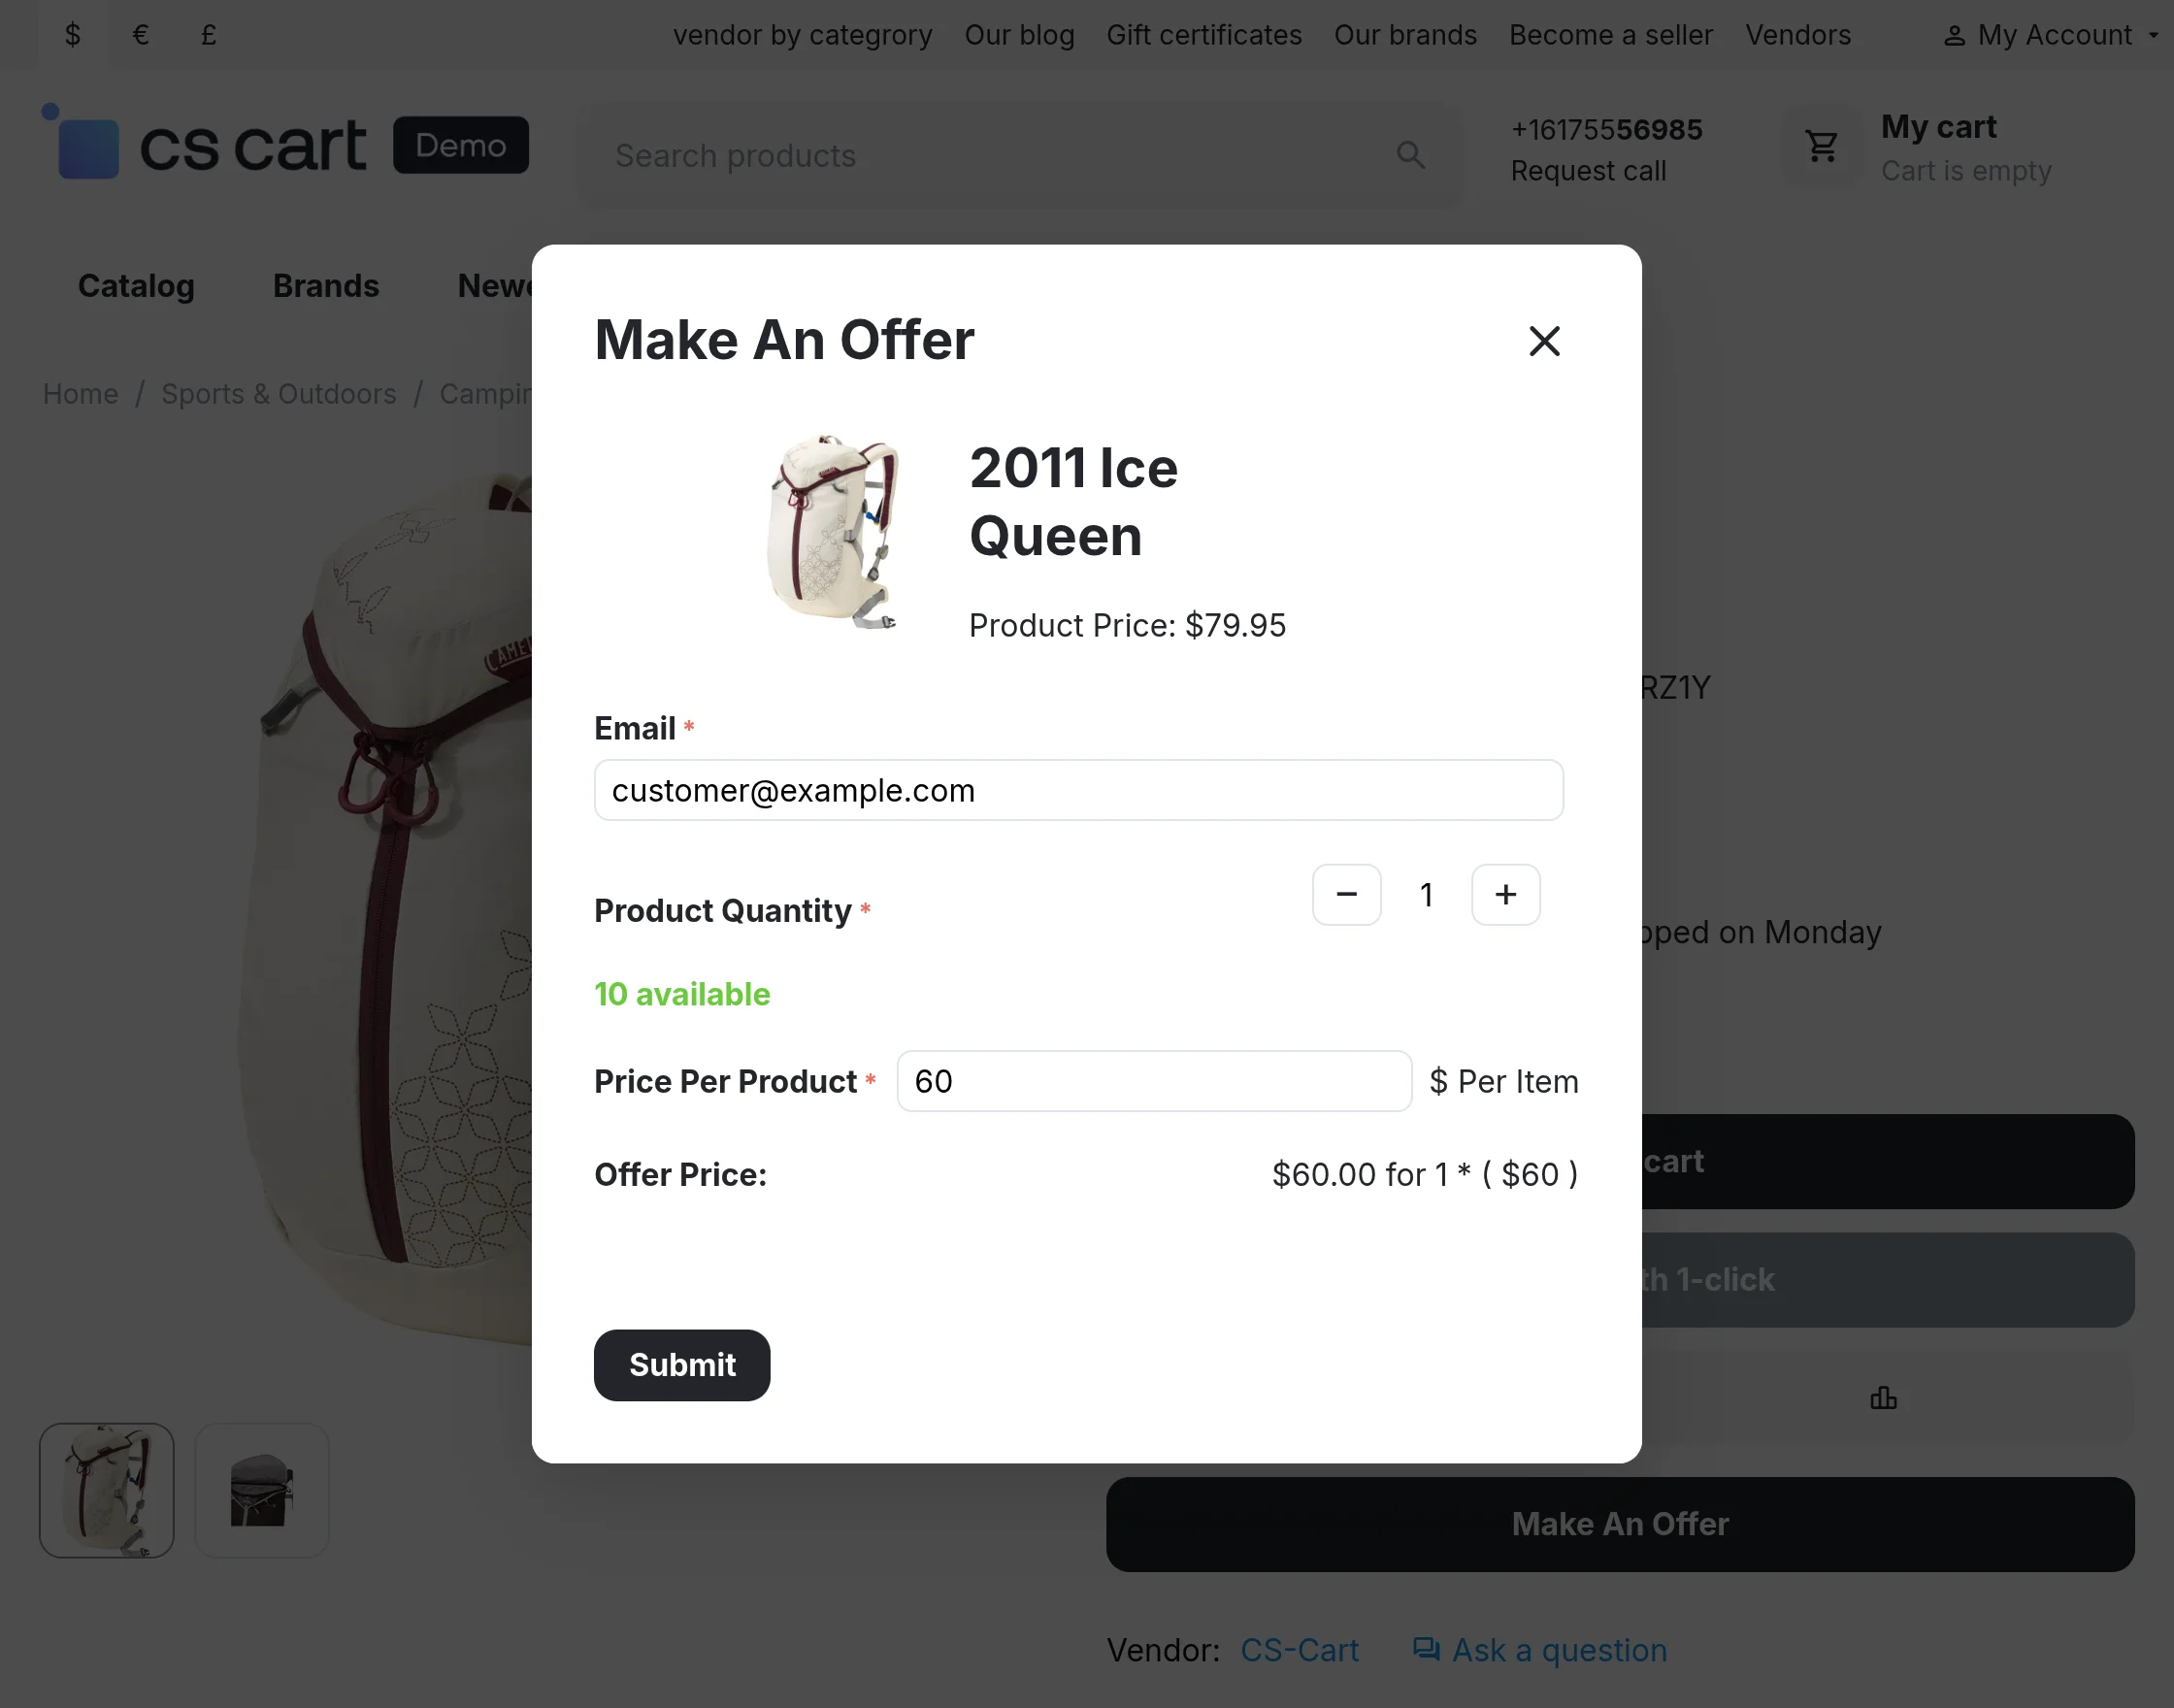
The customer can check the make-an-offer duration and request to make an offer on any product. On the product page, click on “Make an Offer” to view the offer form.
After clicking on the”Make an offer”, the request form opens and the customer can enter required fields and check the minimum price and the maximum price of the product.
Then the customer can request to make an offer between the minimum or maximum price of the products.
Manage Offers at the Admin End
After the offer is get submitted by the visitor at the front end, it will be listed at the backend.
Go to the Marketing >> Make an offer >> Offers. View of the list of offers. Click on the desired offer to view the detail page.
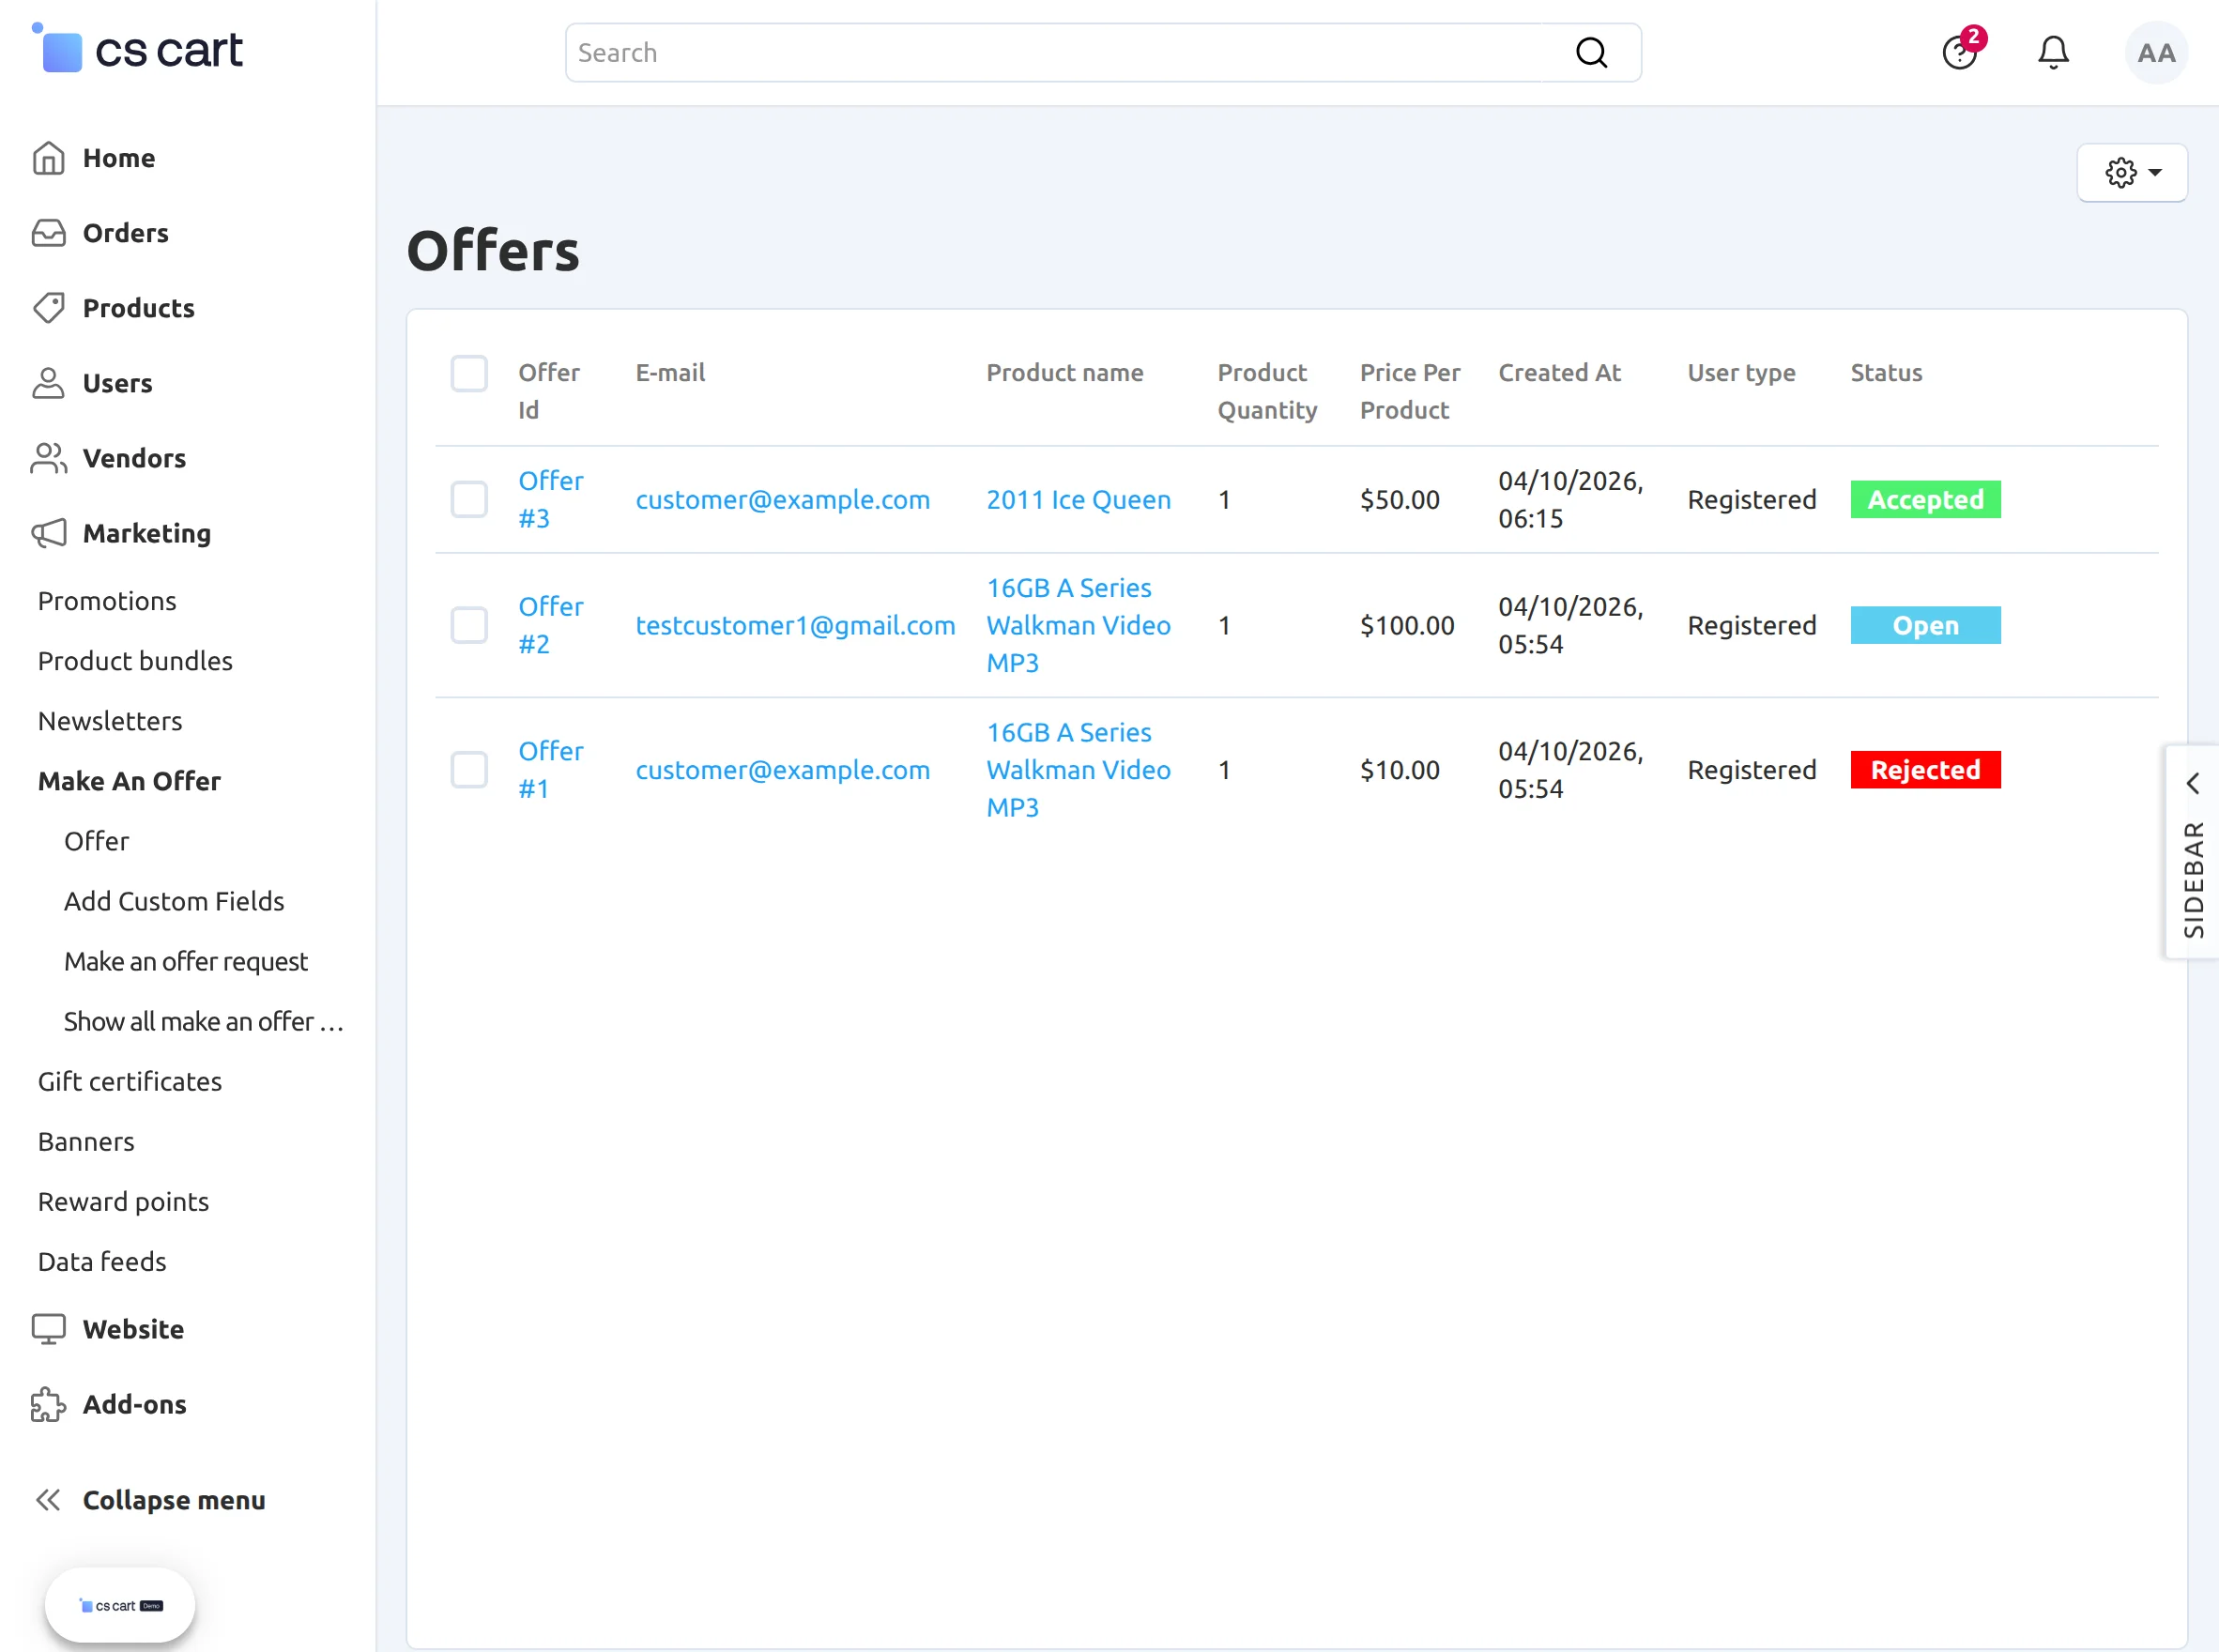
Click on the “reject” button to reject the offer and the “accept” button to accept it.

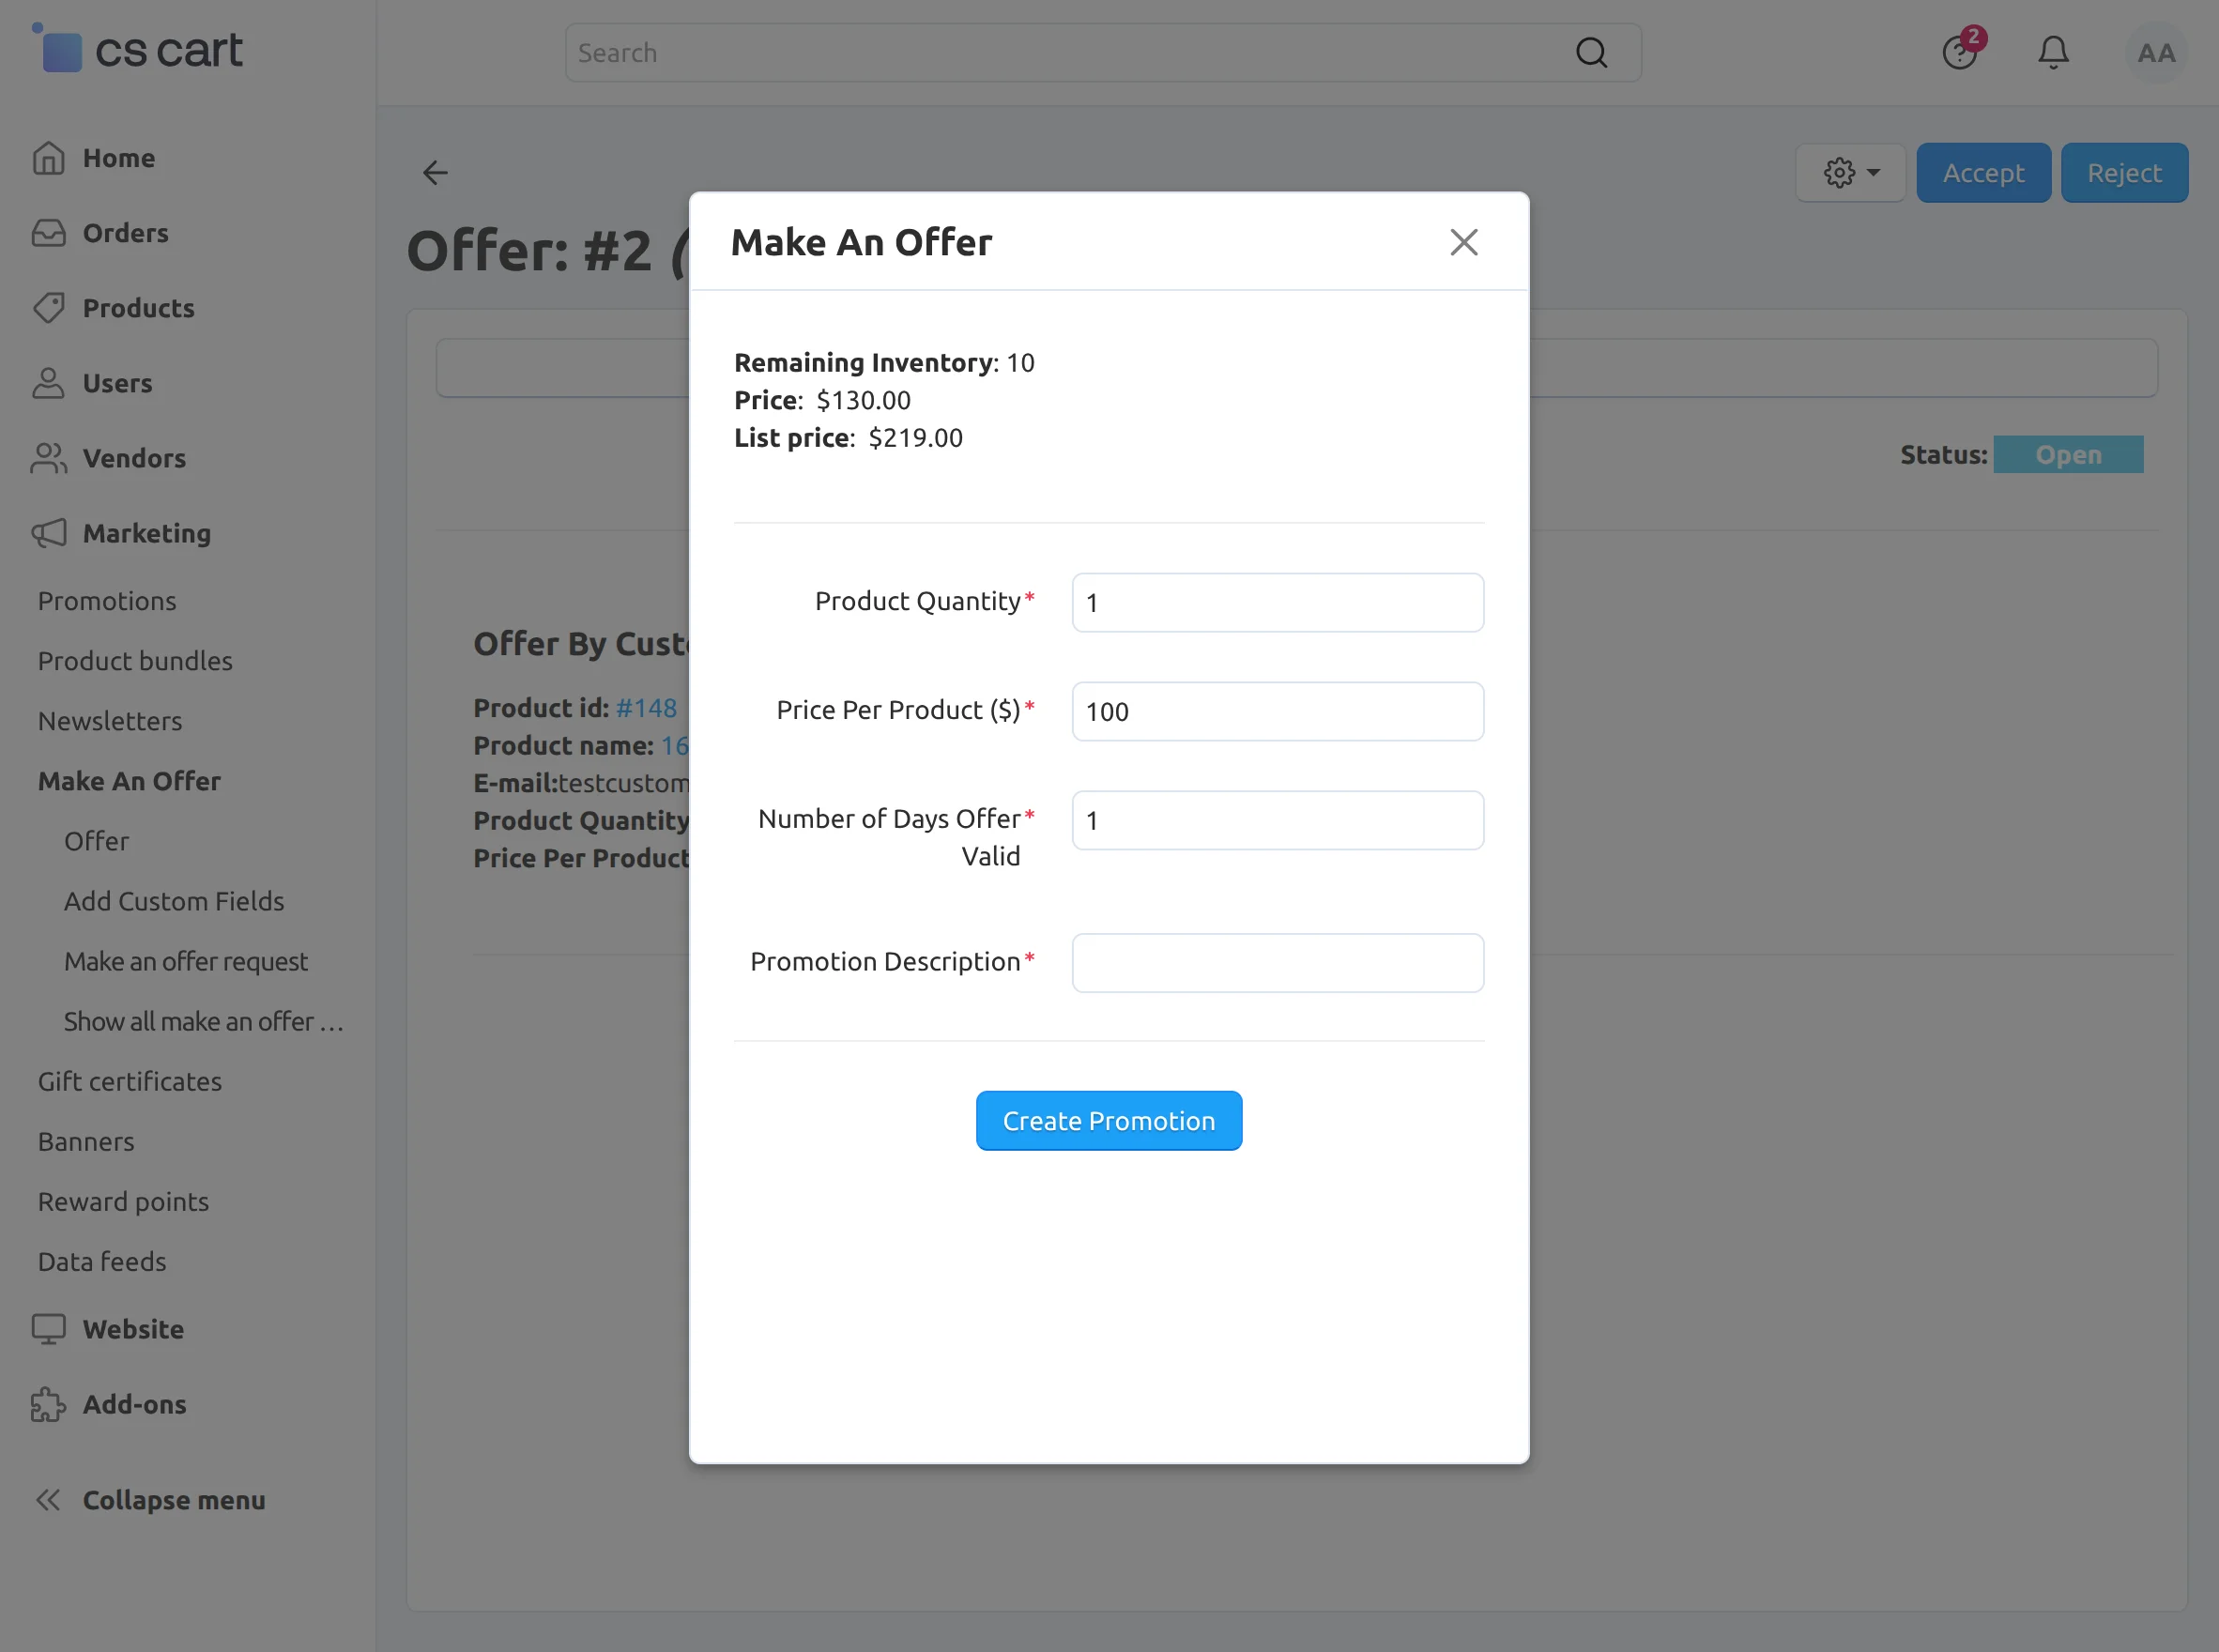
Once Admin accepts the offer, a form gets popped up where he needs to fill the details as shown below in the snapshot.
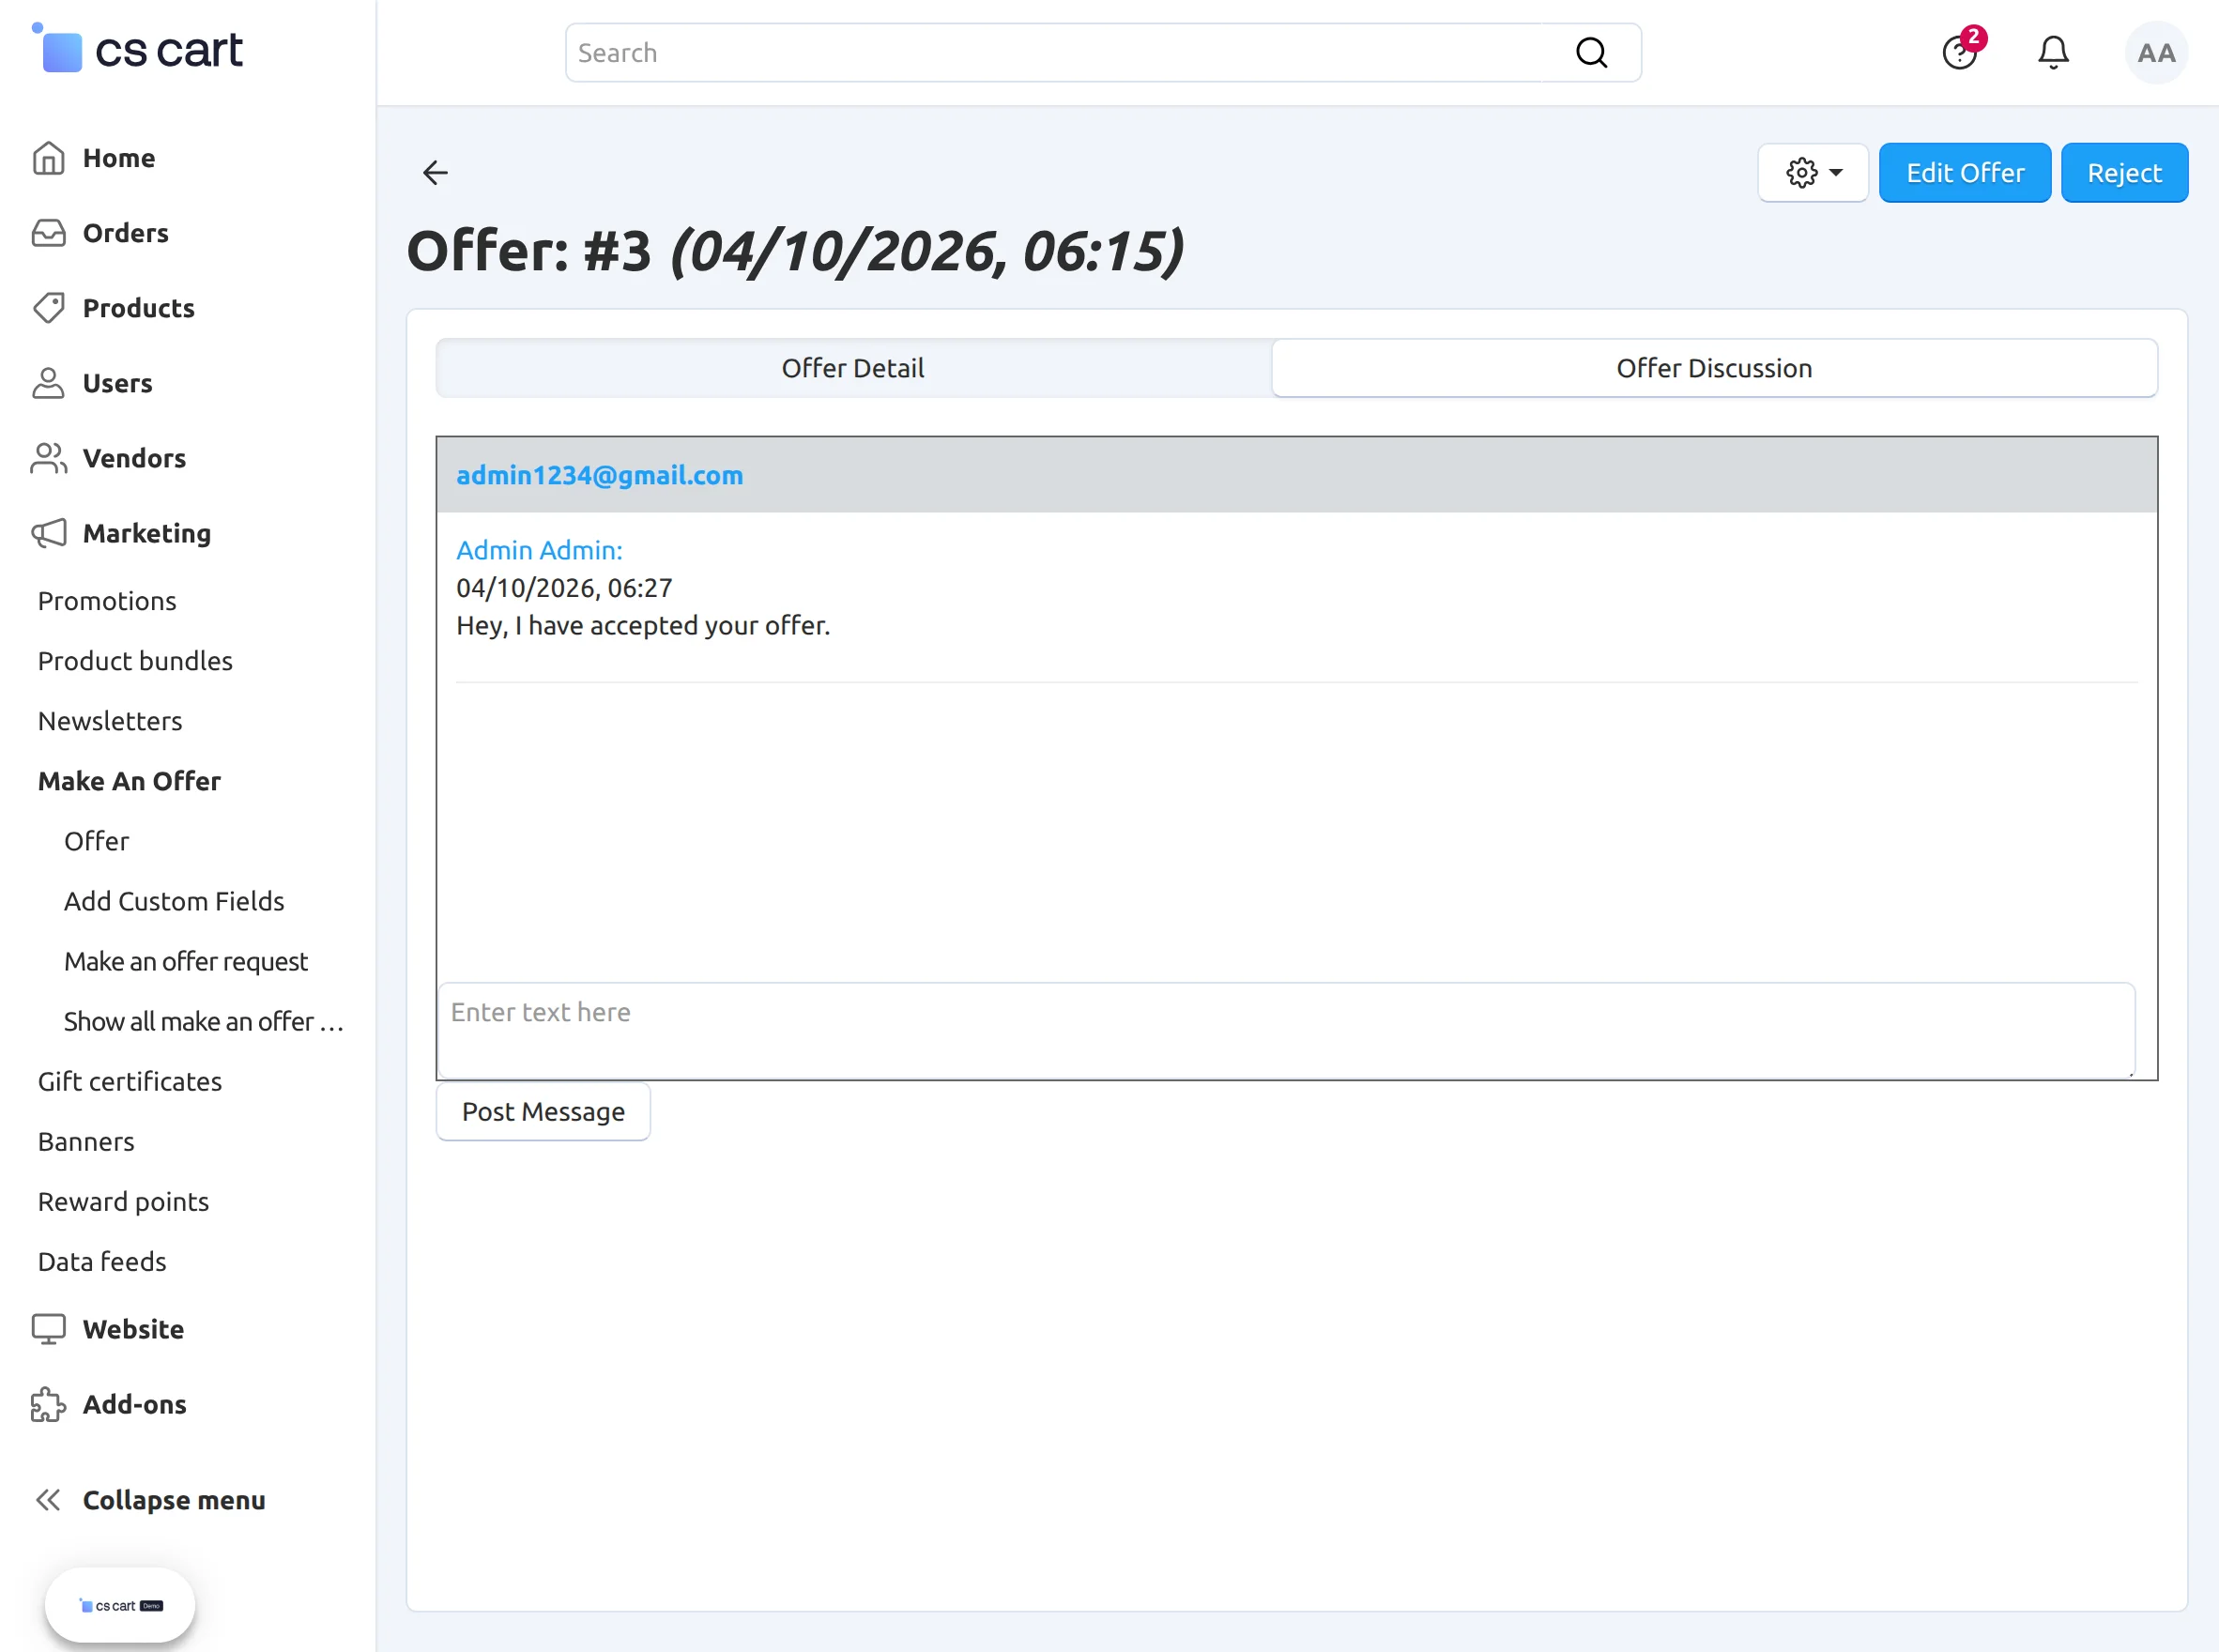
In the discussion panel, the admin can communicate with the user as shown below in the snapshot.
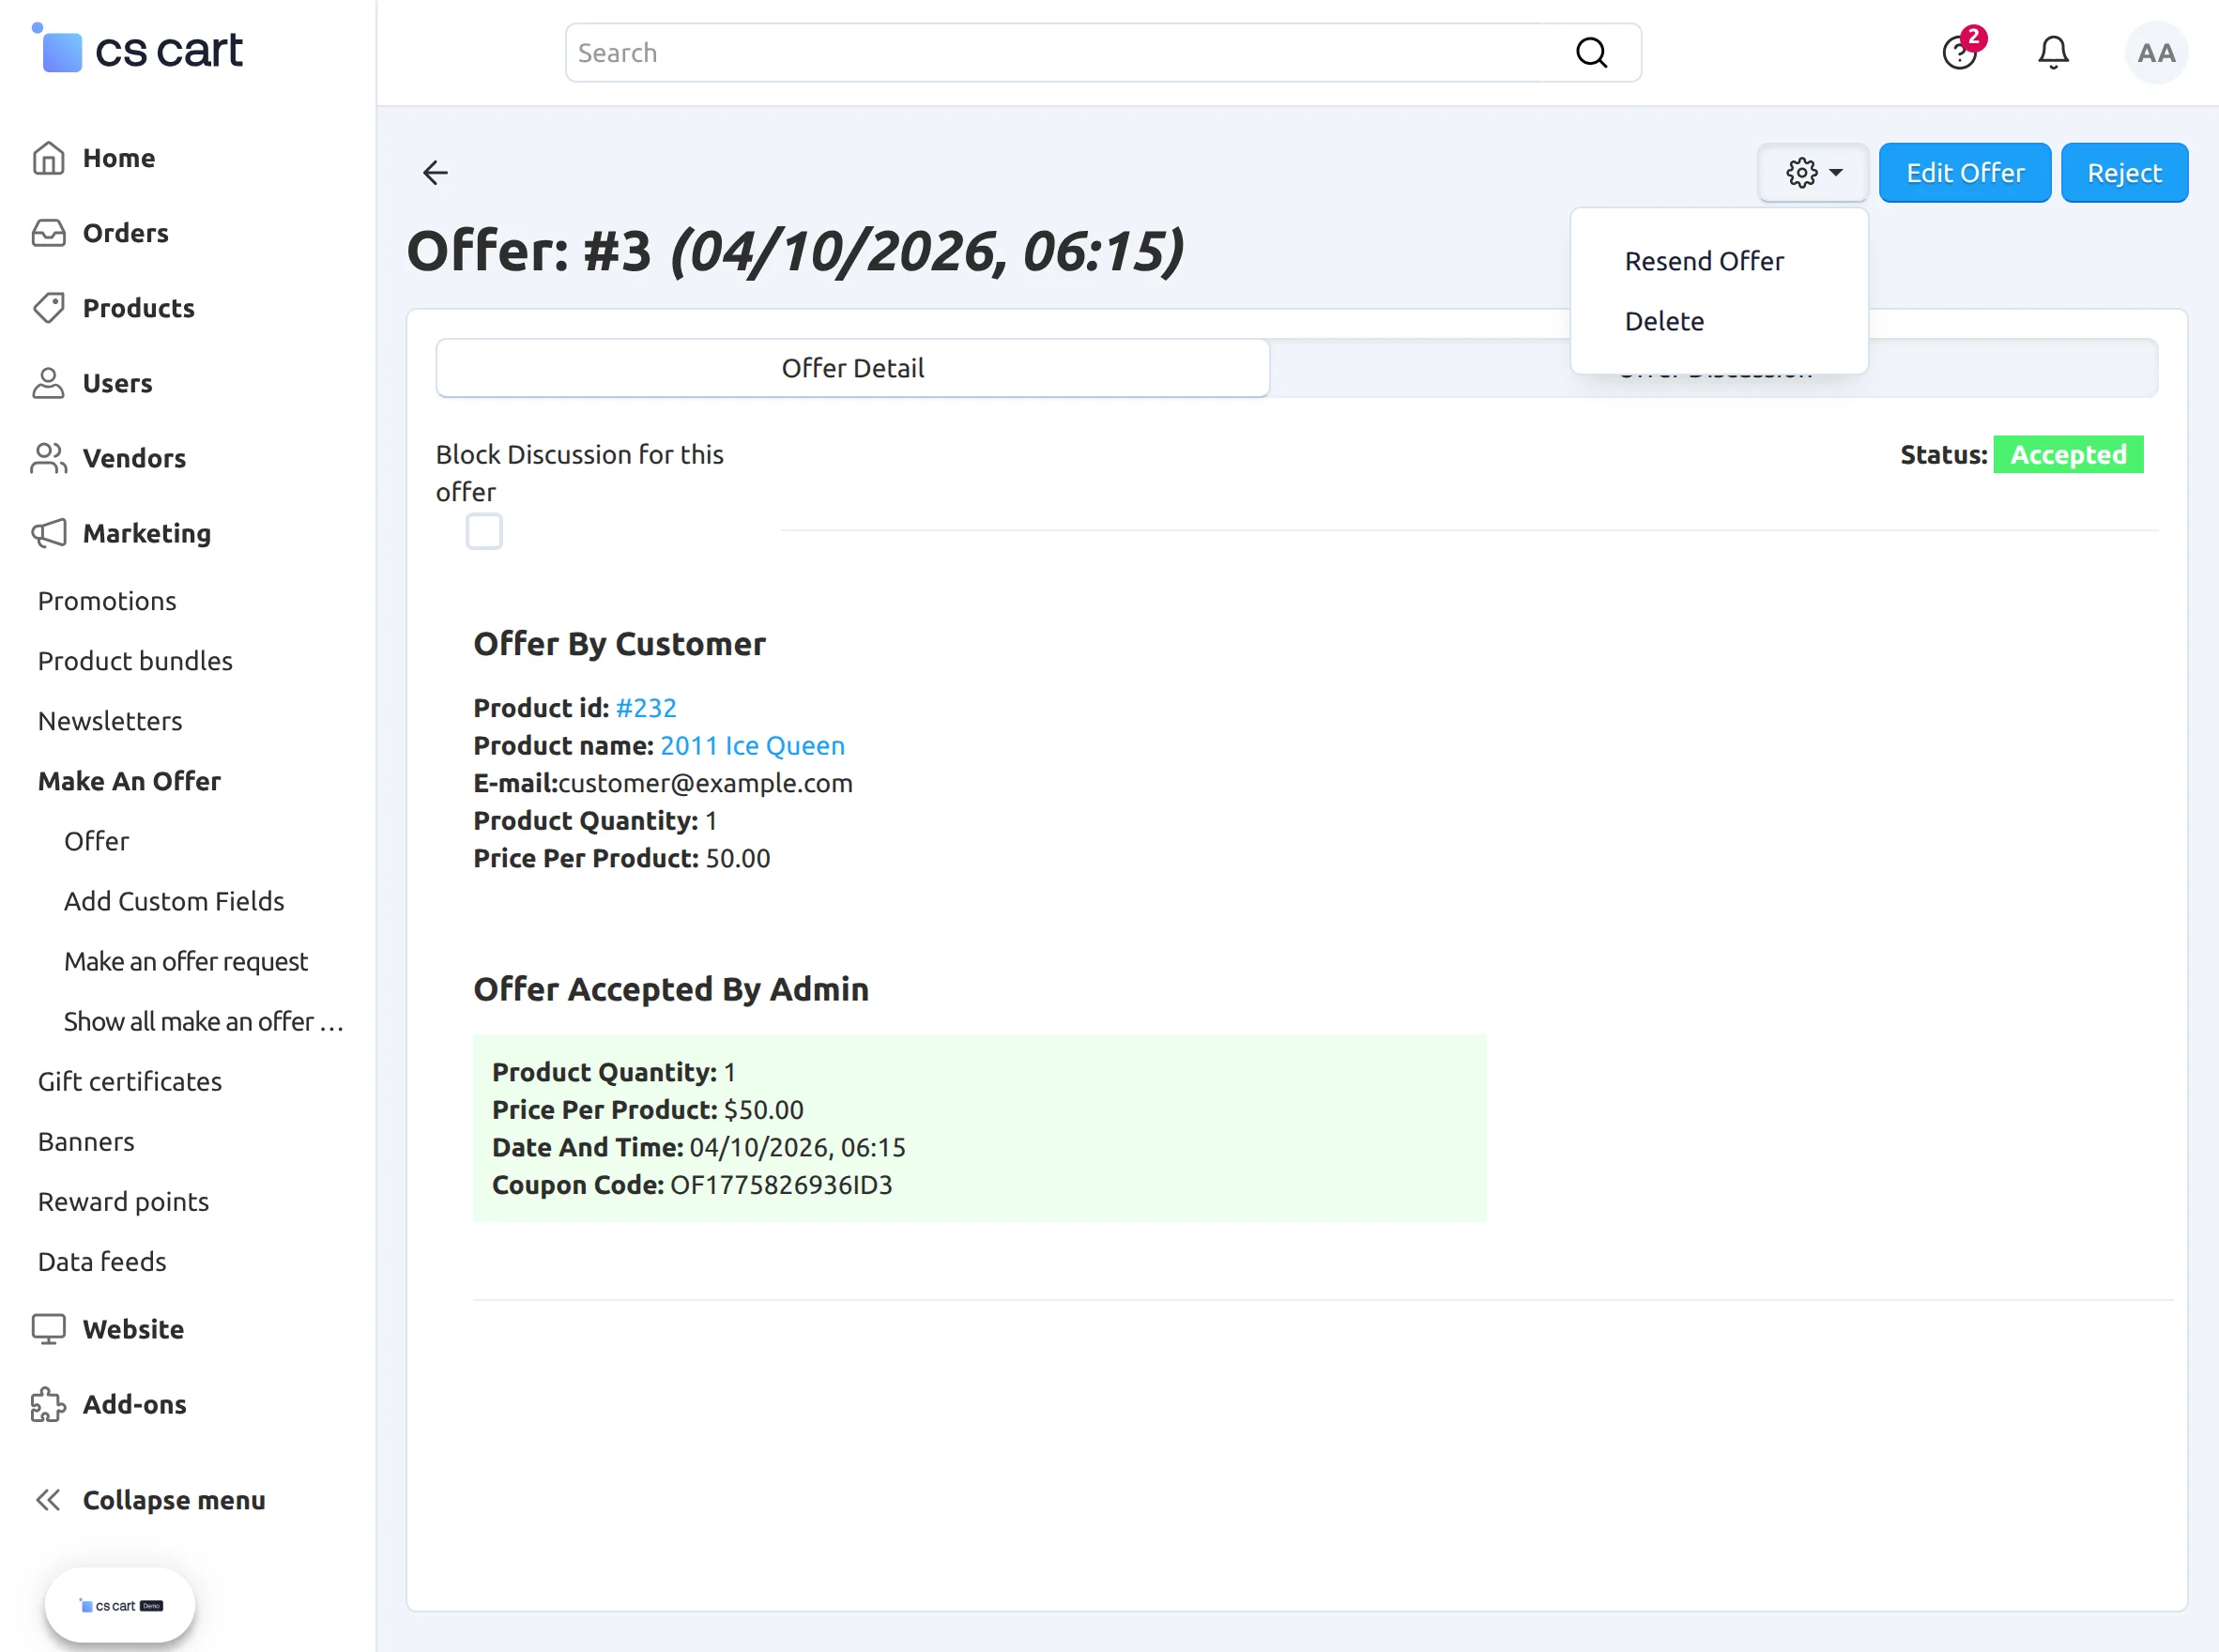
In the offer detail page, the admin will find the following functionalities listed below.
- Click on “block discussion for this offer” to disable the chat functionality from the user end.
- To resend the offer details to the user, click on “resend offer”.
- Click on “delete” to delete the offer.
- View of offer history.
User end
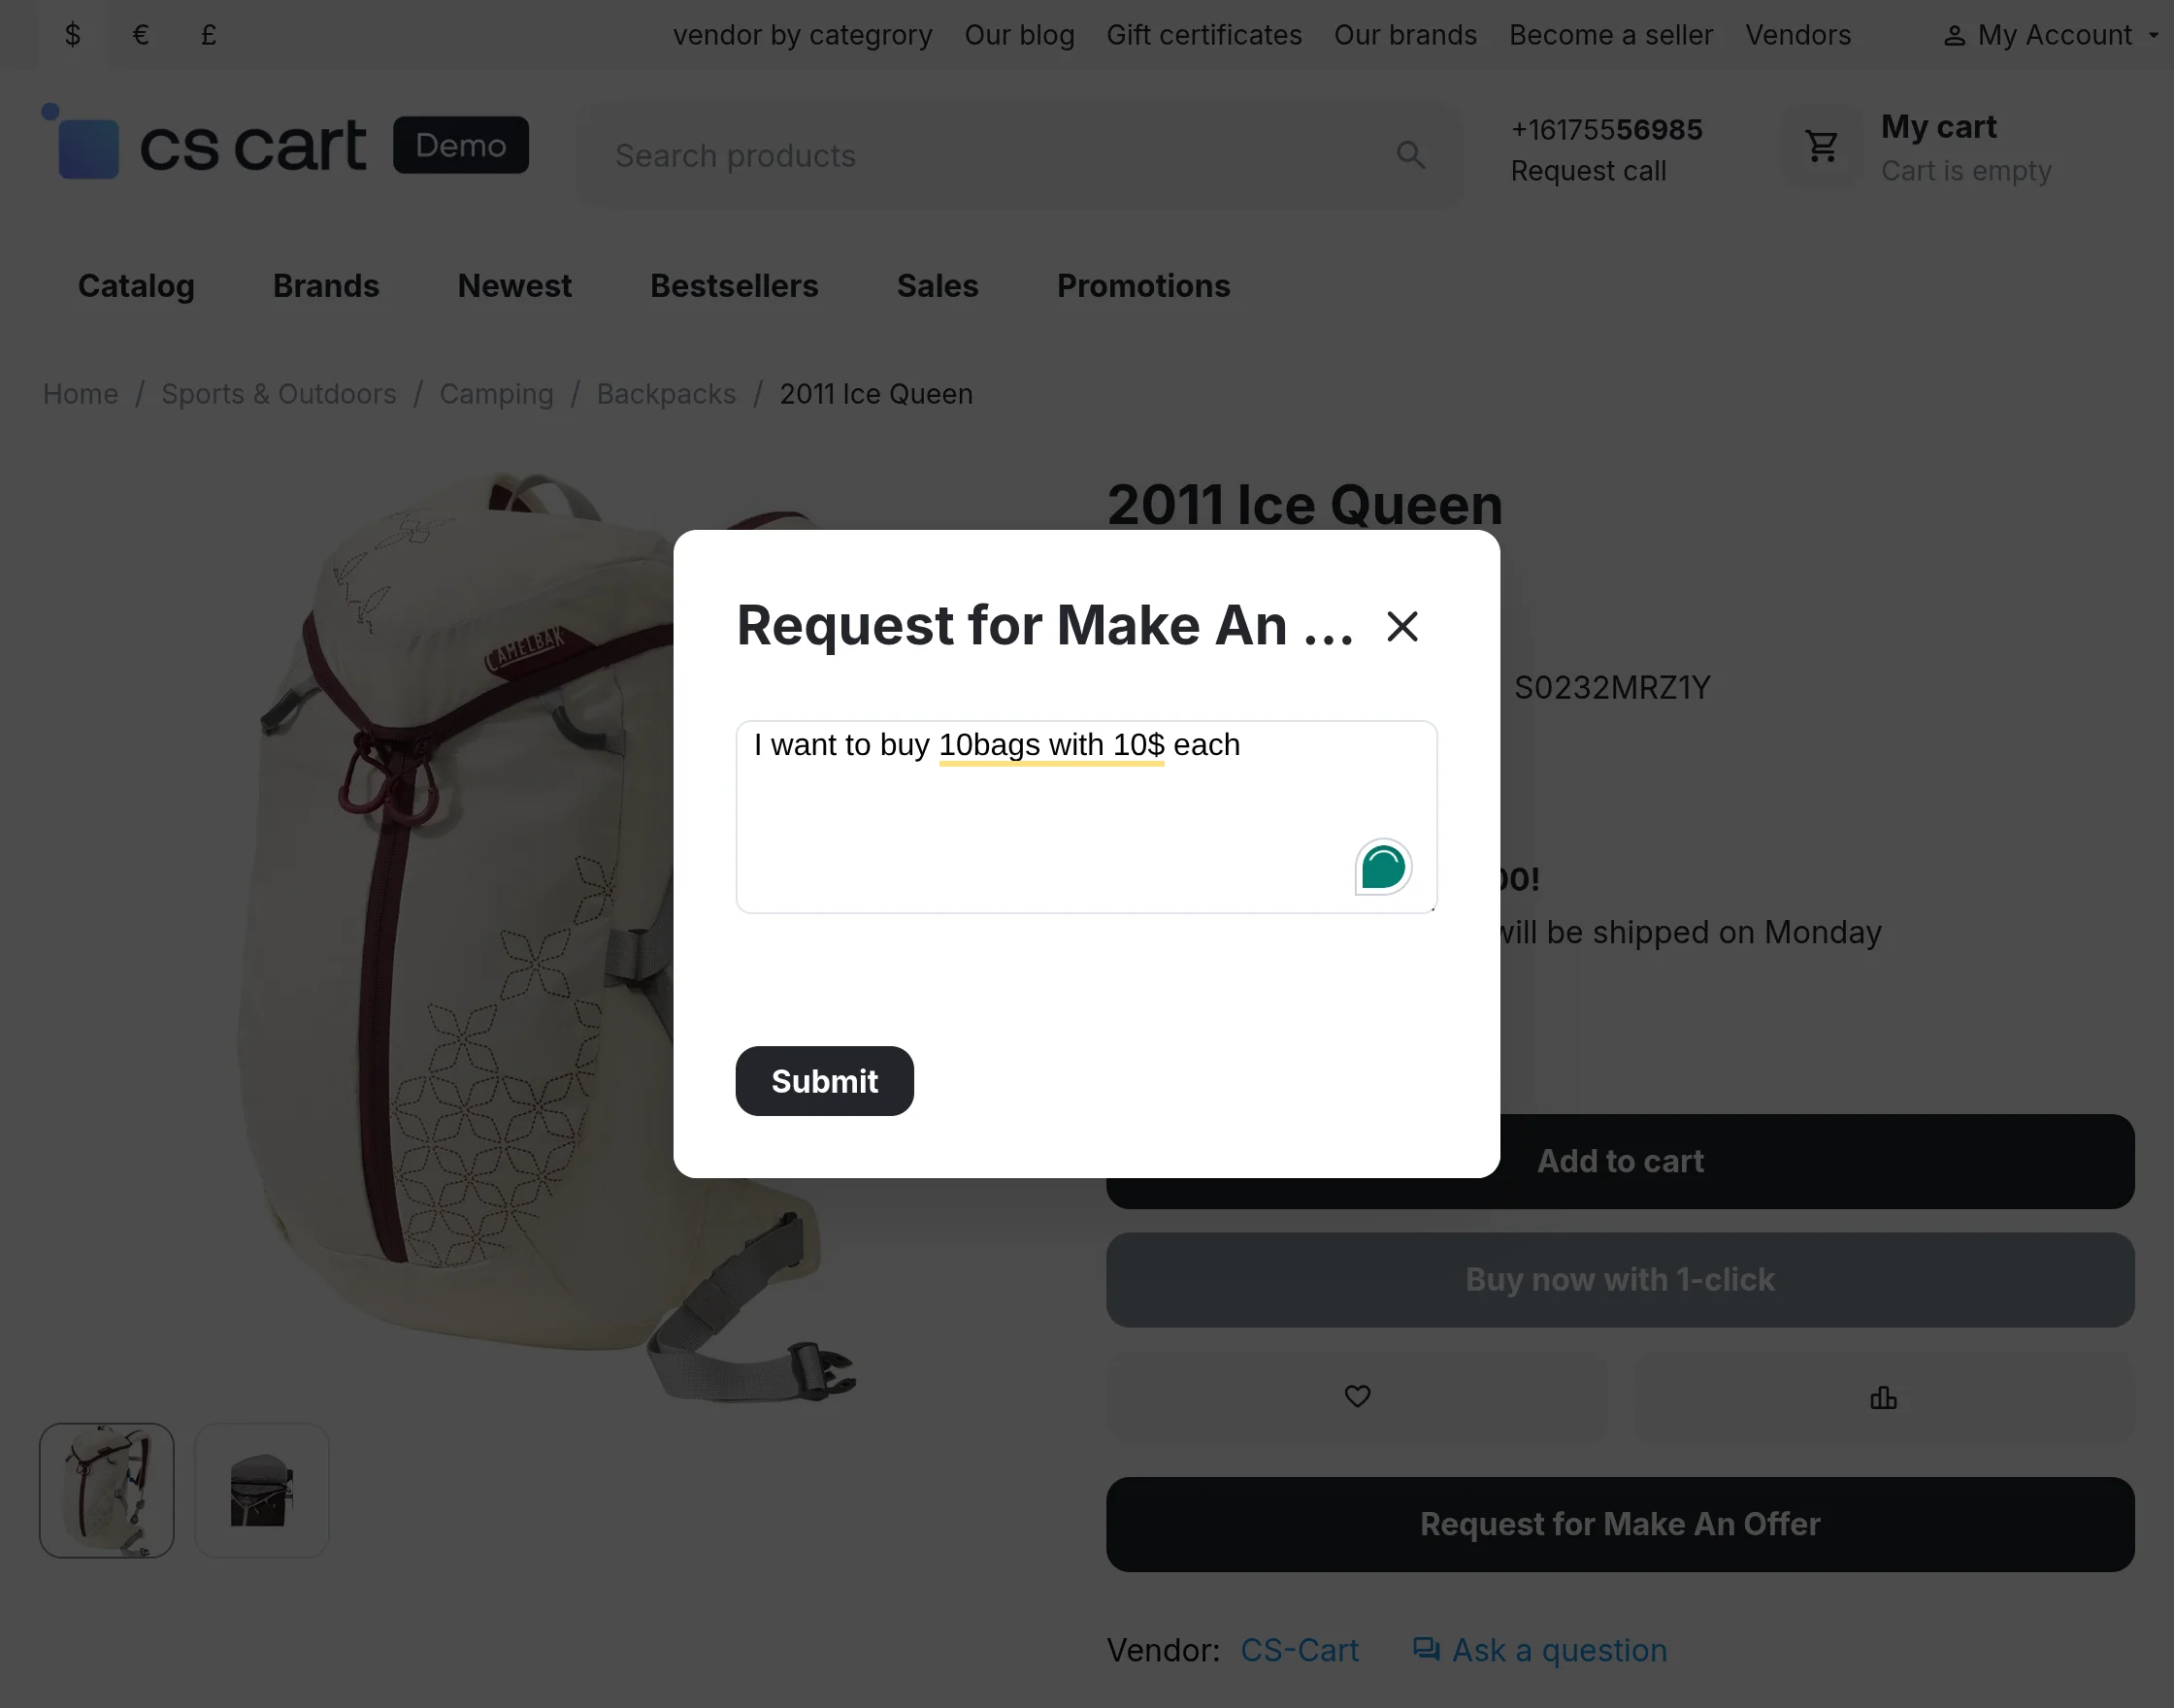
Request For Make an Offer
The customer can request to make an offer on the product. By clicking on the “Request for Make an Offer”.
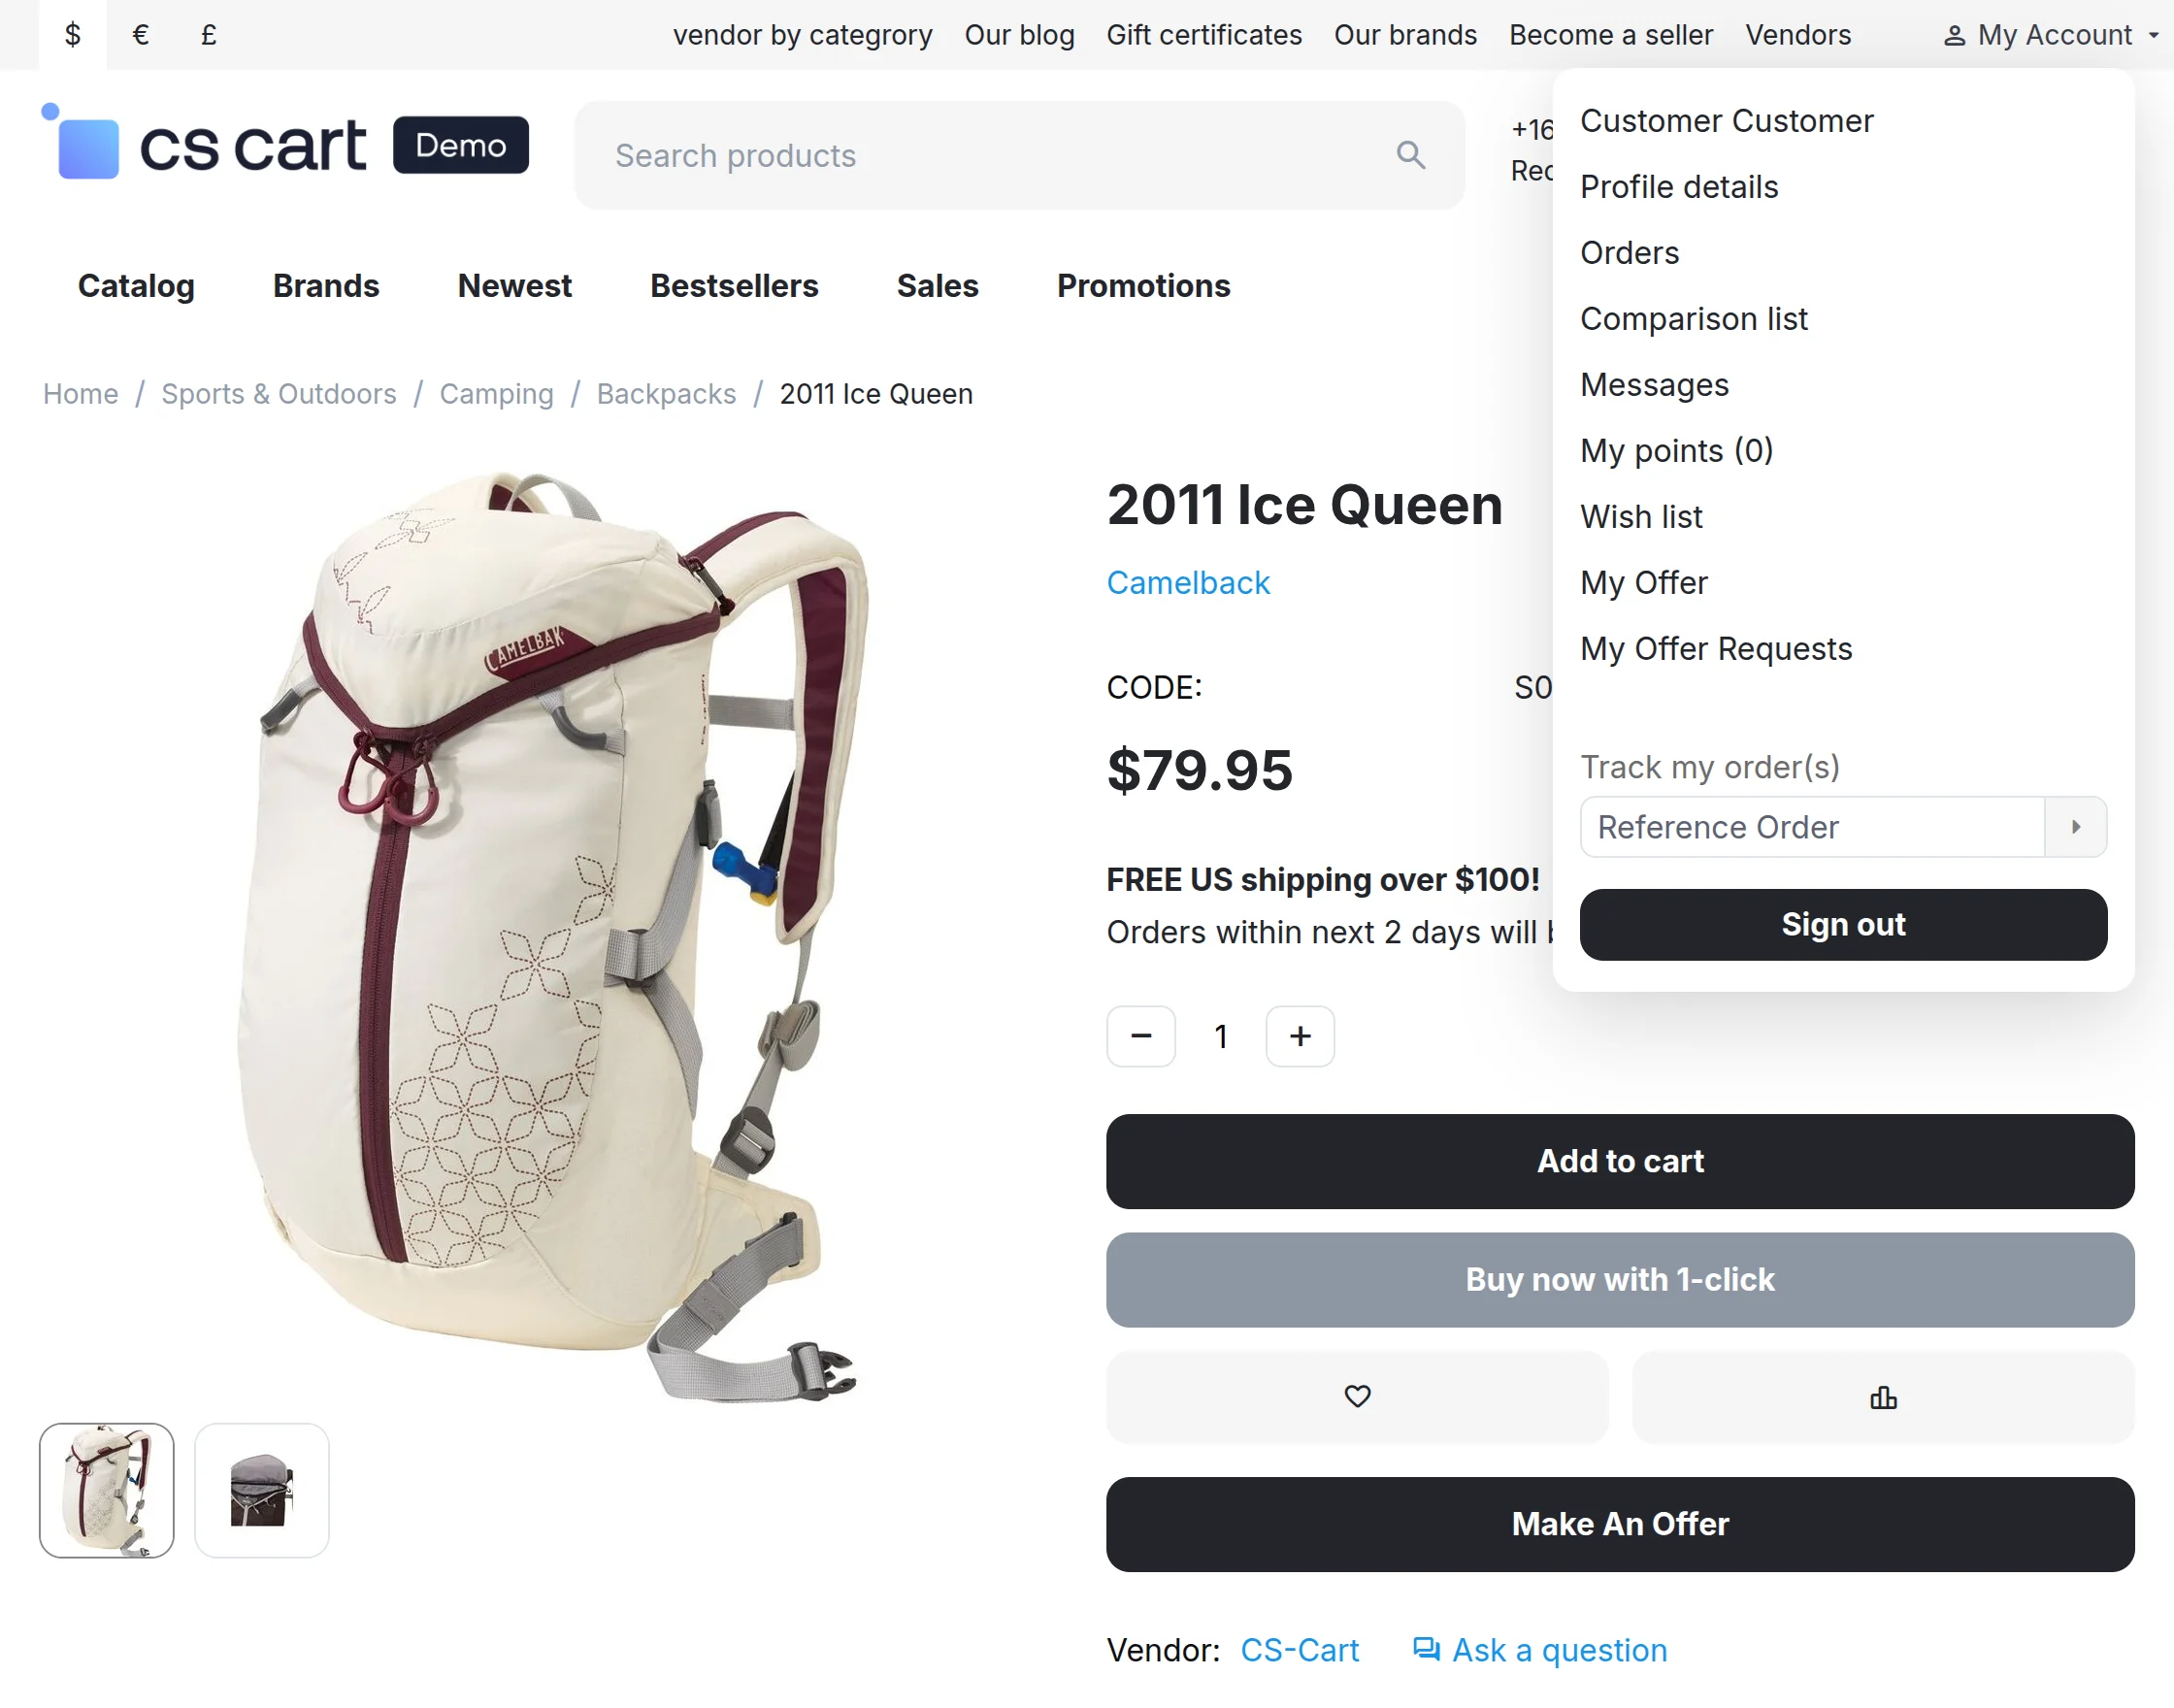
To view the list of offers at the user end, he/she needs to click on the ” My offer” section as shown below in the snapshot.
Now, Click on the desired offer to view the detail of it as shown below in the snapshot.
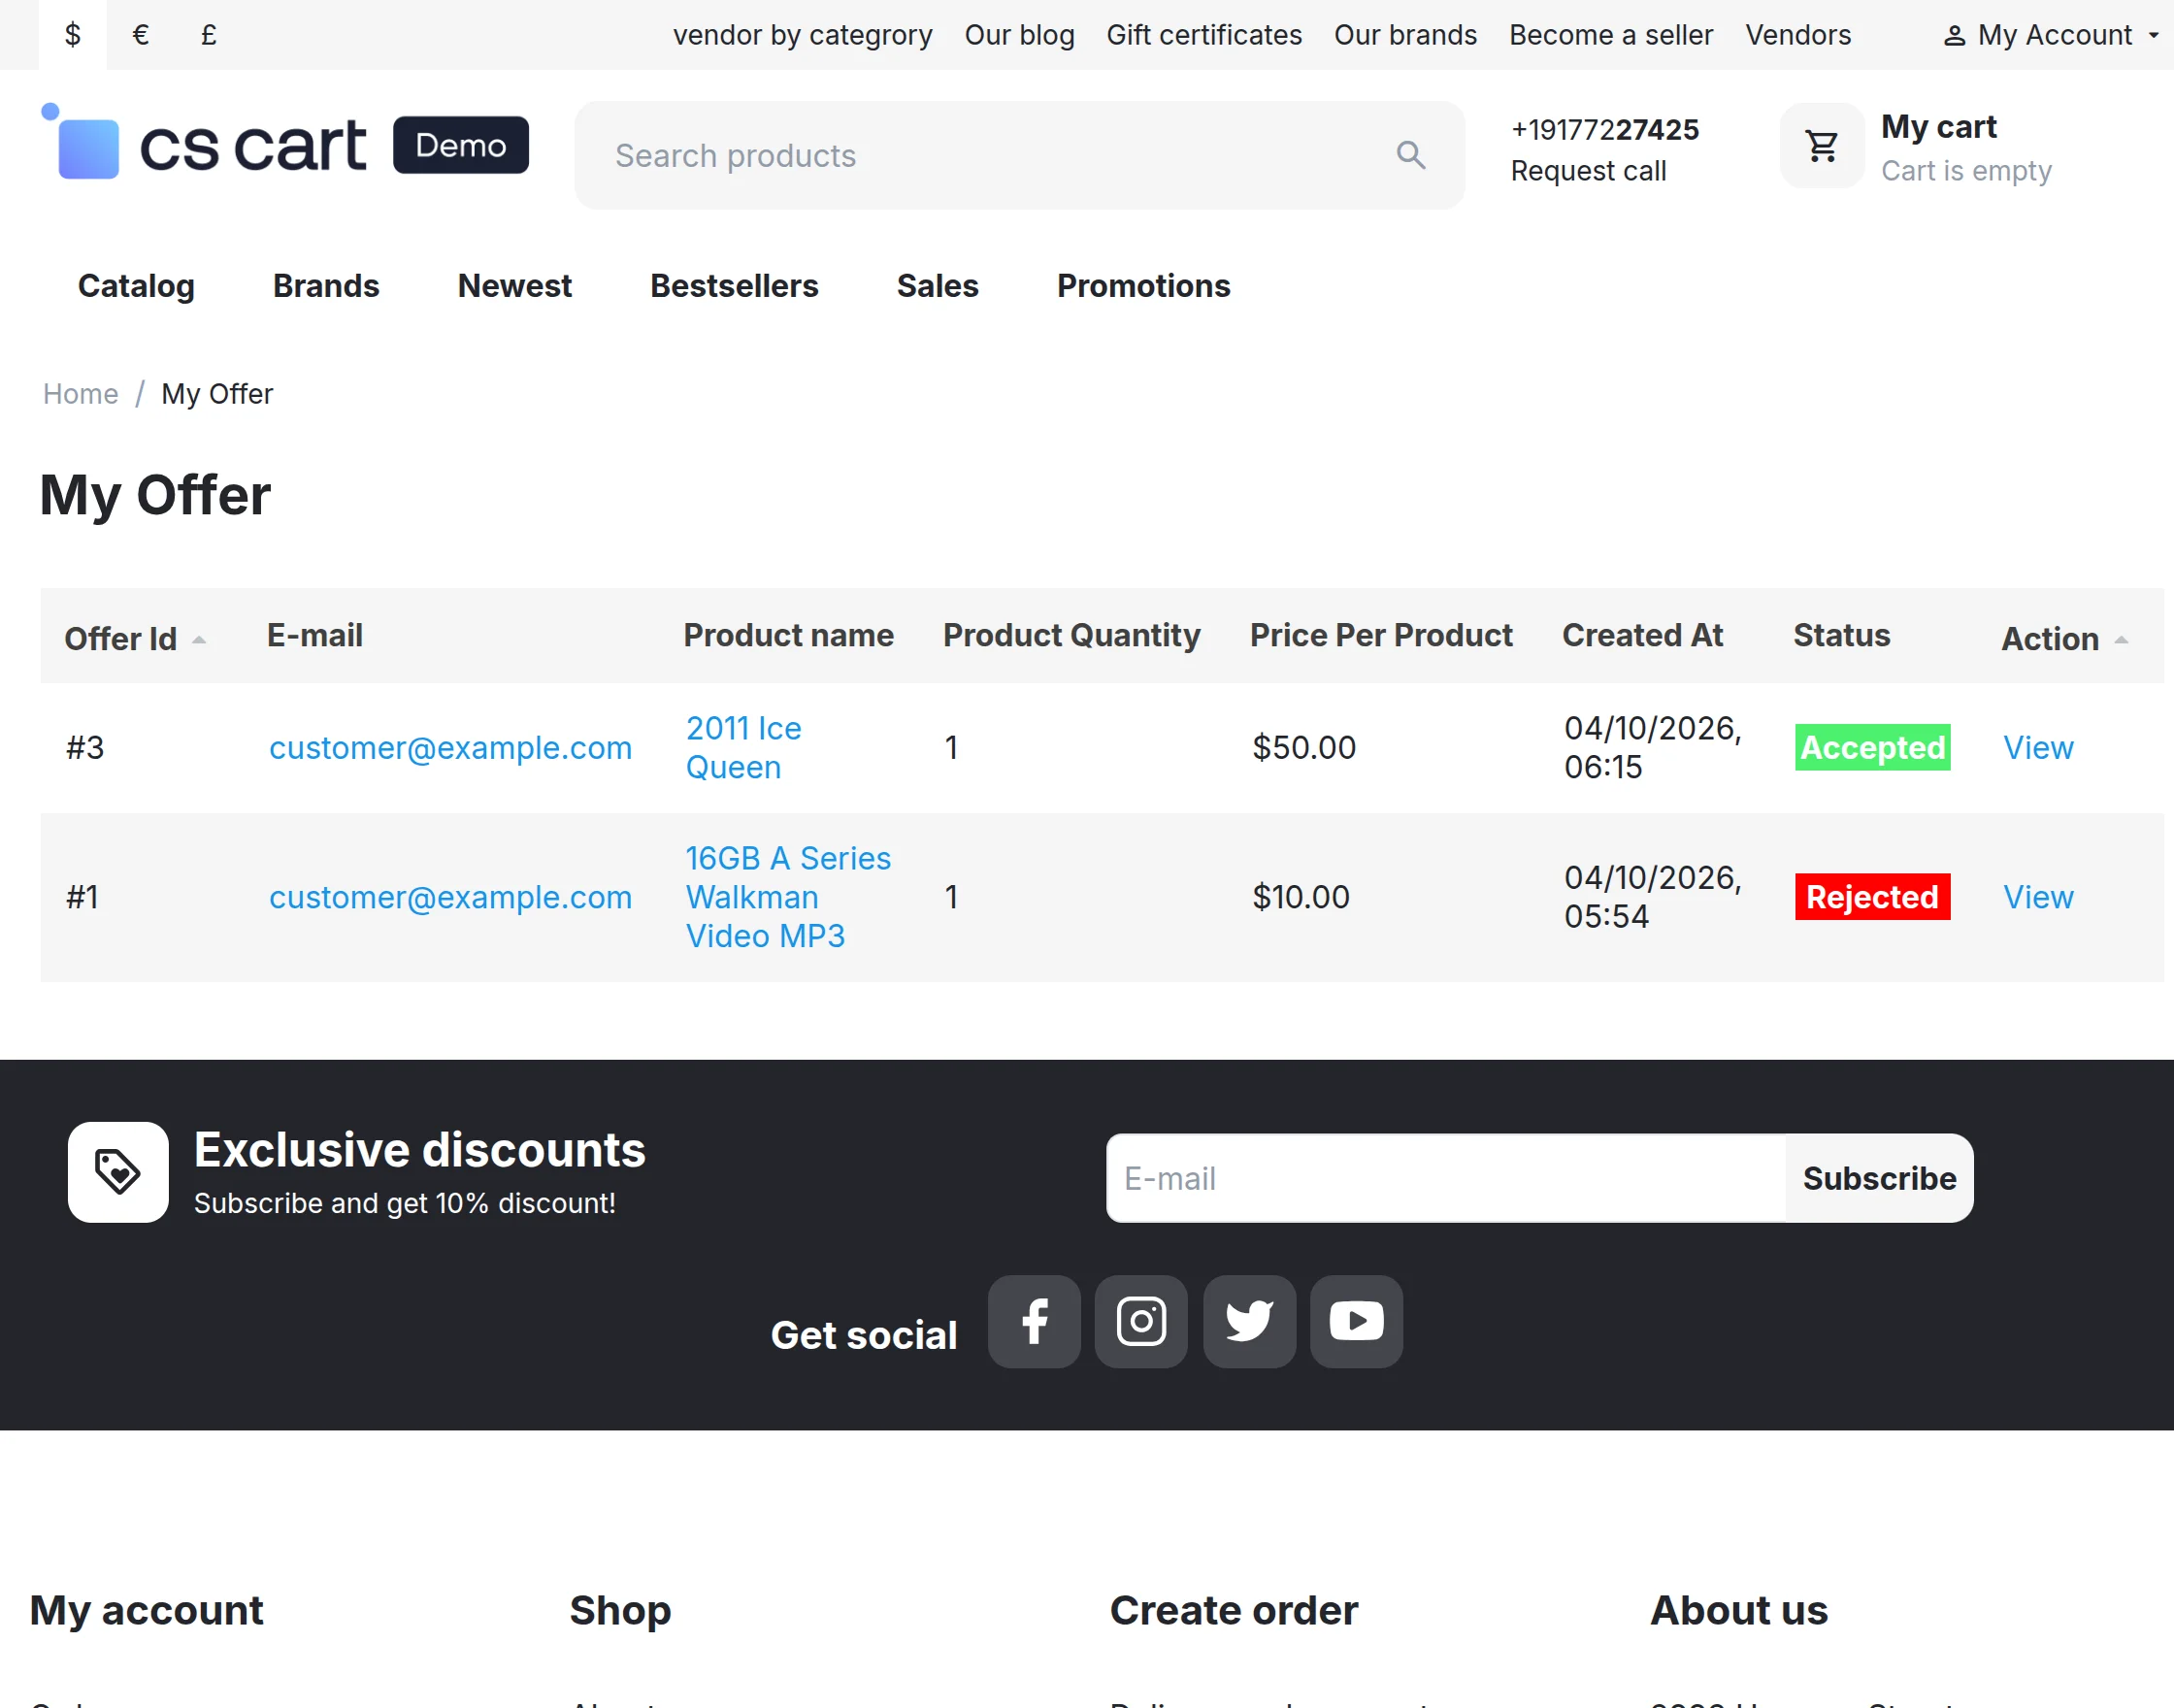
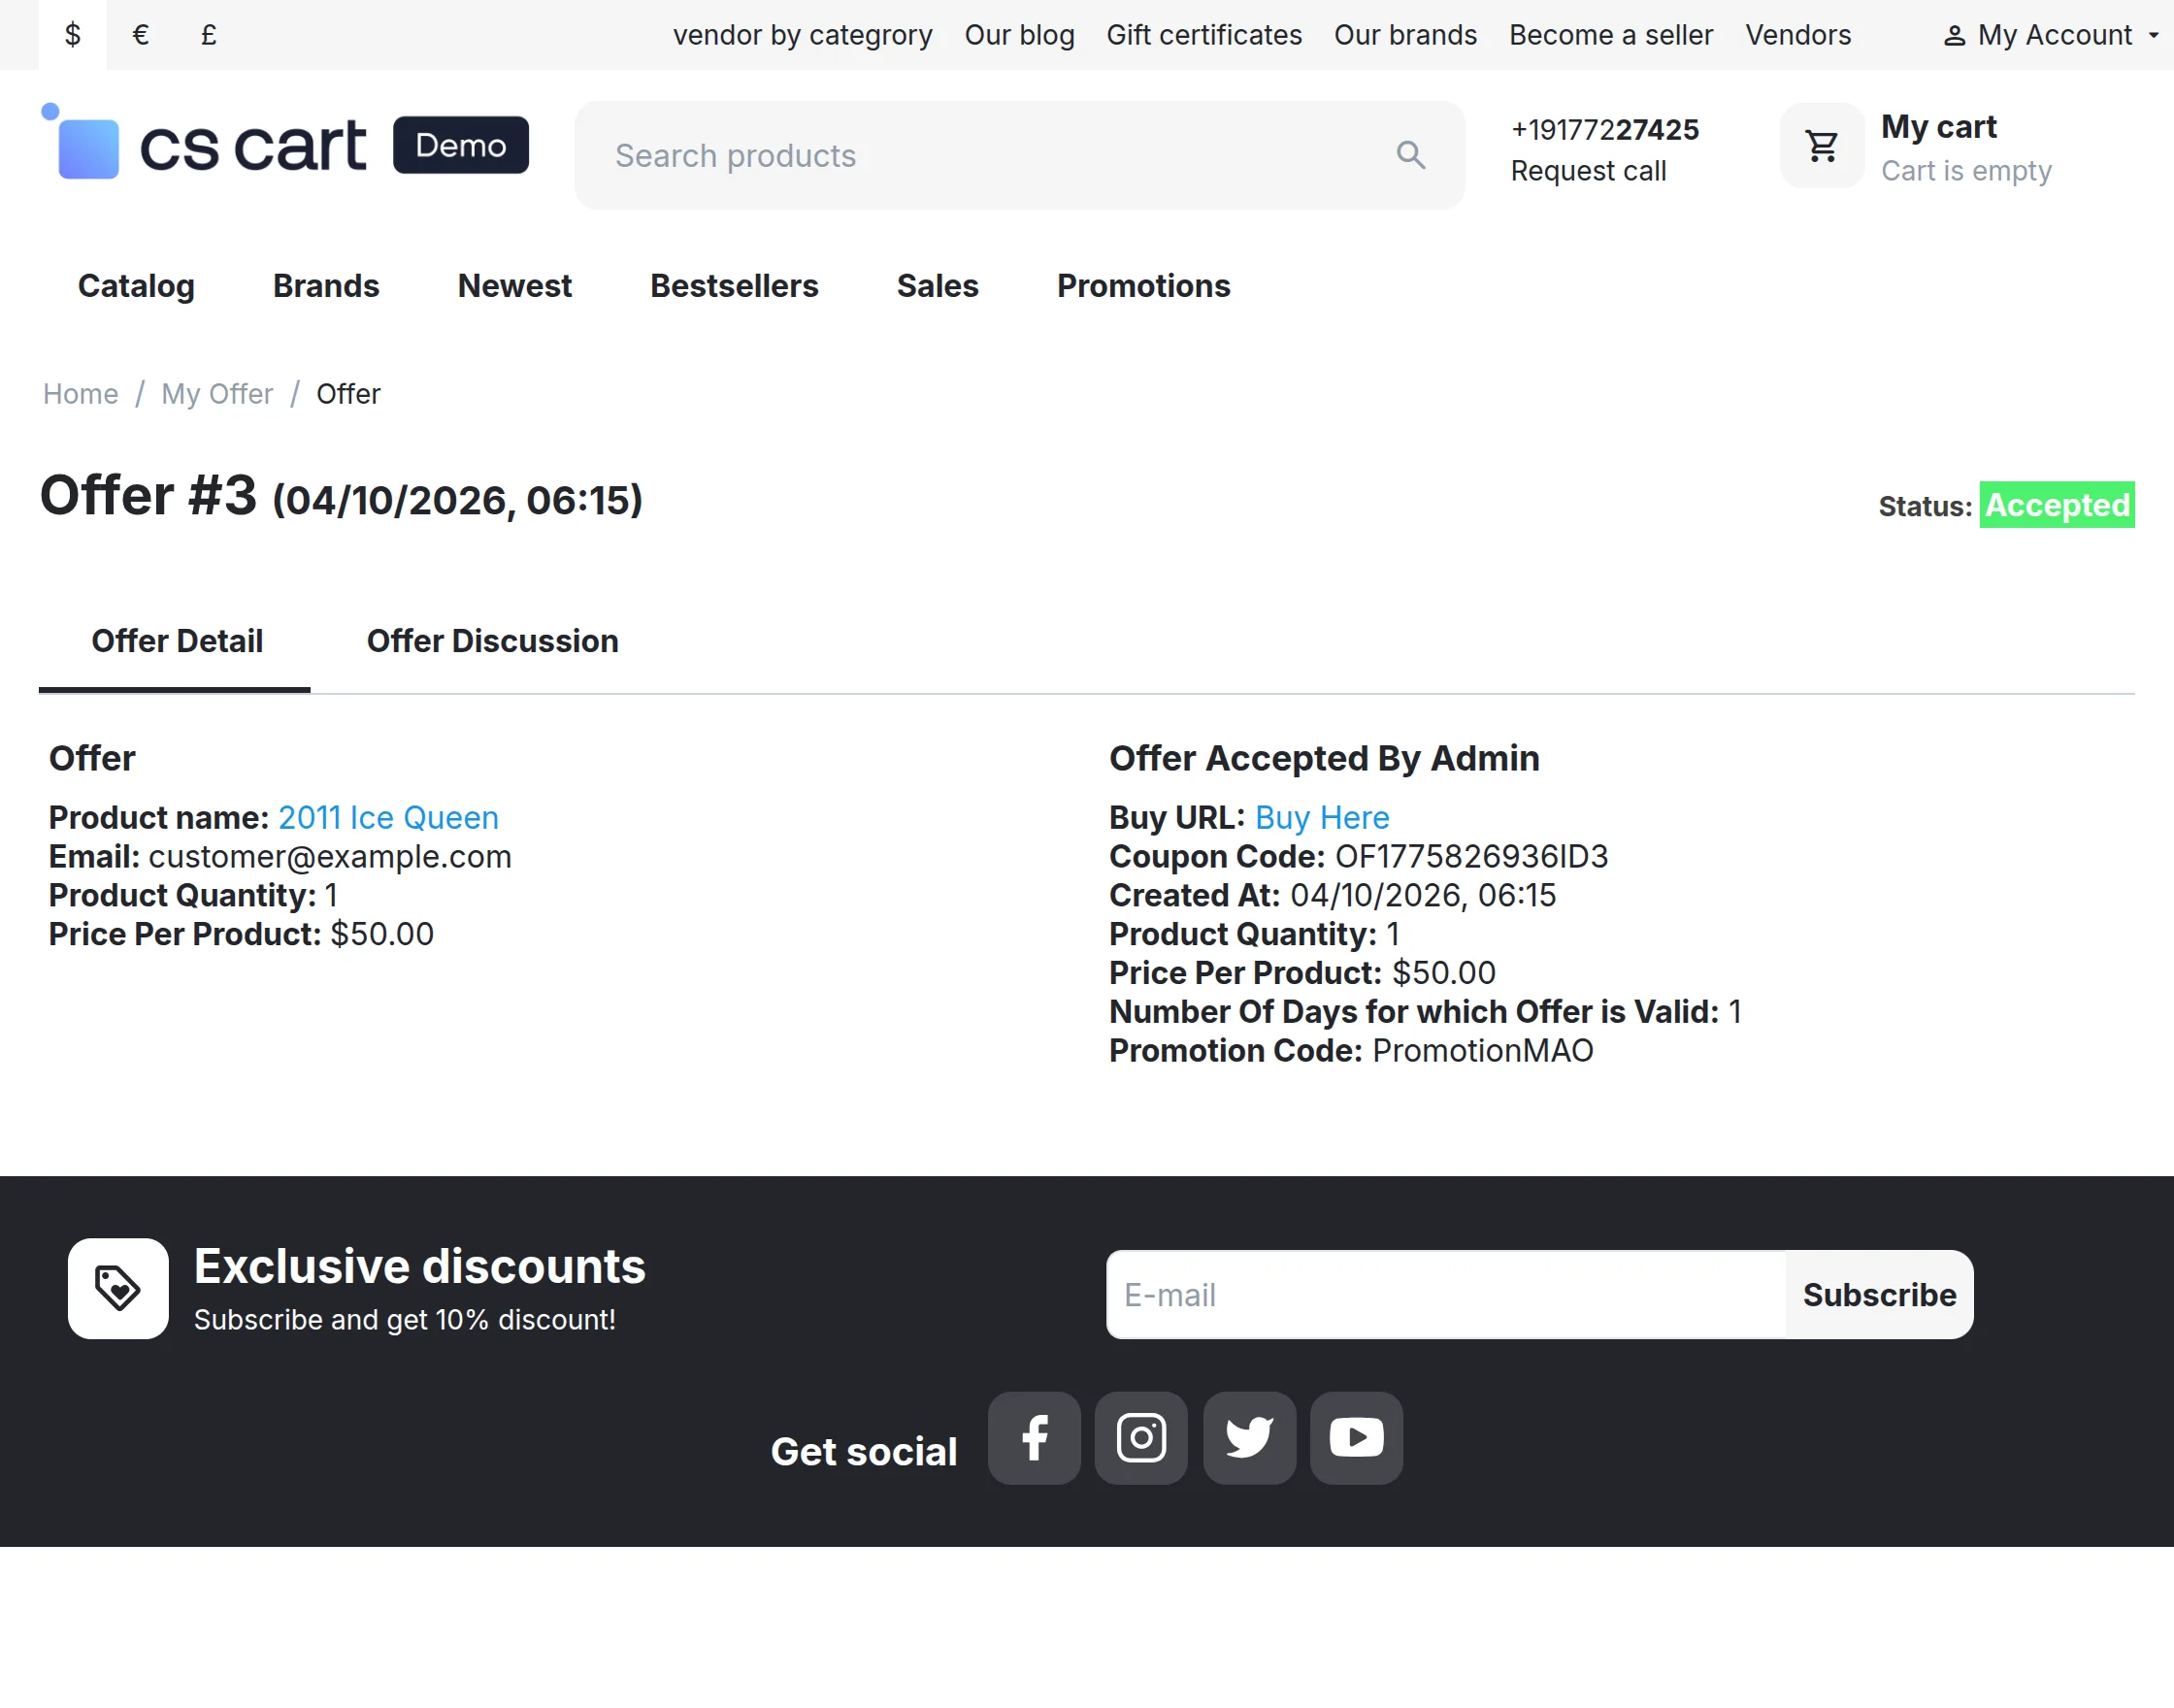
The view of the offer detail page. You can view the latest offers accepted/rejected by the admin here.

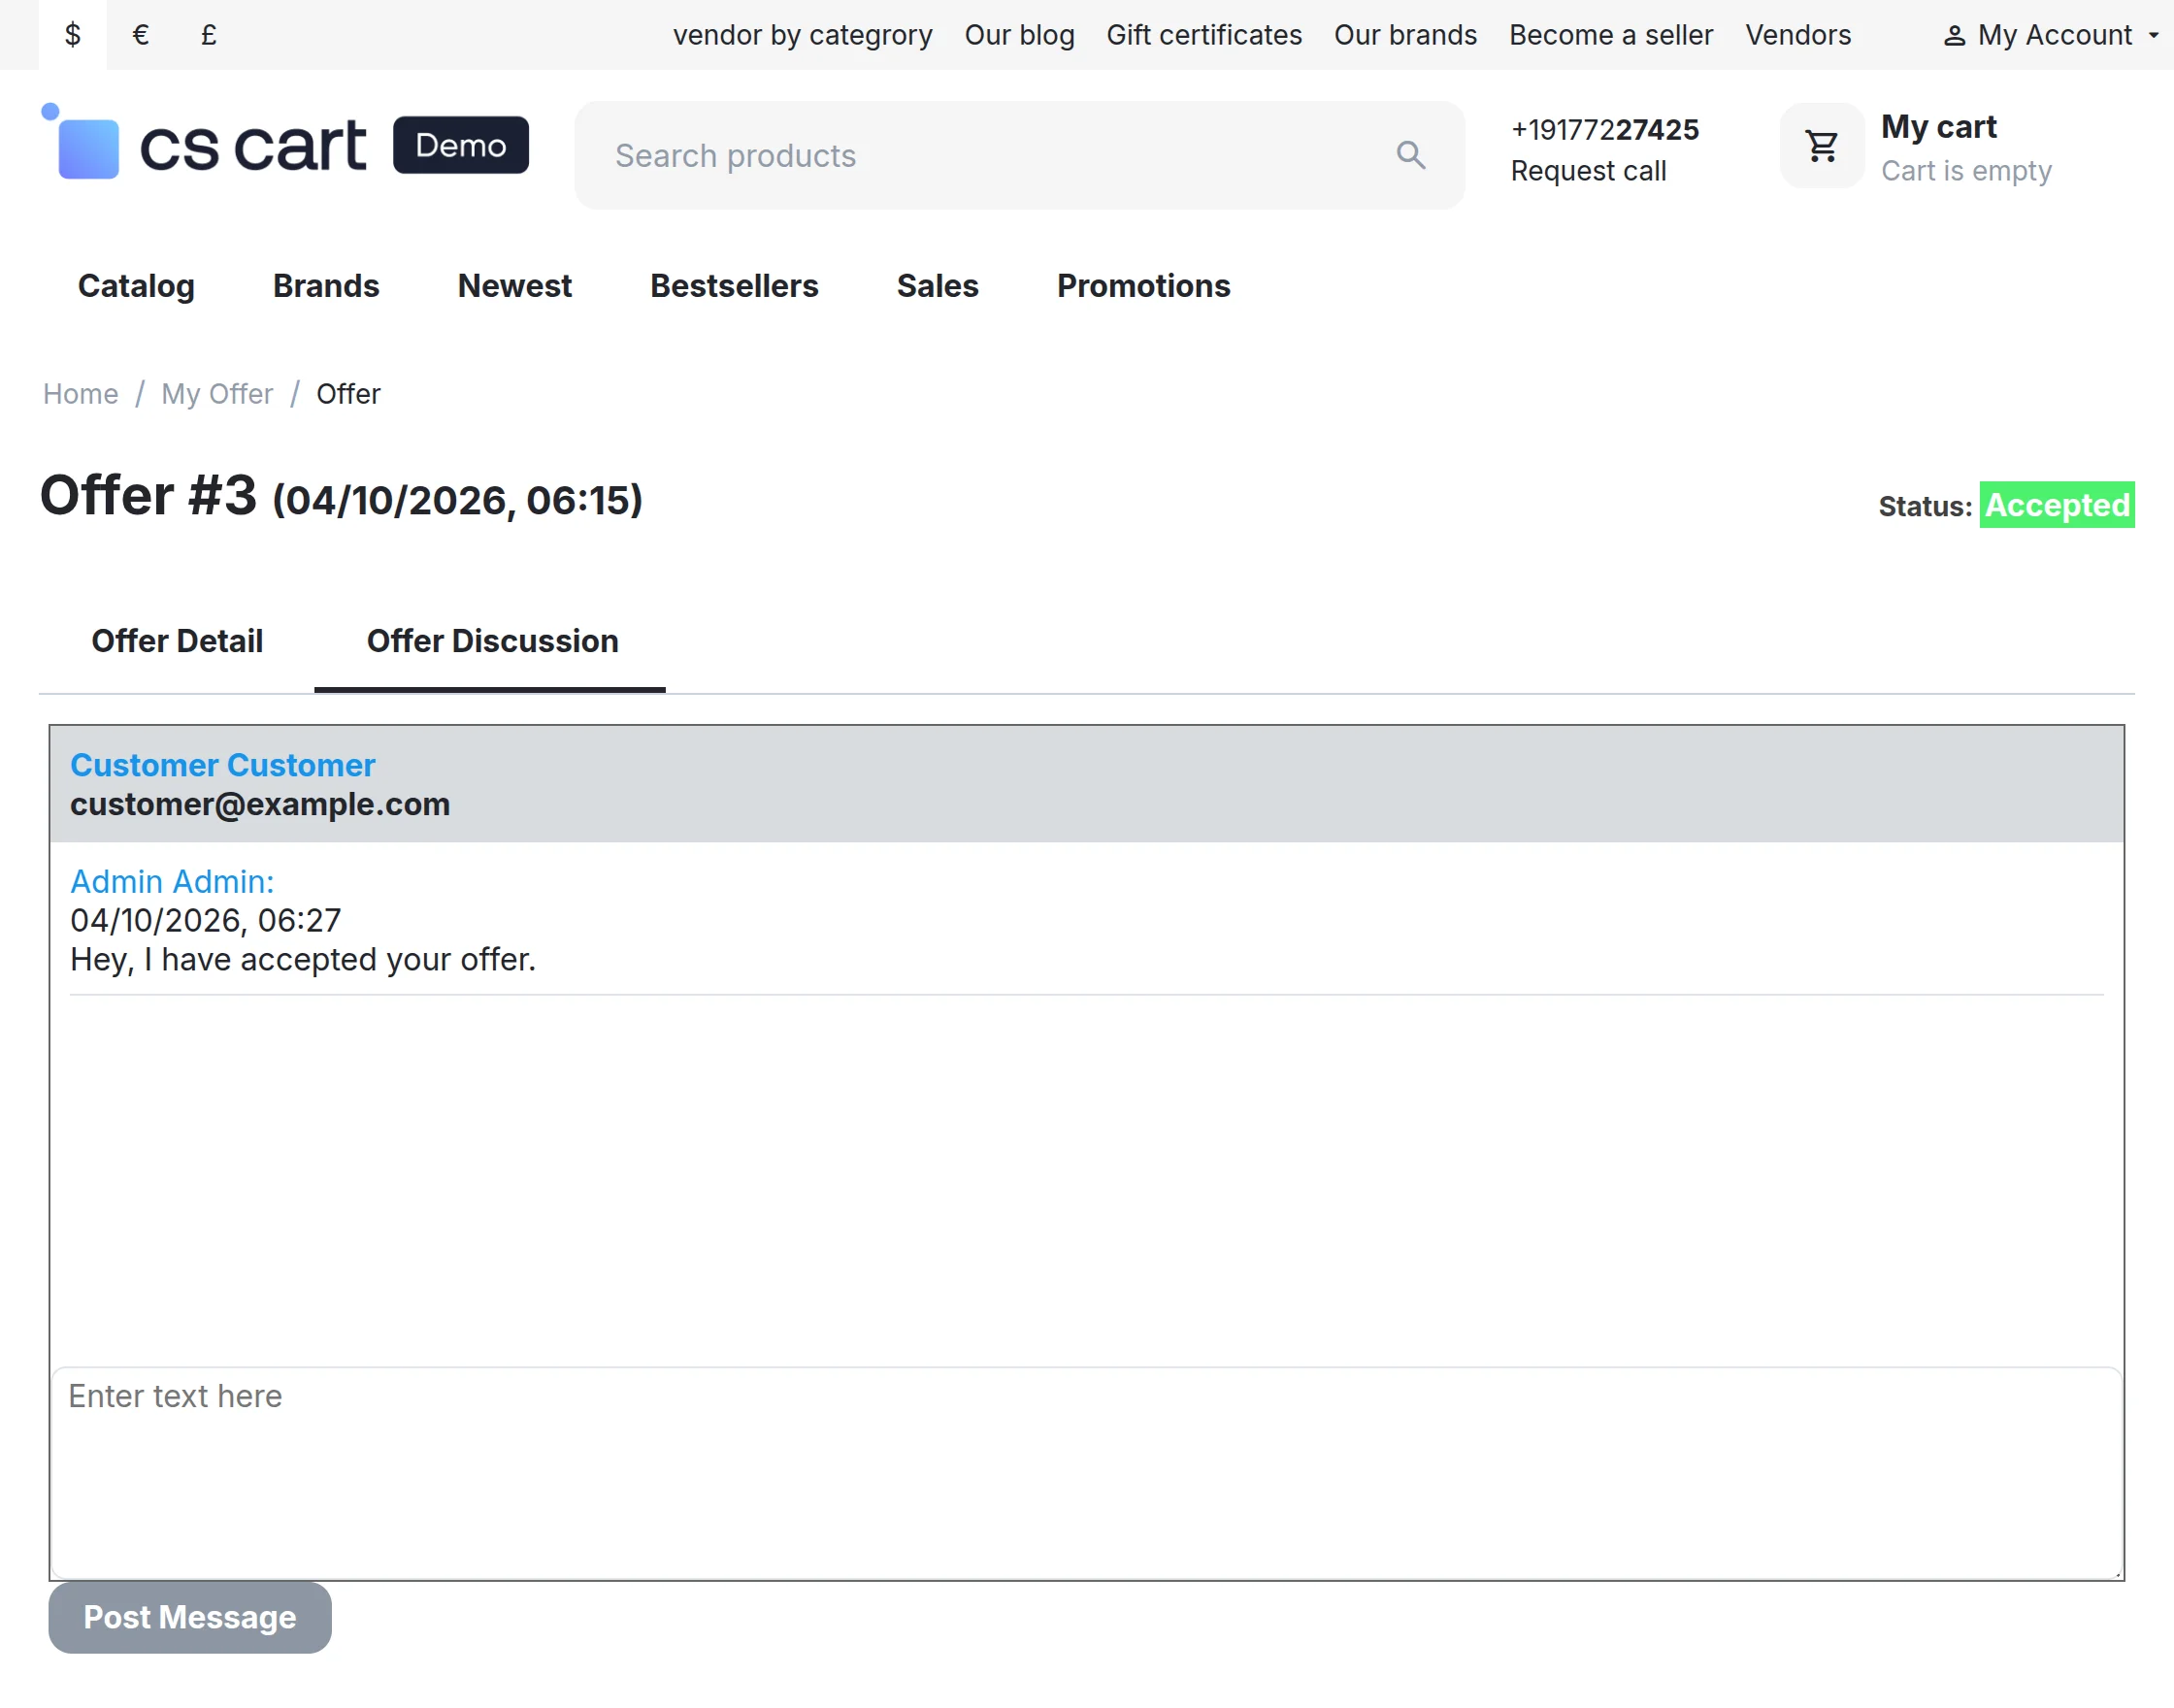
View of the discussion panel at the user end.
Click on “Buy Here” to purchase the product as per the offer.
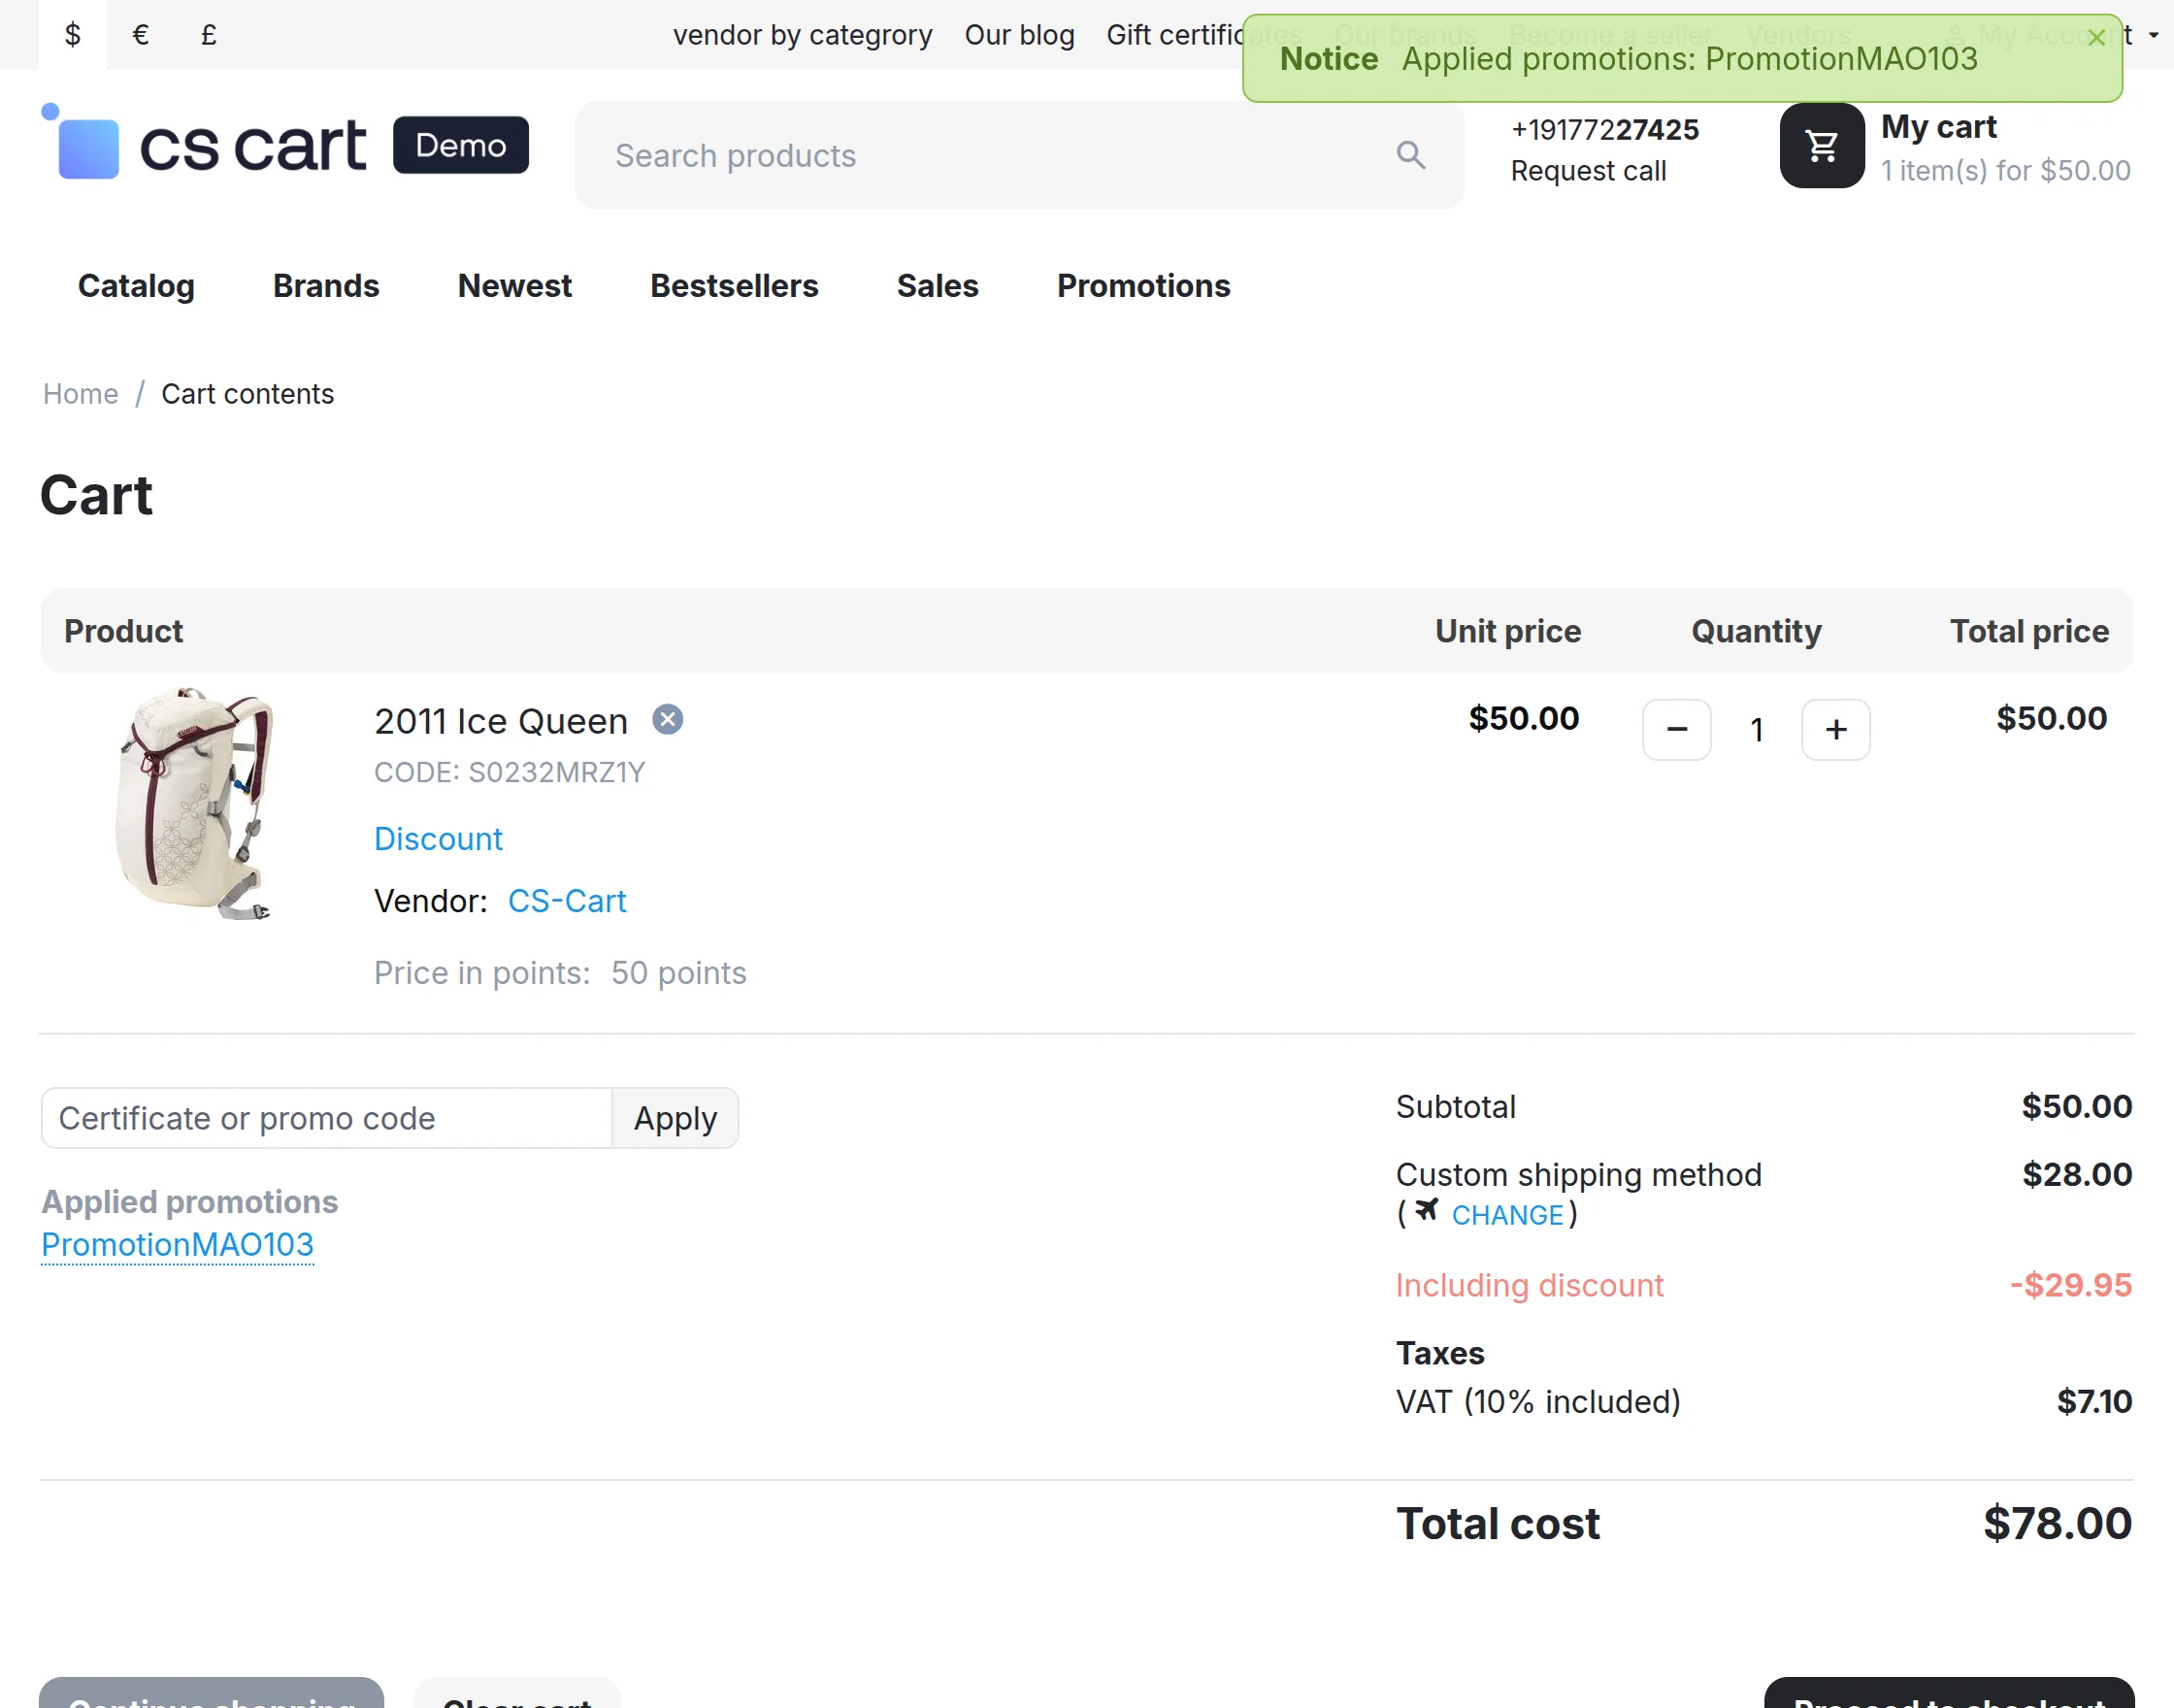
View of the checkout page.
View Make an Offer Product List
Now the customer can also view all the make-an-offer product lists.
After clicking the “Offer Products“. The customer can view all make an offer products list.
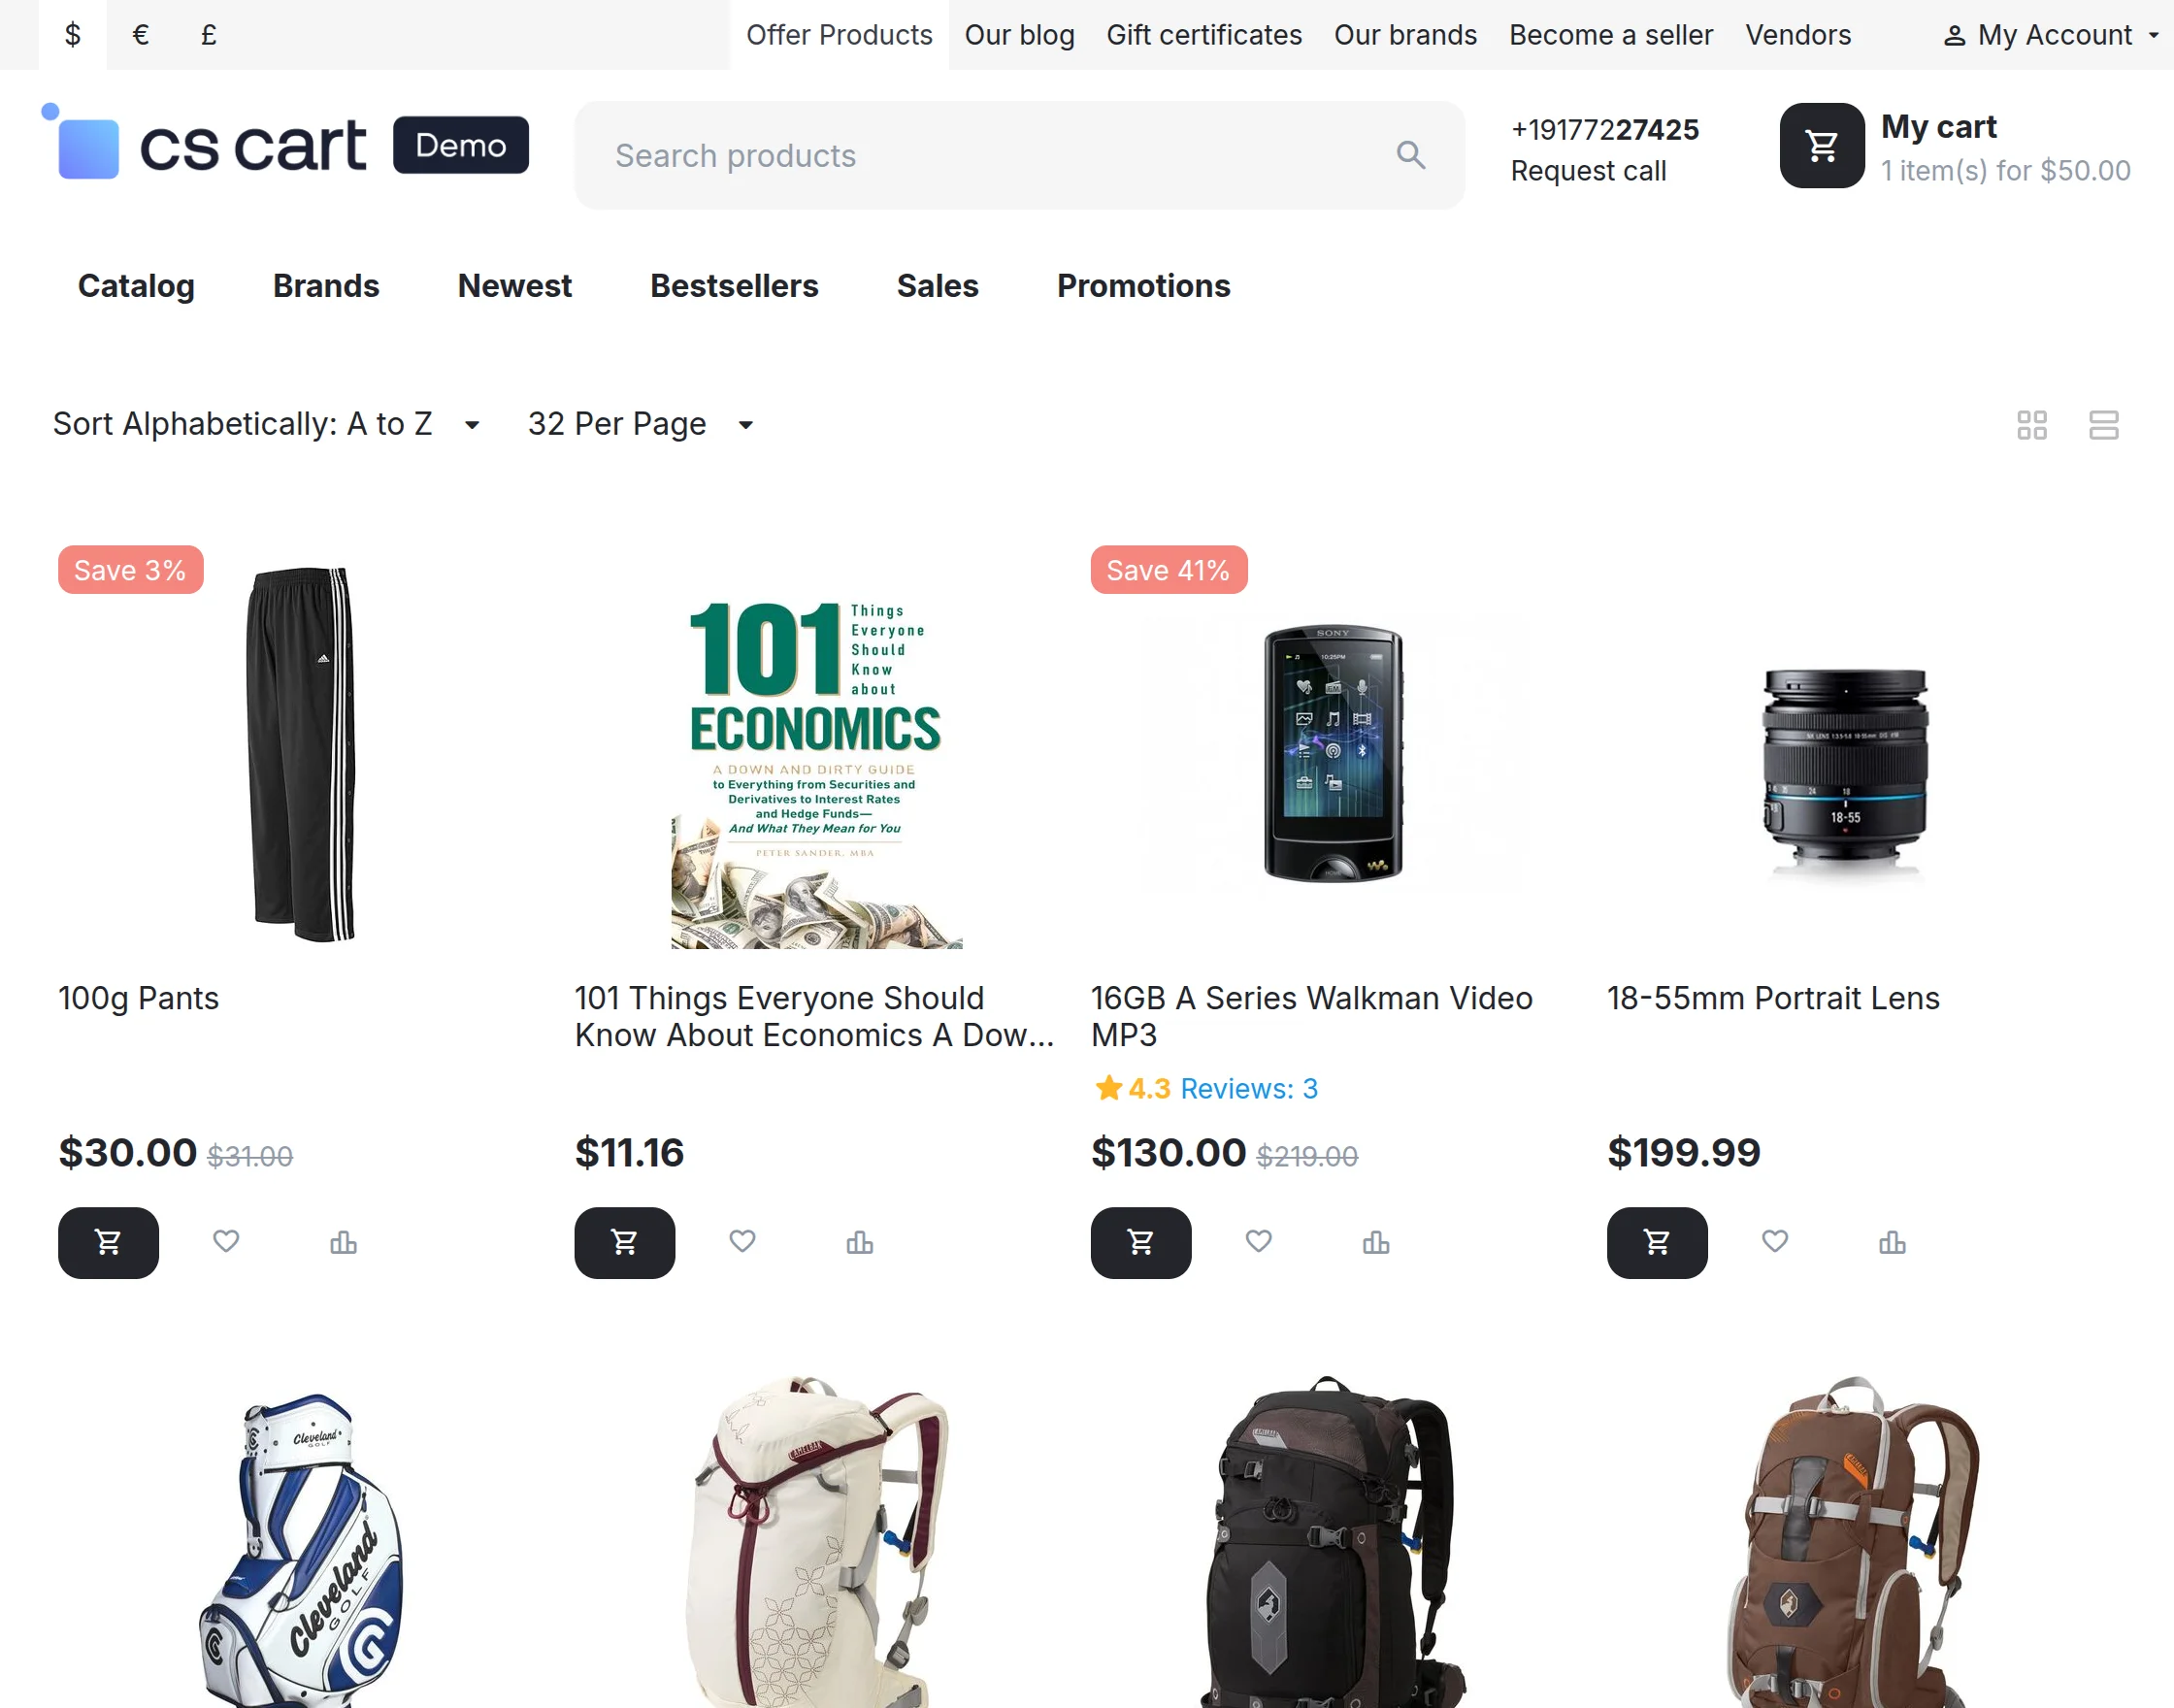
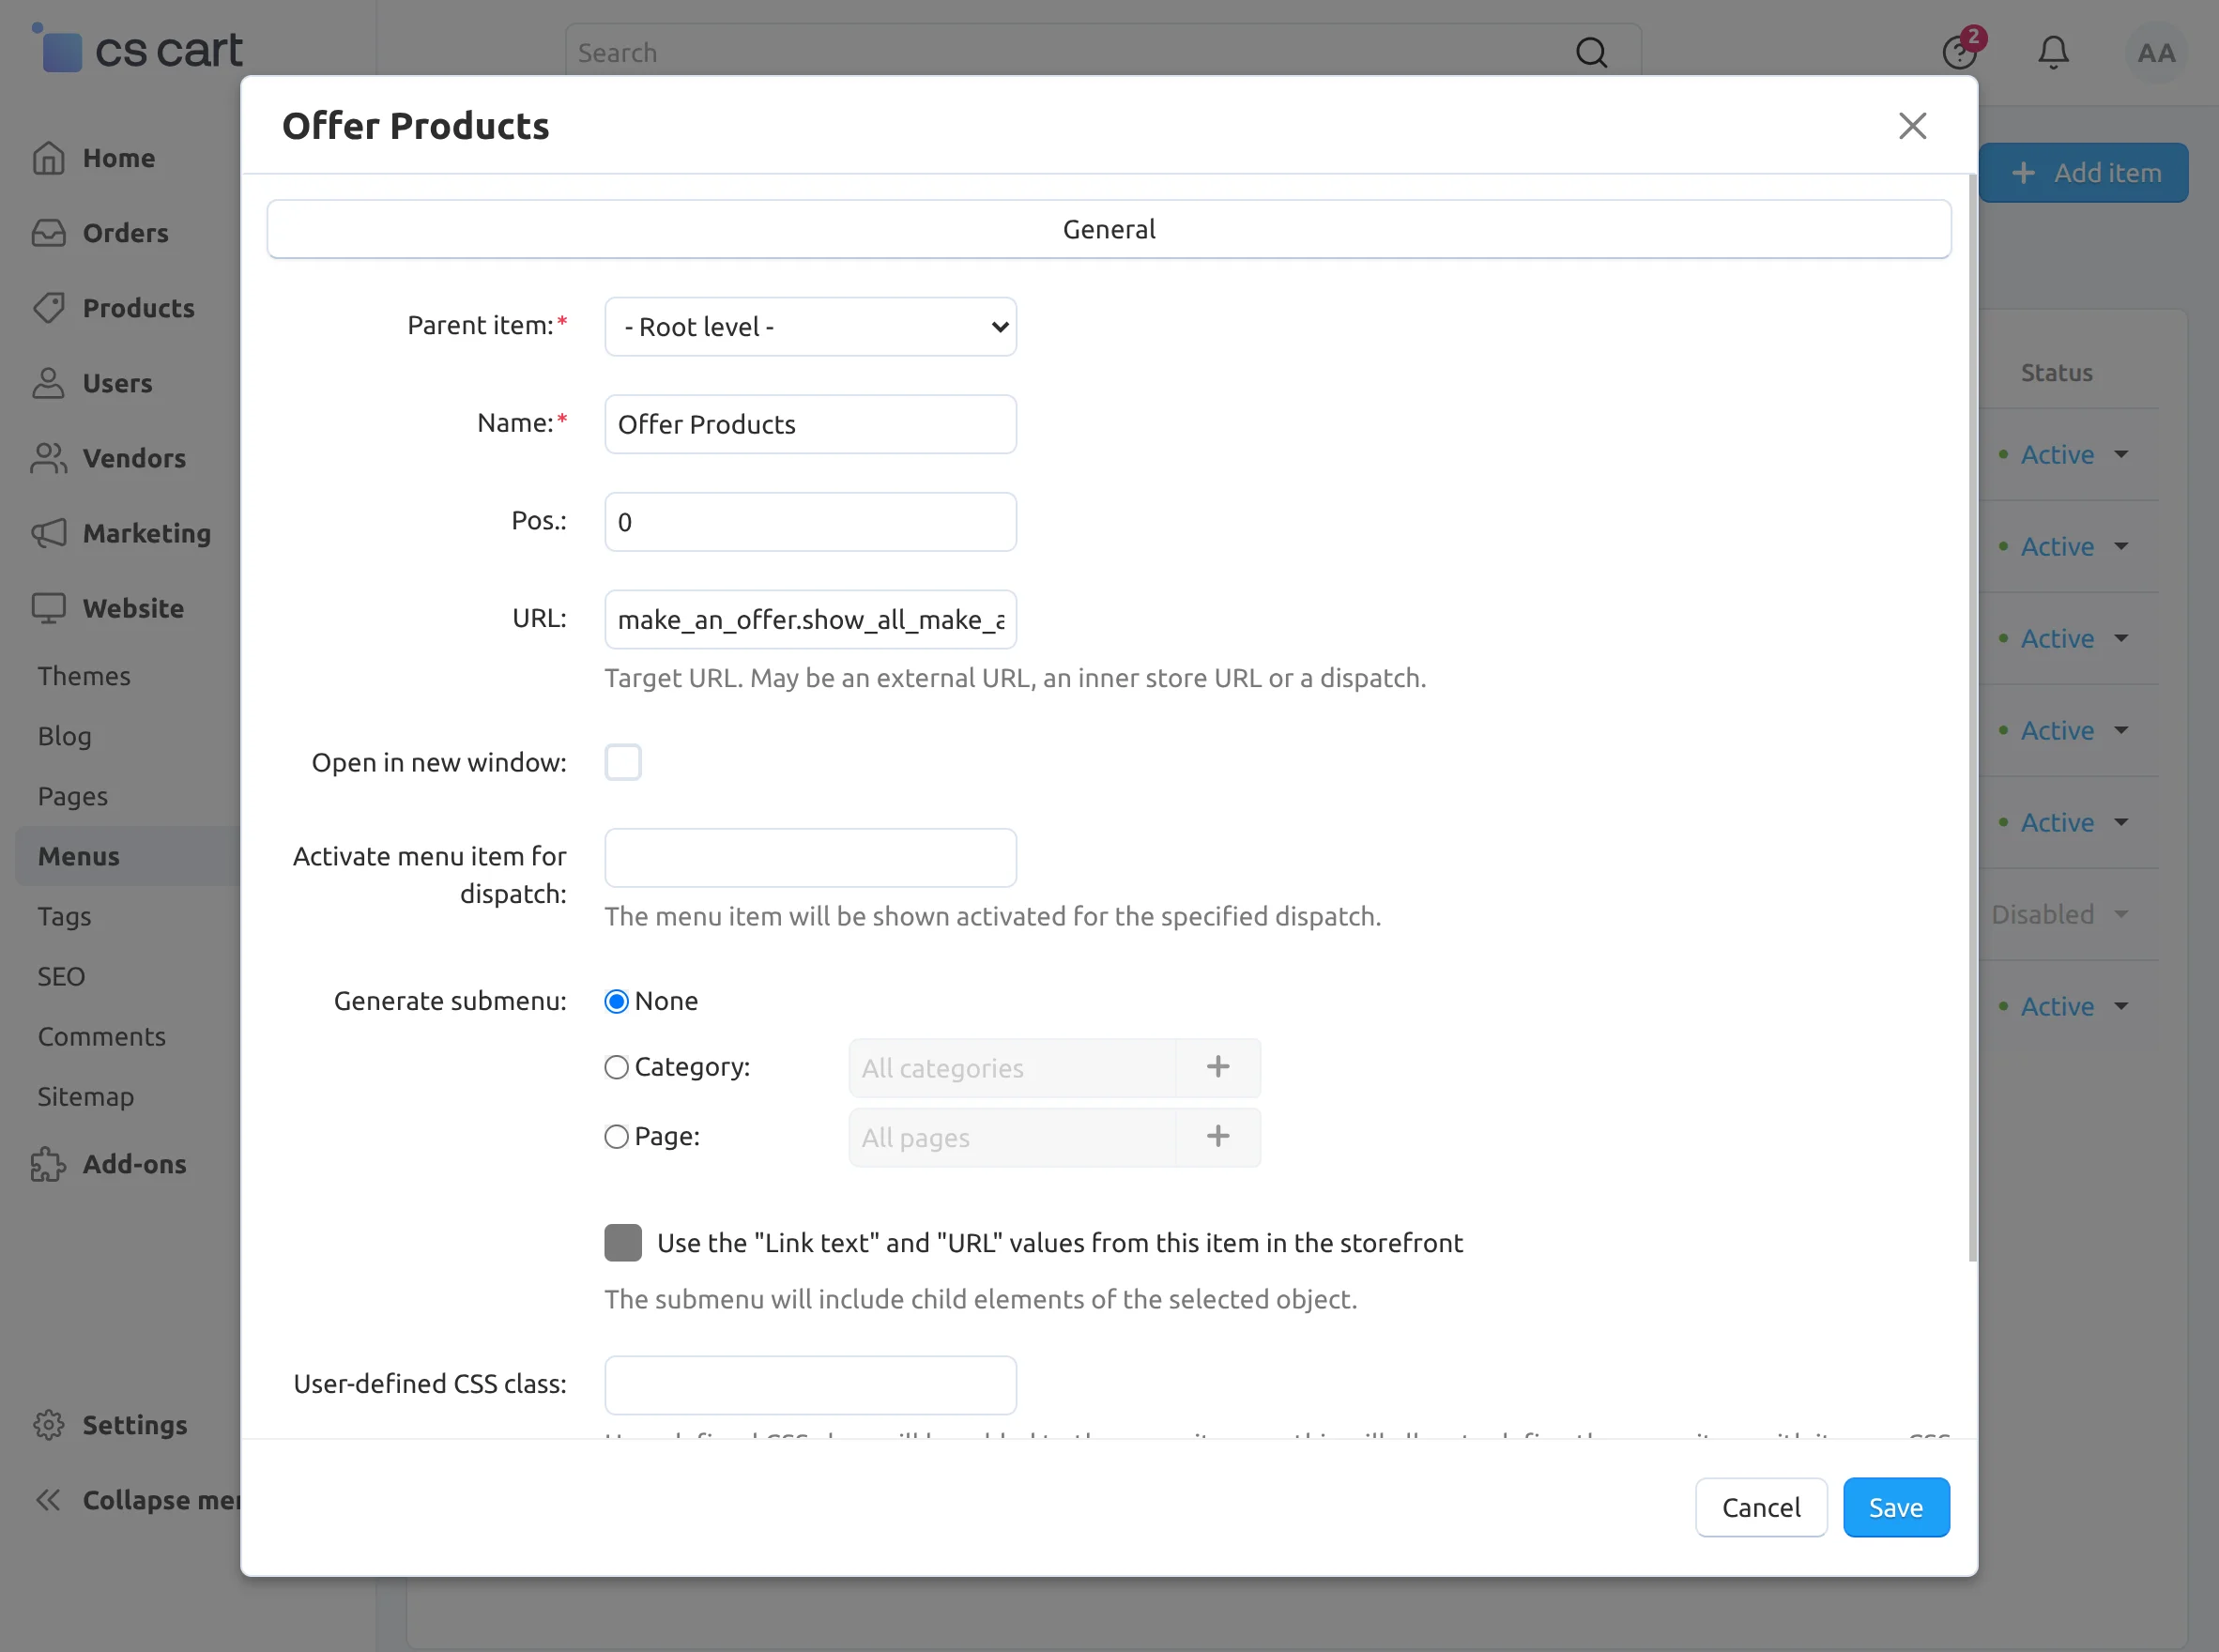
Note: To show make an offer product list on the front end the admin needs to configure the design menu.
The admin needs to click on “Design” > “Menus”>”Quick link” go to the corner and click on “+” to add an item.
Then need to enter “Name” and paste this URL (make_an_offer.show_all_make_an_offer_products) in the URL box then save and check the front end.
Support
That’s all for the CS-Cart Make An Offer, still, have any issues feel free to add a ticket and let us know your views to make the module better http://webkul.uvdesk.com
Please explore our CS-Cart Development Services and Quality cs-cart add-ons
Current Product Version - 4.2.2
Supported Framework Version - 4.16.x , 4.17.x , 4.18.x

Be the first to comment.