WooCommerce Fashion Ethereal Theme is a premium website design theme built to enhance e-commerce stores with a modern, user-friendly interface.
With the WooCommerce Fashion Theme, store owners can effortlessly customize their storefront to create a visually stunning shopping experience that perfectly reflects their brand identity.
Designed specifically for WooCommerce, this theme ensures effortless integration and smooth functionality without requiring coding expertise.
Whether for small businesses or large retailers, this theme provides the perfect balance of design and functionality to maximize online sales.
Additionally, You can check the Xtremo Responsive Theme for WooCommerce as well.
Features- WooCommerce Fashion Ethereal Theme
- Gutenberg Page Builder support
- WooCommerce Ready for seamless store integration
- Fully Compatible with WooCommerce Multi Vendor Marketplace
- Powerful Admin Interface with no coding required
- Highly Customizable design options
- Multiple Homepage & Banner/Product/Category Slider Variations
- Customizable Mega Menu
- Product Review Slider
- Instagram & Twitter Feed Widgets
- SEO Optimized and Core Web Vitals Performance Optimized
- ADA Compliance for accessibility
- 100+ Ready Icons
- RTL (Right to Left) Language Support
- Load More Pagination (AJAX & normal)
- Quick View functionality
- AJAX Shop Filters and AJAX Add/Remove to Cart
- Wishlist, Buy Now Button, and Free Shipping Bar
- PWA Ready for app-like mobile experience
- Recently Viewed Products and Min/Max Quantity & Order Amount
- Product Image Zoom and Slider
- Mobile Filters & Bottom Menu
- Product Filters by Category, Color, Brand, Status
- Order Tracking and Popup Newsletter
- Sale Banner Ready
- Added to Cart AJAX Popup Notice
- Loco Translate Supported with .POT for Multi-language
- Contact Form 7 and Metabox Supported
- Google Web Fonts
- Blog Ready with default Gutenberg block support
- Design-Ready Components
- Social Icons & Latest Posts Widgets
- One-click Demo Data Installer
- One-click Theme Updates
- 24/7 Fast Support
Upload Theme – Fashion Ethereal theme WooCommerce
Fashion Theme for WooCommerce is a premium option that includes a downloadable file, making it easy for store owners to install and launch their stylish online boutique right after purchase.
Fortunately, the installation process is simple. Just follow these steps:
From your WordPress dashboard, navigate to Appearance → Themes → Add New, then click the Upload Theme button to get started.

Upload the ZIP file of the theme that you have downloaded and click on Install Now.

Click the Install Now button.
WordPress will automatically download and install the files. Which is shown in the below image.

Upload Theme By FTP Application / Program
Need to follow the steps:
- Open a FTP Application lik Filezilla
- Navigate your root dir
- wp-contents -> themes
- Extract your theme zip under the “themes” folder
As it is shown in the below image.


Theme Activation & Initial Setup
After installing the Ethereal WooCommerce Theme, follow these steps to activate and configure it properly:
- Go to Appearance > Themes in your WordPress dashboard.
- Locate Ethereal.
- Click Activate.
Once activated, the Theme Setup Wizard will launch automatically.
Click the Start button to begin the guided setup process.
The Setup Wizard helps you quickly configure essential settings and install recommended plugins.
- Click Next to proceed through the setup steps.
- You will have the option to import demo content to replicate the preview layout of the theme.

Demo Import (Ethereal Theme)
There are two methods to import the demo content:
1. Automatic Import via Setup Wizard (Recommended)
During the initial setup, you can import the demo content using the built-in importer (Merlin Wizard).
This method installs:
- Required plugins
- Demo pages
- Theme settings
- Sample products (if WooCommerce is installed)

After the import process is completed, click View Your Website to see your site with the imported demo layout.

2. Manual Import (If Setup Wizard Is Skipped)
If you skip the import step, you can manually import the demo content:
- Go to Tools > Import
- Click WordPress > Run Importer
- Upload the XML file provided inside the theme’s demo folder
- Assign authors and complete the import process
Installing & Managing Required Plugins
To ensure full functionality of the Ethereal theme, certain plugins are recommended.
WooCommerce (Required)
WooCommerce is the core plugin that transforms your WordPress website into a fully functional eCommerce store. It manages:
- Products
- Cart
- Checkout
- Payments
- Shipping
- Taxes
How to Install WooCommerce
- Go to Plugins > Add New
- Search for WooCommerce
- Click Install Now
- Click Activate
Alternatively, want a quicker setup? The Setup Wizard can install and configure it for you in just a few clicks!
Check theWooCommerce installation guide for details →
WooCommerce Configuration Overview :
Once WooCommerce is installed, you can configure your store settings:
- General Settings
- Product Settings
- Tax Settings
- Shipping Settings
- Checkout Settings
- Account & Privacy Settings
- Product Categories, Tags & Attributes
- Coupons Management
Adding Products in WooCommerce
You can create different types of products:
- Simple Product
- Grouped Product
- Virtual Product
- Downloadable Product
- External/Affiliate Product
- Variable Product
Refer to the official WooCommerce documentation for detailed product setup instructions.
WCBoost – Products Compare
The WCBoost – Products Compare plugin allows customers to compare multiple products side-by-side, helping them make informed purchasing decisions.
Features:
- Product comparison table
- Easy add-to-compare option
- Seamless WooCommerce integration
This plugin is fully compatible with the Ethereal WooCommerce Theme.
What’s Included in Fashion Ethereal
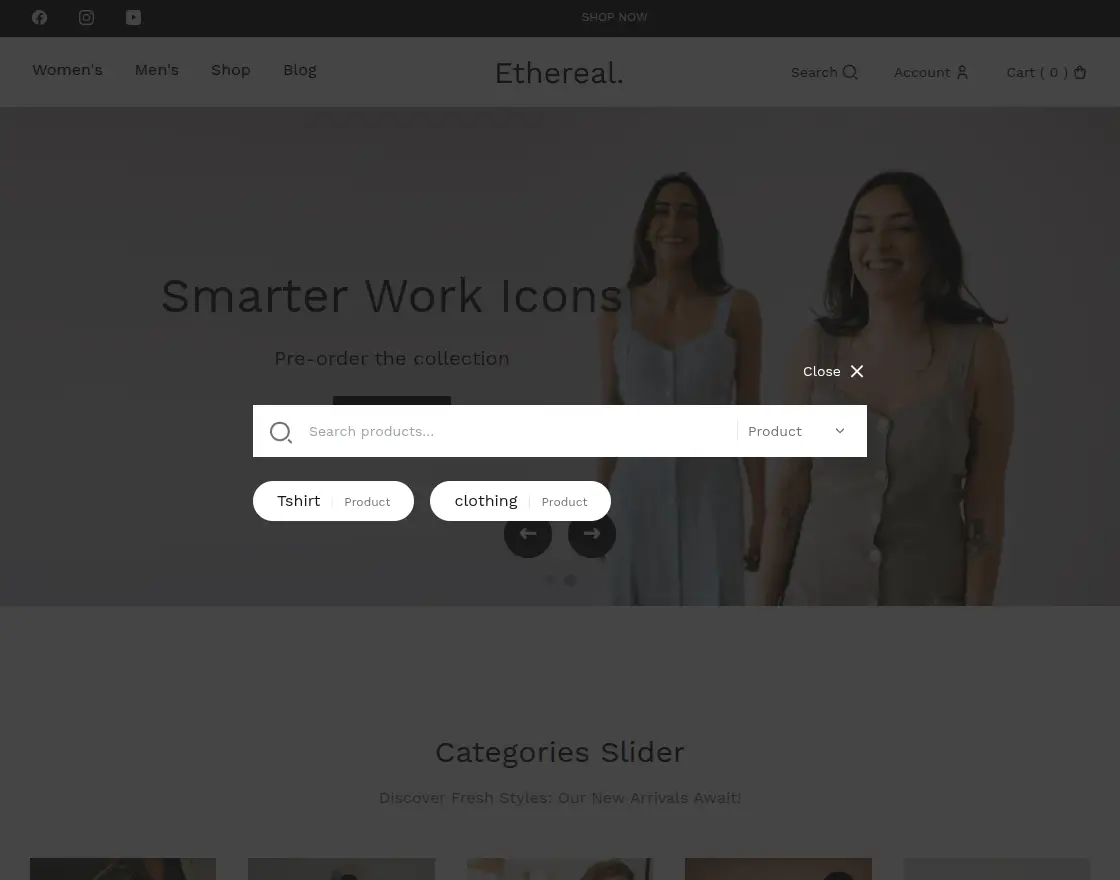
The Menu Bar & Search
The Ethereal theme’s menu bar is designed for effortless navigation, featuring built-in tools to help customers find exactly what they are looking for.
- Smart Search: Users can search for specific products or blog posts (if a blog is set up) across the entire website.
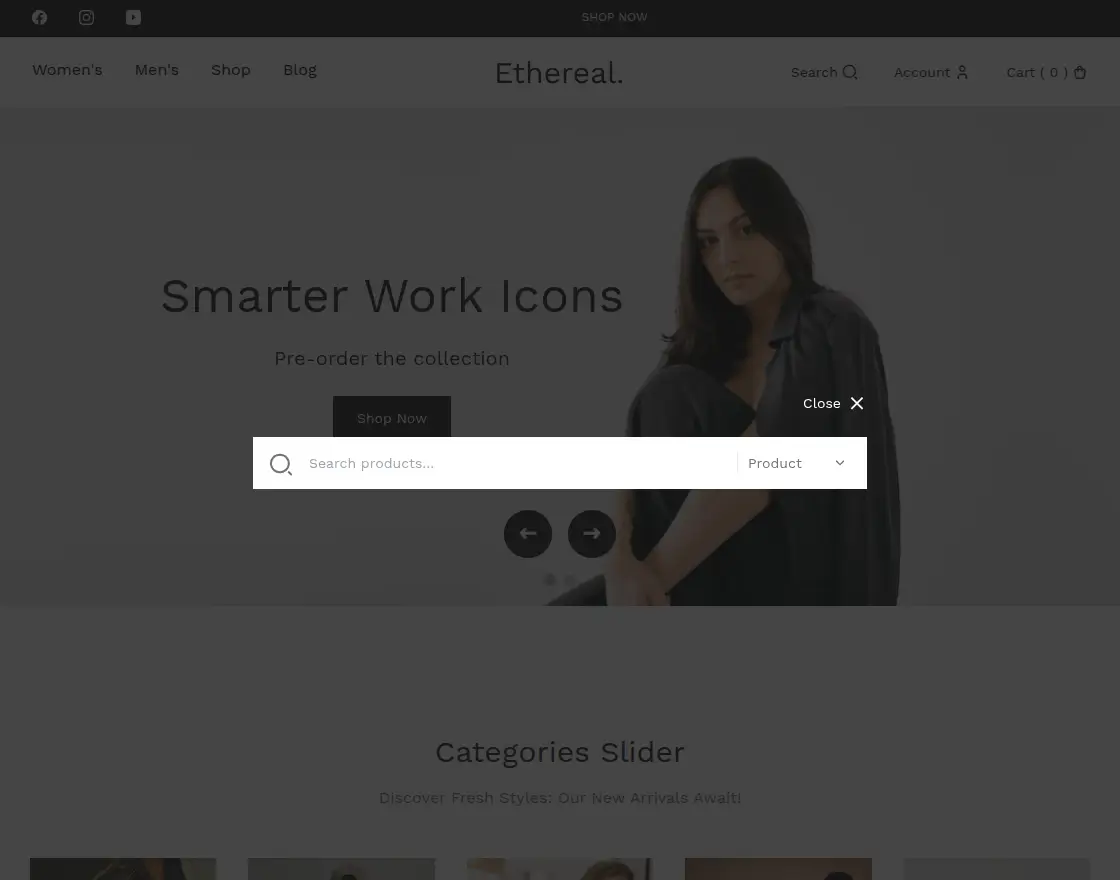
To make shopping even easier, a customer’s recent search history is displayed as soon as they click the search bar.
Account Management
Account: Users can view and manage their profile, including saved addresses.
shown in the below image
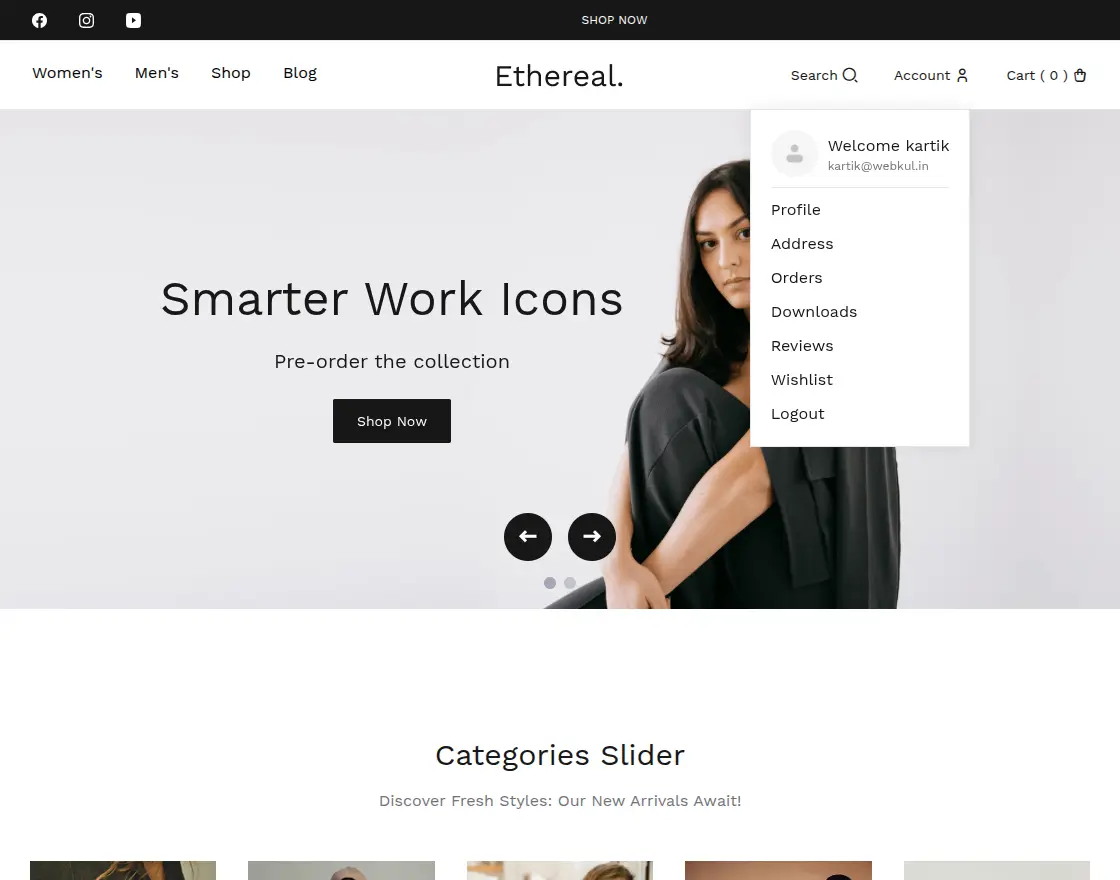
- Orders: Displays detailed information about past and current orders.
- Download: Provides access to downloadable products.
- Reviews: Users can view product reviews shared by other customers.
- Wishlist: Shows products that the user has added to their wishlist.
- Logout: Enables the user to securely sign out of the website.
User Dashboard
This Fashion theme dashboard allows users to view their orders, wishlist, downloadable products, and submitted reviews, as shown in the images below.

Compare product
Check here to Use Plugins to Add Product Compare in WooCommerce.
The single product page of the Ethereal Fashion theme for WooCommerce features a built-in Compare option, allowing users to add items for comparison easily.

The product is added to the compare page by simply clicking the arrow button, as shown in the image below.

With the Ethereal fashion theme, users can easily compare products by clicking the arrow button to add them to the comparison page.
They can then view added products through the ‘Quick View’ feature, making the comparison process faster and more convenient.
The comparison page and products are shown in the image below.

Mini Cart Experience
In the Fashion Theme, users can access their cart by clicking on the Cart option in the menu bar, which navigates them to the cart page.
An additional feature in this theme is the “You May Also Like” section, displayed on the side.
This section showcases related products, offering users more shopping options and enhancing the overall browsing experience.
Shown in the below image.

The products shown in the image above are added to the “You might like” sidebar displayed right next to the cart items.
Products that the admin wishes to showcase to customers are included under the ‘Display Type’ setting.
This functionality is demonstrated in the Ethereal theme in the image below.

Product- Sort
The Fashion Theme offers sorting options that allow users to organize products based on their preferences, as shown in the image below.

Filter – Product
Fashion Theme includes advanced filtering options that allow users to refine products based on specific criteria such as price, color, size, product categories, and stock status.
These filters help customers easily find products that match their preferences, as shown in the image below.

Wishlist – Product
From the admin panel, users can navigate to the wishlist to view products they have marked as favorites. The wishlist is displayed in the image below.

Orders – Product
From the Orders section, users can easily track their placed orders, view order status, check the total amount, and see any actions taken on the products. This image demonstrates this.

Checkout Flow
In the Fashion Ethereal theme, moving from the shopping cart to a completed order is a smooth and intuitive process for your customers.
- Initiating Checkout: Once a customer has reviewed the products in their shopping cart or mini-cart, they can easily proceed by clicking the checkout button.
- Entering Billing Details: The system then directs the user to the secure checkout page, where they can input their billing and shipping informatio

- Selecting a Payment Method: Customers can choose from your store’s available payment options. Standard options include Direct Bank Transfer, Check Payment, or Cash on Delivery.
- Placing the Order: After selecting their preferred payment method, the customer simply checks the box to agree to the website’s terms and conditions, and clicks the ‘Place Order’ button to finalize their purchase.
As shown in the image below.

Theme Options Panel
The Fashion Theme has three sections: Components, Shop, and General Settings. First, we’ll start with Components.
1. Components
To add a section to your webpage, click the ‘Add Section’ button.
The image below displays a list of available components designed to enhance the user interface and ensure ease of use across all pages.

You will see several configuration options:

- Name: Specify the name of the page.
- Select Component: The admin must select a component from the dropdown list.
- Sort Order: Enter the order in which this section should appear on the page.
- Page Follow: Choose the page this section should follow (e.g., Home Page or another existing page).
After configuring the options, the admin can click the Add Selected button to proceed.
Banner Slider
WordPress Theme features a Banner Slider that highlights new or recently arrived products, offering customers a quick shopping experience.
Admins can add links to each banner, allowing users to navigate directly to the relevant product pages.
After add selected button the admin needs to set the following details which are mentioned below:
- Page Follow: Specific components of the Ethereal theme can be configured to appear on selected pages, such as the homepage or other sections, based on the user’s preferences.
- Navigation Dots: Toggle the visibility of navigation dots and choose their alignment — Left, Center, or Right.
- Navigation Arrows: Enable or disable navigation arrows as needed.
- Alignment: Choose the position of the component from the following options:
- Top: Top Left, Top Center, Top Right
- Full Width: Center (spans the full width)
- Center: Center Left, Center Center, Center Right
The below image shows the complete information.

Smart Work Icons is an added slide where you need to enter the following basic details:
- Image: Upload the image for the slide.
- Heading: Enter the headline for the slide.
- Description: Provide the slide description in the text box.
- Button Text: Specify the text to display on the button.
- Button Link: Add the URL where the button should redirect.
- Content Position: Choose the position of the content on the slide. Available options:
- Top Left, Top Center, Top Right
- Center Left, Center Center, Center Right
- Bottom Left, Bottom Center, Bottom Right
- Text Alignment: Set the alignment of the text — Left, Center, or Right.
You can add multiple slides as needed. The images below display example slides like Weekend Wanderer, Nature’s Palette, and The Comfort Layer.
The admin can add a new slide by clicking the “+ Add Slide” button.
shown in the below image.

This is how the Banner Slider appears on the front end for customers.
Sales Strip
The Sales Strip in the Ethereal theme allows the admin to highlight products on sale by adding a link to the product page along with the sale duration.
This helps promote limited-time offers and directs users straight to the discounted items.
Sales Settings can be configured by the admin using the following options:
- Page Follow: Specific components of the Ethereal theme can be configured to appear on selected pages, such as the homepage or other sections, based on the user’s preferences.
- Date: Select the date when the sale will take place.
- Time: Set the time for the sale event.
- Heading: Enter a heading for the sales section.
- Description: Add a description in the provided text box.
- Button Text: Enter the text to display on the button.
- Button Link: Provide the URL to the relevant product or sales page.
This setup is illustrated in the images below.

Image below shows the Sale Strip on the store frontend

Categories Slider
Retailers use the Category Slider to organize products into different categories, allowing customers to easily navigate to specific product listings.
Each category contains distinct products, helping users browse more efficiently based on their interests.
The admin can configure the Categories Slider using the following options:
- Users can set components in the Ethereal theme to appear on specific pages—like the homepage or any other page—based on their selection and preferences.
- Heading: Enter the heading for the component.
- Layout: Select the layout style — either Slide or Grid.
- Description: Add a description in the provided text box.
- Select Categories: Choose the product categories to display in the Categories section.
The images below illustrate these settings.


Category Grid
Category Grid displays products in a grid layout. Clicking a product redirects the user to its product page.
The admin can configure the Categories Grid using these options:
- Page Follow: Specify the page this section should follow.
- Heading: Enter the heading for the component.
- Layout: Select the layout style — as Grid.
- Description: Add a description in the provided text box.
- Select Categories: Choose the product categories to display in the Categories section.
The images below illustrate these settings.

The category Grid will appear to customers like this.

3 Card Product Grid
It displays products in three columns. When customers click on a product, it takes them directly to the detailed product page.
3 Card Product Grid can be configured by the admin using the following options:
- Page Follow: Select the page where the component will appear.
- Section Title: Enter a title for the New Arrivals section.
- Section Description: Add a description for the New Arrivals section.
- Select Categories: Choose which product categories to display.

The 3 Card product grid will appear to customers like this.

Product Slider
In the WooCommerce Theme Product Slider includes navigation arrows that allow customers to slide through and explore more product options easily.
Product Slider:
Configurable by the admin using the options below:
- Page Follow: Specify the page where the product slider will appear.
- Section Title: Enter the title for the New Arrivals section.
- Section Description: Provide a description for the New Arrivals section.
- Select Categories: Choose which categories to feature in the New Arrivals section.
- Number of Products: Define how many products to display in the New Arrivals section.

The Product Slider will appear to customers like this.

Feature Product Slider
Featured Product slider displays product images, allowing customers to browse through multiple options by clicking the arrow buttons.
The admin can configure the slider using the following options:
- Specify the page that will display the product slider.
- Section Title: Enter a title for the New Arrivals section.
- Section Description: Add a brief description for the New Arrivals section.
- Select Categories: Choose the product categories to showcase.
- Number of Products: Set the number of products to display.
- Banner Image: Upload the banner image using the upload button.

The Feature Products Slider will appear to customers like this.

Product Reviews
This section displays customer-shared reviews for all products, allowing users to view feedback and experiences from other buyers.
Product Reviews:
The admin can configure this section using the following options:
- Page Follow: Specify the page where the product reviews component will appear.
- Section Title: Enter a title for the Product Reviews section.
- Select Categories: Choose the product categories to display in the reviews section.
- Number of Products: Define how many products to show in the Product Reviews section.

The Product Reviews will appear to customers like this.

4-Card Product Grid
The 4-card product grid displays four products per row, showing four at a time.
4-Card Product Grid:
The admin can configure this section using the following options:
- Specify the page that will display the product grid.
- Section Description: Add a description for the New Arrivals section.
- Select Categories: Choose the product categories to showcase in the New Arrivals section.

The 4 Card Product Grid will appear to customers like this.

Static page
WordPress Theme lets you create static pages with custom HTML and CSS code.
Admins configure Static Page settings with these options:
- Page Follow: Specify the name of the page this static page should follow.
- Content: Add the required content or custom code based on the page’s purpose.
- Custom CSS: Enter any custom CSS for styling this static page in the provided text box.
shown in the image below.

The image below illustrates how the static page will appear to the customer.

2. Shop
The Shop Page includes social media links that need to be configured by the admin:
- Enable: Toggle to show or hide social media links.
- Social Media Links: Add the URLs for platforms such as Instagram, LinkedIn, Twitter, Facebook, and YouTube.
Once all changes are made, click Save Changes to apply them.

The Social Icons will appear to customers like this.
Promotional Icons
The admin needs to configure the Promotional Icons section:
- Enable: Toggle to show or hide promotional icons.
- To add a new promotional icon, click the “+ Add” button, then enter the following details:
- Icon URL
- Text Link
After filling in the required information, click Save Changes to apply the updates.
shown in the below images.
Promotional link will be shown to the customer like this.

Payment Gateways Icons
Payment Gateway Icons can be configured with the following options:
- Enable: The admin can toggle this option to show or hide the payment gateway icons.
- To add a payment gateway, click the “+ Add” button and provide the following details:
- Logo
- Payment Gateway Name
- Payment Gateway URL
The admin can repeat this process to add multiple payment gateway icons to the page. Shown in the image below.
This is how the Ethereal theme displays payment gateway options to customers.

Quick View
Quick View: This option allows you to enable or disable the Quick View feature on the Shop page. When enabled, users can preview product details without navigating away from the page.
The image below demonstrates this feature.

Mega Menu
Mega Menu: The admin can configure the Mega Menu using the following options:
- Enable/Disable: Toggle the Mega menu visibility on the Shop page. Disabling it will hide the Mega Menu.
- Product Count: Enter the number of products to display in the Mega Menu on the Shop page.
- Display Type: Select the type of products that should appear in the Mega Menu.
shown in the below image.

Wishlist
Wishlist can be configured by the admin using the following options:
- Enable: Toggle to show or hide the Wishlist feature on the Shop page.
- Social Share Link: Enable or disable the social sharing option for wishlist items.
This configuration is illustrated in the image below.

Image below shows how the wishlist appears to the customer

3. General Settings
General Settings configuration options include:
- Define how many days an item stays ‘new’.
- Account Password Strength: Set the required password strength for user accounts.
- Reviews Per Page: Set the number of reviews displayed per page
- Header Menu Limit: Set the maximum number of items to show in the header menu.
- Trending Posts Limit: Define the maximum number of trending posts to display.
- Top Categories Limit: Set the maximum number of top categories to show.
- Blog Page Pagination: Choose between AJAX-based pagination or standard pagination for the blog page.

Support
So that is all for the WooCommerce Fashion Ethereal Theme guide.
Apart from this, check out the Multi Vendor Velocity Theme for WooCommerce packed with features like Mega Menu and promo banners for any business type.
Still, have any issues, feel free to create a ticket or email us at [email protected] and let us know your views to make the plugin better.
Current Product Version - 1.0.0

Be the first to comment.