UnoPim XML Connector enables seamless management and creation of product data using templates.
It allows you to import large volumes of product data effortlessly while ensuring accuracy through mapping and validation.
By creating templates it simplifies the process of importing XML product data and ensures efficient, fast, and reliable product creation.
This guide walks you through installation, configuration, and usage, helping you streamline XML-based product imports in UnoPim.
Compatibility & Requirements
- Supported UnoPim Version: 0.2.x and 0.3.x
- Product Version: 1.0.0
- Server Requirements: Ensure your server meets UnoPim’s system prerequisites before installation.
Features of UnoPim XML Connector
1. XML File Validation
Automatically validates uploaded XML files to ensure proper structure and format before processing.
If the XML contains structural issues or invalid closed tags found, ui error will be shown for quick correction.
2. XML Structure Support
- Supports both parent-level tags and multi-level (nested) XML tags.
- Define structure mapping:
- Multiproduct Tagname: Represents multiple SKUs (e.g.,
<Products>) - Product Tagname: Represents a single SKU (e.g.,
<Product>)
- Multiproduct Tagname: Represents multiple SKUs (e.g.,
3. Attribute Type Mapping
Map XML fields to UnoPim attributes with supported types:
- Text
- Textarea
- Price
- Image
- Gallery
- File
- Boolean
- Checkbox
- Date / Datetime
- Select / Multiselect
Mapping validation ensures correct data type handling for reliable imports.
4. Category Mapping and Auto-Creation
- Map XML fields in Category Mapping.
- If a mapped category already exists, the product is automatically assigned to it.
- However, if the category does not exist, UnoPim automatically creates it during import and links it to the product.
This allows complete catalog creation in a single import process.
5. Template-Based Import Setup
- Create a mapping template after XML file upload and validation.
- However, the template remains inactive until mapping template is saved and all required UnoPim attributes are mapped; therefore, ensuring a complete and accurate configuration.
- Once the template is updated and verified, it becomes active and can be used for product imports.
Ensures error-free product creation by validating mappings before activation.
6. Batch Processing
Handles large XML files efficiently into manageable batches, ensuring faster and error-free imports — even with thousands of SKUs.
7. Product and Media Import
- Imports bulk simple products directly from XML files.
- Supports image import through public image URLs (jpg, jpeg, png).
This ensures your product data and associated media are imported together seamlessly.
8. Template Management and Reuse
Templates can be edited, updated, and reused across multiple import jobs.
Users can rerun an import job using the same or a different template to update existing product data.
UnoPim XML Connector Manual Installation
Download and Install
- Download and extract the extension package.
- Merge the
packagesfolder into the root directory of your UnoPim project.
Register the Package Provider
- Open the
config/app.phpfile. - Add the following line under the
providersarray:
Webkul\XmlConnector\Providers\XmlConnectorServiceProvider::class,
- Open the
composer.jsonfile. - Add the following lines under the
psr-4section
"autoload": { "psr-4": { "Webkul\\XmlConnector\\": "packages/Webkul/XmlConnector/src", "Webkul\\XmlConnector\\Tests\\": "packages/Webkul/XmlConnector/tests" } }
- Register the xmlconnector vite configuration
- Goto
config/unopim-vite.phpfile and add following line under ‘viters’ keys
'xml-connector' => [
            'hot_file'                 => 'xml-connector-vite.hot',
            'build_directory'          => 'themes/xml-connector/build',
            'package_assets_directory'  => 'src/Resources/assets',
        ],
Run Setup Commands
Next, execute the following commands to complete the setup process.
- Dump Composer Autoload
composer dump-autoload
- Migrate Tables for XmlConnector
php artisan migrate
- Publish Assets
php artisan vendor:publish --tag=xml-connector-package
- Clear Application Cache
php artisan optimize:clear
Creating XML Mapping Templates
Once installed, you will see the XML Connector icon on your UnoPim dashboard.
Steps:
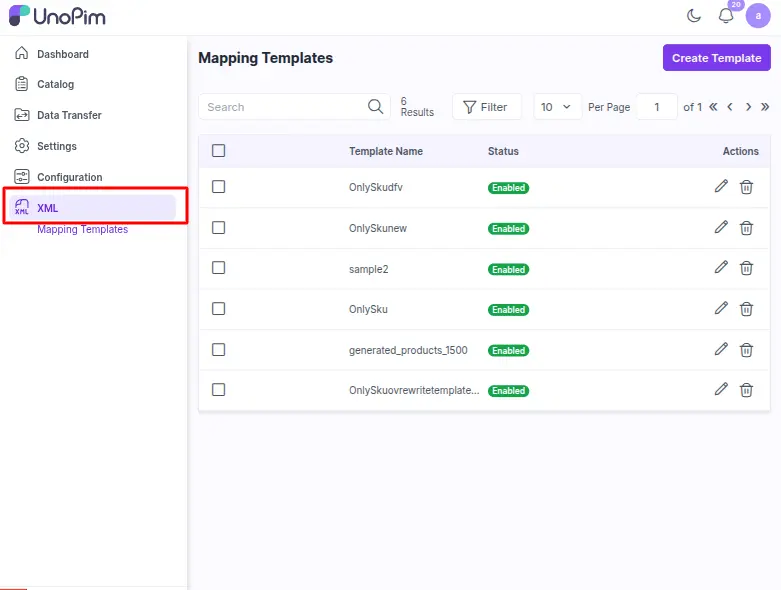
- Navigate and click on XML → Mapping Templates.
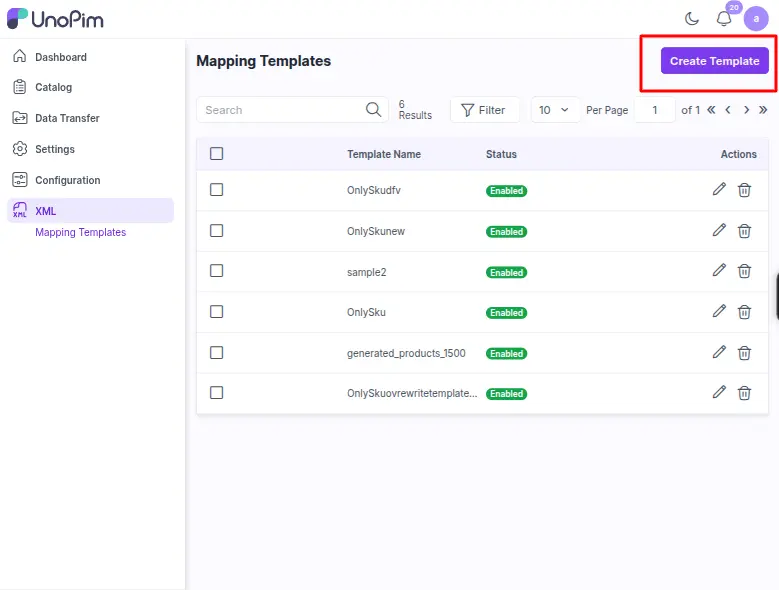
- Click on Create Template.
On clicking Create Template, a pop-up form window appears, allowing you to upload your XML file.
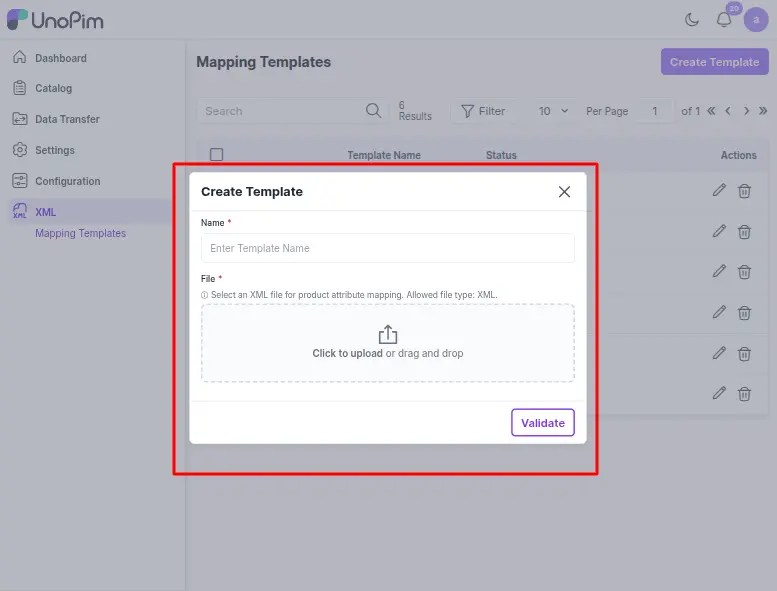
- Upload a valid XML file containing product details.
Sample XML file for Single product creation:
<?xml version="1.0" encoding="utf-8"?>
    <products>
        <product id="text">
           <sku><![CDATA[SKU00001]]></sku>
        <name><![CDATA[Short Kurti]]></name>
        <short_description><![CDATA[b2b000000001]]></short_description>
        <category_path><![CDATA[second]]></category_path>
        <ps><![CDATA[132.00]]></ps>
        <cost><![CDATA[67.00]]></cost>
        <status><![CDATA[true]]></status>
        <brand><![CDATA[OEM]]></brand>
        <quantity><![CDATA[1000]]></quantity>
        <photo><![CDATA[https://www.pothys.com/cdn/shop/files/01-LKURPR-004-RS-1249---Copy.jpg?v=1750428881&width=600]]></photo>
           <photo1><![CDATA[https://iasbabuji.com/wp-content/uploads/2022/05/Arjun-Gowda-IAS.jpg]]></photo1>
           <gallery><![CDATA[https://encrypted-tbn0.gstatic.com/images?q=tbn:ANd9GcS0edcO1kZnsAGZbbj6JuhFt0MzHBCoudTt6A&s,https://www.pothys.com/cdn/shop/files/01-LKURPR-004-RS-1249---Copy.jpg?v=1750428881&width=600]]></gallery>
        <mpn><![CDATA[]]></mpn>
        <ean><![CDATA[69222558320000001]]></ean>
        <description><![CDATA[Sample description for product]]></description>
        <InStock><![CDATA[true]]></InStock>
        <weight><![CDATA[0.05]]></weight>
        <Availability><![CDATA[Delivery 4 to 10 days]]></Availability>
        <test_select><![CDATA[24.00]]></test_select>
        <color><![CDATA[Red]]></color>
        <size><![CDATA[M]]></size>
        <date><![CDATA[2003-11-02]]></date>
        <url_key><![CDATA[b2b0001]]></url_key>
    </product>
    </products>
- Template Name: The template name is automatically populated based on your XML file. You can modify it if needed.
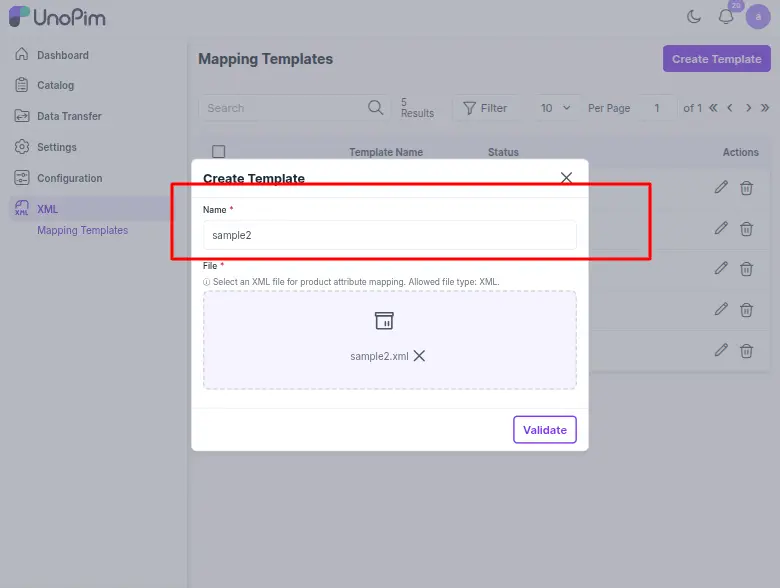
- Click Validate to check the XML structure and ensure it follows the required format.
- Define:
- Multiproduct Tag (Optional): e.g.,
<products> - Product Tag (Required): e.g.,
<product>
- Multiproduct Tag (Optional): e.g.,
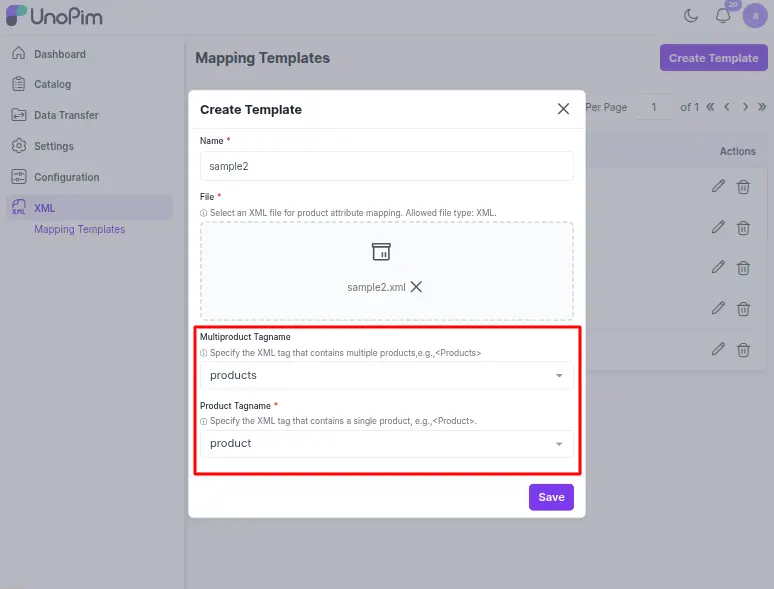
- Click on Save to create the template.
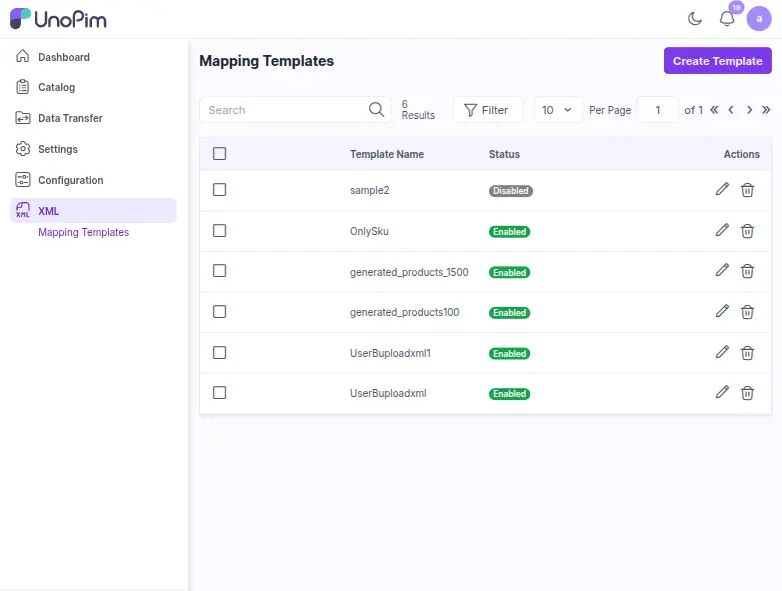
- The template will appear on the Mapping Template page.
- By default, the template remains disabled until all required UnoPim attributes are mapped, and the mapping configuration is updated and saved.
- Edit the template to map all XML nodes to the corresponding UnoPim attributes.
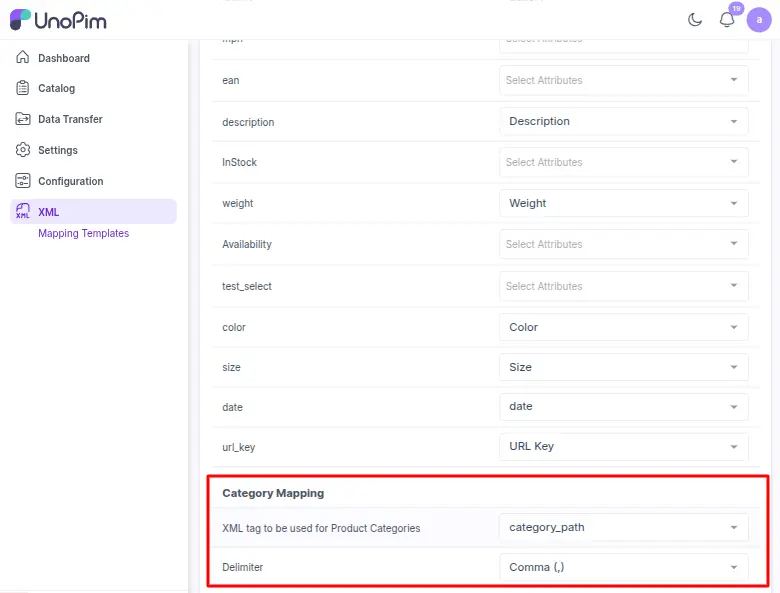
- If you want to assign categories to products, make sure the XML tag for the category is properly mapped in the template. As a result, it automatically assigns categories during the import process.
- For Multiselect attribute types, separate multiple values using a comma delimiter to ensure the data appears correctly in UnoPim.
- After completing all required mappings, click on Save to update the template. Only after this step , the template becomes active and enabled.
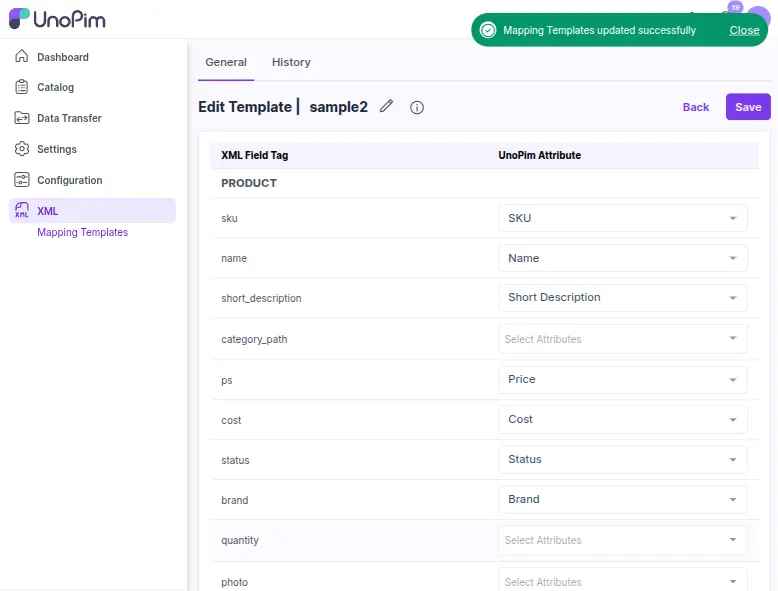
Mapping is essential so that during product import, UnoPim can identify which XML fields correspond to its internal attributes (e.g., sku, name, price). Required Unopim attributes must be mapped.
XML Product Import Job
After creating and activating a mapping template, you can import products into UnoPim using the Import Job feature.
Steps:
- Navigate to Data Transfer → Imports → Create Import.
- Fill in the General Section:
- Code: Enter a unique job code (e.g.,
samplesku). - Type: Select XML Products as job type.
- Code: Enter a unique job code (e.g.,
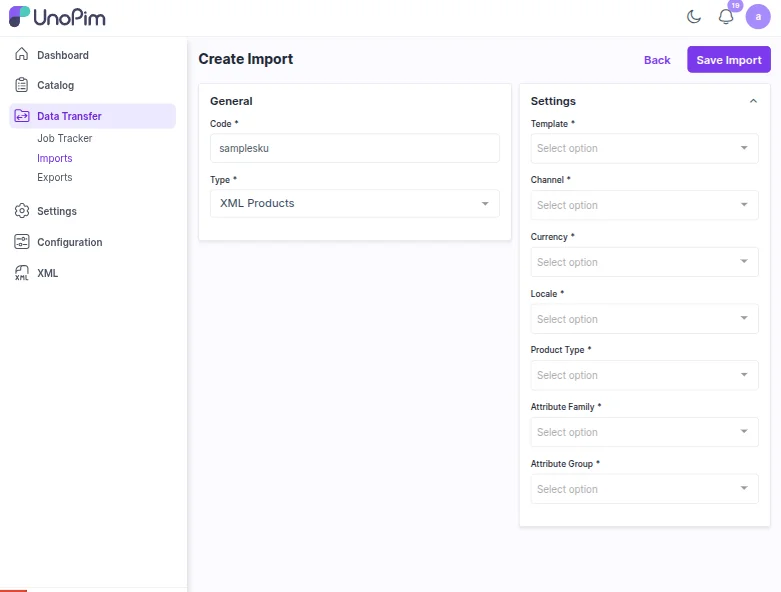
- Configure Settings:
- Template: Select the mapping template you created and activated. This template defines how XML nodes are mapped to UnoPim attributes.
- Channel: Select the UnoPim channel where the imported products will be available.
- Currency: Select the currency for pricing information.
- Locale: Choose the language/locale for the imported product data.
- Product Type: Currently, only Simple products are supported.
- Attribute Family: Select the attribute family for the products.
- Attribute Group: Choose an attribute group (for example, General) within the selected family.
- Attribute Assignment Behaviour: If any mapped attribute is not yet assigned to the selected family, this job will automatically assign it to the selected family and group during the import process.
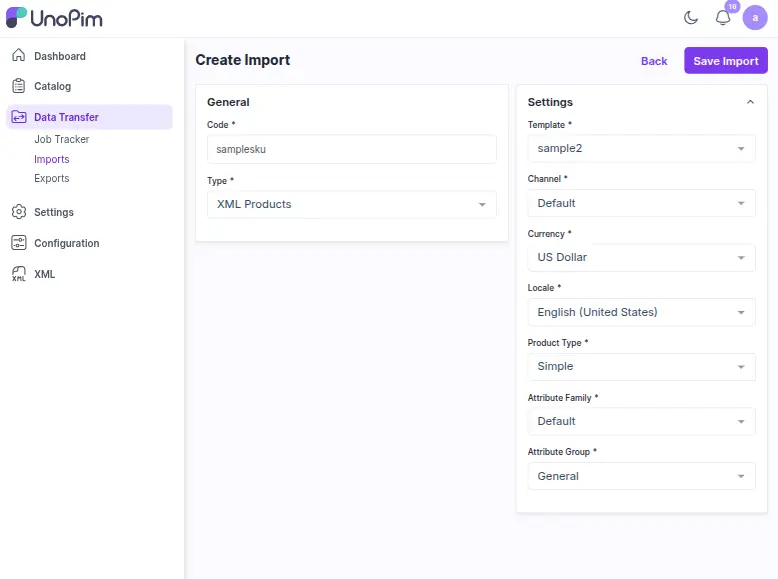
- Save and Import:
- Click on Save Import to save the job configuration.
- Click on Import Now to start the import process.
- You can monitor progress and view logs using the Download Log option.

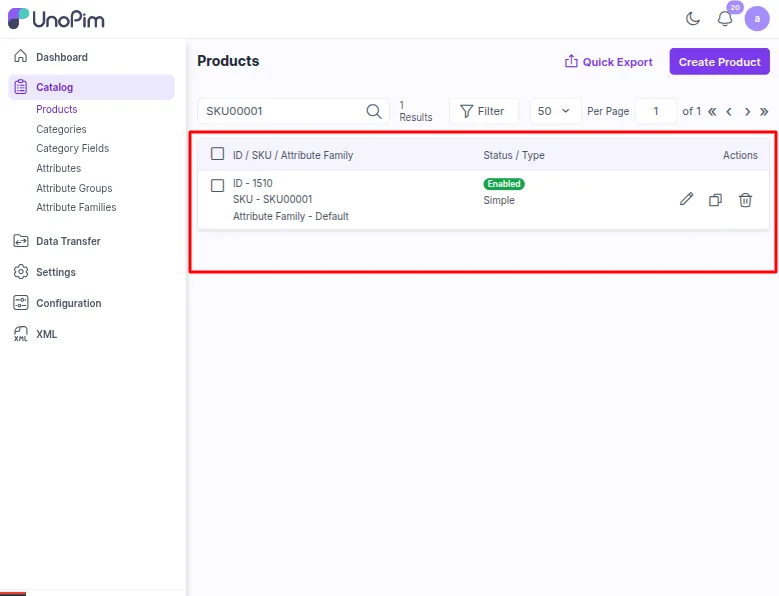
Once the job completes successfully, navigate to Catalog → Products to view the imported sku.
This concludes the UnoPim XML Connector User Guide.
We hope this documentation offers clear guidance so that you can get started efficiently and manage your work with the UnoPim XML Connector smoothly.
For any questions, clarifications, or assistance, please contact our support team at [email protected].
Alternatively, you may submit a ticket through our HelpDesk System and our team will respond promptly.
Current Product Version - 1.0.0
Supported Framework Version - 0.3.2

Be the first to comment.