Laravel eCommerce Point of Sale extension offers extensive functionality for admins, enabling easy creation of multi-stores.
It also allows seamless tracking of daily sales and efficient customer management.
The physical stores will have a POS front-end for which the admin can assign a POS agent who can easily manage the daily sales with their respective customers.
The POS system can work both online and offline mode in case of poor connectivity.
Laravel eCommerce Point of Sales module is supported by Bagisto version, 2.3.0
Which printer and scanner support Bagisto POS?
Bagisto point of sale system supports Epson TM-T82 Thermal POS Receipt Printer
and the paper width and the roll Diameter are 79.5 ± 0.5 (W) × dia. 83.0; 57.5 ± 0.5 (W) × dia. 83.0.
And mostly barcode scanner support bagisto POS system like Retsol Ls450.
Check a brief overview of the POS terminal workflow
Features Of Laravel eCommerce Point of Sale
- Creation of multiple outlets from the back-end.
- Sales agents can manage discounts from the front-end.
- Sales agents can handle customers both online and offline.
- Front-end cart hold functionality.
- Ability to create multiple carts from the front-end.
- Barcode generation and printing available at the back-end.
- Separate product inventory management by assigning inventory sources to each outlet.
- Support for cash and card payments at the front-end.
- Real-time synchronization of customers and orders in offline mode.
- Capability to place orders with custom products.
- Support for various product types: Simple, Configurable, Downloadable, Virtual, Bundle, Grouped, Booking, and Custom.
- Customizable POS sales invoices.
- POS sales reporting with extensive filtering options at the admin end.
- Barcode prefix option added into module configuration.
Requirements
Bagisto GraphQL API: Bagisto Headless Ecommerce v2.3.2
Bagisto: v2.3.0
Installation
- Unzip and Merge Files Extract the extension zip file and merge the
packagesfolder into your project’s root directory.
- Update
composer.jsonAdd the following entry under thepsr-4section incomposer.json:
"Webkul\\Pos\\": "packages/Webkul/Pos/src"
- Update
bootstrap/providers.phpAdd the following line under theproviderssection inbootstrap/providers.php:
Webkul\Pos\Providers\PosServiceProvider::class,
- Run Commands From the project root, run the following commands in your terminal:
composer dump-autoload

php artisan pos:install
- Congratulations! 🎉 Your Bagisto POS Extension is now installed and ready to use.
To access the front-end, navigate to:
https://example.com/pos
Laravel eCommerce Point of Sale Configuration
From the Admin dashboard, click “Configure > Point of Sale > settings” in the left-hand menu. This will redirect you to the POS Configuration page.

Let’s go through with the Configuration Settings one by one:
Status :
Here Admin can also active or inactive the POS status.
Heading On Login:
Enter the POS heading which will also be visible on the POS login panel.
Sub-Heading on Login:
Enter the Sub-Heading which will be visible on the POS login panel.
Footer Content:
Enter the footer content which will be displayed in the footer section of the POS login panel.
Footer Note:
Enter the footer note.

Barcode
Print Product Name With Barcode :
Admin can also select Yes in the option if they want to print the product name with the product barcode.
Barcode Size [Width of the barcode in pixels]:
Here admin can enter the width size of the barcode.
Barcode Size [Height of the barcode in pixels]:
Here admin can enter the height of the barcode.
Generate Barcode With:
Admin can generate the barcode with the Product ID or with Product SKU(Stock keeping unit) from the drop-down.
Hide Barcode Icon:
The admin can also active or inactive the section as per their need.
POS Product
Allow Sku For Custom Product
Once the admin active this section, at the front end the POS agent can add the Custom Product SKU while adding the product to the customer cart.

Manage Agent
On the admin dashboard, click the POS icon which is there on the left-hand side to check on for the features available in the backend for admin.
- Agents: Here you will find the list of multiple users that have been created by the admin.

Create Agent
The admin can add the agents by clicking on the”Create Agent” button.
Here, the admin needs to enter the below details:
Username:
The admin can enter the username of the user.
First name :
Here the admin can enter the first name of the user.
Lastname:
The admin needs to enter the last name of the user.
Email :
The admin can enter the email ID of a user.
Add Image:
Add an image to represent the user.
Password:
The admin can set the password for the user.

Outlet:
Select the outlet from the drop-down.
Status:
Admin can active or inactive the store status from the toggle button.
Lastly, hit the Save Agent button to save the user configuration successfully.
Manage Outlet
Here you will find the list of multiple Laravel eCommerce Point of Sale outlets.

The admin can also add the store by clicking on the “Add Store” button.
Here, the admin needs to enter some details –
Store Name:
The admin needs to enter the name of the store in the field.
Status:
The admin can active or inactive the store status from the drop-down.
Store Address:
The address of the store will be provided in this section.
Country:
The admin can select the country of the store.
Store State:
The admin needs to select the state of the store.
Store City:
Need to select the city of the store.
Store PostCode:
Need to enter the postcode of the store.
Inventory Source:
The admin has to choose the separate inventory for each store from the drop-down.
Receipts:
The admin needs to select the US receipts or Indian receipts from the drop-down.
Lastly, hit the Save Store button to save the store configuration successfully.
After creating the store, the admin will Manage the Product in the store by hitting the below icon shown in the image.

Manage Products
Now, under the Manage Products tab, the admin will assign the products to the store by enabling the products for the store. Assigned products will be displayed on the POS front end.

**Note:
However, In POS Inventory is Centralised.
This centralized inventory will depict that any inventory changes done on the website will be reflected in the POS end or vice versa.
Likewise, if the online stock of the product is 200, then all the POS store stock will be the same i.e. 200.
The stock will automatically decrease on each sale from the online store or the POS store accordingly.
Barcode Product List
Here admin can view all the products associated with his store accordingly.
They can generate barcodes for the products to be used by the POS agent to add a product to the cart during the check-out process.

Generate Barcode
Admins can generate barcodes by selecting “POS>Barcode Products,” choosing the products, and selecting “Generate Barcode” from the drop-down.
Then, they simply click the submit button to generate the barcodes.

After that now admin is allowing POS users to easily print a barcode for a product in a required quantity by clicking on the Print Barcode button available on the product.
Here admin will first select the products for which they also want to set the barcode quantity.
Then they will select the barcode option to “Print the Barcode” from the drop-down then click on the submit button.
Now, the admin will also add the quantity of the barcode to print.

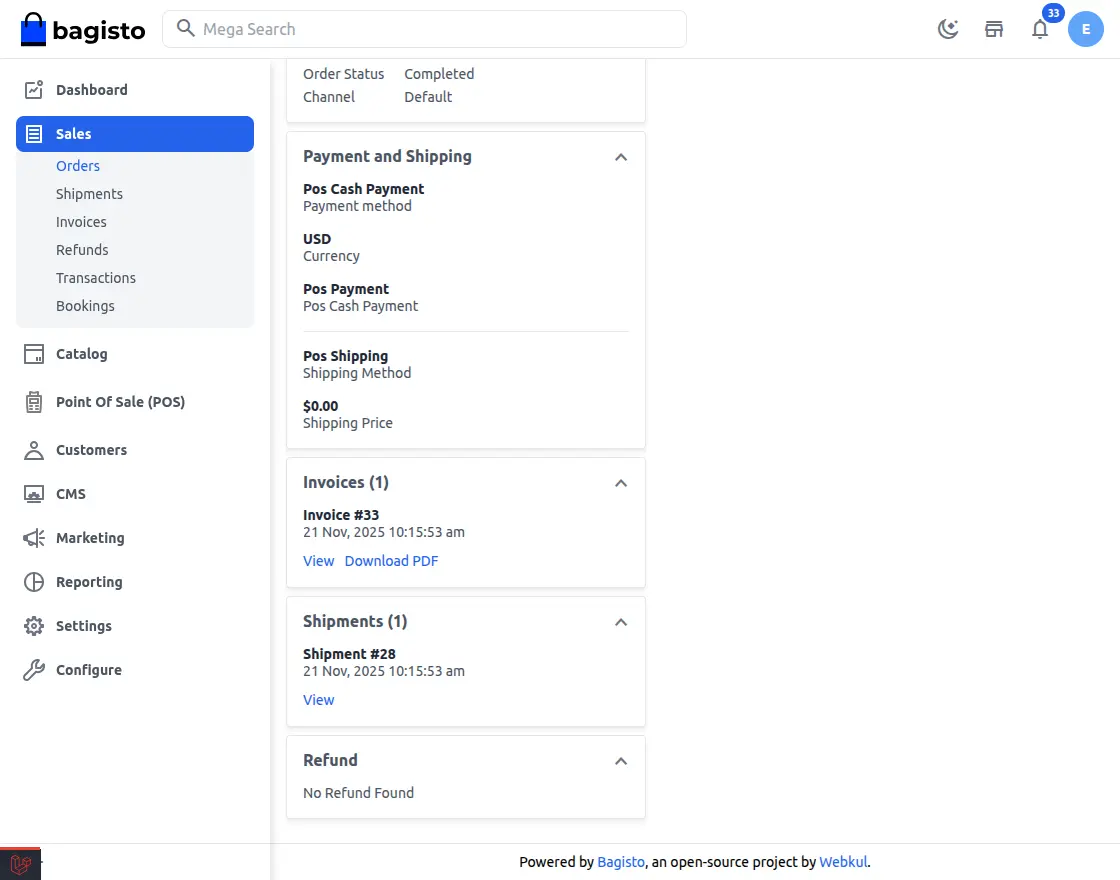
Orders
Here admin can view all the POS orders in a given list or they can view any order details by simply clicking on the order as shown in the image below.

By clicking on the eye icon as shown in the above image, the admin can easily check the order information.
Request Product
Under the Request Product tab, the admin will check the “Low stock product request” sent by the POS user.

Admin can click on the action button shown in the above image the open tab will show all information like User, store details, the required quantity and inventory source.
Admin can select the request status from the drop-down and then complete the product request by assigning the requested quantity to the respective store.

Bank Details
Under this section, the admin can add the bank details for the successful payment process on his POS store.
Also in the section admin can see his Bank List.

Once the admin clicks on the “Add Bank” button they will find the below snapshot, under that he will enter the information about his bank details.
General
Bank Name: The admin needs to enter the bank name.
Bank address: Needs to enter the bank address
Email: Needs to enter the email ID
Phone Numer: The admin can enter the phone number
POS Agent & Bank Status
Assign POS Agent: Here admin can assign the bank to the POS agent
Bank Status: Select the Bank Status, Active/Inactive

Now at the POS store once the customer pays the bill the POS agent can select the preferred bank from the below Select Bank drop-down.

Detailed Sales Report
This section allows the admin to check his detailed sales report for his POS and website. As you can see in the below image the admin can easily filter the sales report based on Banks and Sales Type.

Receipts
Here the admin can manage receipts according to their requirement such as adding new receipts, editing receipts, and previewing receipts.

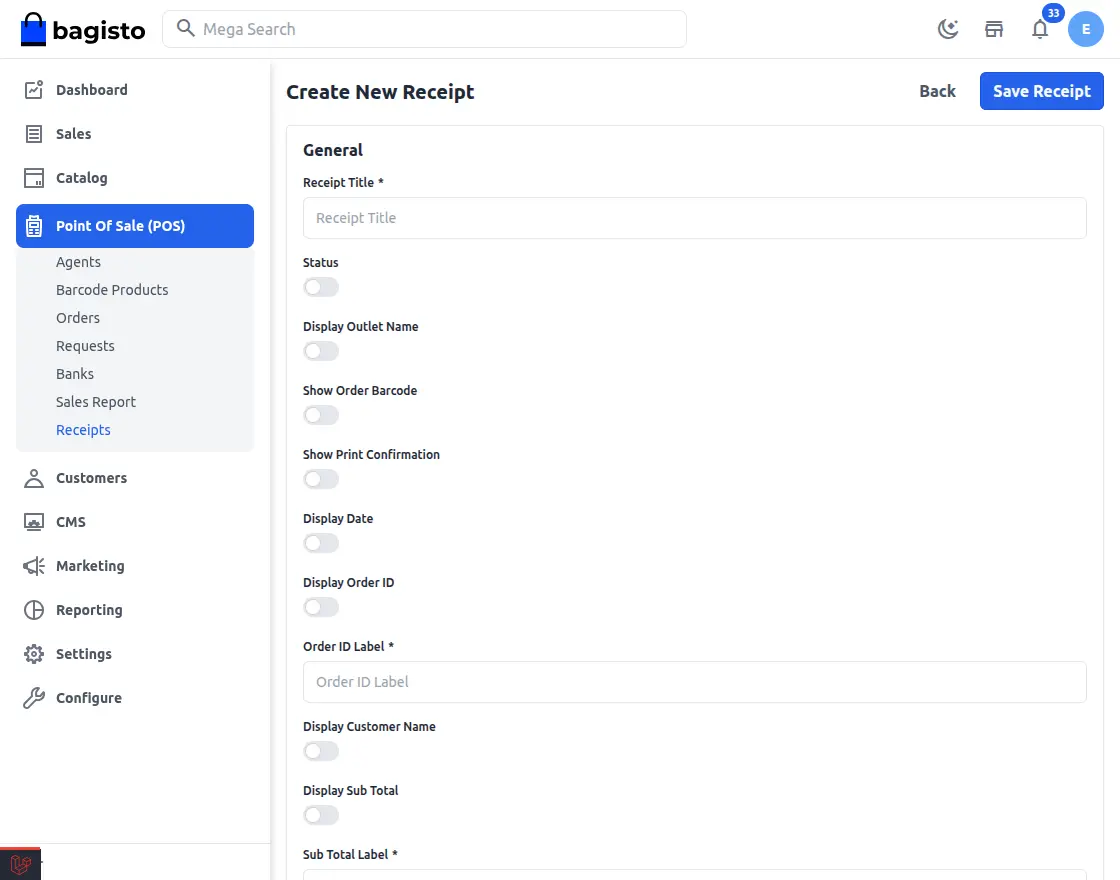
Add Recepit
The admin can add a new receipt by clicking on “Add Receipt”.
- Title: The admin can enter the title of the receipt.
- Status: The admin can enable or disable receipt status.
- Display Store Name: By enabling this the admin can display the store name.
- Display Date: By enabling this option the admin can display the date on receipt.
- Display Order ID: The admin can display the order ID on receipt by enabling this.
- Order ID Label: The admin can enter the order ID label.
- Display Customer Name: By enabling this the admin can display the customer name on the receipt.
- Display Sub Total: The admin can display the subtotal on receipt by enabling this.
- Sub-Total Label- The admin can enter the sub-total label.
- Display Tax: By enabling this the admin can display tax on the receipt.
- Tax Label: The admin can enter the tax label.
- Display Credit Amount: By enabling this admin can display the credit amount on the receipt.
- Credit Amount Label: The admin enters the credit amount label.
- Display Change Amount: The admin can display the change amount by enabling this.
- Change Amount Label: The admin can enter the change amount label.
- Display Cashier Name: By enabling this the admin can display the cashier’s name on the receipt.
- Cashier Name Label: The admin can enter the cashier name label.
- Display Store Address: By enabling this the admin can display the store address on receipt.
- Grand Total Label: The admin can enter the grand total label.
- Display Discount Amount: By enabling this the admin can display the discount amount on the receipt.
- Discount Label: The admin can enter the discount label.
- Display Logo: By enabling this the admin can display the logo on the receipt.
- Upload/Remove/Set Size of Logo: The admin can upload, remove and resize a logo.
- Header/Footer Content: The admin can enter header or footer content on receipt.
Laravel eCommerce Point of Sale Front-end
The agent can easily log in to the Laravel eCommerce Point of Sale Front-end by using the Username and Password.

After signing in to the POS system, the POS Users will be redirected to the POS panel as shown in the below image.

Once you have made any changes in the admin end, make sure you refresh the POS front end to reflect the changes.
POS Cash Drawer Amount
After logging into the POS system, the user is prompted to enter the cash drawer amount. A pop-up appears, asking for the Drawer Opening Amount and a remark.
The POS user has to enter the drawer opening amount, for example, $200 as shown in the image, which is the required amount set for that particular day.

After login, the POS user will see the panel, where all the products are displayed that are assigned by the admin to the particular store.
The user will also see the Cart section where the POS user will manage the customer orders.

POS – Custom Product
The POS user can also add a product in the cart which is not available in their POS but the product is available in the physical store.
POS user will have to click on the button as shown in the below image.

POS – Cashier Management
Under the Cashier, The POS user manages the functionalities given below –
- Close Counter
- Today Cash
- Sale History

Today’s sale
Under Cashier, there is another option Today sale is available which displays the Today Cash Sale and the Today Card Sale.
The order ID, time, order total and the order payment mode details are also visible to the POS agent under the Today Cash option.

Sale History
The POS user can view the sale history under the Sale History option. For a particular date, the cash sale and the card sale are listed under Sale History.

POS – Order Management
The POS user can manage sales activity like adding products to the cart, adding customer details, putting the cart on hold to process it later, and paying for the order from his panel as shown below.
After adding the products to the cart the POS user will now add customer details by clicking on the default customer option and then following the steps as shown in the below image.

Note: The Pos user can search customers by their name or email as well.
After clicking on the add customer button the below pop-up will be displayed.

The POS user can add a new customer step by step filling in the above fields as shown in the image and then clicking on the save button to proceed with the payment.
Product Checkout
Once the customer is selected the POS user can also complete the order after a click on the pay button.
If the customer has chosen the cash method then the customer will also provide some amount to pay for the order and the POS user will refund him the remaining money as shown in the screenshot below.

As shown in the above image Payment Method is Cash, the Total Order Amount is $10.55, the amount paid by the customer is $10.55 and the balance amount to be paid back to the customer is $0.00.
Finally, click on the Confirm Payment for completing the payment.
Under the Sale History Section, POS users can print the invoice for the order and can continue further with other orders.

POS Panel- Apply Discount
The POS user can apply the discount to the cart.
To apply the discount, the POS user will click the Add Discount option available in the cart as shown below.

after clicking on the Cash Discount, the below pop-up will be displayed.
POS Panel- Cart on hold
The POS user can put a cart On Hold to process it later by simply clicking on the Hold Cart option as shown below.
Clicking on the Hold option will display a below pop-up where the POS user will specify the reason for putting the cart on hold.
After successfully holding the cart, the POS user can check the Hold Sale by navigating to POS > Sales > Hold Sale.

The above image displays the cart details of the product which has also been put on Hold. The Note entered by the POS user is also displayed under the Note section.
Here POS user can:-
- Click the “Add To Cart” button to add the order back to the cart to process it further.
- Also, Click the “Remove” button to remove the hold cart.
Split Payment
Now the customer can also split the order payment into Cash and Credit/Debit card at the checkout as shown in the below image.
The agent can also choose the options as per their customer preference.

POS Panel – Offline Sale
The sales orders which got processed in the offline mode will be seen under POS > orders > Offline orders.
If customer wants to return the pos agent can also return item in offline.

Once the POS System get connected to the internet, the POS user can synchronize offline sales with the online store.
After syncing, the offline sale the POS user can see offline orders in the History section.
POS Panel-Product Management
The POS user can manage their Store Product under the Product Section.
Here POS users can –
- Set the minimum unit of quantity for the low-stock product by navigating to POS>Products>Setting as shown in the below image.
- The POS user can check the low stock product under the Low Stock Product section as shown in the below image.

- The POS user can send the request for Low Stock Products by clicking on the Send Request button as shown in the above image.
After clicking on the Send Request button below pop-up will be displayed. The POS user can mention the required quantity for the particular product along with the comment then hit the done button.

The POS user can view all low-stock requests and their statuses under POS > Products > Requested Product, as shown below.
That’s all for Laravel eCommerce Point of Sale, still, have any issues feel free to add a ticket.
Also, let us know your views on making the module Laravel eCommerce Point of Sale better https://bagisto.uvdesk.com/en/
Current Product Version - v2.3.0
Supported Framework Version - v2.3.0

Be the first to comment.