Simplify the login and registration process of your store with Prestashop Social Login. Let customers create accounts quickly through Facebook, Google, X (Twitter), and Amazon.
- Facebook, Google, X (Twitter), and Amazon login buttons on the login page.
- Easy and Fast login.
- Customers do not need to remember their username and password.
- Enhance customer experience.
Features of Prestashop Social Login
- Allow customers to login/register on the store via Facebook, Google, Amazon, or X (Twitter).
- Easy to integrate user accounts to the store.
- Display social login options on the checkout page.
- Admin has to provide their credentials for Facebook, Google, X (Twitter), and Amazon.
- Admin has to create Facebook, Google, X (Twitter), and Amazon apps.
How to Install Prestashop Social Login
- Go to back office ->modules.
- Upload the module zip file.
- The module will automatically get installed on your Prestashop.


Custom Hooks Information
For displaying the social login button on the front end in Prestashop Version 1.6 you have to add code on following tpl files:
On yourprestashopfolder/themes/your-theme/authentication.tpl file:
Add
{hook h="displayWkSocialLoginBtn"}
inside “p” tag having class “submit”.
For PrestaShop version 1.7/8/9
For displaying the social login options on the checkout page, you need to add a hook on following tpl files:
Path: `/themes/<theme name>/templates/customer/_partials/login-form.tpl`
Add the hook just before the {block name=’login_form_footer’})
{block name='wk_display_after_login_form'}
    {hook h='displayWKCustomerLoginFormAfter'}
{/block}
Prestashop Social Login Configuration
After the successful installation of the module, the admin needs to configure it.
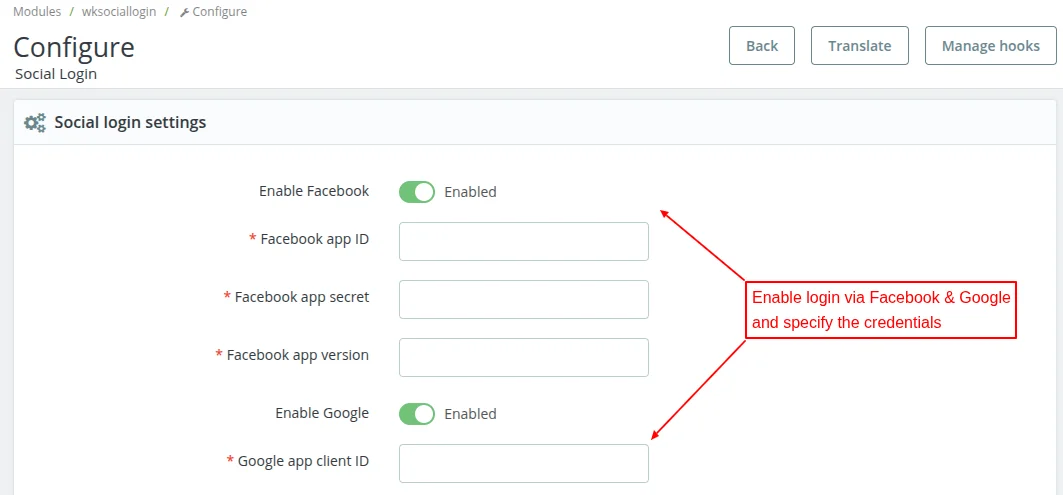
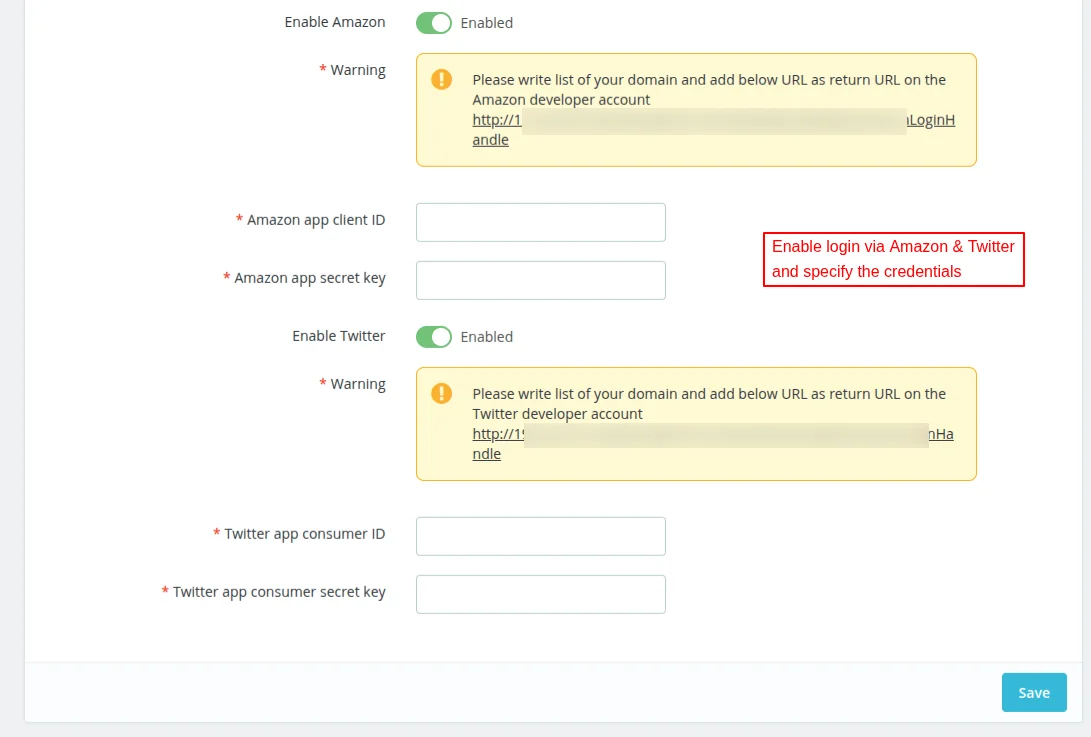
To enable the Facebook, Google, Amazon, and X (Twitter) login tab, the admin needs to provide the Facebook app ID, Google app client Id, Amazon App client ID, and X (Twitter) App consumer ID.
How To Get Facebook API Credentials
To obtain a Facebook App ID, you have to create a developer account on Facebook. Admin can create a developer account using this link: https://developers.facebook.com/
- Facebook will ask you to create an external application linking your website to their API.
- App ID and App Secret can be also referred to as Consumer Key and Secret or Client ID and Secret)
Steps to obtain the Facebook App ID:
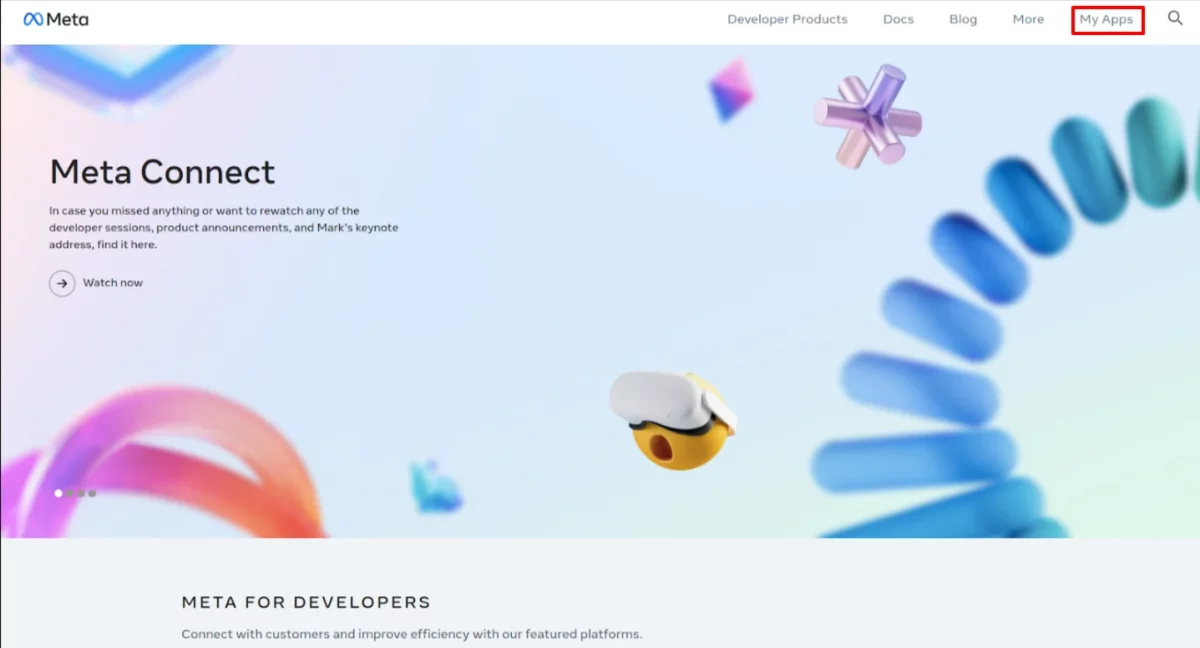
- Sign in or create a new account on the Facebook developer platform.
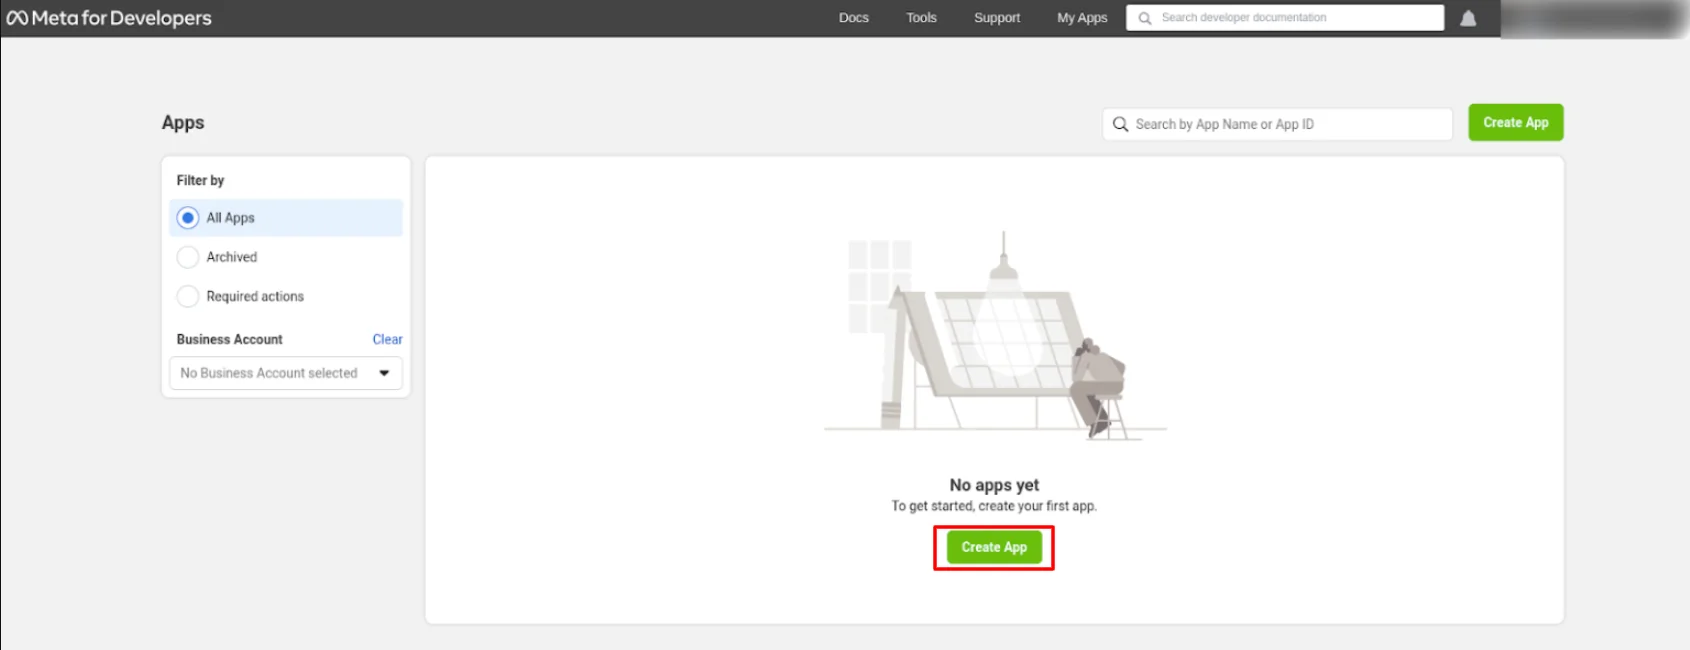
2. After completing the login process, click on My Apps.
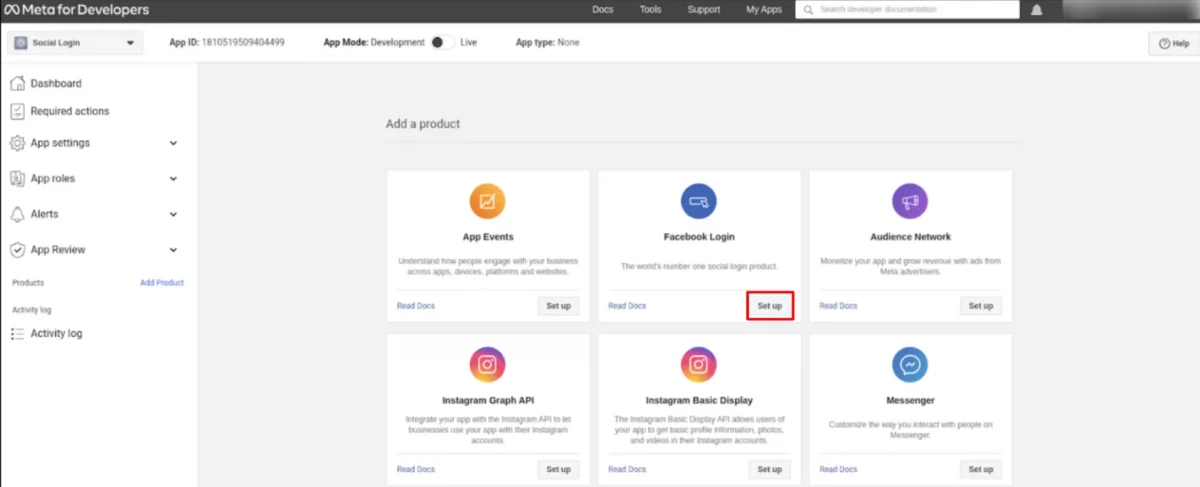
3. After the My App page opens up, click on “Create App” option to proceed further.
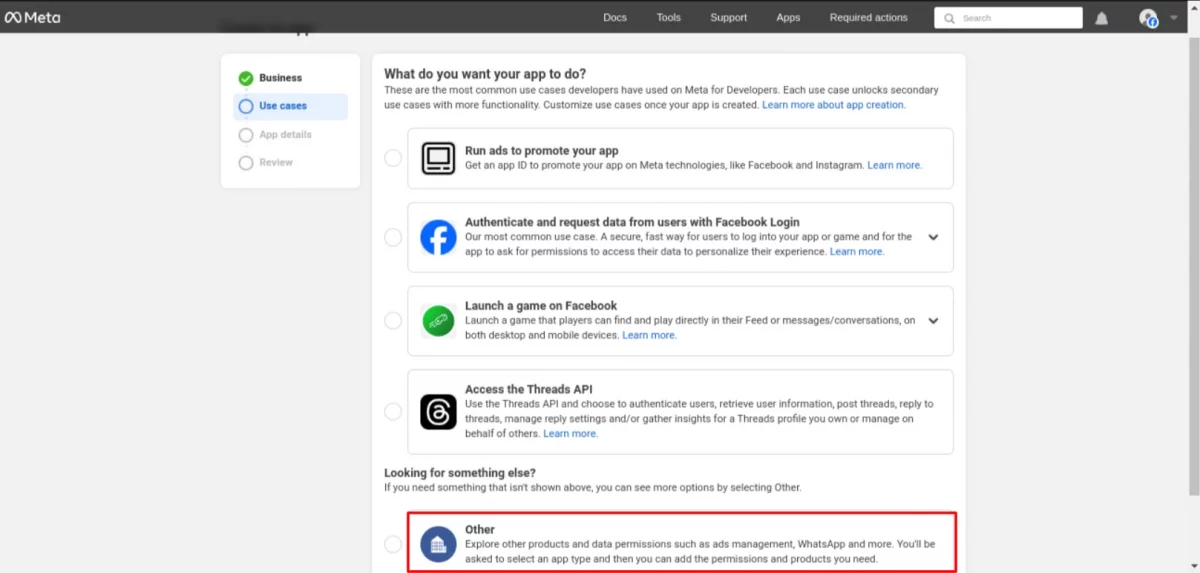
4. Select the “other” option in the dialogue box.
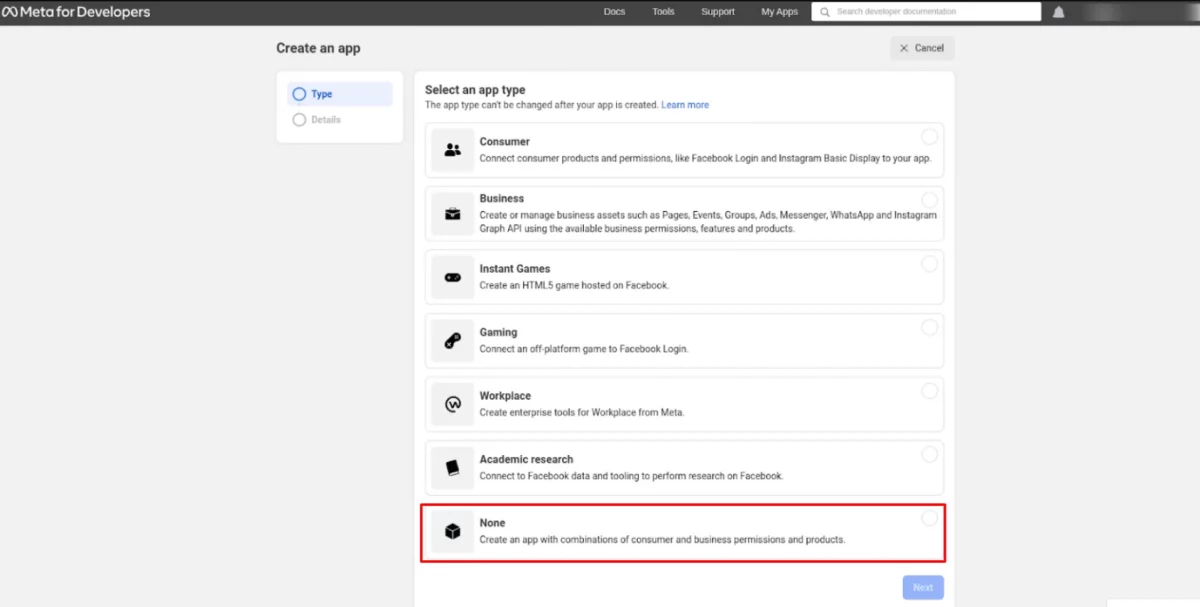
5. Next, Select the none option in the dialogue box and then click on next button.
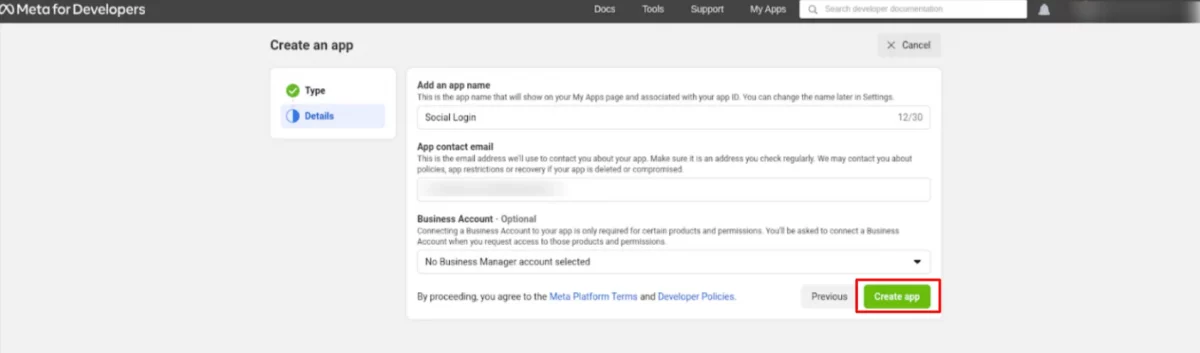
6. Now add the details in two fields:
- Add an App Name: Add the name of your app in this section.
- App Contact Email: Add your email ID for contact in this section.
After adding details in the fields, click on “Create App” button.
7. Click and open the “Set Up” button of “Facebook Login”.
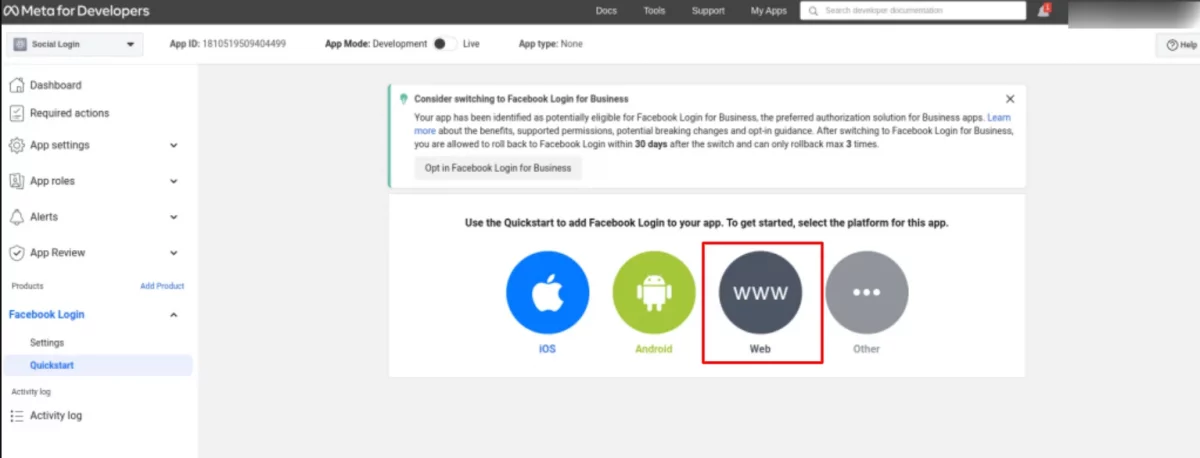
8. Now open the left side menu and select www from the same.
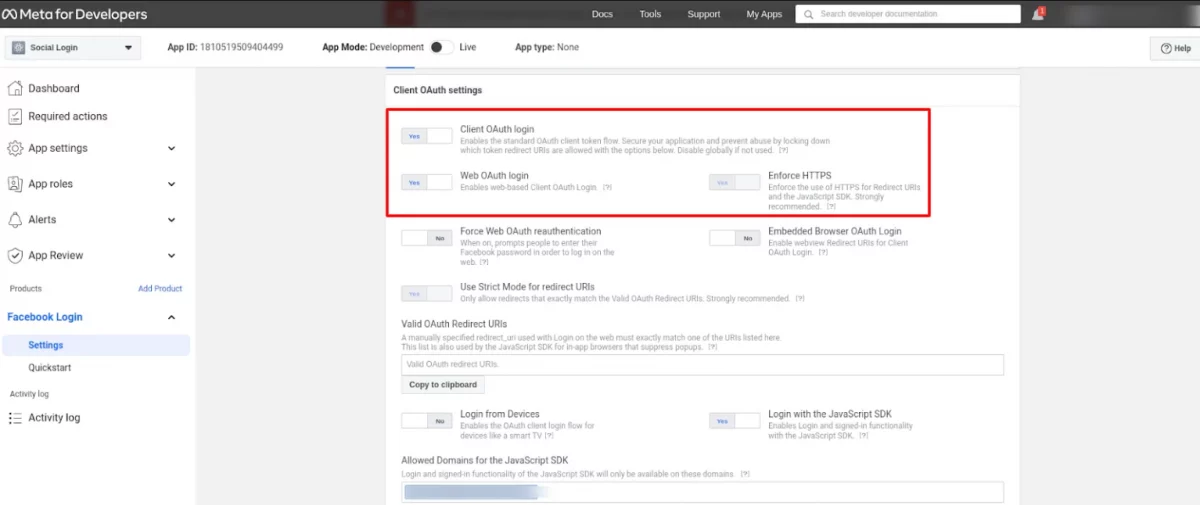
9. Enable the following Client OAuth Settings:
- Client OAuth Login
- Web OAuth login
- Enforce HTTPS
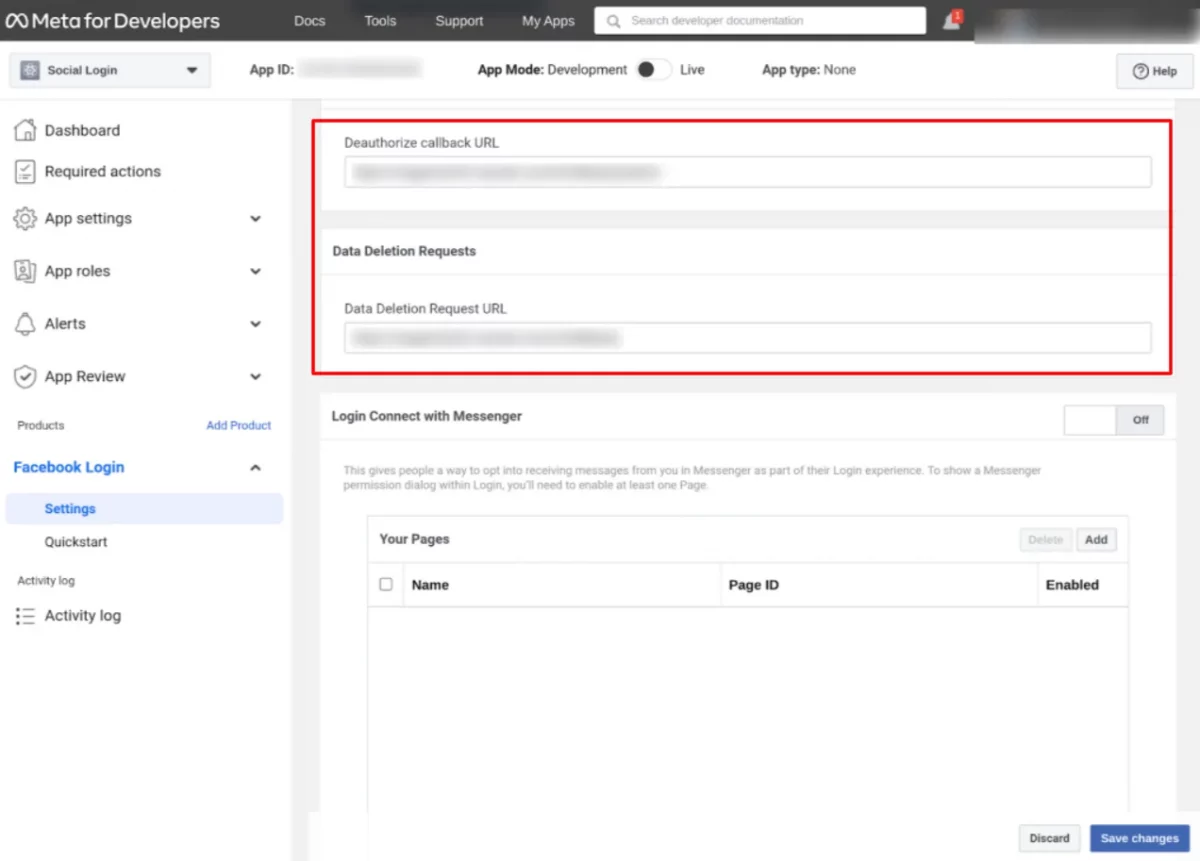
- Deauthorize callback URL: Add the URL of your page in this section
- Data Deletion Request URL: Add the URL of your webpage
Once you have filled all the requirements, click on the “save” button.
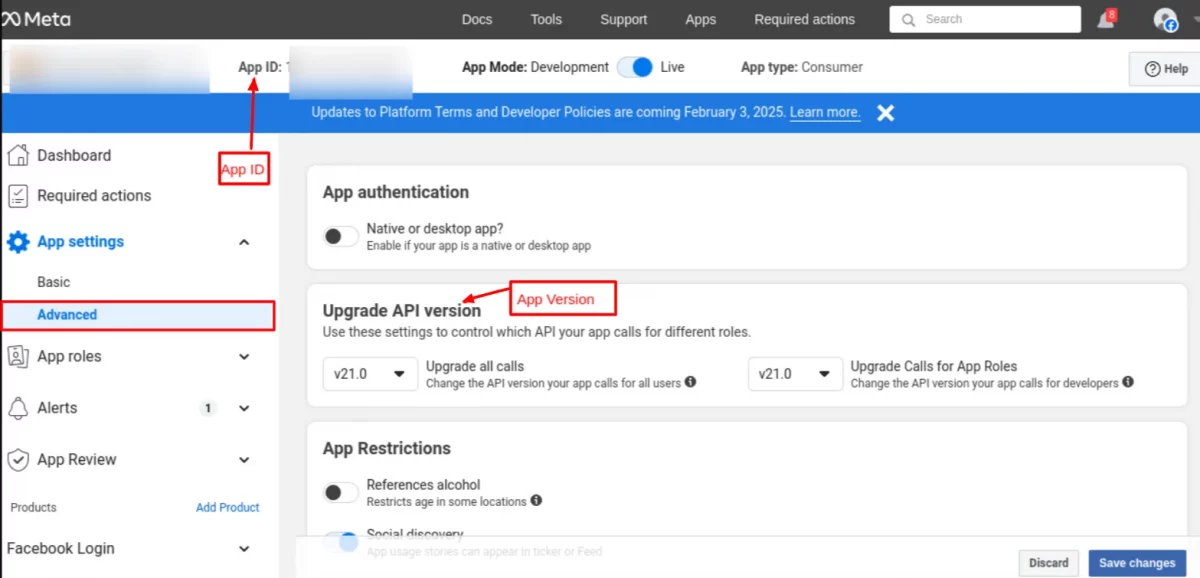
10. Now, you have to obtain the app ID and app version by clicking on “App Setting” and then selecting Advanced.
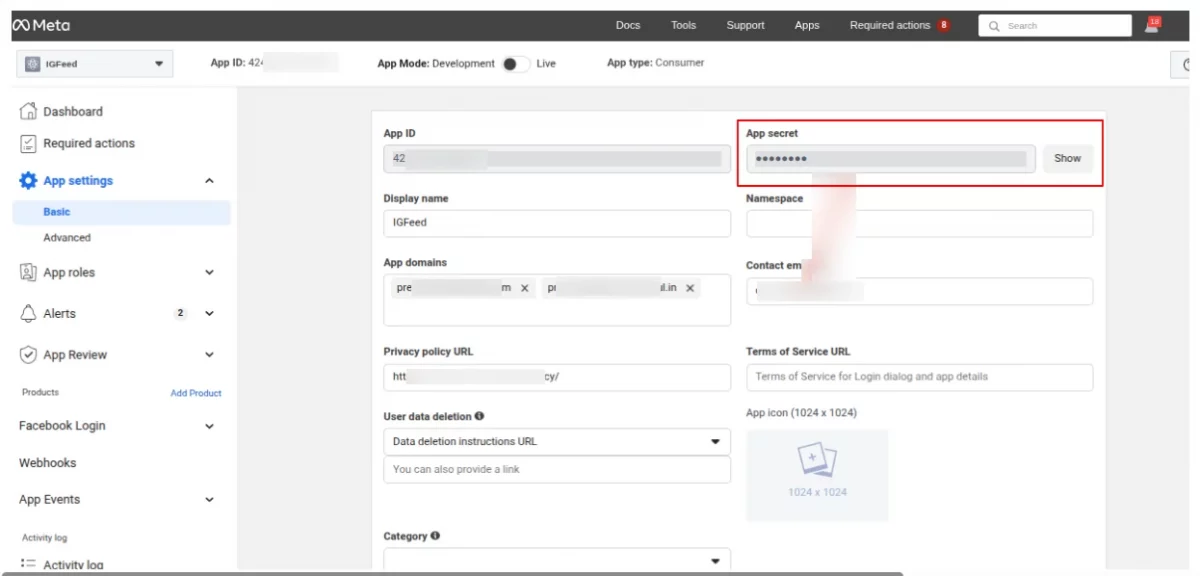
11. You can get the app secret under the ‘Basic’ tab.
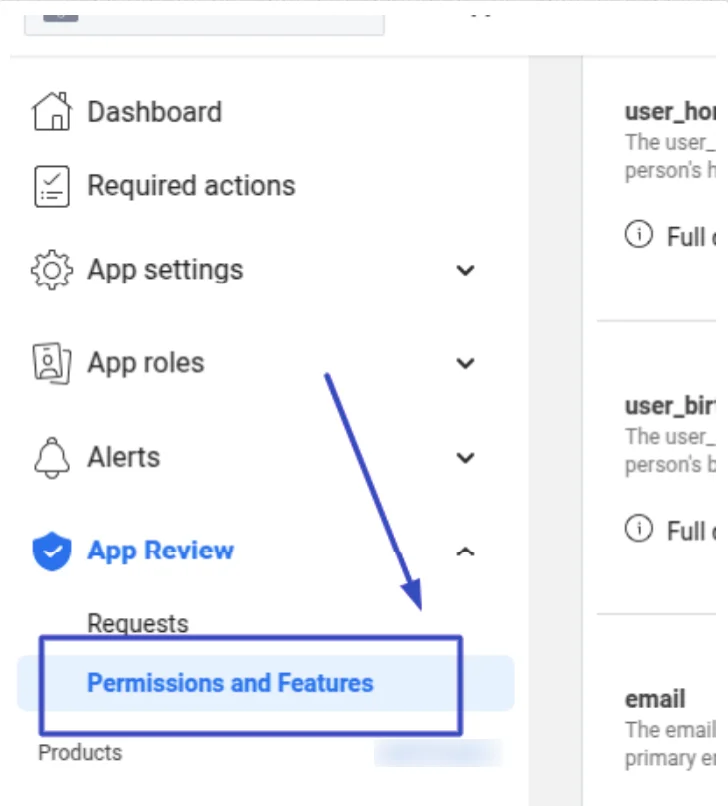
12. In the Facebook developers console for your app, go to App Review-> Permissions and Features.
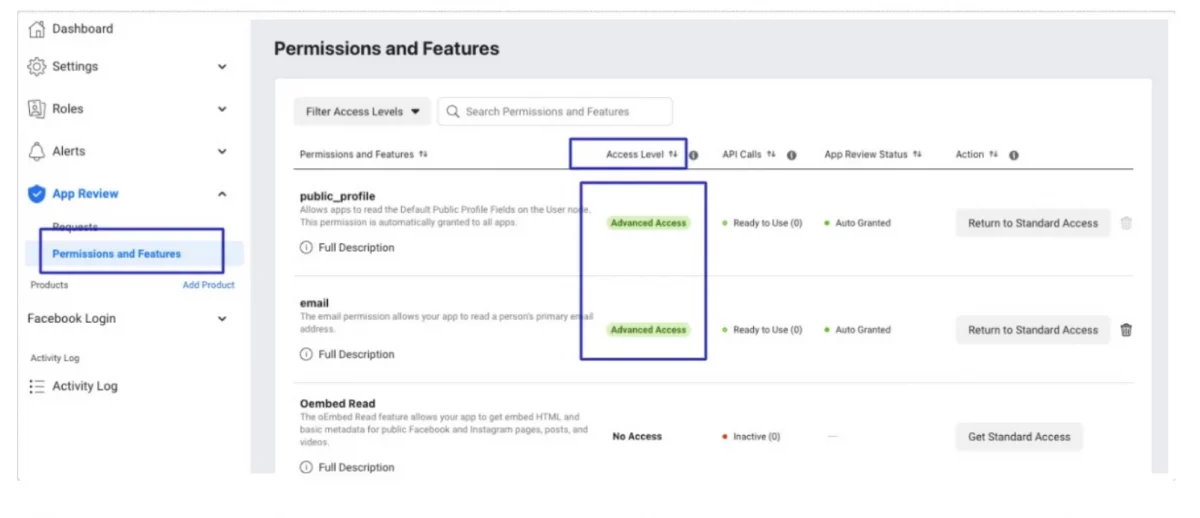
Set the public_profile and email to have advanced access. This will allow all Facebook users to have access, and these two settings are auto-granted. Ensure the Access Level indicates Advanced Access.
13. If you need to do the business verifications for “Advance access” so, You can follow the documentation below for the business verifications.
- https://www.facebook.com/business/help/2058515294227817?id=180505742745347
- https://developers.facebook.com/docs/development/release/business-verification
If you have any problem for the busineess verification then you need to connect with the support team from here: https://developers.facebook.com/support/
How To Obtain Google API Credentials
To get the Google app ID, the admin will have to first create an account on the Google Developers console.
- Next, he will create a project by clicking on Project -> New Project.
- Add the name of your project.
Note: Please note that you should not include any Google Word for your project name.
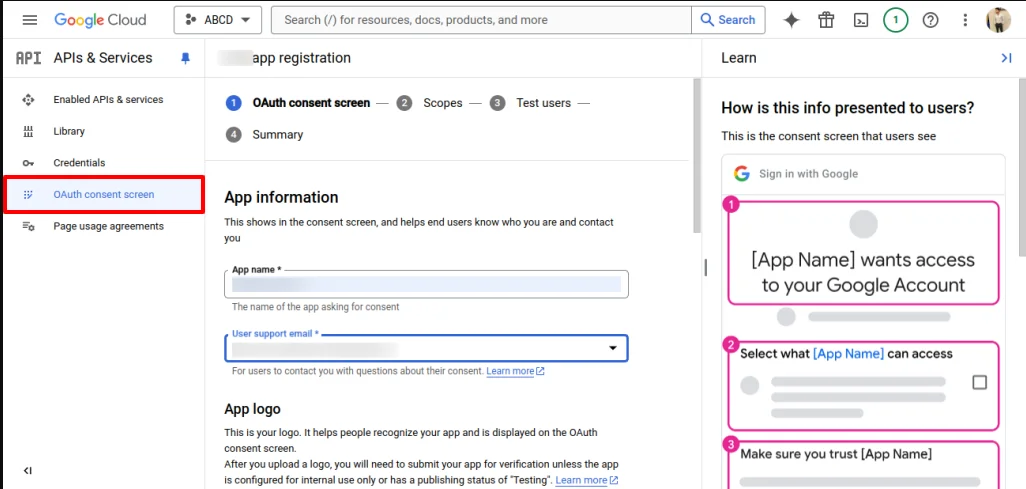
Now, go to Google API keys-> credentials-> OAuth Consent screen. Here admin has to provide an email ID and product name.
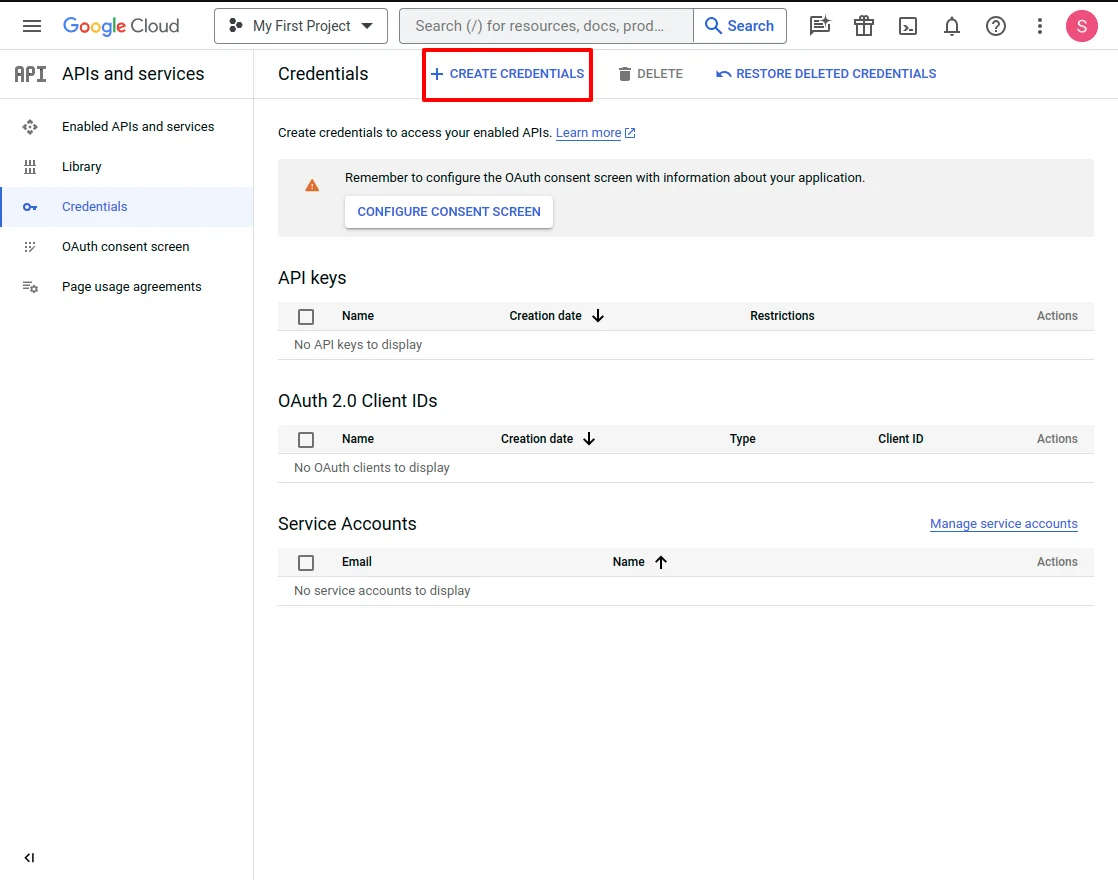
2. Now, Go on the Credentials menu option and select the Create Credentials option.
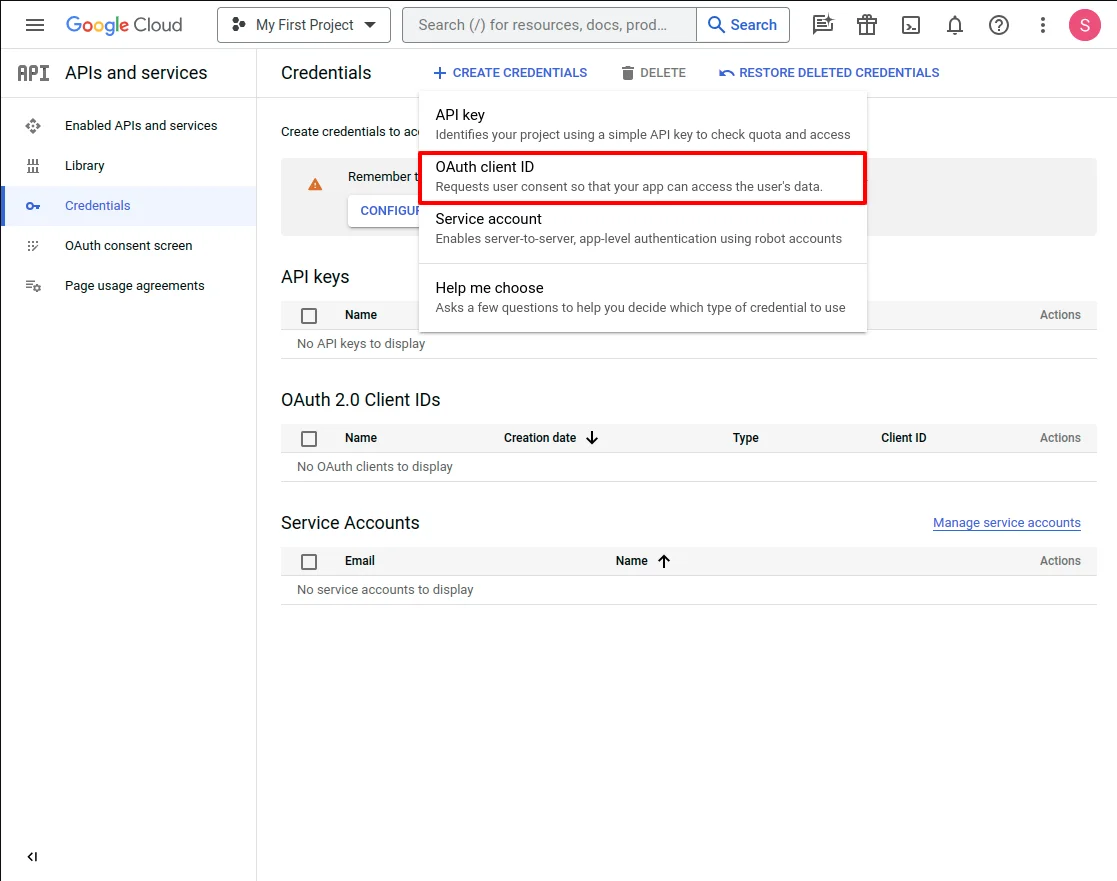
3. Select the OAuth client ID option from the drop-down.
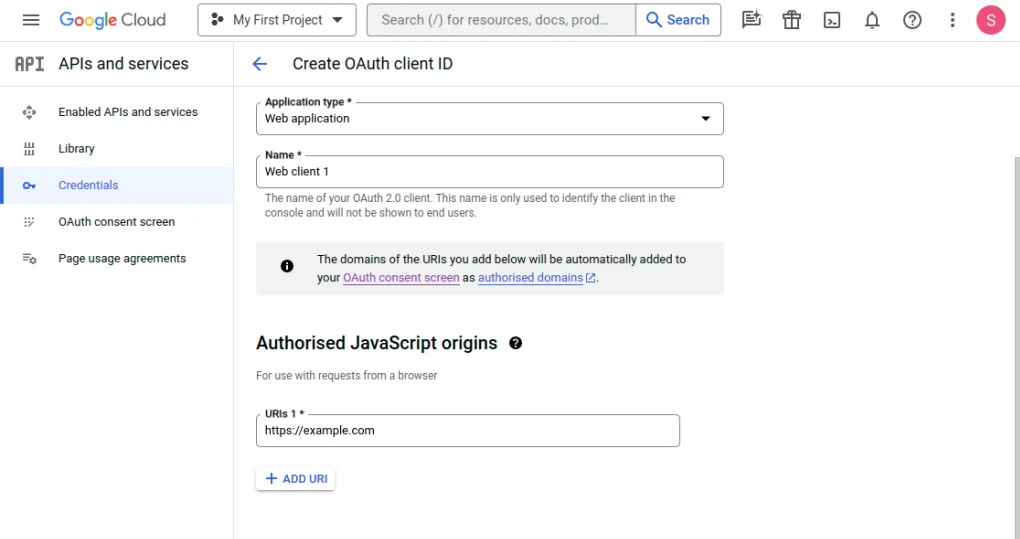
4. Now, Select the Application type and add the Authorized JavaScript origins and the Authorized redirect URLs. After adding the details, click on the Create button.
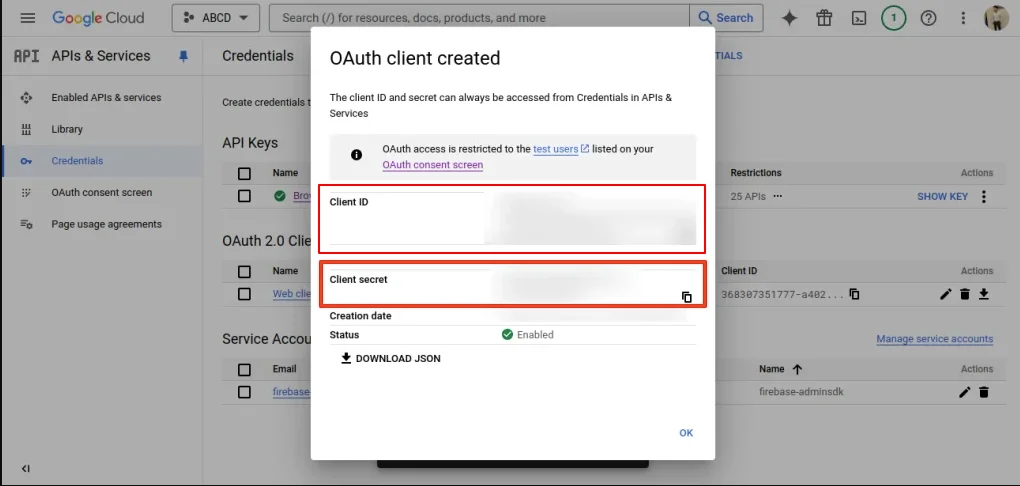
5. The last step is to click on the Create button and then the Client ID and Client Secret will be provided to you.
How to Get X (Twitter) API Credentials
Admin has to create a developer account on X (Twitter). Admin can create a developer account at https://developer.twitter.com/
After signing up as a developer from X (Twitter) the admin needs to provide the information to create the project.

After successfully submitting the information, a project will be created on the admin’s X (Twitter) developer account.

Once you click to configure the project app button, the admin will redirect to the below-mentioned page to set up the app.

After clicking on the setup button the admin needs to enter the required details to set up the app.

Just after saving these details, a new tab/section will add to the X (Twitter) developer account.

By clicking on the regenerate button, new credentials will be generated.

How to Obtain Amazon API Credentials
Admin has to create a developer account on Amazon. Admin can create a developer account at https://developer.amazon.com/dashboard
Once the admin creates the account on the Amazon developer account he will redirect to the below-mentioned page.

After clicking on the settings button, the admin will redirect to the below mentioned page.

Once the admin clicks on the Security Profile button, the admin needs to create a new security profile.


After creating a new Security Profile, it will be displayed in the security profile section and the admin needs to edit it.


Front End View
As configured by the admin, Facebook, Google, Amazon, and X (Twitter) tabs will display for log in.
Login Page

Checkout Page

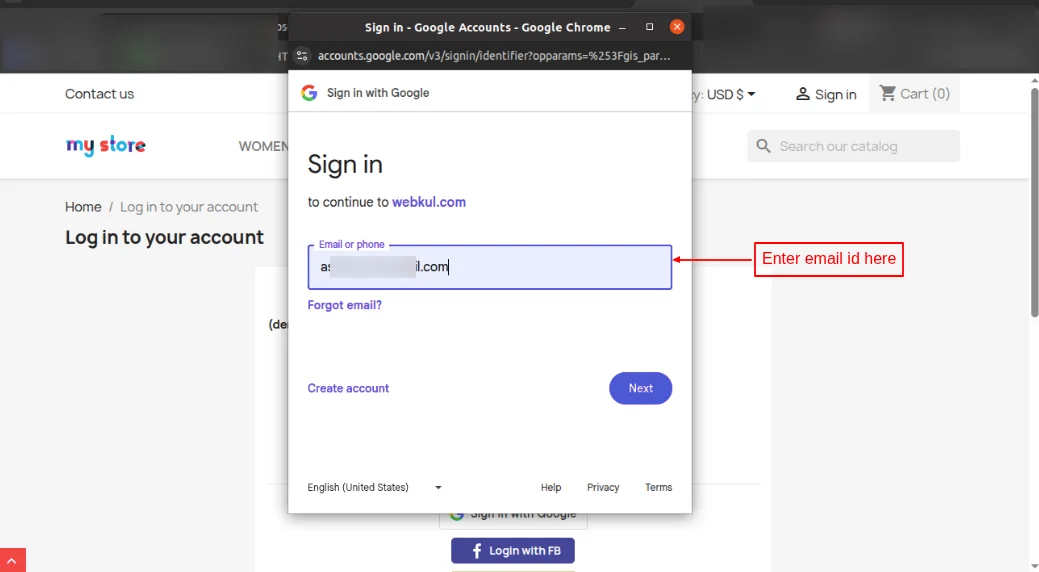
When customers log in via their social account, let’s say Google, a popup appears on the page where they can specify their email id and log in to their account.
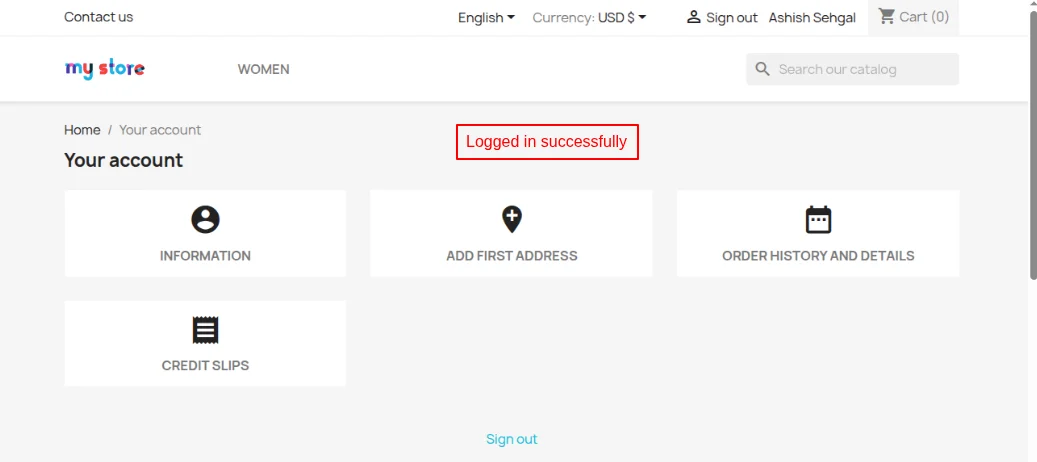
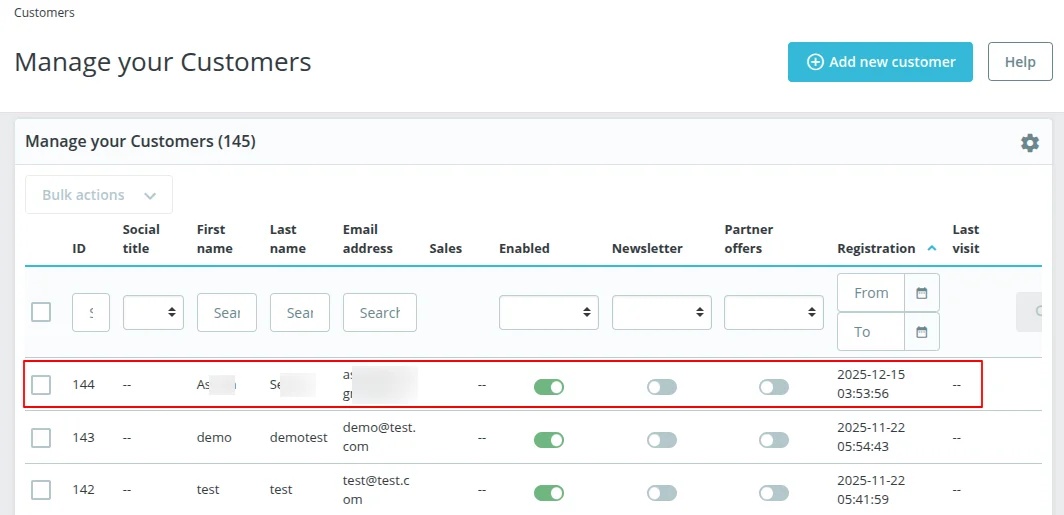
When a customer logged in successfully, his/her entry gets created under Customers tab in PrestaShop back office.
If the already registered customer log in via social account, then a new entry will not be created for that customer in the back office.
Support
For any kind of technical assistance or query, please raise a ticket at http://webkul.uvdesk.com or send us a mail at [email protected]
Also, please explore our Prestashop development services and vast range of quality Prestashop addons.
Current Product Version - 4.1.2
Supported Framework Version - 9.x.x, 8.x.x, 1.7.x.x

Be the first to comment.