PrestaShop ActiveCampaign Email Marketing module is an all-in-one solution for creating and automating personalized customer experiences that grow your business.
The platform helps more that 180000 businesses across 170 countries build meaningful connections with their customers.
Take your business to the next level with an effective email and marketing automation solution to acquire, convert, and retain customers.
Send professional and personalized emails to customers for abandoned carts through ActiveCampaign automations.
Seamlessly synchronize all your PrestaShop customers with ActiveCampaign and send emails & campaigns.
Features of Prestashop ActiveCampaign Email Marketing
- Integrate your PrestaShop store with ActiveCampaign via API.
- Send personalized emails for abandoned carts via ActiveCampaign automations.
- Send beautiful emails for sales, deals, etc via campaign.
- Export all or specific contacts from PrestaShop to ActiveCampaign.
- Update all or specific exported contacts on ActiveCampaign.
- Delete all or specific exported contacts on ActiveCampaign.
- Automatically create cutomers on ActiveCampaign when created on PrestaShop.
- Automatically update cutomers on ActiveCampaign when updated on PrestaShop.
- Add as many contact lists as you want to send campaign.
- Create custom messages that will be sent in campaign emails to contacts.
- Create multiple campaigns that you want to send to customers.
- Create two types of campaigns: standard and scheduled.
- View performance report of each campaign in the back office.
- View a list of customers who have abandoned carts from the back office.
How to Install Prestashop ActiveCampaign Email Marketing
- Firstly, go to the module manager in the back office and click on ‘upload a module’.
- After that, drag and drop the module file or select the file from the system.
- In this way, the module installation will be successful.


After the successful installation of the module, few new tabs get available in the back office.
From these tabs, the admin can configure the module settings, export contacts, add lists, create message templates, etc.

Prestashop ActiveCampaign Email Marketing Configuration
After the successful installation of the module, the admin needs to configure it.
The module configuration consists of 3 sections:
- General Settings
- Abandoned Cart Settings
- Contact/Campaign Settings
General Settings
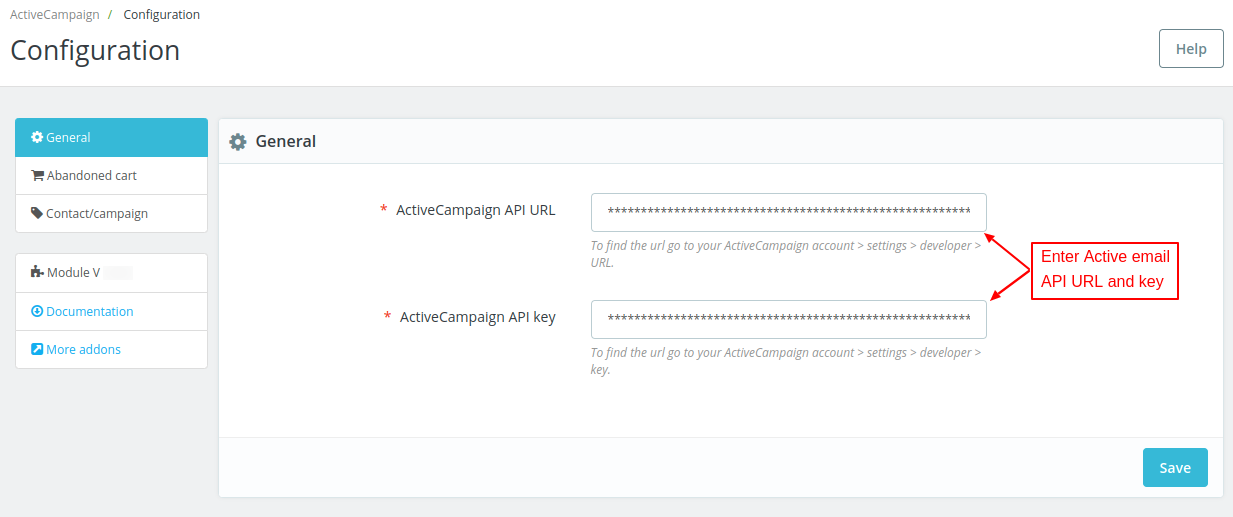
Under General Settings, the admin needs to specify the ActiveCampaign API URL and key that he got from his ActiveCampaign account.
How to get API URL and Key
To get ActiveCampaign API URL and Key, you need to create an account on ActiveCampaign.
Enter email address.

Now, enter your name and phone number to proceed.

In the next step, select the option as per requirement and proceed.

Verify your email address and setup password to continue.


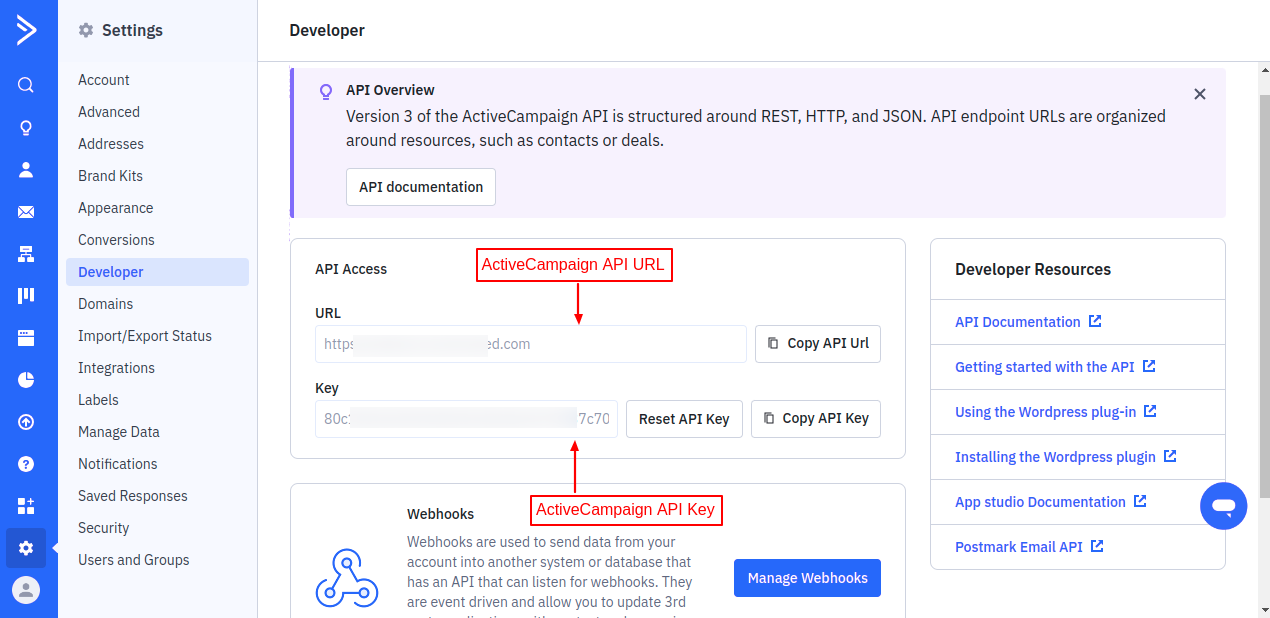
Once account is created, go to Settings.

Now, click on Developer.

On the Developer page, you will find ActiveCampaign API URL and Key.
Abandoned Cart Settings

Abandoned cart after
Here, the admin needs to set the time after which the cart will be considered as abandoned.
Suppose a user added products to the cart and left the website without completing the purchase at 2 pm on 15/10/2024. The admin has set 24 in the field.
Now, after 2 pm on 16/10/2024, the cart will be considered as abandoned.
Price structure for products
The admin can select whether he wants to send tax incl. or tax excl. price in abandoned cart reminder emails.
Mark abandoned cart as completed
If enabled, the abandoned cart will be marked as completed in ActiveCampaign, once it is converted into an order.
Note: For sending abandoned cart reminder emails, the admin needs to add the URL mentioned in the above screenshot in cron tasks manager.
How to Create Automation
Go to Automations tab on dashboard.

Click on ‘Create an automation’ button.

Now, search for what purpose you want create an automation and select automation template from the search results.

Now, click on ‘Get Started’ button.

On clicking ‘Get Started’ button, a popup appears on the page where you need to select integration, product, category, and cart value to proceed.

After selecting the options, click on ‘Next’ button.
Now, you need to delete the conditions. On deleting the conditions, a popup appears on the page as shown in the below screenshot.


Now, drag the wait condition towards ‘+’ symbol.
Once dragged, a popup appears on the where where you can set the condition.


Under Sending Options, drag ‘Send an email’ option to ‘+’ symbol.
Once dragged, a popup appears on the page where you can select the suitable option.

On selecting the option, a popup appears on the page where you need to specify email name, subject line, and click on save button.

Now, select a template under ‘Designed’ tab.

After saving the selected template, your automation is ready.
Contact/Campaign Settings

Real time customer export as a contact
If enabled, customers will be created/updated in ActiveCampaign when created/updated on prestaShop.
Select a message for campaign
If a campaign message is not available in prestaShop, then the message templated selected by admin in this field will be assigned to the campaign.
Contacts
Under Contacts, the admin can:
- Export contacts from PrestaShop to ActiveCampaign.
- Update the exported contacts.
- Delete the exported contacts.

Click on export contacts button.
Export contacts
The admin can export export specific contacts to ActiveCampaign.


The admin can also export all the contacts to ActiveCampaign at once from PrestaShop.

Once exported, the admin can view it under Contacts tab.

Update Contact
The admin can update all the exported contacts on ActiveCampaign at once or update specific contacts.


Delete Contact
The admin can delete all the exported contacts on ActiveCampaign at once or delete specific contacts.


Lists

Click on ‘Add list’ button.
The admin can create a list by adding list name, URL, and description.

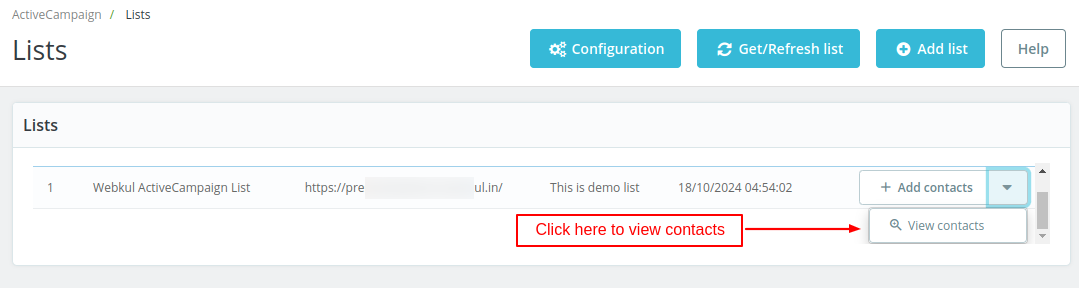
Once created, the admin can view it under Lists.
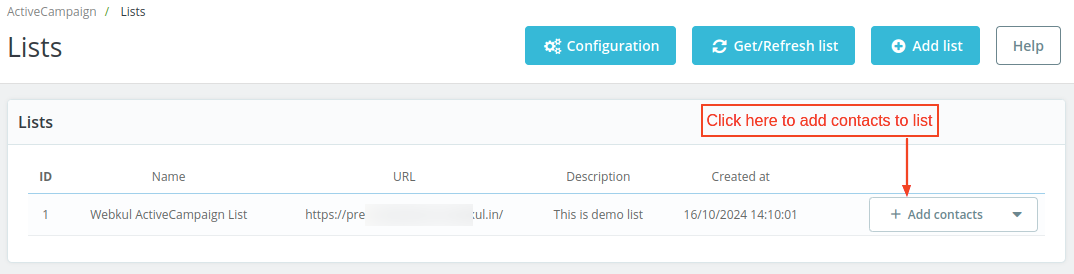
Click on ‘Add contacts’ button to add contacts to the list.
The admin can add all the exported contacts to the list at once or add specific contacts.
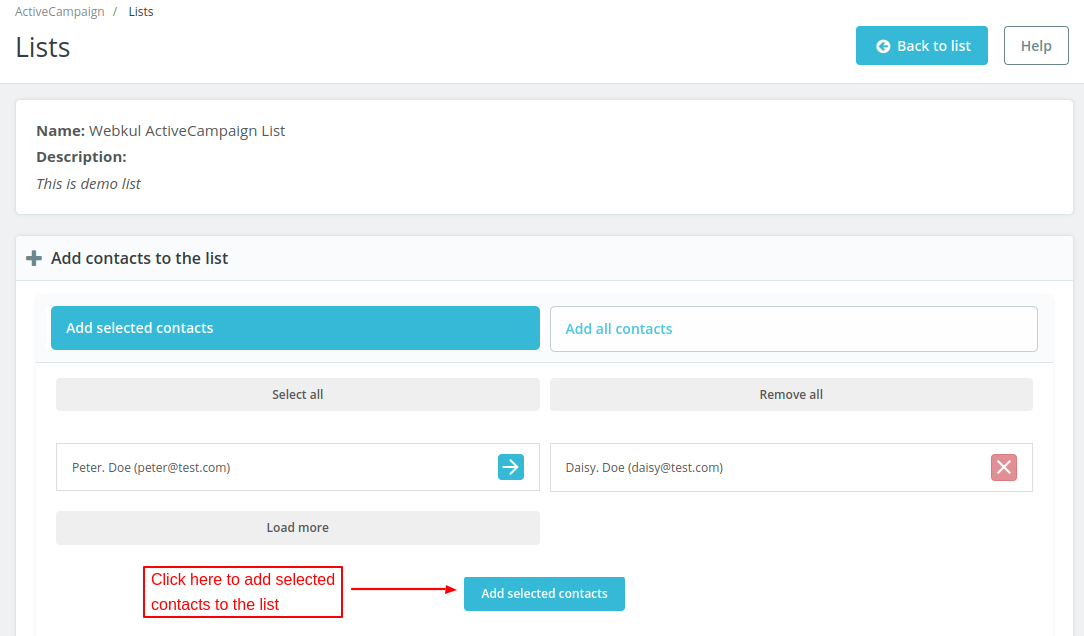
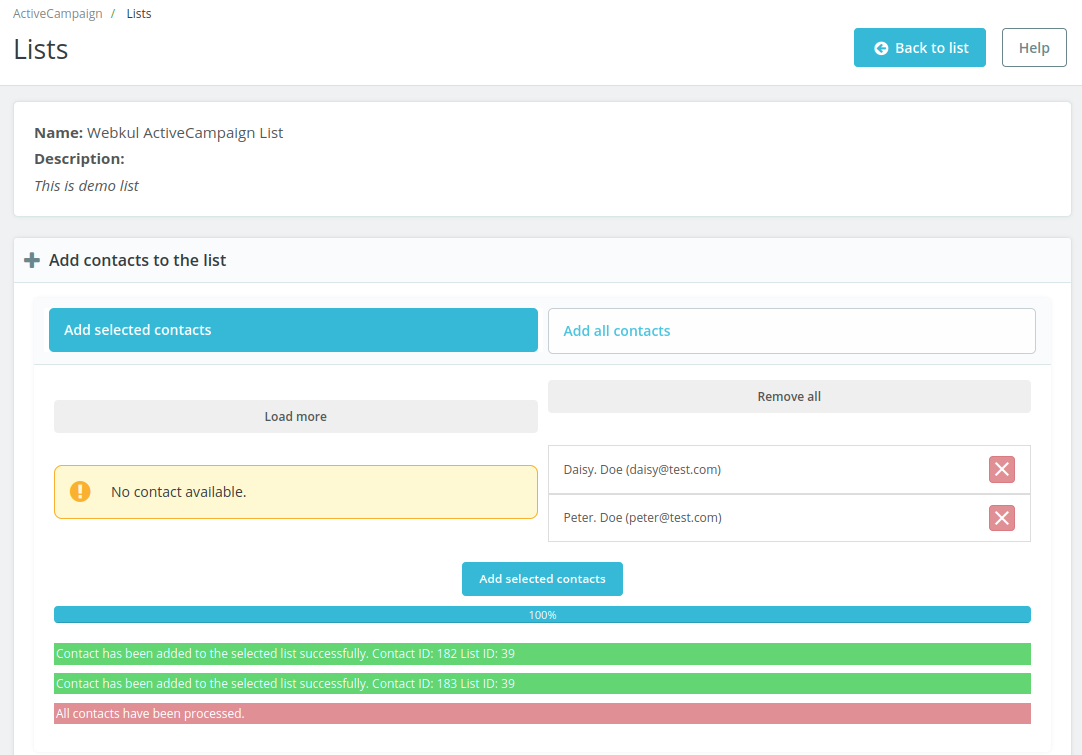
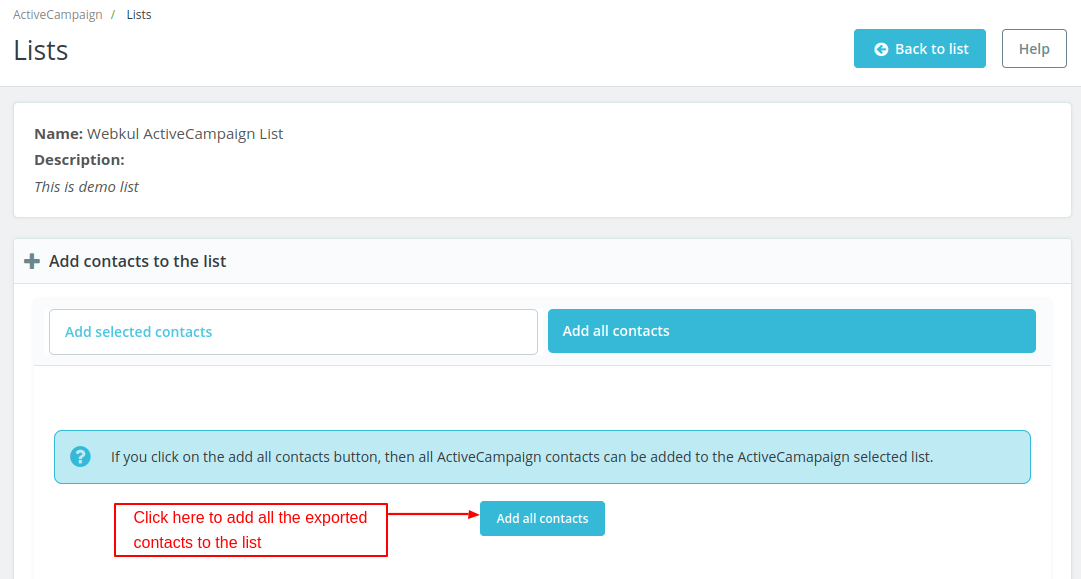
On clicking ‘Add all contacts’ button, the contacts that have been exported will add to the list.
The admin can view contacts added to the list by clicking on ‘View contacts’ button.
Messages
Under Messages, the admin can add messages that will be send in email to customers.

Click on ‘Add Message’ button.
The admin can add a message by specifying message subject and description.
Text entered in message subject field will display in campaign mail subject.

Once added, the admin can view it under Messages.

Click on ‘View’ button to see the message details.
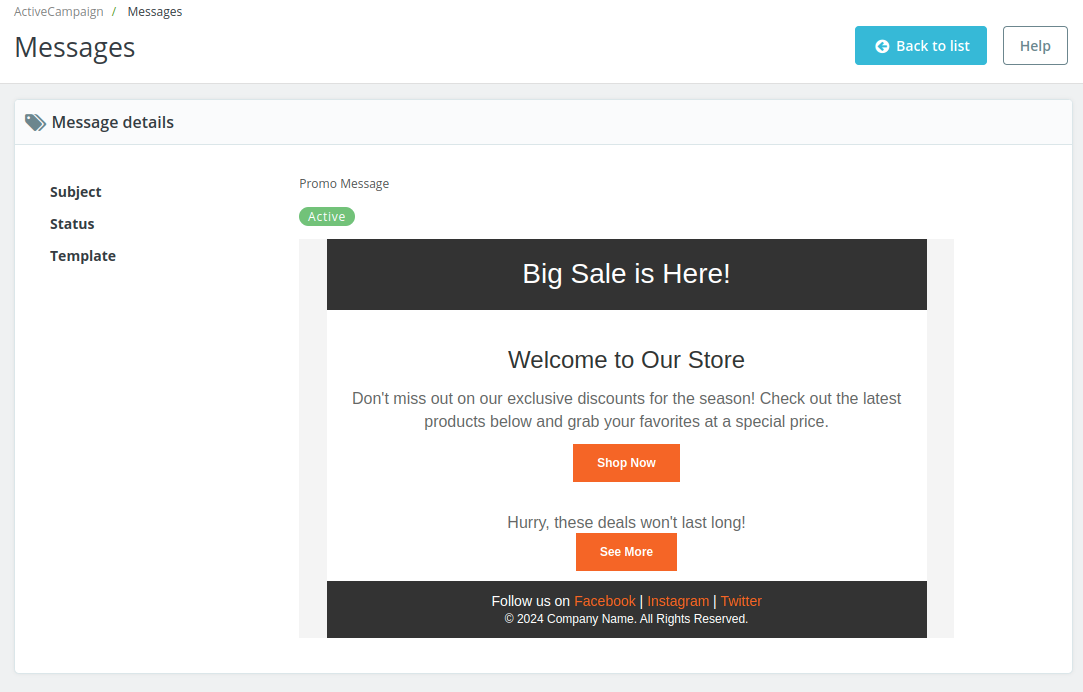
The admin can edit, duplicate, or delete the message.
On clicking the duplicate button, a popup appears on the page asking for confirmation.


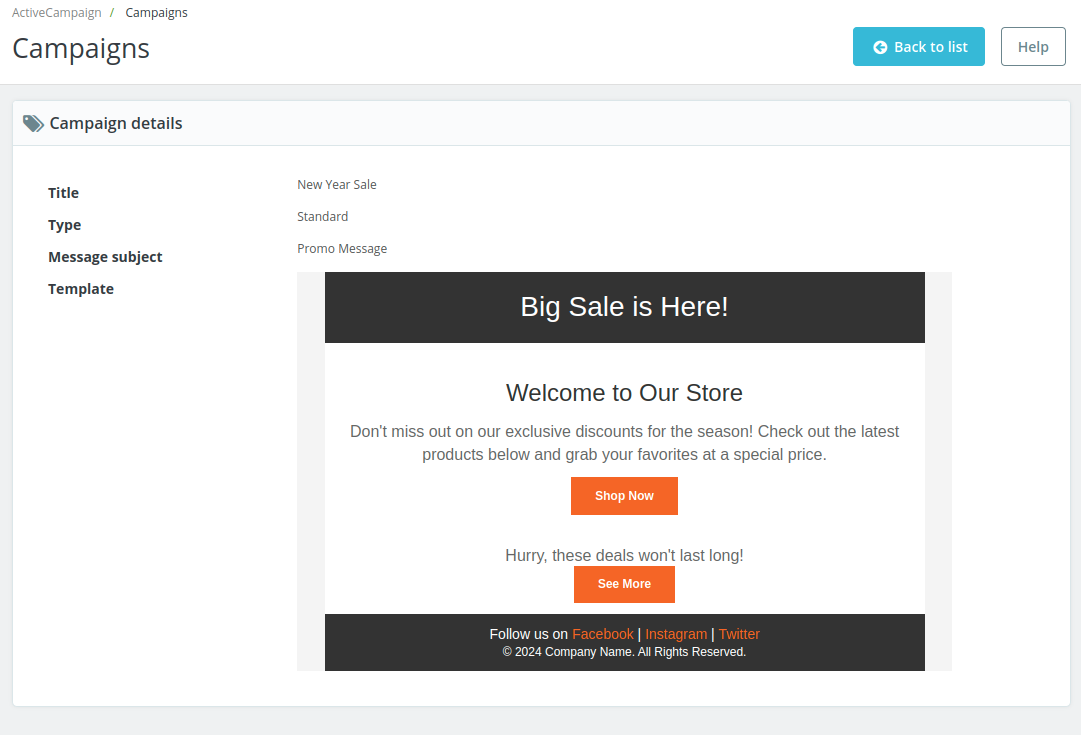
Campaigns
Under Campaigns, the admin can create campaigns to send messages to the contacts.

The admin can add campaign by clicking on ‘Create campaign’ button. Also, the admin can fetch the campaigns created on ActiveCampaign by clicking on ‘Get/Refresh campaign’ button.

On clicking the create campaign button, a form appears on the page with following options:
- Title: Enter campaign title here.
- Type: Select the campign type as ‘Standard’ or ‘Scheduled’.
- Select Lists: Here, the admin needs to select the lists whose contacts will receive campaign email.
- Select a message: Here, the admin needs to select a message template that will be sent to the contacts selected for the campaign.
Campaign Type
Admin can create two types of campaigns:
- Standard
- Scheduled
If the admin wants to send campaign email immediately, then he can choose standard campaign type.
And, if the admin wants to send campaign emails at a fixed date and time, then he can choose scheduled campaign type.

Once added, the admin can view it under ‘Campaigns’.

To see the campaign details, click on the ‘View’ button.
Click on ‘View report’ button to view the performance report of a campaign.

Abandoned Cart
Under this tab, the admin can view a list of customers who have abandoned their carts.

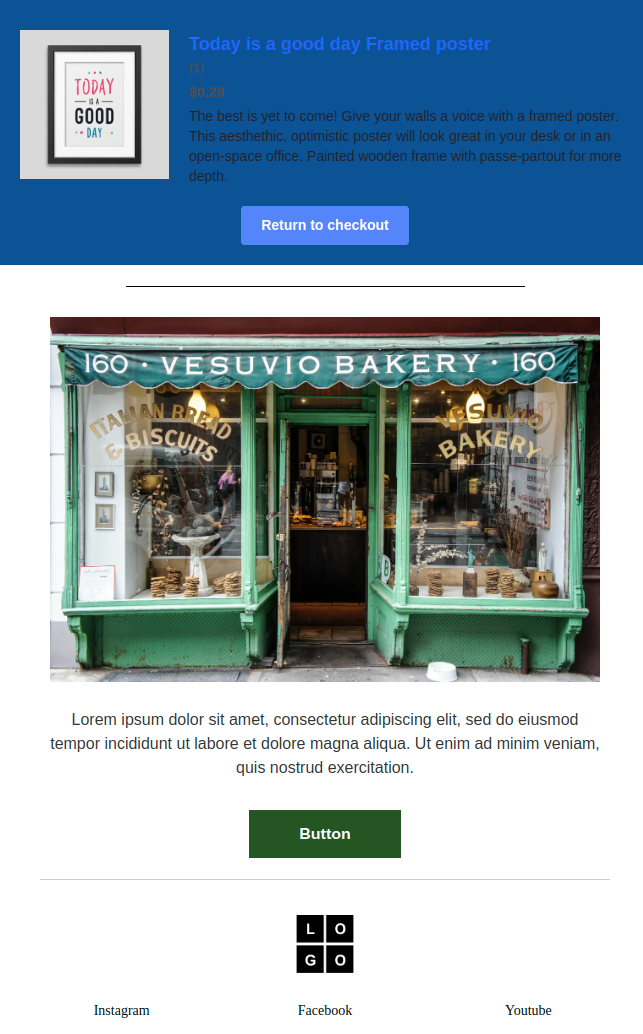
Abandoned cart email screenshot
Support
For any kind of technical assistance or query, please raise a ticket at http://webkul.uvdesk.com or send us a mail at [email protected]
Also, please explore our PrestaShop development services & vast range of featureful PrestaShop Addons.
Current Product Version - 1.0.0
Supported Framework Version - 8.x.x, 1.7.x.x

Be the first to comment.