Introduction
Odoo Web Calendar Export (iCal) enables you to export your Odoo events in iCal format, making it easy to sync with Google, Apple, and Outlook calendars.
This ensures your schedules are always connected and accessible across platforms.
Odoo Web Calendar Export (iCal) keeps everything up to date by reflecting changes made in Odoo directly in your external calendars, helping you stay accurate and on time.
With this updated module option, you can generate a public shareable URL for your events.
This makes it simple to share schedules with others or directly add the link to calendars of your choice for syncing events.
Features
- Odoo Web Calendar Export (iCal) converts events into a universal (.ics) format.
- Seamlessly sync Odoo with Google, Apple, and Outlook calendars.
- Export events including title, date, time, and detailed description.
- Import external events into Odoo easily by uploading ICS files.
- Keep all schedules updated automatically with real-time calendar syncing.
- Share Odoo calendars instantly using a unique public calendar link.
- Manage recurring events smoothly across every connected external calendar.
- Centralize multiple schedules into one simple, easy-to-use calendar.
- Stay organized and never miss tasks, deadlines, or meetings.
Installation
- Once you purchase Odoo Web Calendar Export (iCal) module from the Webkul store, you will receive a link to download the module’s zip file.
- Extract the file on your system after the download finishes. As a result, you will be able to see a folder named- ‘wk_export_web_cal’
- Copy and paste this folder inside your Odoo Add-Ons path.
- Now, open Odoo App and click on the Settings menu. Here, click on Activate the Developer Mode.
- Then, open the Apps menu and click on ‘Update Modules List.’
- In the search bar, remove all the filters and search ‘wk_export_web_cal’
- You will be able to see the module in the search results. Click on ‘Install’ to install it.
Workflow
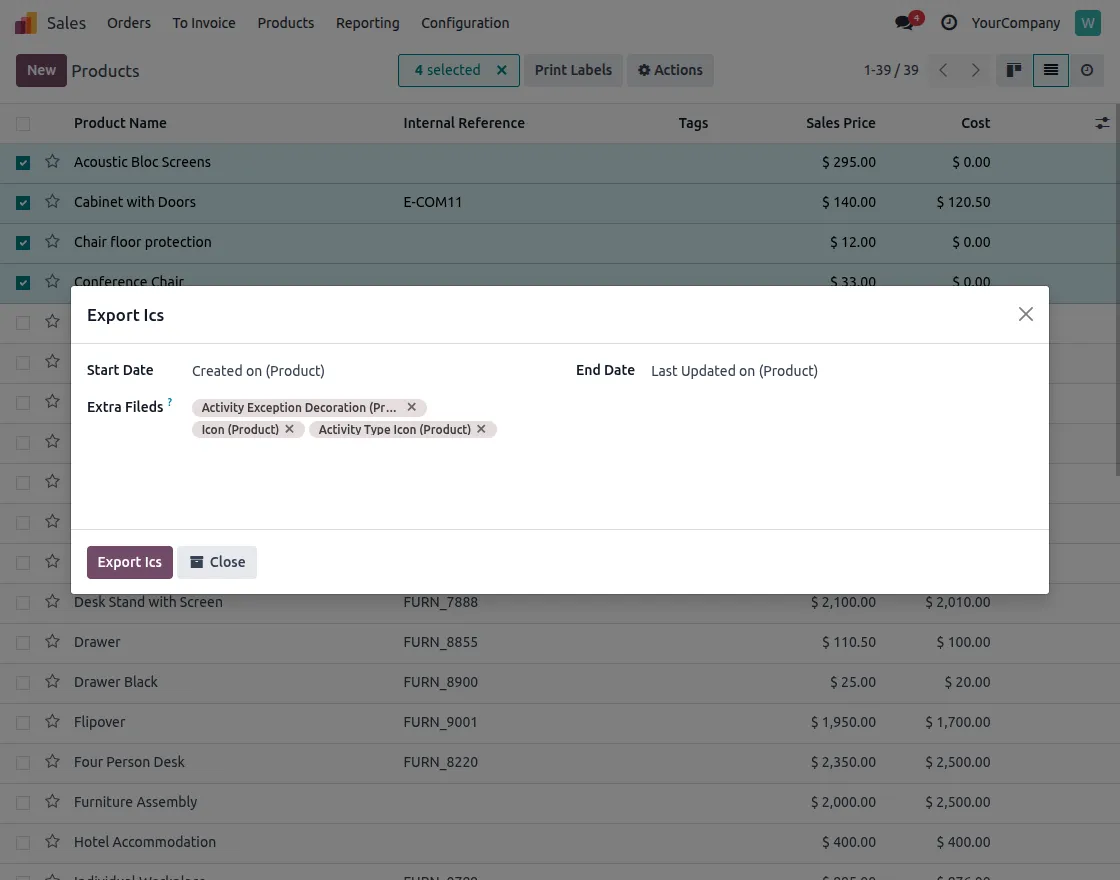
- After installing Odoo Web Calendar Export (iCal) module, select the desired product from the list and export it as an .ics file.

2. Next, export ICS information by filling in details such as start date, end date, and additional fields.
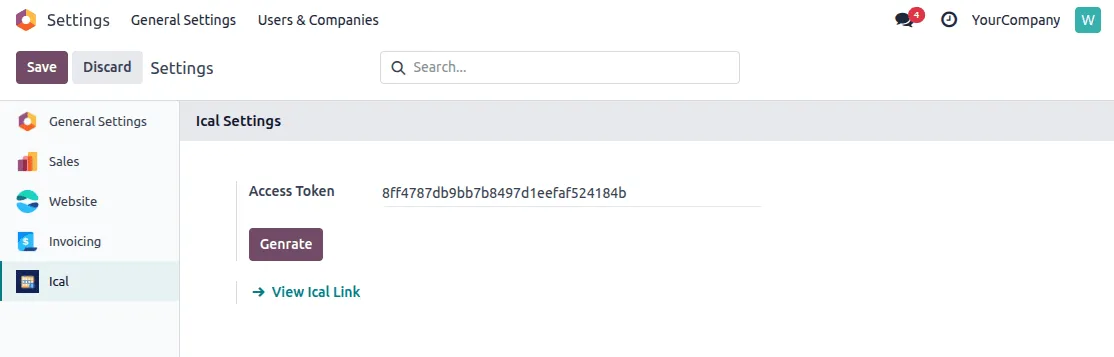
3. Open the ical module in settings, and there you will see an option to generate an access token.
Click on the Generate button for the access token. Only after generating this, you can move further for the public URL by clicking on the view iCal link button.
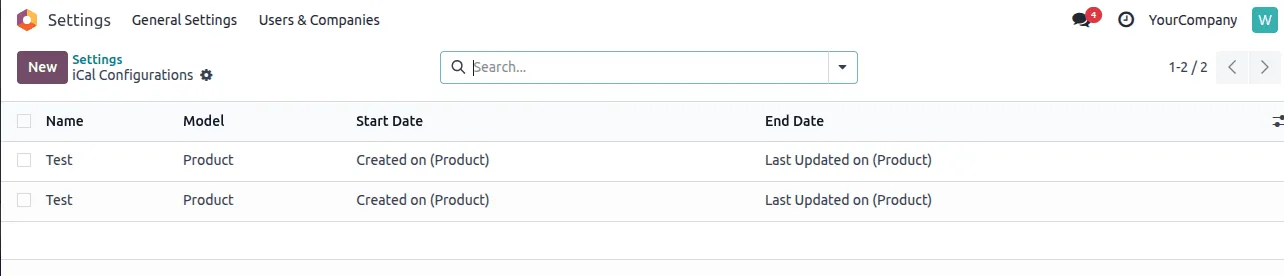
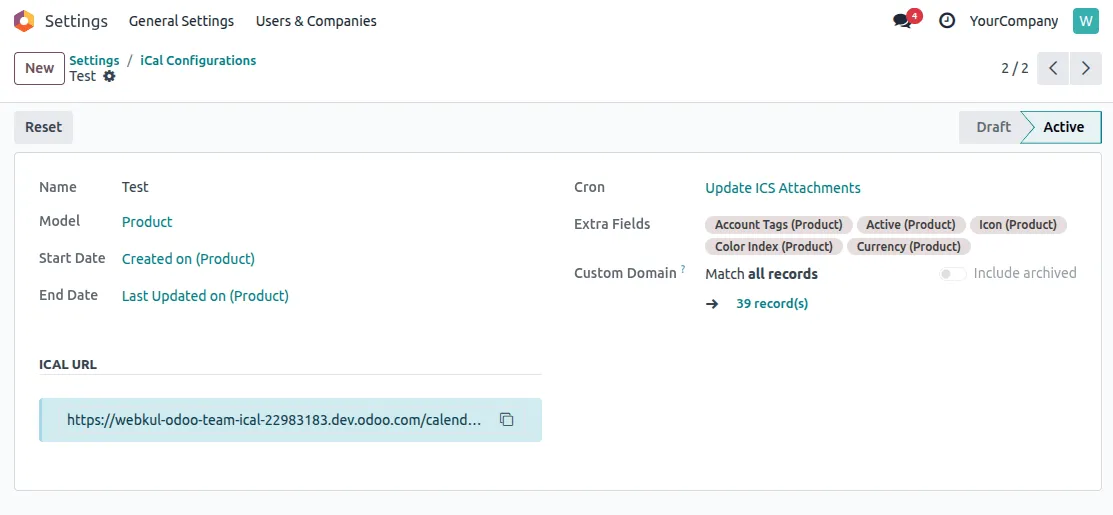
4. You can configure a new URL by clicking on the New button.
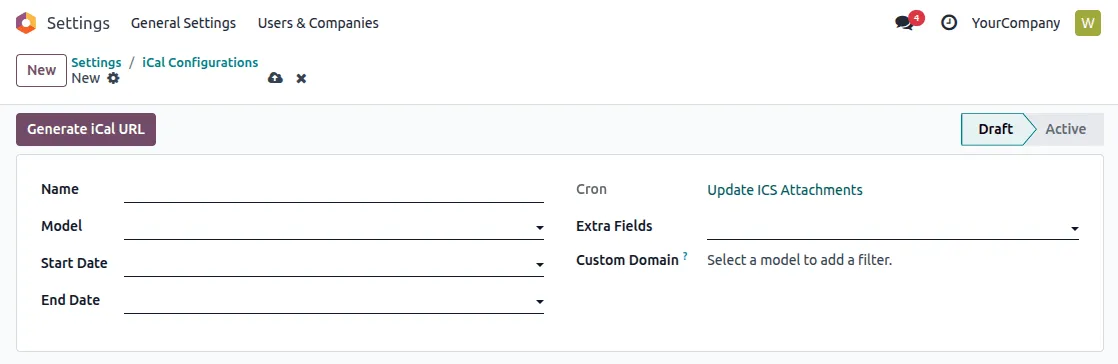
5. Different Fields need to be configured here before the public URL is generated, like:
- 1. Model: Which category is your data that needs to be configured.
- 2. Start Date: The start date from which you need this data list.
- 3. End Date: The end date when this data is no longer updated.
- 4. Extra Fields: The fields in which this data will lie.
6. Now, you can copy this iCal URL to share events and data of your choice.
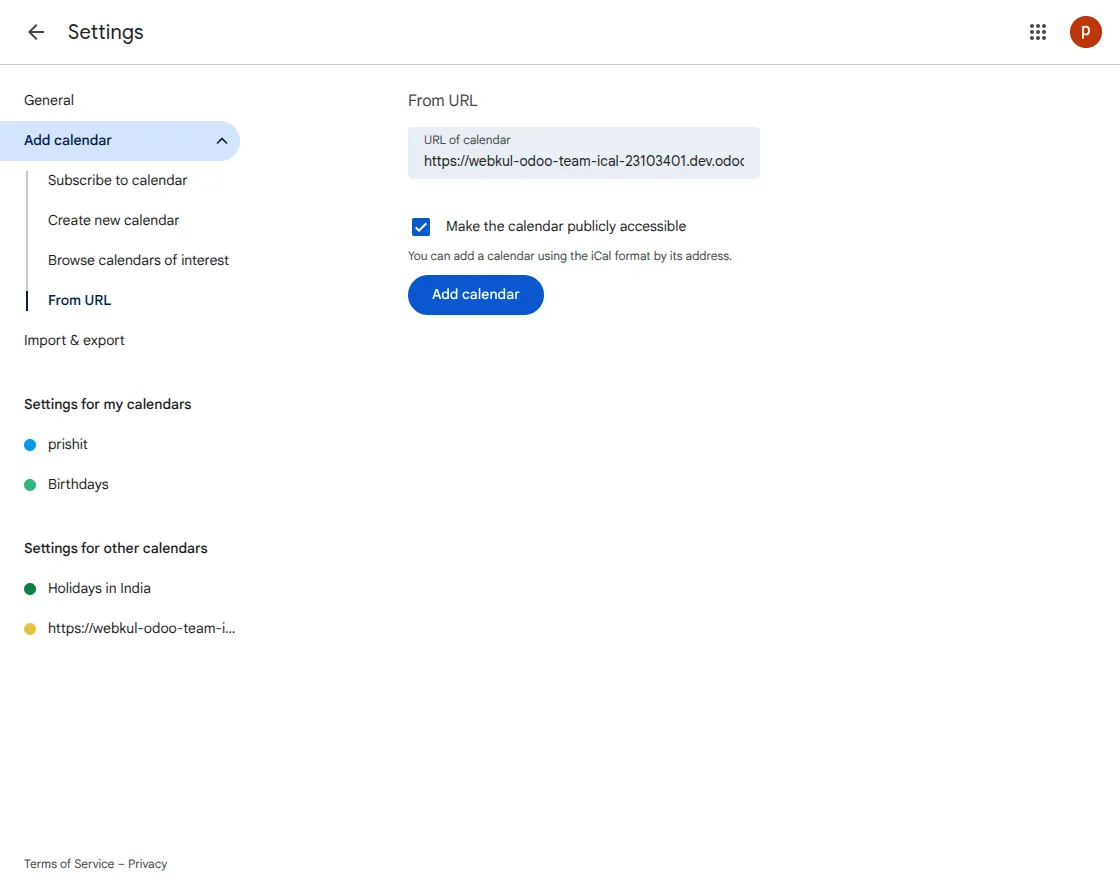
7. Open any calendar settings of your choice to add your URL and see your events or data.
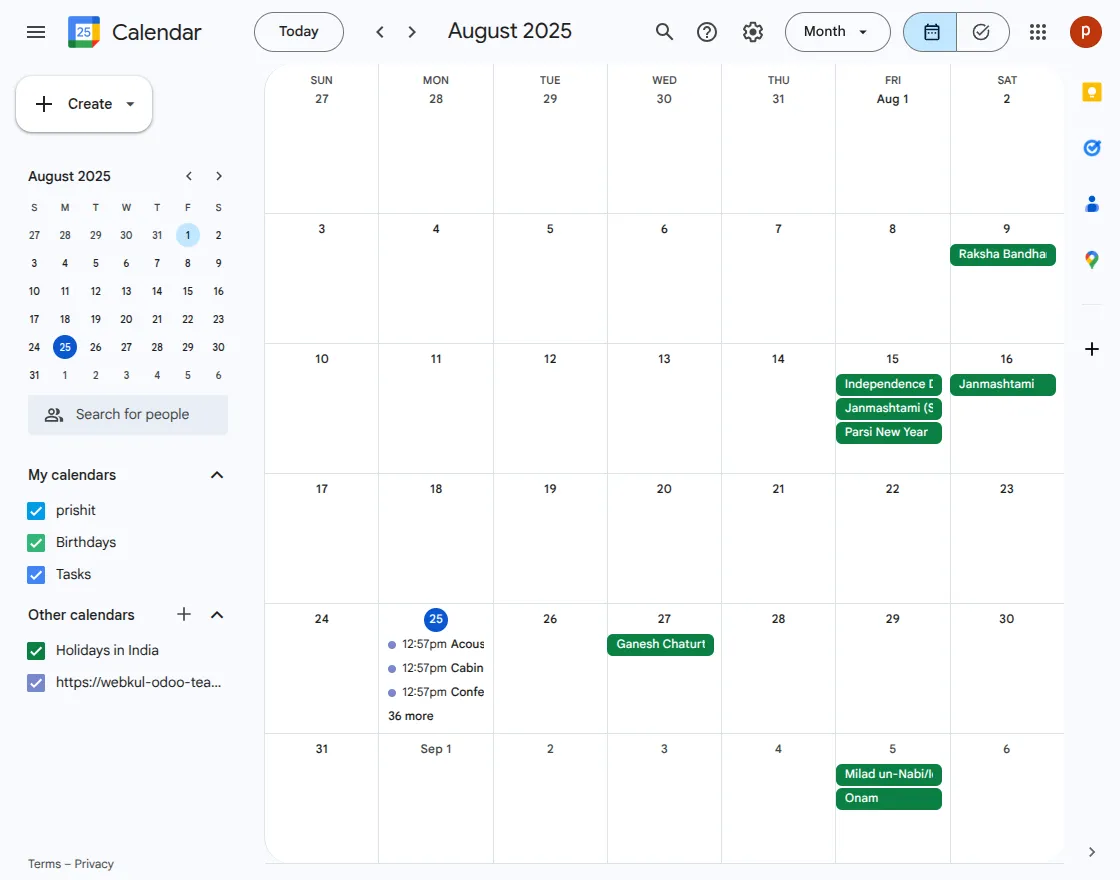
9. You can add your copied URL in calendar settings to see your events on that particular date.
9. You can see your events or data on that particular selected date

Need Help?
Hope you find the guide helpful! Please feel free to share your feedback in the comments below.
If you still have any issues/queries regarding the same, please raise a ticket at the UV Desk.
I hope this helps. In case of any further queries, contact us at our support mail.
Thanks for paying attention!!
Current Product Version - 1.0.0
Supported Framework Version - V18, V17, V16

Be the first to comment.