INTRODUCTION
Odoo Quickbooks Online Connector: easily manage your accounting!!
Accounting is vital for businesses, enabling effective management of incoming and outgoing transactions to monitor profits and losses.
QuickBooks Online, a leading accounting solution globally, experienced significant growth in FY’19, while Odoo offers easy, managed backend data.
On the other hand, Odoo is an ideal software for backend data management, free from complexities.
The Odoo QuickBooks Online Connector eases data import and export for efficient accounting management by integrating with the QuickBooks Online application.
FEATURES
- Easily connect Odoo with QuickBooks Online.
- Schedule cron runs to import data at specific times.
- Import partners, vendors, products, purchase orders, sale orders, invoices, and payments via cron.
- Shared Import Button for convenient data import.
- Set a maximum limit of 2000 for data import.
- Easy to use export function from QuickBooks Online.
- Users can perform manual mapping of payment terms and payment methods.
- Effortlessly manage accounting data such as QuickBooks tax codes, payment methods, and payment terms.
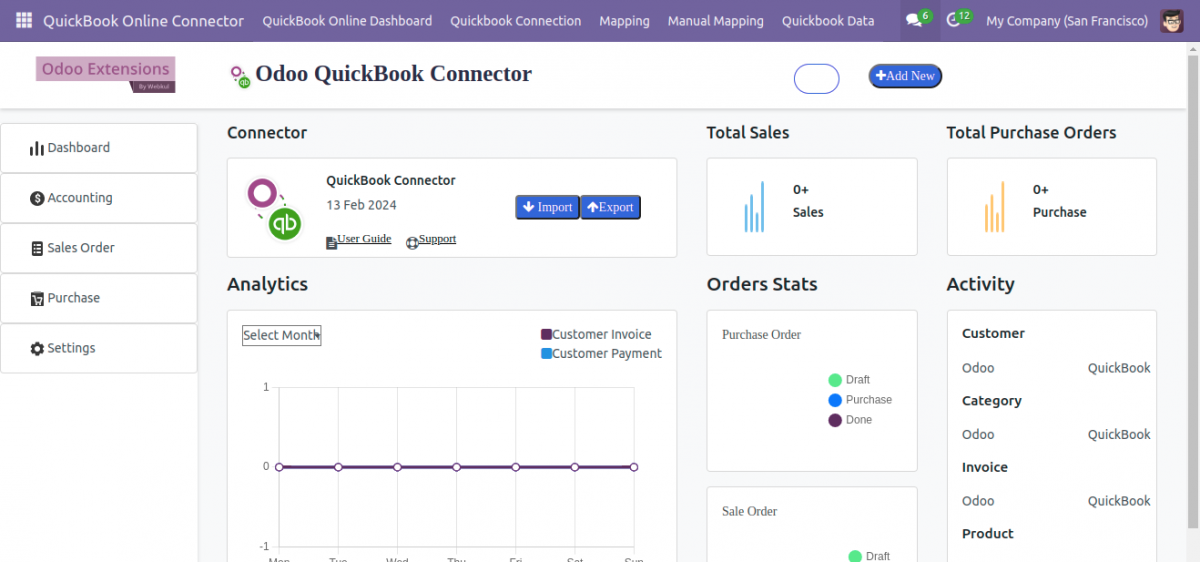
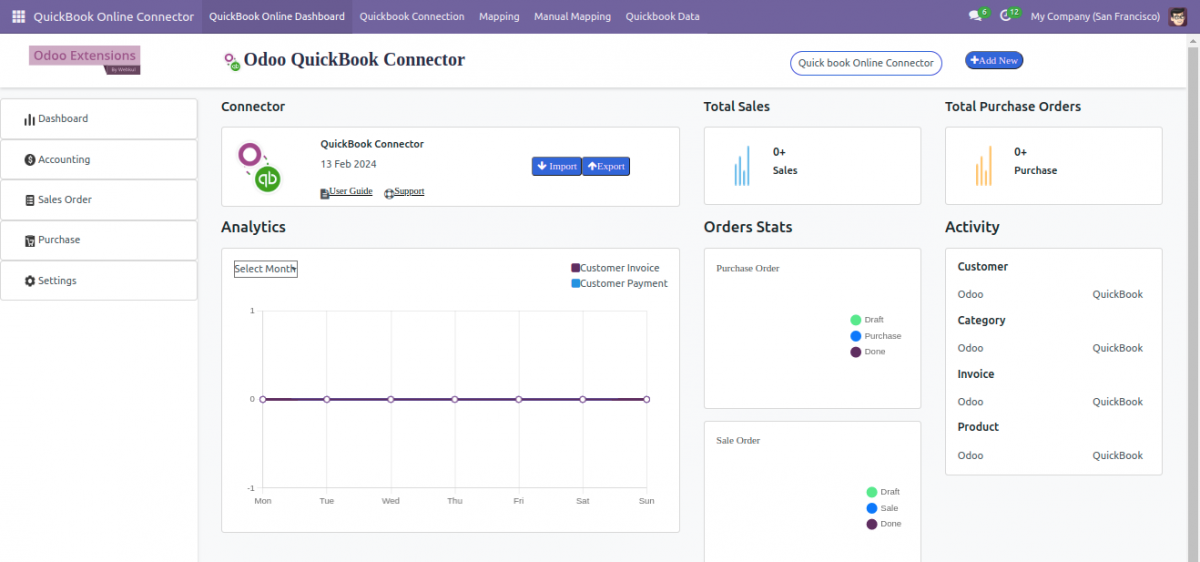
- Track all connected QuickBooks Online instances from the dashboard.
- Monitor data through line graphs, donut charts, progress bars, bar graphs, and data cards.
INSTALLATION
- Once you purchase the App from the Webkul store, you will receive the link to download the zip file of the module.
- Extract the file on your system after the download finishes. You will see a folder named- ‘quickbook_online_connector..’
- Copy and paste this folder inside your Odoo Add-Ons path.
- Now, open the Odoo App and click on the Settings menu.
- Click on Activate the Developer Mode.
- Then, open the Apps menu and click ‘Update Modules List.’
- In the search bar, remove all the filters and search ‘quickbook_online_connector.’
- You will be able to see the module in the search results. Click on ‘Install’ to install it.
Before moving further, explore our Odoo development services & an extensive range of quality Odoo Apps.
WORKFLOW
- After installation, Navigate to the QuickBooks online connector.
2. Here, you will see the Odoo Quickbooks Online Connector Dashboard. Click the ‘Add New‘ button on the top right side to configure the new Quickbooks Online Connection.
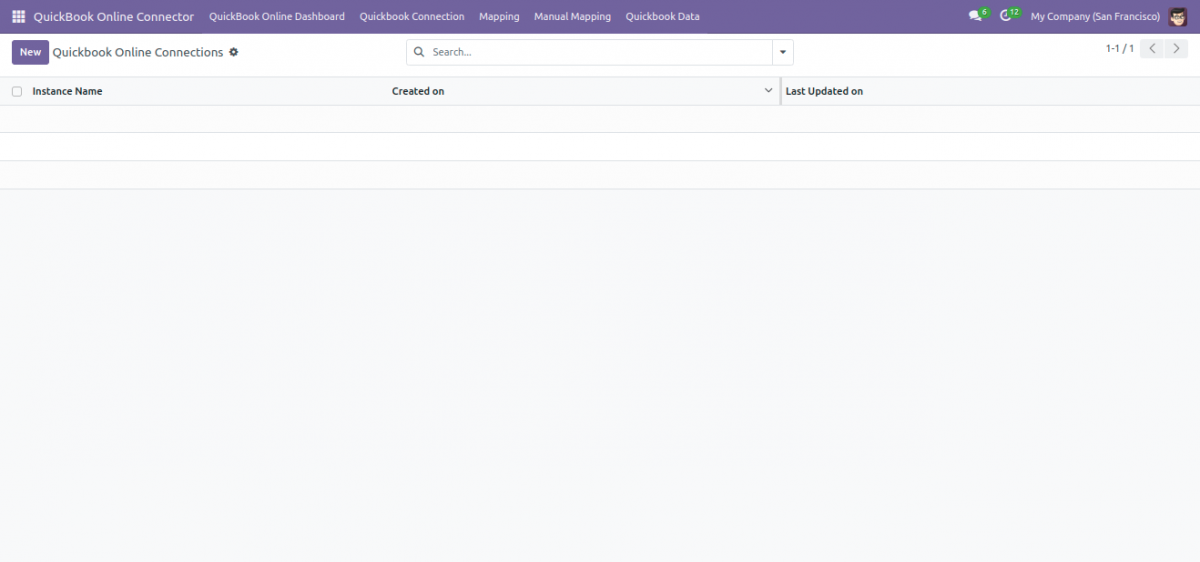
3. Now Click on the New button for a new connection.
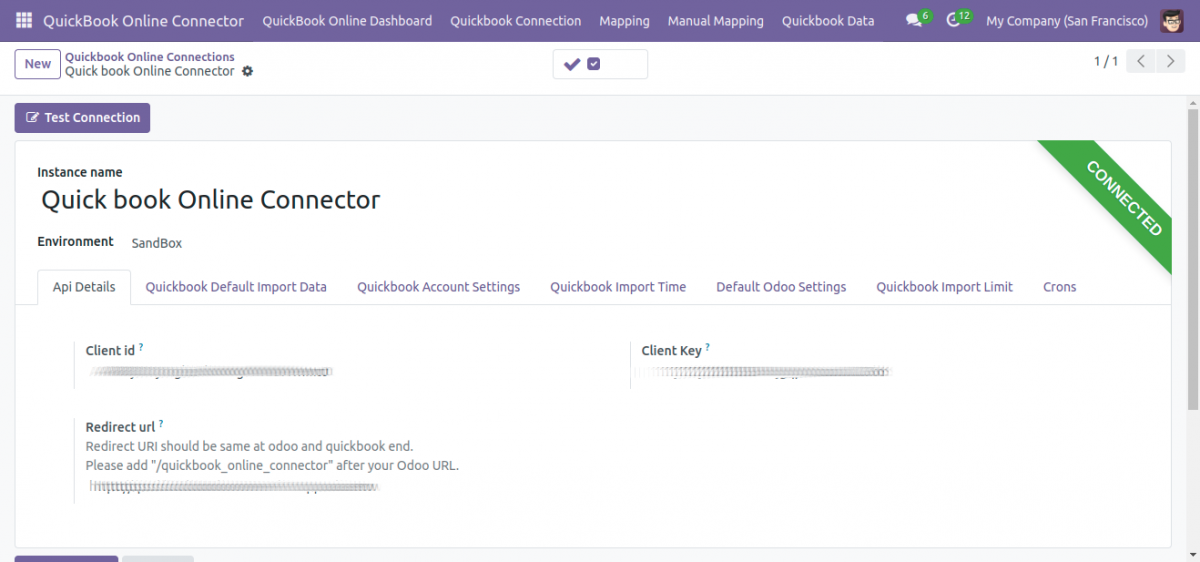
- Now, you can see a form where you need to select the environment between the Production and Sandbox.
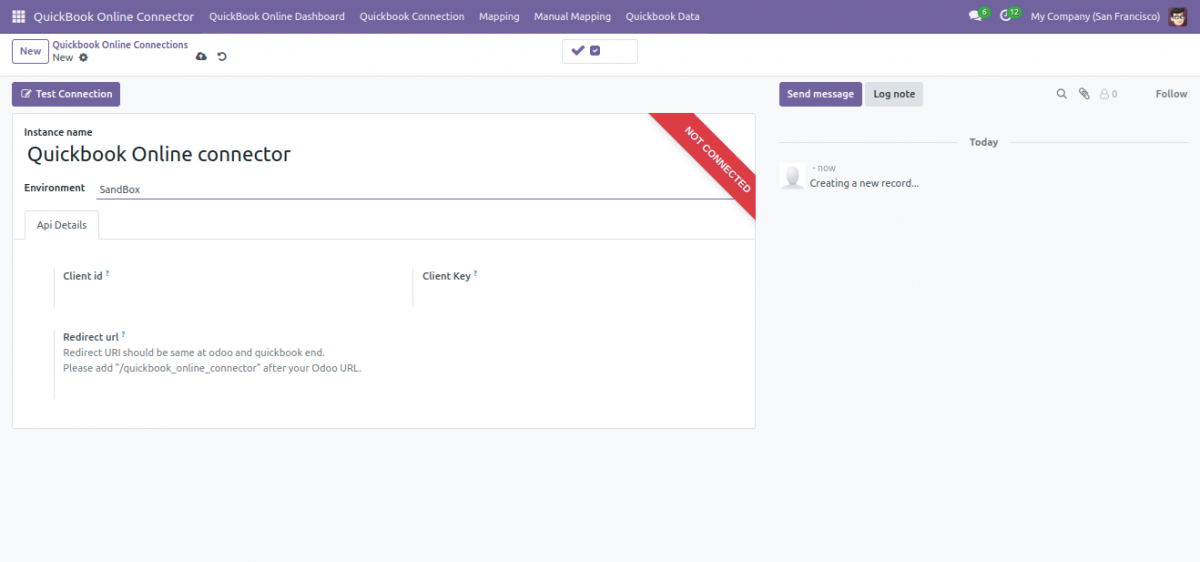
- Add the Client ID, Client key, and the redirect URL that you’ll get from the Quickbooks Online Website;
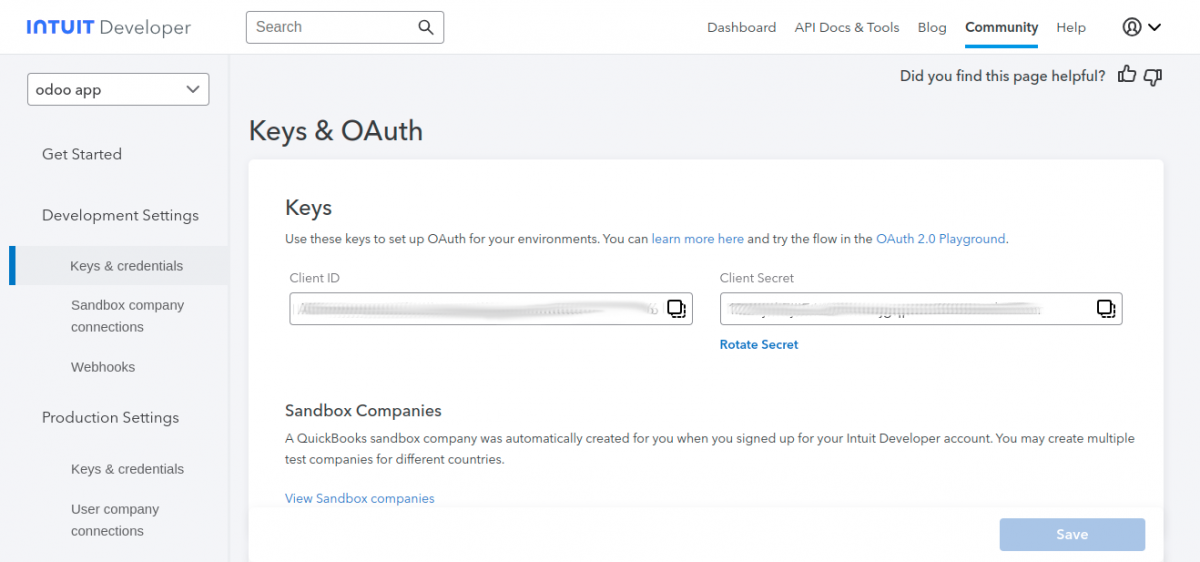
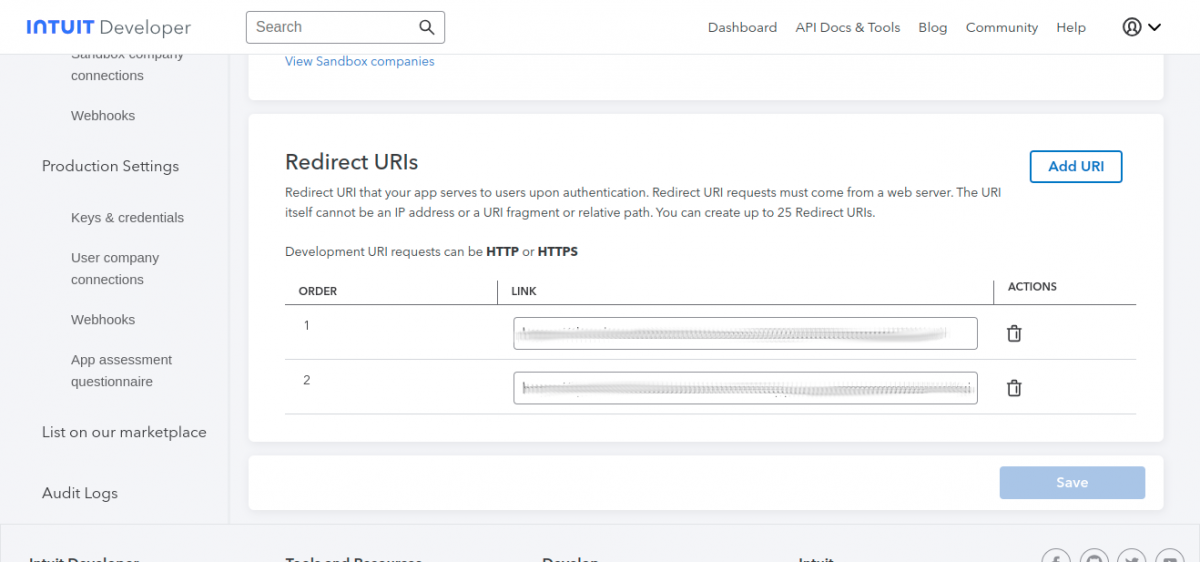
- Here, You need to add the Redirect URL from the Odoo instance.
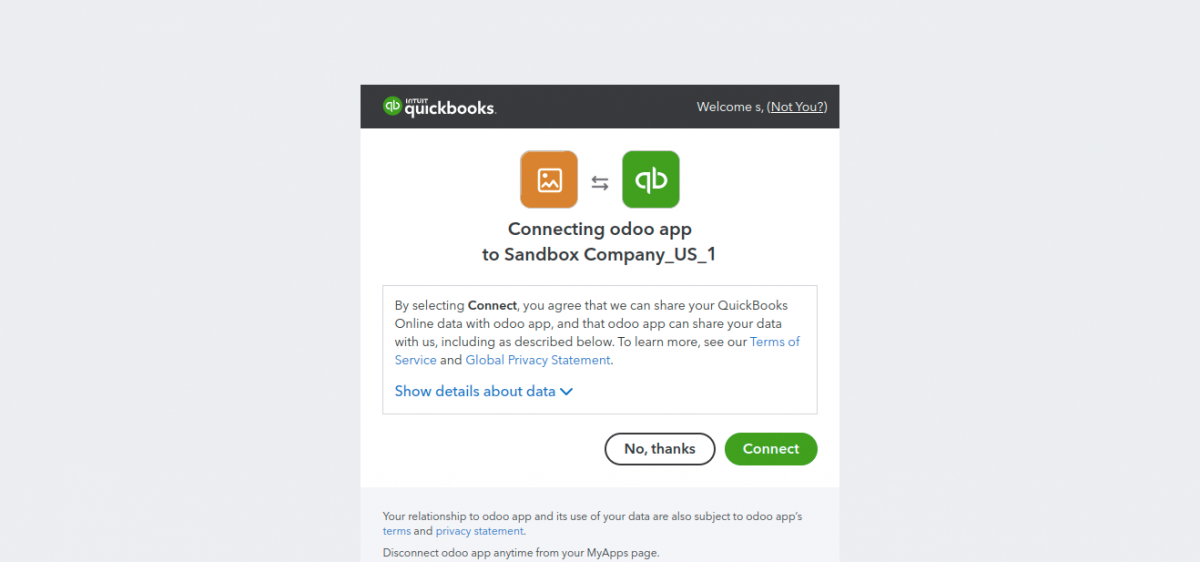
- Once done, click on the test connection button. It will ask to connect the odoo app to the sandbox company, Click Connect.
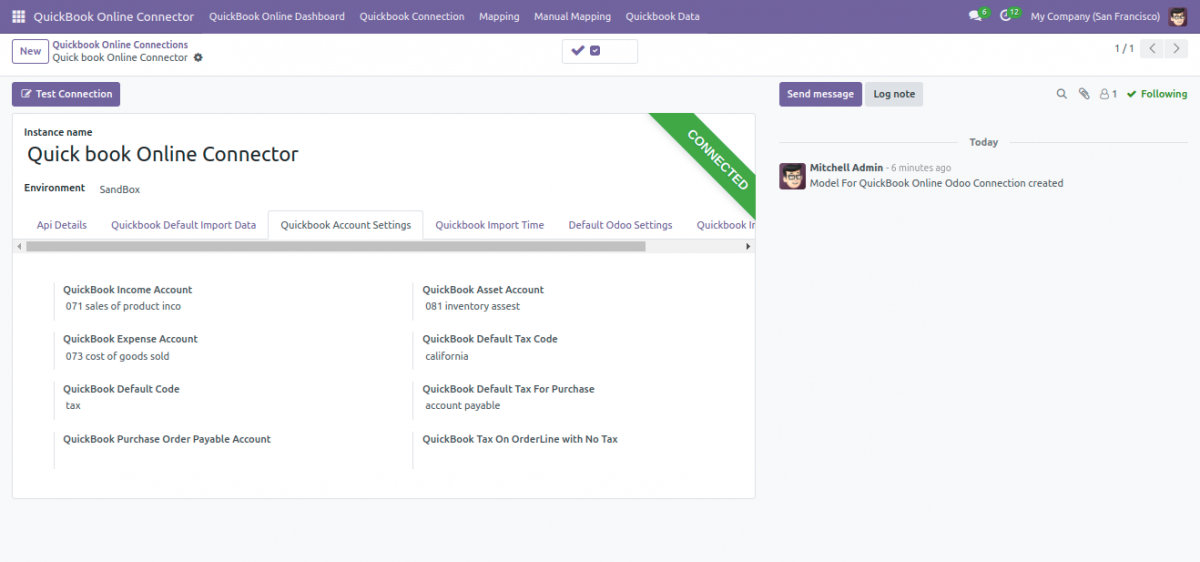
- After a successful connection, Quickbook Extra Settings will be available i.e., Quickbook Account Settings, Quickbook Import Time, Default Odoo Settings, Quickbook Import Limit, and Quickbook Default Import Data.
- Configure Quickbooks settings as per your requirements
| Tab Name | Settings Explained |
| Quickbook Account Settings | Configure Quickbook income/expense/asset account, Quickbook default tax code, Quickbook purchase order payable account, and Quickbook default code. These data will help while exporting data from Odoo to Quickbooks Online. |
| Quickbooks Import Time | Configure Quickbook’s last import date for the customer, order, category, etc. Otherwise, you can leave these fields blank. |
| Default Odoo Settings | Configure the category, pricelist, salesperson, warehouse, sales team, and discount product for orders. It will help you to import data from Quickbook Online to Odoo. |
| Quickbooks Import Limit | limits the data import from Quickbooks online to Odoo via cron. Moreover, you can select a limit between 1 to 2000. |
| Quickbook Default Import Data | Here, you will get four buttons. Import QuickBooks sales tax.Import QuickBooks tax codes.Import QuickBooks payment terms.Import QuickBooks payment method. These buttons will help you to import these data from Quickbooks Online to Odoo. |
Import from Quickbooks Online to Odoo
- Now, go to the dashboard; from the top section, you can see the import and export buttons.
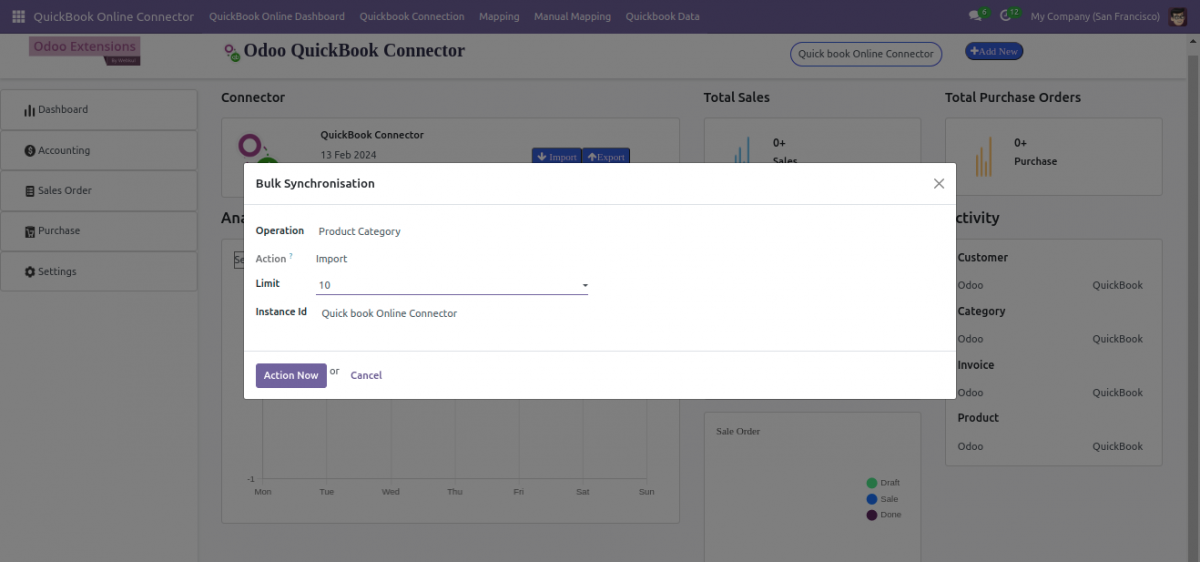
- On selecting the import button, you can see the three options i.e. Operation, Limit, and Instance.
Operation: Set the data type like product, partner/vendor, sale/purchase order, account, etc that you want to import.
Limit: Set the maximum limit of the data you can import at a time. Its default value is 1 to 2000.
Instance: Select the Quickbooks Online Instance from which you want to import the data.
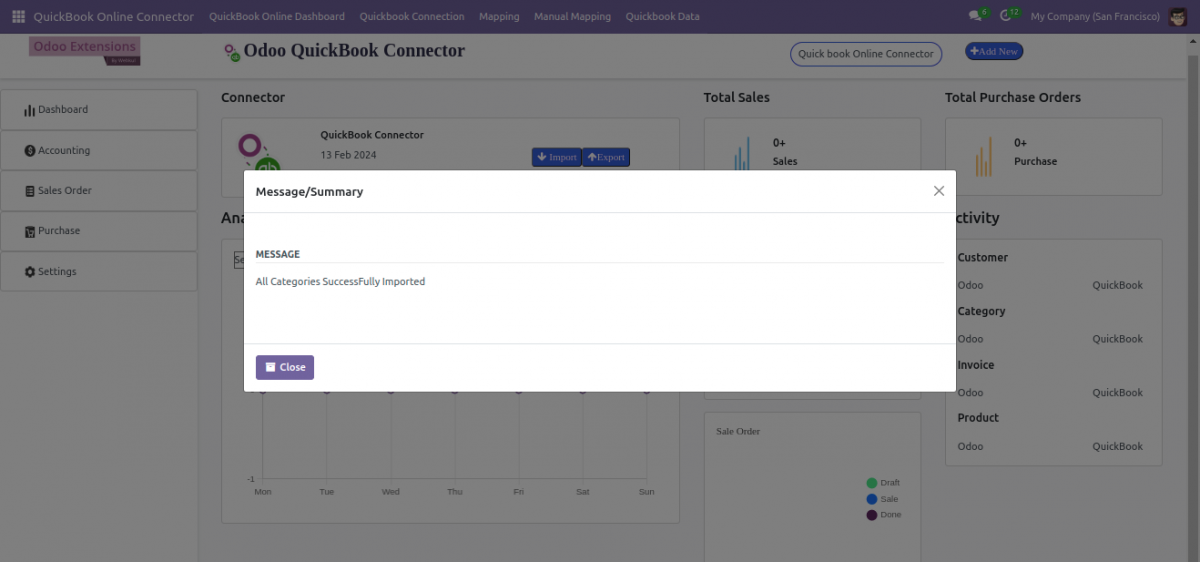
- Click ‘Action Now‘ to import data from Quickbooks Online to Odoo. In case there is already a mapping in Odoo for data. Then, it will update the existing one; otherwise, it will create a new one.
Export from Quickbooks Online to Odoo
- On selecting the Export button, you can see the three options i.e., Operation, Limit, and Instance.
Operation: Set the data type like product, partner/vendor, sale/purchase order, account, etc that you want to import.
Action: You need to select between the options Export and Update.
Limit: Set the maximum limit of the data you can import at a time. Its default value is 1 to 2000.
Instance: Select the Quickbooks Online Instance from which you want to export the data.
- Click ‘Action Now ‘ to export data from Odoo to Quickbooks Online. It will export the data that is not mapped and will update the mapped data.

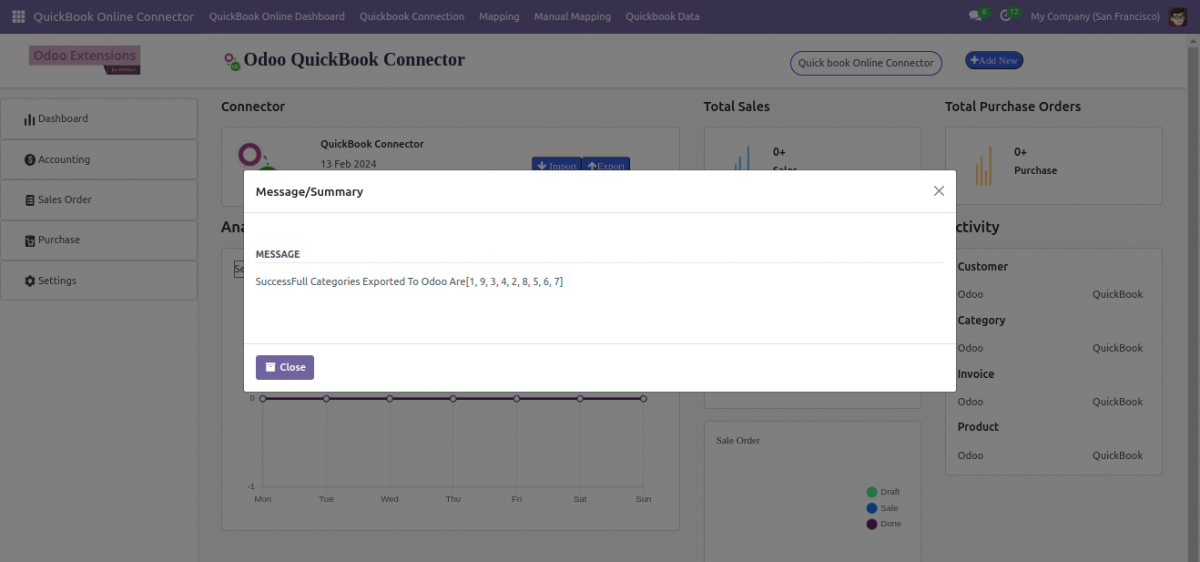
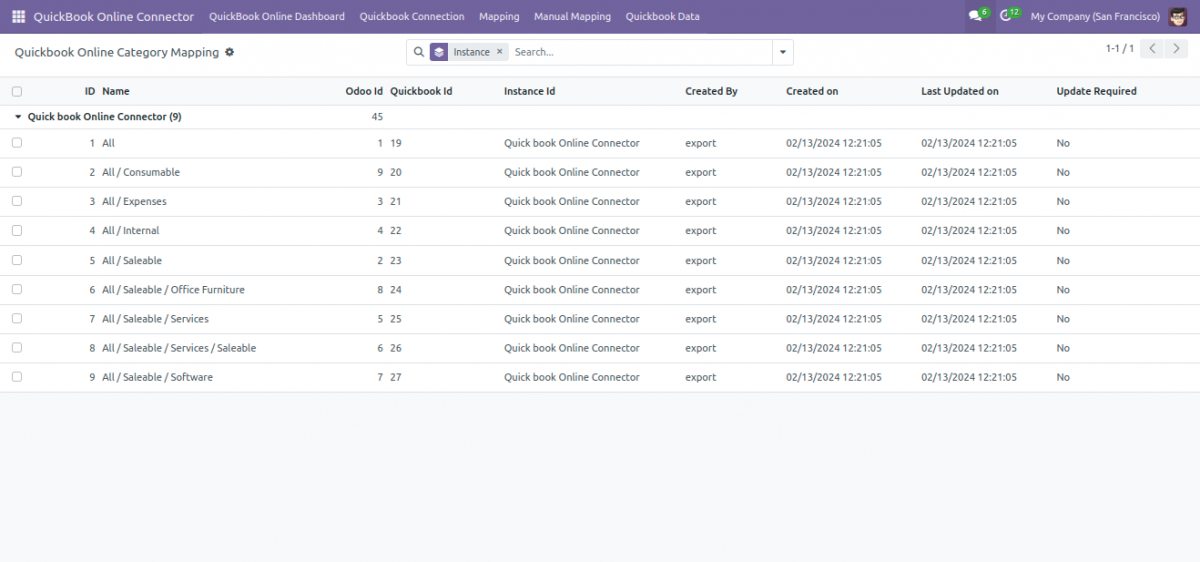
- Go to the Product Category Mapping data from the Mapping tab.
- Go to the tax Mapping data from the Mapping tab.

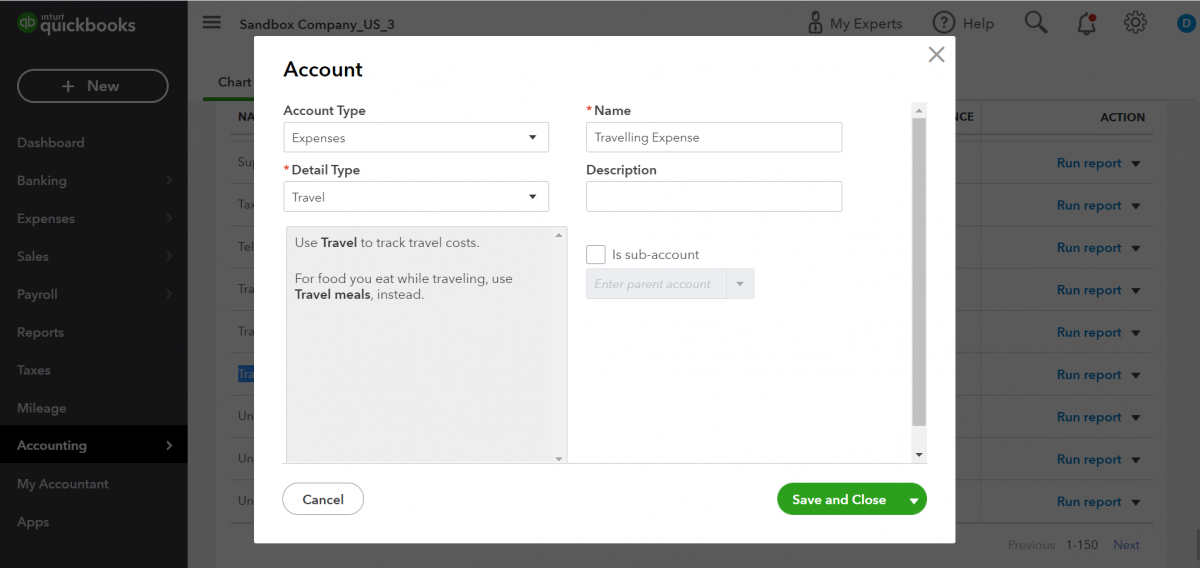
- You can check the Layout of the Account data in Quickbooks.
- You can check the Layout of the Product Categories data in Quickbooks

NEED HELP?
We hope you find the guide helpful! Please feel free to share your feedback in the comments below.
If you still have any issues/queries regarding the same, please raise a ticket at the UV Desk.
For any doubt, contact us at our support mail.
Thanks for paying attention!!
Current Product Version - 1.0.1
Supported Framework Version - Odoo 17,16,15

Be the first to comment.