Introduction
Odoo Qlik Connector is a powerful integration tool that connects your Odoo ERP system with Qlik Cloud’s advanced business intelligence platform.
With this connector, you can seamlessly sync your business data from Odoo to Qlik, enabling dynamic dashboards, interactive reports, and in-depth data analysis.
By bridging Odoo’s robust business management features with Qlik’s visual analytics, the Odoo Qlik Connector helps you uncover insights, track performance, and make confident, data-driven decisions.
Features
- Synchronisation of Odoo data with Qlik dashboards
- Easy-to-configure connection setup with secure authentication
- Visualize complex ERP data with interactive Qlik reports by using the syncing feature
- Supports the sync of custom fields and modules from Odoo to Qlik
- Create spaces on Odoo and export to Qlik Cloud
- Import existing spaces from Qlik Cloud to Odoo
- Create data files on Odoo and export to Qlik Cloud
- Define data models for any Odoo model and sync data
- Add filters in data models to filter out unwanted data
Installation
- Once you purchase the App from Webkul store, you will receive a link to download module’s zip file.
- Extract the file on your system after download finishes. As a result, you will be able to see a folder named- ‘odoo_qlik_connector.
- Copy and paste this folder inside your Odoo Add-Ons path.
- Now, open Odoo App and click on the Settings menu. Here, click on Activate Developer Mode.
- Then, open Apps menu and click on ‘Update Modules List.’
- In the search bar, remove all the filters and search ‘odoo_qlik_connector’
- You will be able to see module in the search results. Click on ‘Install’ to install it.
Workflow
Connection Steps
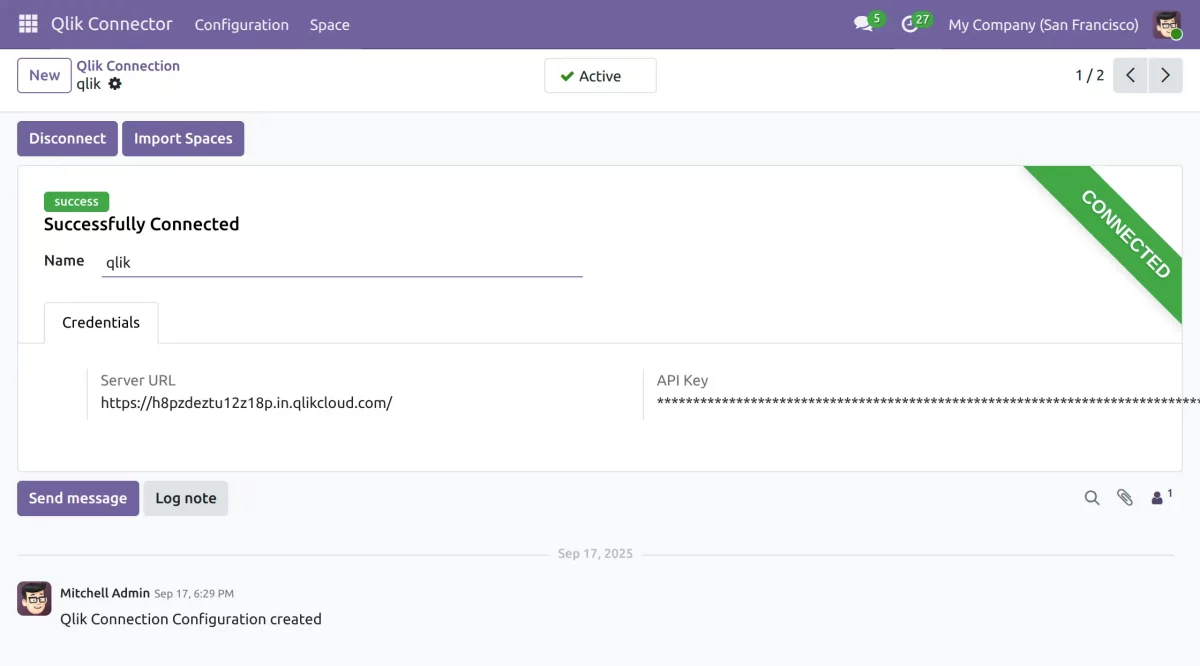
- After installation, go to Qlik Connect in your Odoo dashboard.
2. Click on Configuration and select Connections, and click New Connection.

3. Enter a name following your naming connection. Add the Qlik Server URL and API Key (you will get this key from your Qlik account).
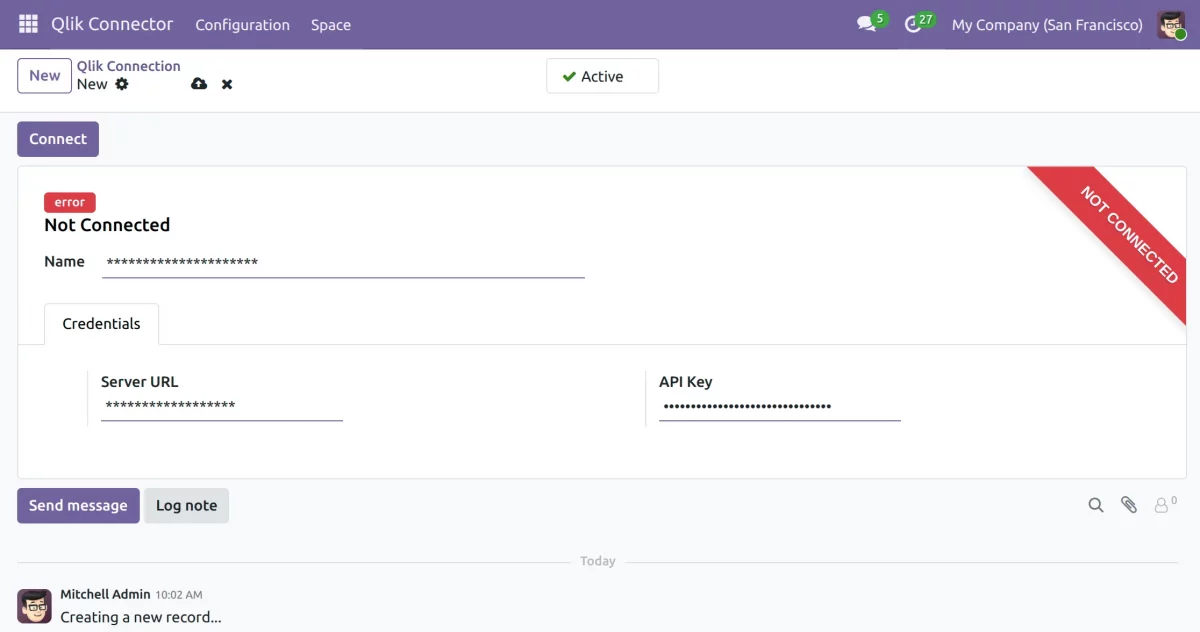
4. Click on Test Connection to verify the setup.
Export steps: Creating a New Space
- Navigate to Spaces in your Qlik Connect dashboard and click Create New Space to set up a space.


2. Creating a Data File Inside a Space
Enter the following details:-
Space Type: Select the type: Shared, Managed, or Data space type
Name: Provide name to your space
Short description: Provide the short description to you space
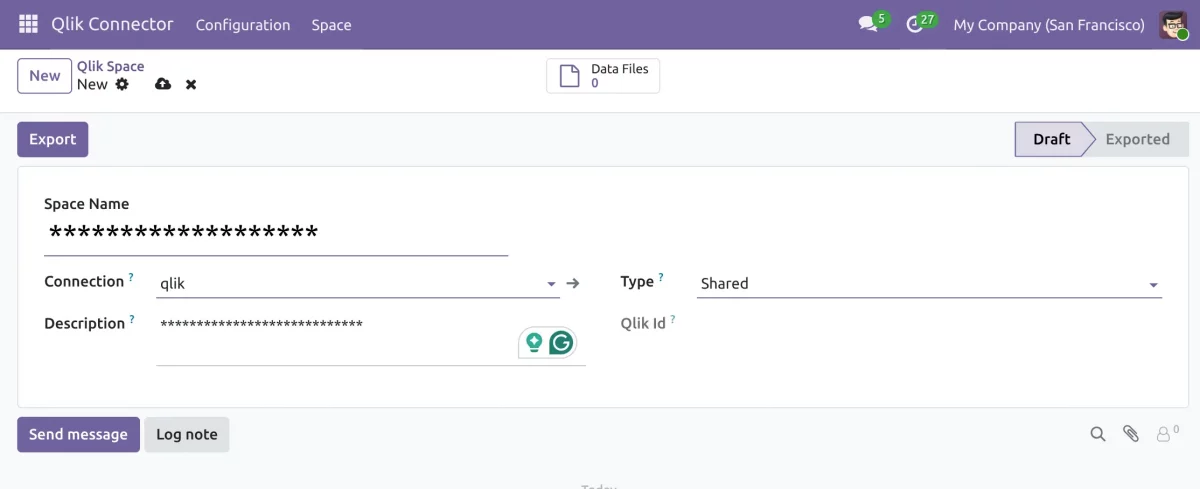
3. Click Export to send the space to Qlik Cloud and confirm the Qlik ID is fetched after the space export.

4. Open a created space to add new data files. And click Create Data File inside the selected Qlik space.

5. Enter a name for this new data file and Select which space will hold this data file.
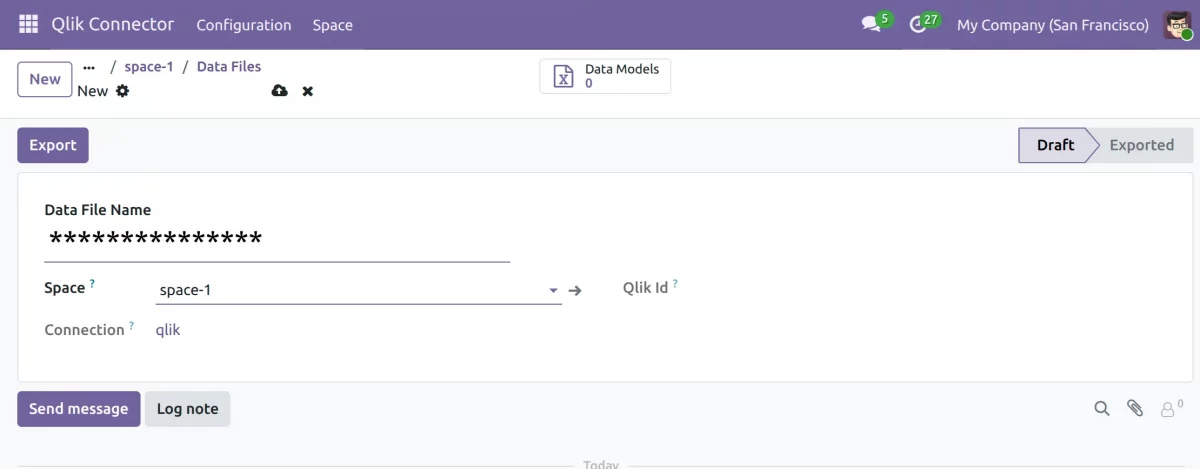
6. Click Export to send the data file to Qlik and confirm the Qlik ID is generated for the data file.

Creating a Data Model
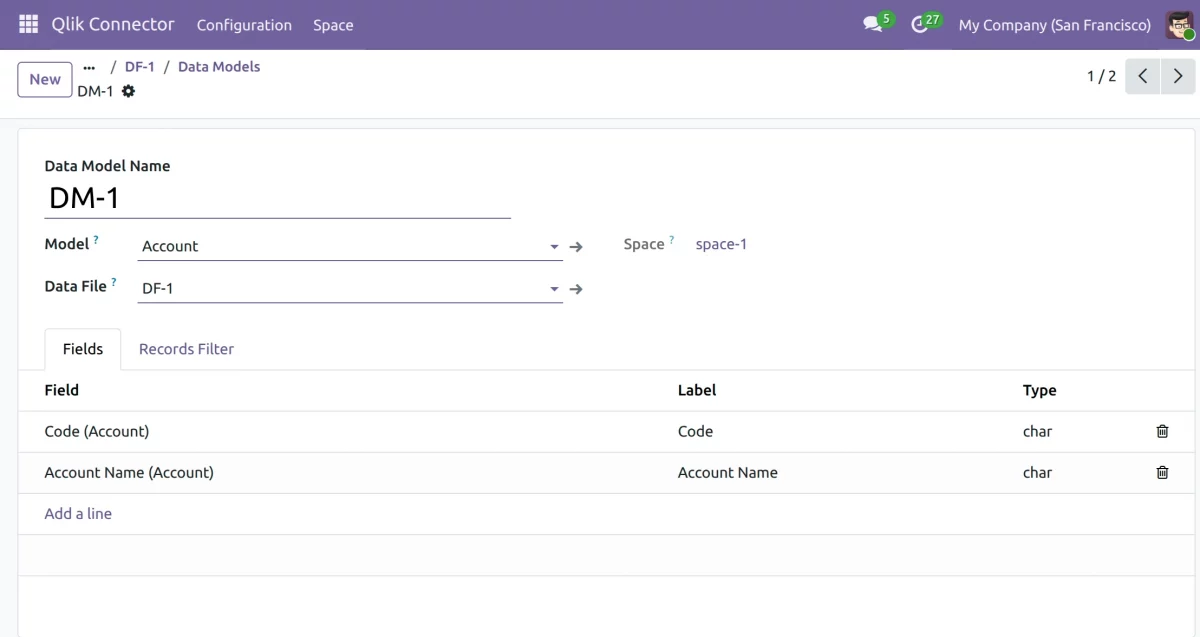
- Go to the Data Files section for managing file models and click Create New Model for the selected data file.

2. Enter a name for this new data model and select which data file this model should use.
3. Confirm the space once the file is selected and add the fields needed inside your new data model. Once done click on export the space will be exported from odoo to qlik.
Applying Filters and Viewing Records
- Go to Record Filters to apply data conditions and apply filters to limit data before syncing out.
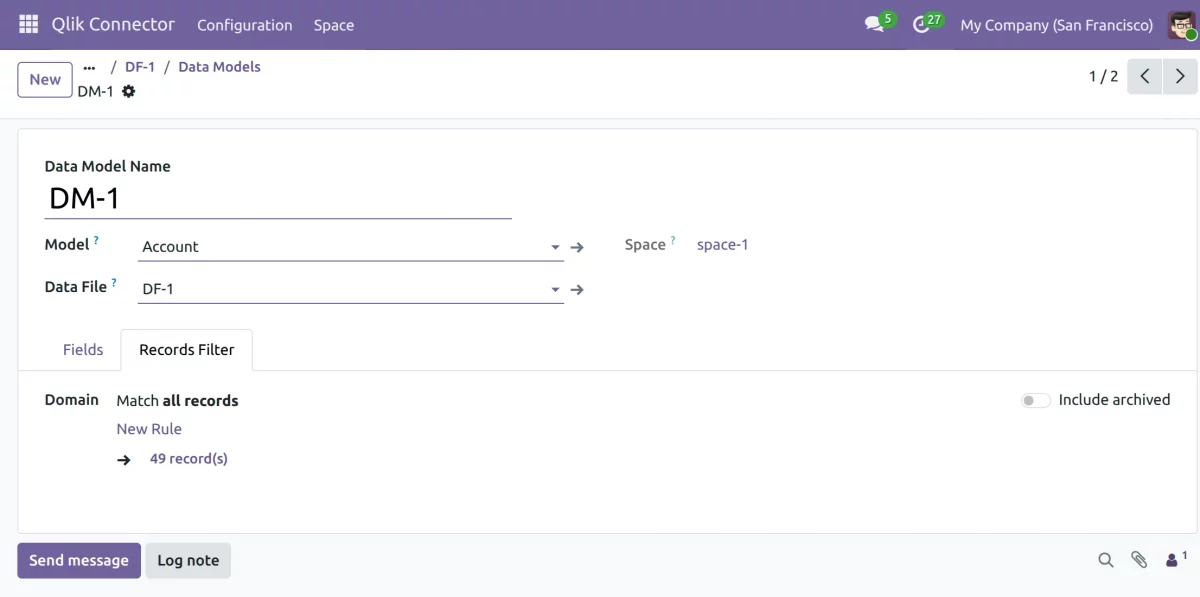
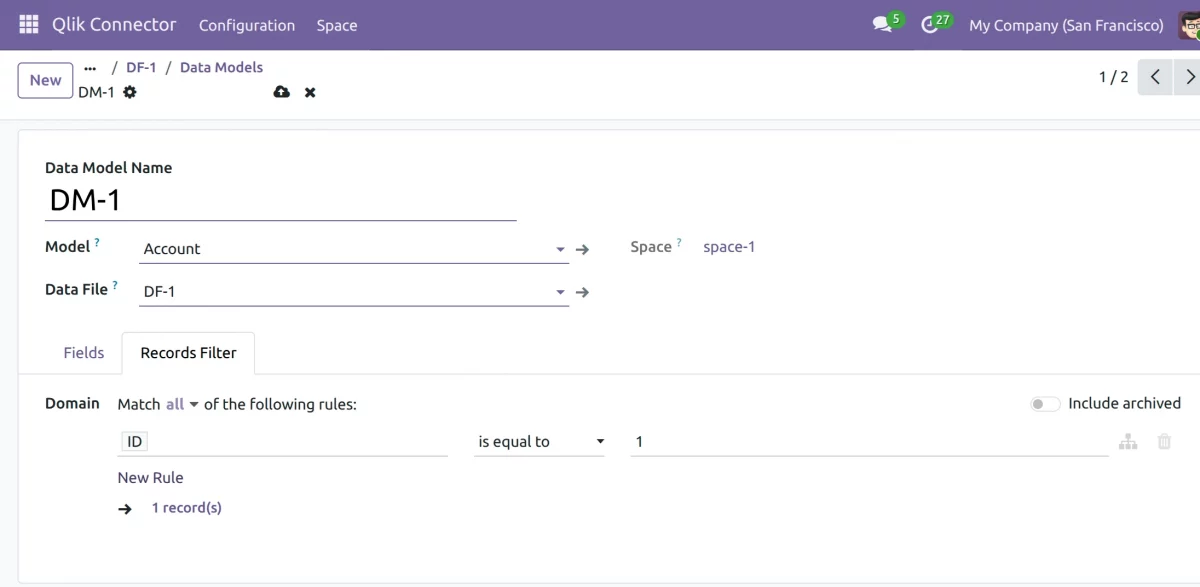
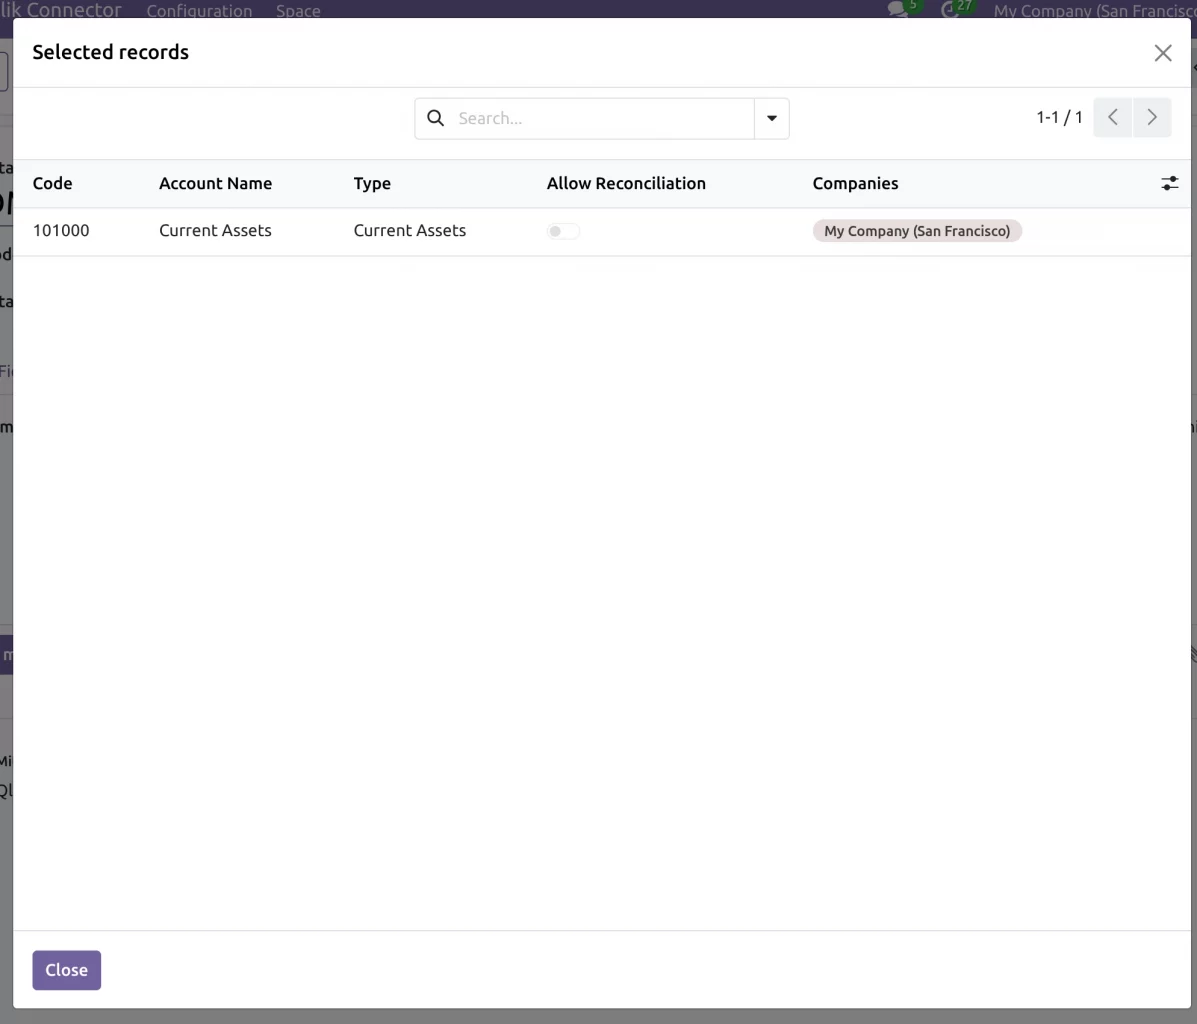
2. Click File Records to view synced file records.
Need Help ??
Hope you find guide helpful! Please feel free to share your feedback in the comments below.
If you still have any issues/queries, please create a ticket at the UV Desk.
I hope this helps. In case of any further queries, contact us at our support mail.
Thanks for paying attention!!
Current Product Version - 1.0.0
Supported Framework Version - Odoo V19, V18, V17

Be the first to comment.