Introduction
Odoo POS RMA allows POS users to raise return or exchange requests directly from paid orders.
Additionally, the admin configures product-level eligibility and defines return rules, such as accepted return days and approval users.
Moreover, Odoo POS RMA processes each request through a proper backend flow, from draft to approval, confirmation, and finally refund. Negative refund lines are generated once requests are confirmed.
Furthermore, it includes validations to prevent incorrect or duplicate returns, ensuring accurate post-sale handling and complete control.
Features
- You can enable returns and exchanges in POS
- Set product-level return eligibility easily
- Define return policies in backend settings
- Send approval emails automatically to users
- Create refund lines with negative quantities
- It shows the request status clearly in POS
- You can track request status from the POS and backend
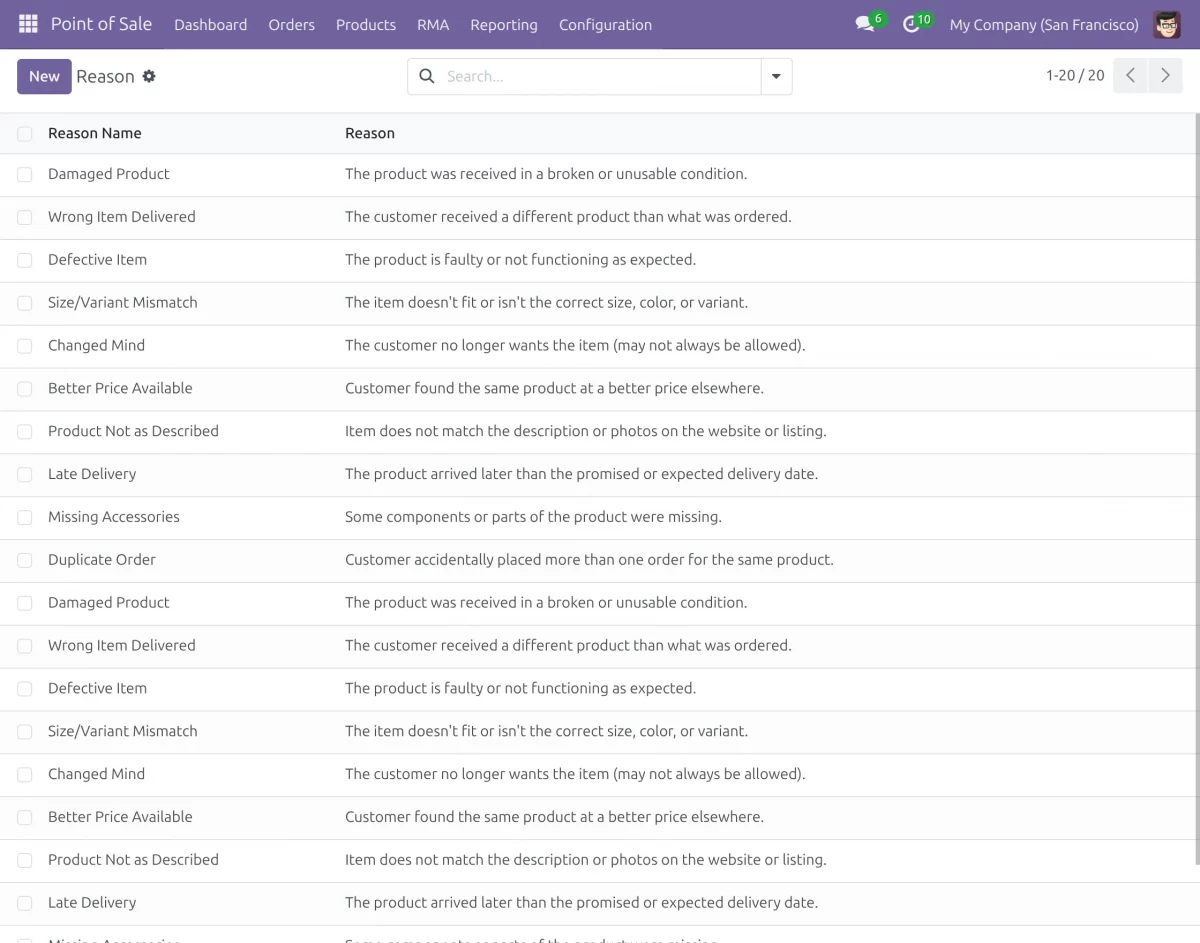
- Add and manage reason options for each return/exchange request in POS
Installation
- Once you purchase the App from Webkul store, you will receive a link to download module’s zip file.
- Extract the file on your system after download finishes. As a result, you will be able to see a folder named- ‘pos_rma’
- Copy and paste this folder inside your Odoo Add-Ons path.
- Now, open Odoo App and click on the Settings menu. Here, click on Activate Developer Mode.
- Then, open Apps menu and click on ‘Update Modules List.’
- In the search bar, remove all the filters and search ‘pos_rma’
- You will be able to see module in the search results. Click on ‘Activate’ to install it.
Workflow
Return Policy Configuration in POS
- After installing the POS RMA module, go to Point of Sale → Settings → Return Policy to set your return policy.
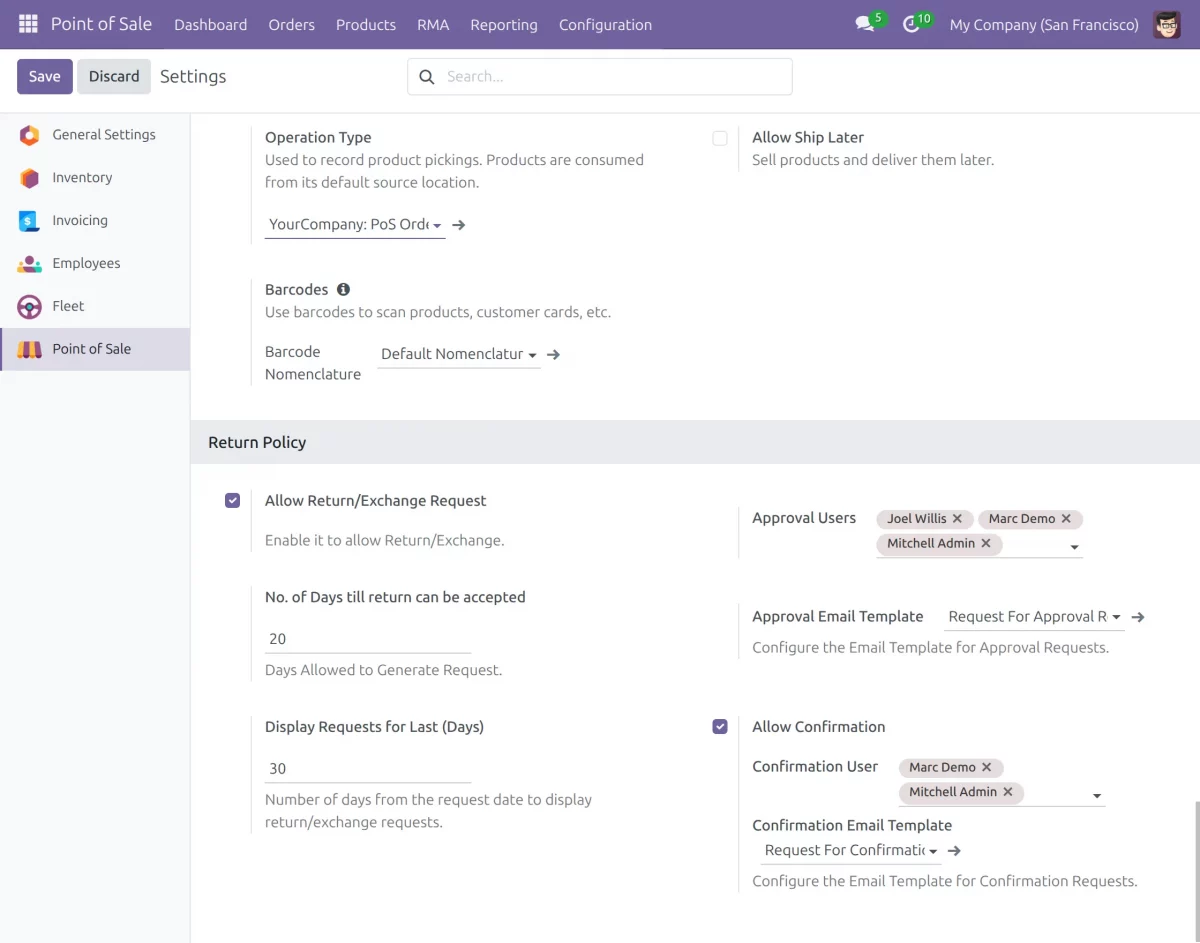
In this section, you can configure the following settings:
- Allow Return/Exchange Request:
Enable this option to let POS users create return or exchange requests. - No. of Days till Return Can Be Accepted:
Define the number of days after purchase within which a return or exchange request can be made. - Display Requests for Last (Days):
Set how many previous days’ return or exchange requests will be shown in the POS interface. - Approval Users:
Select the users responsible for reviewing and approving return or exchange requests. - Approval Email Template:
Choose the email template that will be used to send approval notifications automatically. - Allow Confirmation:
Enable this option to make confirmation mandatory after approval and before refund creation. - Confirmation User:
Assign users who will confirm the approved requests for final processing. - Confirmation Email Template:
Also, select the email template to send confirmation notifications to users automatically.
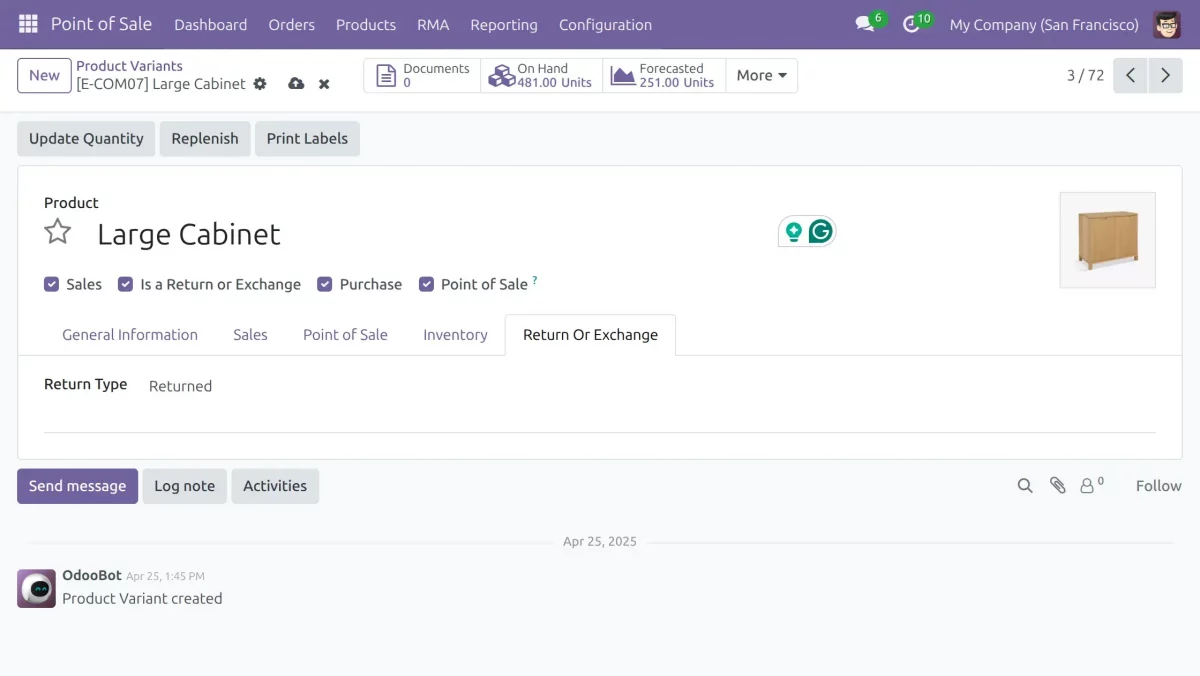
Product Configuration for Return or Exchange
2. Go to Products → Product Variants and open the product you want to make returnable.
You must also check the Is a Return or Exchange Option checkbox to enable return or exchange for that product.
As a result, only products with this option enabled become available for return or exchange in POS.
Managing Return/Exchange in RMA
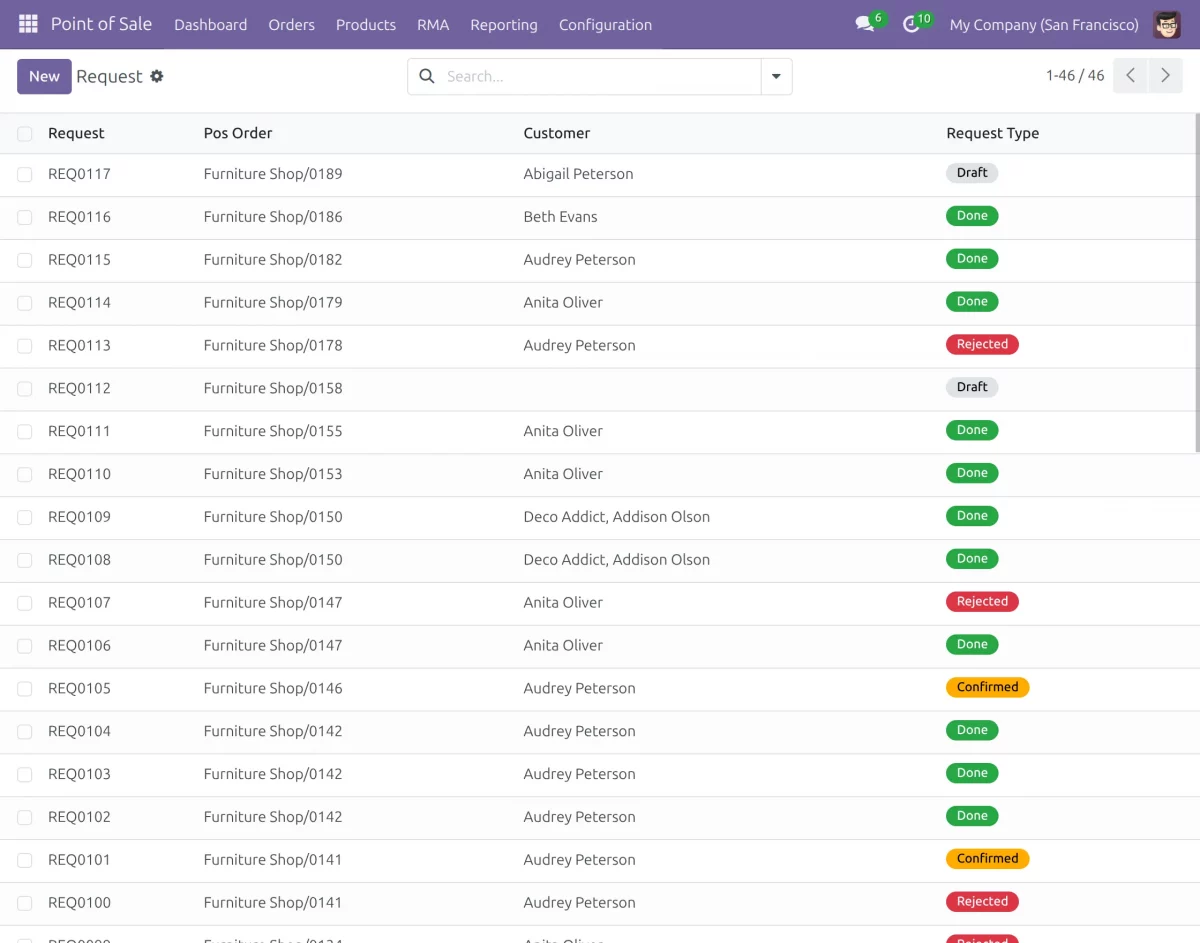
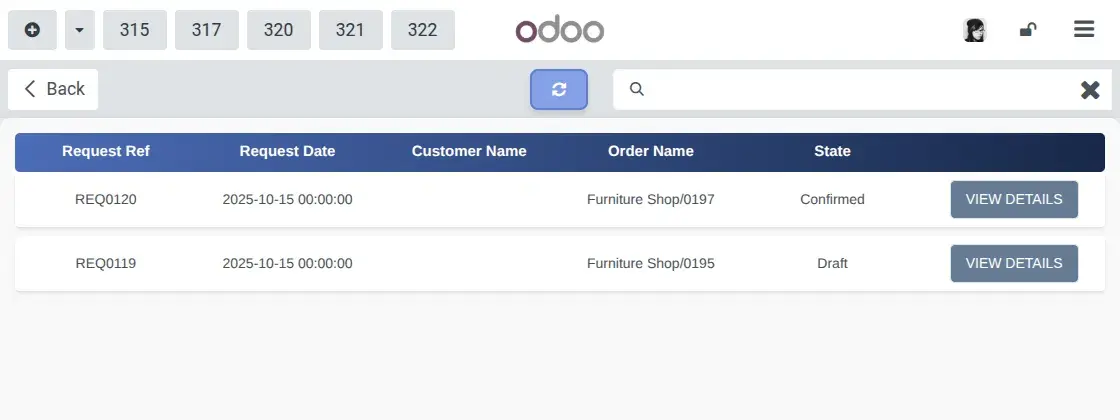
3. To begin, go to POS > RMA > Return/Exchange Requests. Here, you can view all submitted return or exchange requests.

Go to POS > RMA > Return/Exchange Reasons. Here, you can view or manage all return/exchange reasons.
4. In the POS frontend, click the Action button, and afterward click All Requests in the pop-up to see all return or exchange requests.
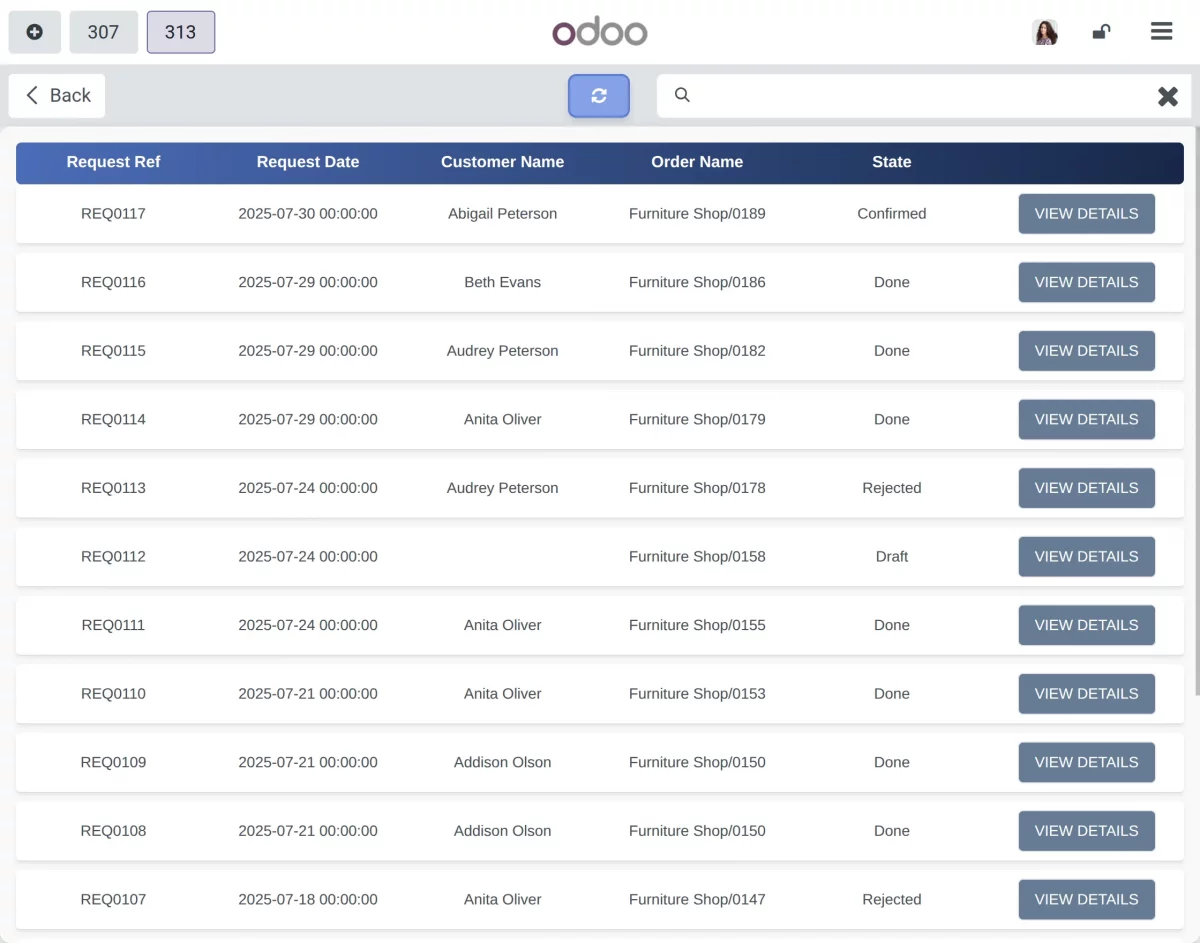
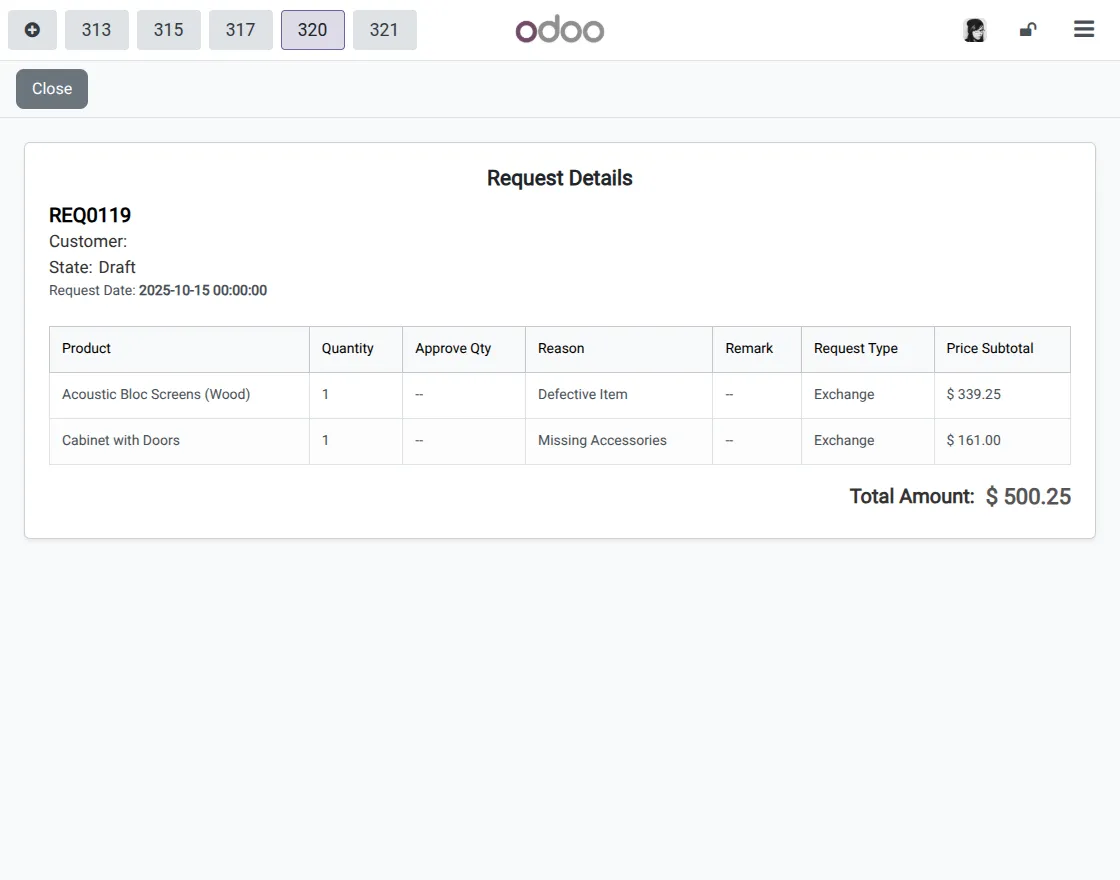
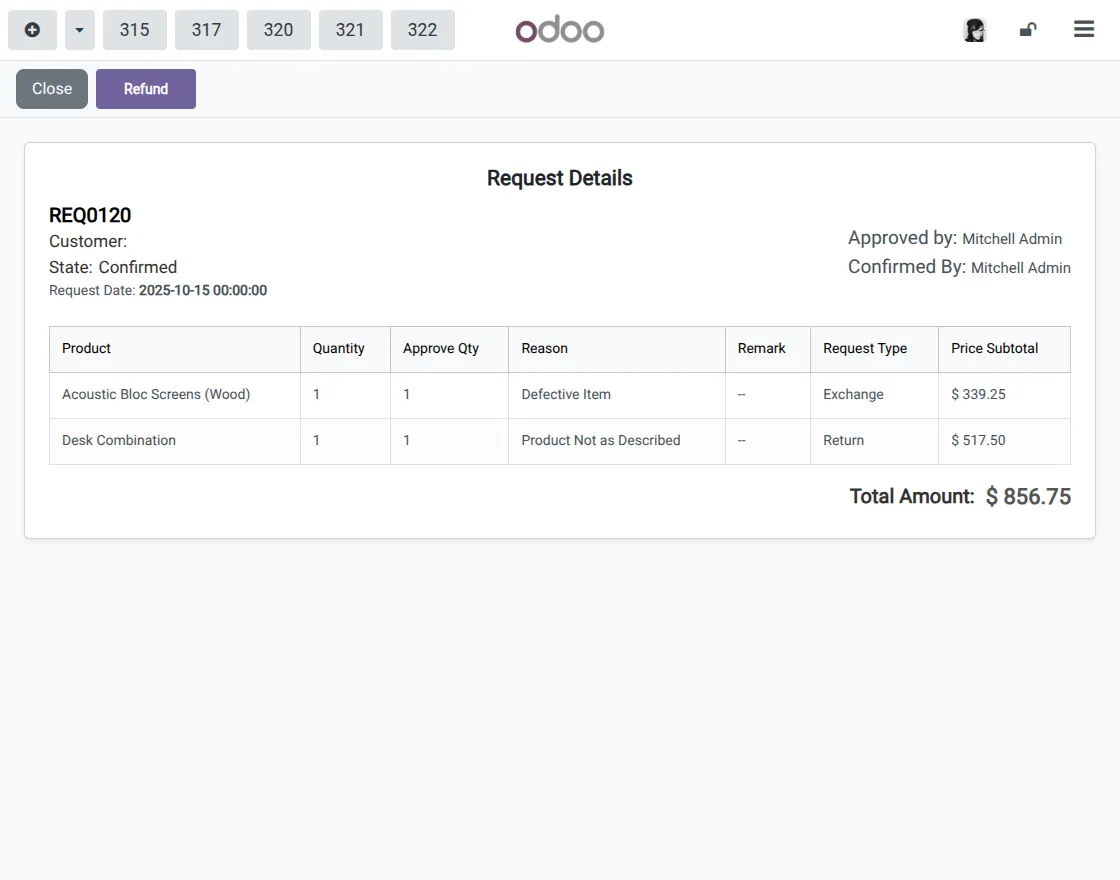
5. Click the View Details button on any return or exchange request to open a detailed view showing all information, including product, reason, request date, and current status
6. Next, go to Orders > Paid Orders. You will see a list of all paid orders.
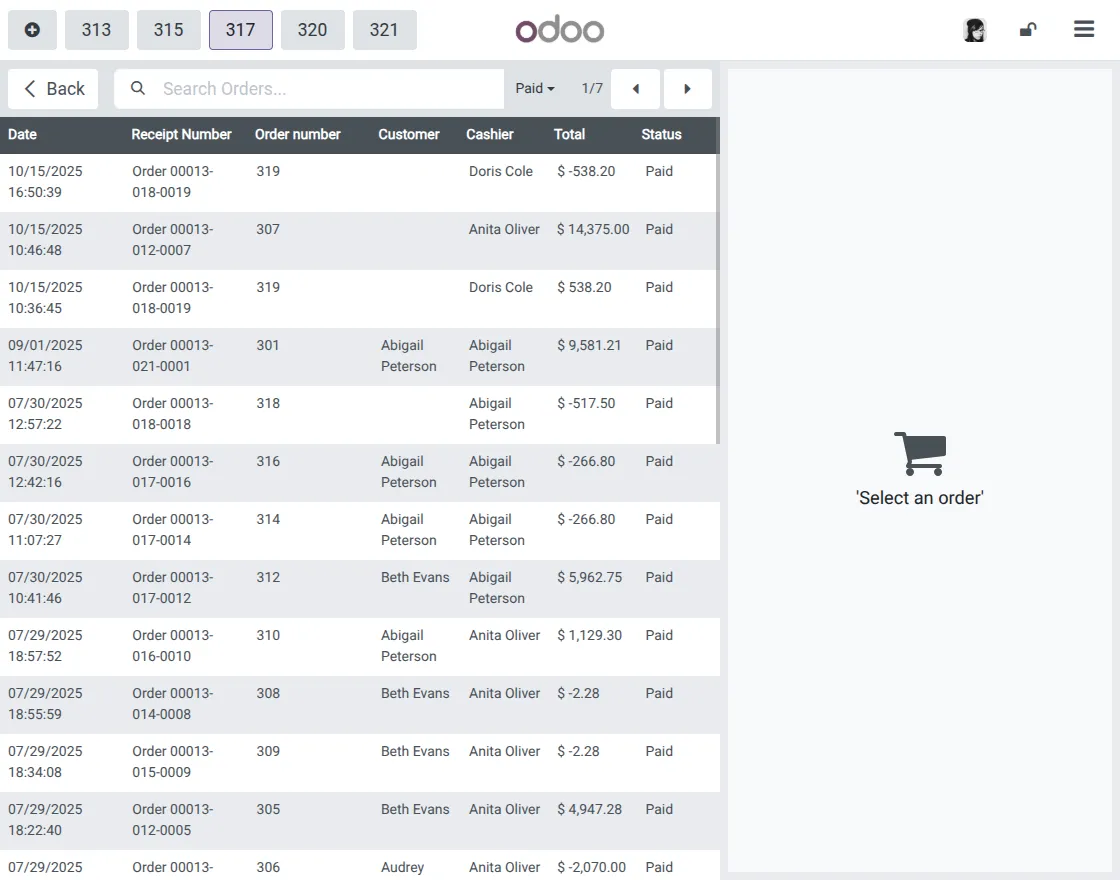
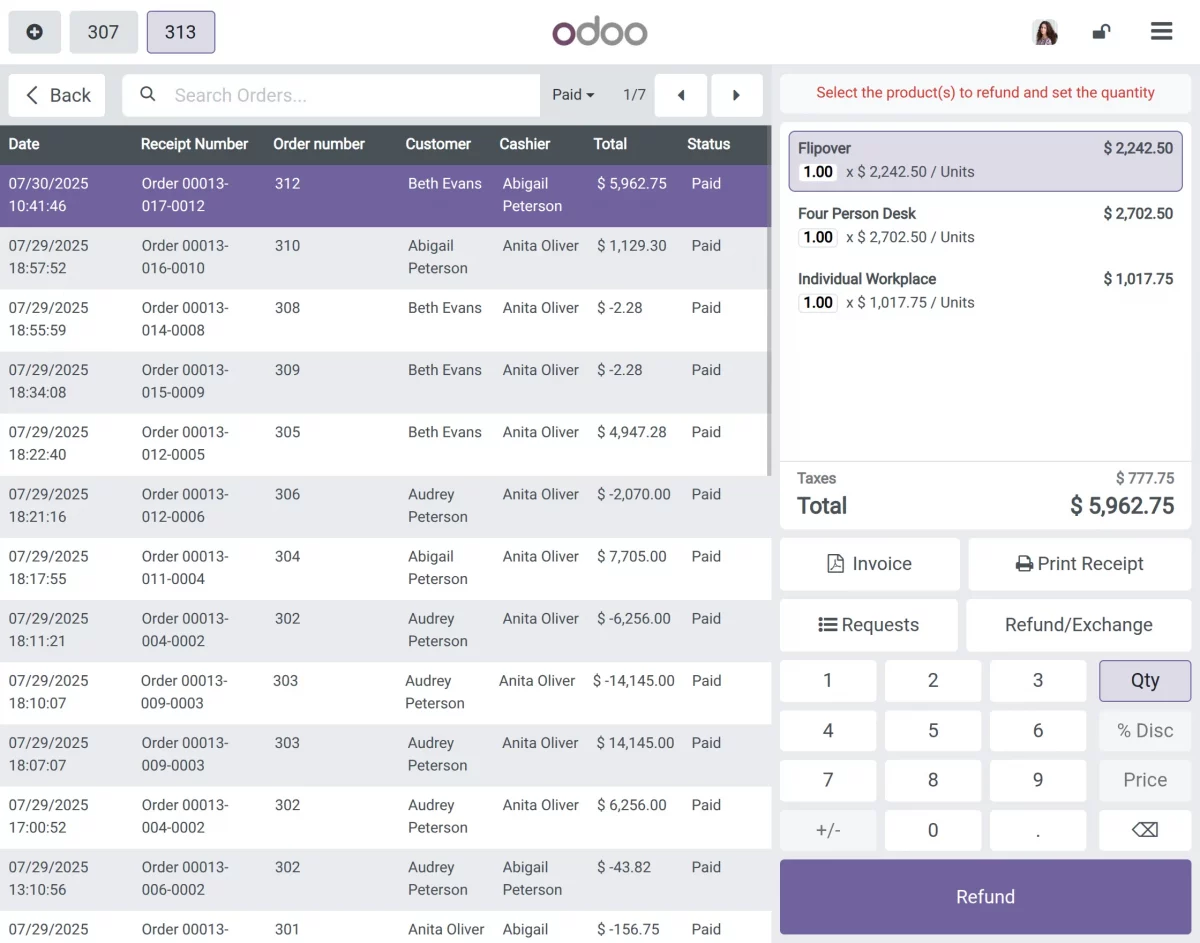
7. After that, click any paid order from the list to open its details, and then click the Refund/Exchange option to initiate a return or exchange request.
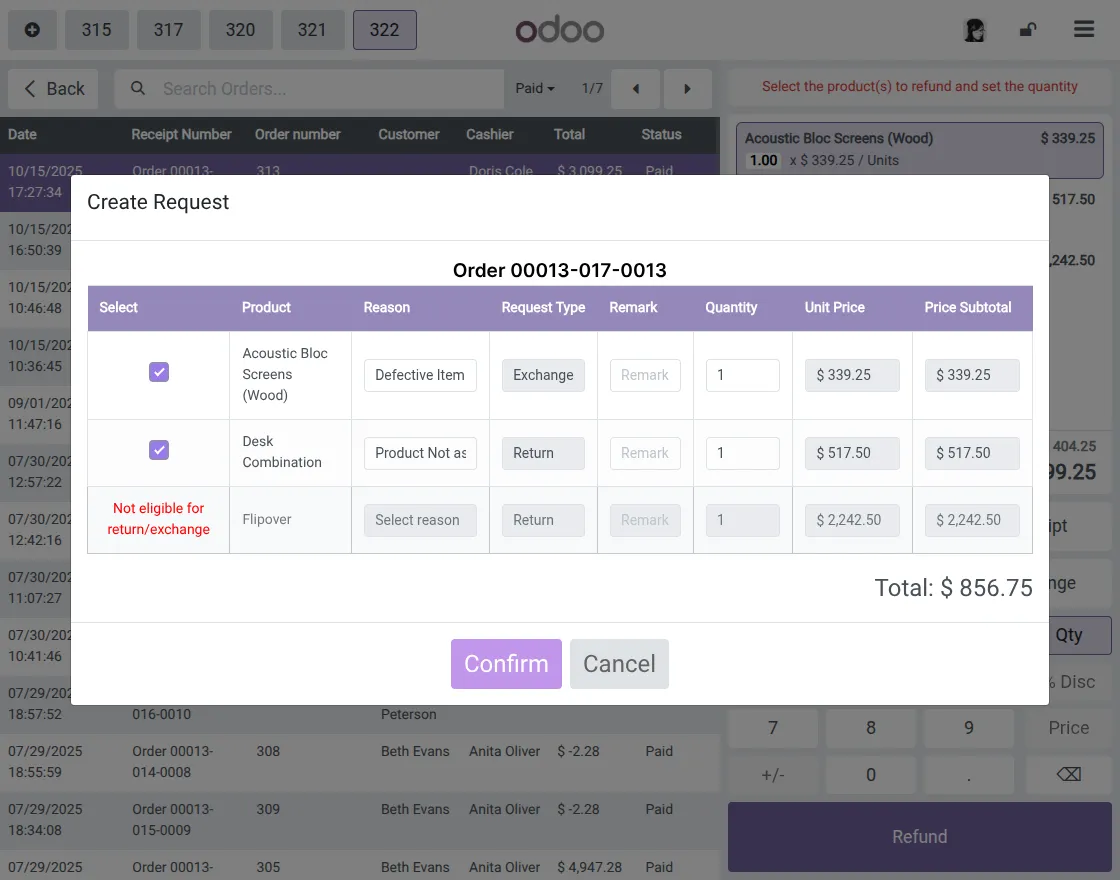
8. A Create Request pop-up appears. Then select the product, reason, and quantity for the return or exchange.
- Selecting a reason is mandatory; otherwise, the request will not initiate and an error will be shown.
- Additionally, the system clearly marks products that are not eligible for refund or exchange in the column.
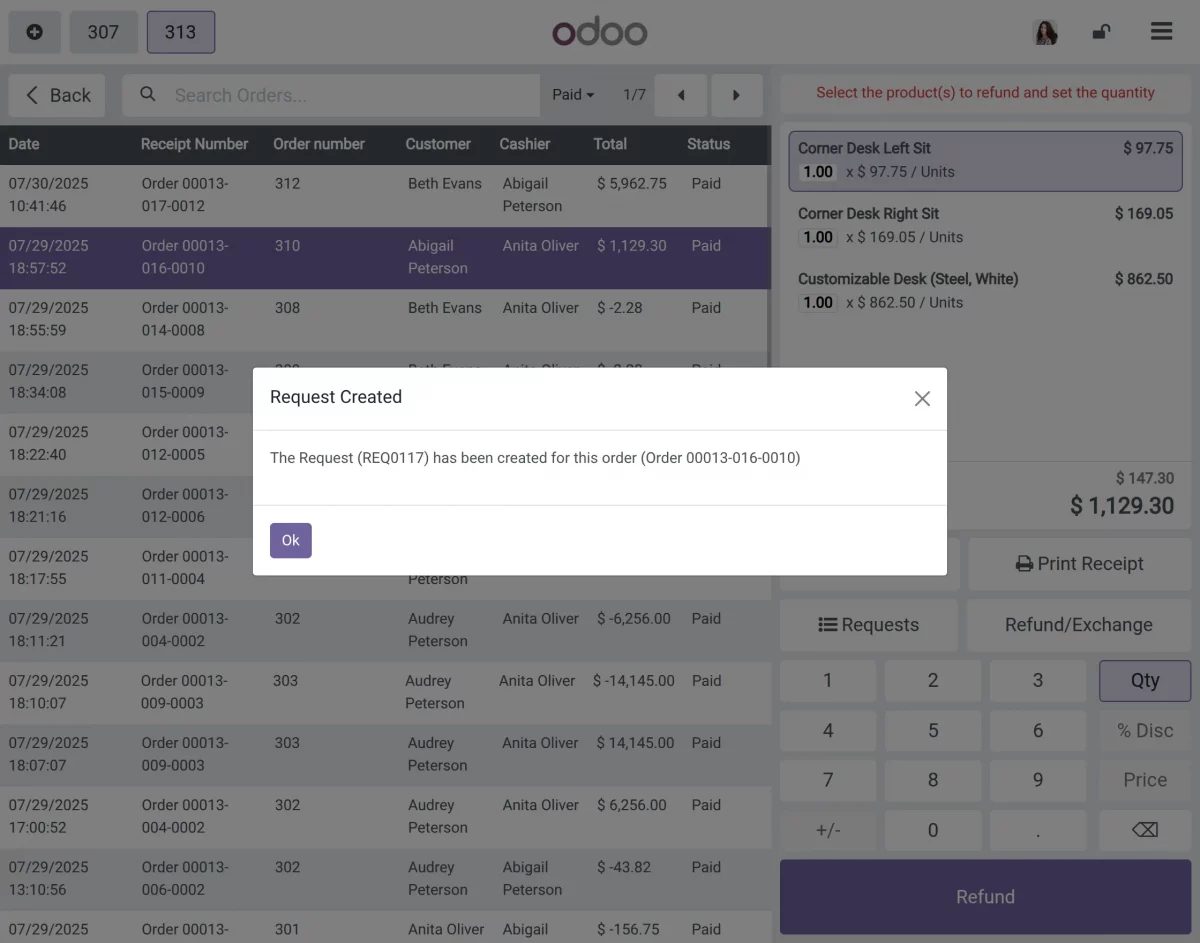
9. After filling the request, click the Confirm button. Then a pop-up appears showing the message: Your request has been created for the order with the order number mentioned.
10. First, go to POS > RMA > Return/Exchange Requests. Then you can view all submitted return or exchange requests.
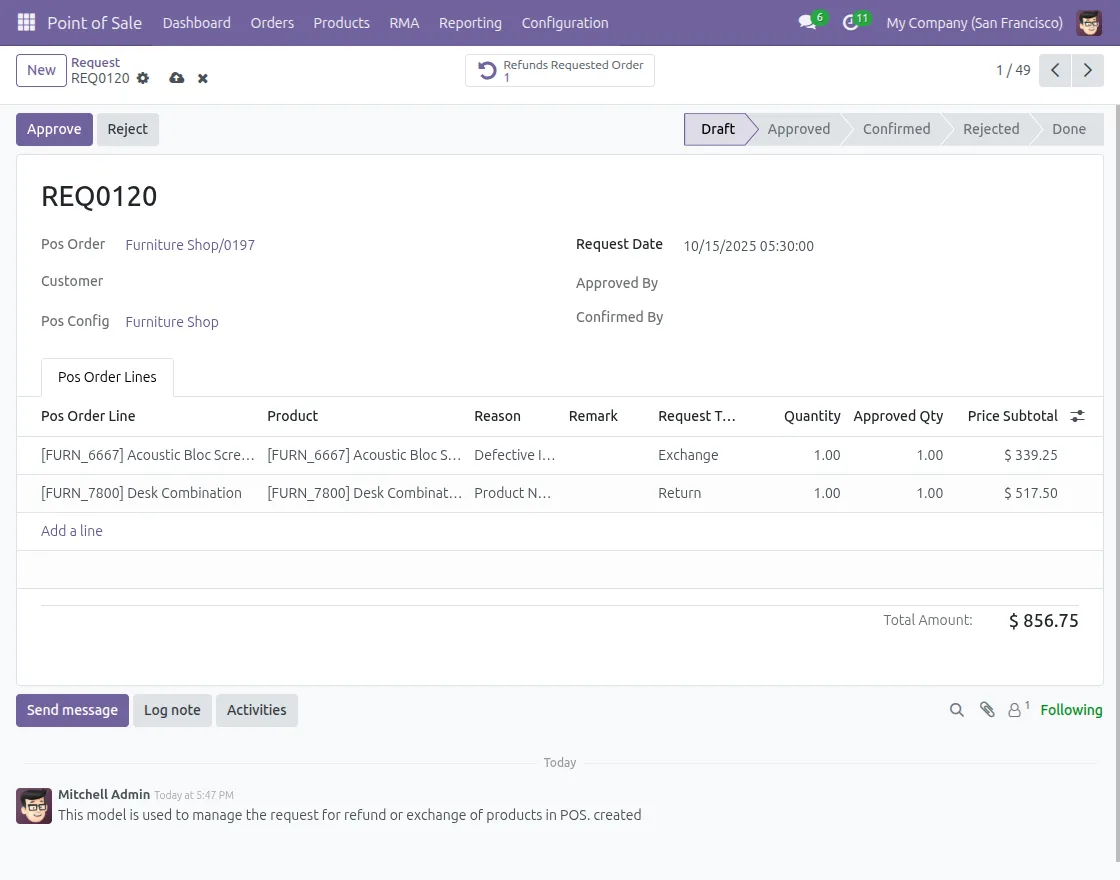
11. First, click any request with Draft status to open it, then review and approve the request to process the return or exchange.
Before approving, set the approved quantity; otherwise, a validation message will be shown.
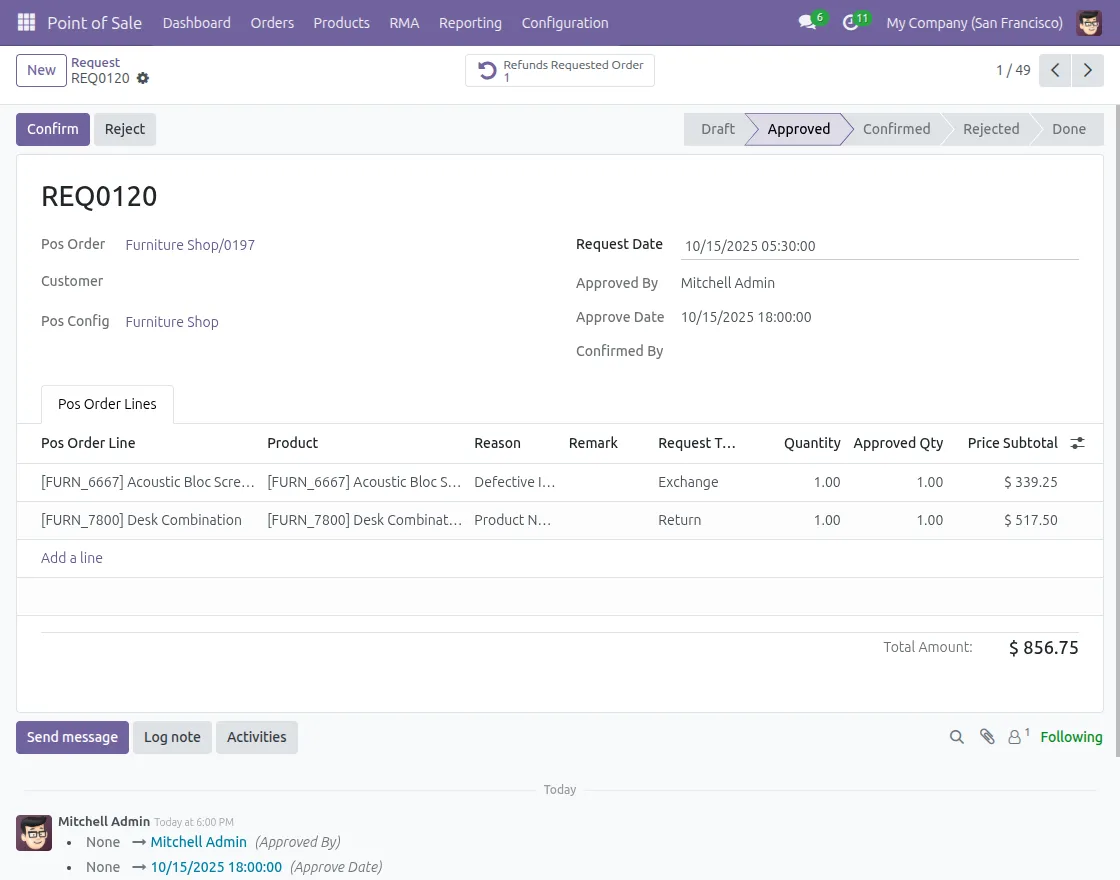
12. Next, after approving, click the Confirm button to finalize the request, or choose to Reject the request if needed.
13. Then, after approving and confirming a request, go to POS > Requests and click the Refresh button to apply the changes.
14. Next, go to the request’s Detail Screen and click the Refund button.
Additionally, make sure the request is in the Confirmed state; otherwise, a pop-up will appear asking you to confirm the request first
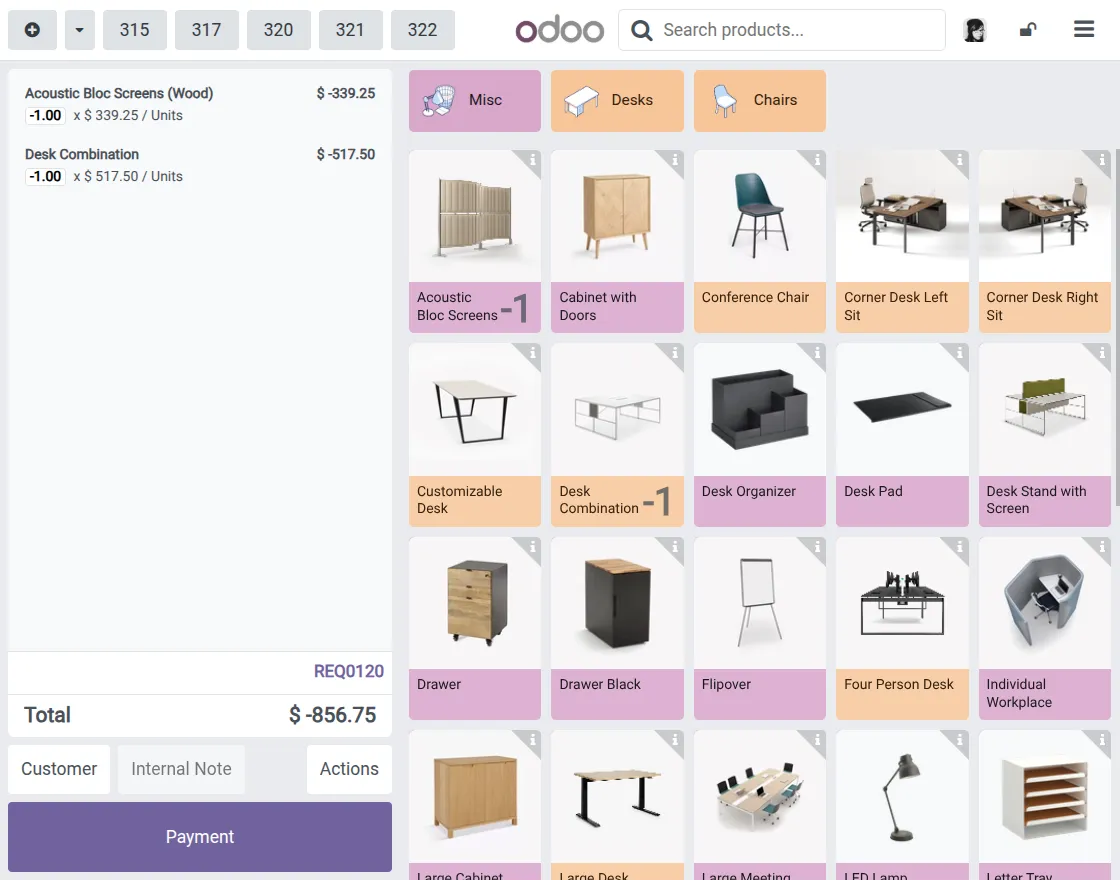
15. After you click the Refund button, the POS automatically creates a refund order line with a negative quantity. You also cannot remove these refund order lines from the POS interface.
Finally, proceed to make the payment in POS to validate and complete the refund process.
16. Finally, once you validate the refund payment, the order request status changes to Done.

Need Help?
Hope you find guide helpful! Please feel free to share your feedback in the comments below.
If you still have any issues/queries, please create a ticket at the UV Desk.
I hope this helps. In case of any further queries, contact us at our support mail.
Thanks for paying attention!!
Current Product Version - 1.0.0
Supported Framework Version - Odoo V19, V18

Be the first to comment.