Magento 2 Digipin automatically detects and fills the digital pin code when a customer enters their address details.
This helps make checkout faster and avoids incorrect pin codes. The module works on the customer address page, checkout page, and multi-shipping page.
Features
- Auto fills Digipin when customers enter address details.
- Works on the customer address page, checkout page, and multi-shipping page.
- Supports shipping and billing address forms.
- Enables faster checkout and reduces errors in pin code entry.
- Admin can easily enable or disable the module from the backend.
Installation
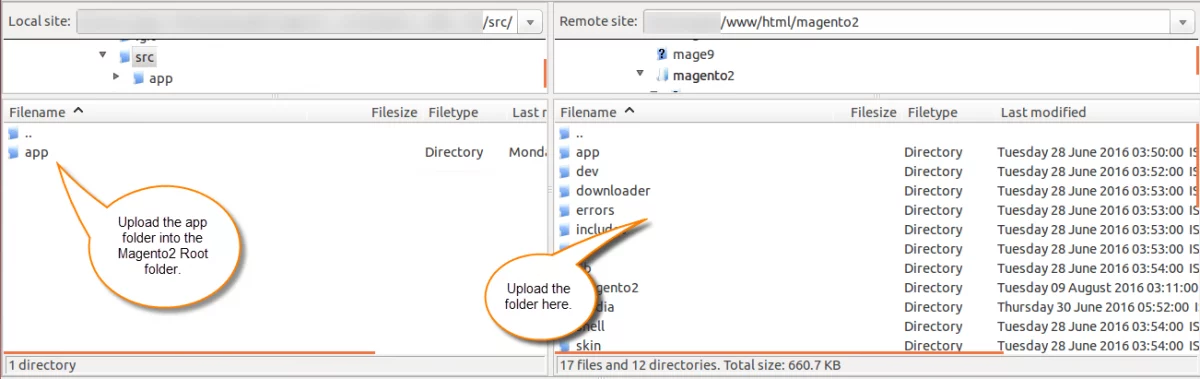
Customers will get a zip folder then they have to extract the contents of this zip folder on their system.
The extracted folder has an src folder, inside the src folder you have the app folder. You need to transfer this app folder into the Magento 2 root directory on the server, as shown below.
After the successful installation, you have to run these commands in the Magento 2 root directory:
php bin/magento setup:upgrade
php bin/magento setup:di:compile
php bin/magento setup:static-content:deploy
php bin/magento indexer:reindex
php bin/magento cache:flush
Multi-lingual Support
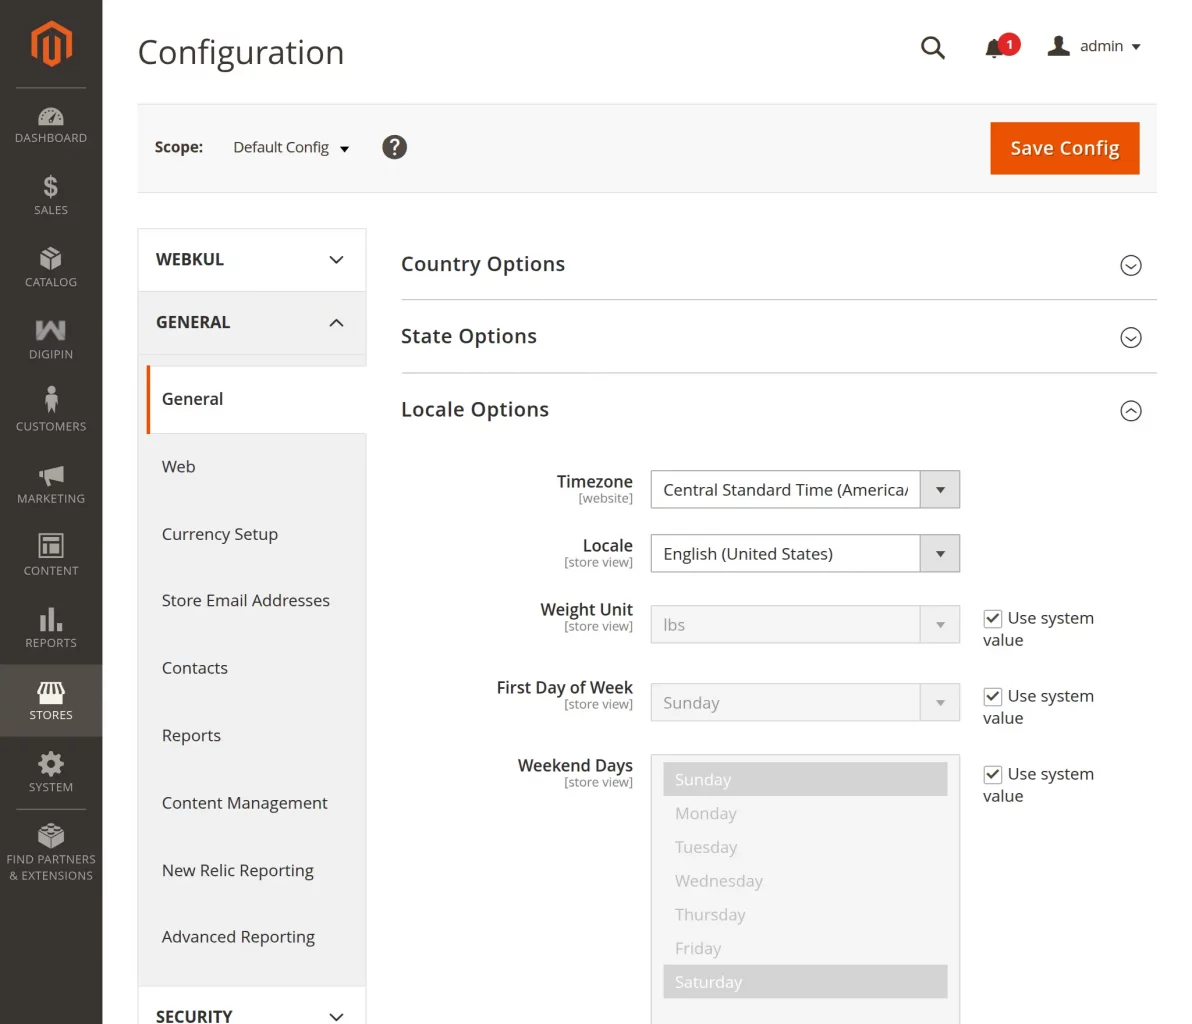
For the multilingual support, the admin will navigate through Store->Configuration->General ->Locale Options and select the locale as German
(the language into which the admin wants to translate his store content).
Language Translation
For Magento 2 Digipin translation, navigate to the following path in your system src/app/code/Webkul/DigiPin/i18n.
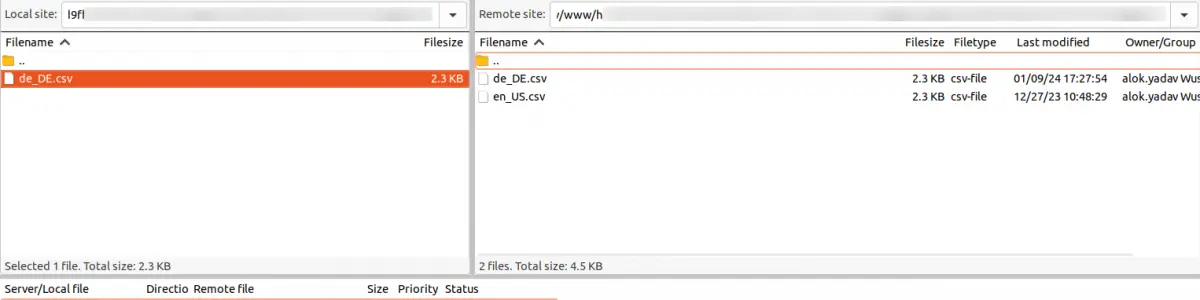
Now, upload it to the path src/app/code/Webkul/DigiPin/i18n where the installation of Magento 2 is on the server. The module gets translated into the desired language.
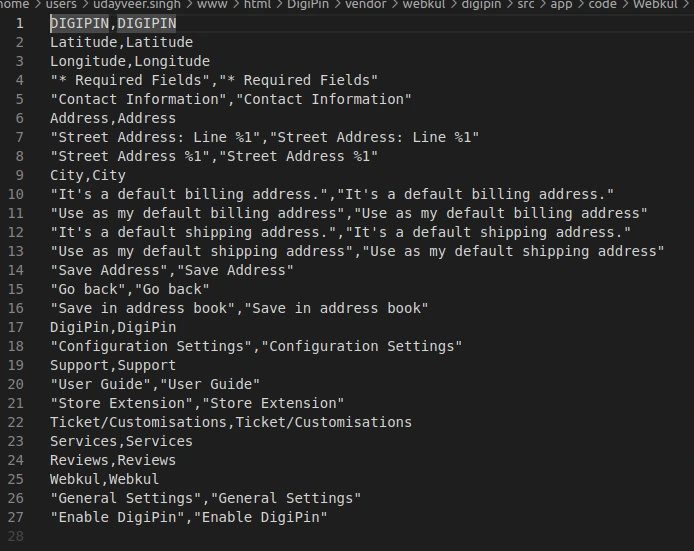
The user can edit the CSV like the image below.
After editing and translating the CSV file, you need to save the translated file name according to your region, language, and country code, such as – de_DE.CSV.
Followed by uploading the translated file to the same folder from where you have obtained it. Now your module translation is complete.

Module Configuration
To configure Magento 2 Digipin, the admin should go to: Stores → Configuration → Webkul → DigiPin
Here, the admin can see General Settings:
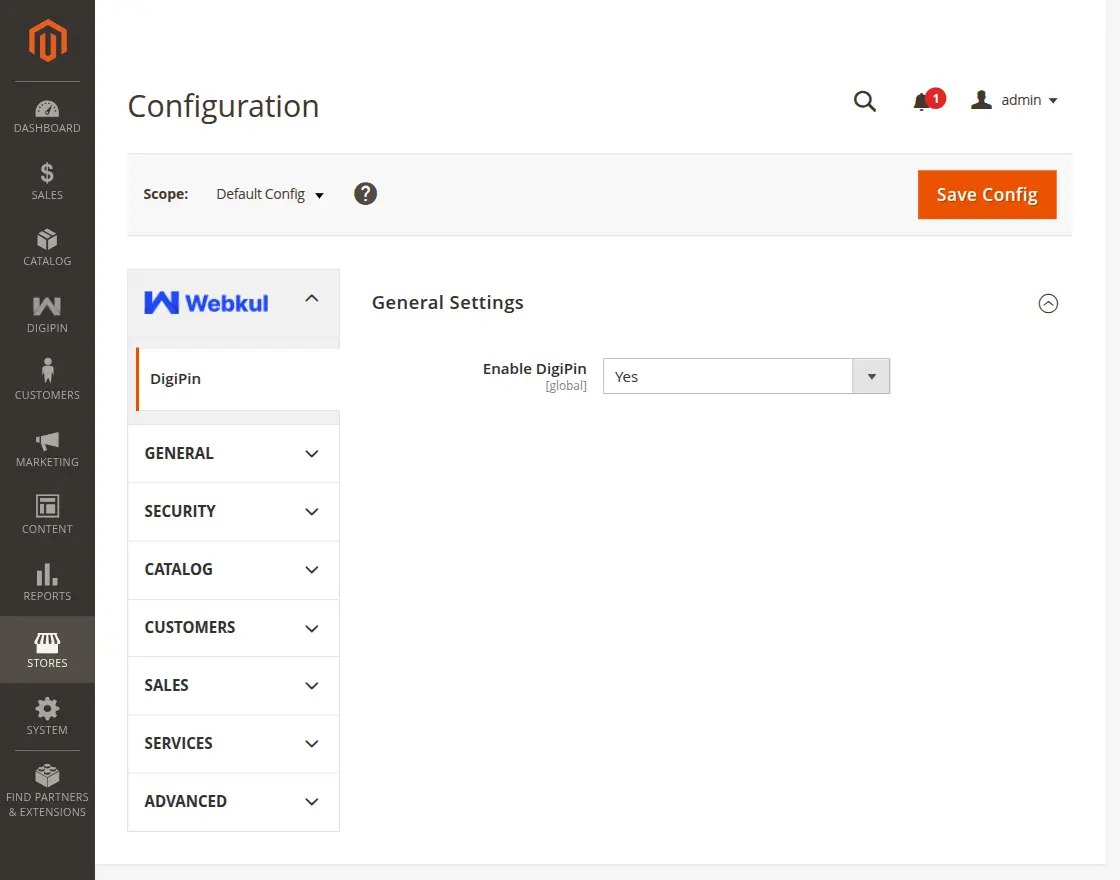
Enable DigiPin – Use the drop-down to enable or disable the module.
Click Save Config to apply the changes.
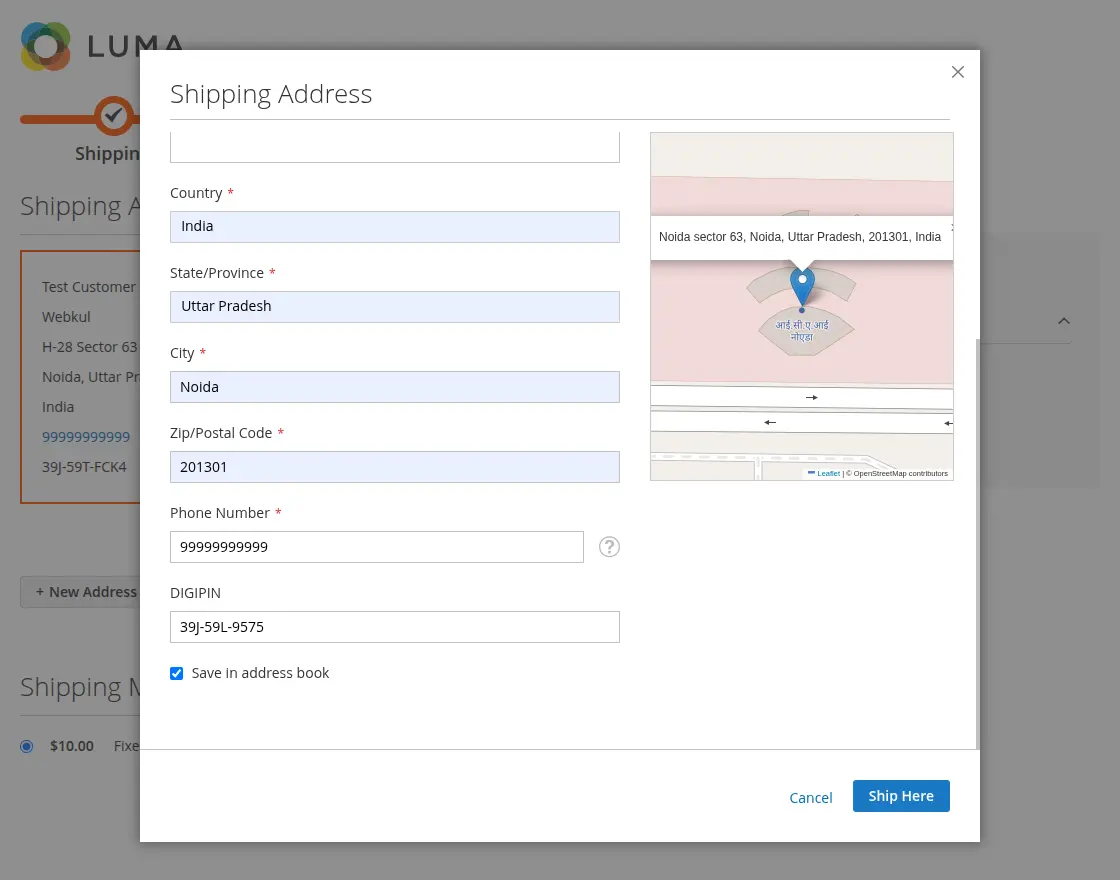
Checkout Page
During checkout, the module fills the Digipin as soon as customers enter their shipping or billing address.
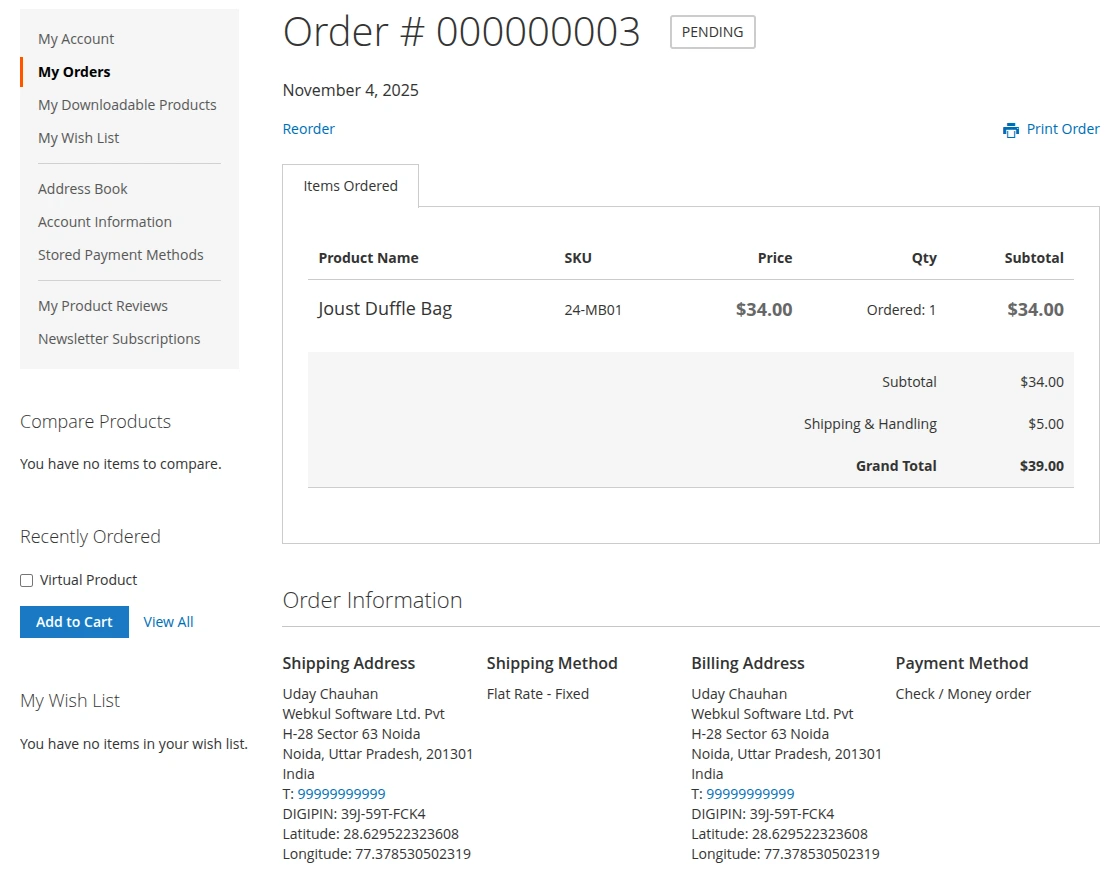
Customer Order View Page
Customers can see the digital pin code on their order details page.
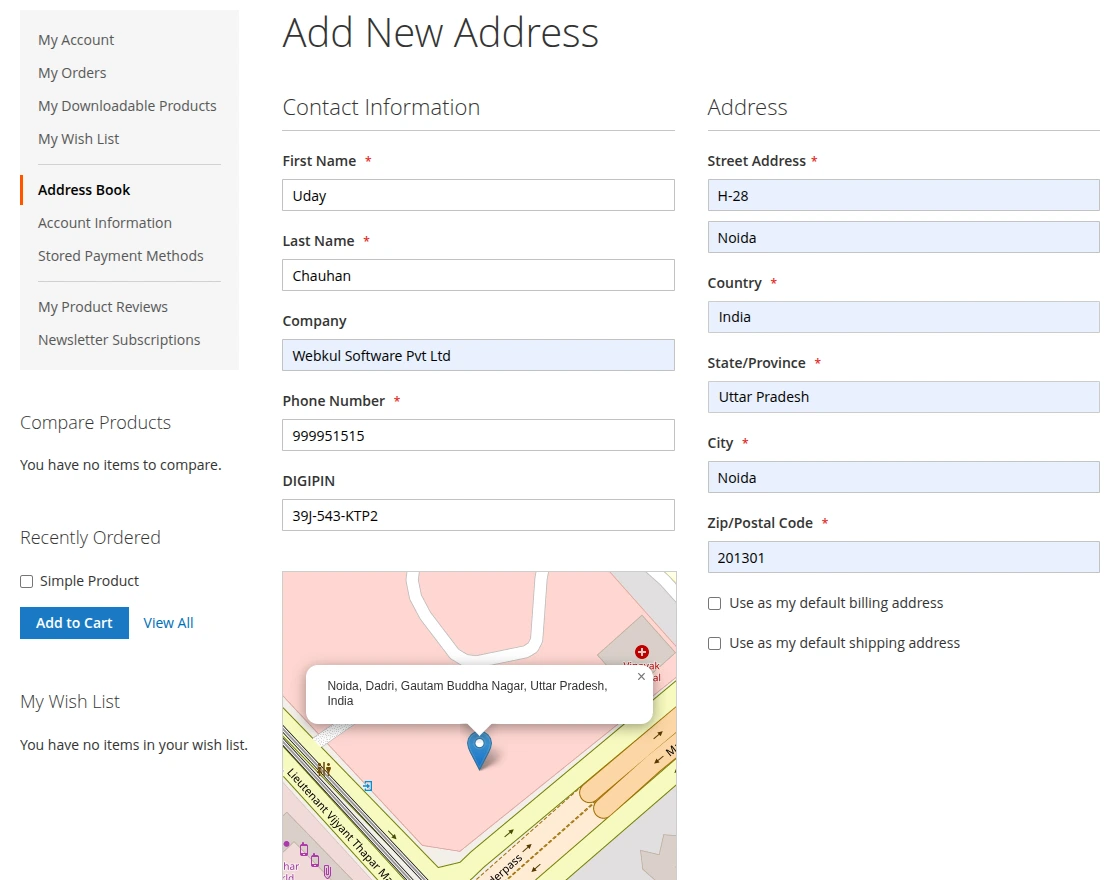
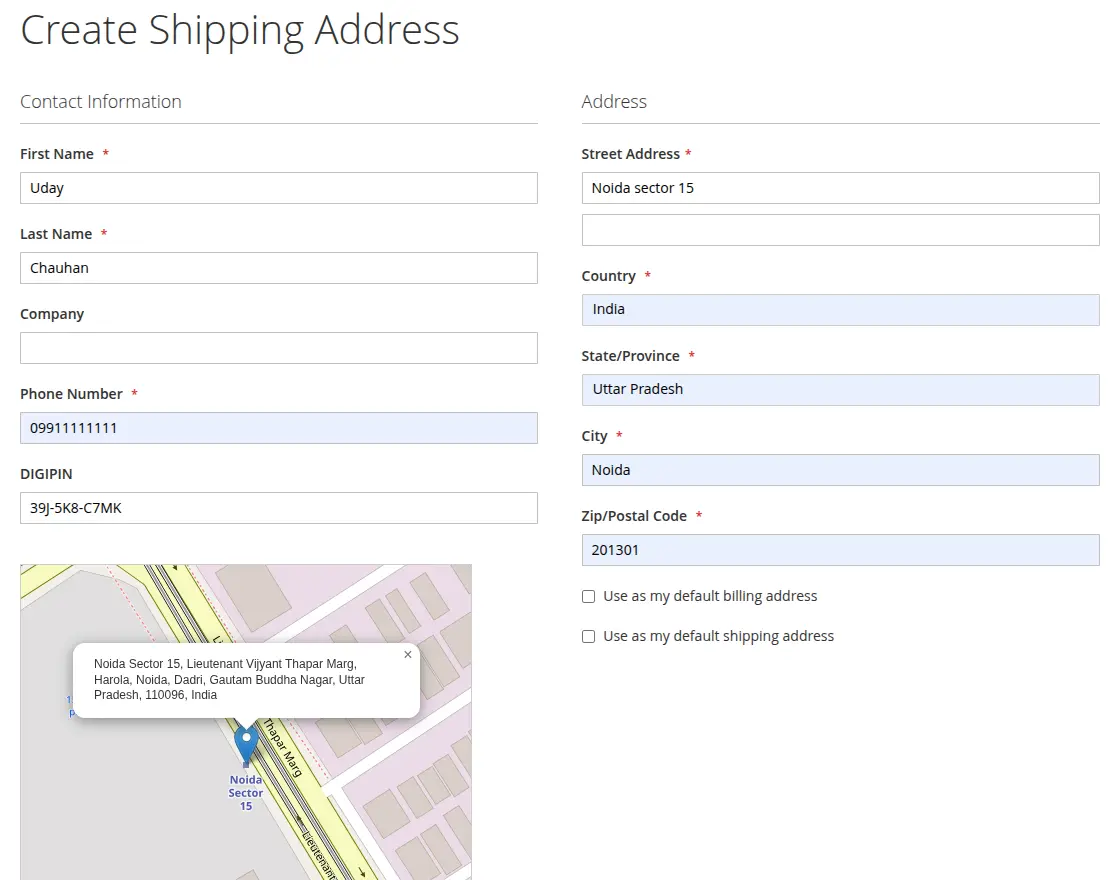
Adding or Editing Customer Address
When a customer adds a new address or edits an existing one, the module fills the pin code automatically after fill the address details
Multi-shipping Page
Magento 2 Digipin automatically fills the Digipin for each address, reducing errors and making the checkout process faster.
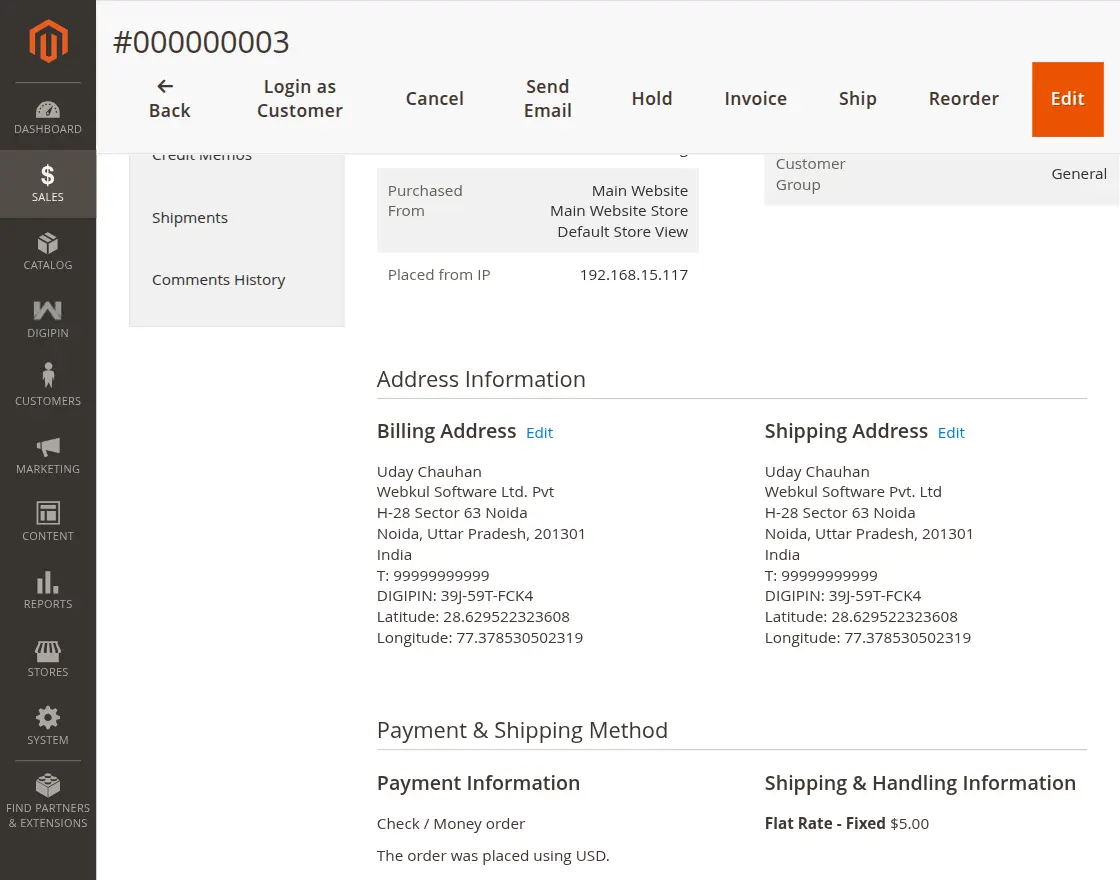
Admin Order View Page
Admins can see the digital pin code with the shipping address on the order details page.
That’s all for the Magento 2 Digipin.
However, if you still have any issues, feel free to add a ticket and let us know your views to make the module better at webkul.uvdesk.com
Current Product Version - 4.0.0
Supported Framework Version - Magento 2.0.x, 2.1.x, 2.2.x,2.3.x, 2.4.x

Be the first to comment.