Replace Add to Cart for Magento 2 extension allows the admin to change the standard “Add to Cart” button label with a custom text, link, email or a phone number.
The customized Add to Cart button can be used for many purposes like – pre-launch products, restrict the product purchase for customers, pre-order products, made to order, call to order products etc.
The customized Add to Cart button will be displayed on all the products types like – simple, configurable, virtual, downloadable, bundle, and grouped product types.
And, will be visible on all pages of the store such as the product page, category page, search page, advanced search page, wishlist page, compare page, and other CMS pages.
Watch the below video tutorial to understand the extension workflow :
Features
- The admin can enable or disable the module.
- Replace Add to Cart button with a link.
- The admin can replace Add to Cart button with an email address.
- Replace Add to Cart button with a phone number.
- Replace Add to Cart button with a custom text.
- Add products Ids for which ‘Replace Add To Cart’ will not work.
- Select categories for which ‘Replace Add To Cart’ will not work.
- Custom Add to Cart label is visible on the product pages.
- Custom Add to Cart label is visible on the category pages.
- The module supports all products types.
- Custom Add to Cart label is visible on search and advanced search pages.
- Custom Add to Cart label is visible on wishlist page.
- The module source code is open for customization.
- Custom Add to Cart label is visible on compare page.
- Custom Add to Cart label is visible on CMS pages.
- The customer can’t check out the product for which the Add To Cart button has been replaced with the link, email and phone number.
Installation
The installation is quite simple just like the standard Magento 2 extensions.
Customers will get a zip folder and they have to extract the contents of this zip folder on their system.
The extracted folder has an src folder, inside the src folder you have the app folder. You need to transfer this app folder into the Magento 2 (Adobe Commerce) root directory on the server as shown below.

After the successful installation, you have to run these commands in the Magento 2 root directory.
First command – php bin/magento setup:upgrade

Second Command – php bin/magento setup:di:compile

Third Command – php bin/magento setup:static-content:deploy

After running the commands, you have to flush the cache from the Magento admin panel by navigating through->System->Cache management as shown below.

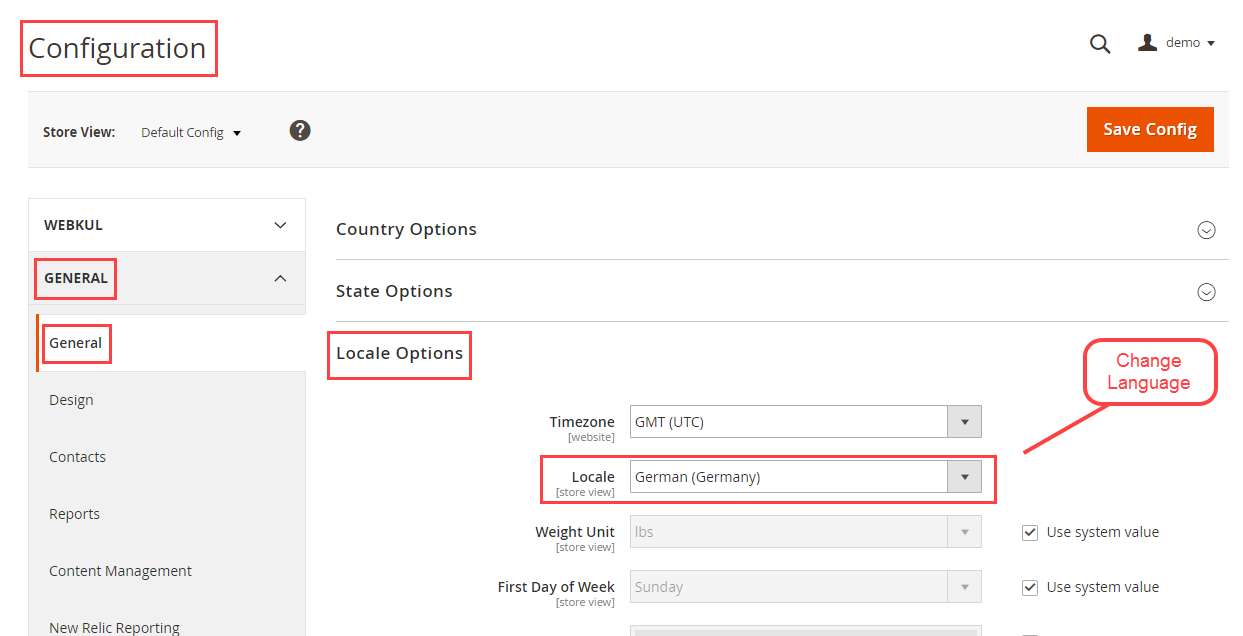
Multi-Lingual Configuration
For Multilingual support, please navigate to Store>Configuration>General >Locale Options. And select your desired language from the Locale option.
Language Translation
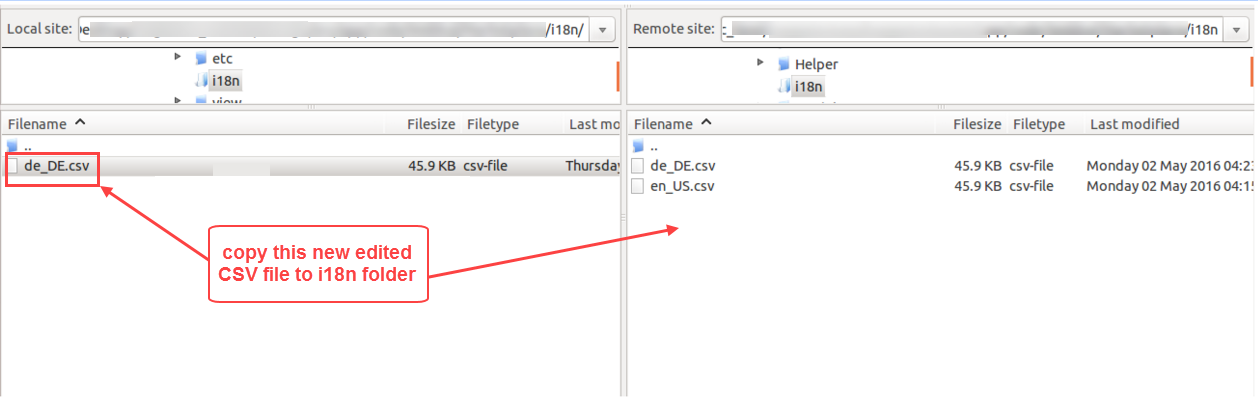
For module translation, navigate to the following path in your system app/code/Webkul/ReplaceAddToCart/i18n/en_US.csv. Open the file named en_US.CSV for editing as shown in the below screenshot.

Then replace the words after the comma(,) on the right in the file with your translated words.

After editing and translating the CSV file, you need to save the translated file name according to your region language and country code such as – de_DE.CSV. Followed by uploading the translated file to the same folder from where you have obtained it. Now your module translation is complete.
Module Configuration
After the installation, the admin can easily configure the module settings. For this, the admin will navigate to Stores -> Configuration ->Webkul -> Replace Add To Cart as shown below.

Here, the admin will:
Enable – Select Yes to enable the module. Else, set No to disable it.
Replace Add To Cart – Select the options from the drop-down the admin wants to replace with Add To cart button.

Once will click on drop-down following four fields will display:
- Text: Select Text If admin wants to replace add to cart with Text from the drop-down. Label options will appear once admin select Text as shown below:

- Link: Select Link If the admin wants to replace add to cart with a Link from the drop-down. A Label and URL options will appear under the Link field. The admin will enter the label and URL respectively as shown below:

- Email: Select Email If admin wants to replace add to cart with an Email from the drop-down. An Email Id option will appear against the email field. The admin will enter the email as shown below:

- Phone: The admin will enter the phone number if selected the Phone as an option for Replace Add To Cart field as shown below.

Select Category – On the selected categories, the “Replace Add to Cart” extension functionality will not work. The selected categories will continue to show default Add to Cart on the storefront same as before.
Product Ids – Here the admin can enter the product Ids for which ‘Replace Add To Cart’ will not work.
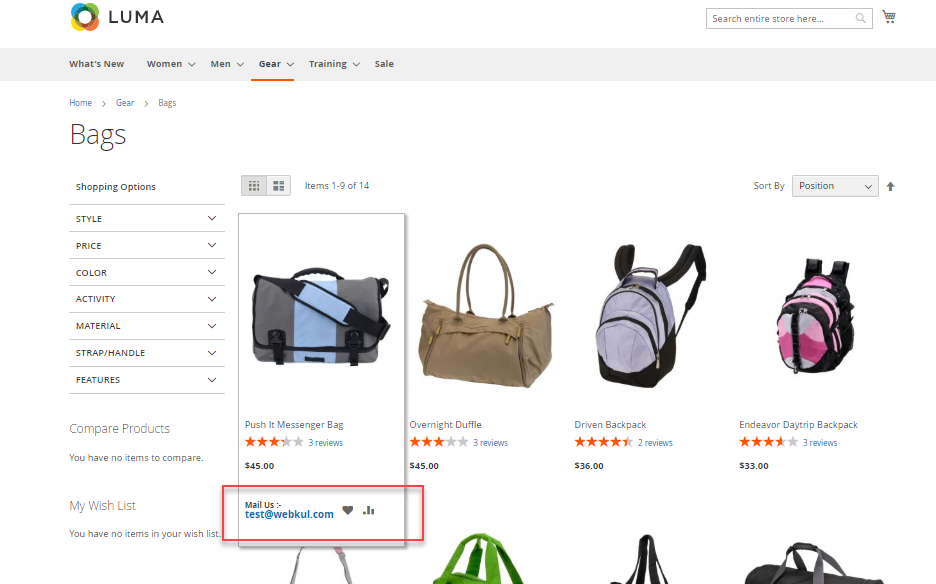
Replace “Add To Cart” Button By “Email Address” – Front-End
If the admin has set Email as an option for Replace Add To Cart field, then it will be visible on the following pages.
Category Page:
In place of Add to cart button, the configured email address will be visible on the category page.
Product Page:
In place of Add to cart button, the configured email address will be visible on the product page.

Compare Page:
In place of Add to cart button, the configured email address will be visible to customers on the compare page.
Search Page:
In place of Add to cart button, the configured email address will be visible to the customers on search page

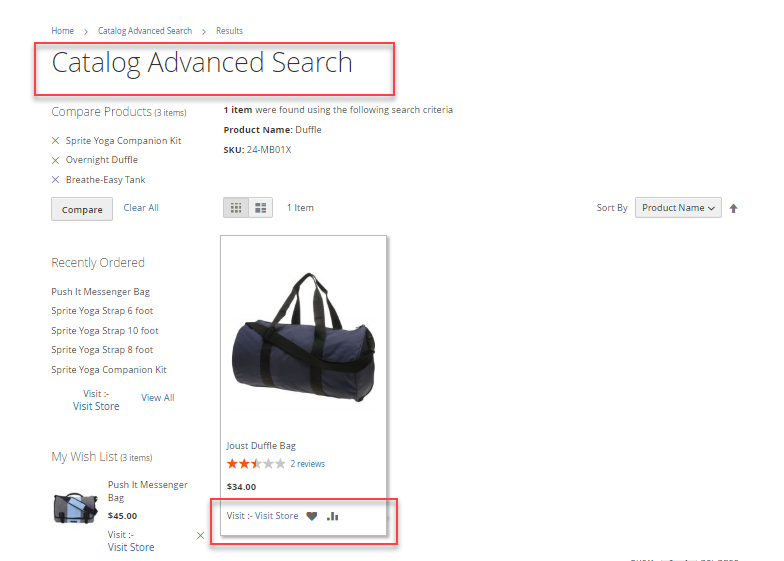
Advanced Search:
In place of Add to cart button, the configured email address will be visible on the advanced search page.

Wishlist:
In place of Add to cart button, the configured email address will be visible to customers on the wishlist page.

CMS Page:
In place of Add to cart button, the configured email address will be visible to the customers on the CMS page as shown below.

Replace “Add To Cart” Button By “Phone Number” – Front-End
If the admin has set Phone as an option for Replace Add To Cart field, then it will be visible on the following pages.
Category Page:
In place of Add to cart button, the configured phone number will be visible to the customers on the category page as shown below.

Product Page:
In place of Add to cart button, the configured phone number will be visible to the customers on the product page as shown below.

Compare Page:
In place of Add to cart button, the configured phone number will be visible to the customers on the compare page as shown below.

Search Page:
In place of Add to cart button, the configured phone number will be visible to the customers on the search page as shown below.

Advanced Search:
In place of Add to cart button, the configured phone number will be visible to the customers on the advanced search page as shown below.

Wishlist:
In place of Add to cart button, the configured phone will be visible to the customers on the wishlist page as shown below.

CMS Page:
In place of Add to cart button, the configured phone number will be visible to the customers on the CMS page as shown below.

Replace “Add To Cart” Button By A “Link” – Front-End
If the admin has set Link as an option for Replace Add To Cart field, then it will be visible on the following pages.
Category Page:
In place of Add to cart button, the configured link will be visible to the customers on the category page as shown below.

Product Page:
In place of Add to cart button, the configured link will be visible to the customers on the product page as shown below.

Compare Page:
In place of Add to cart button, the configured link will be visible to the customers on the compare page as shown below.

Search Page:
In place of Add to cart button, the configured link will be visible to the customers on the search page as shown below.

Advanced Search:
In place of Add to cart button, the configured link will be visible to the customers on the advanced search page as shown below.
Wishlist:
In place of Add to cart button, the configured link will be visible to the customers on the wishlist page as shown below.

CMS Page:
In place of Add to cart button, the configured link will be visible to the customers on the CMS page as shown below.

Replace “Add To Cart” Button By The “Text” – Front-End
If the admin has set Text as an option for Replace Add To Cart field. then it will be visible on the following pages.
Note: The Text entered by the admin is just a label for the button and hence, the functionality of the button Replace “Add to Cart” always remains the same, no matter whatever text is entered by the admin.
Category Page:
In place of Add to cart button, the configured custom text will be visible to the customers on the category page as shown below.
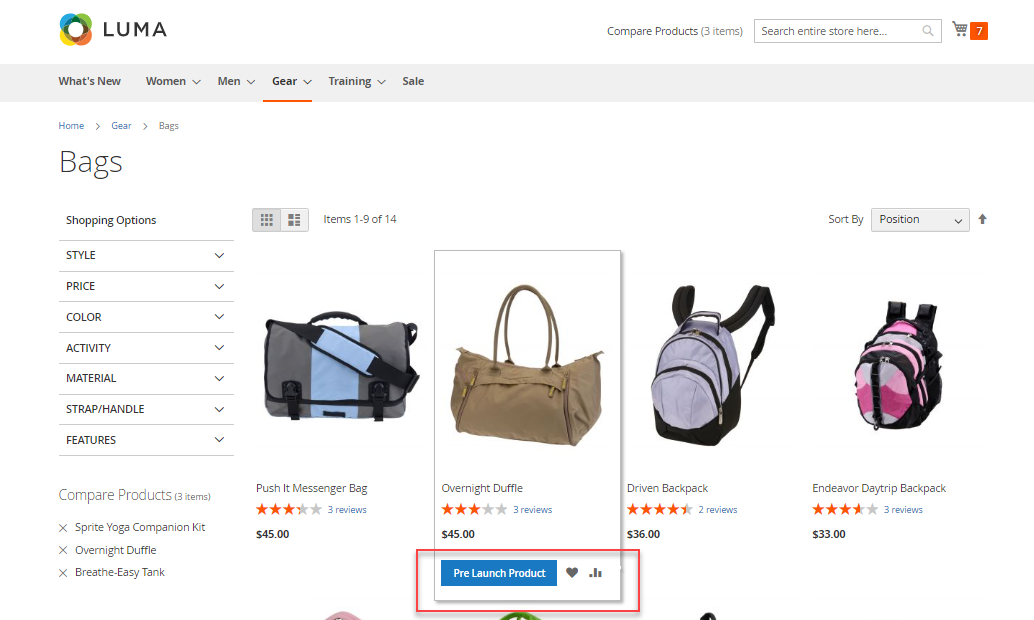
Product Page:
In place of Add to cart button, the configured custom text will be visible to the customers on the product page as shown below.

Compare Page:
In place of Add to cart button, the configured custom text will be visible on the compare page.

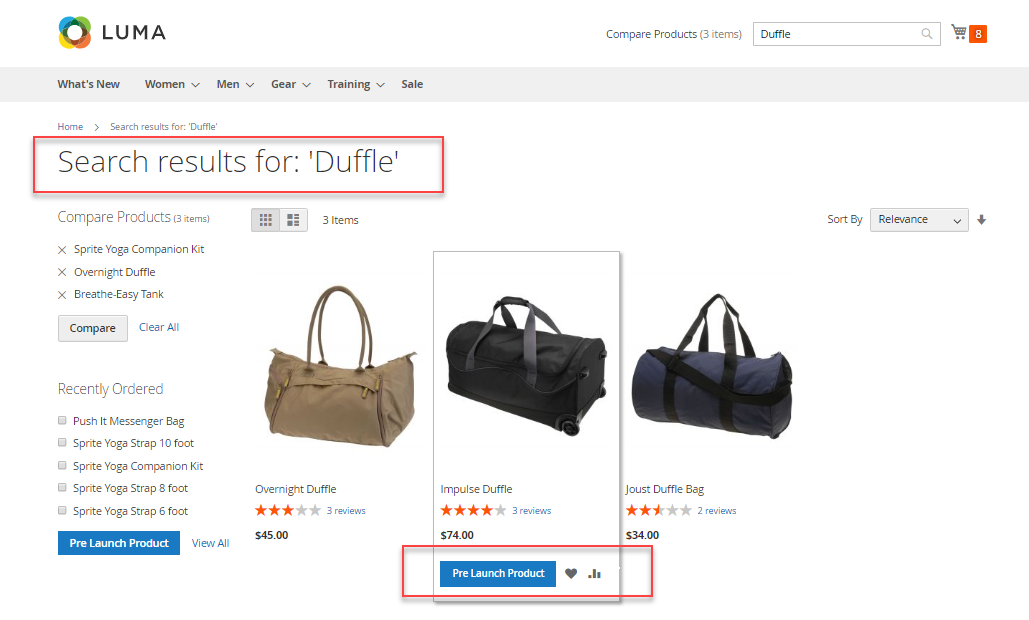
Search Page:
In place of Add to cart button, the configured custom text will be visible on the search page.
Advanced Search:
In place of Add to cart button, the configured custom text will be visible on the advanced search page.

Wishlist:
In place of Add to cart button, the configured custom text will be visible to the customers on the wishlist page as shown below.

CMS Page:
In place of Add to cart button, the configured custom text will be visible to customers on the CMS page.

Shopping Cart
If a customer tries to check out the product for which the Add to cart button has been replaced by a link, email, or phone. Then, the following error message will be displayed as per the configuration set.
- Add to cart button has been replaced by Email.

- When Add to cart button has been replaced by Phone.

- When Add to cart button has been replaced by Link.

Note: The customers can easily add the products to the cart and checkout when Add to cart button is replaced by the custom Text.
Cart Replacement Based on Product
For an instance, if the same product is added under two categories even if only one of the categories is selected to restrict “Replace add to cart” functionality.
On the Front end:
Add to cart button will still appear, rather than Replace add to cart.
Since for that particular product in the back end Admin has configured to restrict “Replace Add to cart” by listing its Product Id, and Hence it will reflect on the front end based on product.

That’s all for Magento 2 (Adobe Commerce) Replace Add To Cart module. Still, have any issues please feel free to add a ticket at https://webkul.uvdesk.com/
Explore the Adobe Commerce Cloud development services by Webkul. Also, other quality Magento 2 extensions.
Current Product Version - 5.0.0
Supported Framework Version - Magento 2.0.x, 2.1.x, 2.2.x,2.3.x, 2.4.x

Be the first to comment.