Magento 2 AI Locale Translator is an AI-powered extension that automatically translates Magento store content into multiple languages. It translates locale files, module text, product information, and product attributes using advanced AI models like ChatGPT, Gemini, and Ollama, helping store owners create fully localized storefronts without manual effort.
This module enables you to build and manage a multilingual Magento store by automating the translation of both frontend and backend content.
It supports translation of Magento modules, ensuring that all interface text such as labels, buttons, and messages are accurately localized for different store views. Additionally, it translates product content and attributes, making it easy to maintain consistent multilingual product data across your catalog.
This extension is ideal for businesses looking to expand globally and provide a seamless shopping experience in multiple languages using AI-driven automation.
Now if you want to generate an AI concise product review summary on the product pages you can check the Magento 2 AI Product Review Summary Extension.
You can also go through the below video to get to know the functionality.
Features
- Translates CSV locale files (e.g, en_US.csv) into any target language.
- Automatically generates and saves translations for selected Magento default and installed modules.
- Translates module interface phrases, labels, and storefront text for complete localization.
- Provides translation support for product content, including product titles, descriptions, and other details.
- Enables translation of product attributes, helping manage multilingual product data easily.
- Automates CSV file translation based on store views.
- Admin can choose which modules to translate.
- Provides a multilingual store experience effortlessly.
- Supports ChatGPT, Gemini, and Ollama AI models.
- The admin can enable/disable the module.
- Allows the admin to easily download the generated translation files.
- The admin can check the translation process status.
- The admin can delete the translated files.
- Improves translation accuracy with advanced AI-powered processing.
Installation
#1 Download Module
Firstly, you need to log in to the Webkul Store, go to My Account>My Purchased Products section, verify, and then download and extract the contents of this zip folder on the system.
#2 Upload Folder
Once the module zip is extracted, follow path src>app and then copy the app folder into the Adobe Commerce Cloud root directory on the server as shown below:

#3 Run Commands
After uploading the module folder, you need to run the following commands in the Magento 2 root directory:
php bin/magento setup:upgrade
php bin/magento setup:di:compile
php bin/magento setup:static-content:deploy
php bin/magento indexer:reindex
php bin/magento cache:flush
php bin/magento cron:install
php bin/magento cron:run
Language Translation
If you need to do the module translation, please navigate to the following path in your system app/code/Webkul/AILocaleTranslator/i18n.
Open the file named en_US.csv for editing as shown in the below screenshot.

Once you have opened the file for editing. Replace the words after the†comma(,)†on the right with your translated words.
After editing and translating the CSV file, you need to save the translated file name according to your region language and country code such as – de_DE.csv.
Then upload the translated file to the same folder from where you have obtained it. Now your module translation is complete.

How to Get ChatGPT API Credentials?
The user has to first create an OpenAI account and log in to the OpenAI dashboard as shown in the screenshot.

Now the user will have to click on the Personal in the top-right corner and a popup will appear. The user will click on the View API Keys option.

A page will open and a button Create New Secret Key will be visible as shown in the screenshot.

Once the user clicks on this button a pop-up will display with the API key. The user can copy the key from here with the help of the copy button.

Note – If you want to translate your product reviews then you can use our Magento 2 AI Review translator extension for translation.
How to Get API Credentials for the Google Gemini AI Model?
The user has to first create and log in to the Google Gemini dashboard, then select the Get API key and continue, as shown in the screenshot.

Then click on Get API Key:

After that, it will redirect to a new page, and you can click on create api key to get the api key.

Then create the API for the new project.

After that, a popup will appear, from which the new API key will be copied.

Module Configuration – Magento 2 AI Locale Translator
After successfully installing the AI Locale Translator module, the admin can navigate to: Stores → Configuration → Webkul → AI Locale Translator → General Settings
Once the Enable Module option is set to Yes, select the desired AI model such as ChatGPT, Gemini, or Ollama.
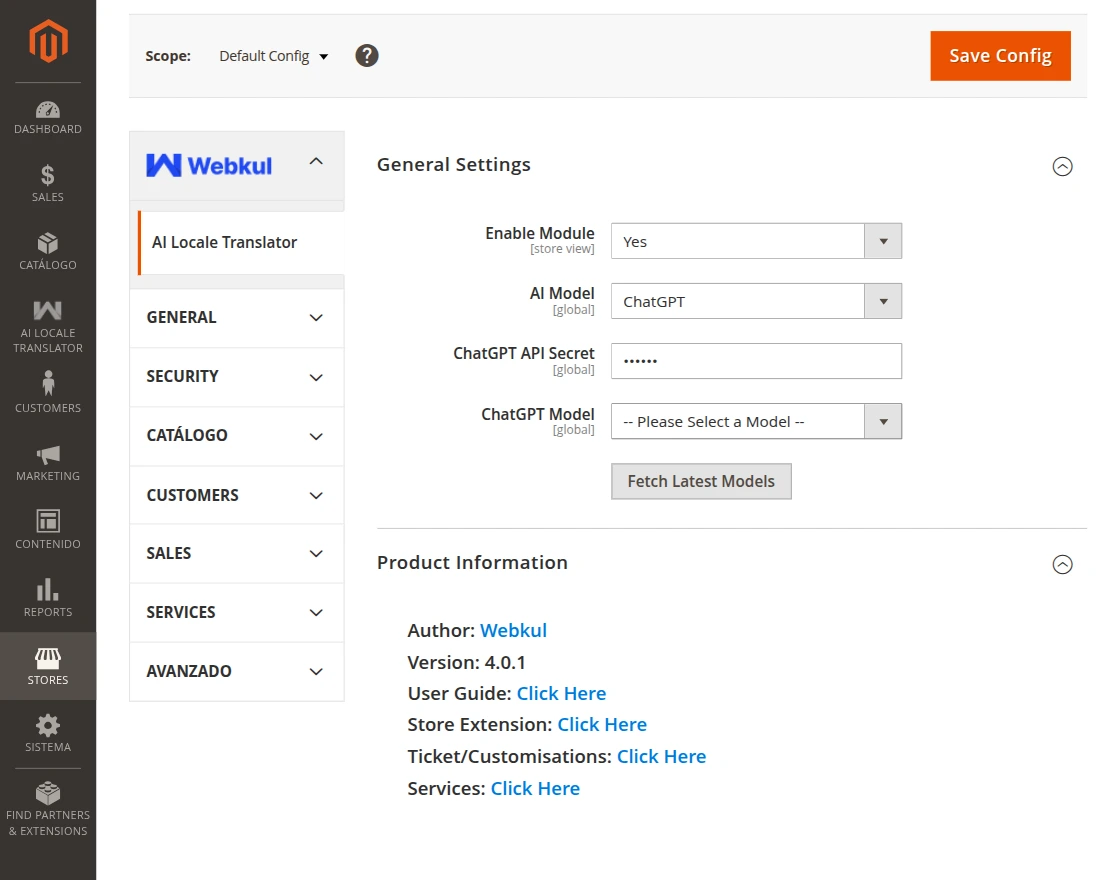
Here, the admin must make the configurations below to set the module settings.
ChatGPT AI Model
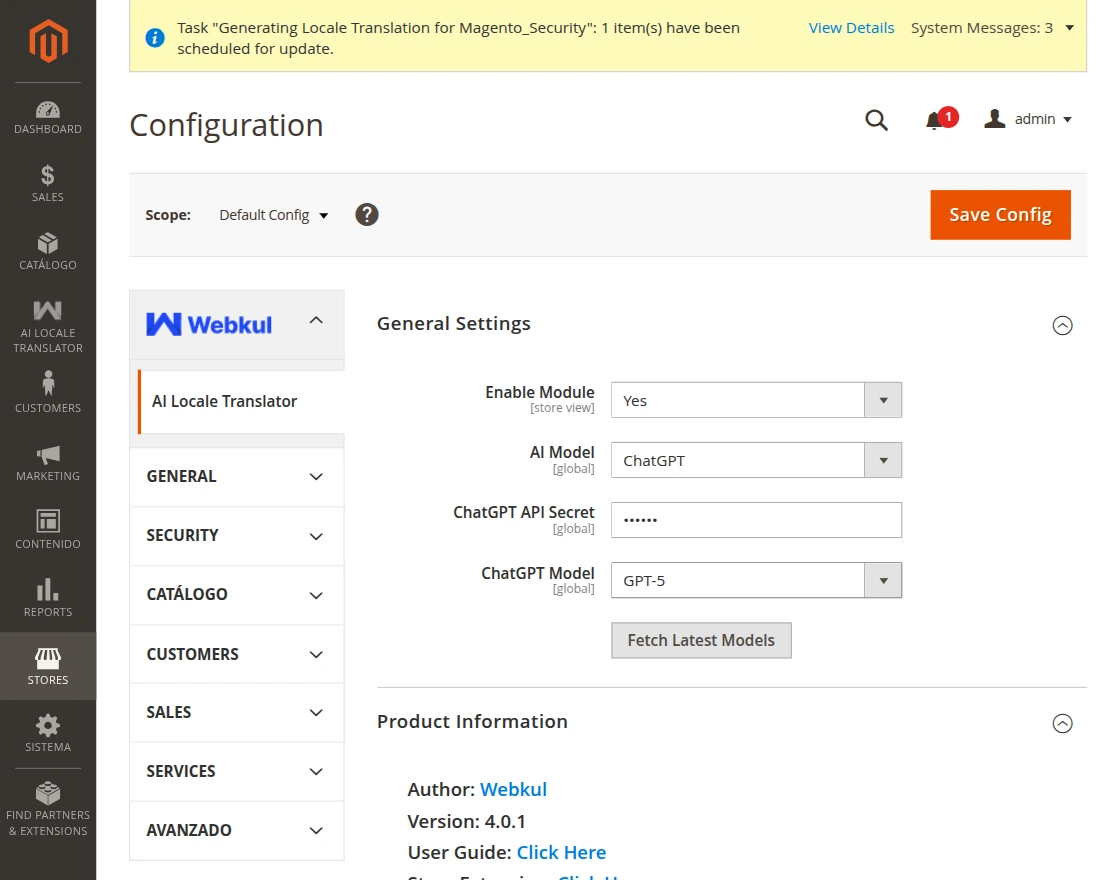
Enable Module- Enable the module status from here.
AI Model: Select ChatGPT here.
ChatGPT Model: The admin can select the latest ChatGPT model from here.
ChatGPT API Secret: Enter the API secret key from the OpenAI account
Fetch Models: This pulls the latest available versions directly from the AI provider, so you’re always working with current options
Note: After entering the respective API key and saving the configuration, the models available for the selected AI service will be fetched automatically.
Ollama AI Model
If the admin selects the Ollama AI model, then they have to configure it accordingly.
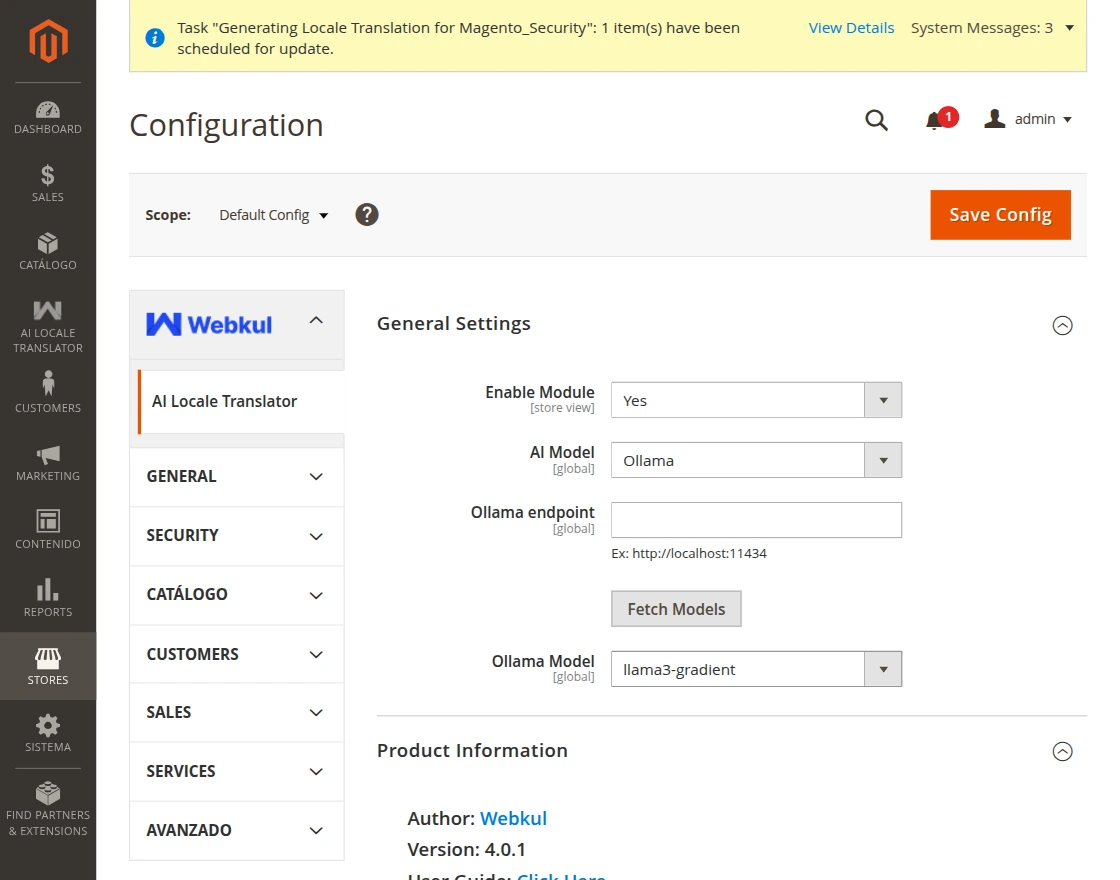
Enable Module: Enable the module status from here.
AI Model: Select Ollama here.
Ollama Endpoints: Enter the Ollama endpoint (Ex: http://localhost:11434).
Ollama Model: Click the “Fetch Models” button to automatically retrieve and display the available Ollama models.
Gemini Model
If the admin selects the Gemini AI model, then they have to configure it accordingly.
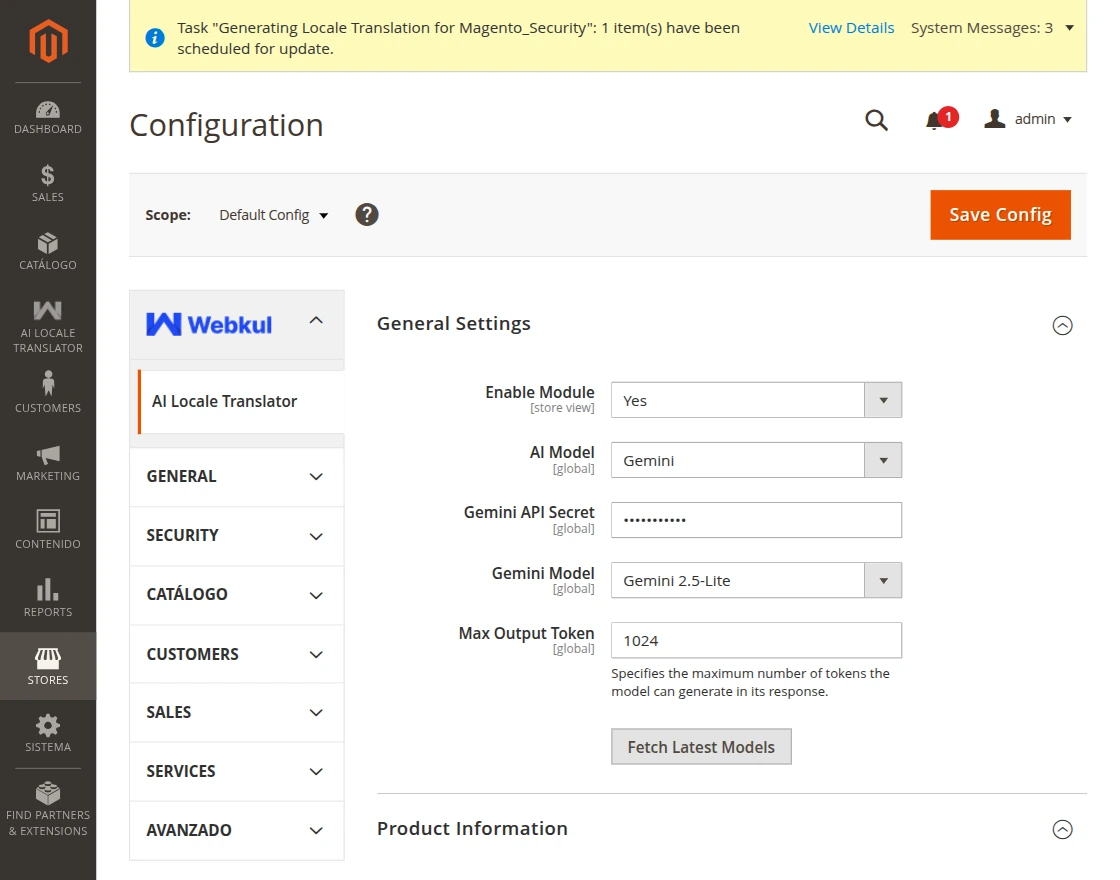
Enable Module: Enable the module status from here.
AI Model: Select Gemini here.
Gemini Model: Click the “Fetch Latest Models” button to automatically retrieve and display the most recent available Gemini models.
Max Output Token: Enter the Max Output Token for the model
Gemini API Secret: Enter the API secret key from the Gemini account
Setup Locale Language
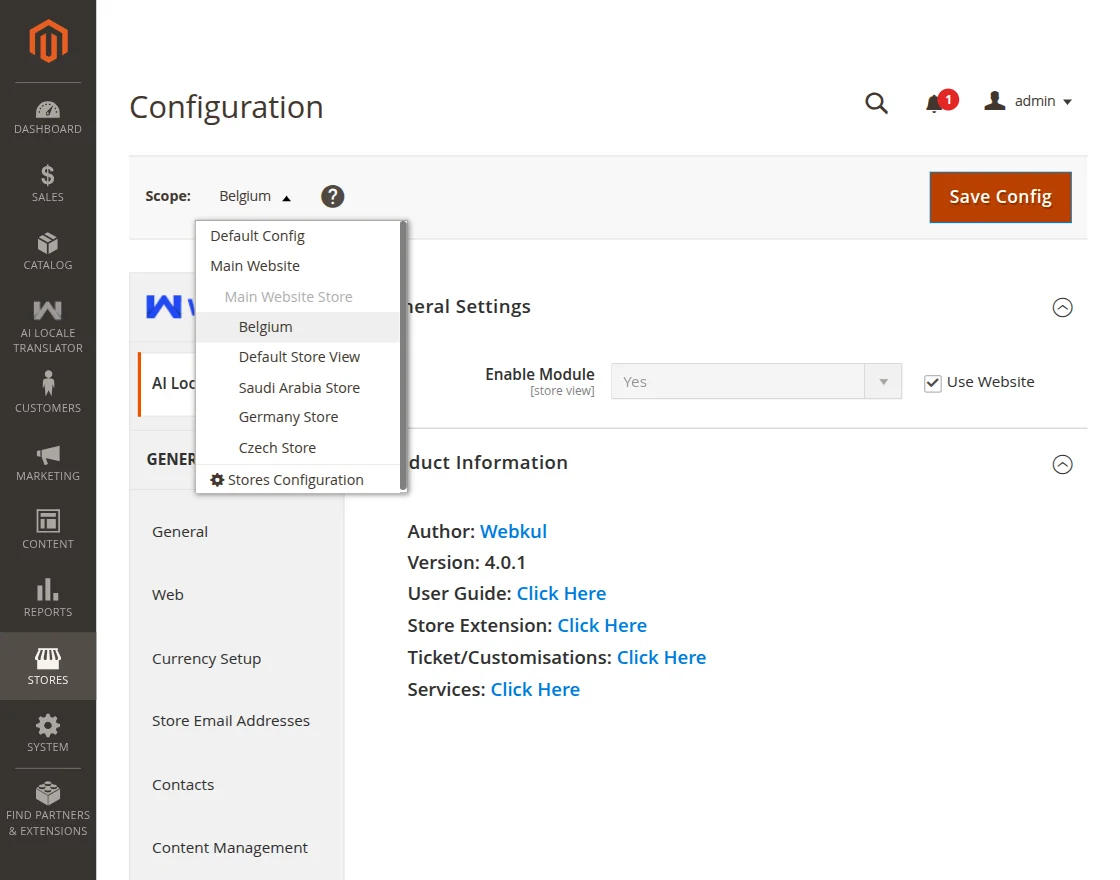
- To configure the Locale Language, first navigate to Stores → Configuration.
- Next, select the Store View for which you want to configure the language from the scope dropdown at the top-left corner.
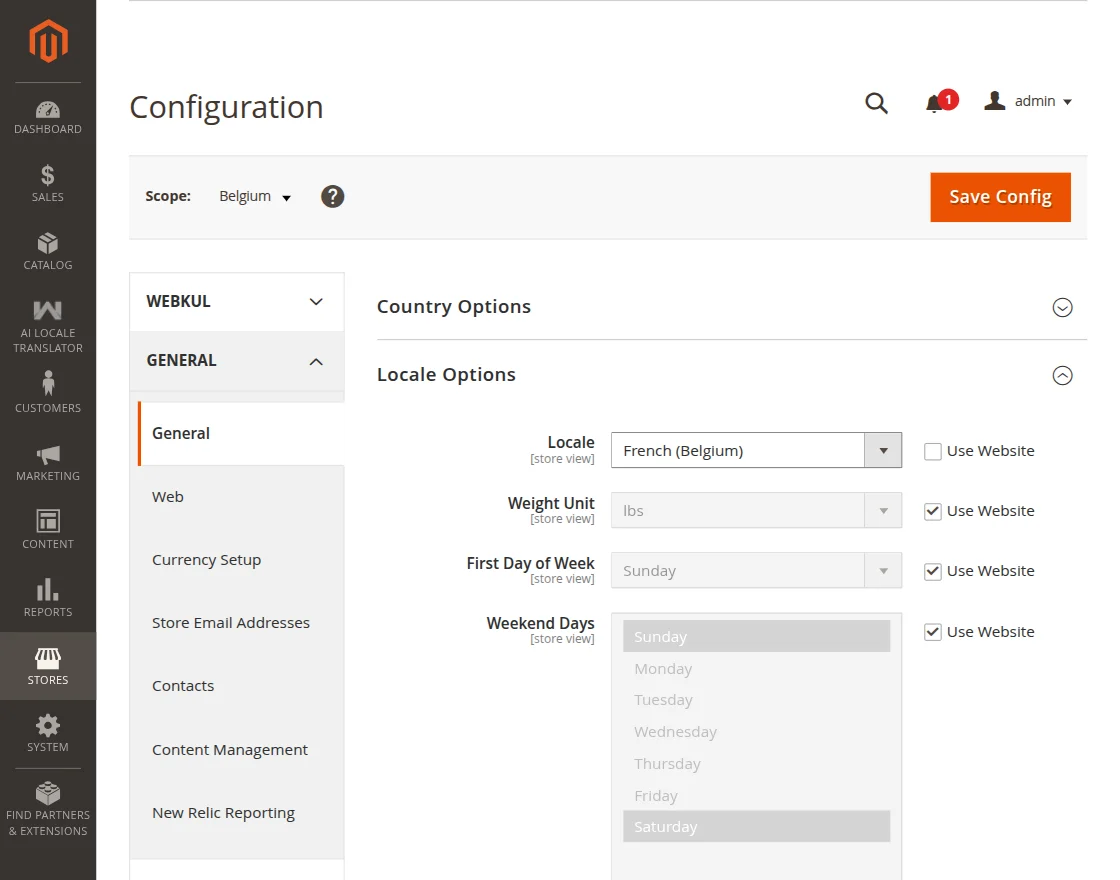
- Then navigate to General → General → Locale Options.
- After that, choose the Locale Language according to the language you want to apply for the selected store view.
- Once the locale language is configured for the store view, you can proceed to generate translations for the modules and product content based on the selected store view language.
AI Locale Translator Workflow
To create and manage translation, navigate to AI Locale Translator from the admin sidebar menu.
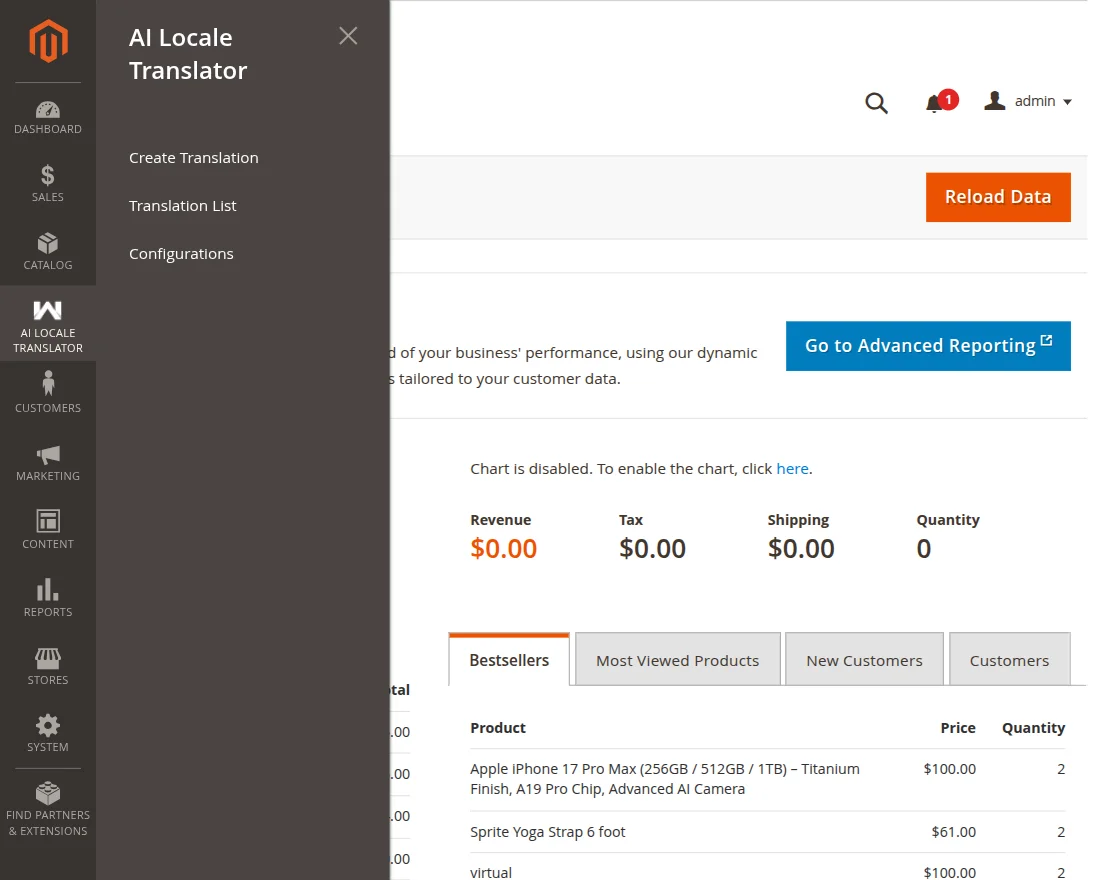
This has three sections:
- Create Translation: Create translation for selected Magento default and installed modules.
- Translation List: View, Delete, and Download the translation files.
- Configurations: Module configuration.
Admin Create Modules Translation:
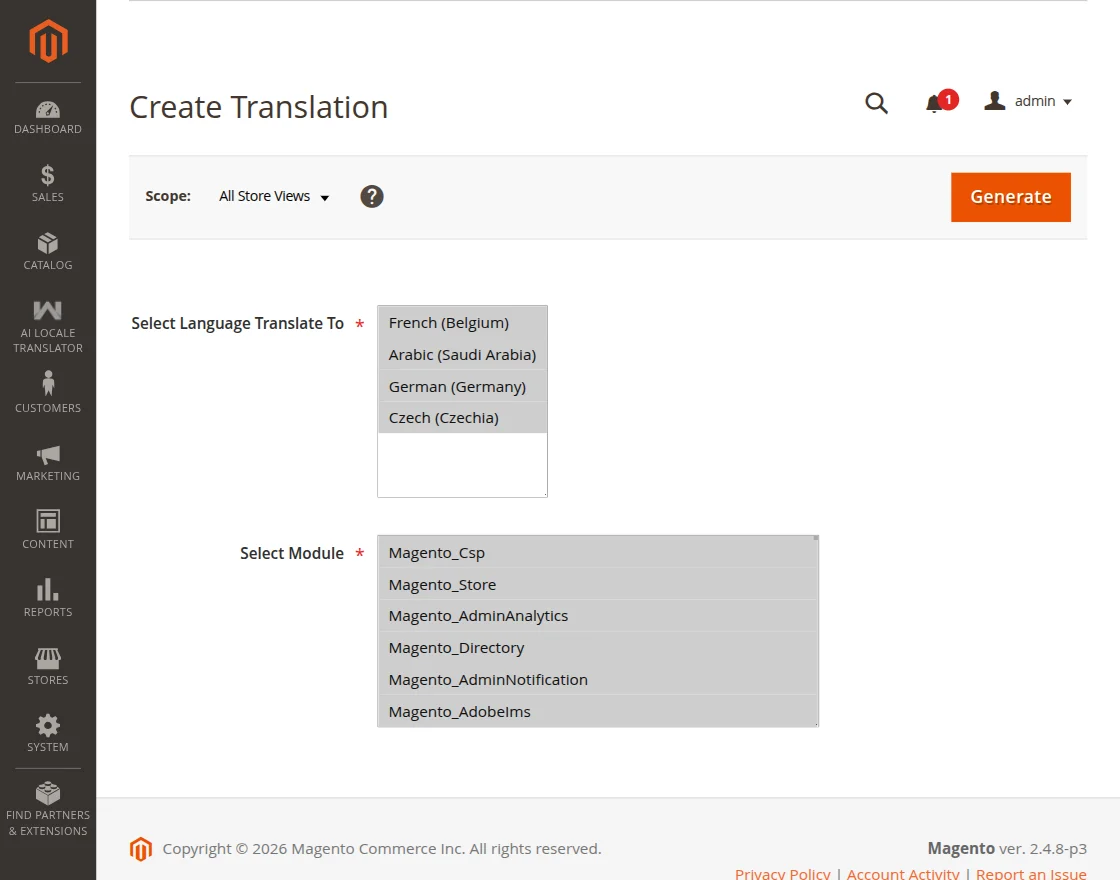
- To generate translation files, navigate to AI Locale Translator → Create Translation from the Magento Admin Panel.
- Next, choose the language from the Select Language Translate To field. The languages listed here are automatically populated based on the languages configured for the available store views.
Then, select the modules that you want to translate from the Select Module section. - After selecting the required options, click the Generate button to start the translation process.
- The module will automatically generate the translated CSV files for the selected modules based on the chosen store view language.
Note: You can select multiple modules and multiple languages at the same time to generate translation files in bulk.
Admin Create Products Translation:
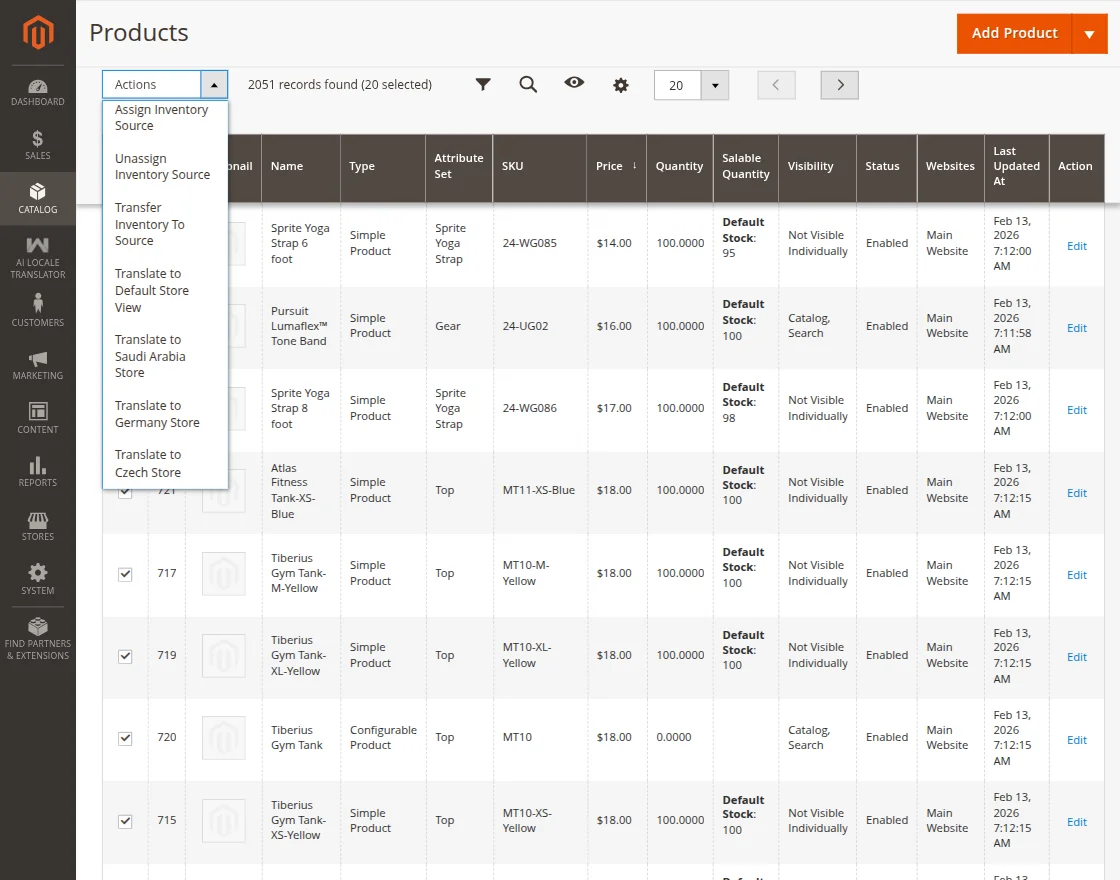
- To generate product translations, navigate to Catalog → Products from the Magento Admin Panel.
- From the product grid, select the checkbox of the product(s) that you want to translate. You can select multiple products if you want to translate them in bulk.
- Next, click the Actions dropdown menu located above the product grid.
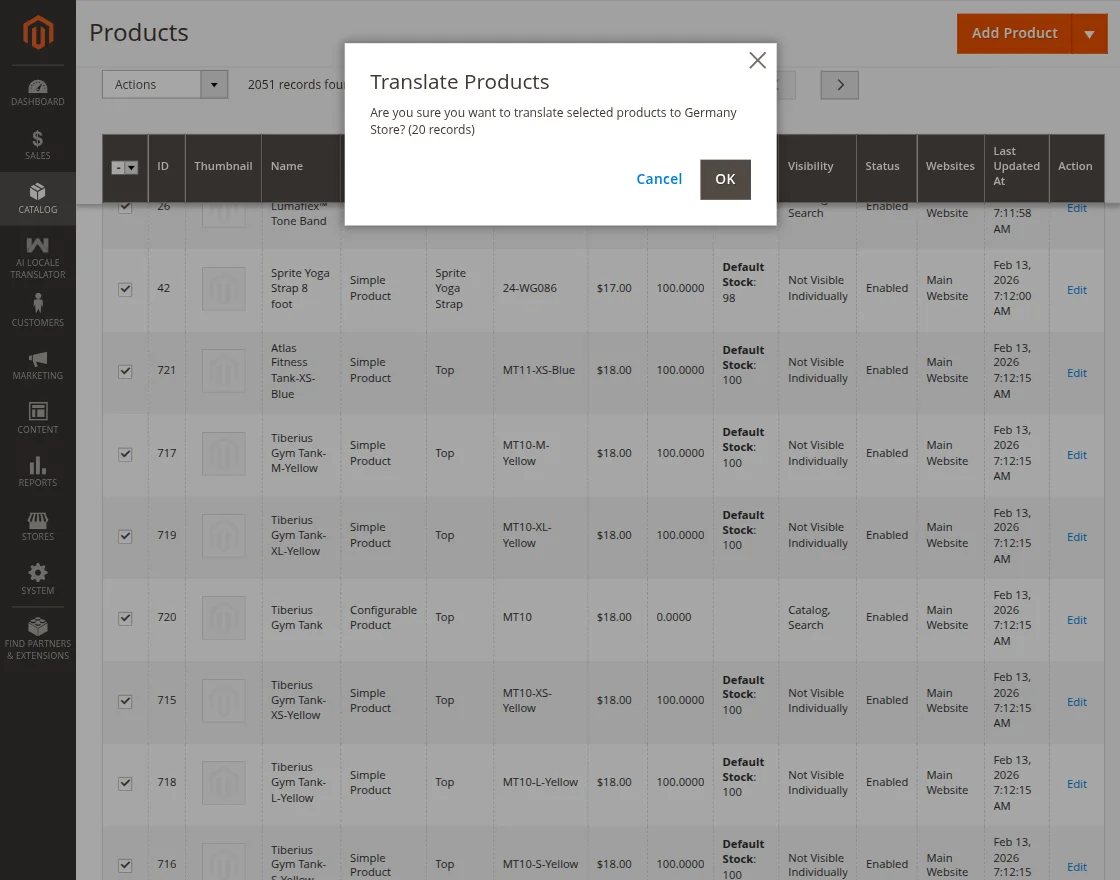
- From the available options, select Translate to [Store View] based on the store view language in which you want the product content to be translated.
- After selecting the desired option, click the OK button.
- The system will automatically translate the selected product content and supported attributes, and the translated content will be saved for the corresponding store view language.
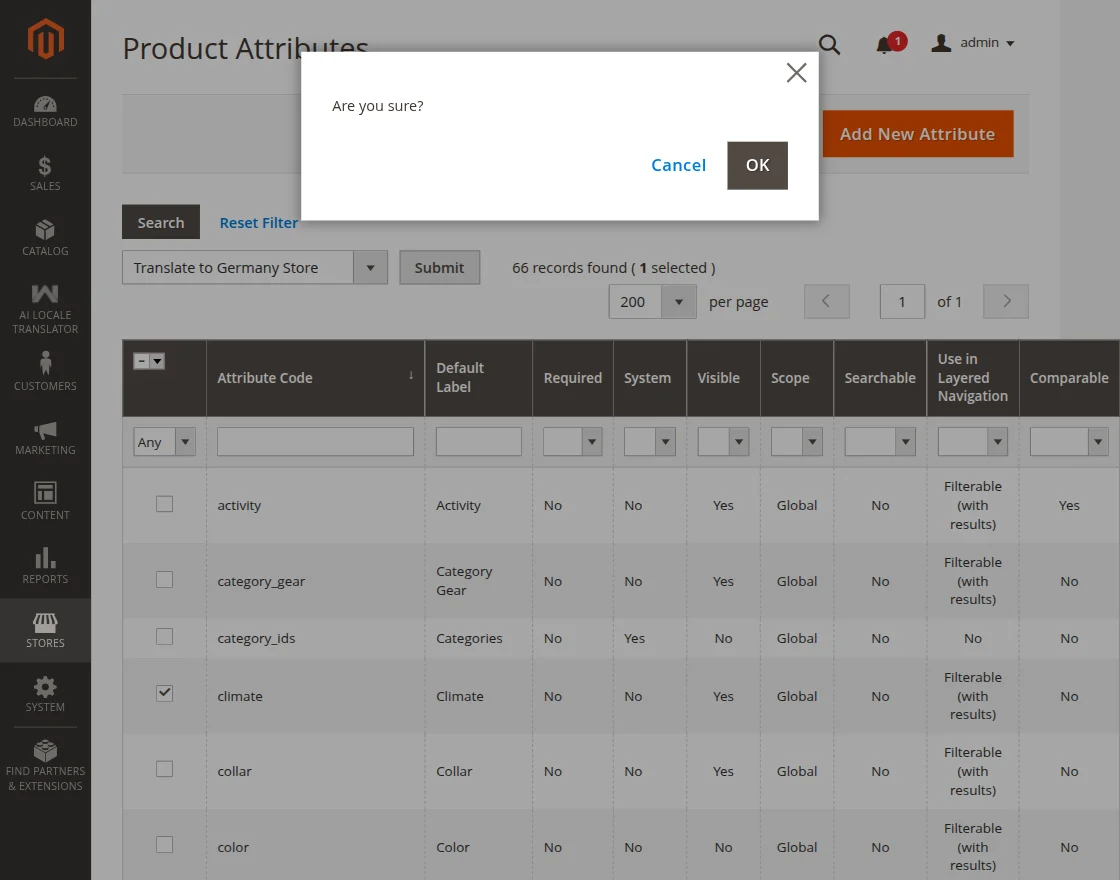
Admin Create Product Attributes Translation:
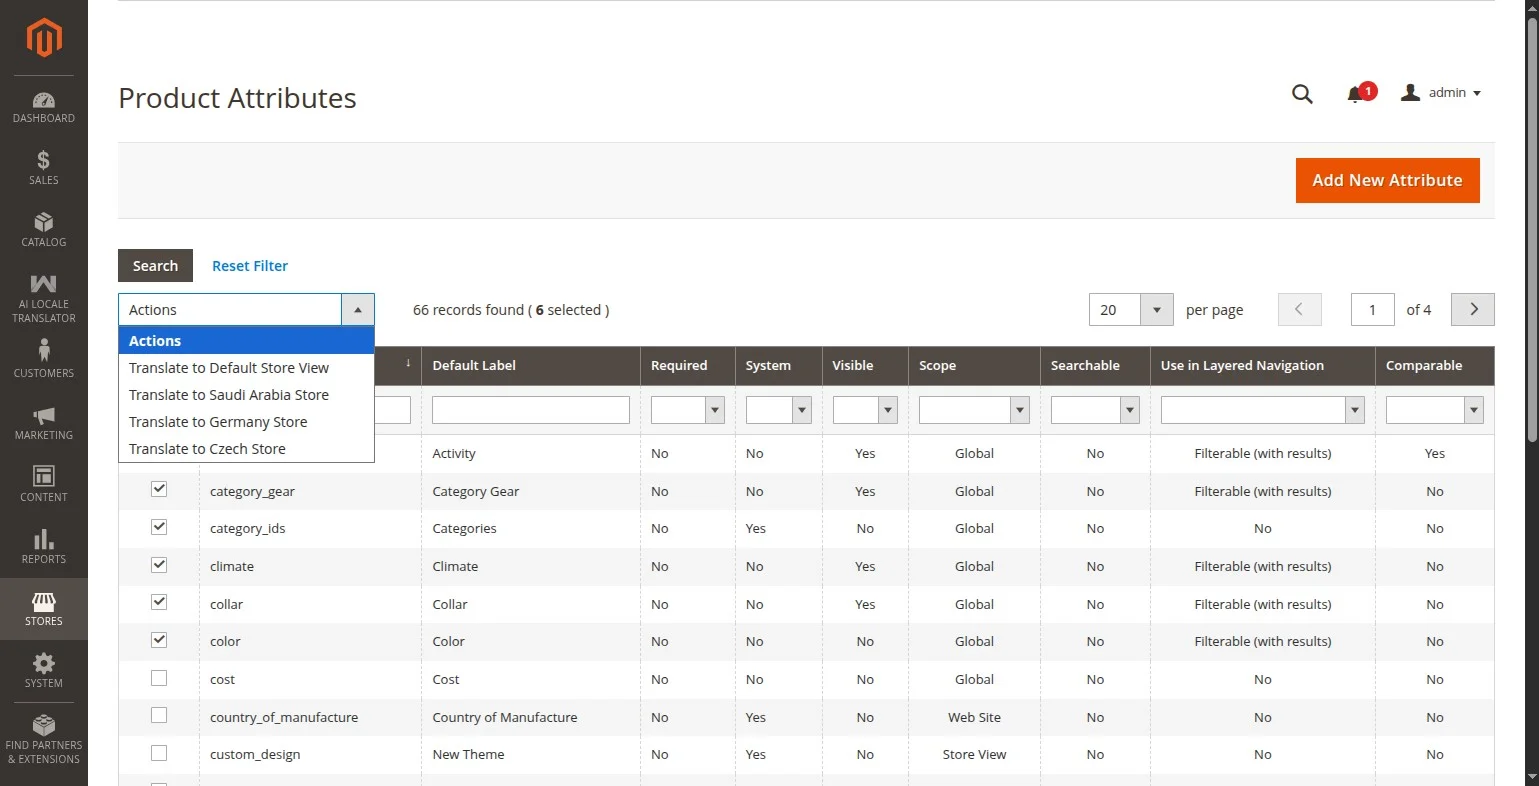
- To generate product attribute translations, navigate to Stores → Attributes → Product from the Magento Admin Panel.
- From the Product Attributes grid, select the checkbox of the attribute(s) that you want to translate. You can select multiple attributes if you want to translate them in bulk.
- Next, click the Actions dropdown menu located above the attributes grid.
- From the available options, select Translate to [Store View] based on the store view language in which you want the attribute labels to be translated.
- After selecting the desired option, click the Submit/OK button.
- The system will automatically translate the selected product attribute labels, and the translated content will be saved for the corresponding store view language.
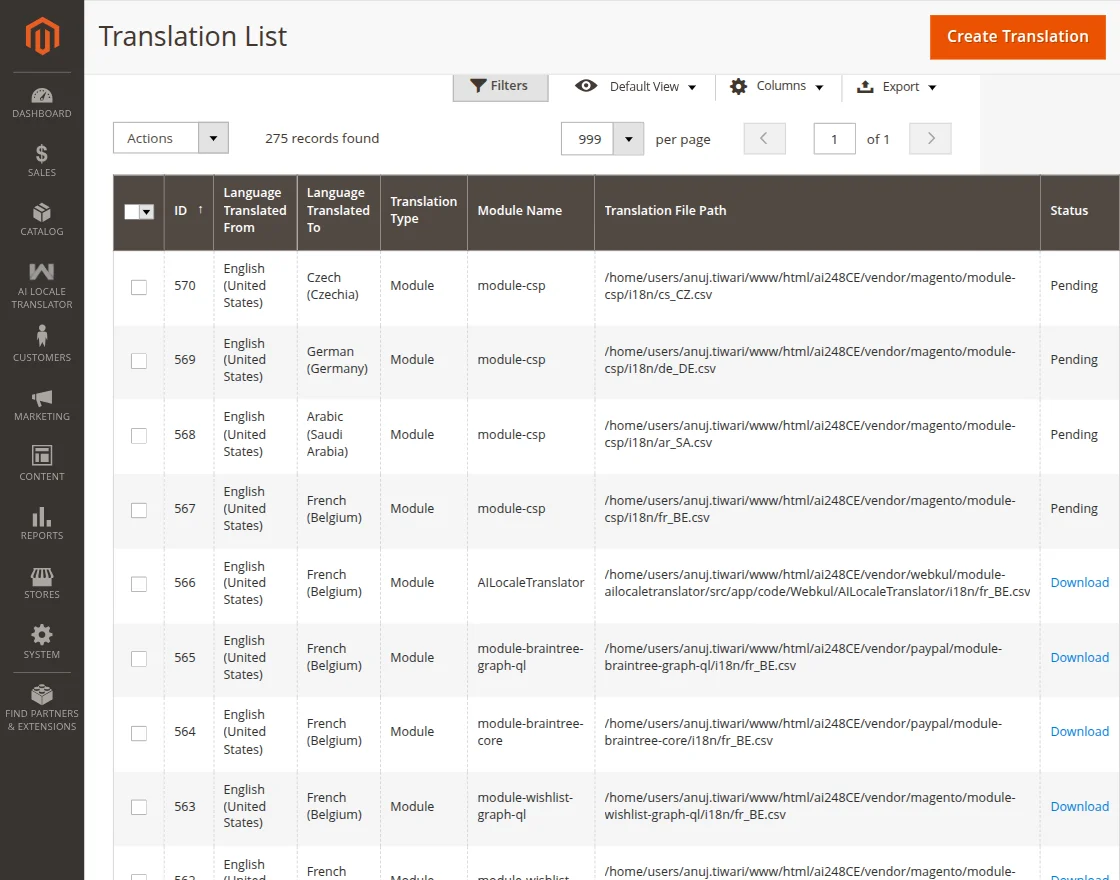
View Translation List
To view translation files, navigate to AI Locale Translator → Translation List.
Here, all generated translations are listed in one place for easy review and management. From this section, the admin can:
- Check the status of all the translations.
- Check source language, target language, translation type, and module name.
- Access the file path of the generated translation.
- Download the translated CSV file directly.
- Delete the translated CSV file.
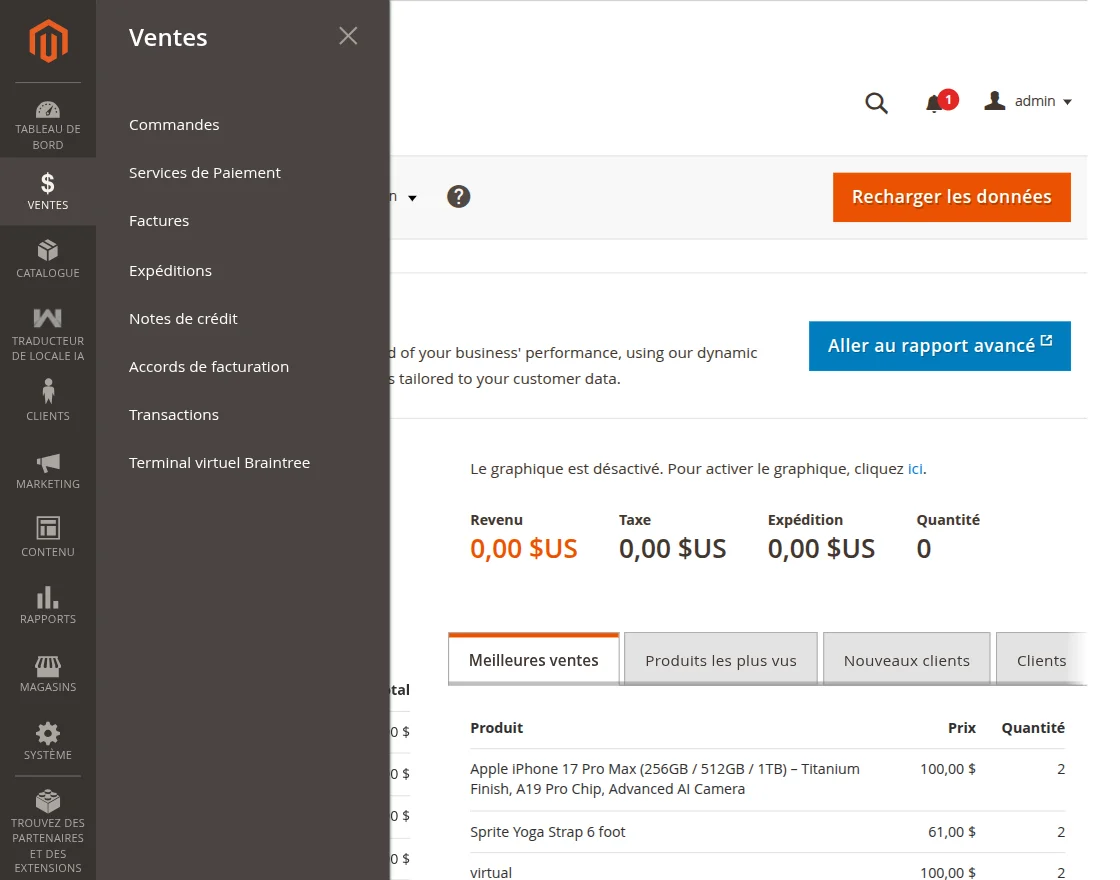
Admin Panel: Post-Translation View
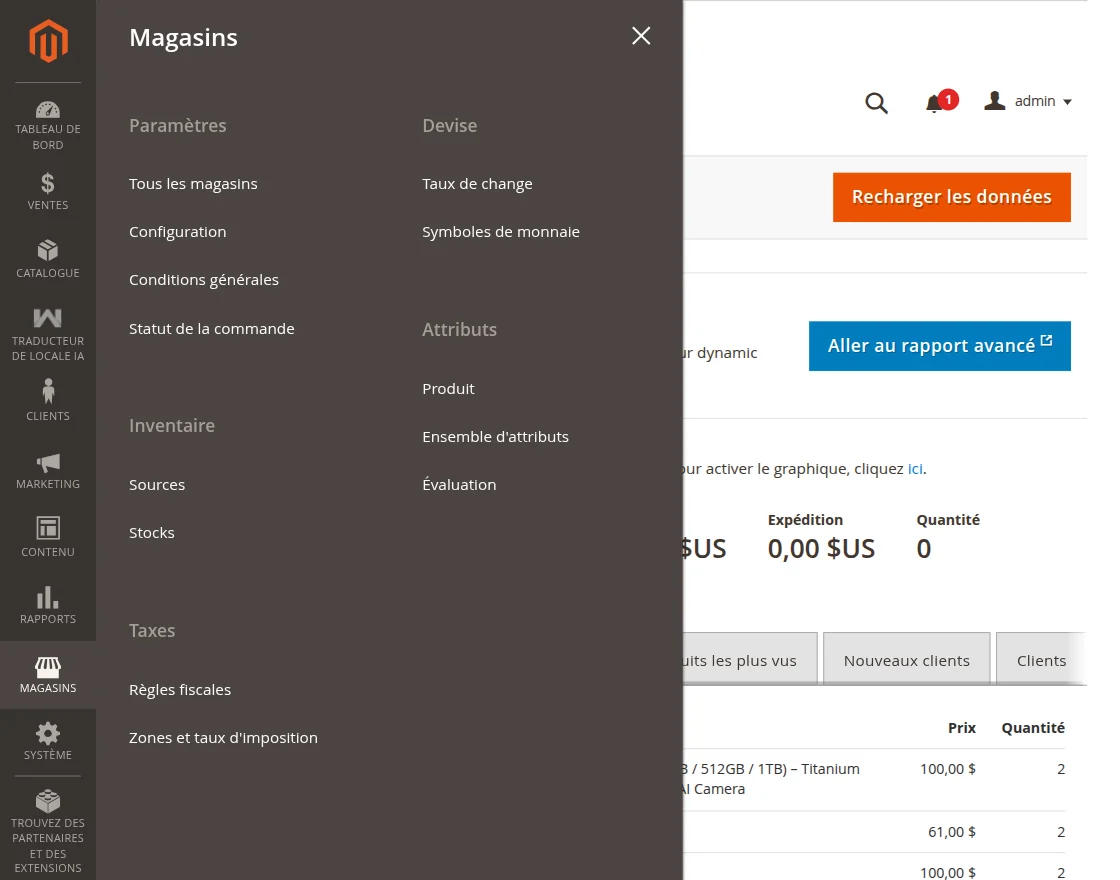
- To view the translated content in the admin panel, the admin needs to change the Interface Locale language. This can be done by navigating to Admin User Settings → Interface Locale and selecting the desired language.
- Once the Interface Locale is updated, the admin interface elements, including labels, menu items, buttons, and other text of the translated modules, will appear in the selected language.
- Below are the images for reference showing how the module appears in the admin panel after the translation is applied.
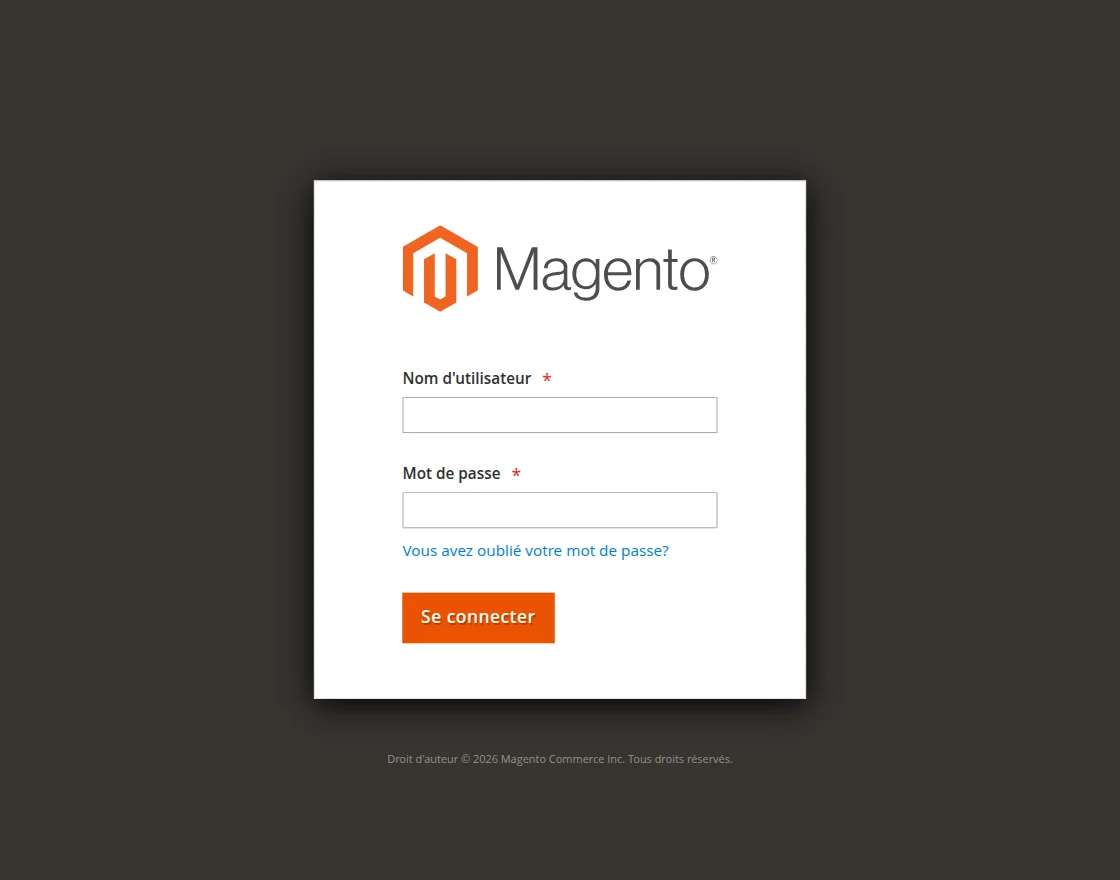

Storefront: Post-Translation View
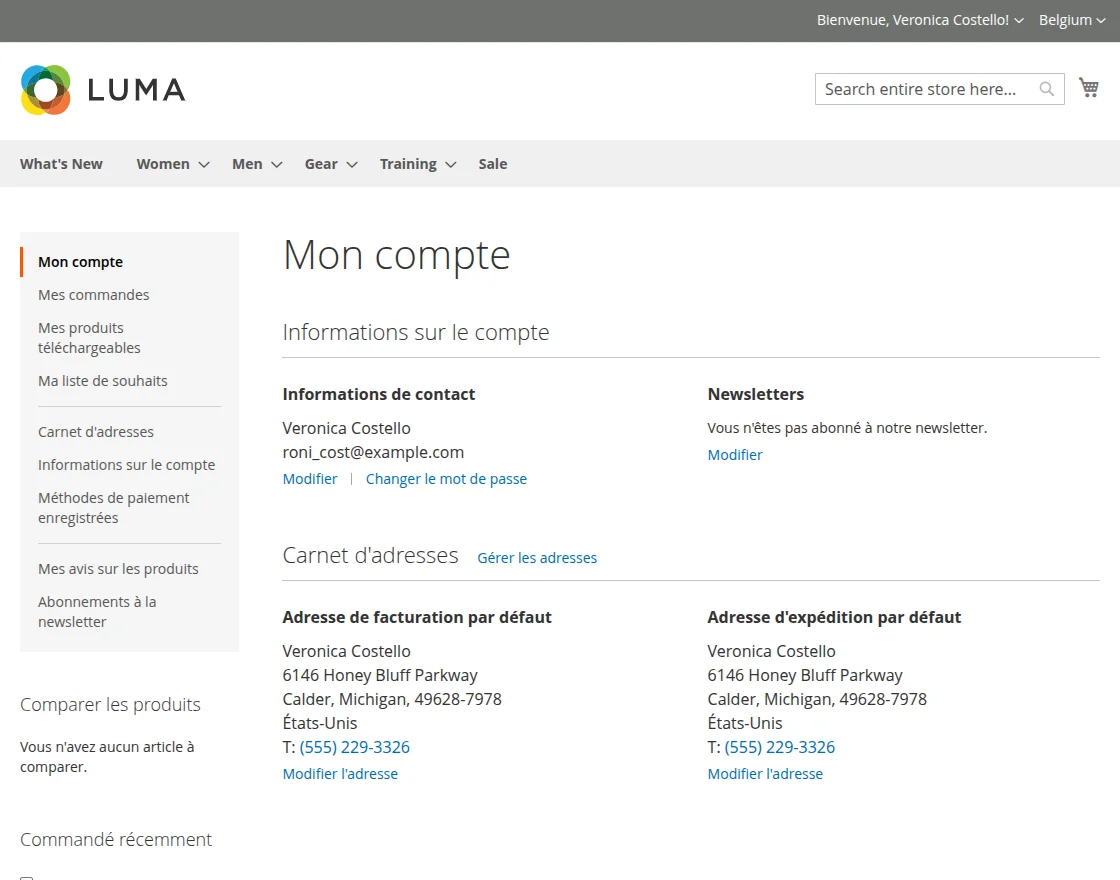
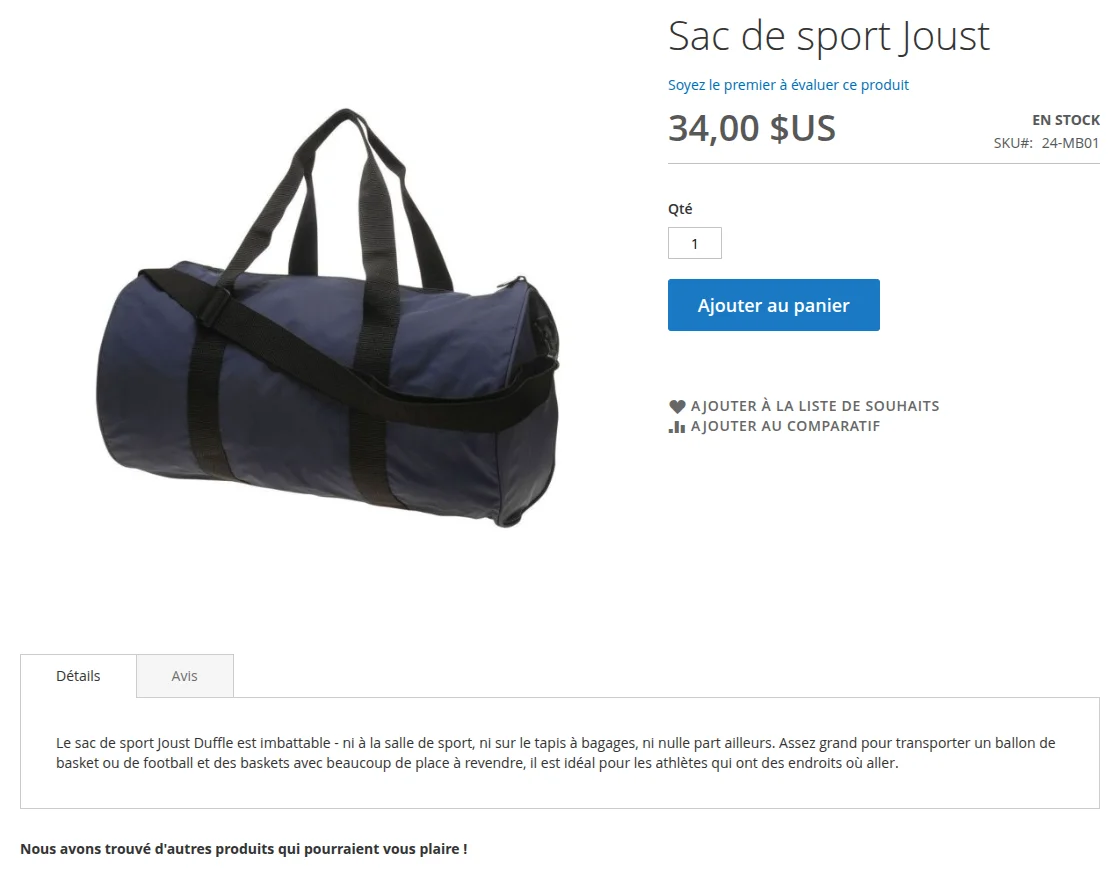
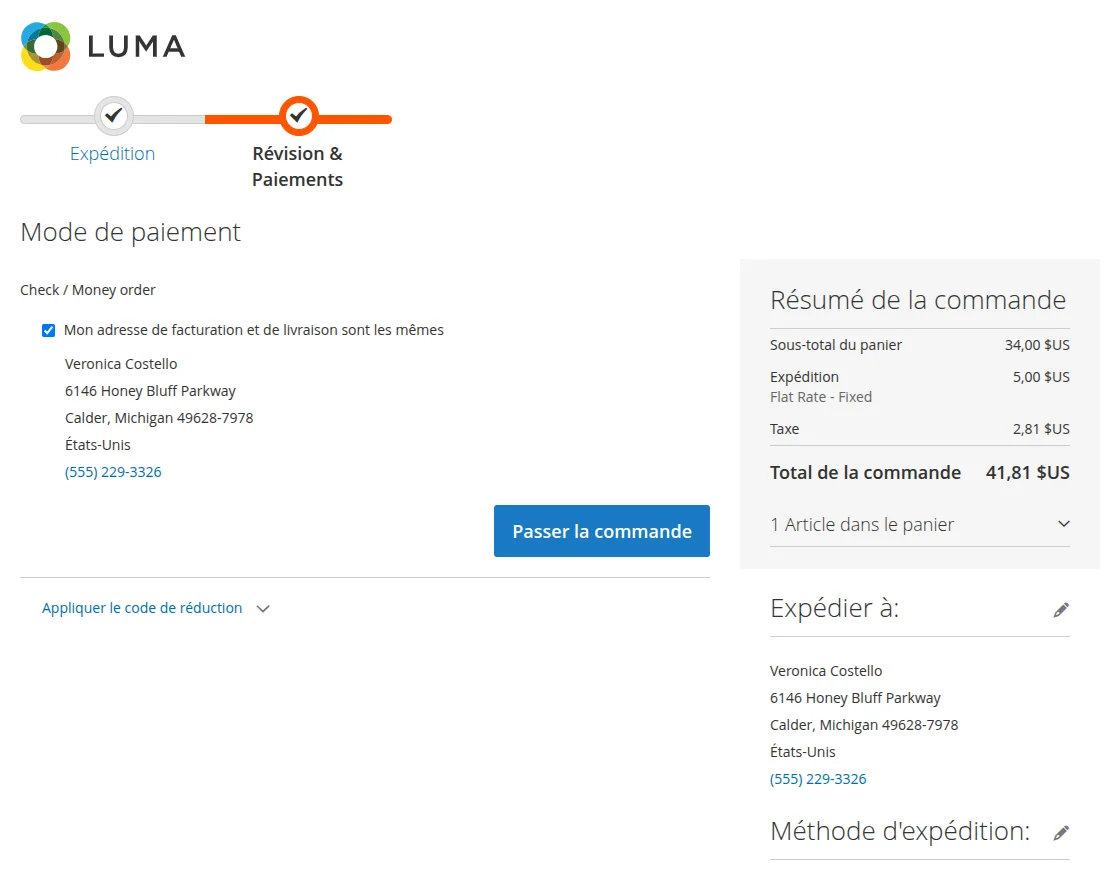
- After the translation process is completed, navigate to the storefront of your Magento store.
- To view the translated content on the frontend, switch to the store view for which the translation was generated.
- Once the appropriate store view language is selected, the translated content will be reflected across the storefront.
- The module interface text, labels, and other storefront elements will appear in the selected language, providing a localized experience for customers.
- Below are the images for reference showing how the translated module appears on the storefront after the translation is applied.


Support
That is all about the Magento 2 AI Locale Translator extension.
If you have any queries regarding the plugin, please contact us at Webkul Support System.
You may also check our top-quality Magento 2 AI Extensions.
Current Product Version - 4.0.1
Supported Framework Version - Magento 2.0.x, 2.1.x, 2.2.x,2.3.x, 2.4.x

Be the first to comment.