Bagisto Laravel native Mobile App Builder. Mobikul as a mobile app developer has dedicated its time and effort to creating an app for various famous open-source platforms.
However, this time after acquiring years of regress experience. Webkul together with Mobikul has created an app for their in-house platform that is Laravel Native Mobile App.
As a matter of fact with the advancement in technology just having a website for a business will restrain growth.
Henceforth, the requirement of the hour is a mobile app.
However, the mobile app build is on Bagisto and uses Flutter for the Android and iOS applications.
This Laravel mobile app builder will allow the customer to checkout in a convenient form due to its easy accessibility.
Thus, this Flutter app has a collection of a feature that makes it an advanced app for customers.
Requirements
Note – To get the Bagisto Laravel Native Mobile App up and running, make sure you have the following.
- Bagisto Version – v2.0.0 or higher
- Android Studio Meerkat | 2024.3.2
- Flutter Version – 3.38.9
- Dart – 3.10.8
- Xcode – 26.3
- Swift – 6.1
Feature List of Laravel Mobile App Builder
- Easy management of the orders with the help of the app.
- Well configured with the backend.
- The app can work on both tablets and smartphones.
- Informative and interactive shopping app with a fast and intuitive response.
- An open-source app that can be customised (paid service) as per business requirements.
- 24×7 support on Facebook (paid), WhatsApp (paid), and mail.
- A search suggestion is implemented to allow customers to get the required product more easily.
- Wishlist to save products for future purchases.
- Multi-lingual functionality (RTL) support for localization of the app.
- The store owner can enable multiple currencies in the app to attract customers all across the globe.
- Real-time synchronization between the app and the website.
- Interactive UI/UX with Modern Material Design standards.
- Easy addition of offers and coupons to engage maximum customers.
- Allow the app user to cut short login processes by implementing a faster and easier social login facility (available on customization).
- Local notification to the customer that avoid the abandoned cart.
- Customers can review products they have recently viewed.
- The application has the option to be displayed in a dark theme.
Installation of Laravel Mobile App Builder
To install the Laravel Mobile app on your server you need to follow the given steps on the given URL:
Follow the URL: Installation of Laravel Mobile App.
Installation:
To install the Bagisto GraphQL API, follow these steps:
1) Install via Composer
Run the following command in your terminal to install the GraphQL API package:
composer require bagisto/graphql-api dev-main
2) Update Middleware Configuration
In the app/Http/Kernel.php file, move the following middleware from the web section in the middlewareGroups array to the global middleware array:
   \Illuminate\Cookie\Middleware\AddQueuedCookiesToResponse::class,
   \Illuminate\Session\Middleware\StartSession::class,
3) Update Environment Settings
Add the following entries to your .env file to configure JWT settings:
   JWT_TTL=525600
   JWT_SHOW_BLACKLIST_EXCEPTION=true
4) Publish Assets and Configurations Run the command below to publish assets and configurations for Bagisto GraphQL:
php artisan bagisto-graphql:install
Usage:
- GraphQL Playground After installation, you can test your API through the GraphQL Playground. Visit:
http://your-domain.com/graphiql
- Postman Integration Alternatively, you can test the API using Postman by accessing:
http://your-domain.com/graphql
That’s it! Your Bagisto GraphQL API is now ready. Execute the project on your specified domain and start building your headless eCommerce solution.
Laravel Mobile App Configuration
The admin can control the Bagisto Laravel mobile app from the backend easily by following a few simple steps.
Each configuration step is displayed one at a time in the tabs below.
To set up the Laravel mobile app, the admin should go to Configure -> GraphQL API.

- Private Key JSON File Content: To access the server key, just click the link located below the input box and set up the project on Firebase.
2. Notification Topic: The administrator has the ability to choose a name for the Bagisto Laravel mobile application.
Push Notifications
The Mobikul mobile app’s push notifications can be easily controlled from the backend.
To do this, the admin should go to Settings -> Push Notifications.

Also, for adding a new notification the admin can click on the Add Notification button.

After this add the below details.
1) Notification Title – The admin is able to put in the title for the notification.
2) Notification Content – The admin can explain the notification in the content section.
3) Image – Include an image for the notification.
4) Notification Type – The admin can choose the type of notification from the drop-down menu, which includes Simple Type, Category Based, or Product Based.
5) Channels – The admin can pick the channels that are either available or have been added by them.
6) Notification Status – Here, the admin can turn the notification on or off.
Additionally, the admin has the option to edit or remove the current notification based on what the business needs.
Further, the admin can edit or delete the existing notification as per the business requirement.
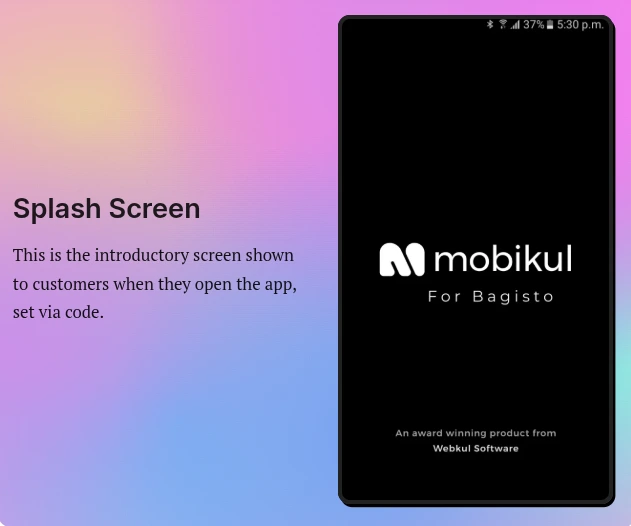
Customer View: Splash Screen
This is the first screen that customers see when they open the app. Also, this screen is included in the app from the coding side.
The business owner will give us this image based on what is needed through a PDF that we get beforehand.
Home Page
The app’s homepage is organized into several sections to make it easier to use.
Carousel Sections
The homepage of the Laravel mobile app builder allows you to add various types of carousels in the slider.
1) Image type: You can select the Image type carousel, which lets you create different kinds of images and link products to them.
2) Banner Section: In this section, users of the application will view the banner that the admin has set up. The banners will rotate one after another.
Featured Products
In this section, users of the Laravel Mobile app will find the highlighted items chosen by the app owner.
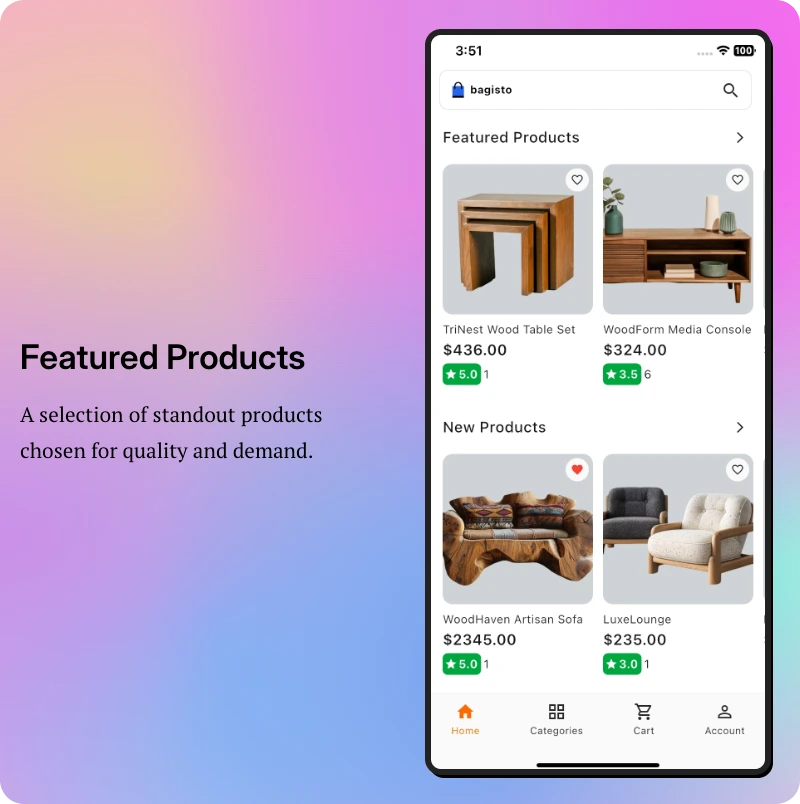
New Products
In the latest additions area, users can view the products that have just been added by the app owner.
Side Drawer
Also, the app motivates users to sign up through the application. It provides a straightforward form for them to enter their information.
This makes it easy to log in whenever they want to use it.
Sign Up –> Create An Account
The user of the Laravel native mobile app builder can easily register the app by completing the registration form.
This way, the app user can input their basic information to become a customer.
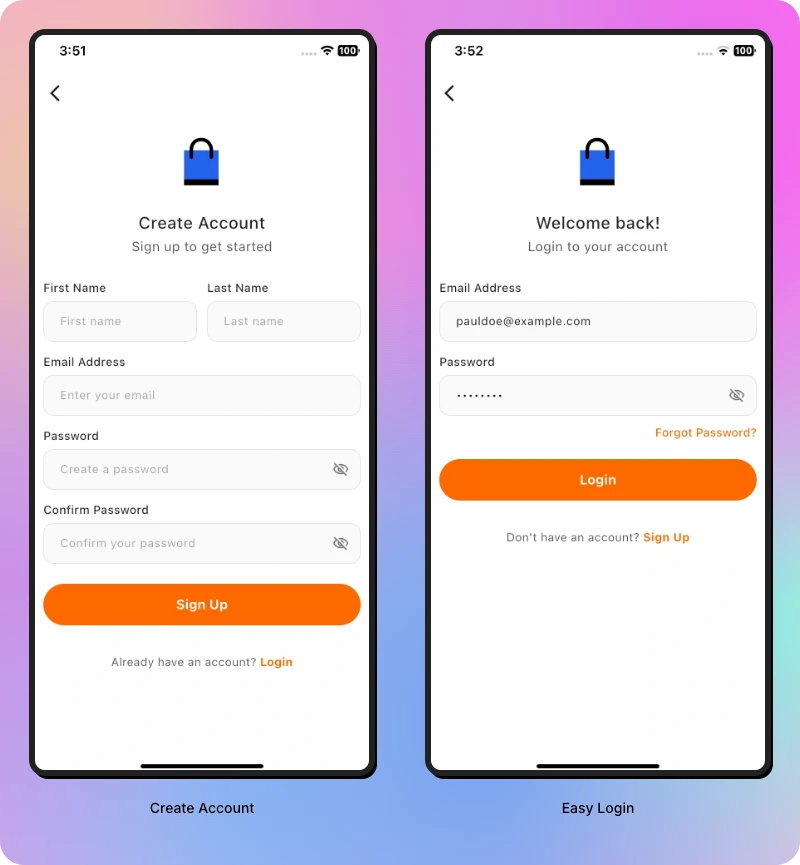
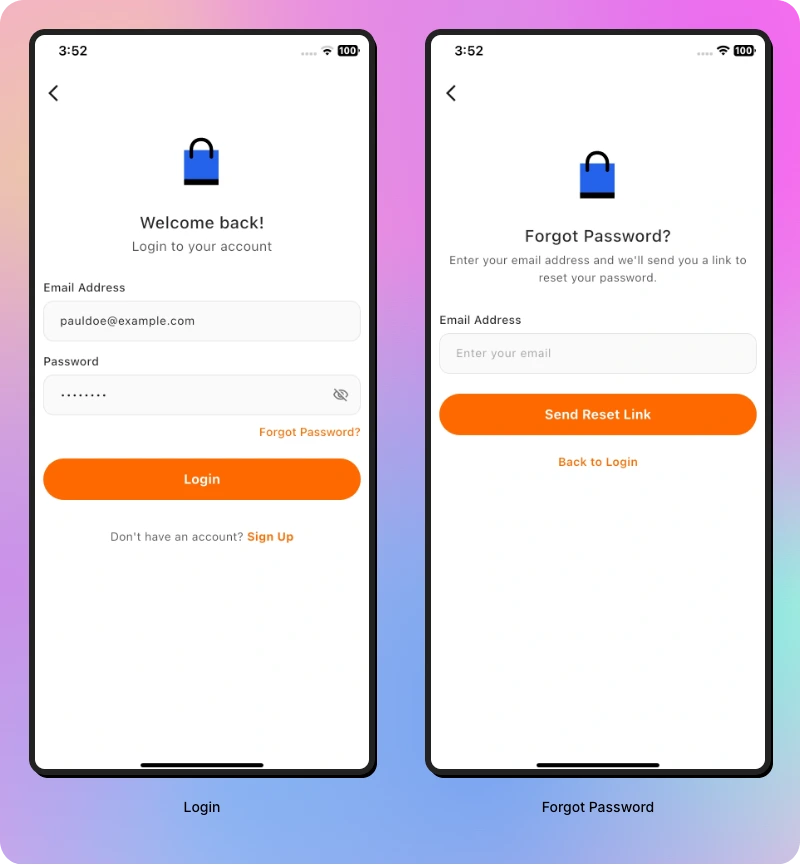
Sign In via Email ID
Once a customer finishes signing up, they can log in using the email ID and password they provided during registration.
Forget password:
Users can change their password by clicking on the Forgot Password link.
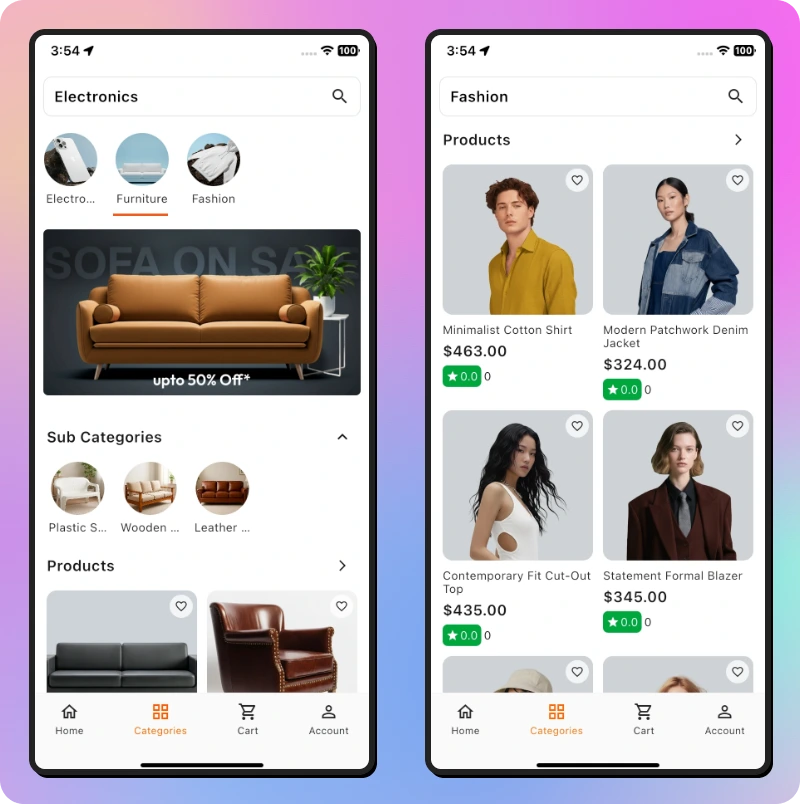
Categories
There are two types of categories in the Laravel mobile application.
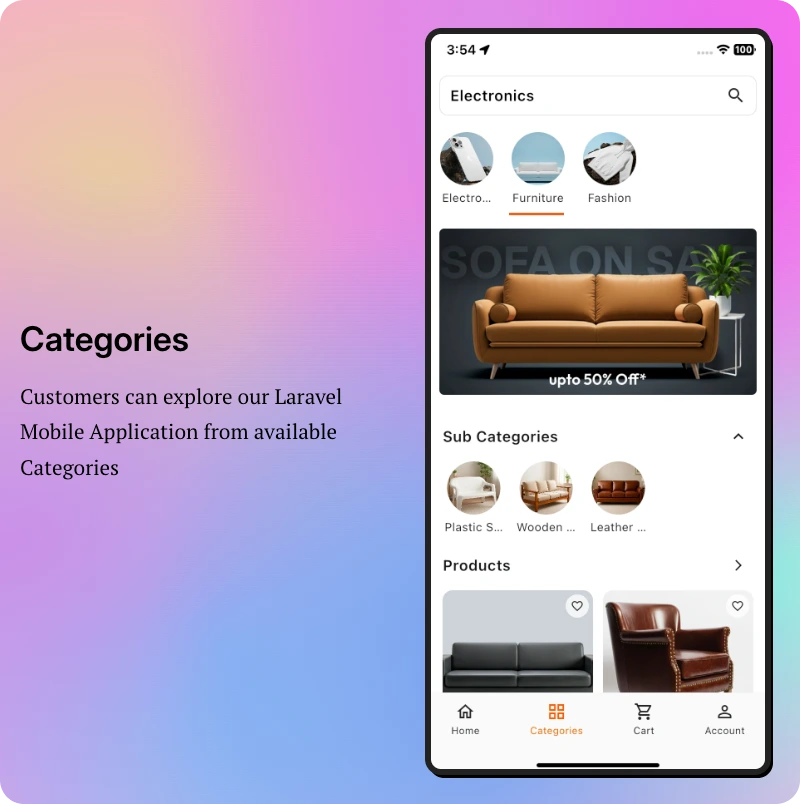
1) Parent category: Users can click on the name of the main category to see it.
2) Child category: Users can click on the subcategory within the main category to view the subcategory.
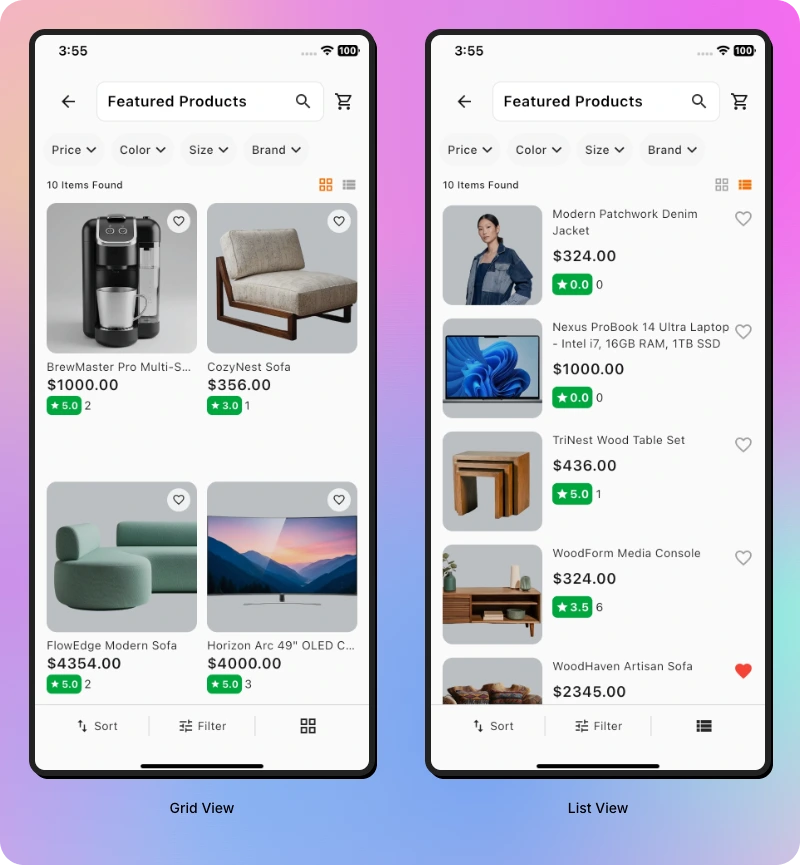
Now after clicking on the child category, all products will show added by the admin. Child category will be listed shown in the Grid and List view.
1) List View: In List view products are added to the list.
2) Grid View: The user can also select the button grid to view the products.
Account Information:-
Once you log into the mobile app, you can check your account info by going to the side menu and clicking on Dashboard.
In this section, you can quickly look at and go over your account details.
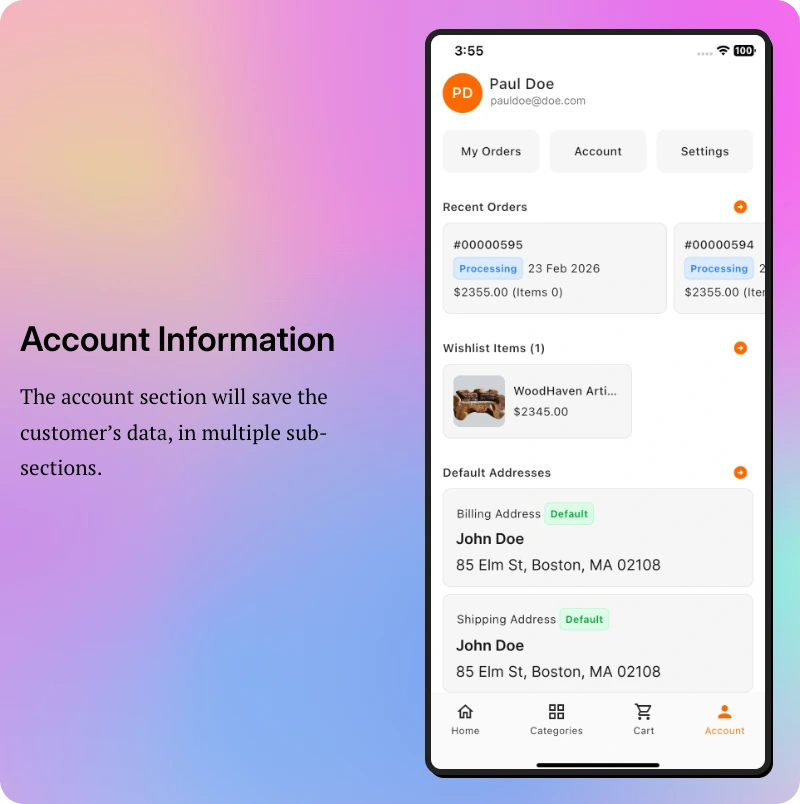
The account section will save the customer’s data, in multiple sub-sections.
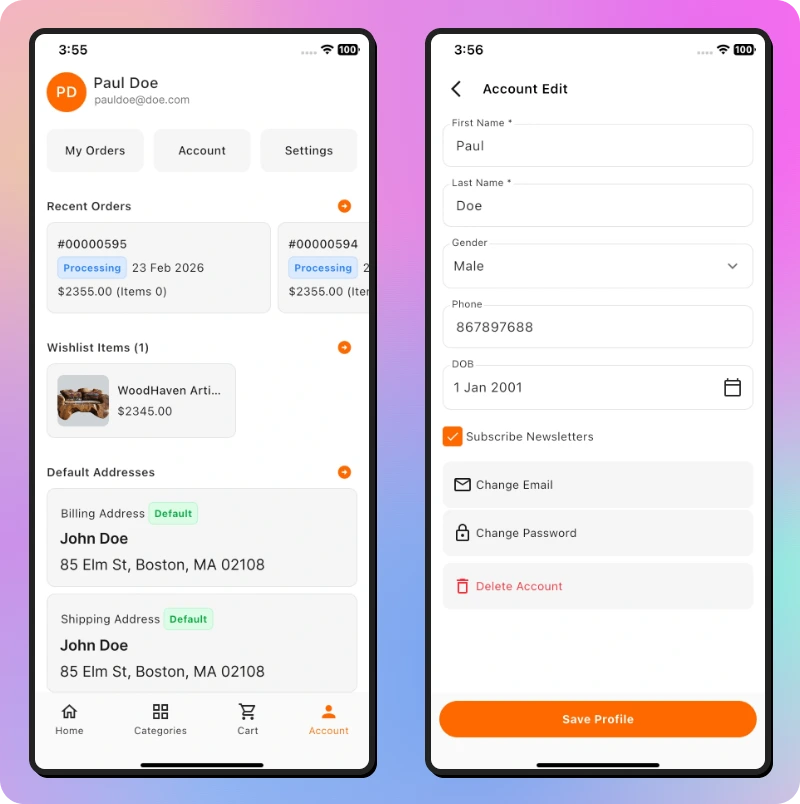
Profile
This part is for the app user to keep their personal info about their account. In this section, the app user can update –
- Their first name, last name, gender, date of birth, and phone number.
- Users can change their email address that they registered with.
- They can also change the password that is connected to their account.
- Customers have the option to delete their registered account.
- Users can also change their Email and Password for the app. They can also delete their account.
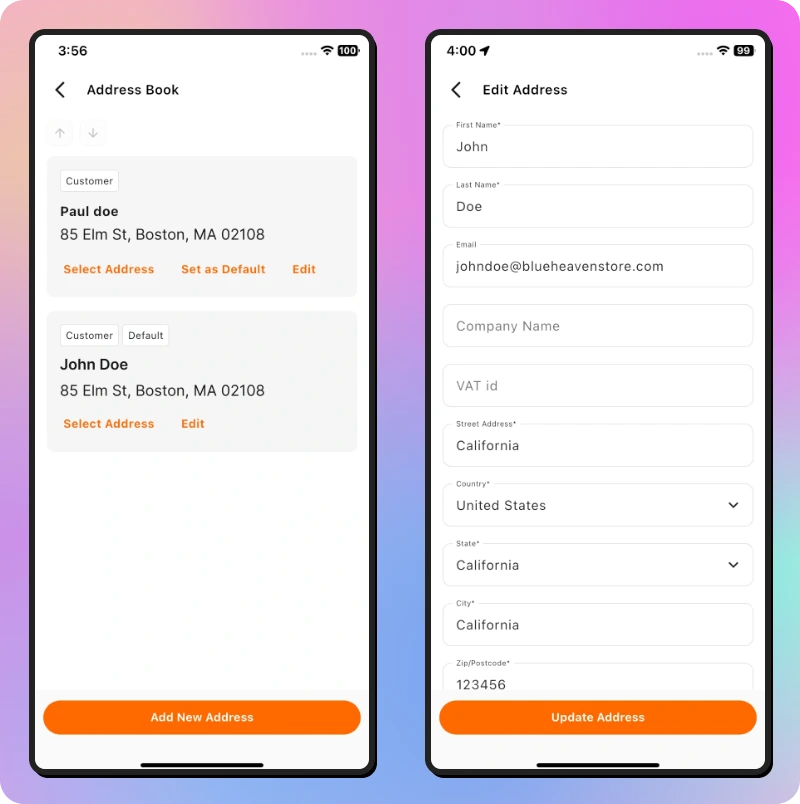
Address
This contains the information about the Default Billing Address, Default Shipping Address, and Manage Other Addresses.
The app user can click on any address to edit the details on the address from the edit button or else can add a new address.
Recent Product: Customers can look at the items they have recently seen in the recent products area, as illustrated in the picture below:
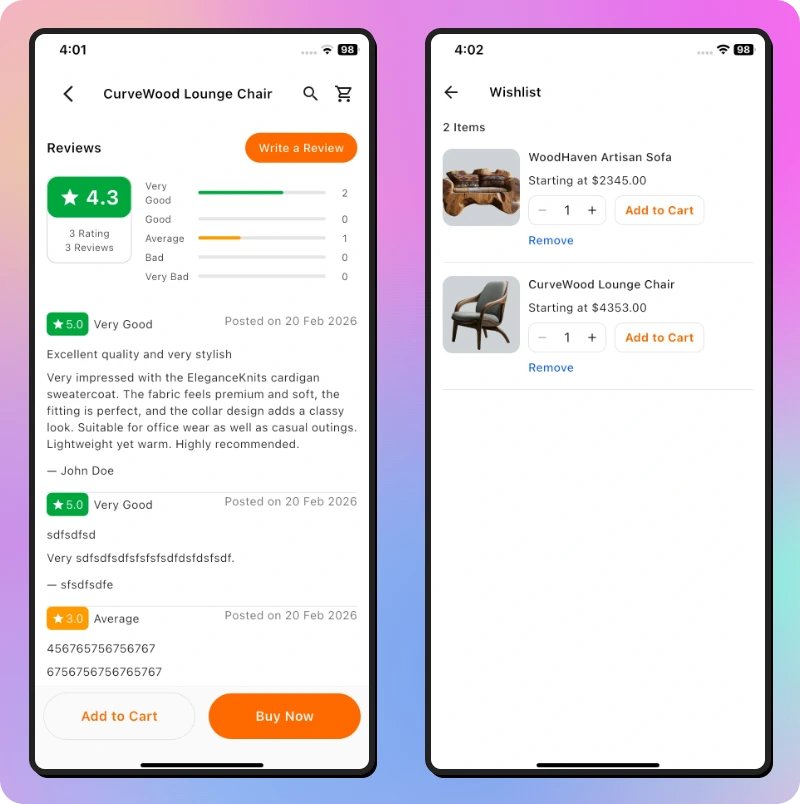
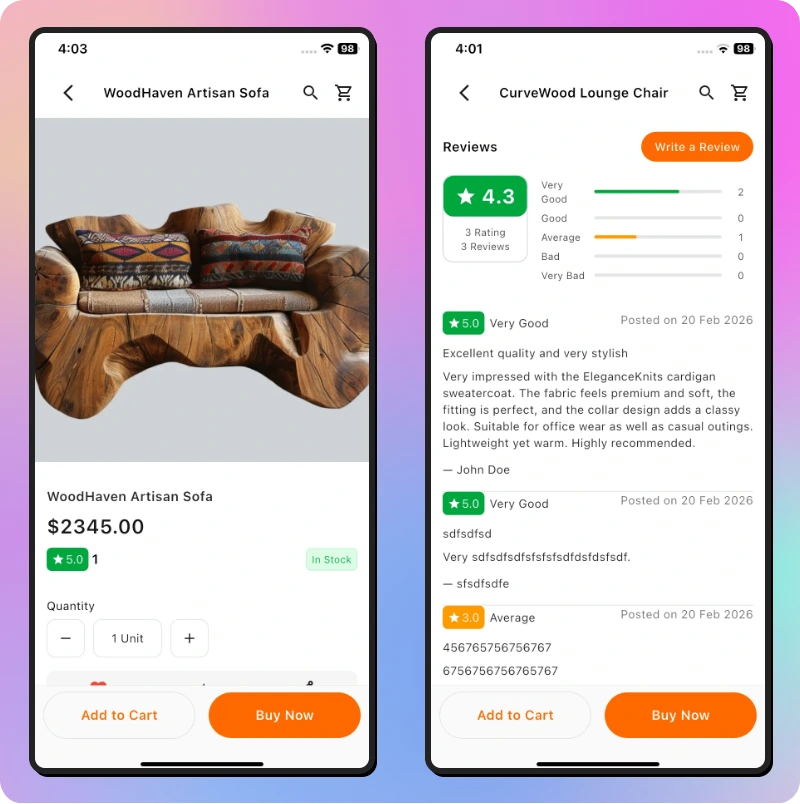
Reviews: The app users can view all their reviews given by them to the products.
Wishlist: The app user can view all the wishlist products from the Wishlist option.
Reviews: The app users can view all their reviews given by them to the products.
Wishlist: The app user can view all the wishlist products from the Wishlist option.
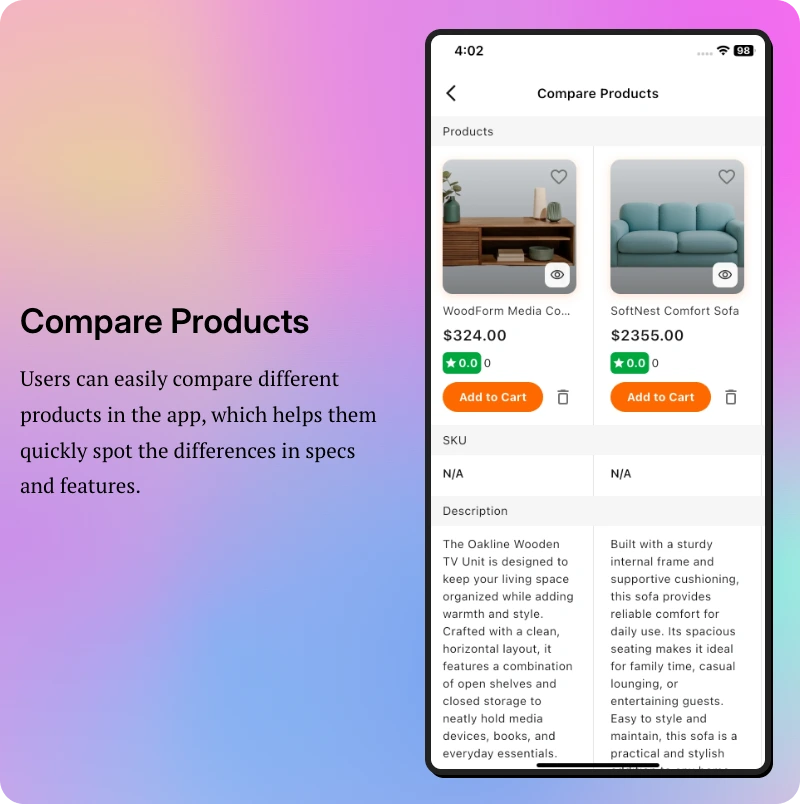
Compare
Users can compare products side by side within the app, allowing them to easily view and evaluate differences in features.
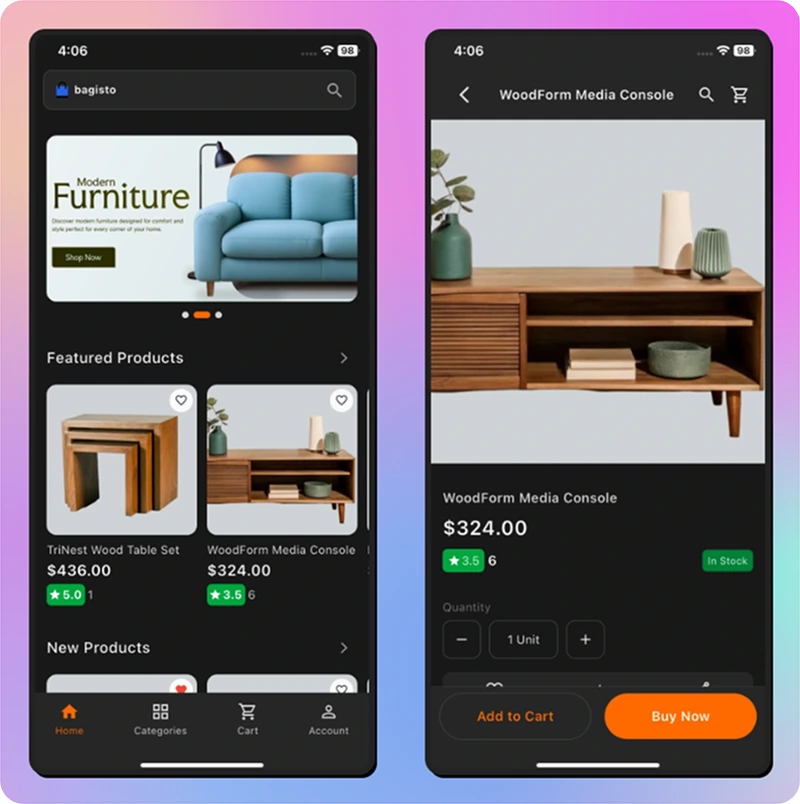
Product View:-
The page shows information about the products that users of the app can look at. So, this page includes the following details-
Add to Cart – Users can click the Add To Cart button to put the product in their cart for later checkout.
Now, people using the app can go ahead with the product they added to their cart.
Here, app users can use a code for their purchases. They also have the choice to keep shopping, update their cart, or empty the shopping cart before clicking to continue.
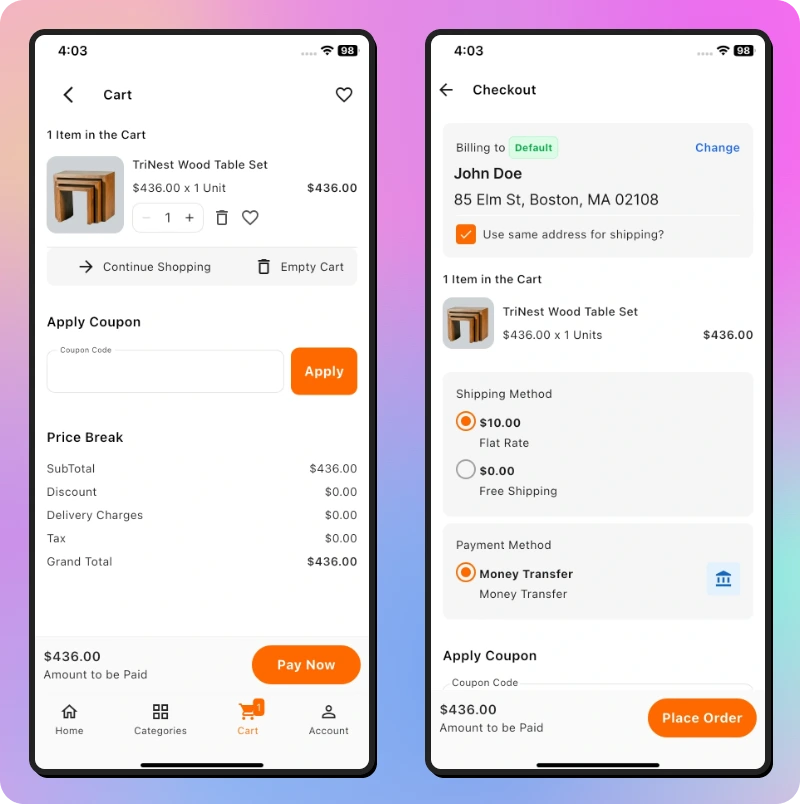
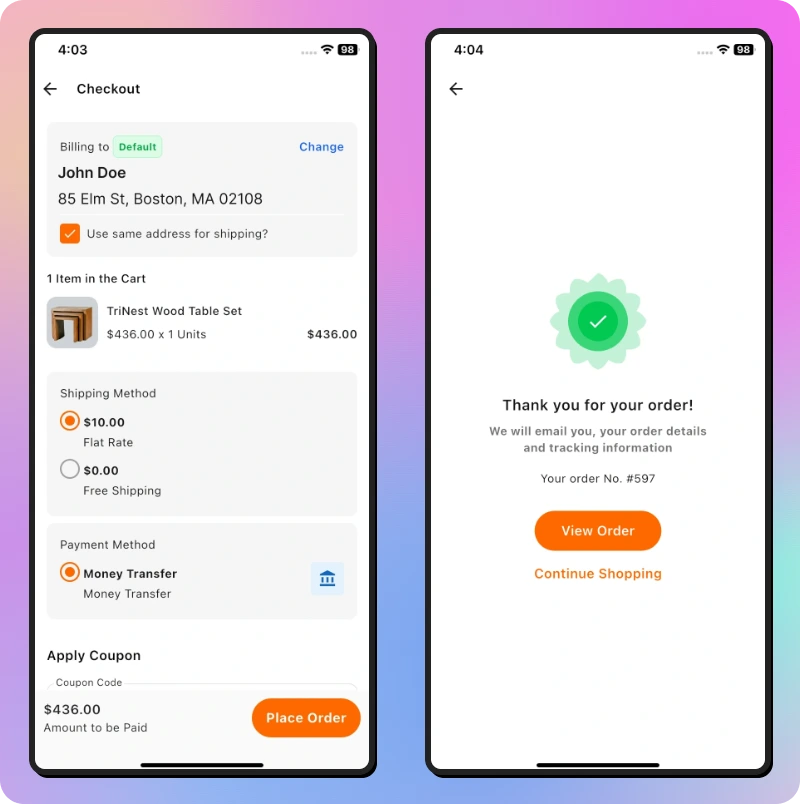
In the next step, users have to choose how they want to pay for their order, which can be either Cash On Delivery or Money Transfer.
Here users can check the price details of the order and can place the order. After that, the order has been placed and will get a confirmation with order ID and email.
Dark Theme
The app has a dark theme that users can choose. If you tap on the Change theme button, the app will switch to a dark color theme, like you can see in the picture below.

Support for Laravel Mobile App Builder
Thus, that’s all for the Laravel mobile app builder still, have any issues feel free to add a ticket and let us know your views to make the module better https://webkul.uvdesk.com.
Current Product Version - v2.3.6
Supported Framework Version - 2.3.6

2 comments
Thanks for the appreciation, if you are looking for any services related to Bagisto please feel free to contact us here at https://bagisto.uvdesk.com/en/