Magento 2 Custom Regions extension allows the store owner to add the state or province for not defined countries in the default Magento Store.
Tax implementation is not possible without state and zip code that’s why the merchant needs the custom region module.
The store owner can also use the CSV file to upload the regions for multiple counties at once.
The customer can select the address at checkout through Google Map for quick and easy shopping.
Watch the video to understand extension workflow:-
Custom Regions Features
- Add regions for the countries not provided by Magento 2.
- Allow adding the Regions through form and CSV.
- The buyer can select the address through Google Maps at the time of checkout.
- The admin can update the Regions.
- Customers can insert the delivery address using Google Maps while checkout.
- GraphQL has been implemented for the extension.
Note:
- Javascript API services are used in our module. To have these services you must have the Google Map API Key to make use of this extension. You can generate one by clicking here.
- You need to enable billing for your Google account project under which the API Key is created. For more information please visit here
Custom Regions Module Installation
The customers will get a zip folder and they have to extract the contents of this zip folder on their system. The extracted folder has an src folder, inside the src folder you have the app folder.
Then, you need to transfer this app folder into the Magento2 root directory on the server as shown below:
After the successful installation, you have to run these commands in the Magento2 root directory:

First Command:
php bin/magento setup:upgrade
Second Command:
php bin/magento setup:di:compile
Third Command:
php bin/magento setup:static-content:deploy
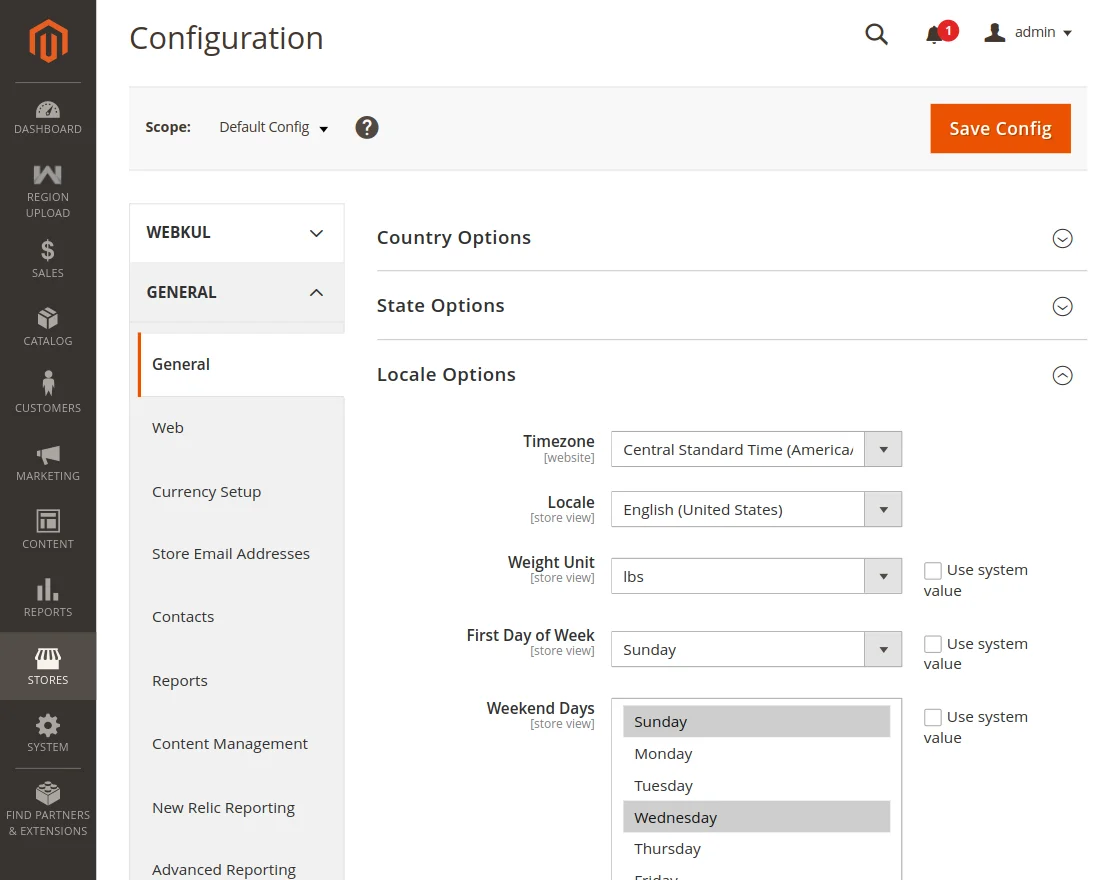
Multi-Lingual Configuration – Custom Regions
Now, for the multilingual support, the admin will navigate through Store->Configuration->General ->Locale Options.
Then, Select the locale as German (the language into which the admin wants to translate his store content).
Language Translation
If the user wants to translate their module from English to German then they need to follow the path
app/code/Webkul/CustomRegions/i18n in their unzipped Custom Regions folder and will get a CSV file with the name “en_US.csv”.
Now they will rename that csv as “de_DE.csv” and translate all right side content after the comma in the German language. After editing the CSV, save it and then upload it to the
path app/code/Webkul/CustomRegions/i18n where they have installed Magento2 on their server.
Then the module will get translated into the German Language. It supports both the LTR and RTL languages.
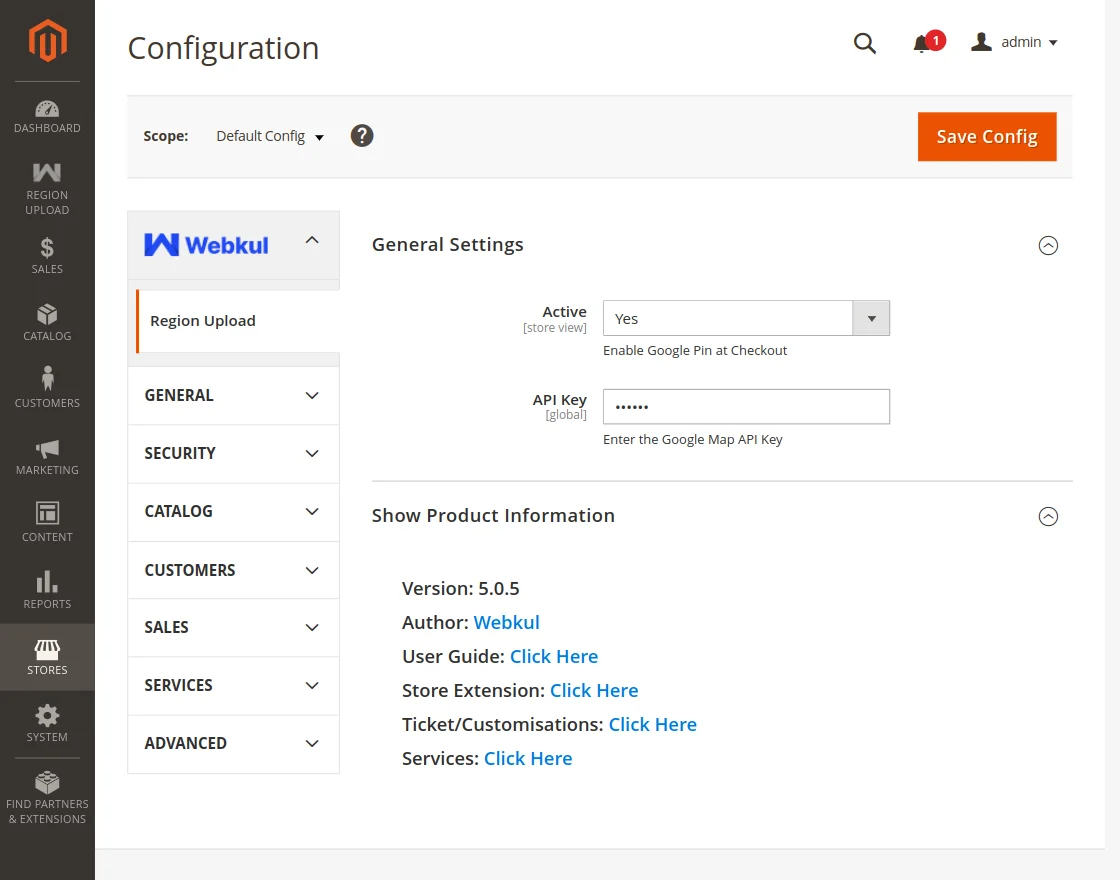
Custom Region Module Configuration
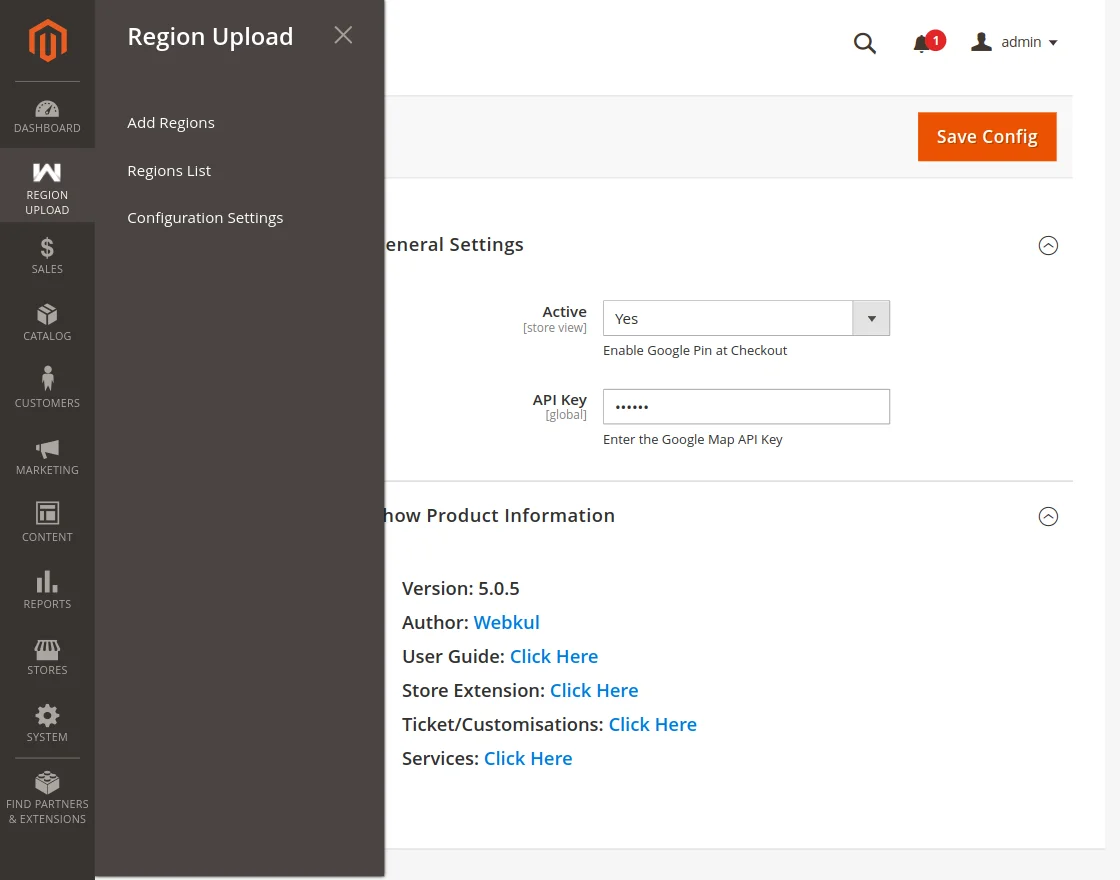
After installing the module, you will be able to see the Region Upload panel under the Stores-> Configuration-> Webkul-> Region Upload
- Active – If active, the functionality of the API Key will work otherwise not.
- API Key – Then Enter the Google map API key.
What is the Google Map API key?
Google Maps API key is a personal code provided by Google to access Google Maps on this site.
Google Maps is integrated with the module for the insertion of the delivery address.
Now, Buyers can select the address at checkout through Google Maps.
NOTE: Google map is only visible when a customer enters a new address at the time of checkout.
Upload Regions
Now merchants can create or upload the regions of the countries not supported by the default Magento 2 store.
This module allows the merchant to define the regions to let their buyers select the address at checkout through Google Maps.
If the admin did not add the region of non-defined countries then in the region list it will not show to the customer and the customer has to provide the address details manually.
Custom Regions – Add Regions
Path to add regions – Region Upload => Add Regions
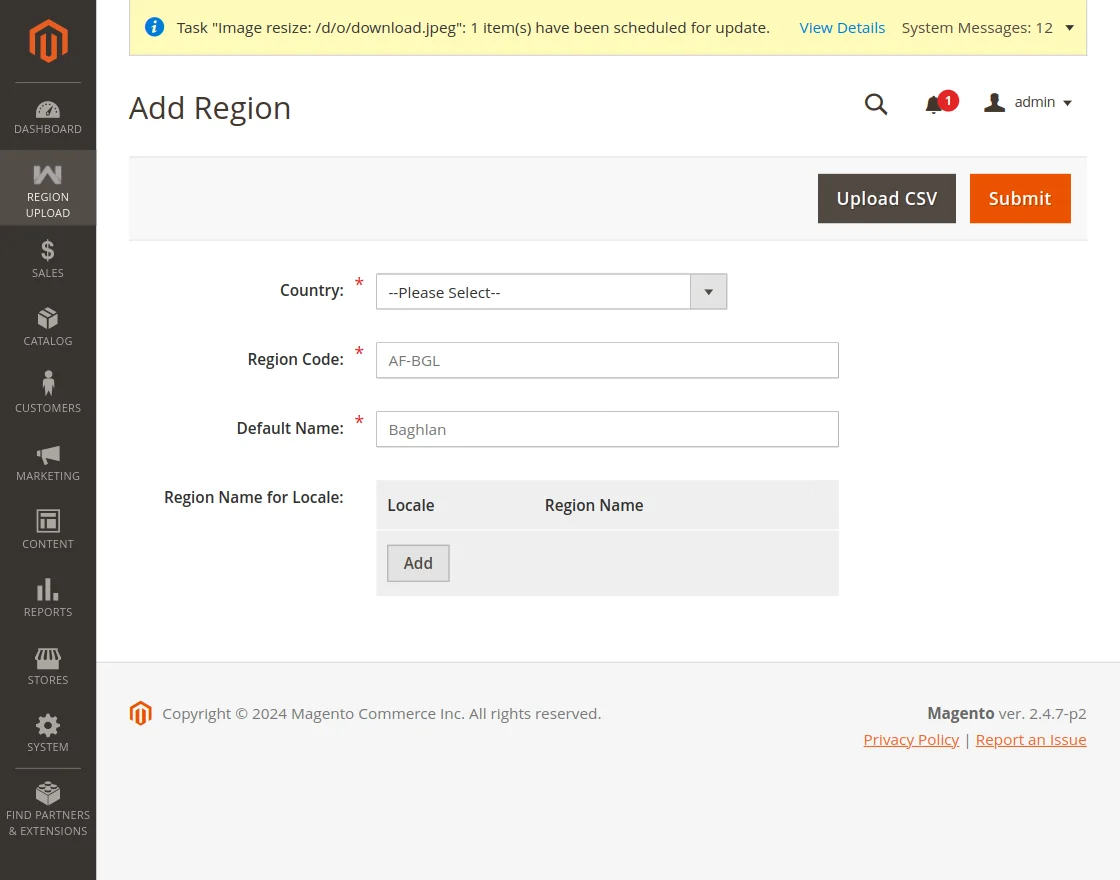
- Country – This dropdown will show the names of those counties whose state is not defined in the default Magento 2 store.
- Region Code – Now the merchant can enter the region code.
- Default Name – After that merchant can write the region name.
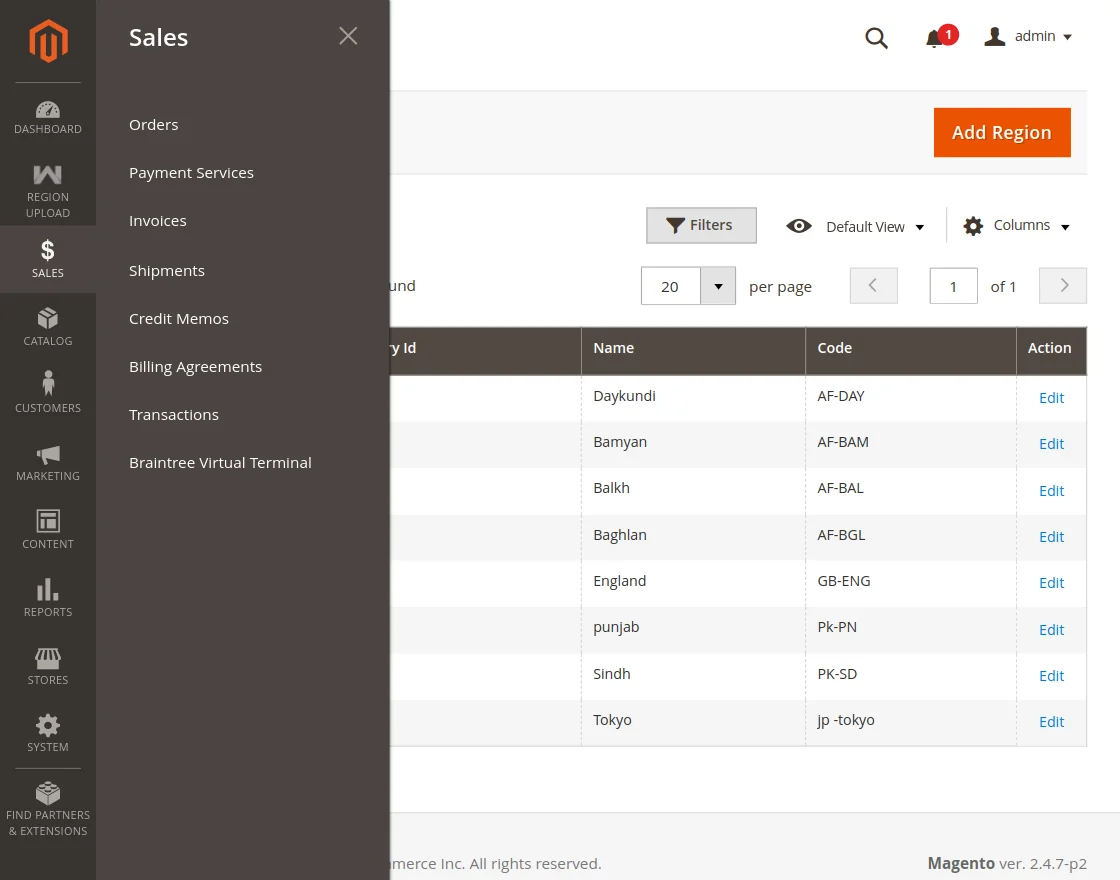
Custom Regions – Upload CSV
Merchants can use the CSV file to upload the regions for multiple counties at once.
follow the path to upload CSV – Sales => Upload Regions => Add Regions => Upload CSV and check the below-given screenshot for more details
- Upload CSV: Click on the upload CSV option.
- Country: Select the country to add the province
- Upload CSV File: Now choose the CSV file to upload
- Submit: Then click on the submit to save the configuration.

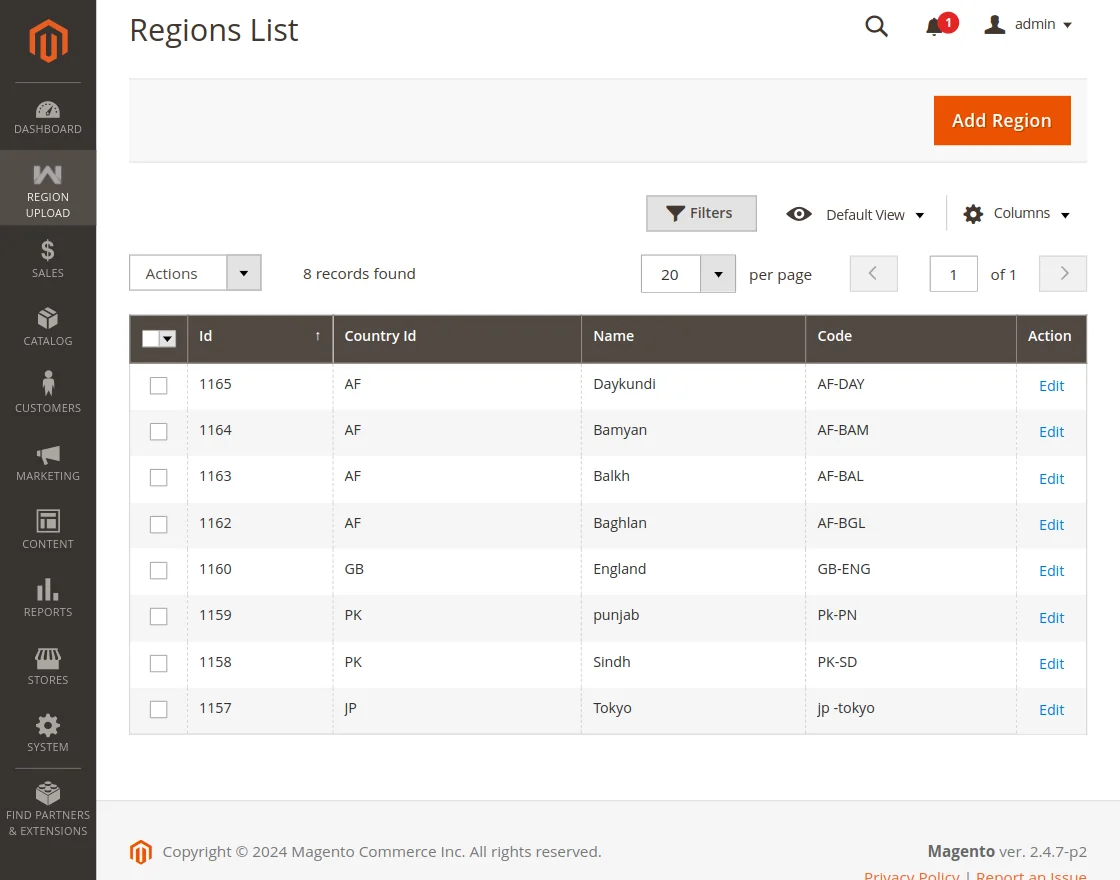
Regions List
After adding the regions or uploading the CSV merchants can check all the created regions list. Furthermore, the merchant can edit, delete, and add the regions.
Path to add regions –Region Upload => Regions List
StoreFront Functionality
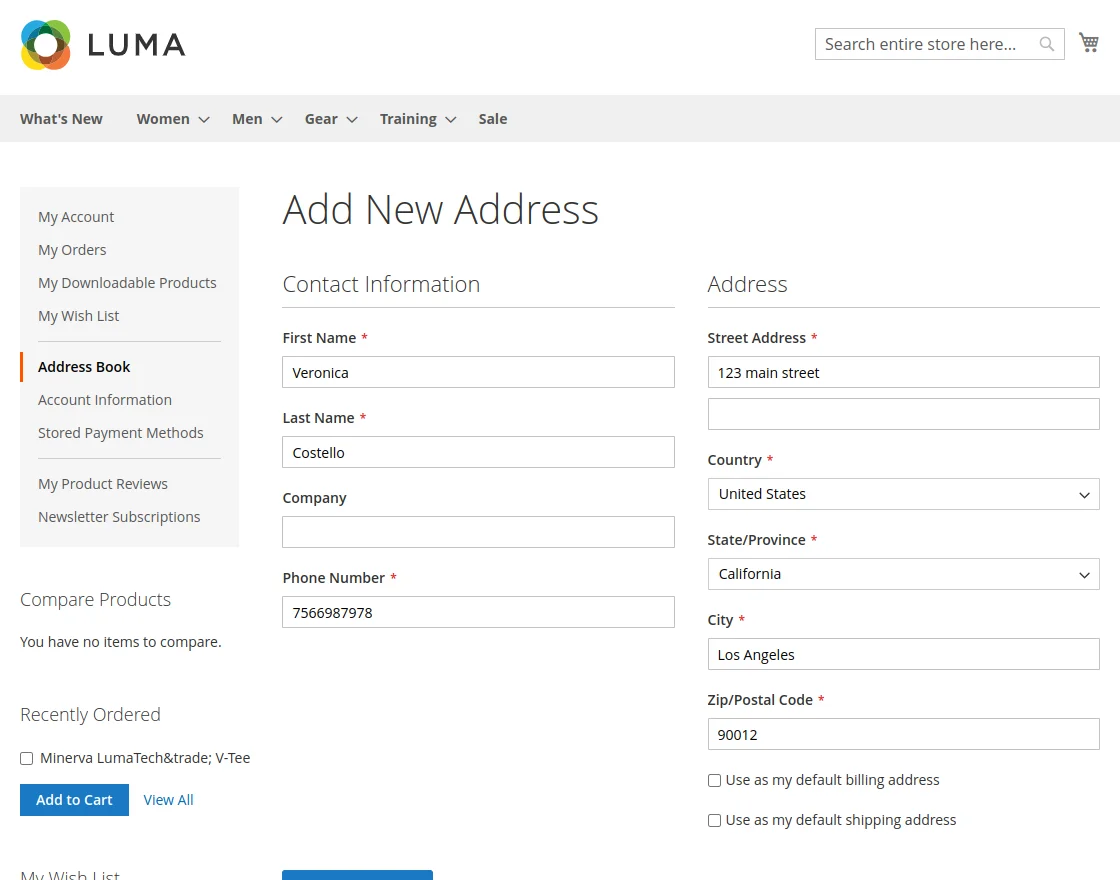
Add Customer Address
The customer will also be able to create a new address based on the country regions that are created by the admin.
From the customer panel, the customer can navigate to the Address Book and click on the Add New Address
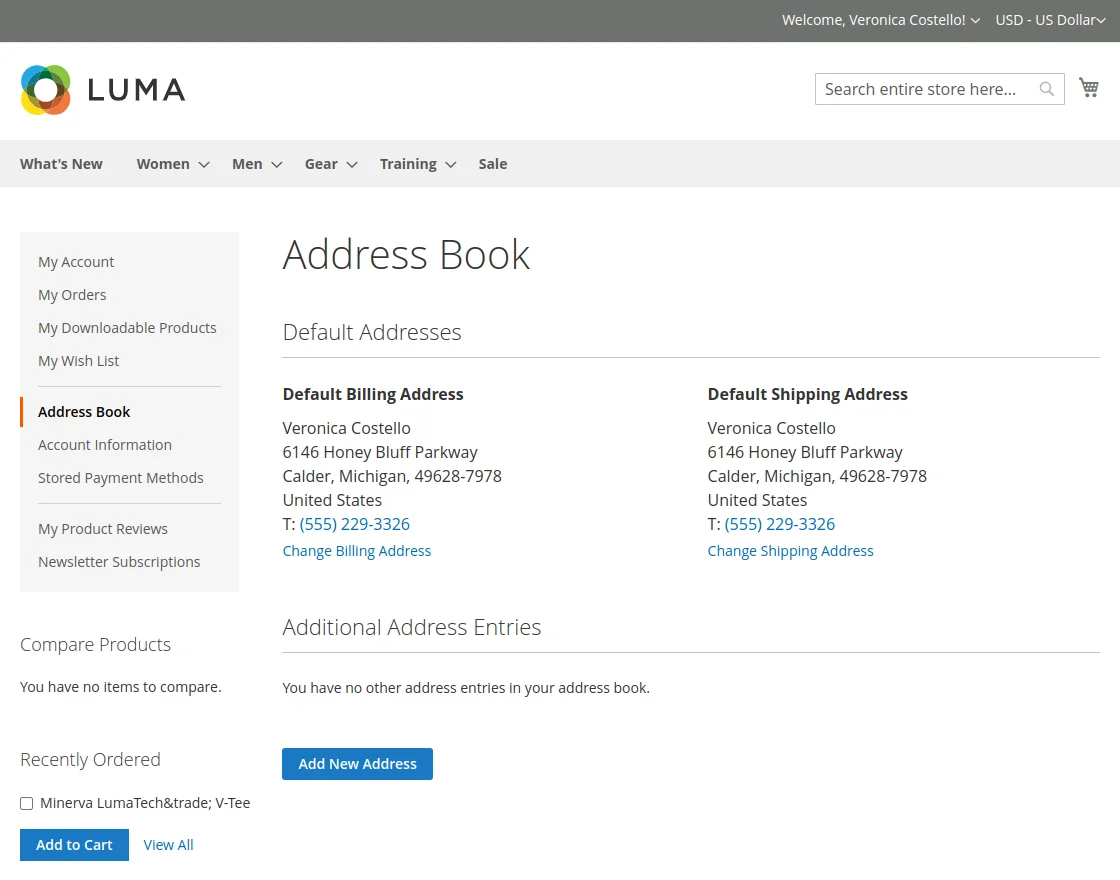
Furthermore, by clicking on the Add New Address the customer can add their address as well.
The customer will be able to select the country created by the admin from the country list.
Cart Page
The custom region module for Magento 2 enables the buyer to select the state or province on the cart page.
Customers can select country, state/province, and enter the zip/postal code to proceed with the shopping.
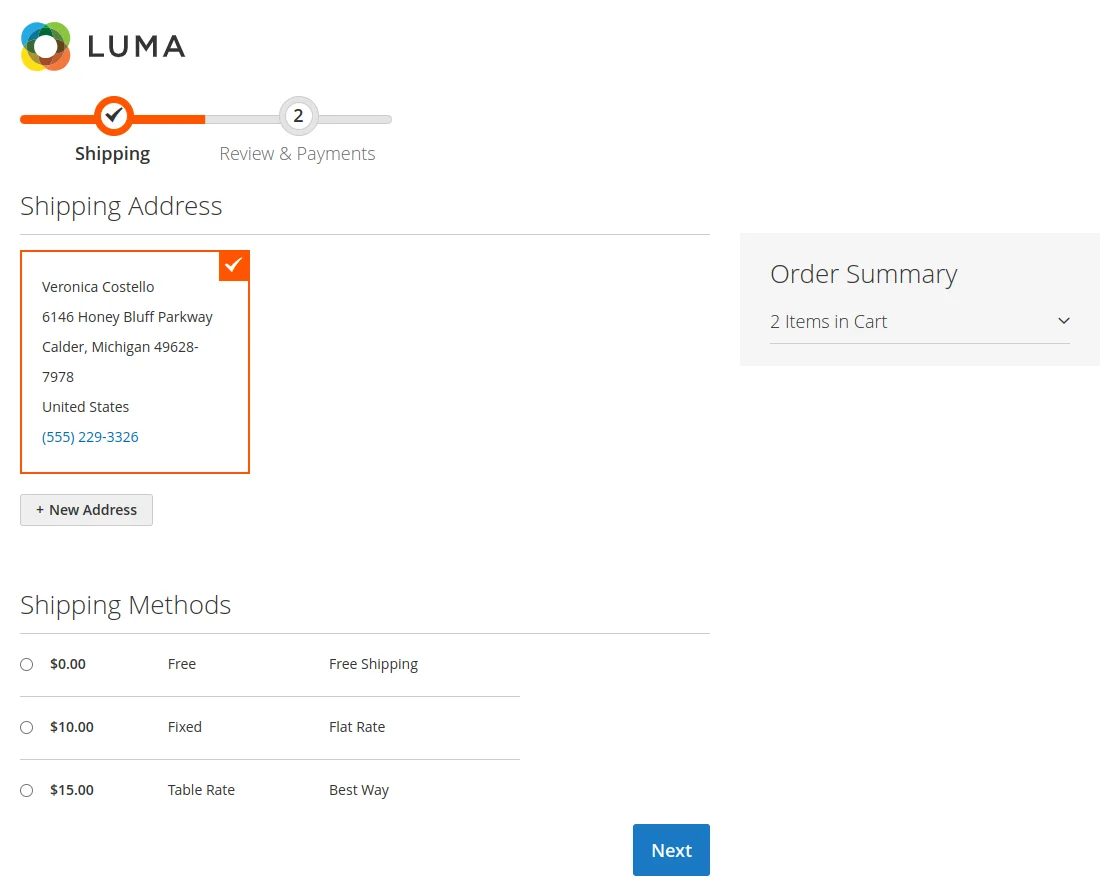
Check Out Page – Custom Regions
Google Maps is integrated with this module for the insertion of the delivery address and forth with customers can select the address at checkout through Google map to complete the buying.
Check the below-given screenshot for more details:
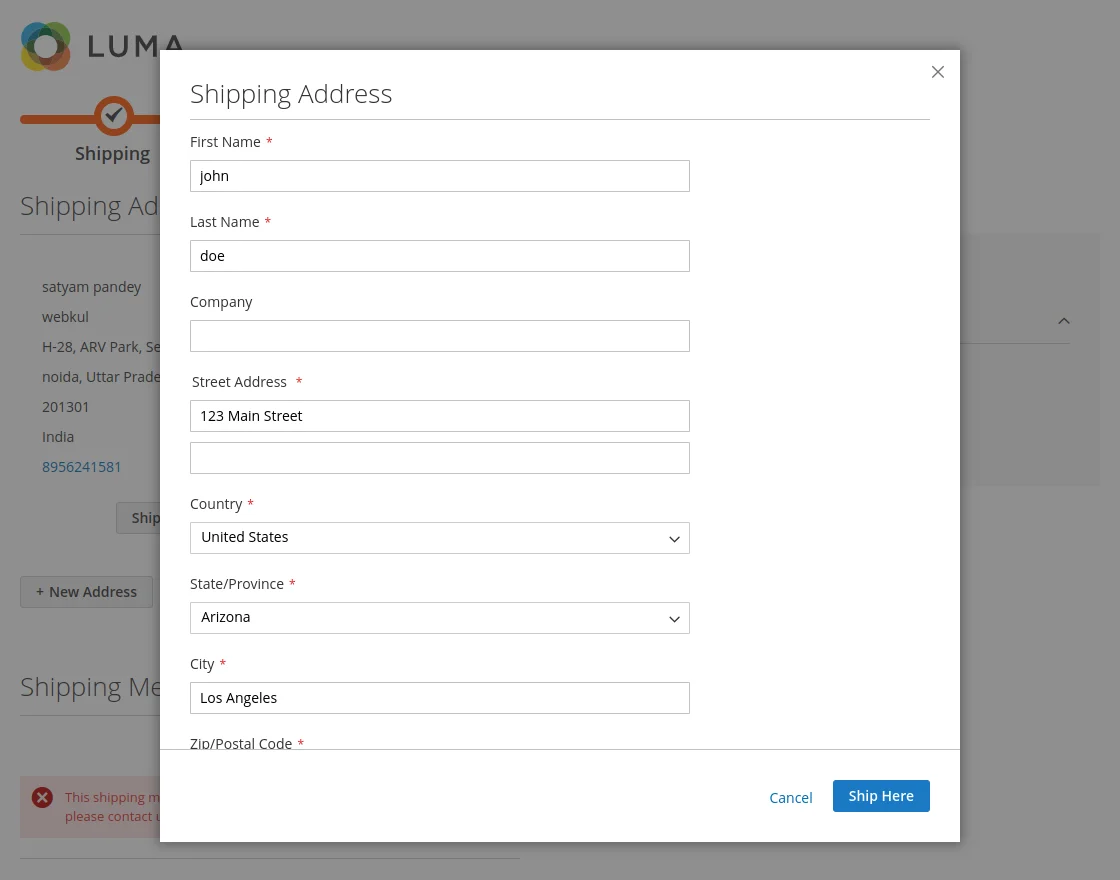
Customers can insert the delivery address using google Maps and the state, zip, and country will automatically get updated.
Support
For support regarding the module, the admin needs to redirects to the Sales >> Support as per the below image.
- User Guide: Here, the admin redirects to the module’s user guide.
- Store Extension: The admin is redirected to the module store.
- Ticket/Customization: Through this, the admin can create a ticket for his queries and issues .
- Services: Here, the admin redirects to the Magento Development Services by Webkul.
- Reviews: The admin can submit reviews for the module here.
That’s all about Custom Regions for the Magento 2 Module.
If you have any more queries or require further assistance, please don’t hesitate to reach out to us through [email protected] or create a ticket.
Current Product Version - 5.0.5
Supported Framework Version - Magento 2.0.x, 2.1.x, 2.2.x,2.3.x, 2.4.x

Be the first to comment.