CS-Cart Product Badges allows the admin to attach custom badges/labels to the products.
Badges can be used to emphasize and promote the product in a very effective manner.
CS-Cart Product Badges provides an option to display badges on the product list page, product detail page, or everywhere.
Moreover, multiple badges can be attached to one product at the same time.
So this way, an admin can draw customers’ attention to the products and improve conversion rates.
Check a brief overview of the plugin –
Features
- Functionality to create custom text and image badges at the admin end.
- Ability to attach badges to a single product or all products of a category.
- In addition, Functionality to specify the badge position on the product image.
- Functionality to set the time frame during which a badge will be displayed.
- Options to adjust badges on the product image as per the need.
- Functionality to attach badges to the products at the vendor end.
- Also Option to disable the default discount label.
- Functionality to attach as many badges as required.
- The badge preview block is provided to feel the look of the badge at the admin end itself. (No need to check the front-end.)
- Moreover Easy to configure and manage at the admin end.
How To Upload and Install
After downloading the CS-Cart Product Badges, you get a zip file and install.txt. Read the install.txt carefully and configure it accordingly.
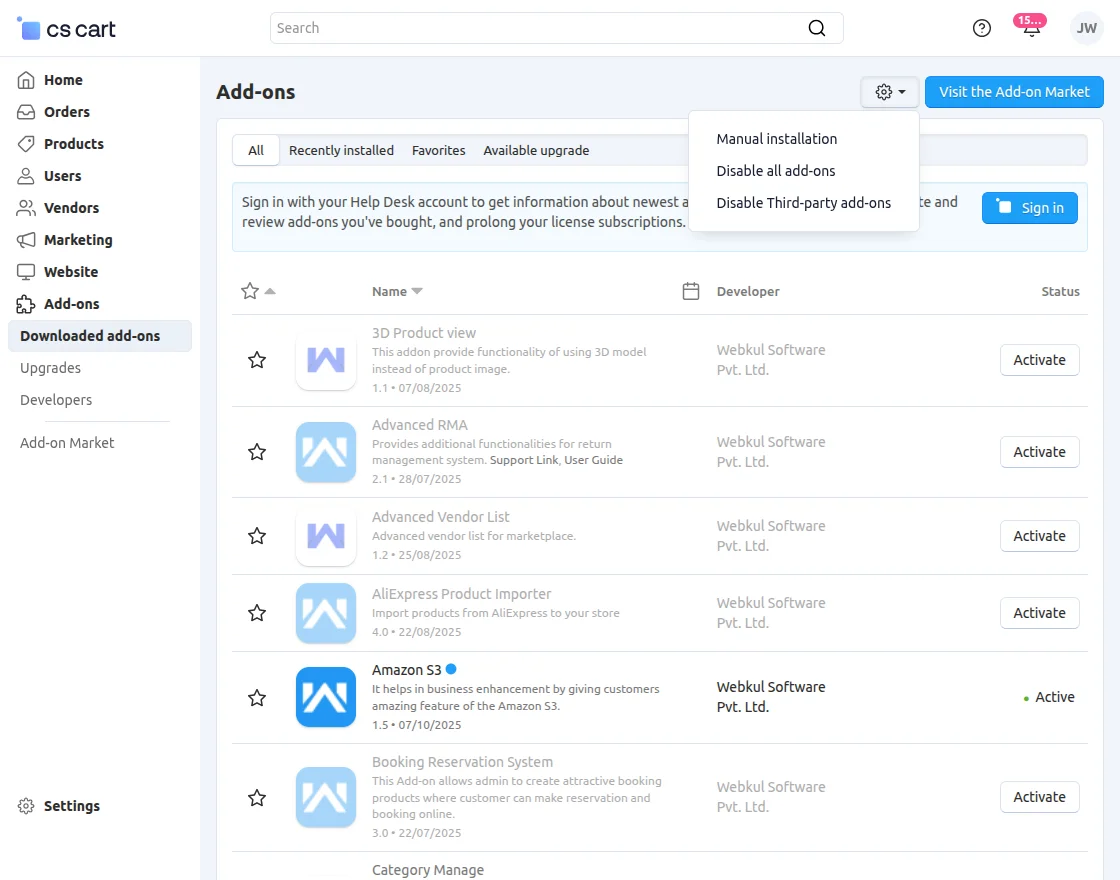
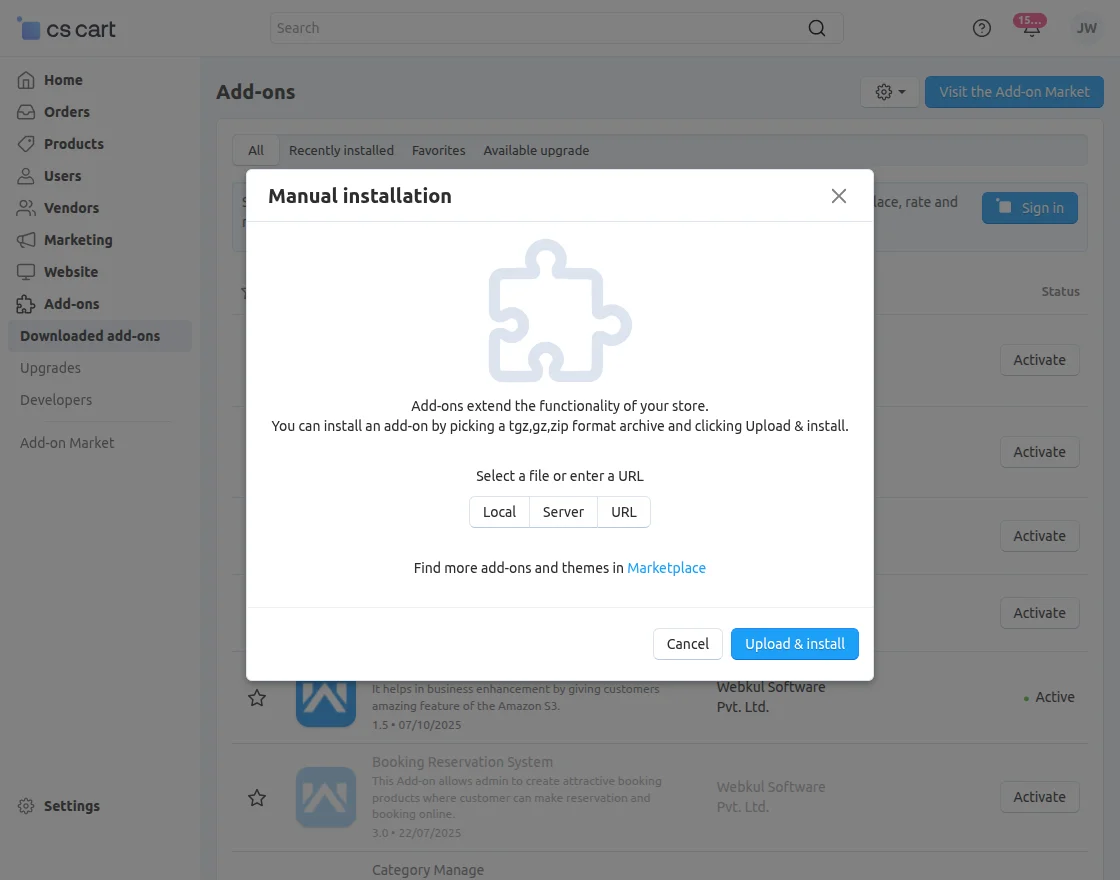
Go to Manage Add-ons, and click on “Manual Installation” as shown below in the snapshot.
Click on “Local” to browse the zip file and then click on “Upload & Install”.
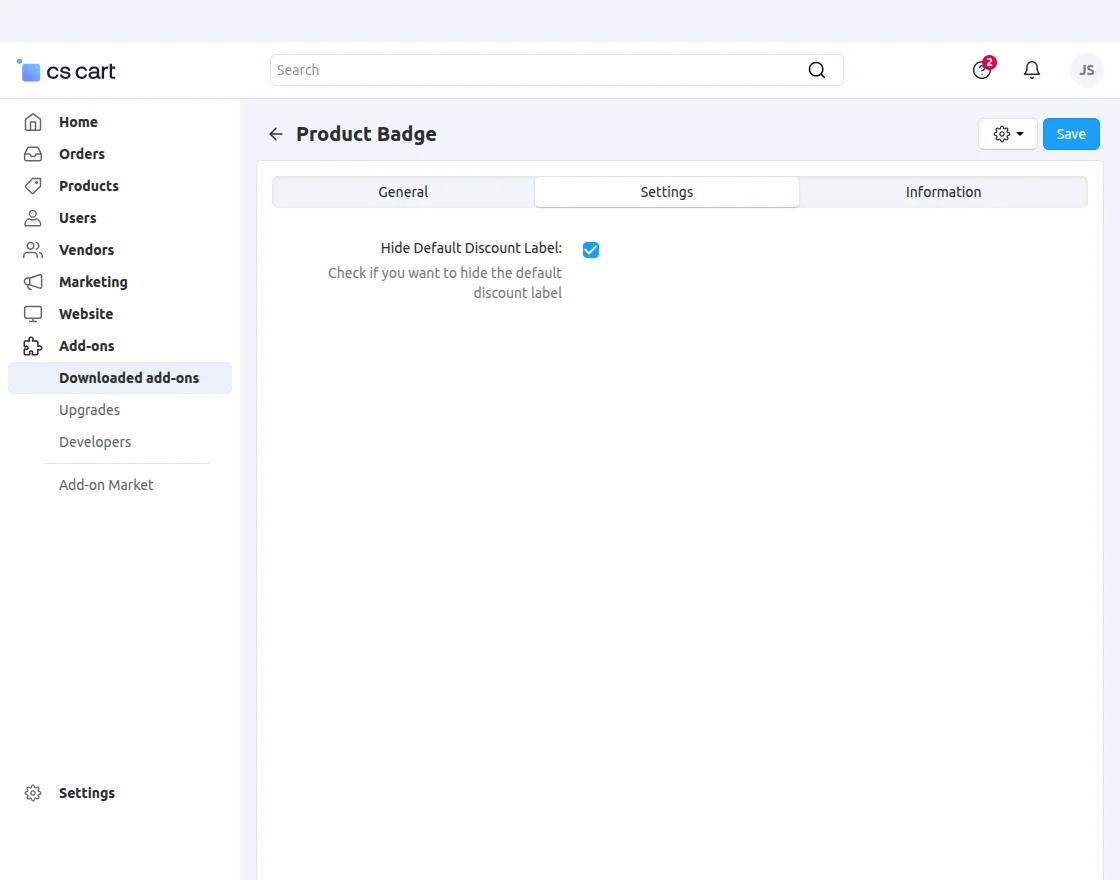
Configuration
To configure the module, go to the Add-Ons >> Developers >> Webkul Software Pvt Ltd. >>Product Badges.
Set the parameter as per the snapshot below.
- To hide the default discount label from the products, check the box provided as shown below.
- Click on the Save button to save the settings.
Badge Management at Back End
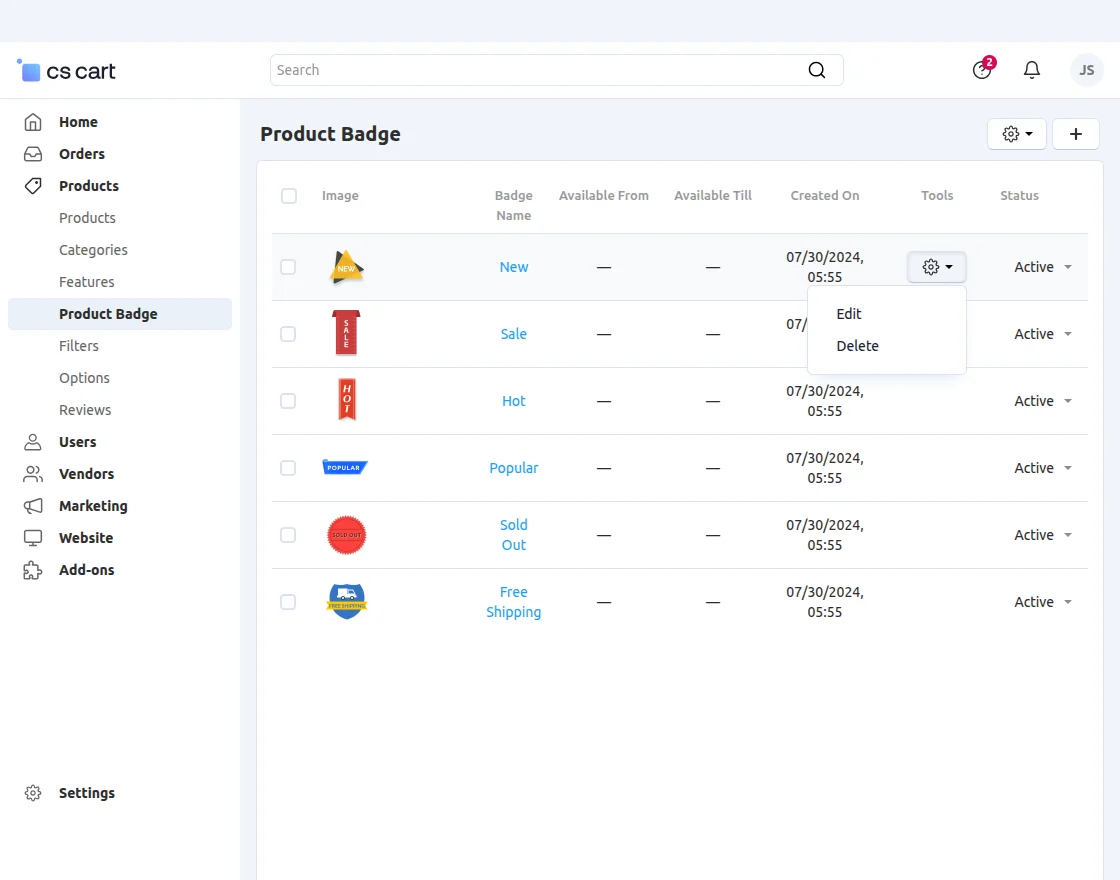
Firstly, go to Products -> Product Badge as shown in the snapshot below.
Moreover, added badges can be viewed, edited, and deleted here. Click on the “+” button to add a new badge as shown in the snapshot below.
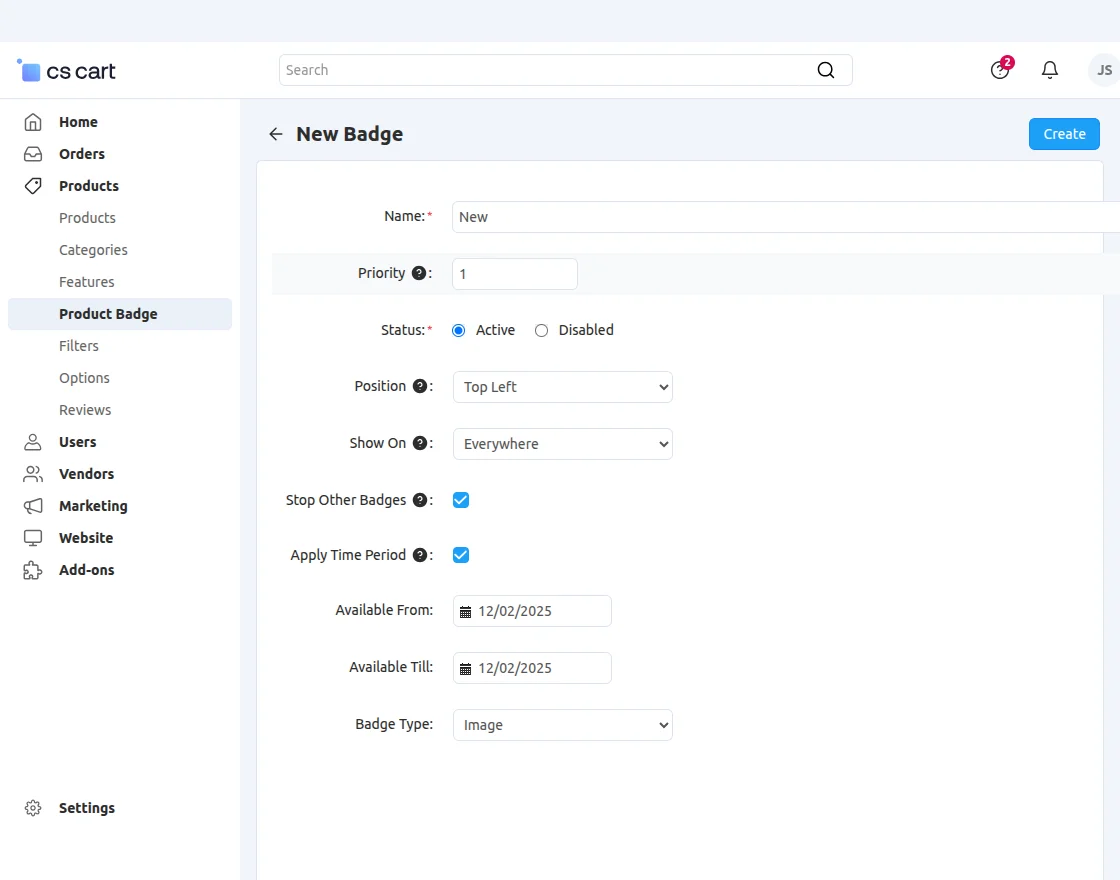
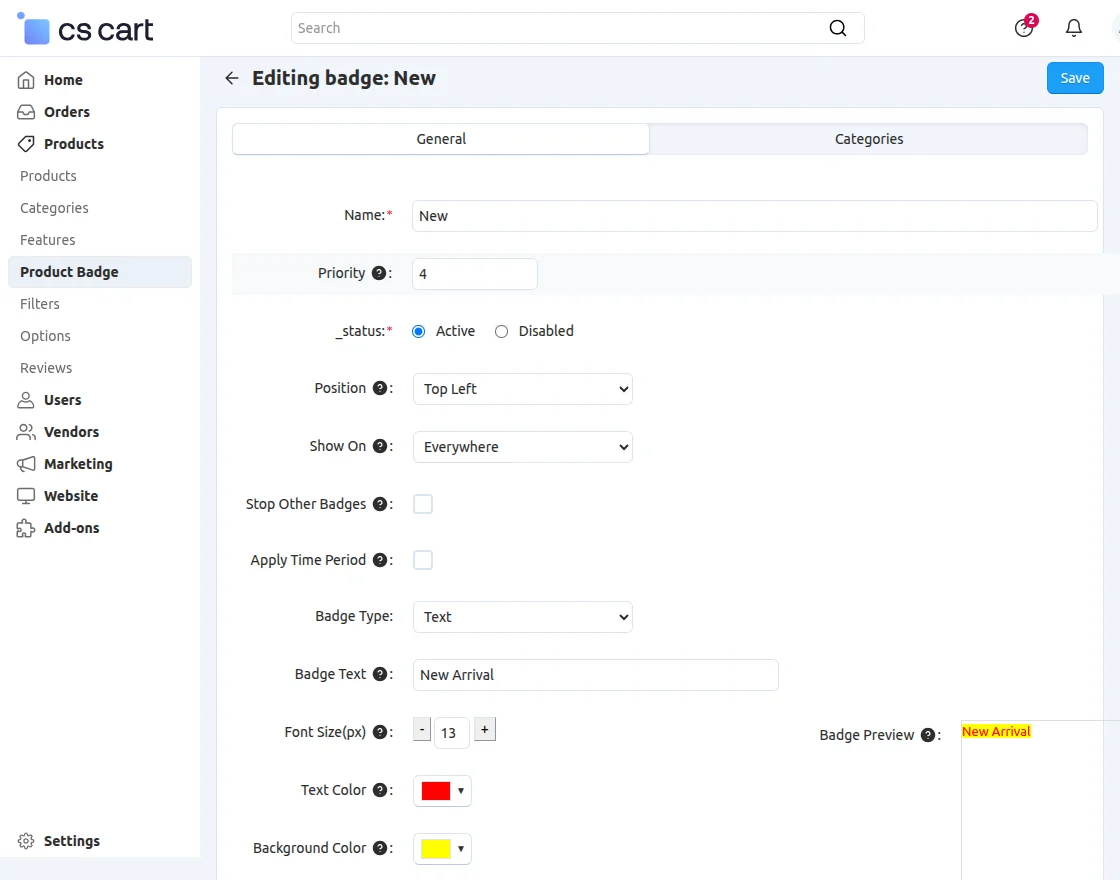
Set the parameters as shown below in the snapshot.
- Enter the desired name of the badge.
- Set the priority and status of the badge. The higher priority badge will get preference.
- And set the position of the badge on the product image.
- Select the view pages of the front-end where the badges need to be displayed.
- Also, click to hide all other badges from the product and show only this badge. The higher priority badge will get preference.
- Click to schedule the badge availability and set the badge availability dates.
- Select the image or text type badge as per your requirement.
- Finally, click on the Create button to create the badge.
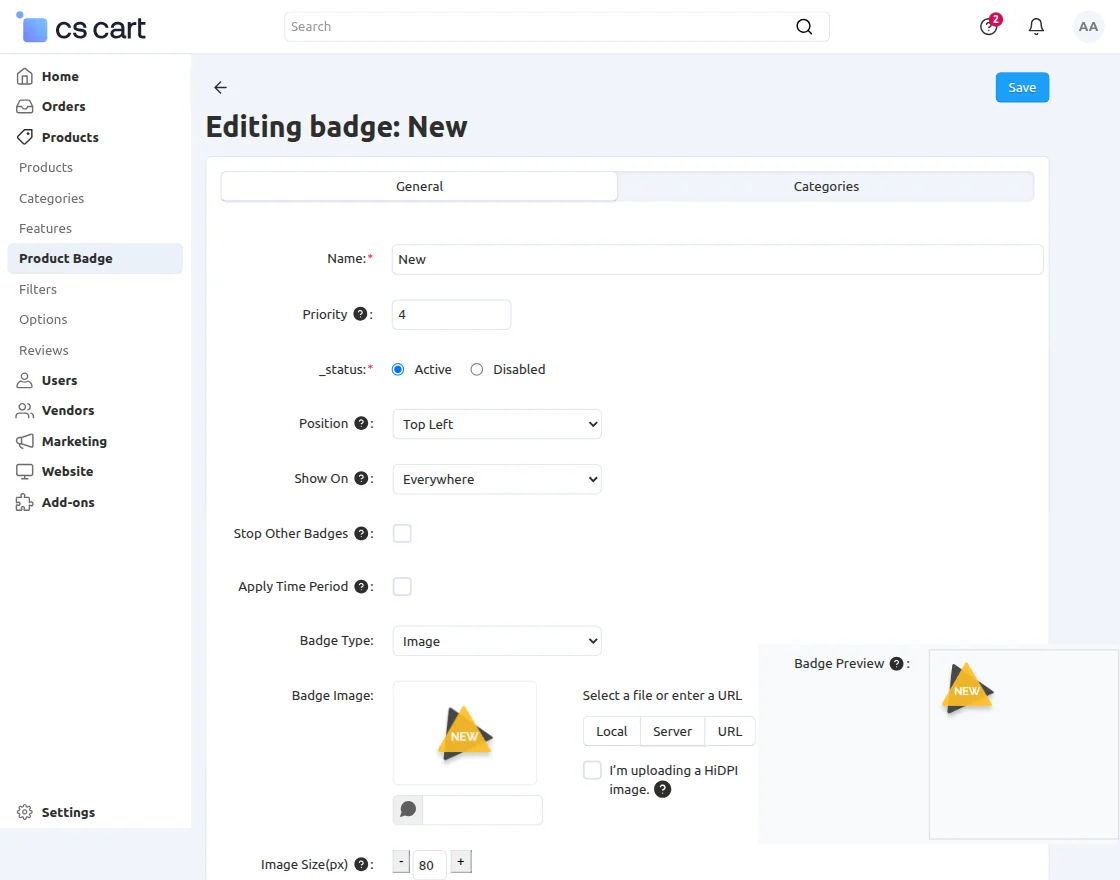
For Image badges: Select the badge type as Image and set the following parameters.
- Browse and upload the badge image.
- Adjust the size of the image.
- Adjust the opacity of the image. The higher the number, the higher the opacity.
- Set vertical margin between badge and product image boundary.
- Set horizontal margin between badge and product image boundary.
- Finally, click on the Save button to save the settings.
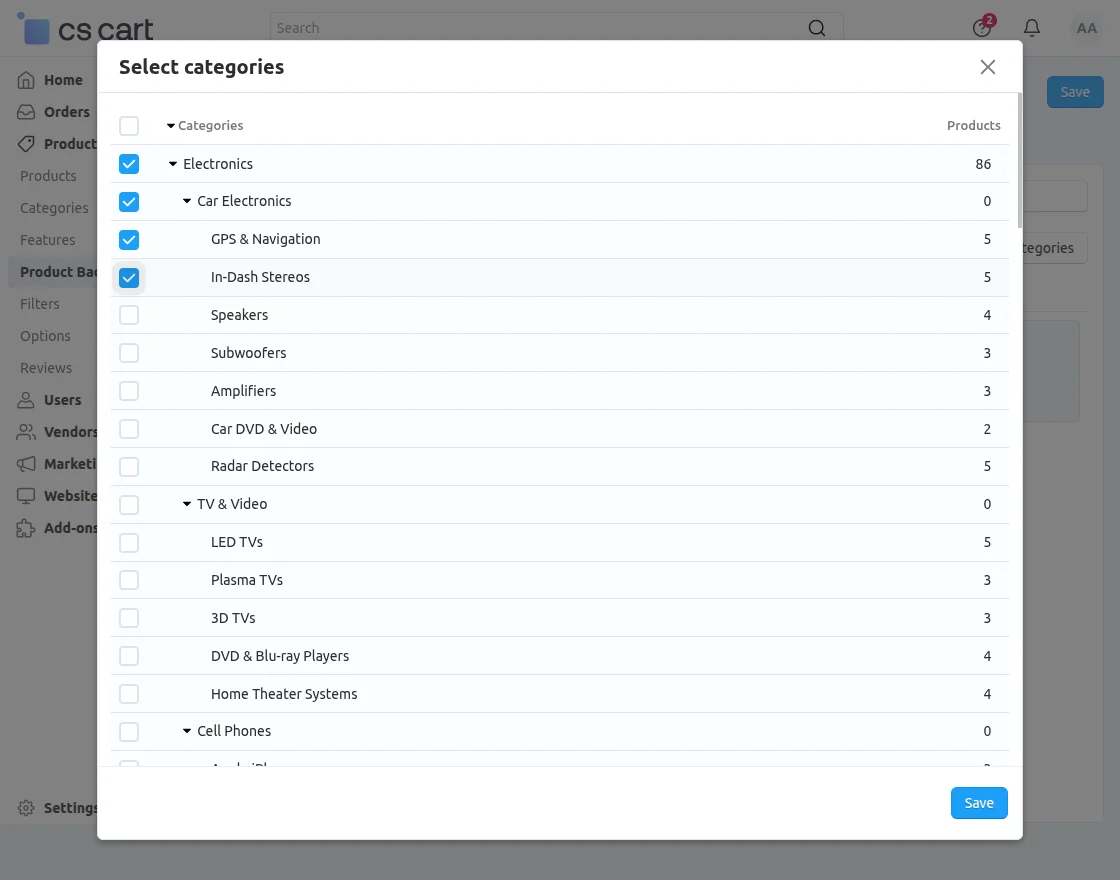
In order to attach the image badge to a complete category, click on the Categories tab as shown above in the snapshot.
- Click on the “+ ” (Add categories) button.
- Select the categories to which the badge needs to be attached.
- Click on the Save button to save the settings.
For Text badges: Select the badge type as Text and set the parameters as per the snapshot below.
In order to attach the text badge to a complete category, click on the Categories tab and make settings in the same way as done for the image badge.
How to attach badges to a product?
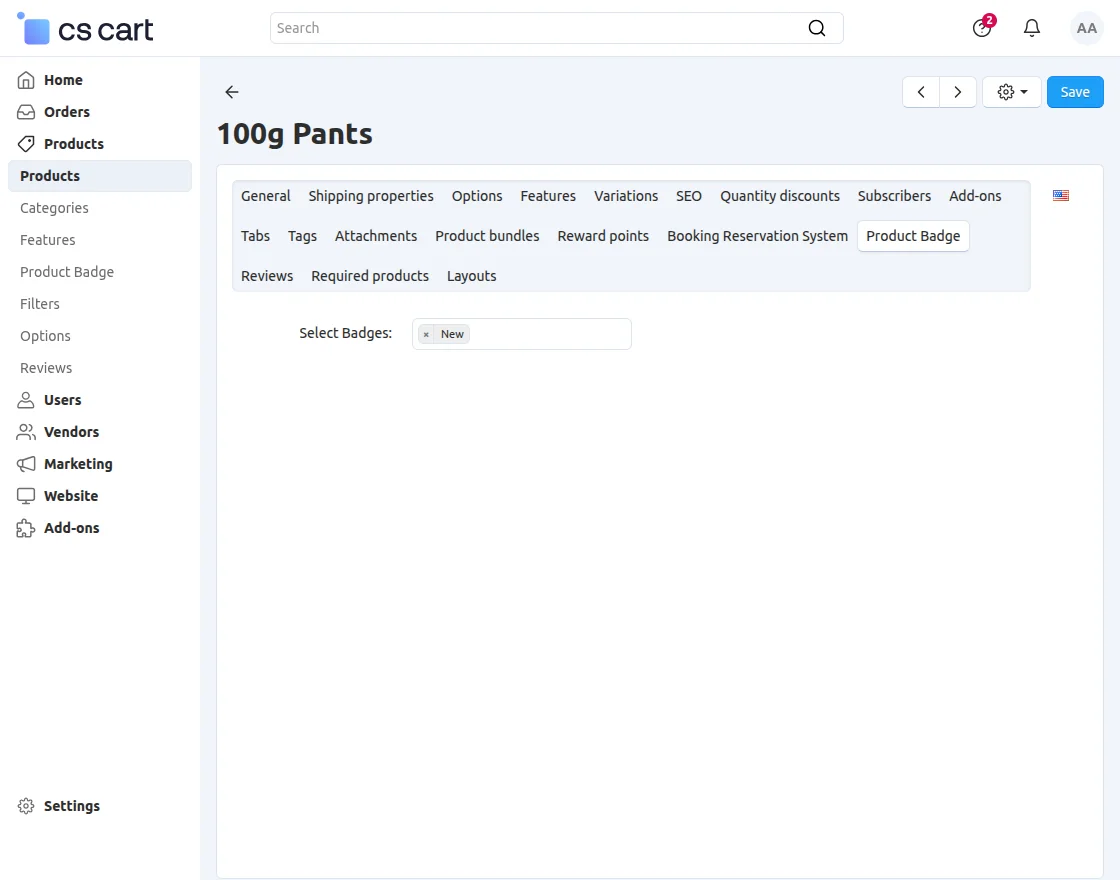
To attach a badge to a product, go to Products -> Products and open the detail page of the desired product.
Select the desired badges from the available list of badges and save.
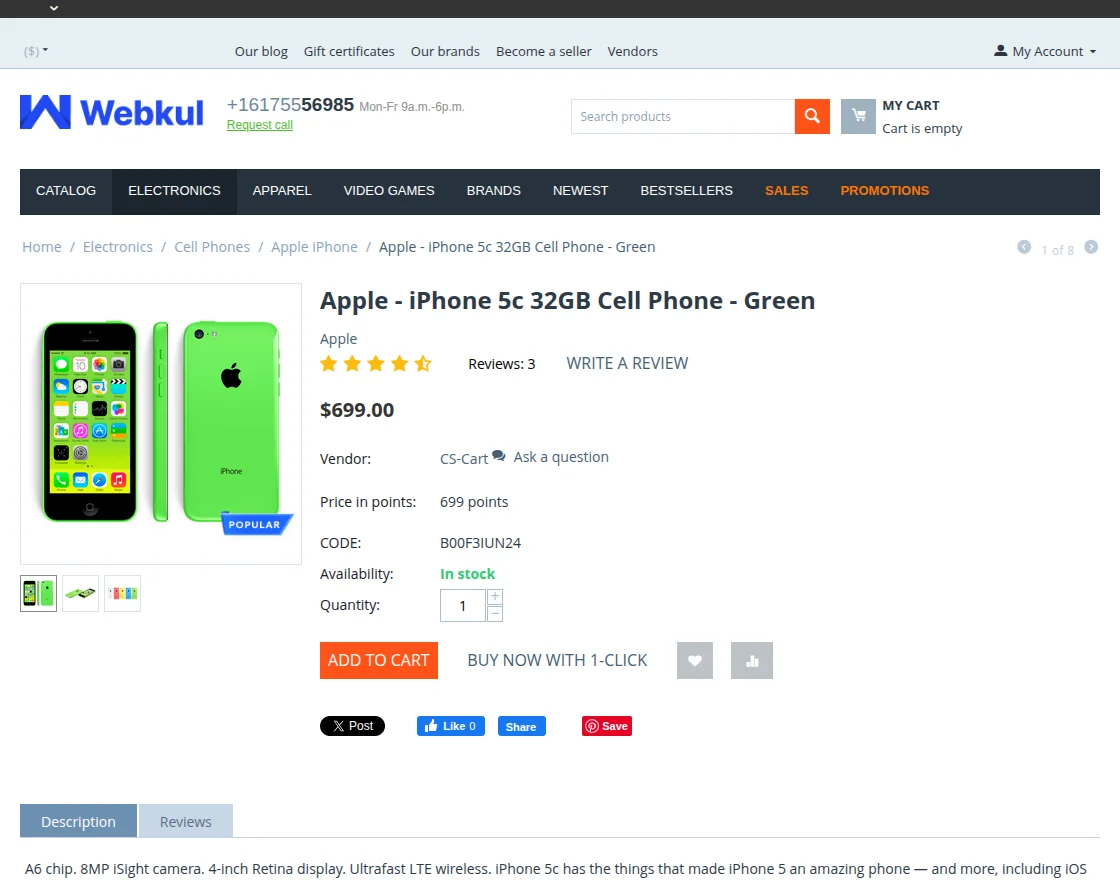
Front End View
View of badges on product detail page at front end :
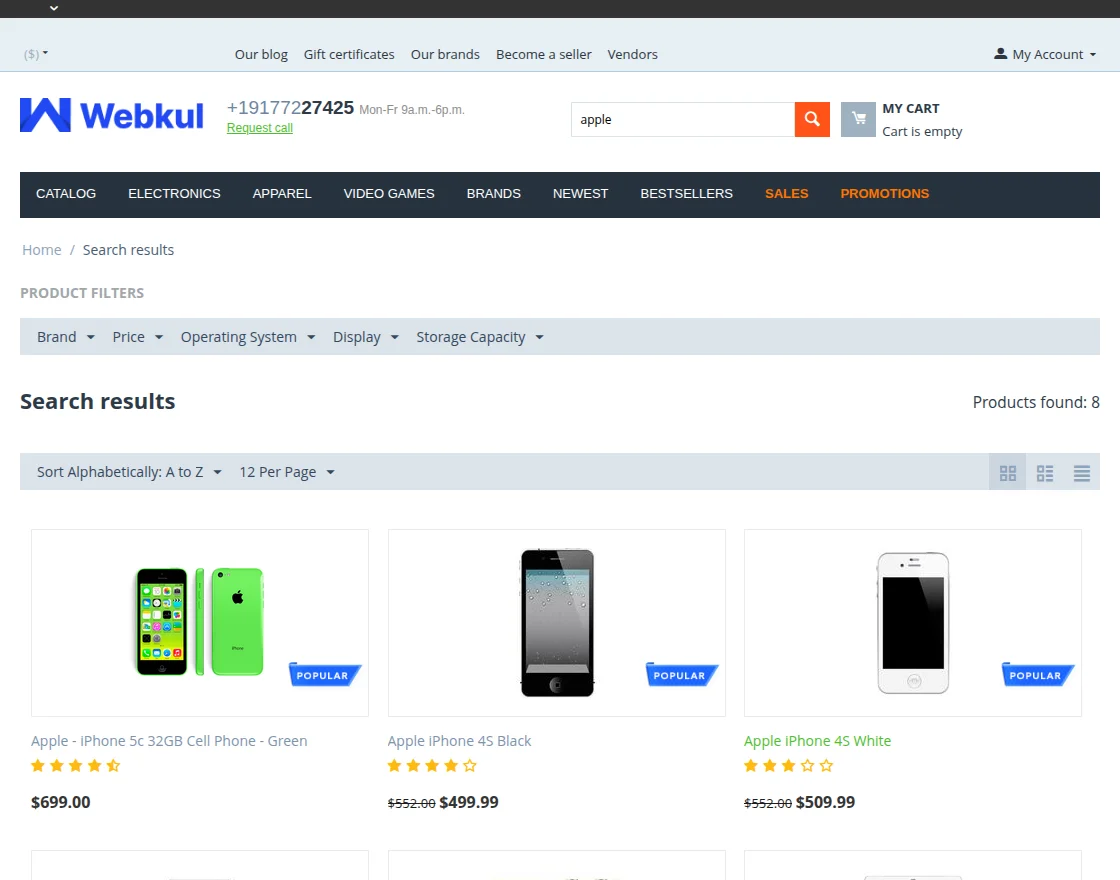
View of badges on home page grid view at front end :
Support
This is all about CS-Cart Product Badges.
If you have any questions, suggestions, or customization requests, feel free to contact us at [email protected] or submit a ticket at webkul.uvdesk.com.
Explore our premium-quality CS Cart Extensions to enhance your store functionality.
You can also explore our CS-Cart Development Services and Quality CS-Cart add-ons.
Current Product Version - 1.3
Supported Framework Version - 4.18

Be the first to comment.