CS-Cart Point of Sale (POS) gives the liberty to manage sales on an online store, along with the physical store, simultaneously.
The assigned sales agent can create the order from his physical store using the POS and the order will be generated & synced with the CS-Cart online store.
The physical stores will have their own POS panel for customer and sales management. Admin can create multiple Sales Agents for the physical store to manage the POS.
The add-on is very useful for increasing the overall revenue by having online stores along with the physical layouts.
A point of sale (POS) basically serves as the central point for customer data, sales reporting, and can even manage labor and inventory.
Running an online business on any eCommerce platform as well as on the physical store with the common inventory, is high-stress and inefficient.
Point of sale system connects every part of a business, to simply and efficiently improve the process.
Businesses are increasingly adopting POS systems. Selling prices of the products are linked to the product code/Barcode of an item, so the cashier merely needs to scan this code to process a sale.
You can also check the below video to get to know the functionality,
Features & Benefits
- Well integrated with both CS-Cart and CS-Cart Multi-vendor.
- Admin can decide agent among the CS-Cart site users, who can access the POS system.
- Admin created POS outlets are visible to vendors and they can assign their products.
- Option to list either only POS products or store products or both on POS devices. By default, all CS-Cart products are listed in “POS Products”.
- Feature to generate & print the barcodes of CS-Cart Products (In bulk or individually) via the admin end. So, Print the barcodes and add the barcodes to your products.
- Configurable settings to set the desired dimensions and prefix for the Barcode.
- Works well with a Barcode scanner and thermal printer.
- Functionality to add products to the cart with the barcode scanner.
- Option to add a new product/listing manually via POS system ie; The agent can add the custom product which is not in the inventory into the cart directly (A service or a product not available in the current inventory can be added instantly to the system.)
- Works well with product options.
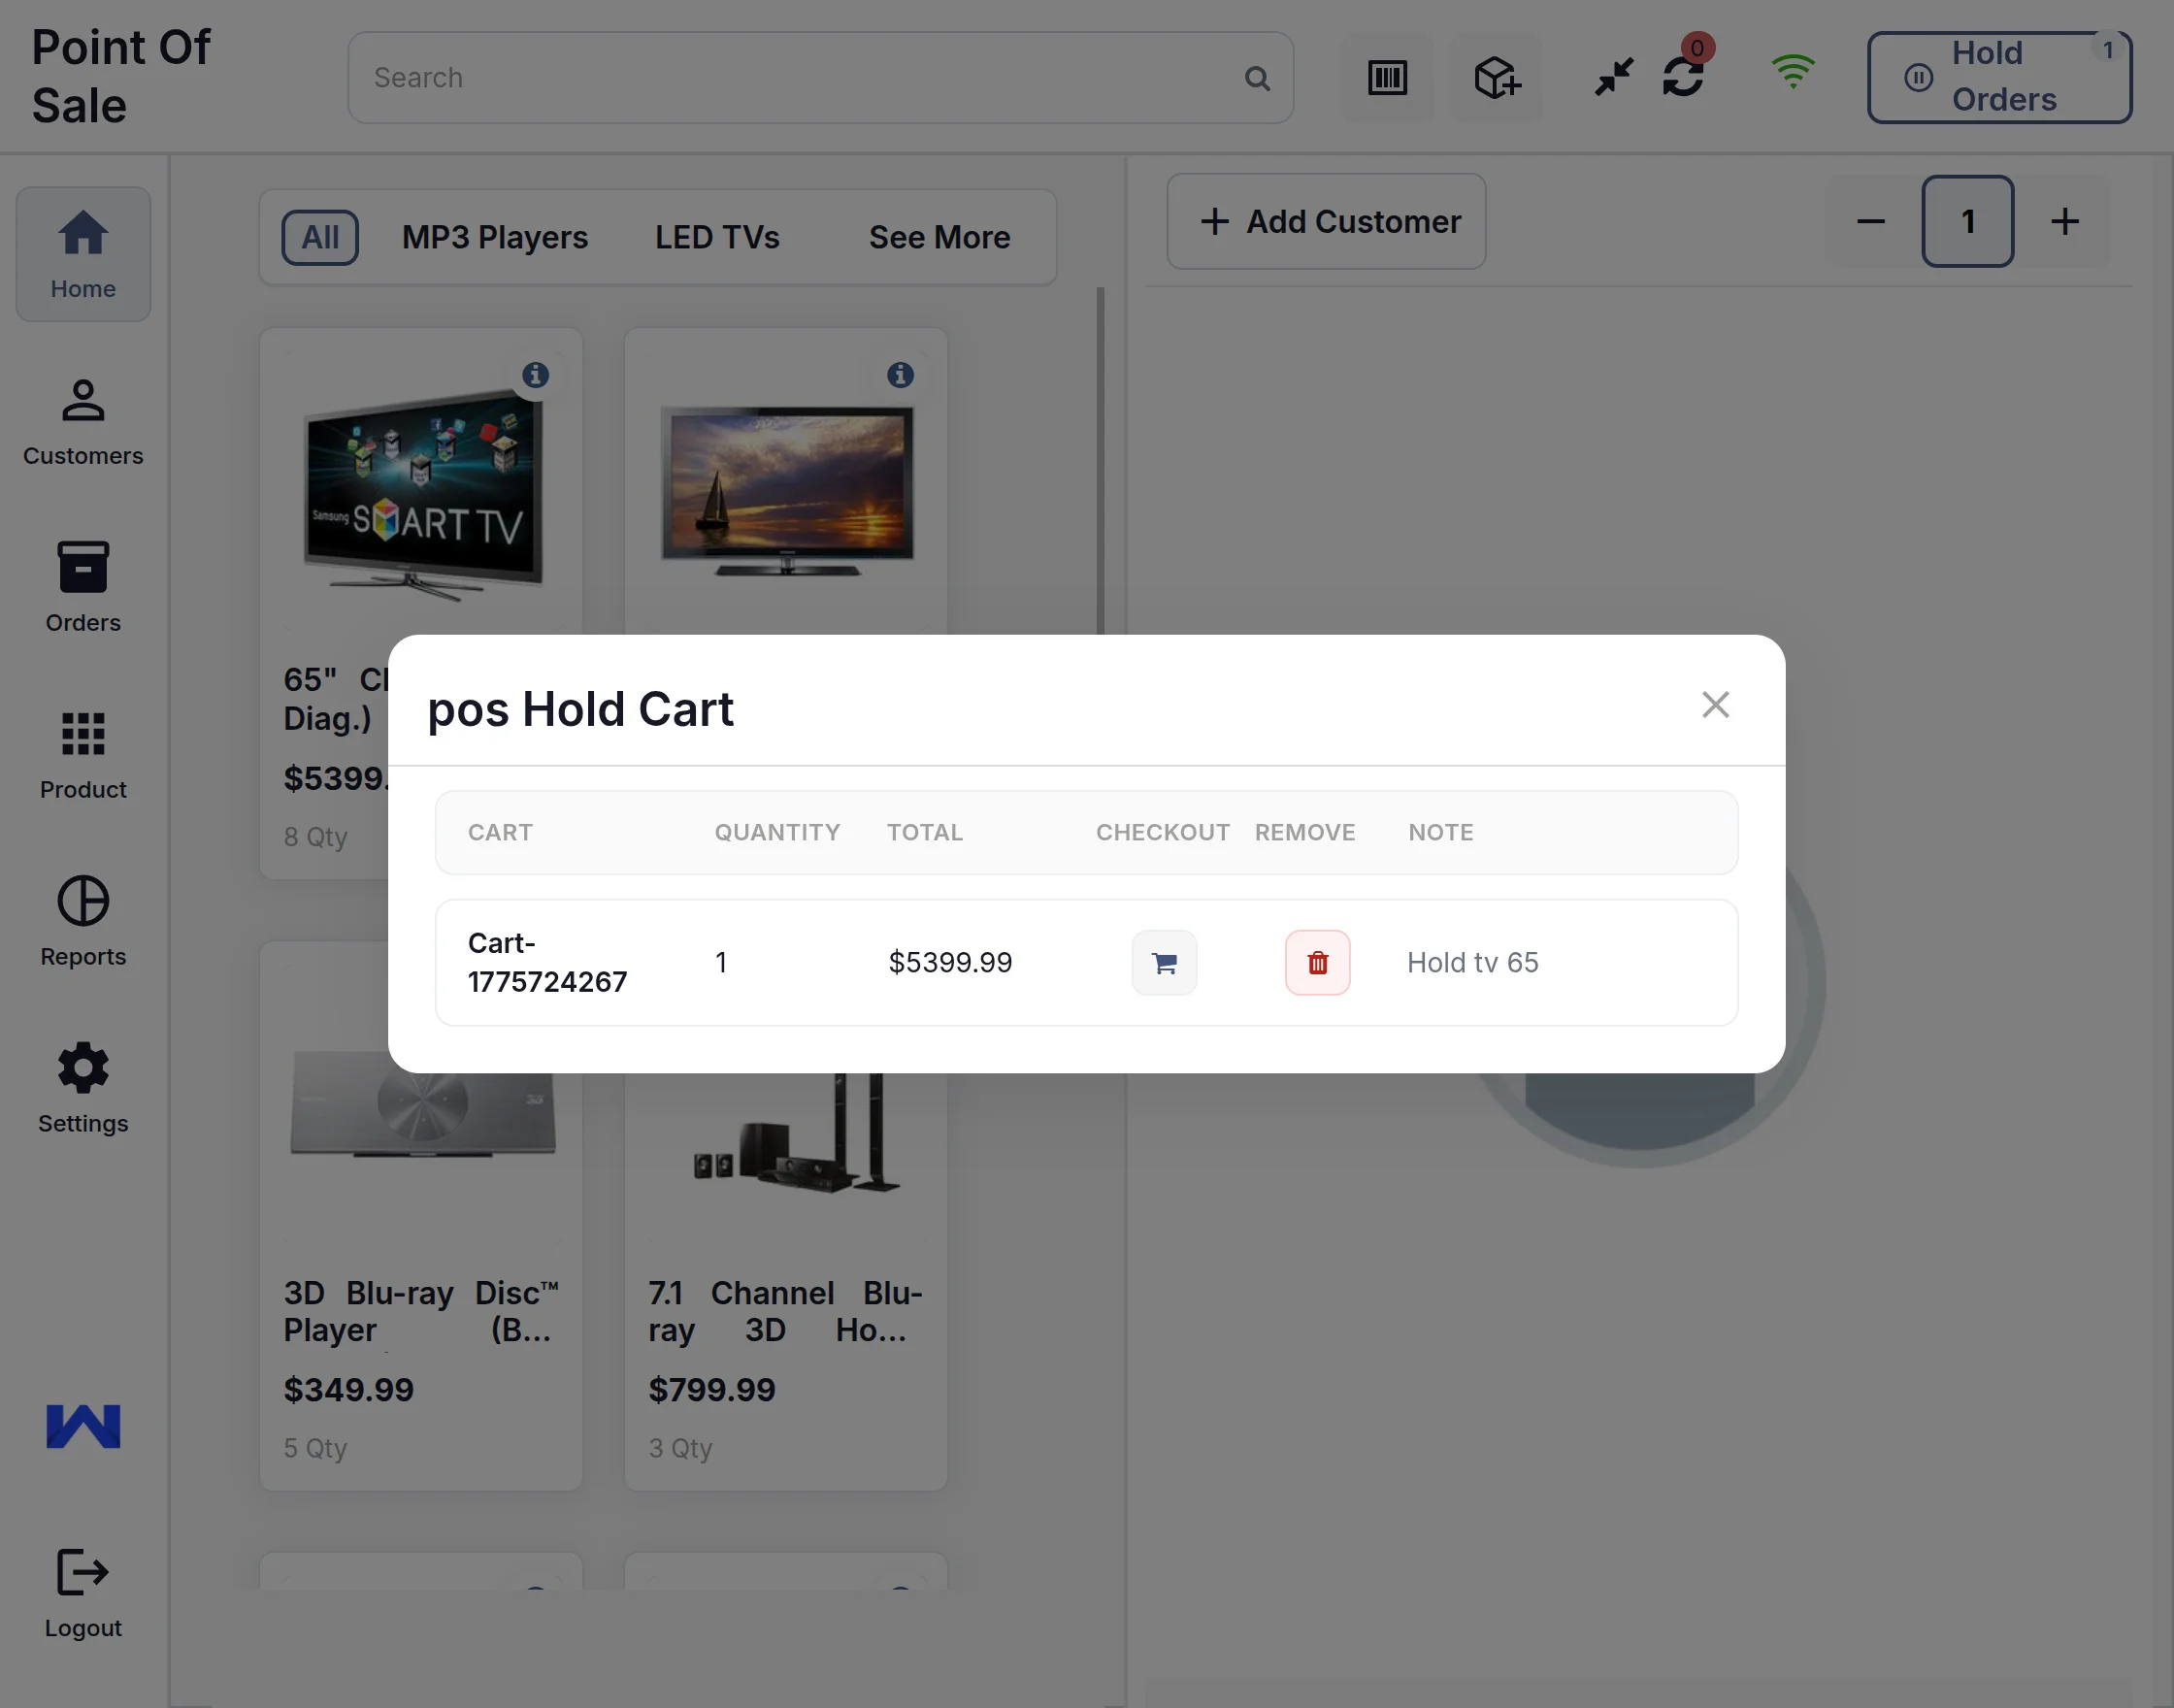
- Functionality to put the cart on hold.
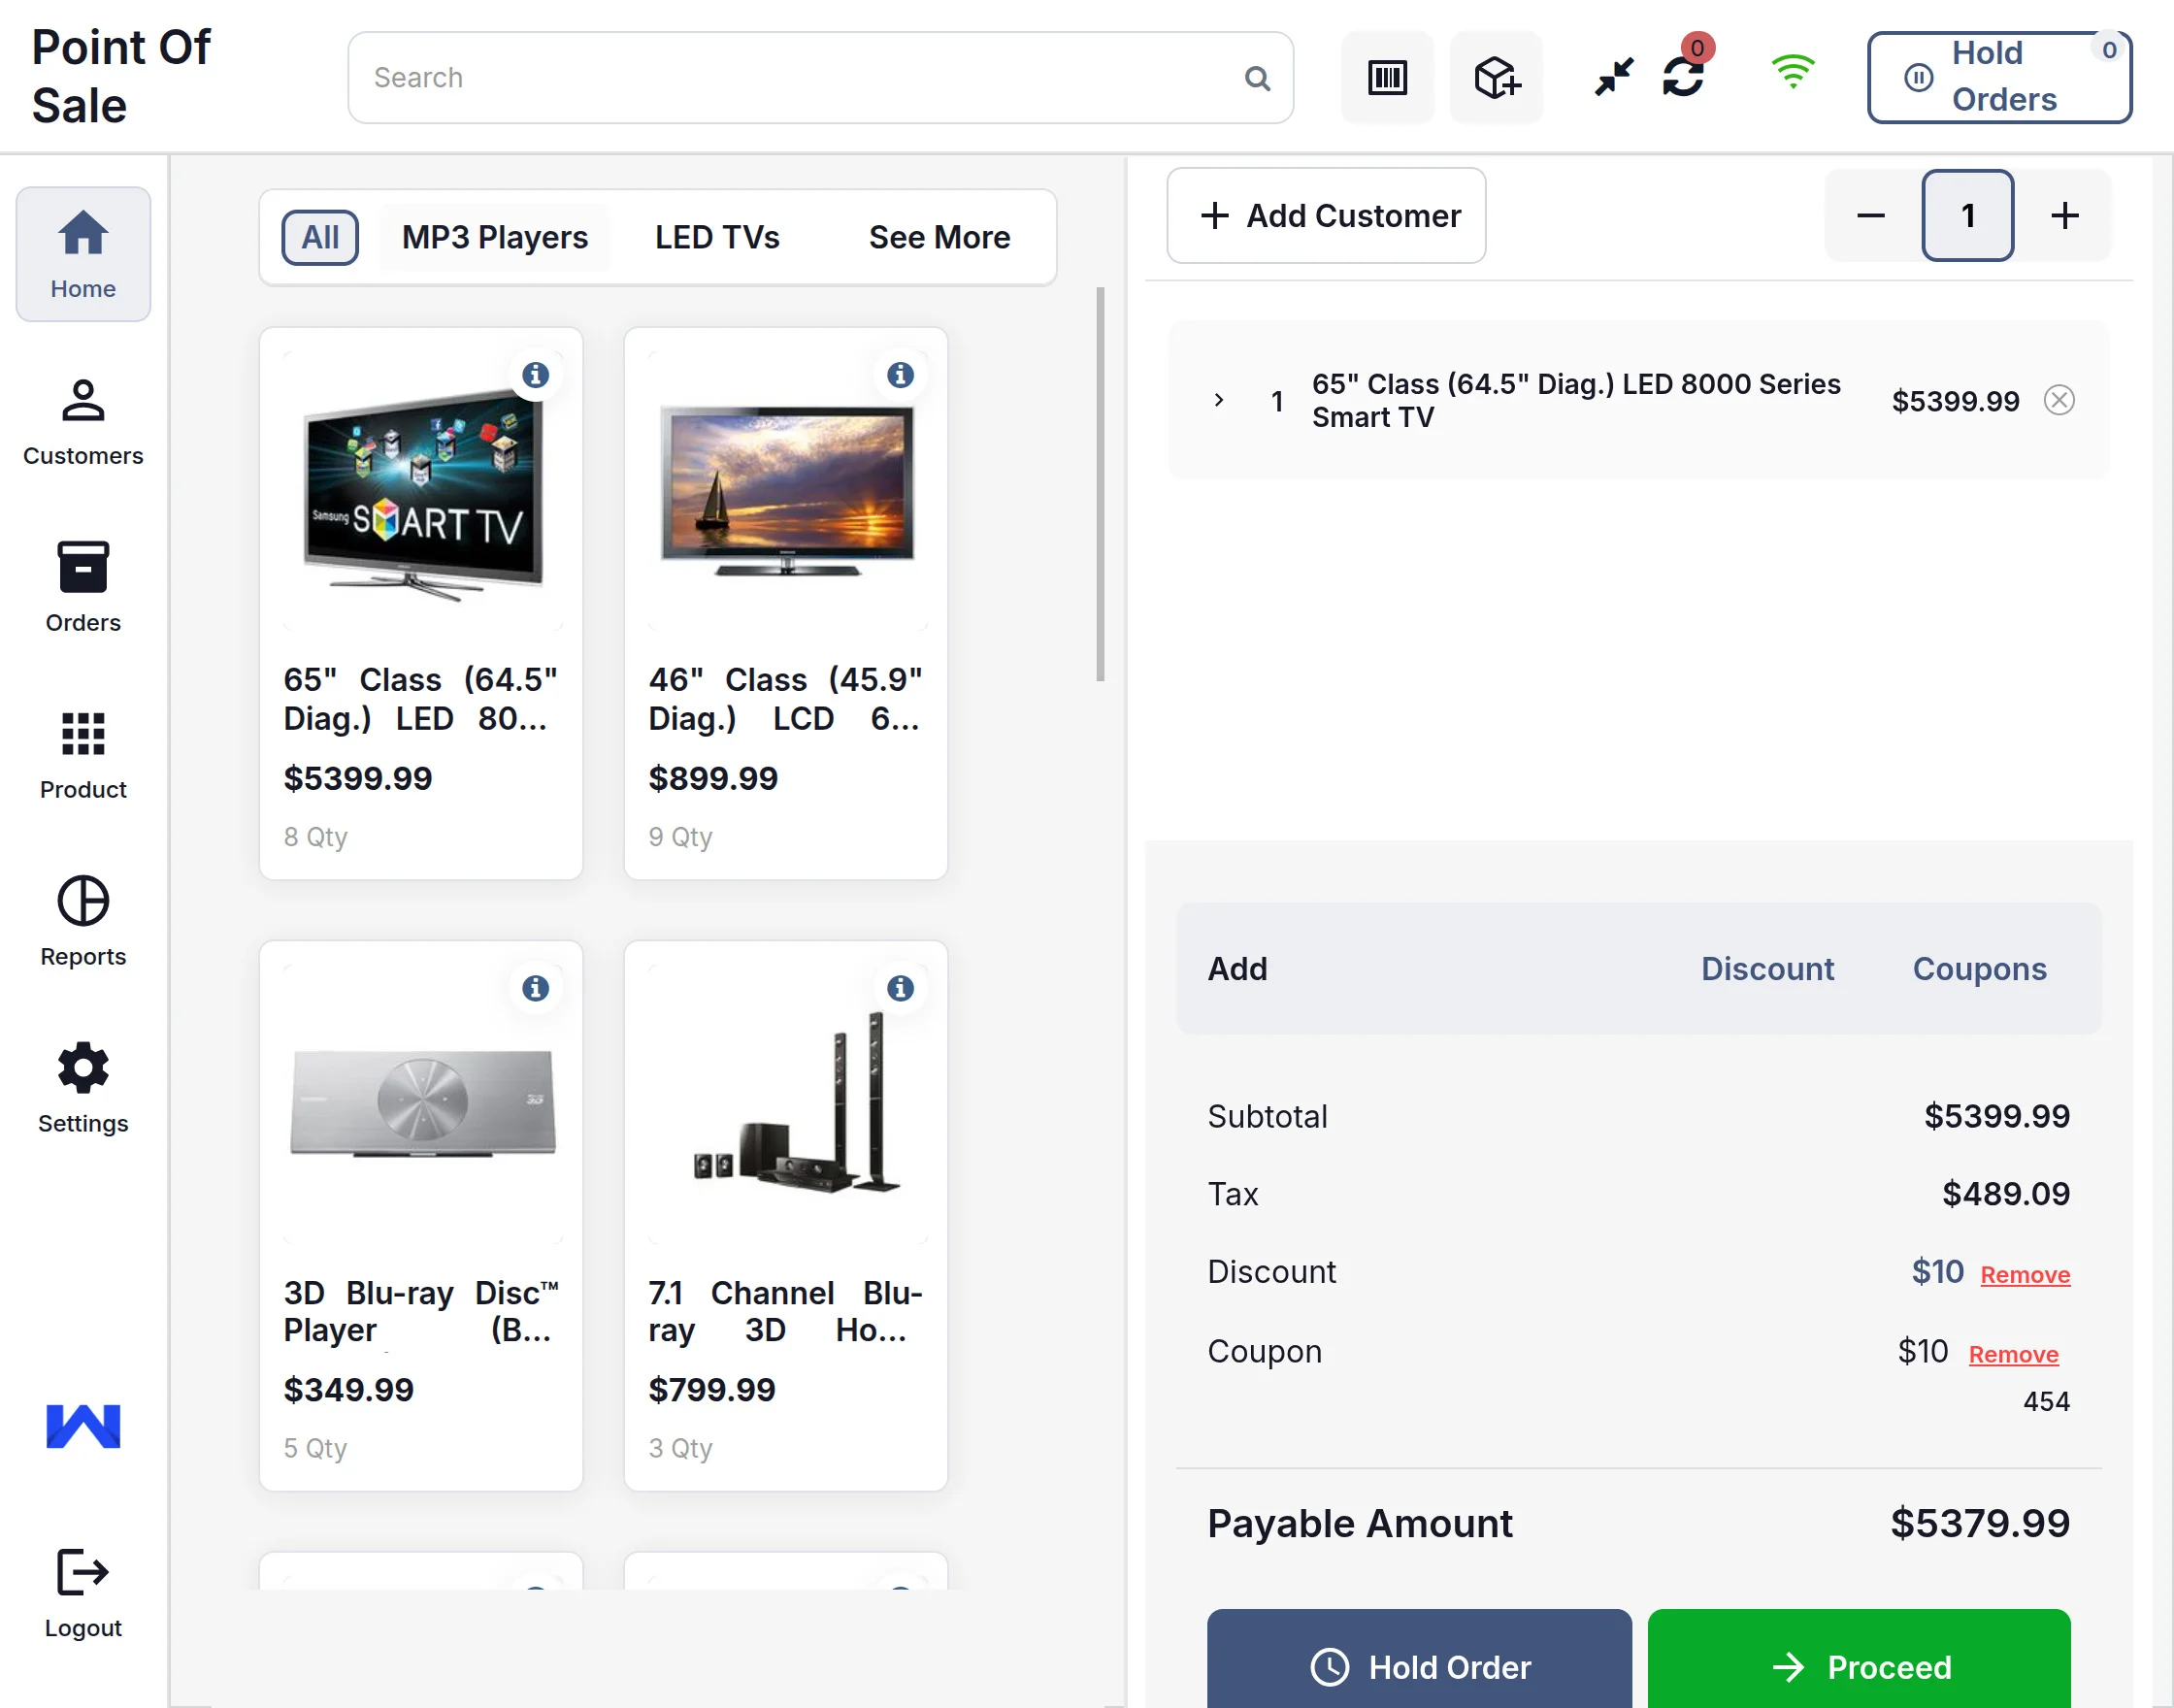
- Option to add a manual discount on the order.
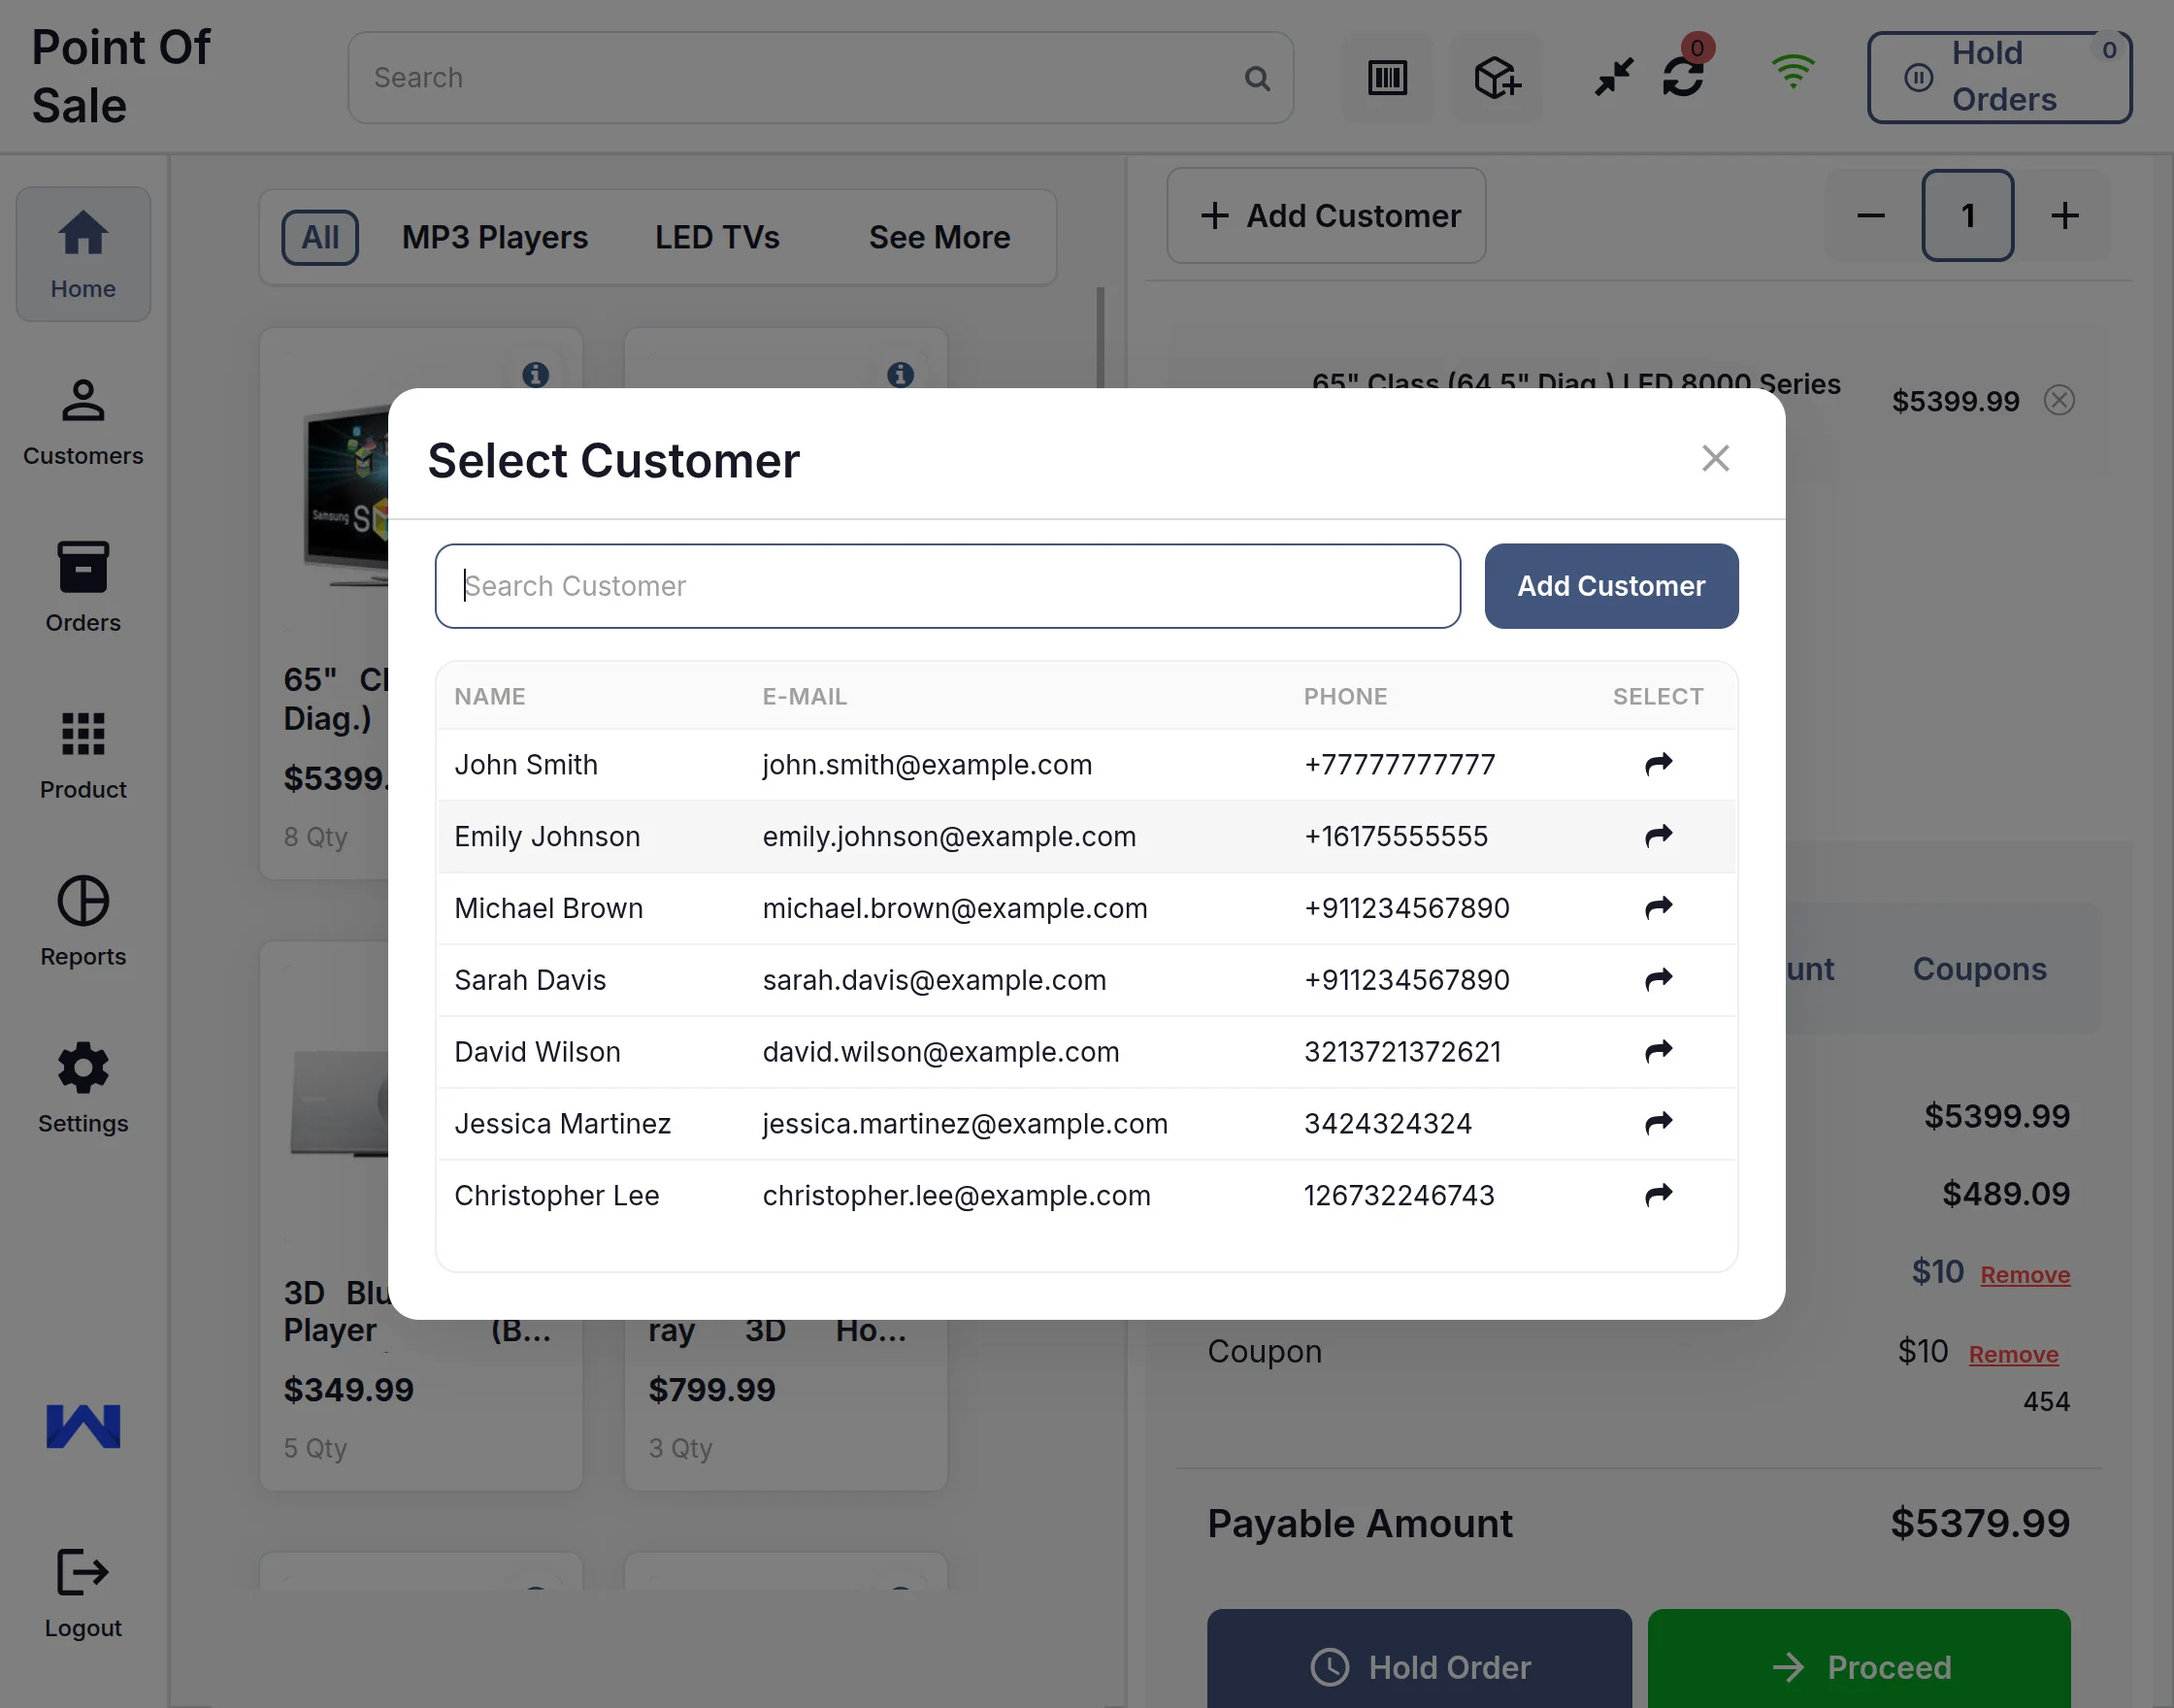
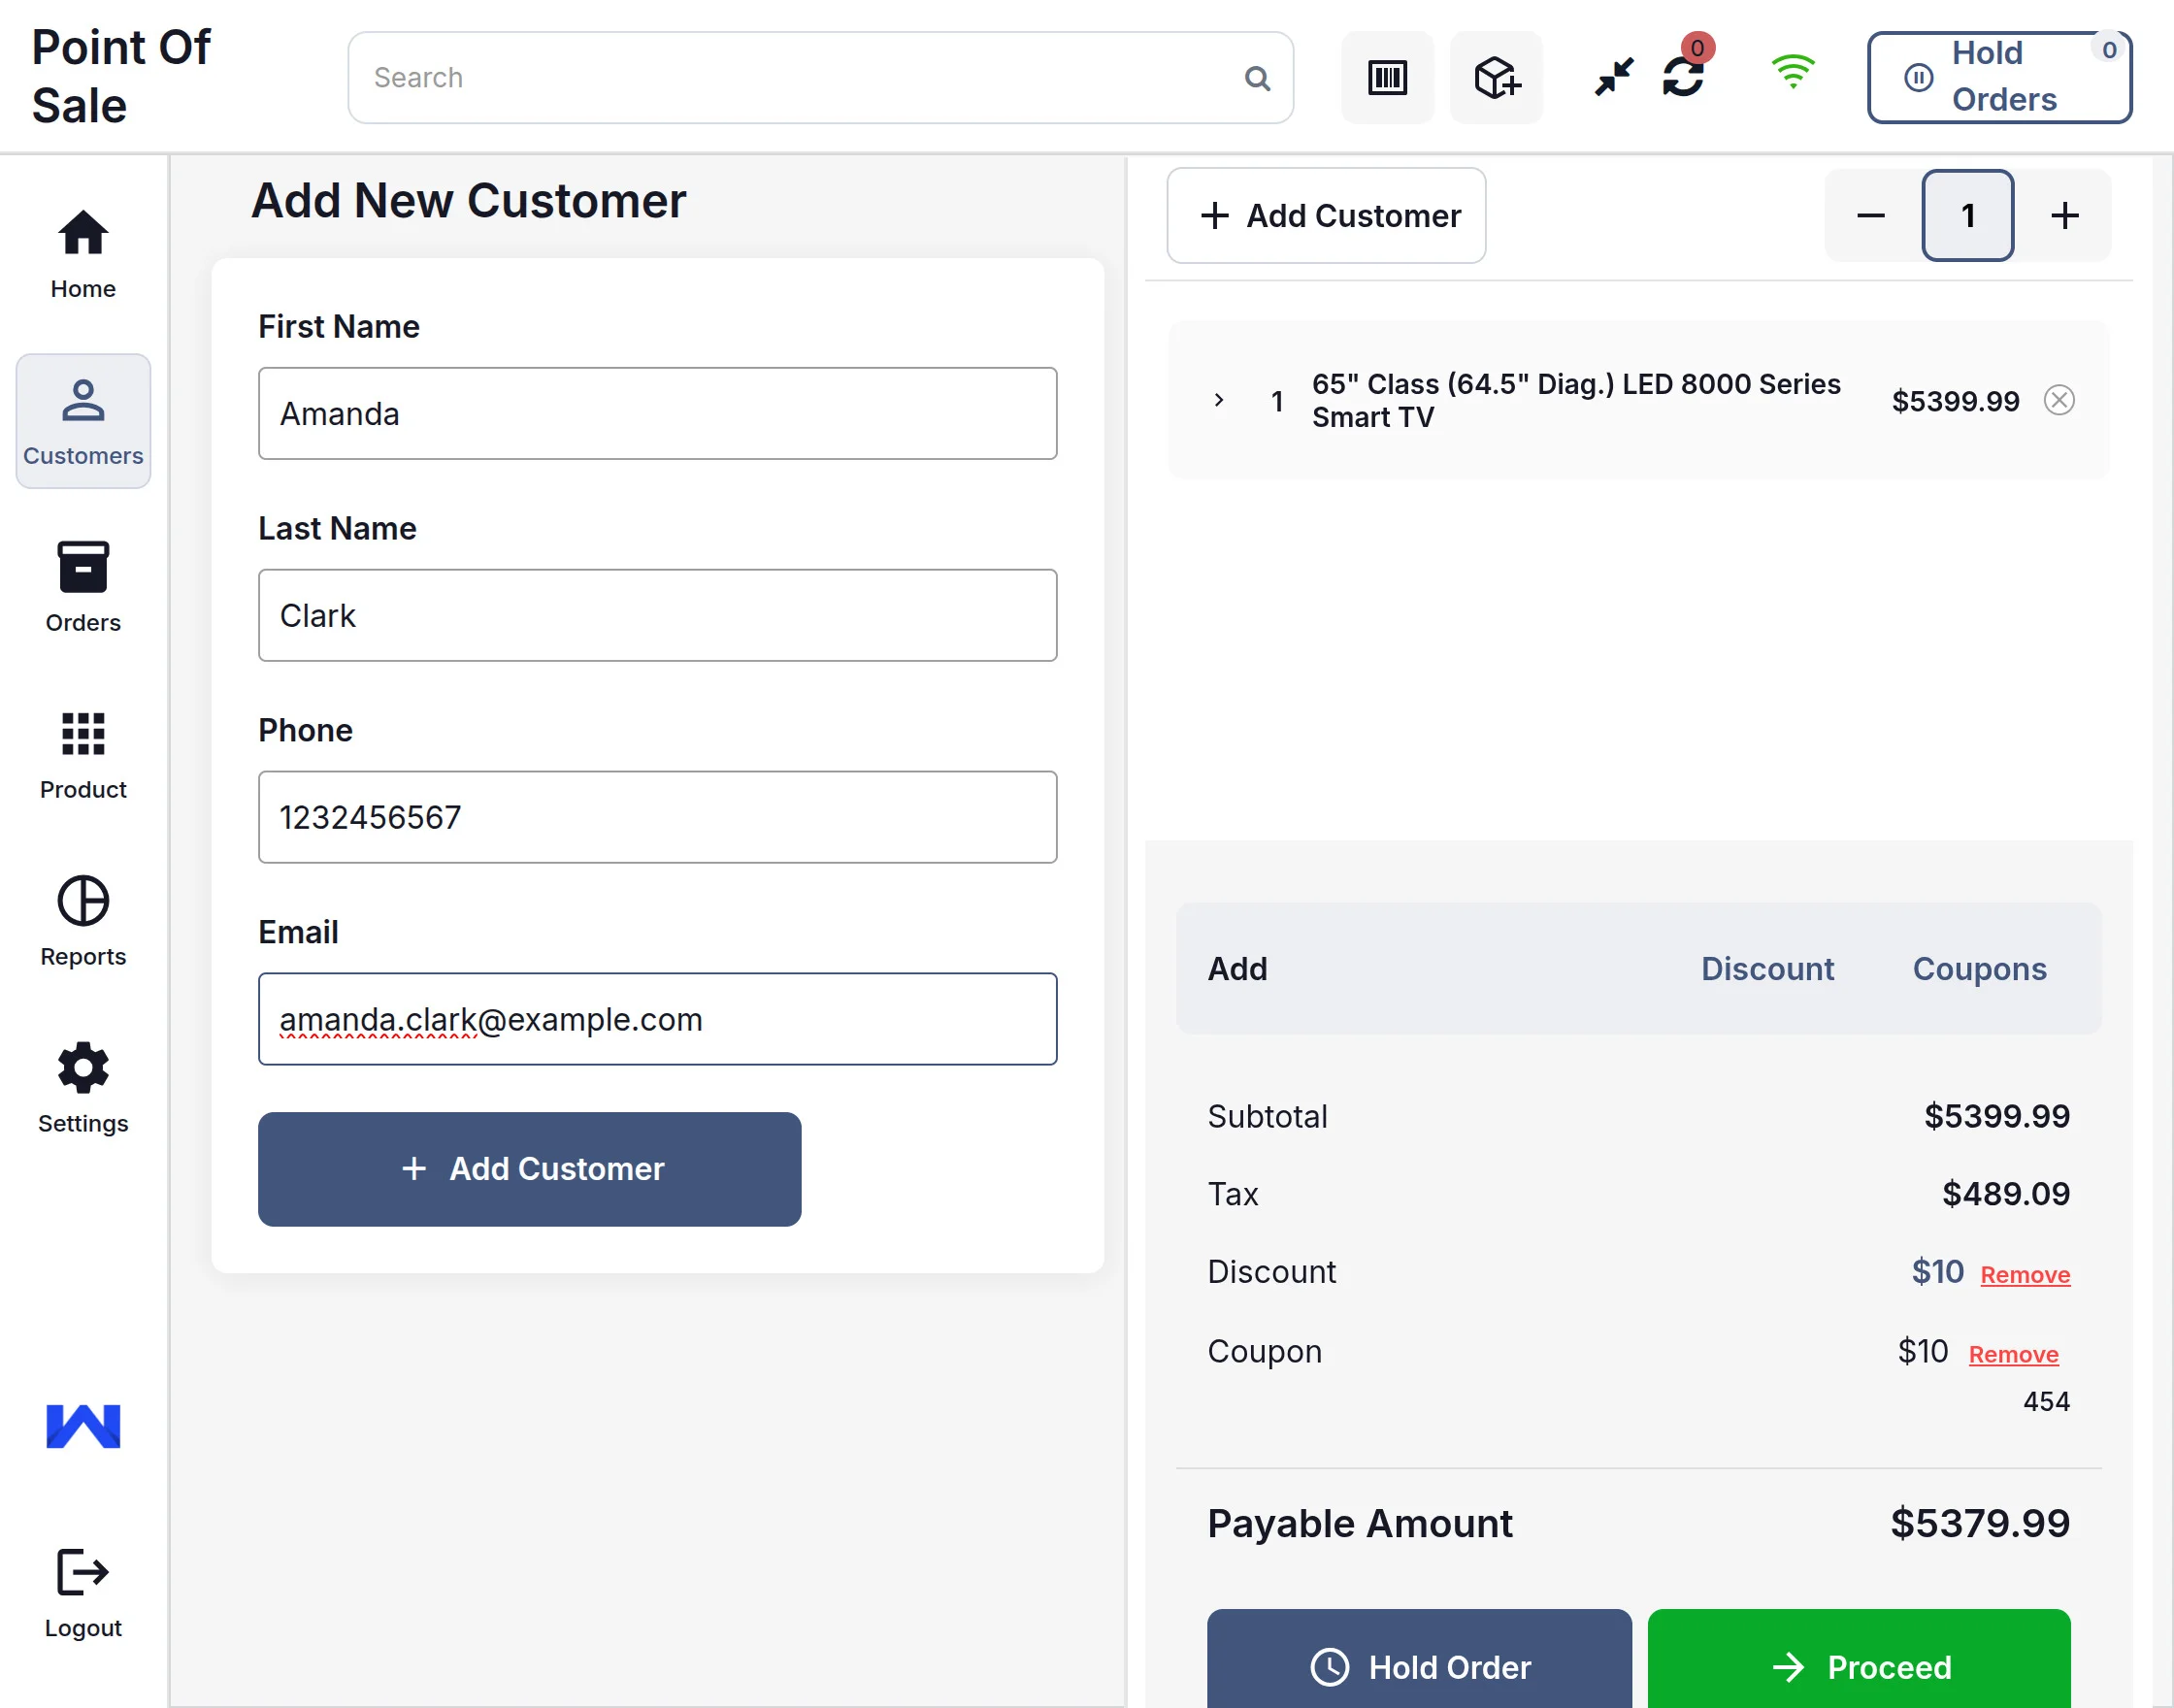
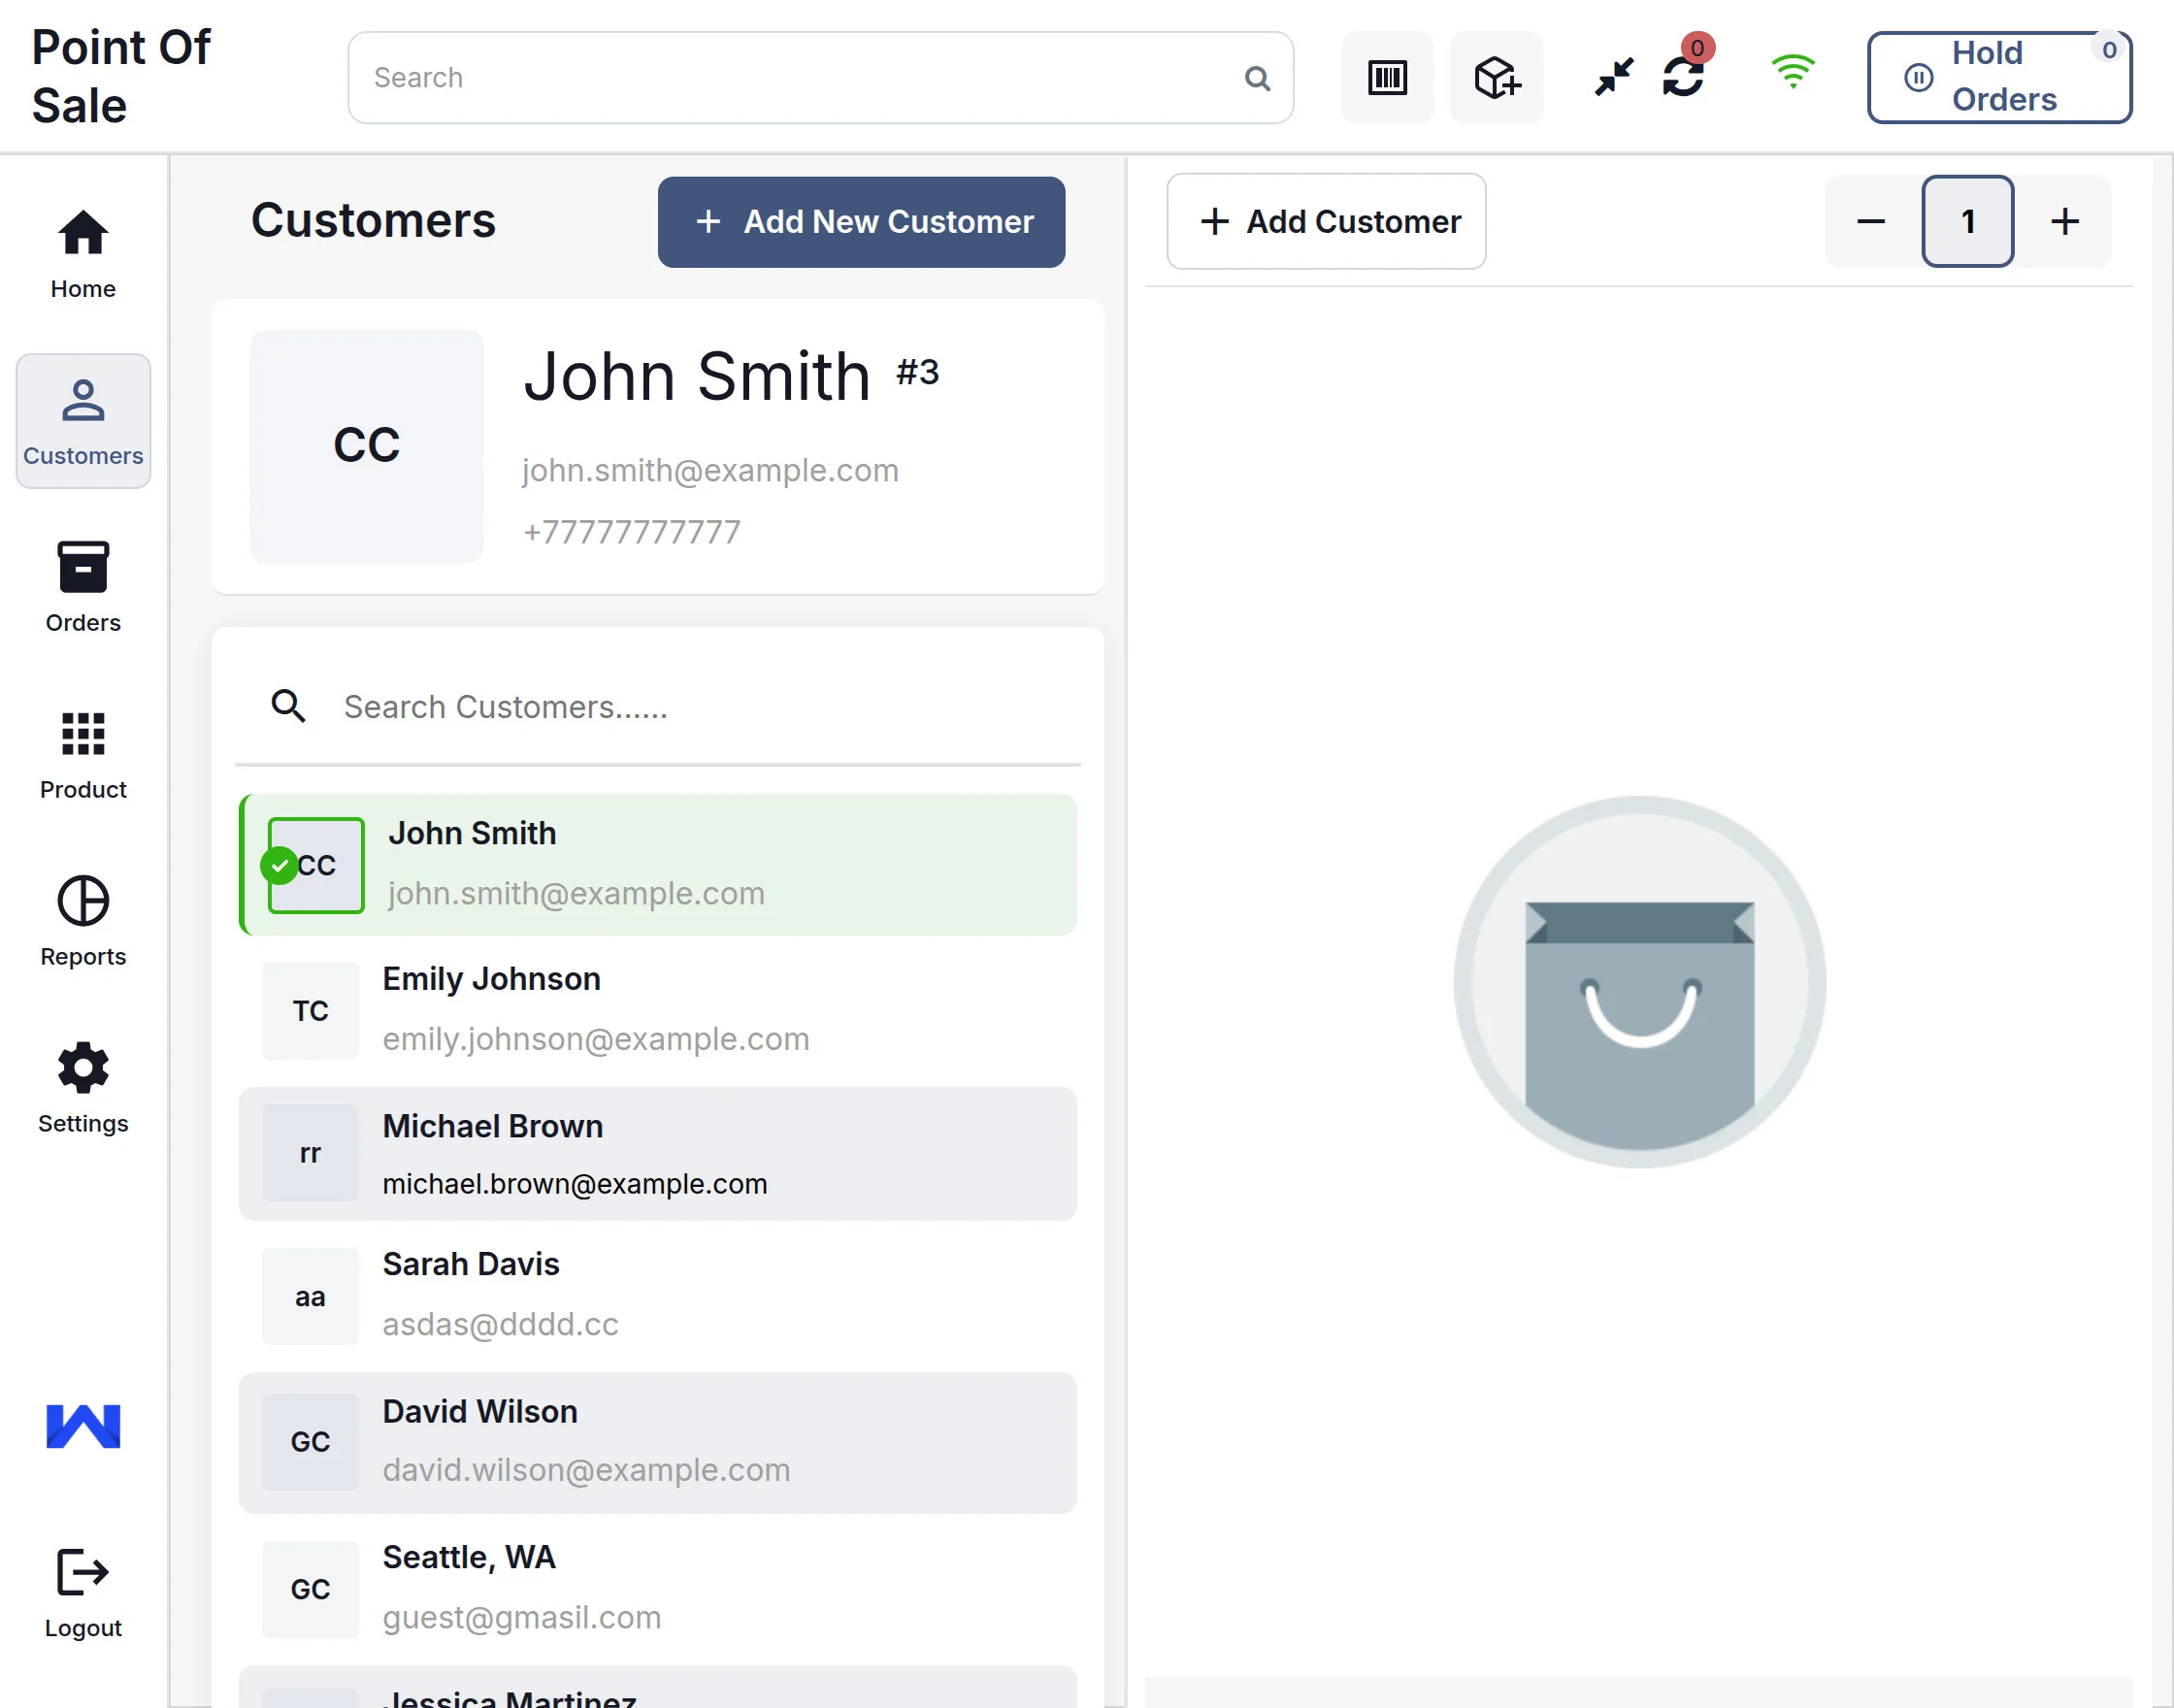
- Functionality to add a new customer via POS device.
- Orders & Inventory synchronization with the online CS-Cart store.
- A magnificent & user-friendly POS frontend view.
- A quick product search option for products by name/SKU.
- Functionality to search for a registered customer by phone number or email.
- Easy to configure and manage at the admin end.
Newly Added Features
- Vendors can now be assigned multiple POS outlets, enhancing flexibility in outlet management.
- Multiple vendors can also be assigned to a single POS outlet, allowing collaborative outlet management.
- Well integrated with CS-Cart Multi-Store Edition. So now you can add POS functionality to multiple stores.
- Works well in Offline Mode. So, Now you can place orders & add new products even when you are not online. The orders & products will synchronize automatically once you are online.
- Supports multicurrency & multi-language. The POS agent can now choose the desired currency and language. This option is available in the agent profile at the POS frontend.
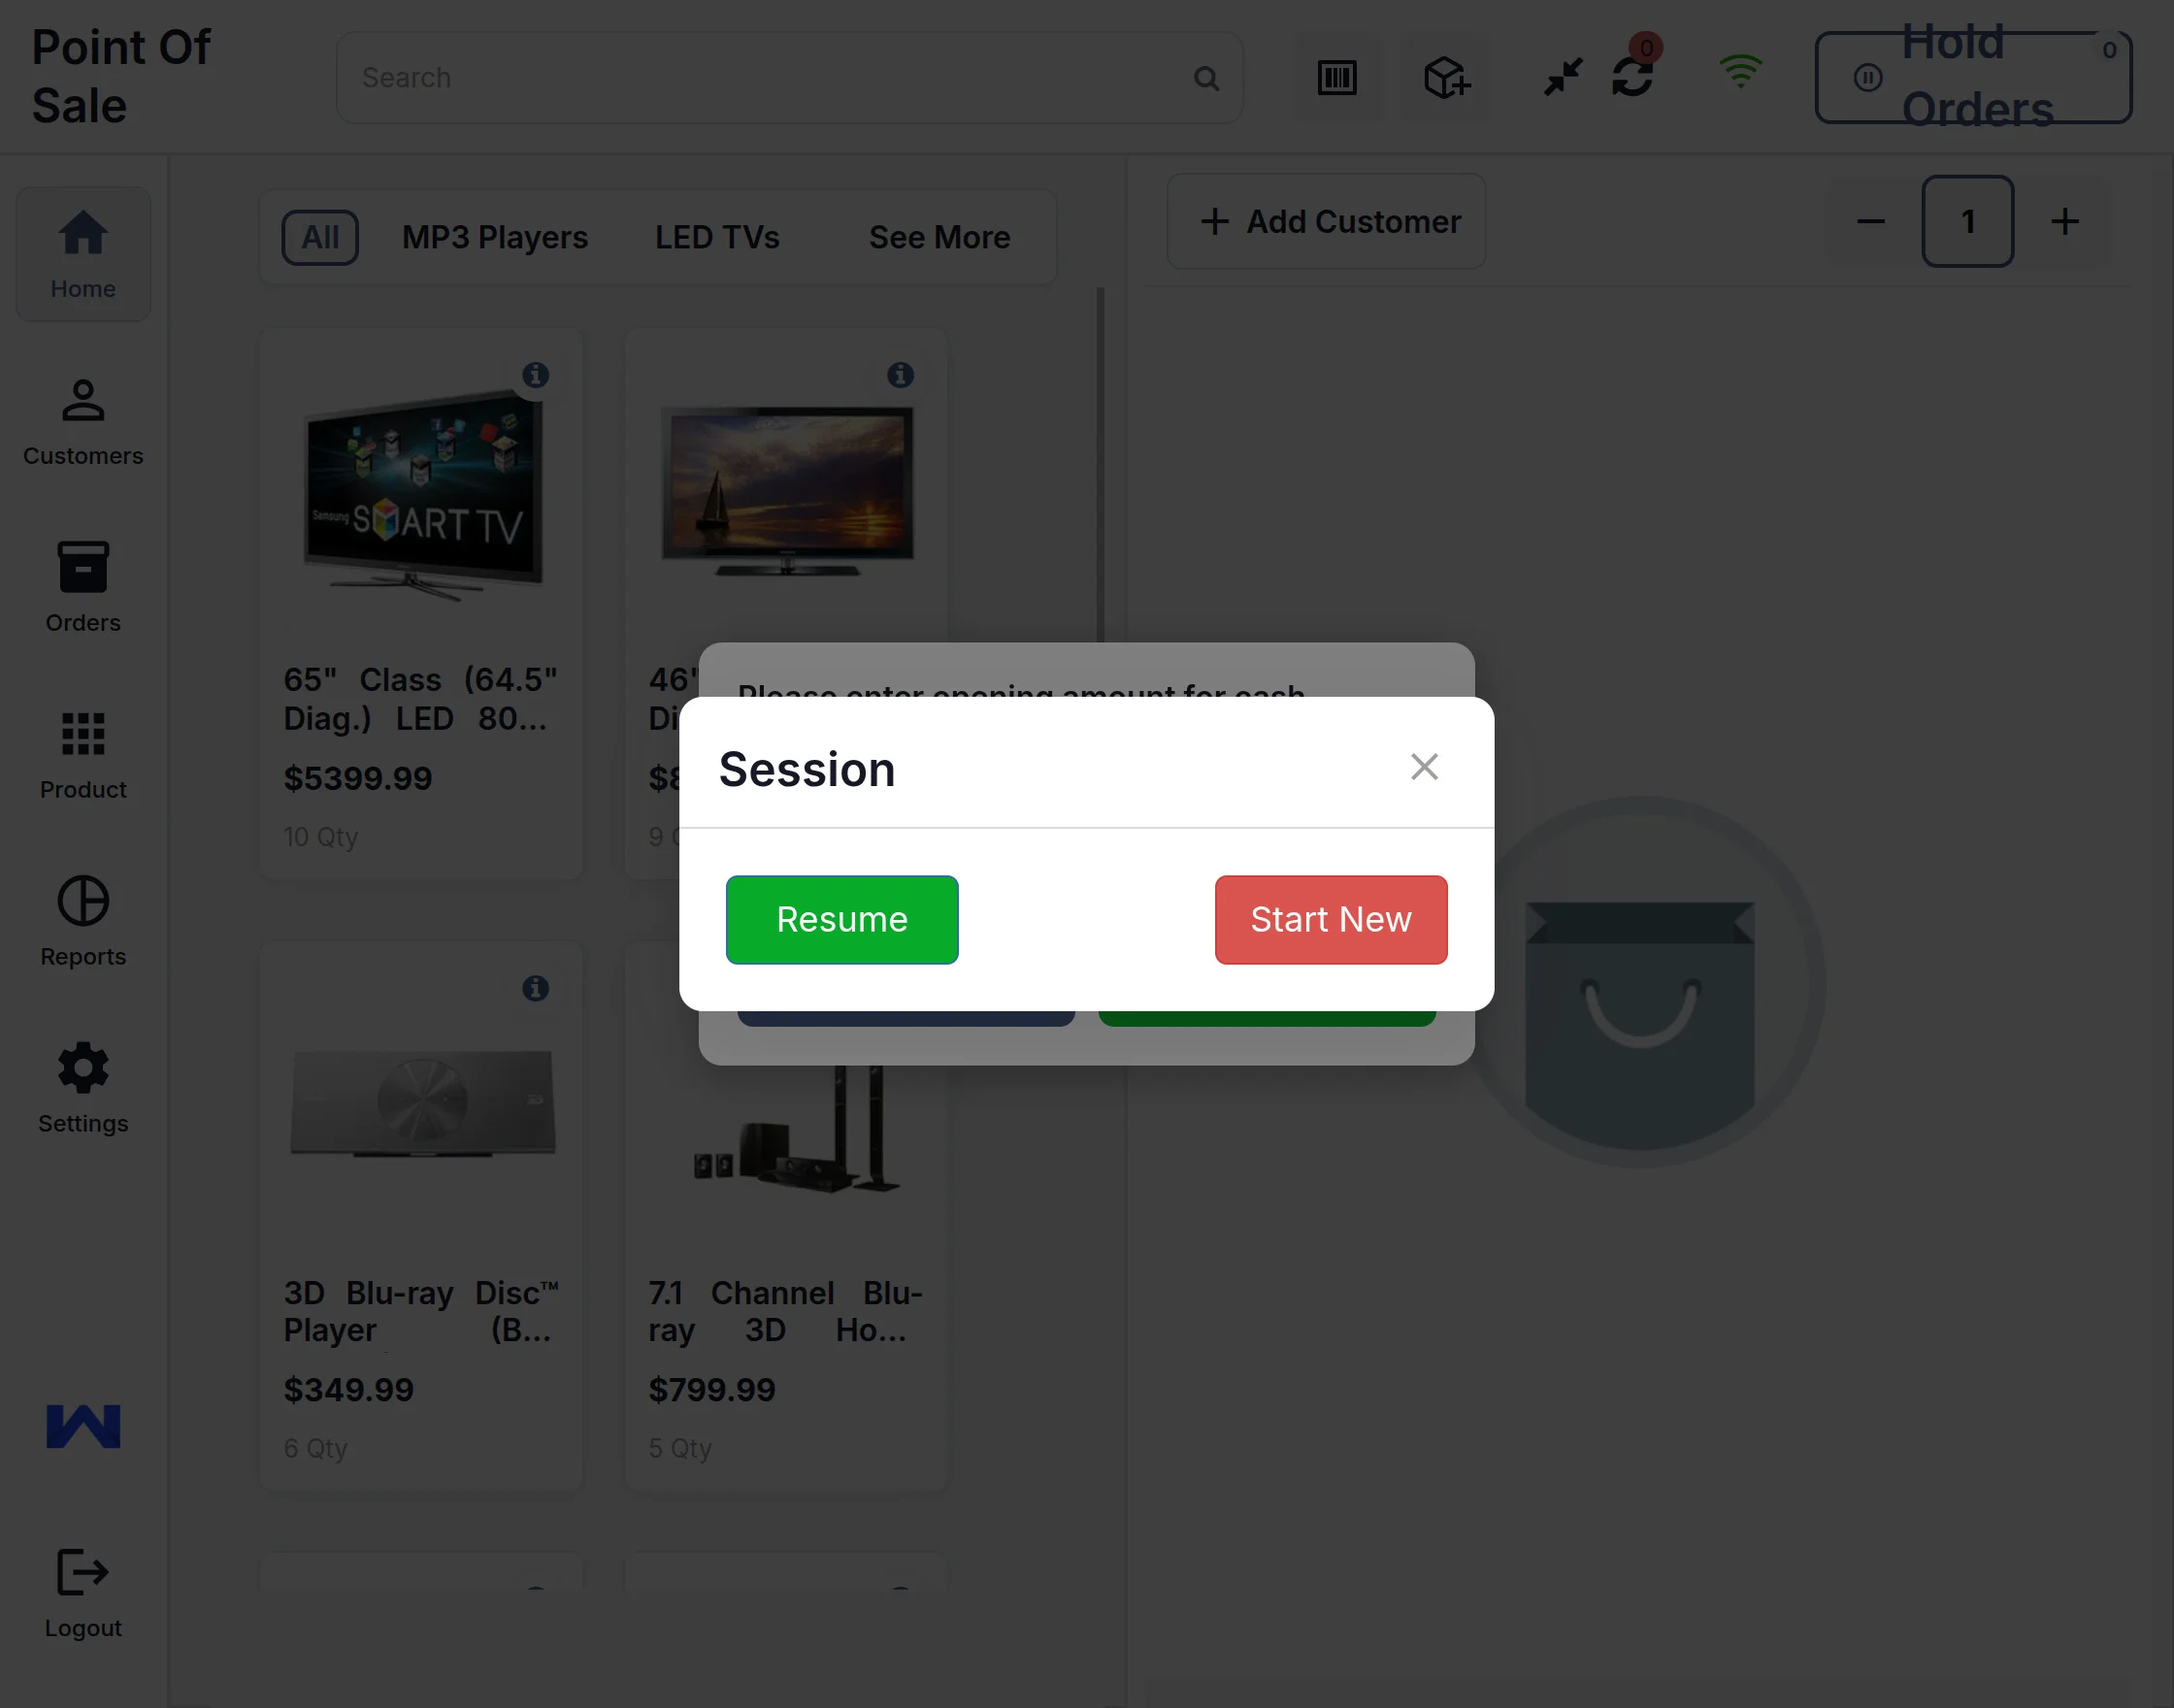
- You can now resume & continue previous sessions.
- Works well with promotion & gift certificate features. You can now apply the coupons.
- Added the progress bar which works on products loading after login.
- Added the full-screen mode functionality.
- Now the admin can load the products through ajax
- Customers added through pos can use the store also.
- Customers can return the product from POS and check the return order history.
- Now the user can use the Progressive Web App for POS.
- Vendor Administrator image in multivendor or administrator in multistore can now be updated.
- Users can check each product’s details from the POS panel.
How To Upload And Install
- After downloading the CS-Cart Point Of Sale (POS) add-on, you’ll get the add-on zip files (For CS-Cart and Multi-Vendor editions separately), one install.txt file, and a relevant User Guide manual doc. Read it carefully for proper configuration.
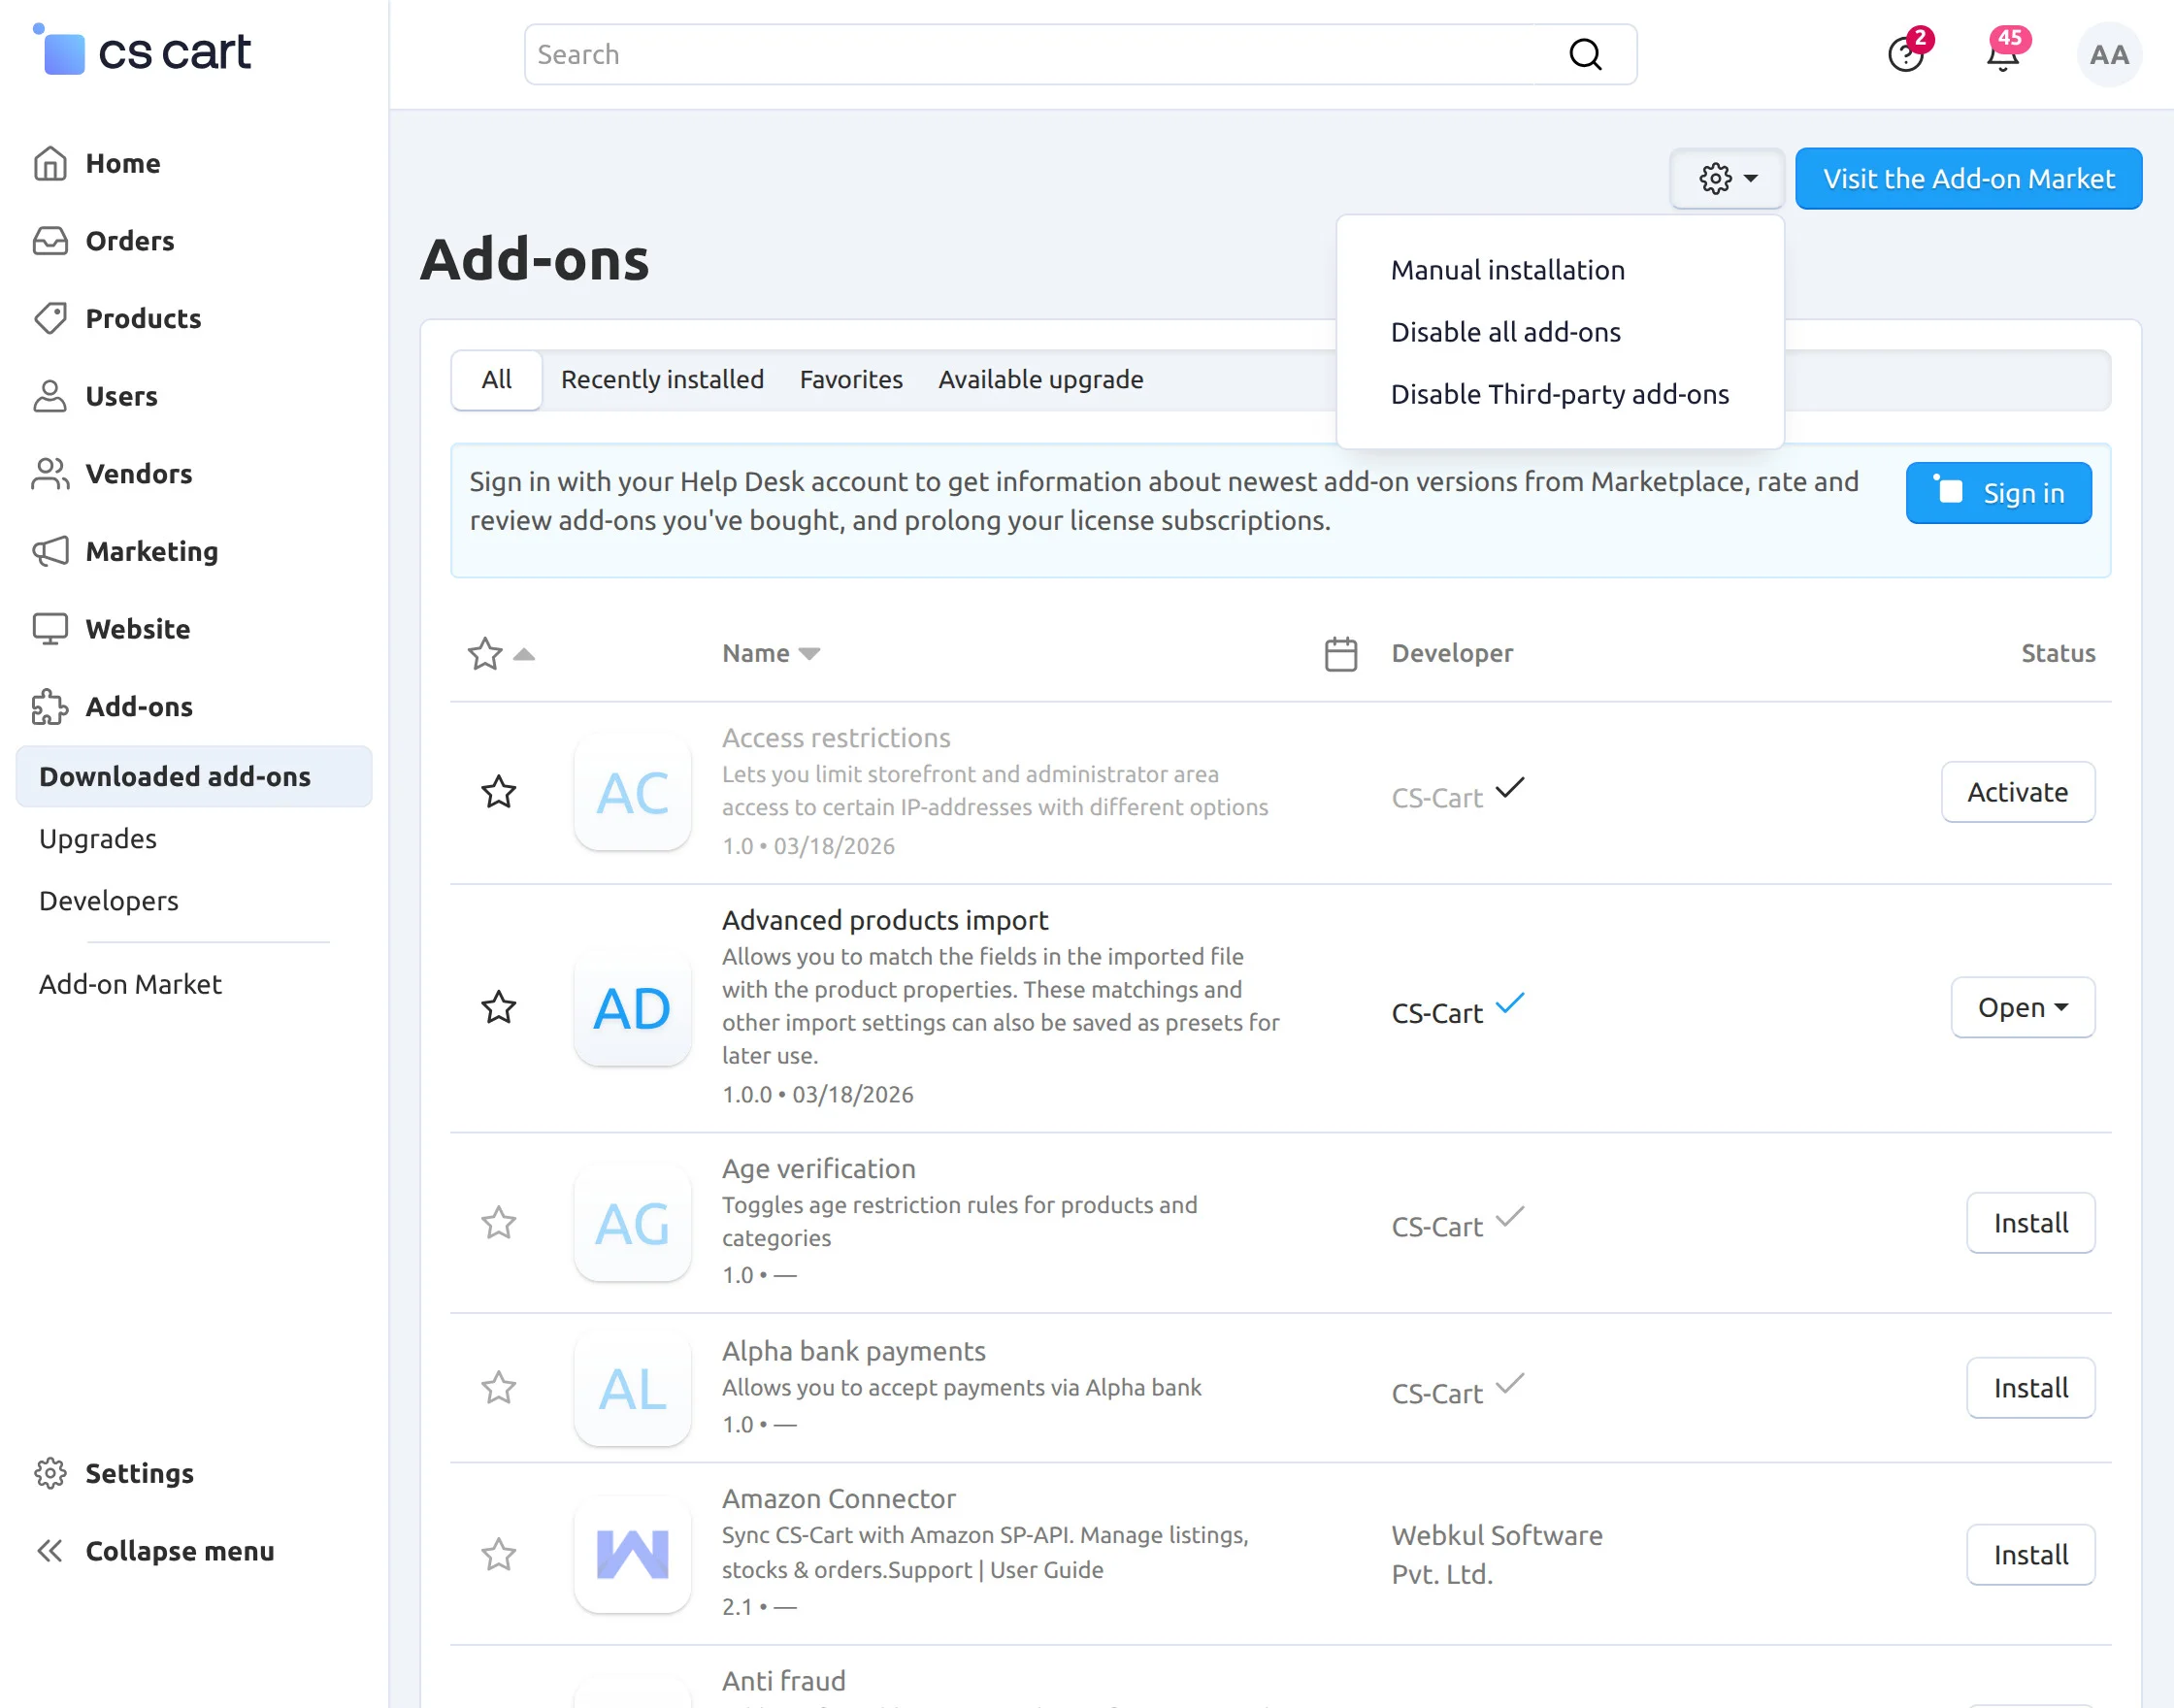
- Navigate to Add-ons > Downloaded add-ons and click on the settings icon, from here you can manually install the zip file as shown below:
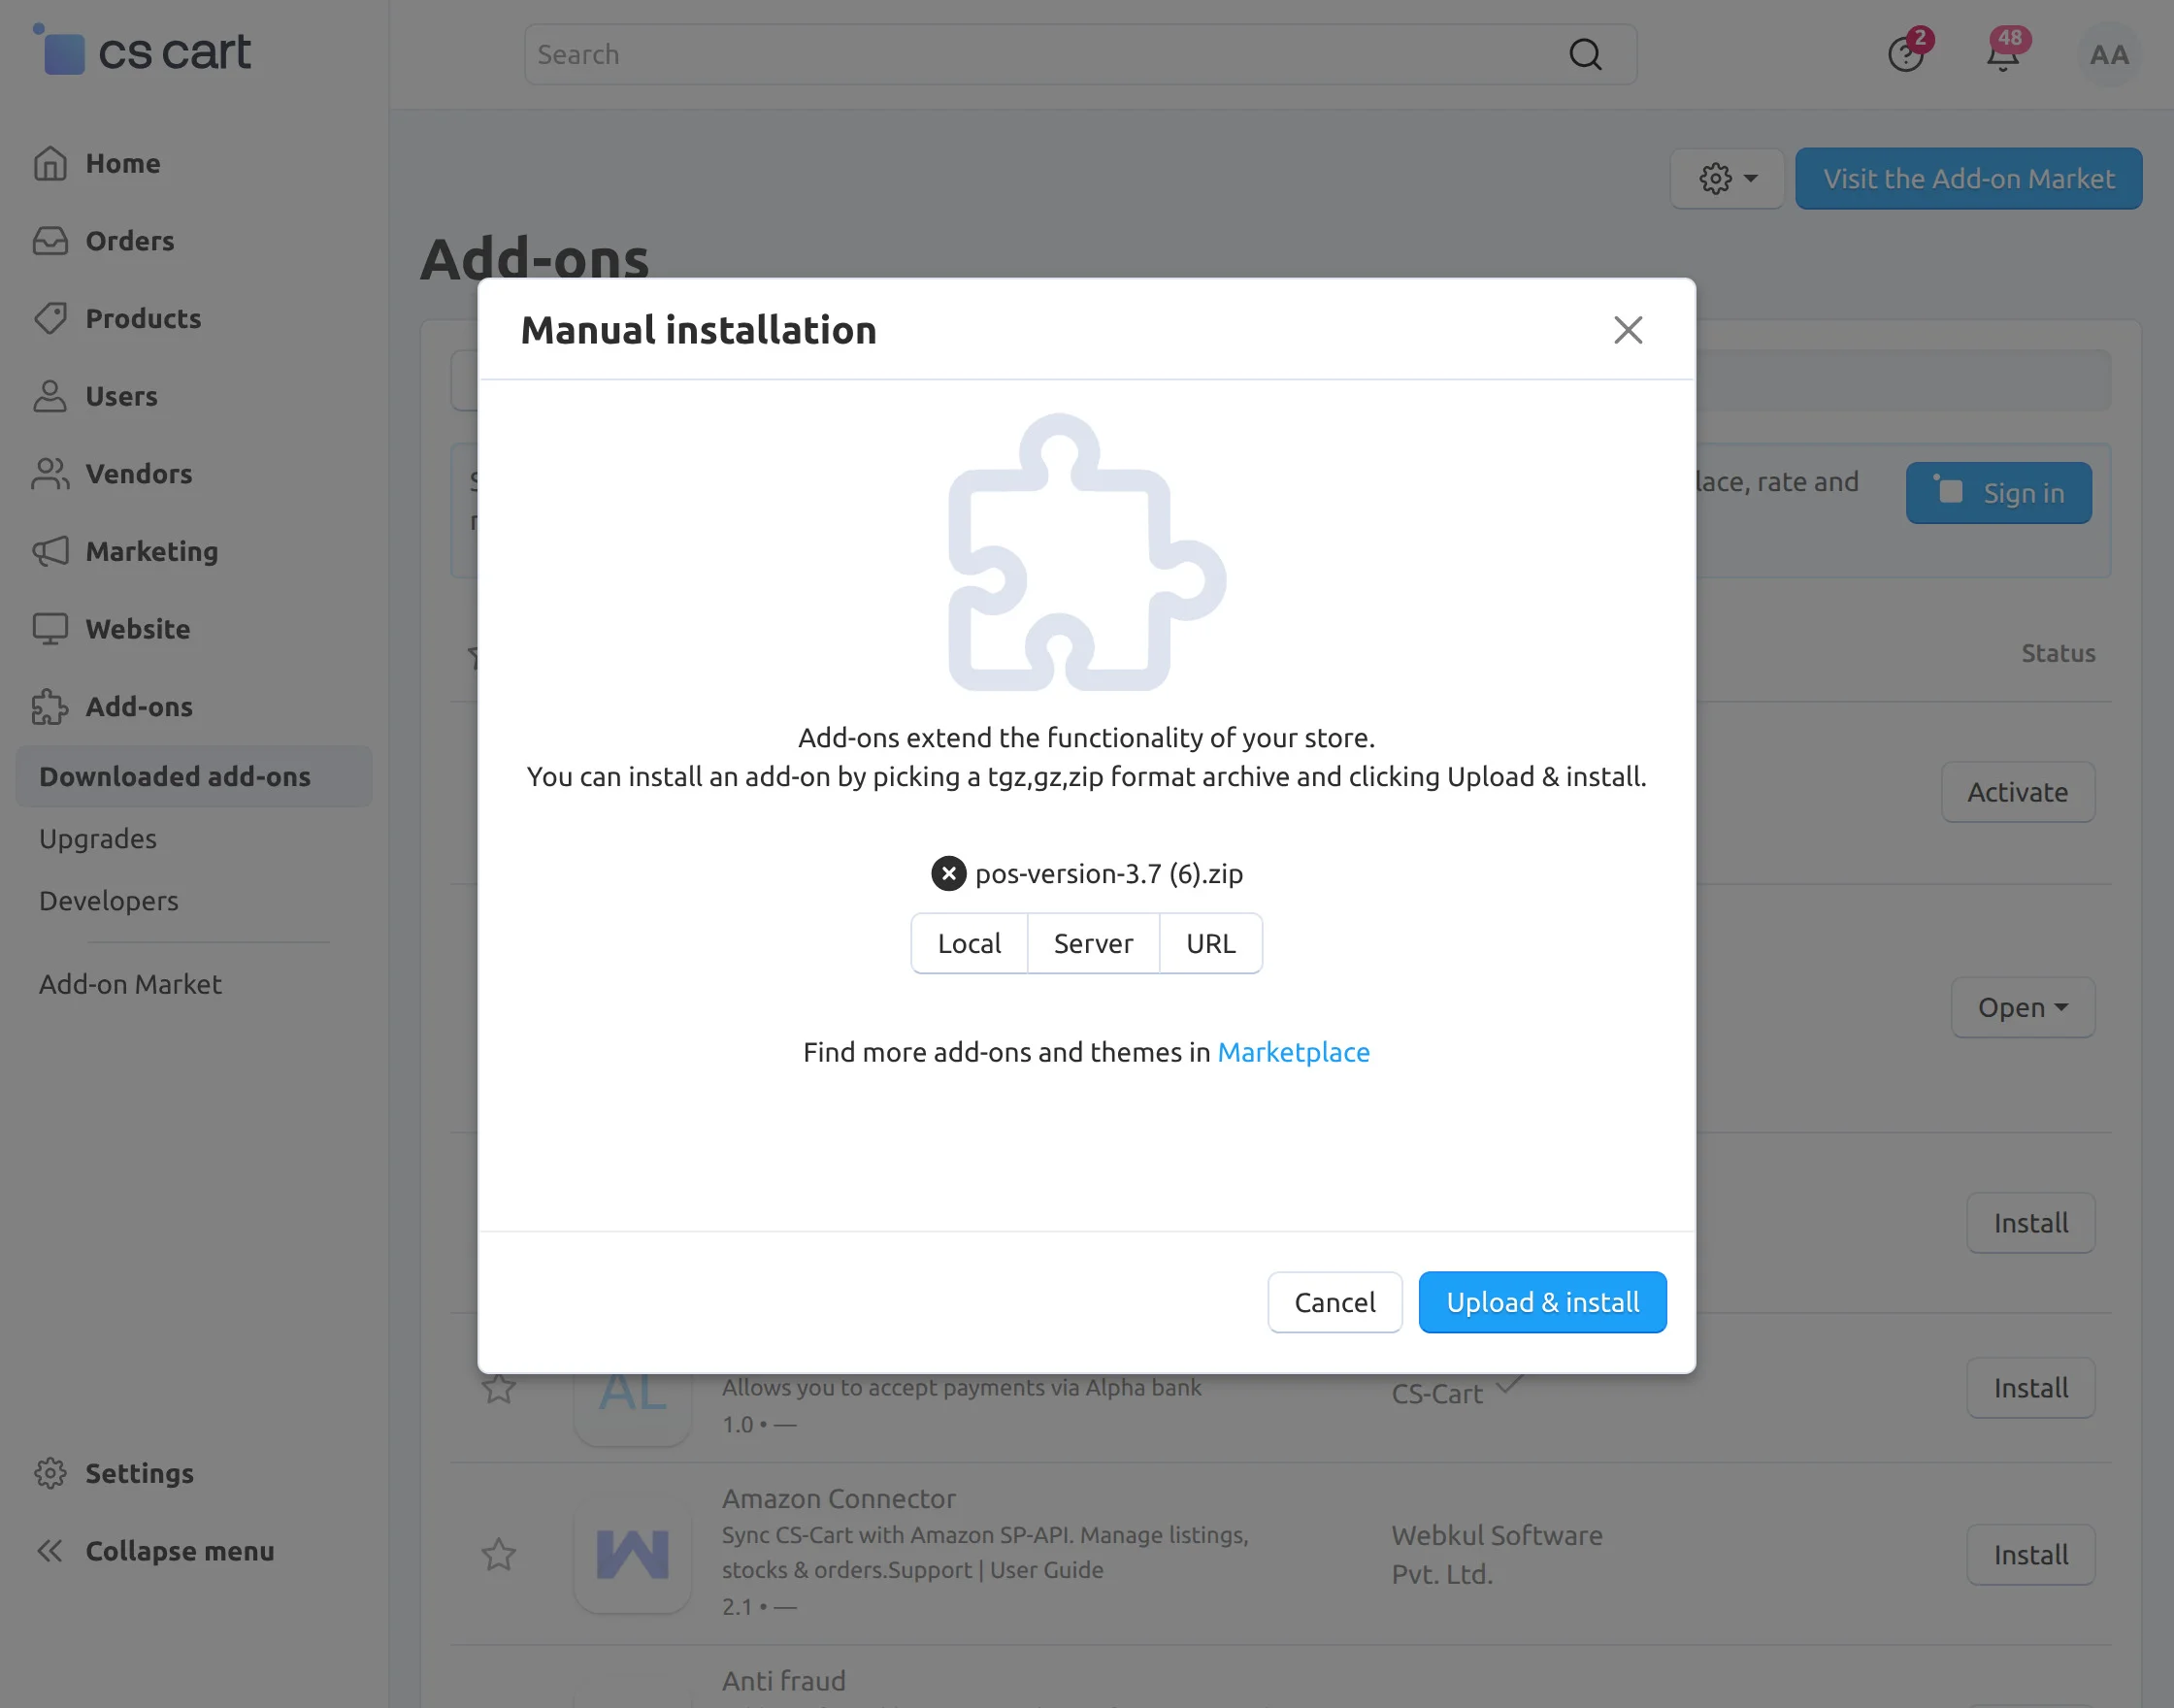
Click on “Local” to browse the zip file and then click on “Upload & Install” as shown below in the snapshot.
Add-on Configuration
After the add-on installation, we need to configure the settings. For that, the admin needs to click on the POS, and then a new page will open for configuration.
In the add-on configuration, there are some general configurable settings along with the settings for the barcode creation.
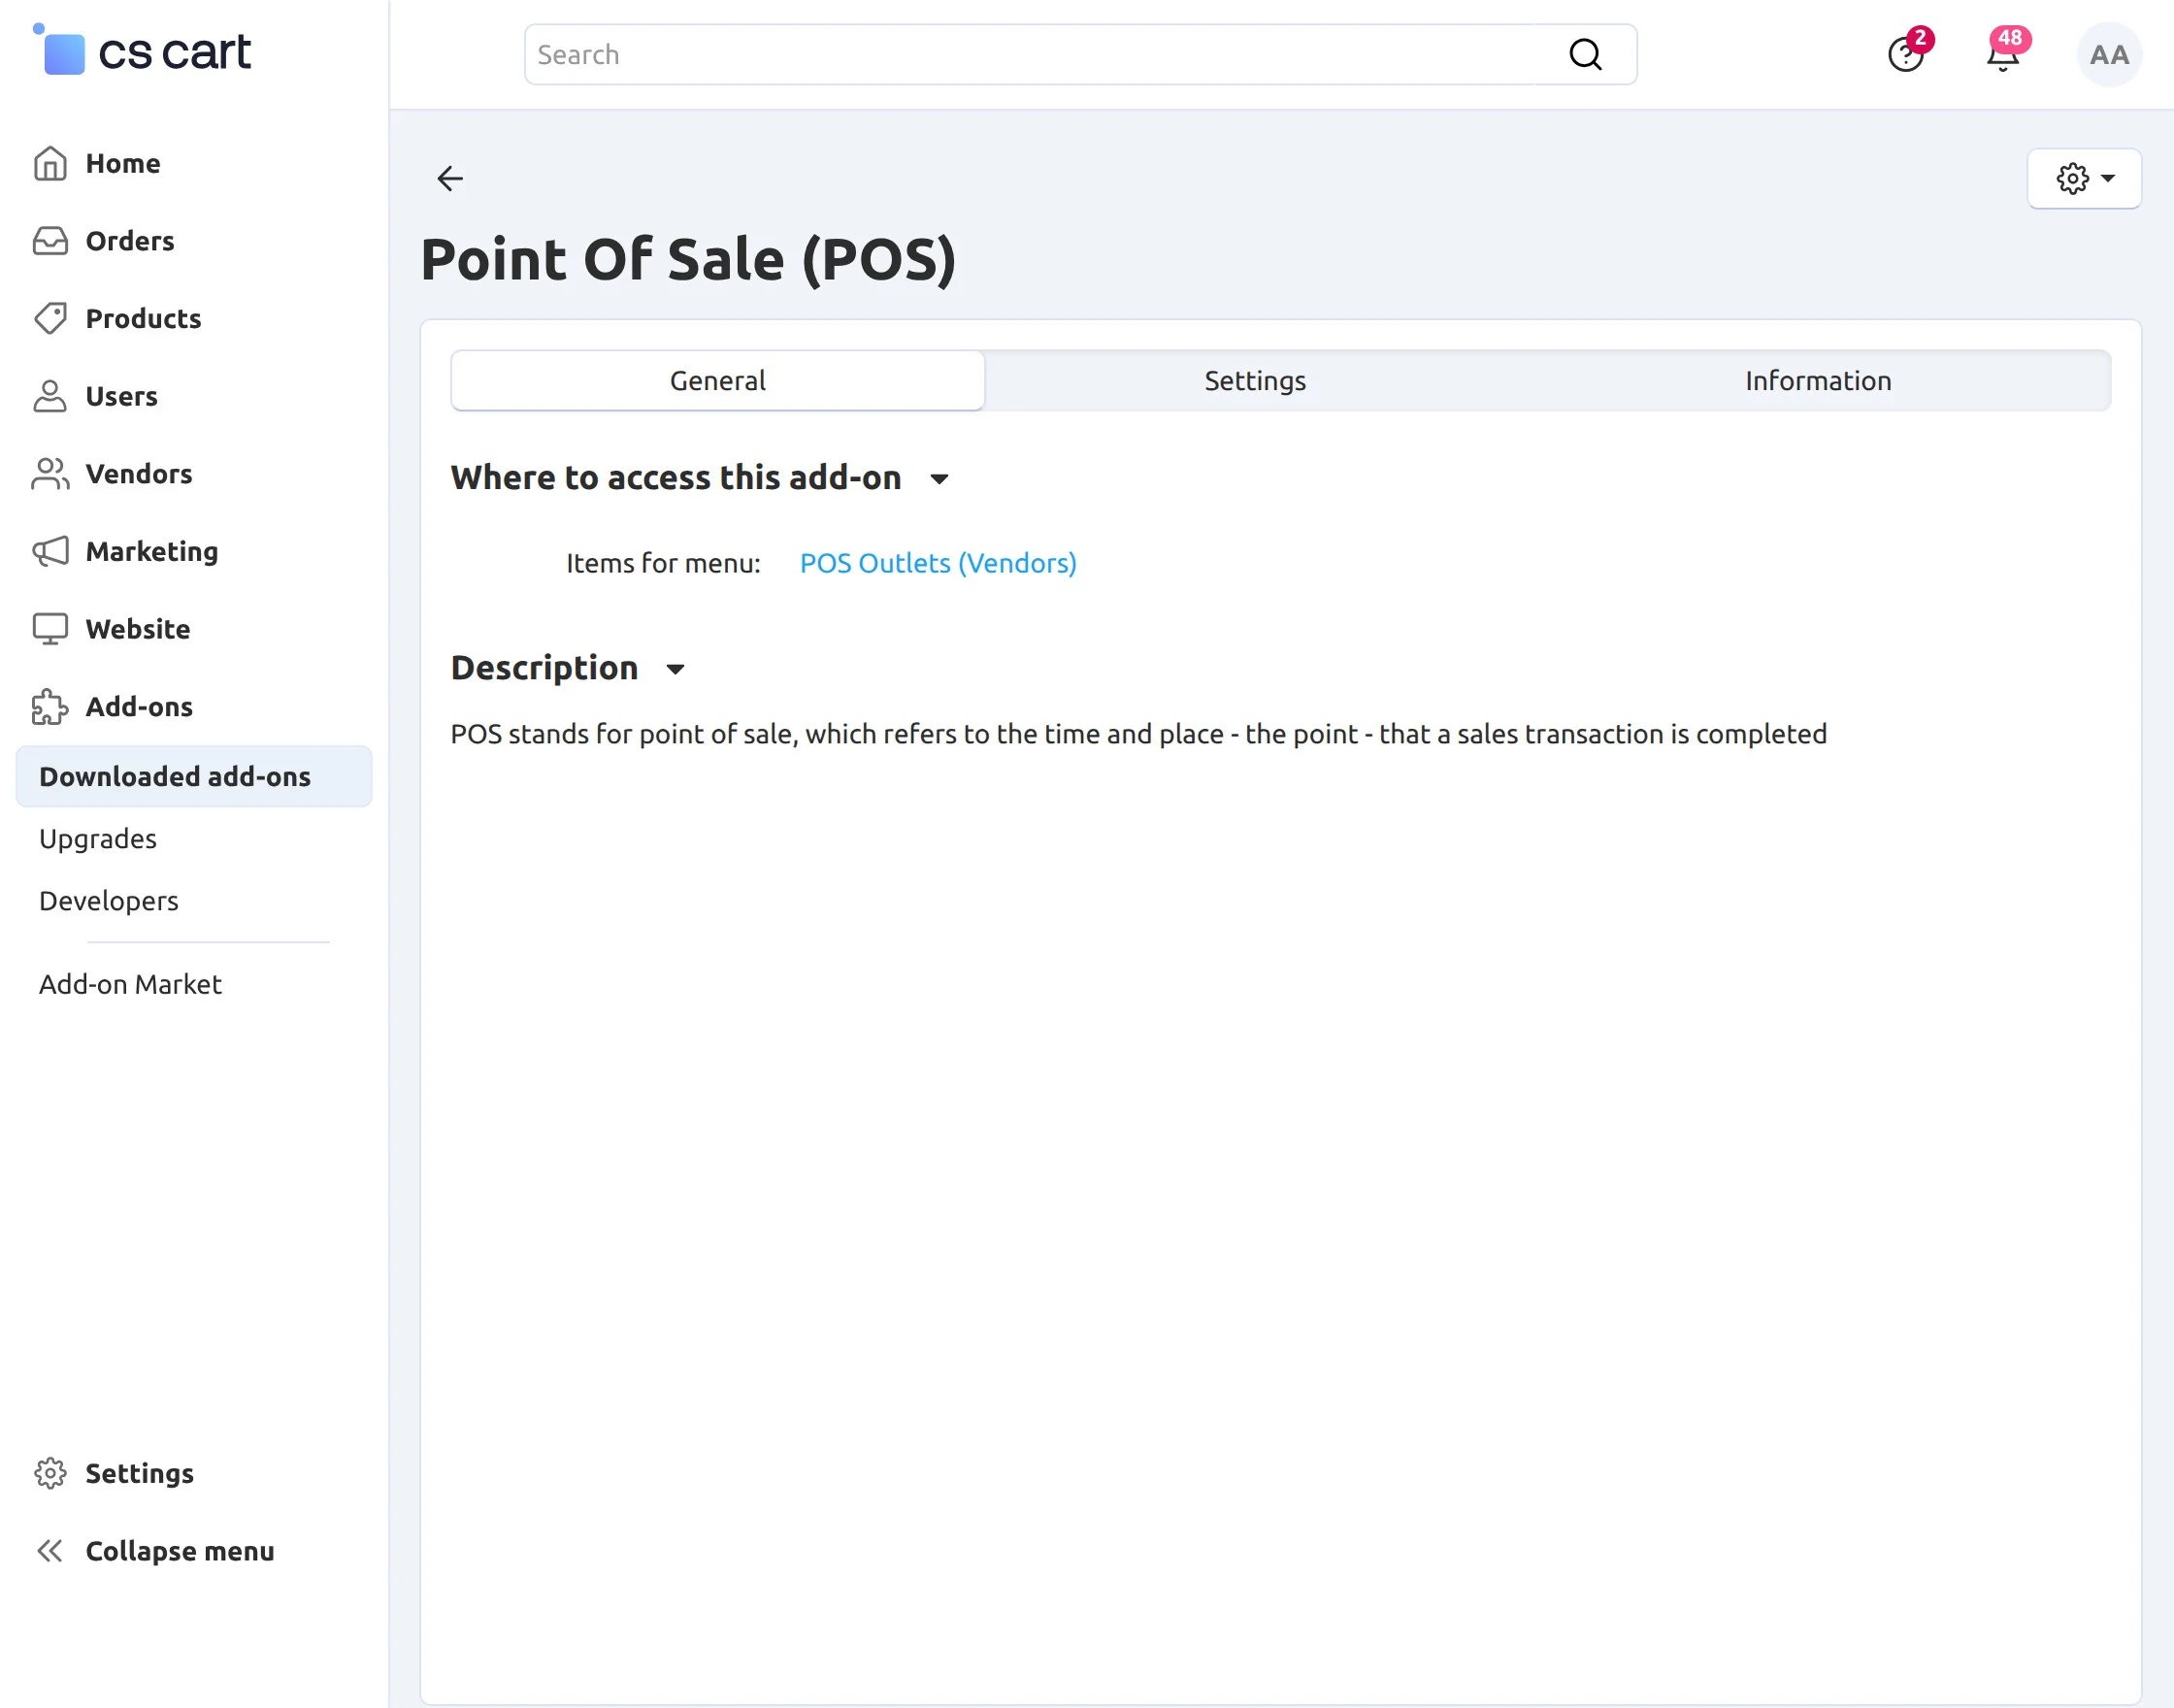
These setting fields include three separate tabs as explained below:
- Configuration
- Barcode Configuration
- PWA Configuration
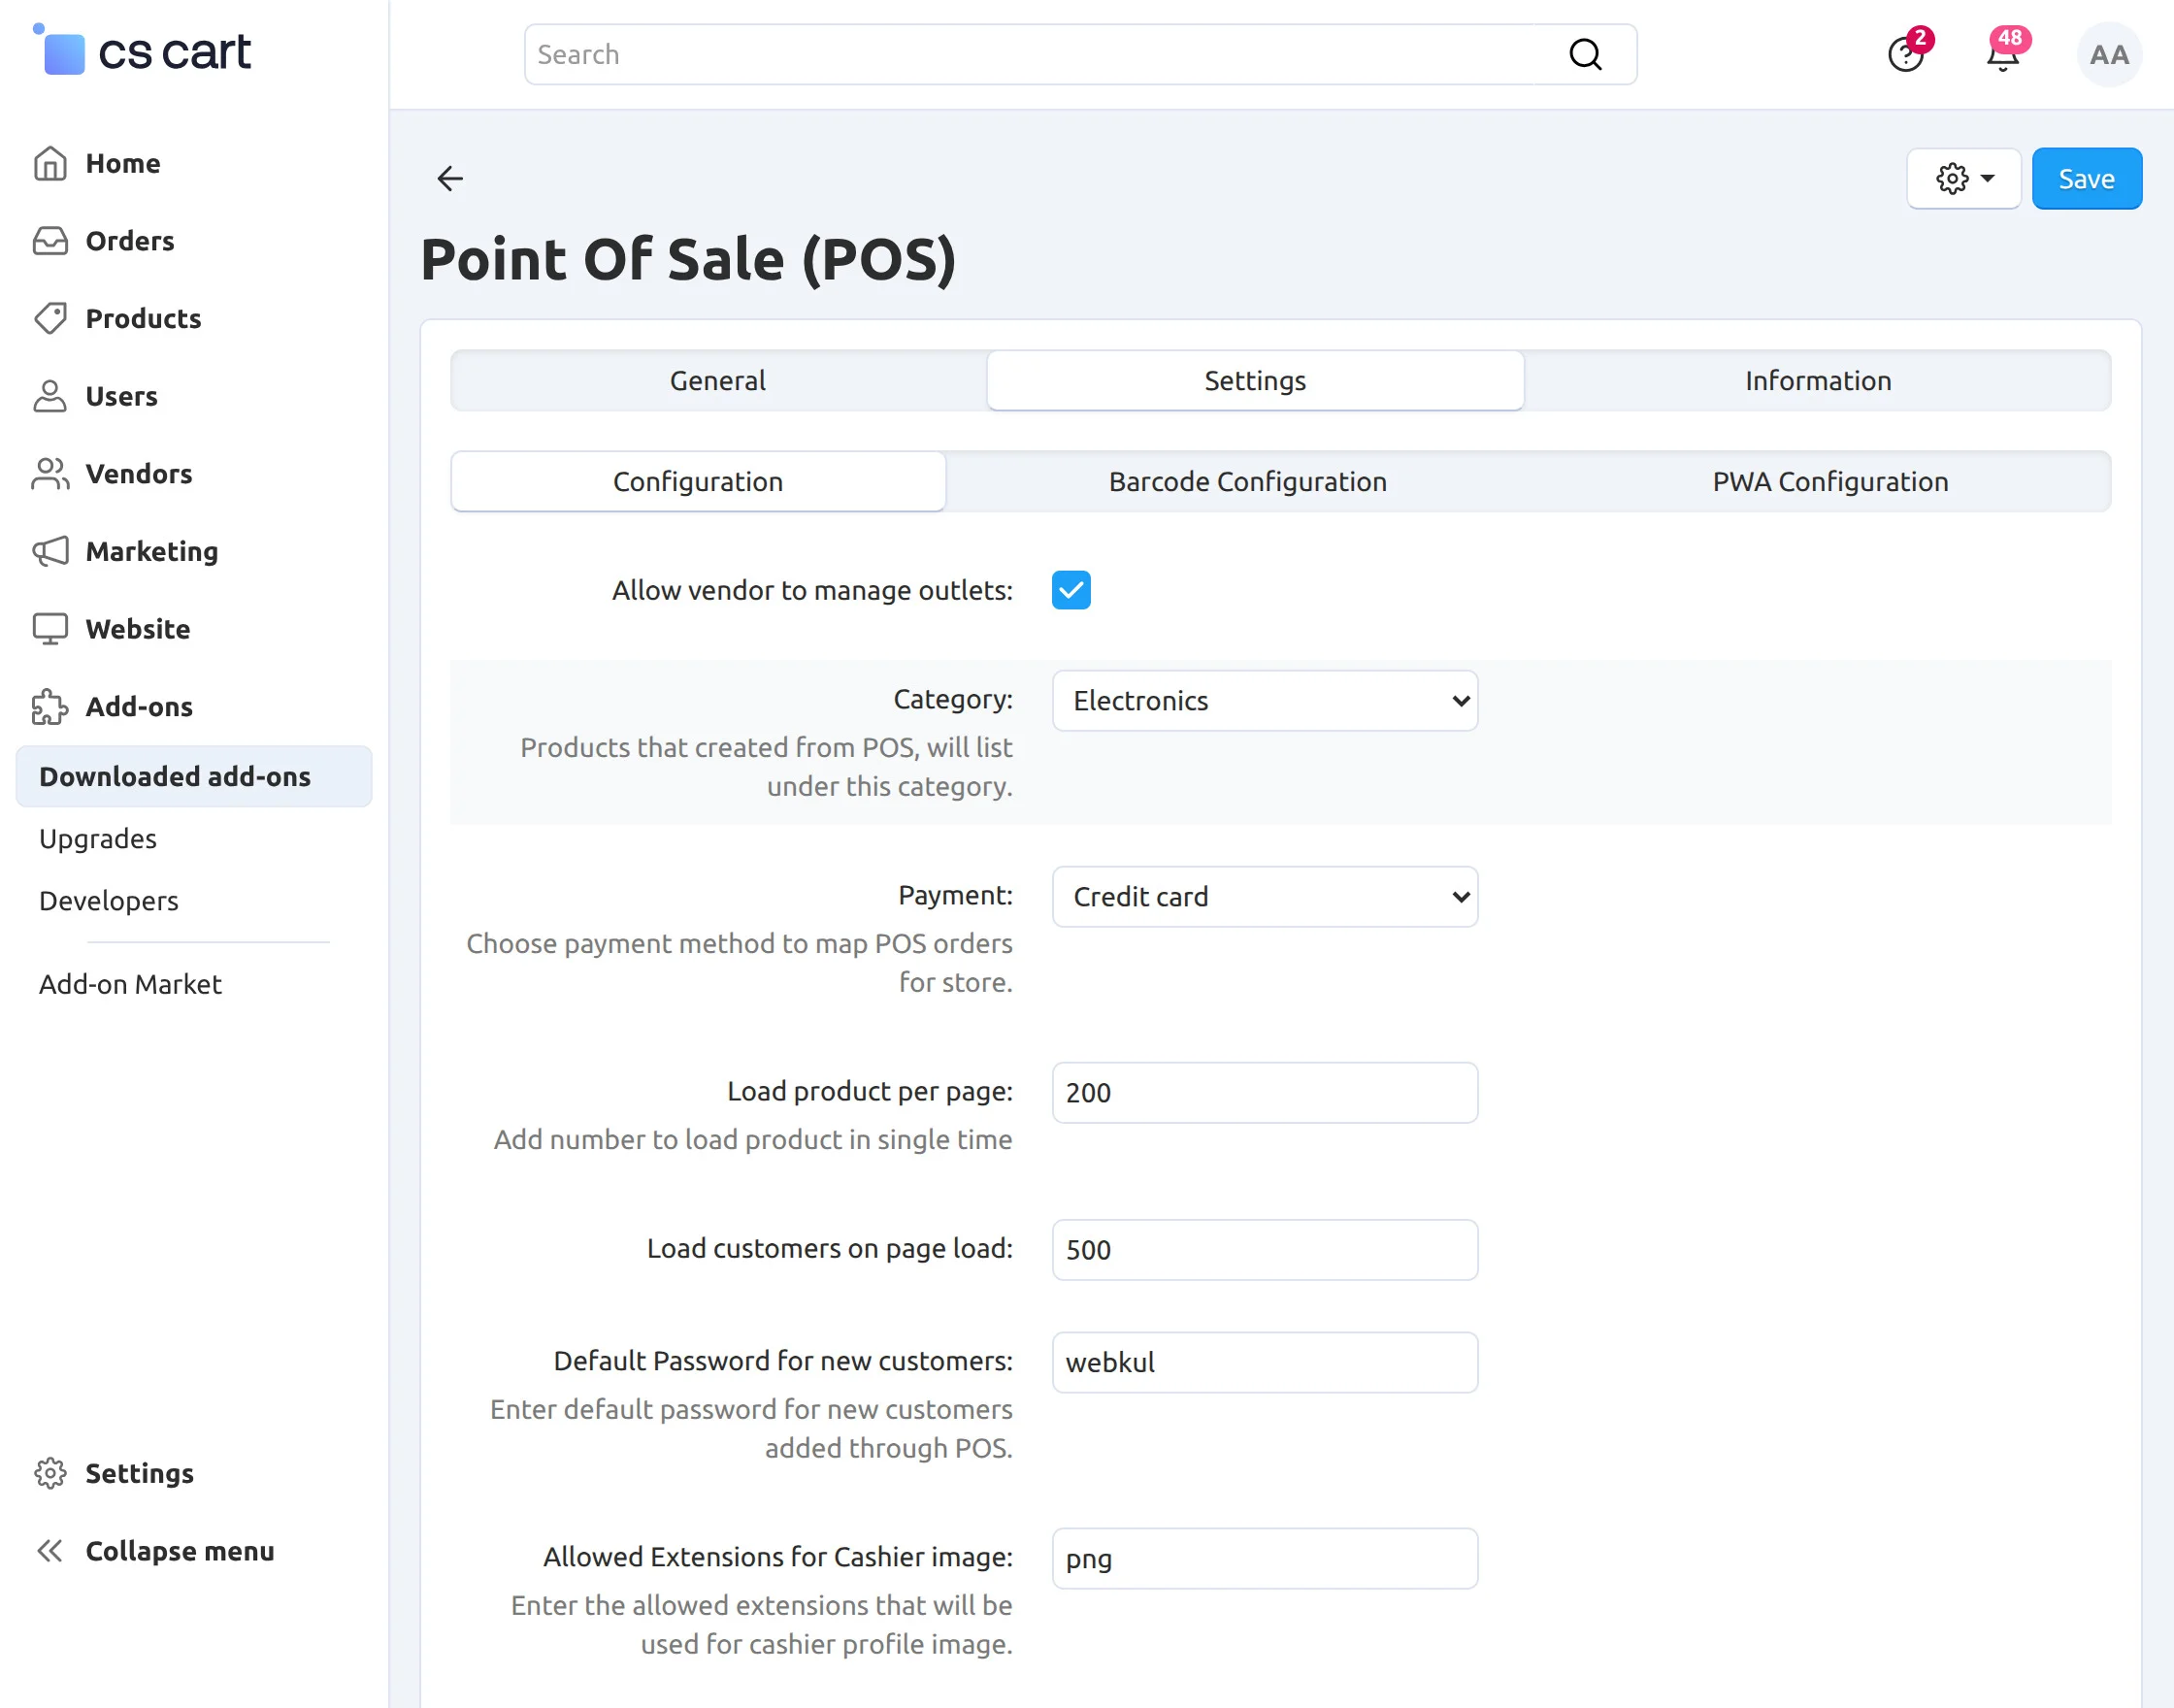
Configuration settings provide –
- An option to set the default category for the newly added product via the POS panel. A service or a product that is not available in the current inventory can be added instantly to the system for selling under this selected category.
- An option to set the Payment Method to get a proper mapping of the POS payments for the store invoice. The payment method selected here will be available for the POS orders in the invoices and order details at the backend and frontend.
- Load product per page means how many products will load on a single page on the POS.
- Load customer on page load means how many customers will load on a single page on POS.
- Admin can set the default password for the new customers.
- Enter the allowed extensions that will be used for the cashier profile image.
Barcode Configuration provides various configurable options to generate the product barcodes, which include –
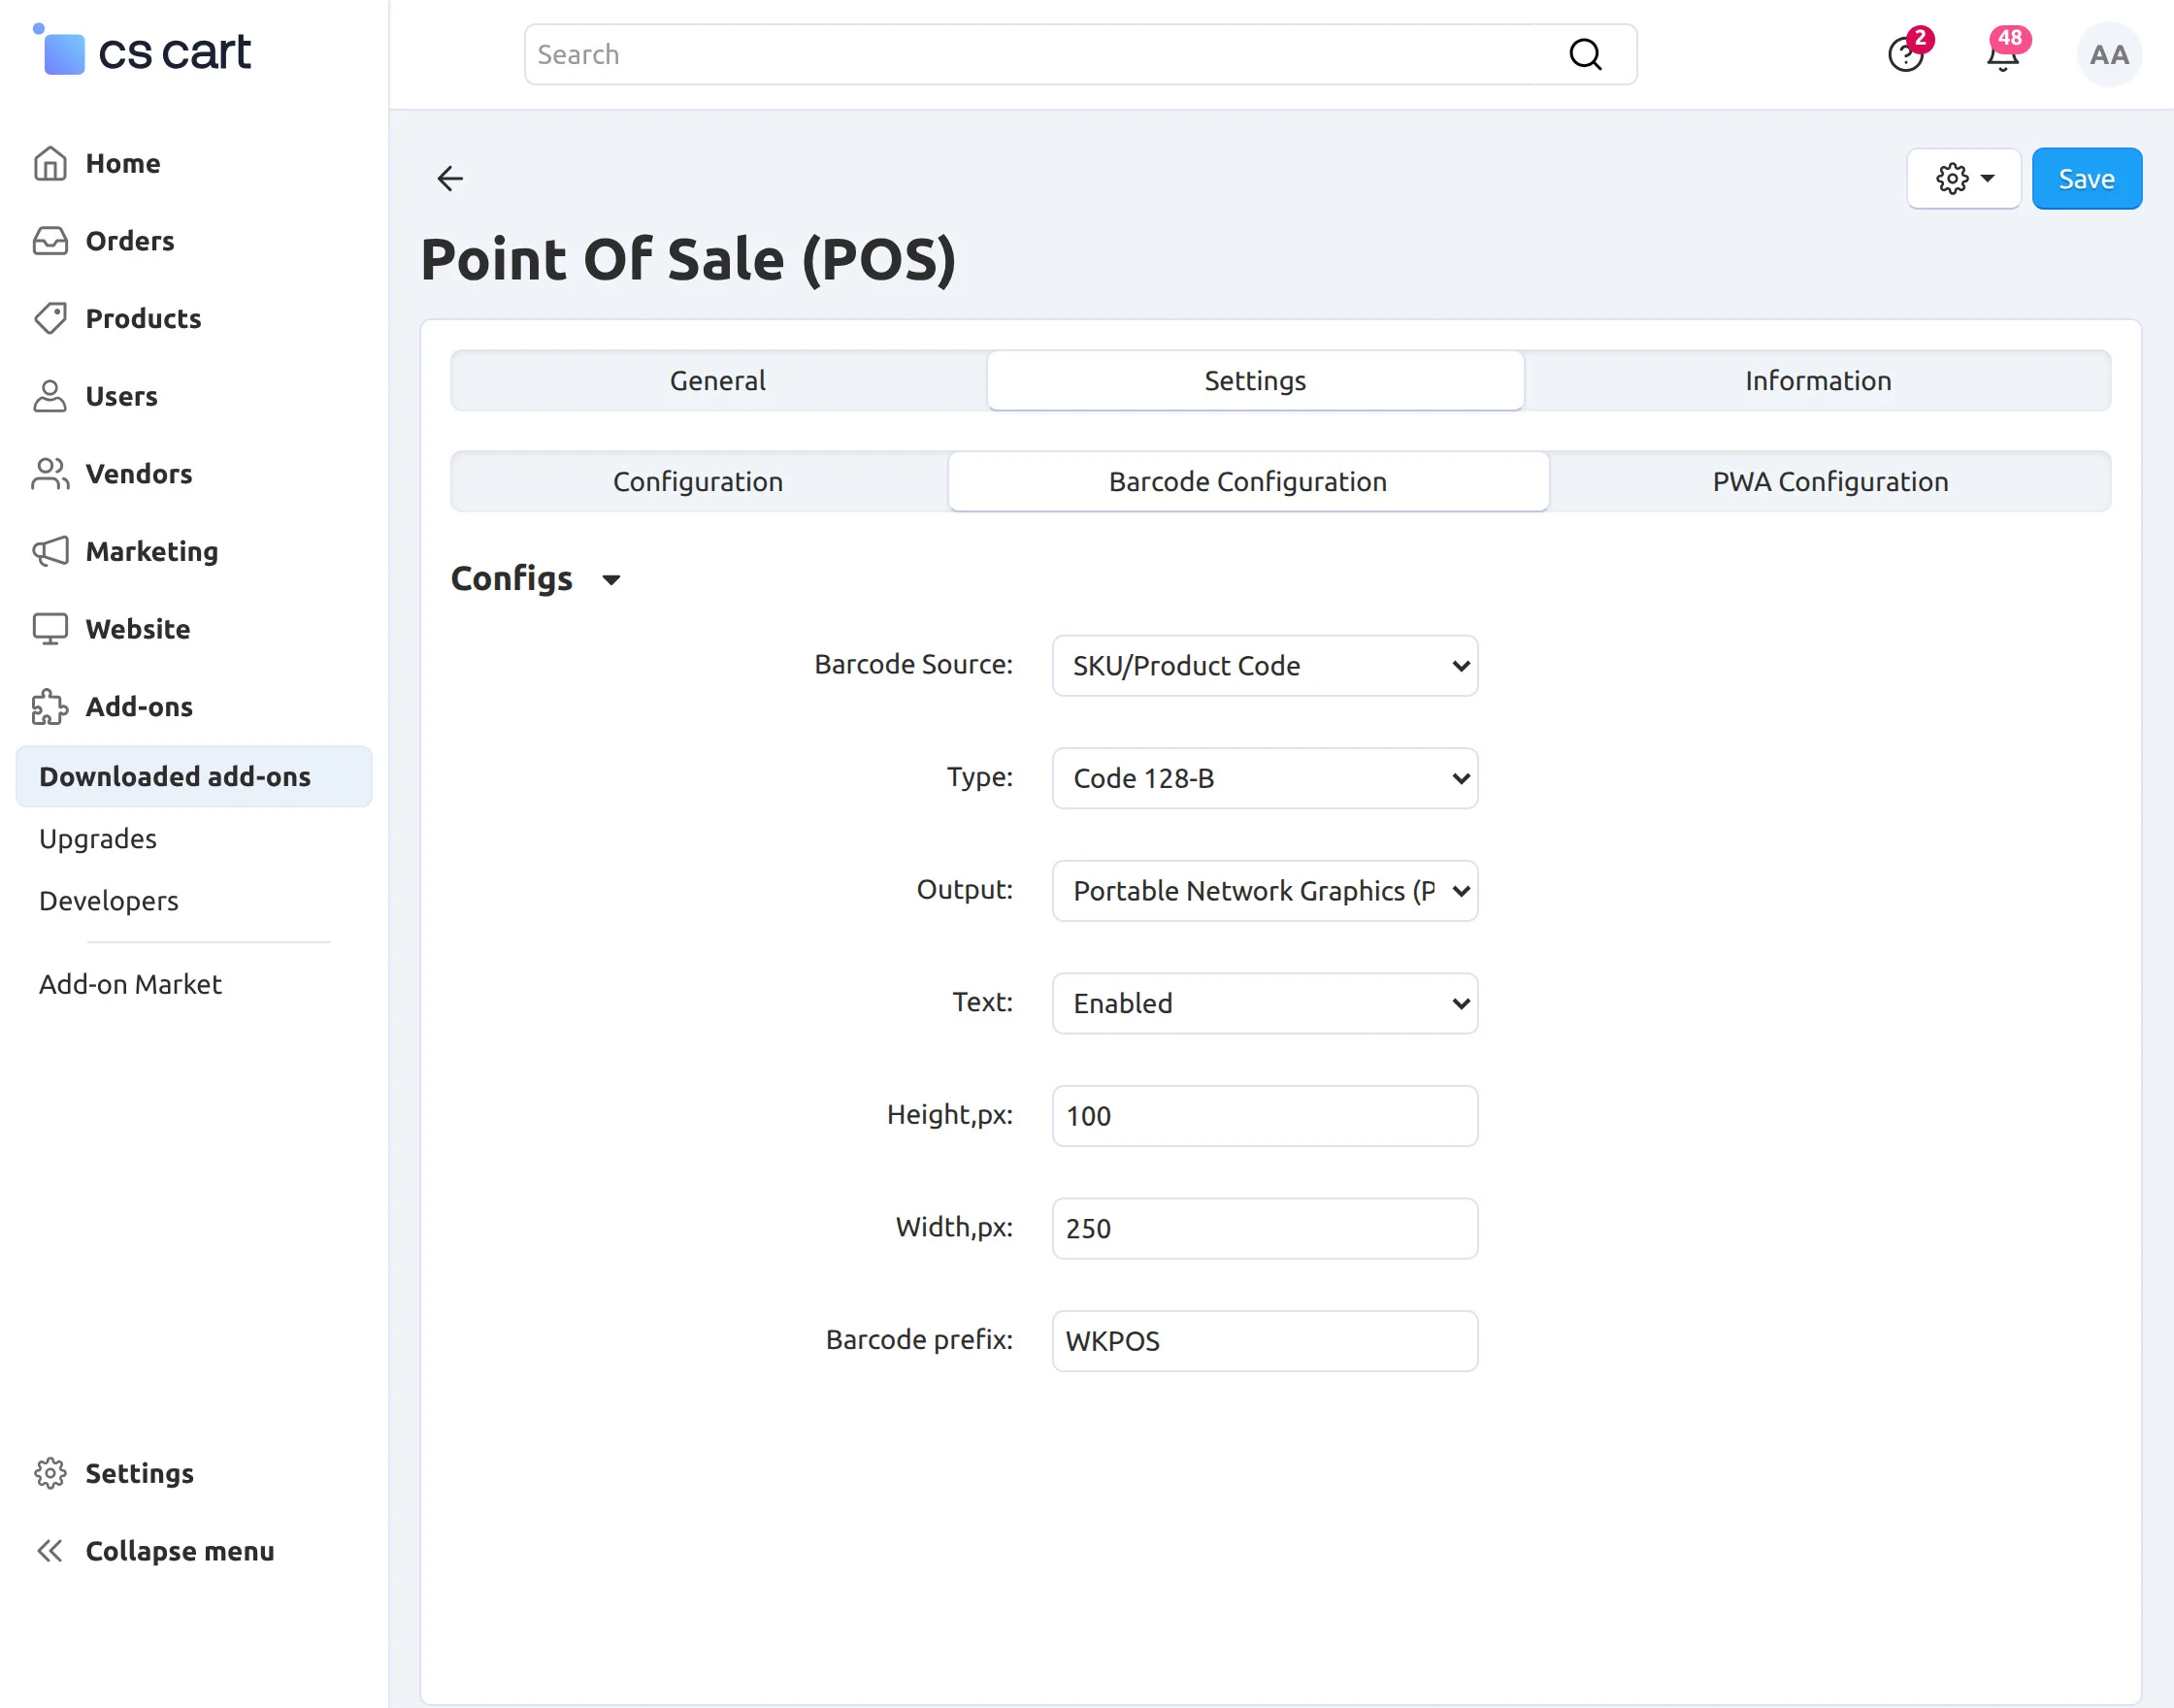
- Barcode Source – Choose the source of the barcode (Product/SKU or manual entry).
- Type – Select the barcode type.
- Output – Choose the output format (JPEG or PNG).
- Text – Enable or disable the display of text on the barcode.
- Height & Width (in Pixels) – Enter the barcode dimensions in pixels.
- Barcode Prefix – Specify the prefix to be displayed on the barcode.
PWA Configuration
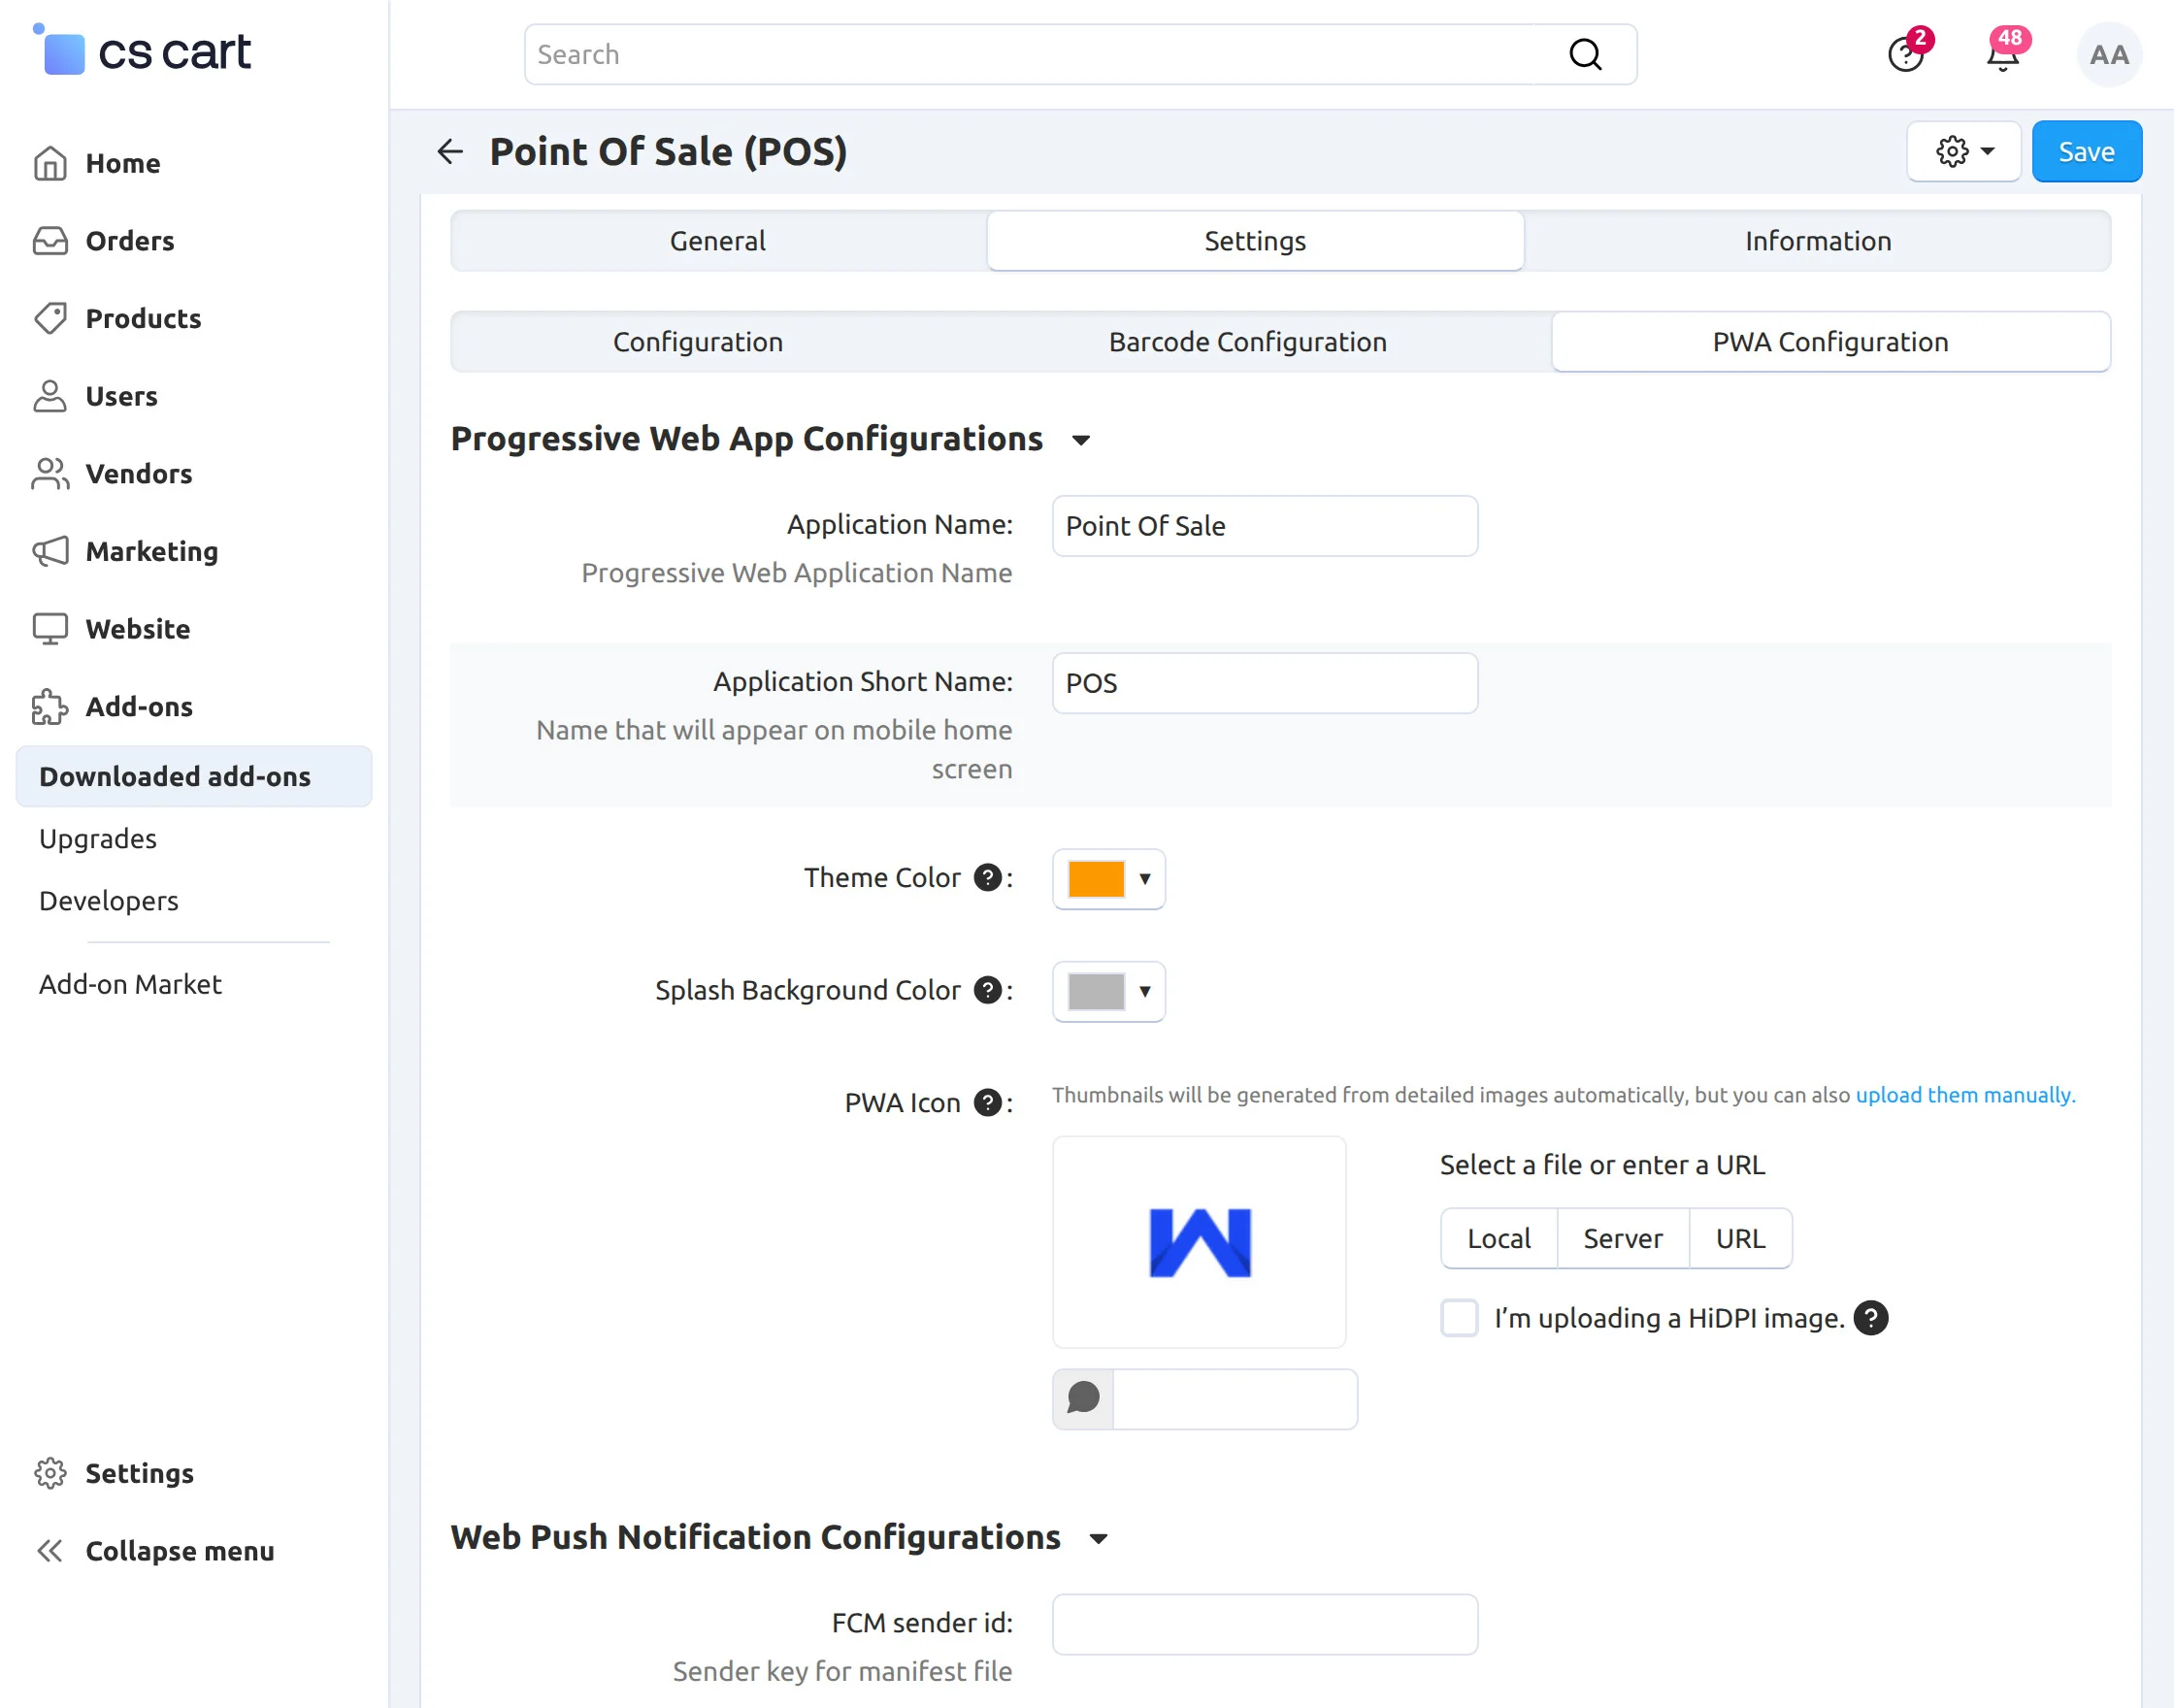
Application Name – Enter a name for PWA.
Application Short Name – Enter the name of PWA for the mobile panel.
Theme Color – Theme color of the PWA.
Splash Background Color – Background color of the PWA.
PWA Icon – Icon for the mobile app.
FCM Sender ID – Enter the FCM ID or sender key for the manifest file.
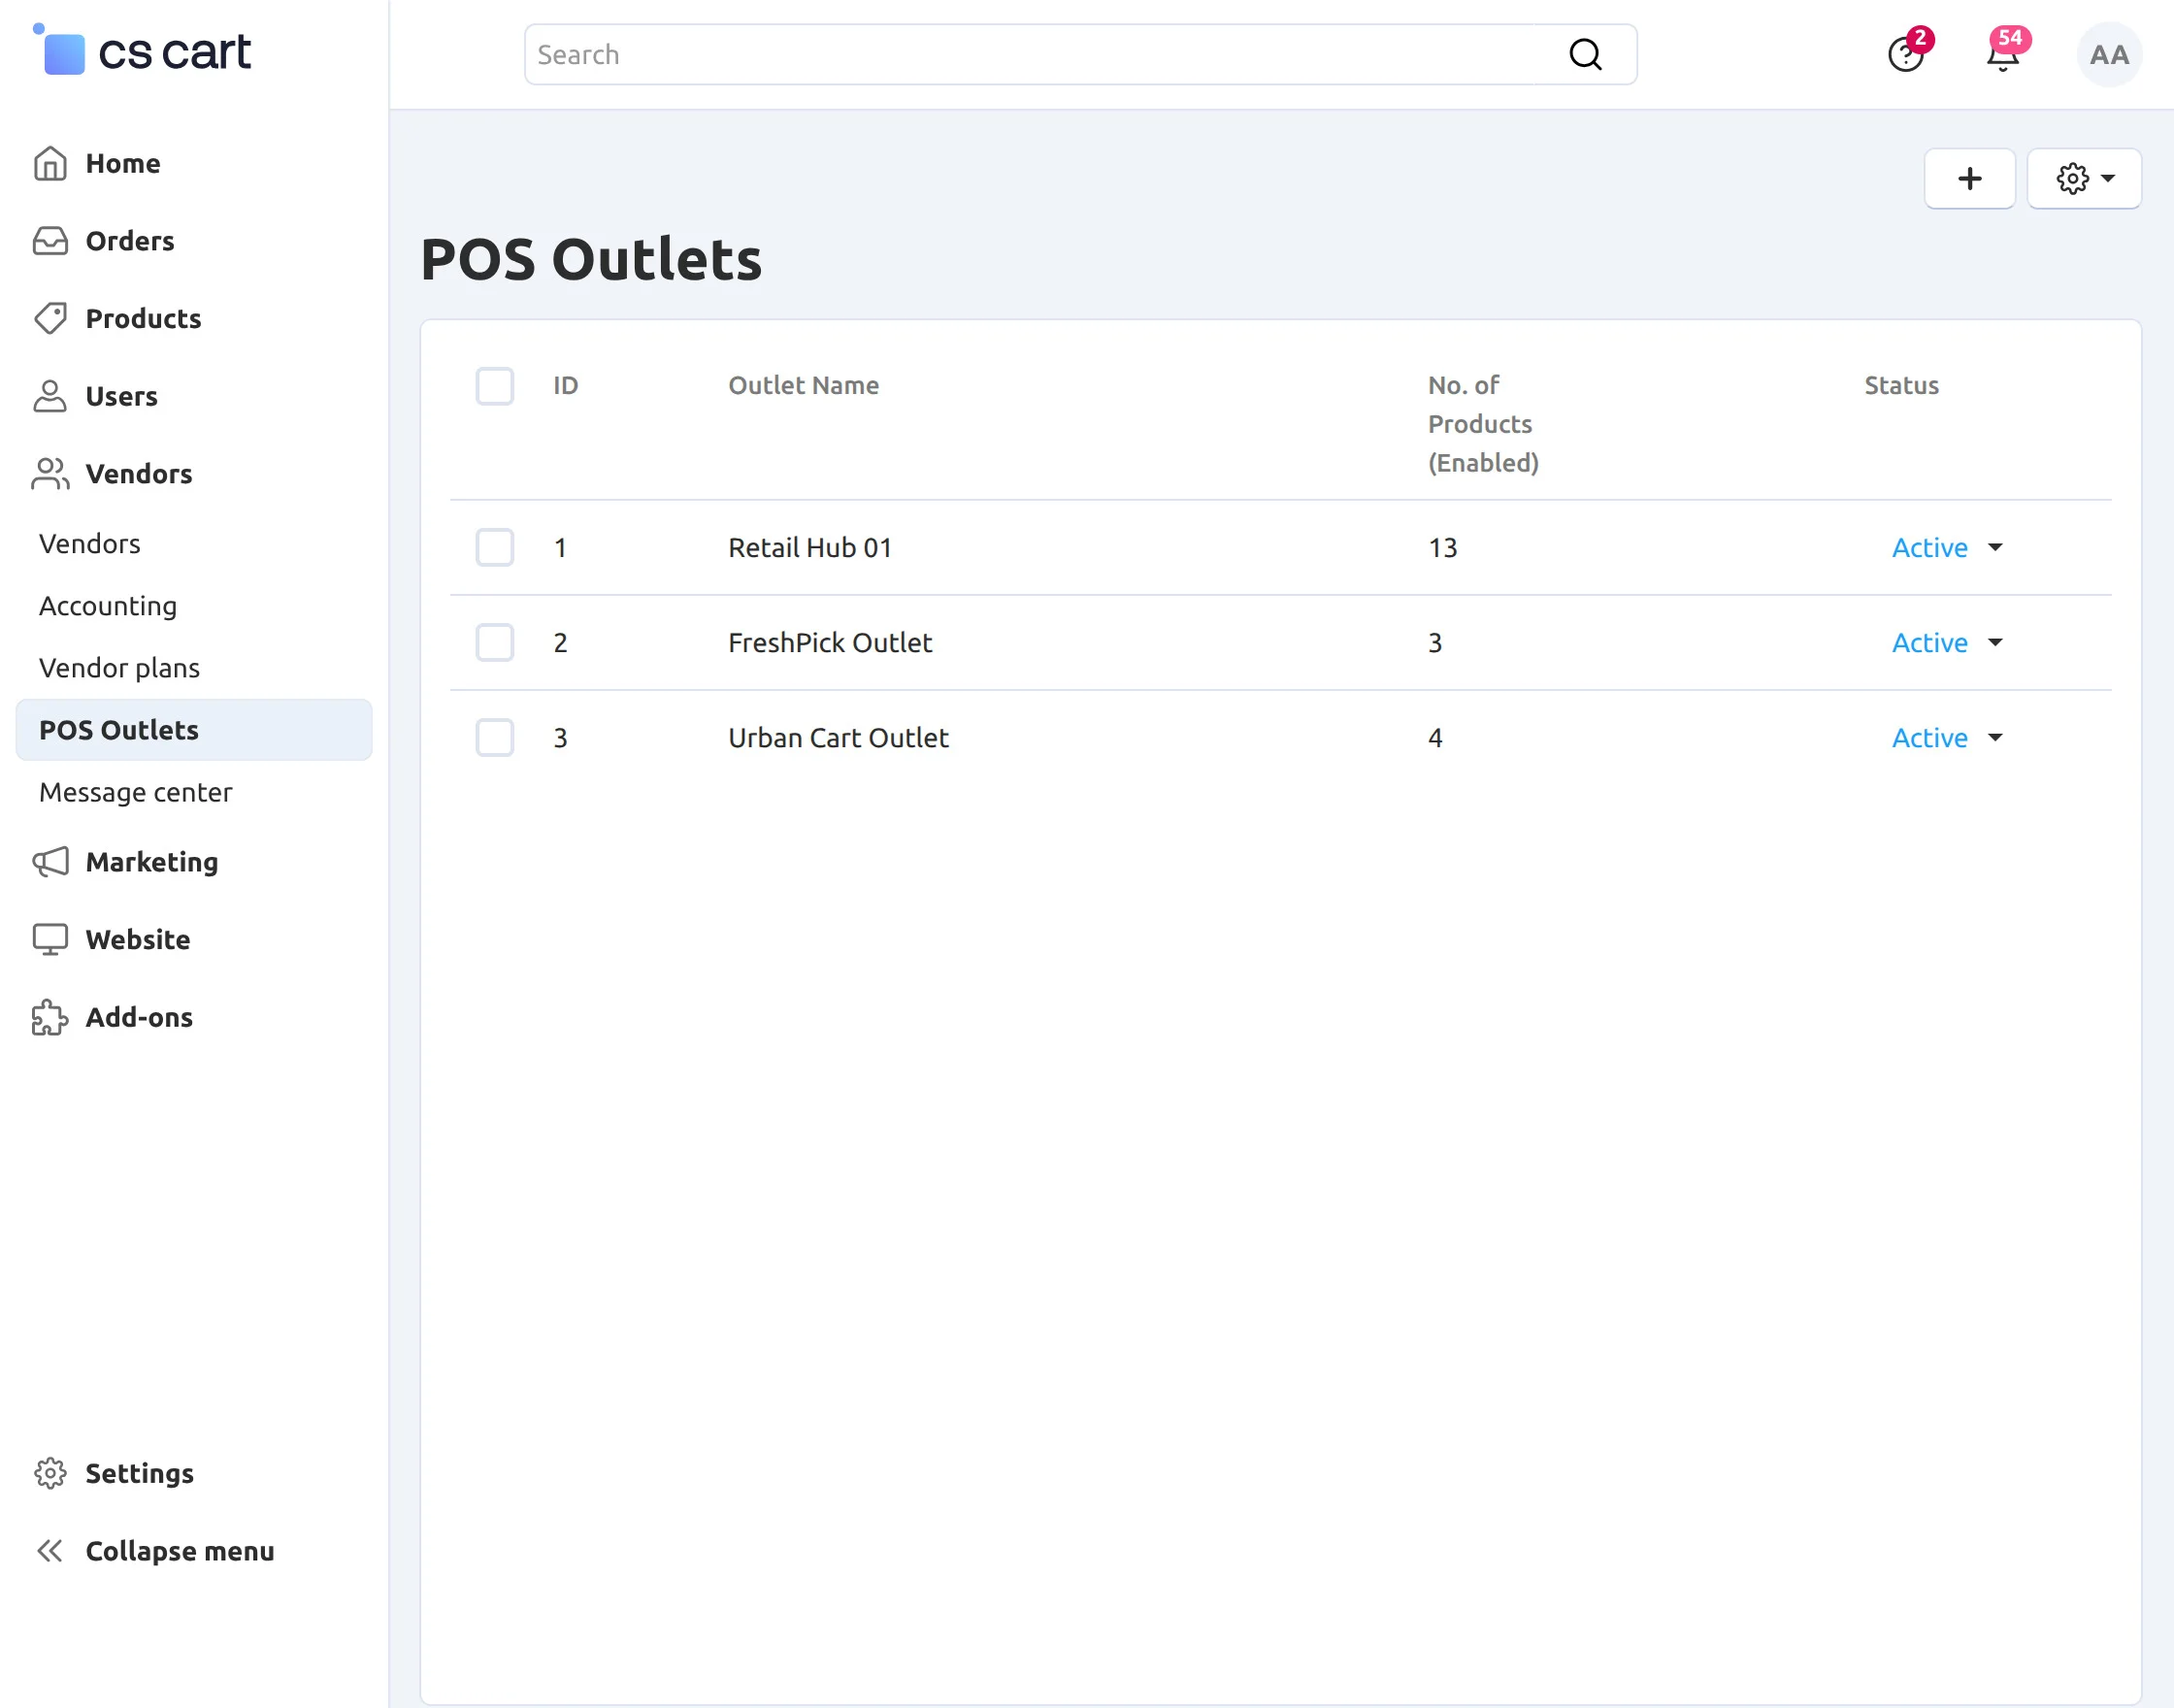
POS Outlet
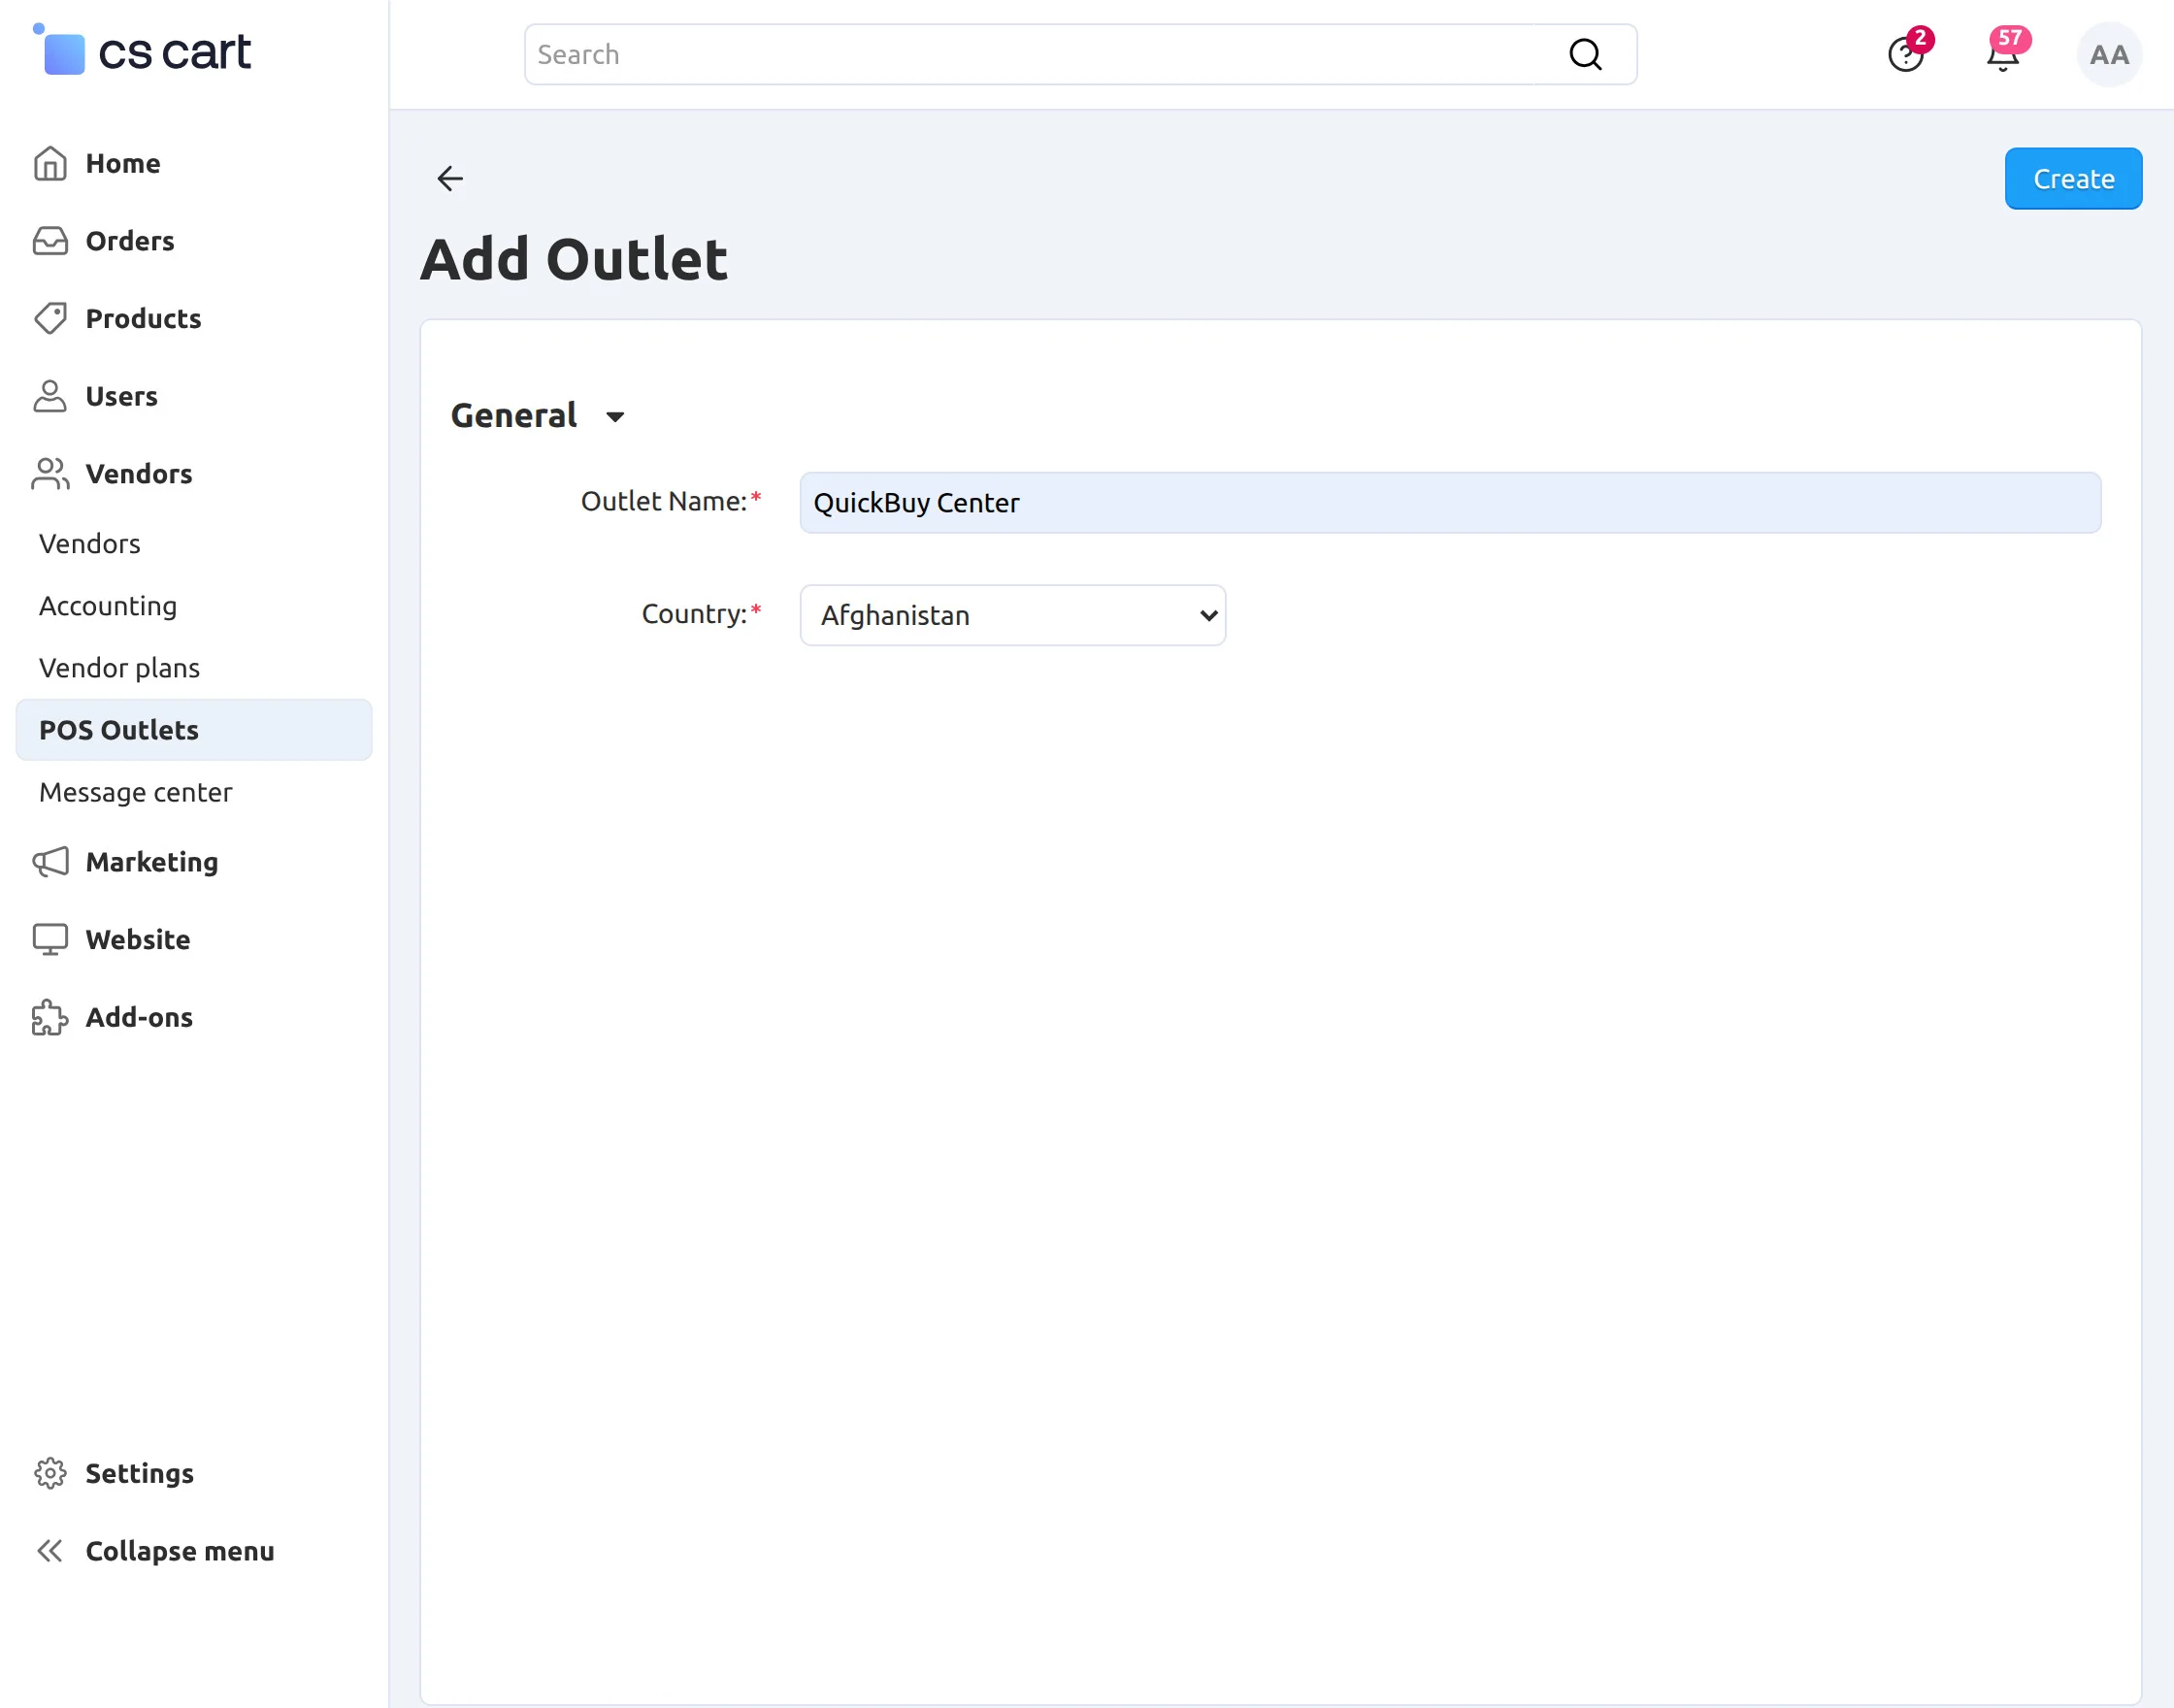
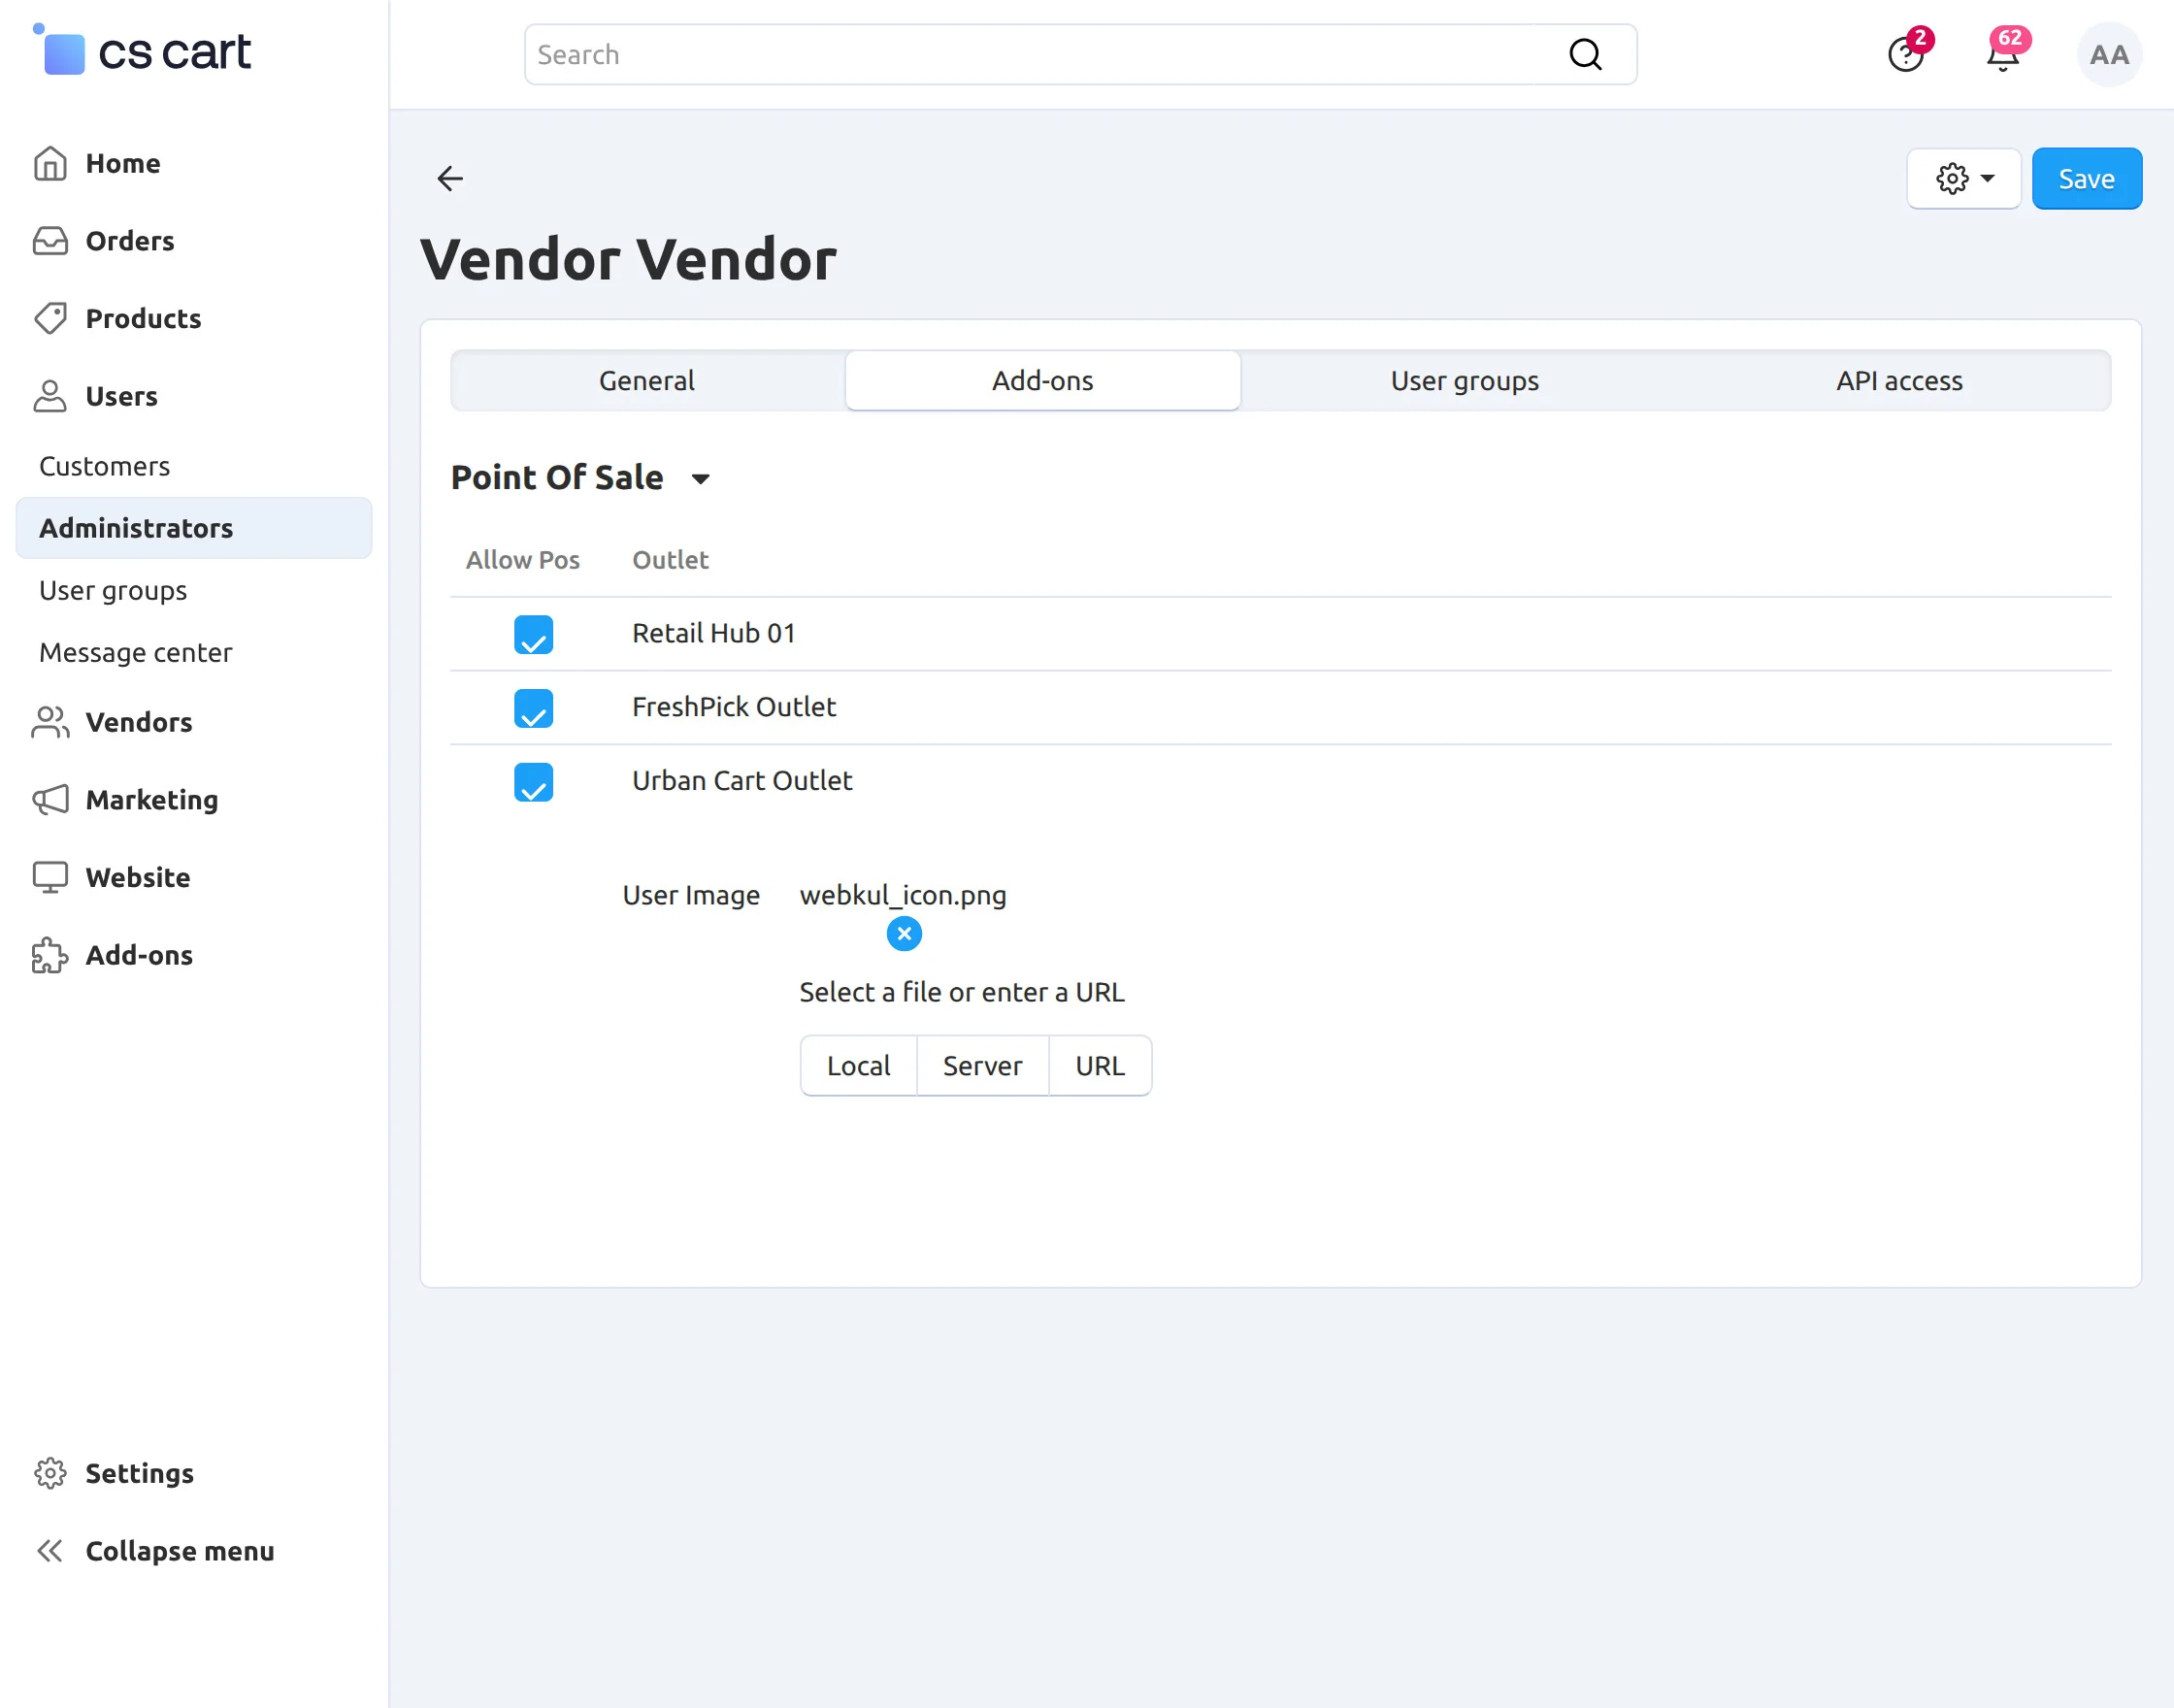
How to Assign Outlets to POS Agent ?

You can also navigate to Users → Customers → Vendor’s Administrators.
Let’s See How to Generate a Product Barcode.
CS-Cart Point of Sale (POS) provides a feature to generate multiple product barcodes. To do this:
- Go to Products → Products
- Select the desired products
- Click the gear icon in the top-right corner
- Choose the Print Barcode option
- Once clicked, the system will generate barcodes for the selected products

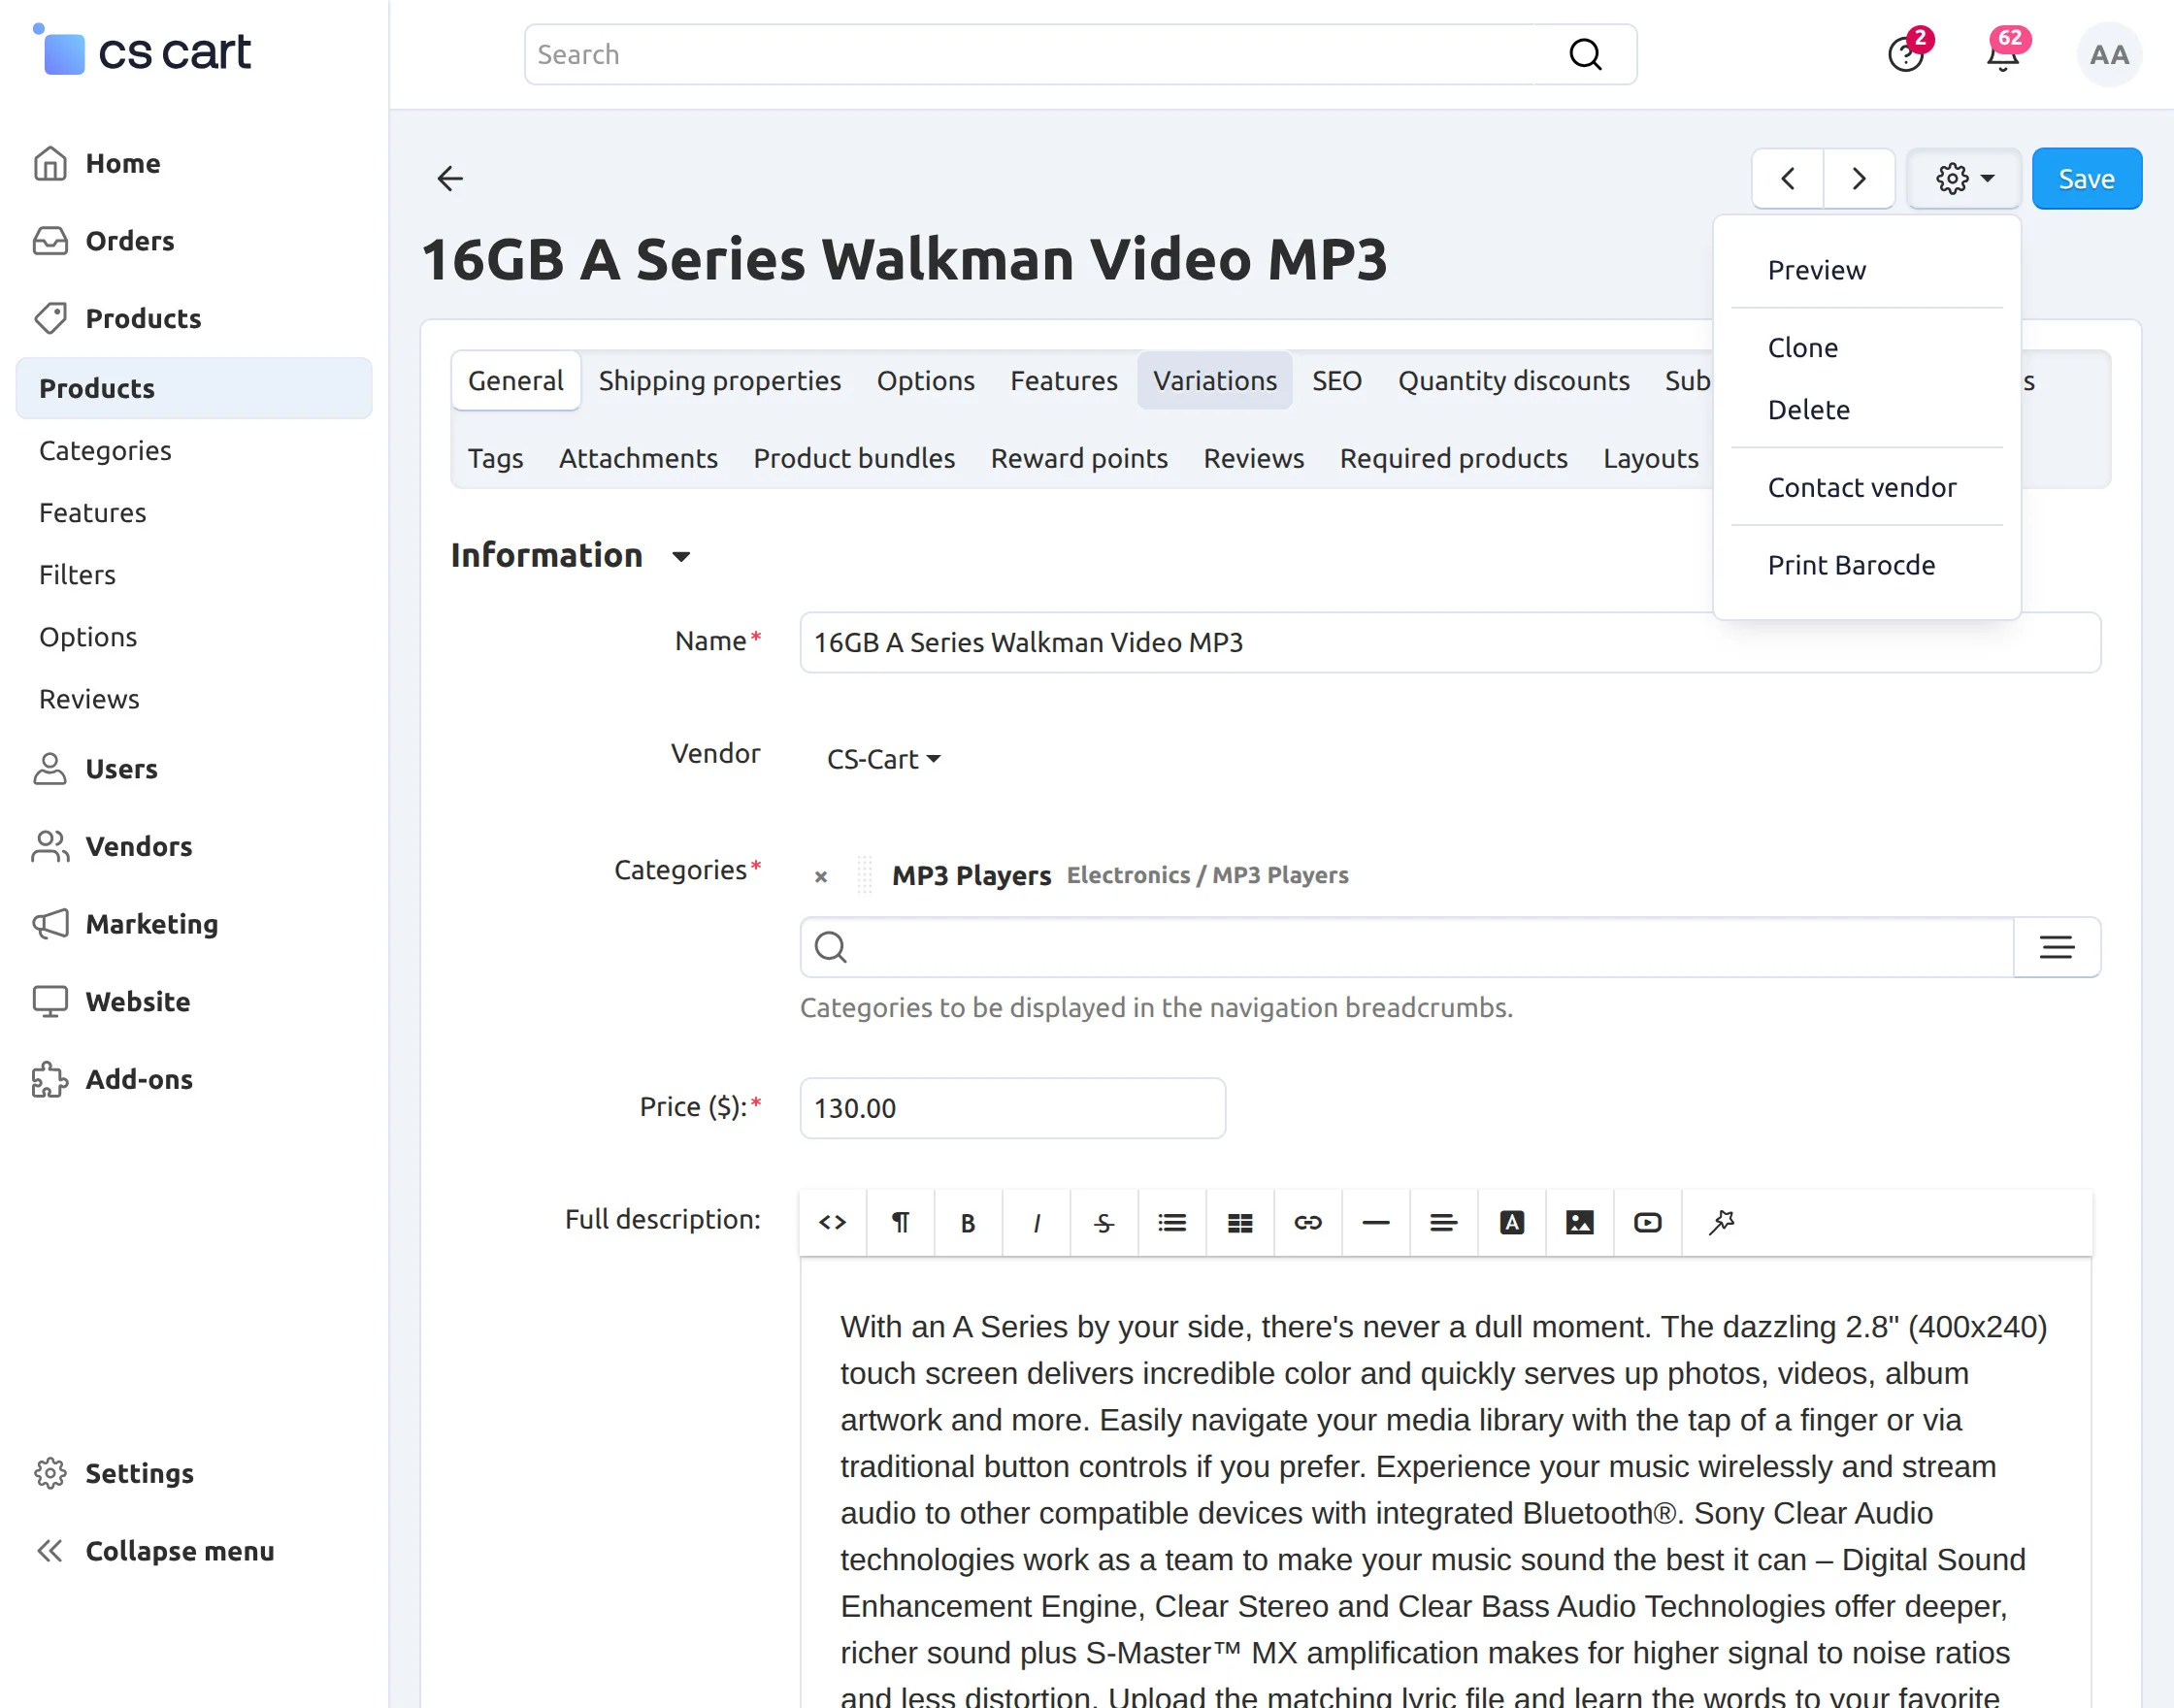
To print the barcode of the product individually, go to the Product detail page at the backend. Click the gear drop-down and print the barcode as shown below.
There is an option to list either only POS products or store products, or both on POS devices on the add-ons section on the product detail page at the backend.
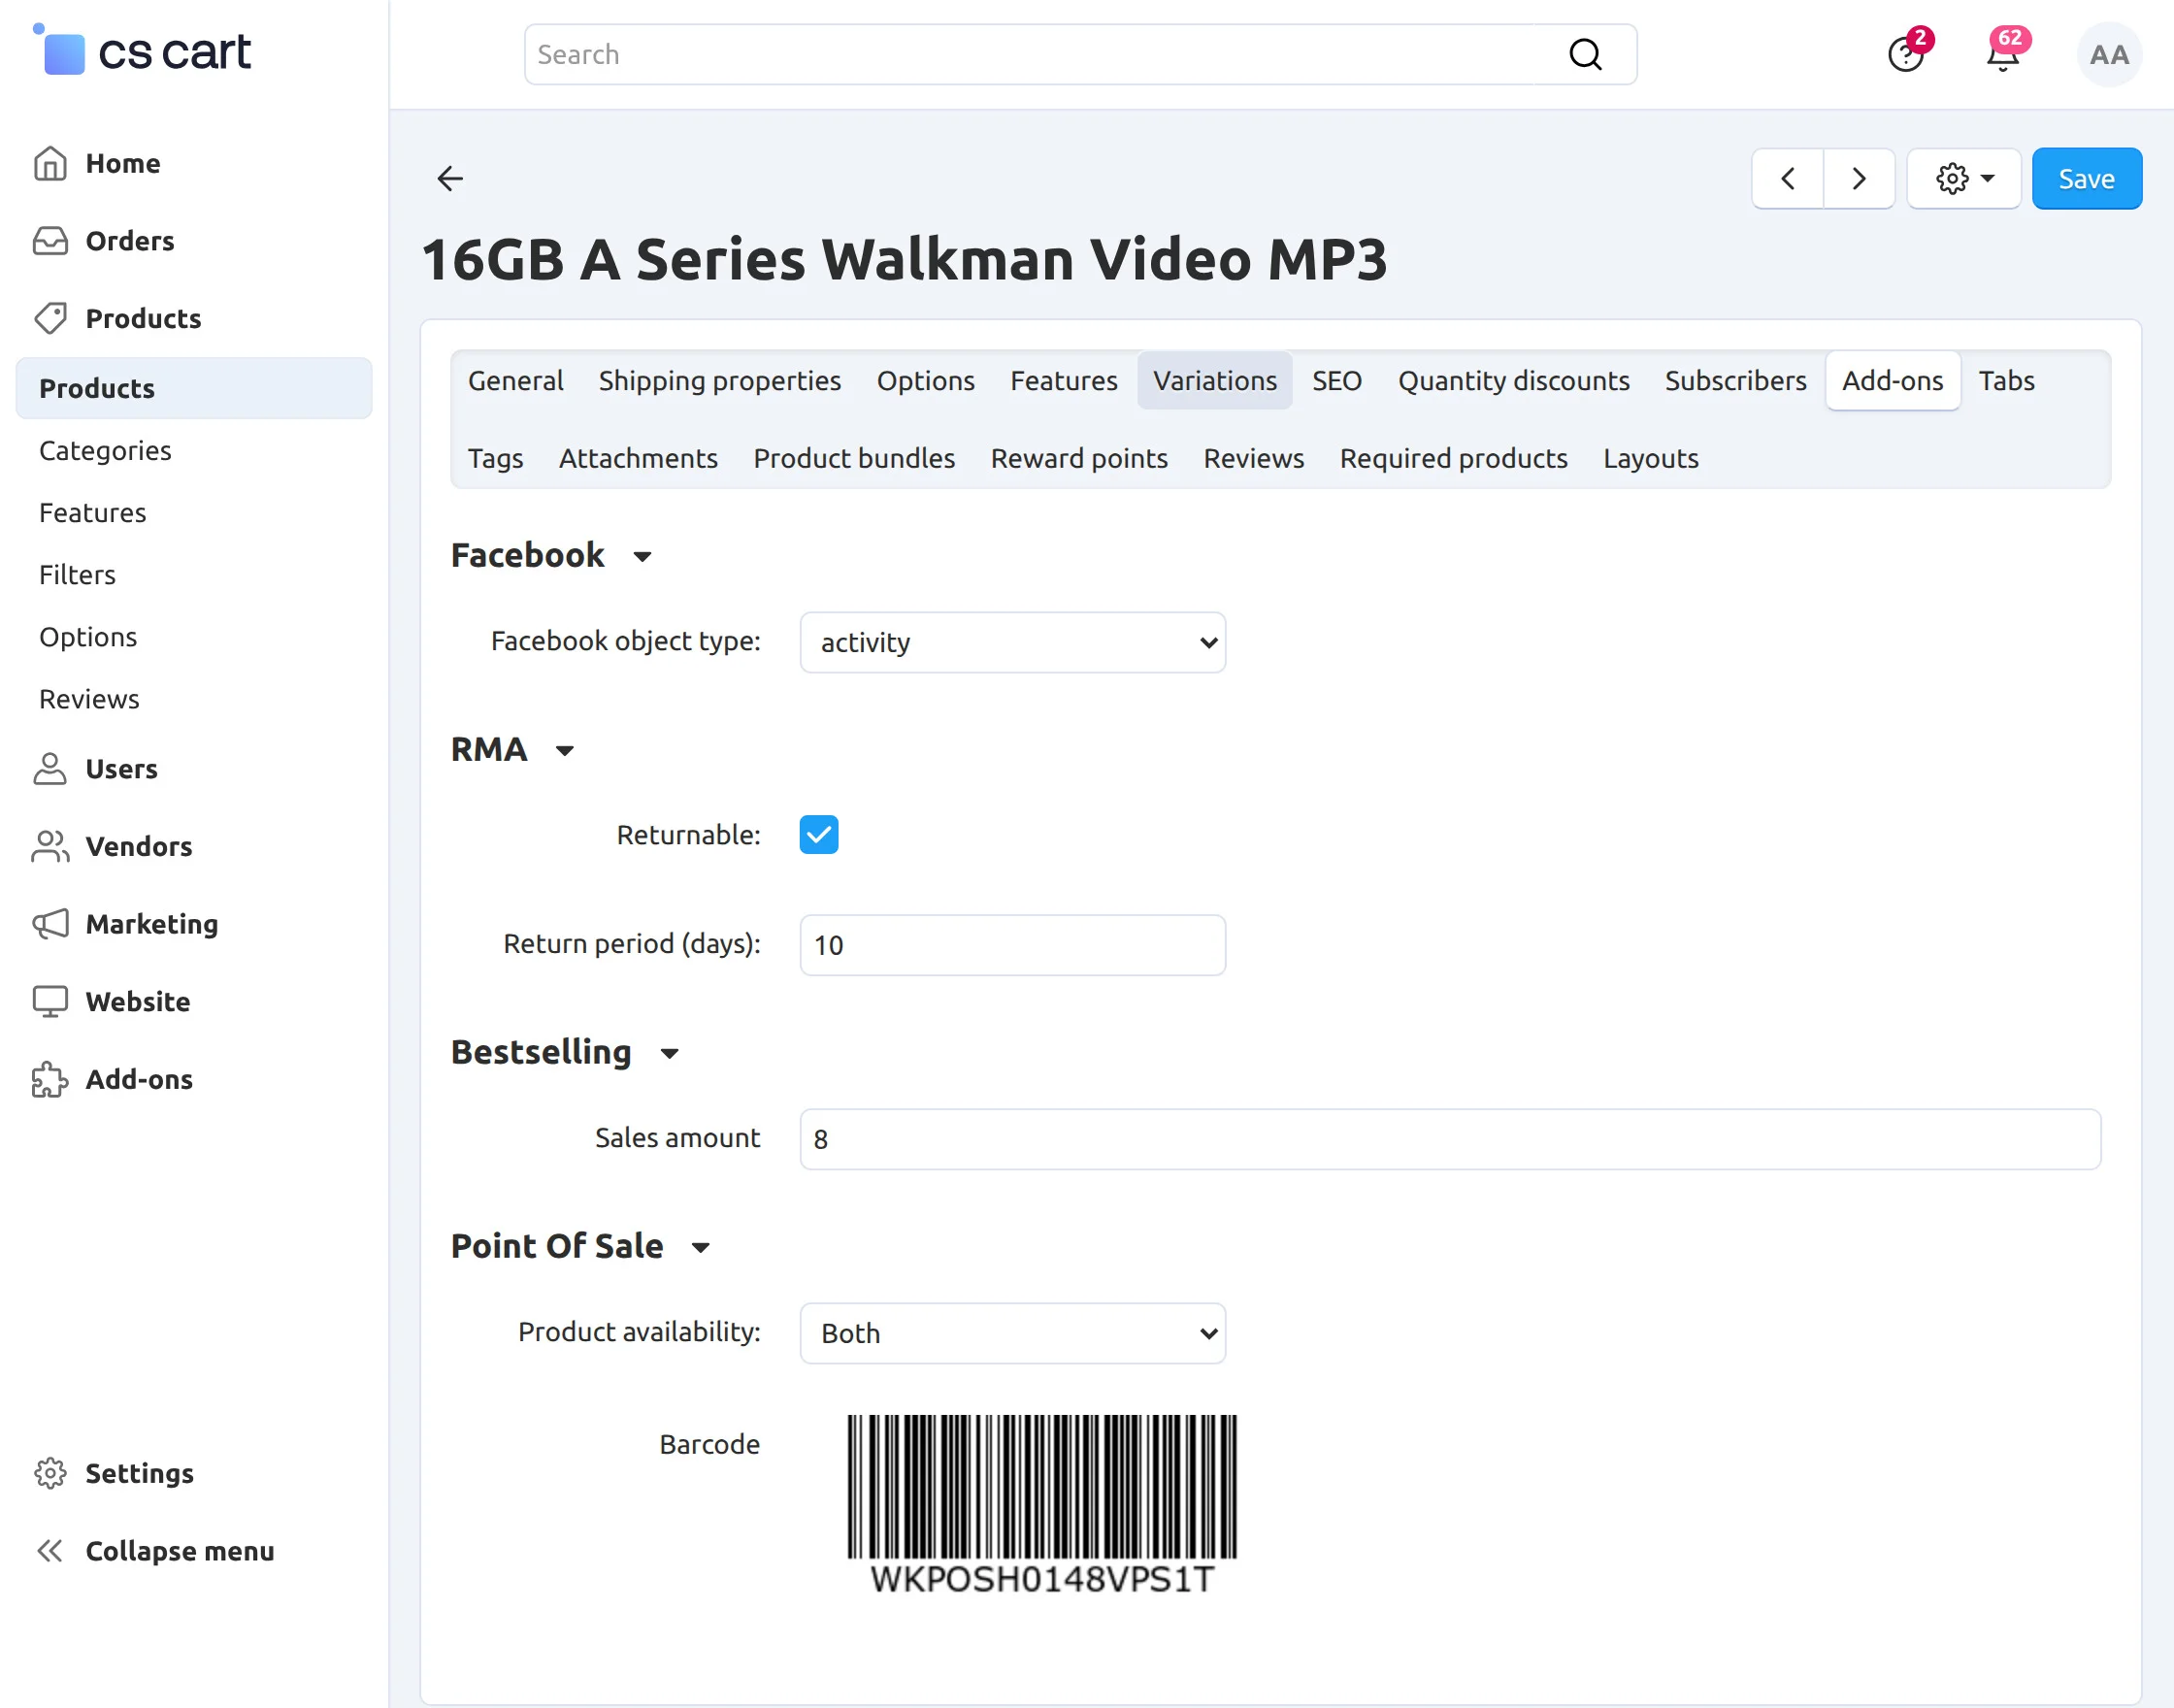
The admin can also check the product barcode here.
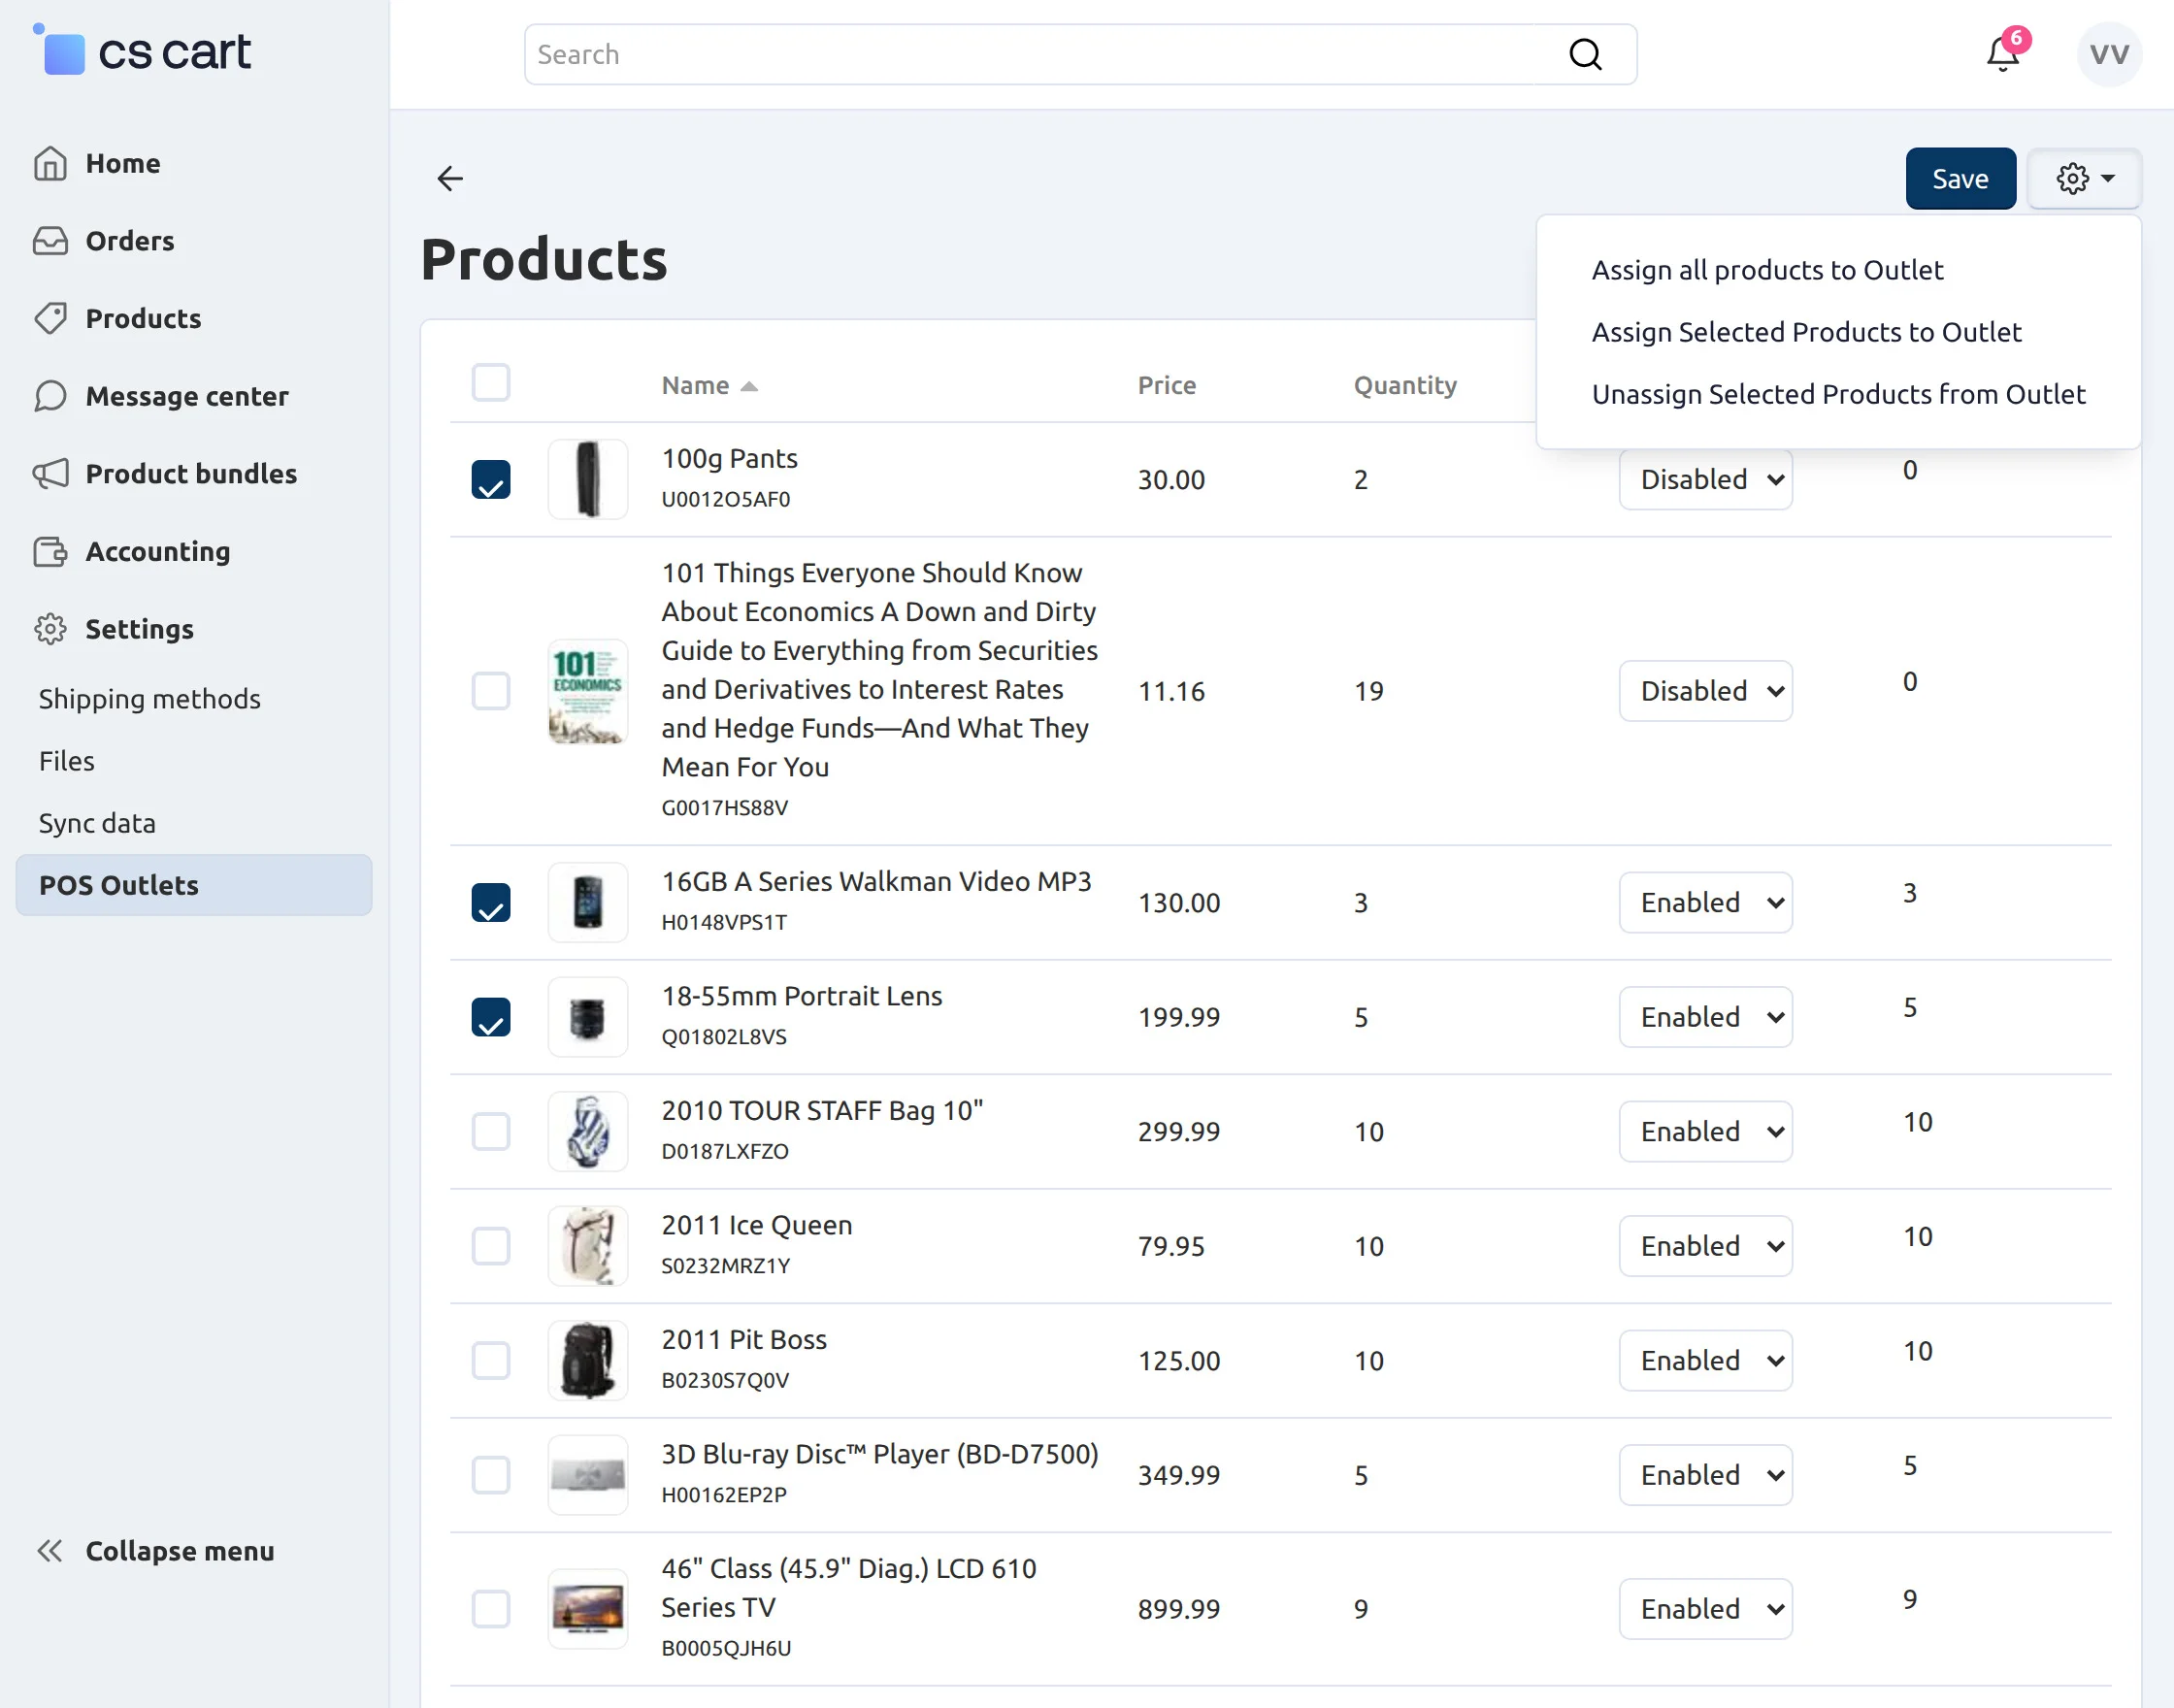
How Vendors Can Manage POS Outlets ?
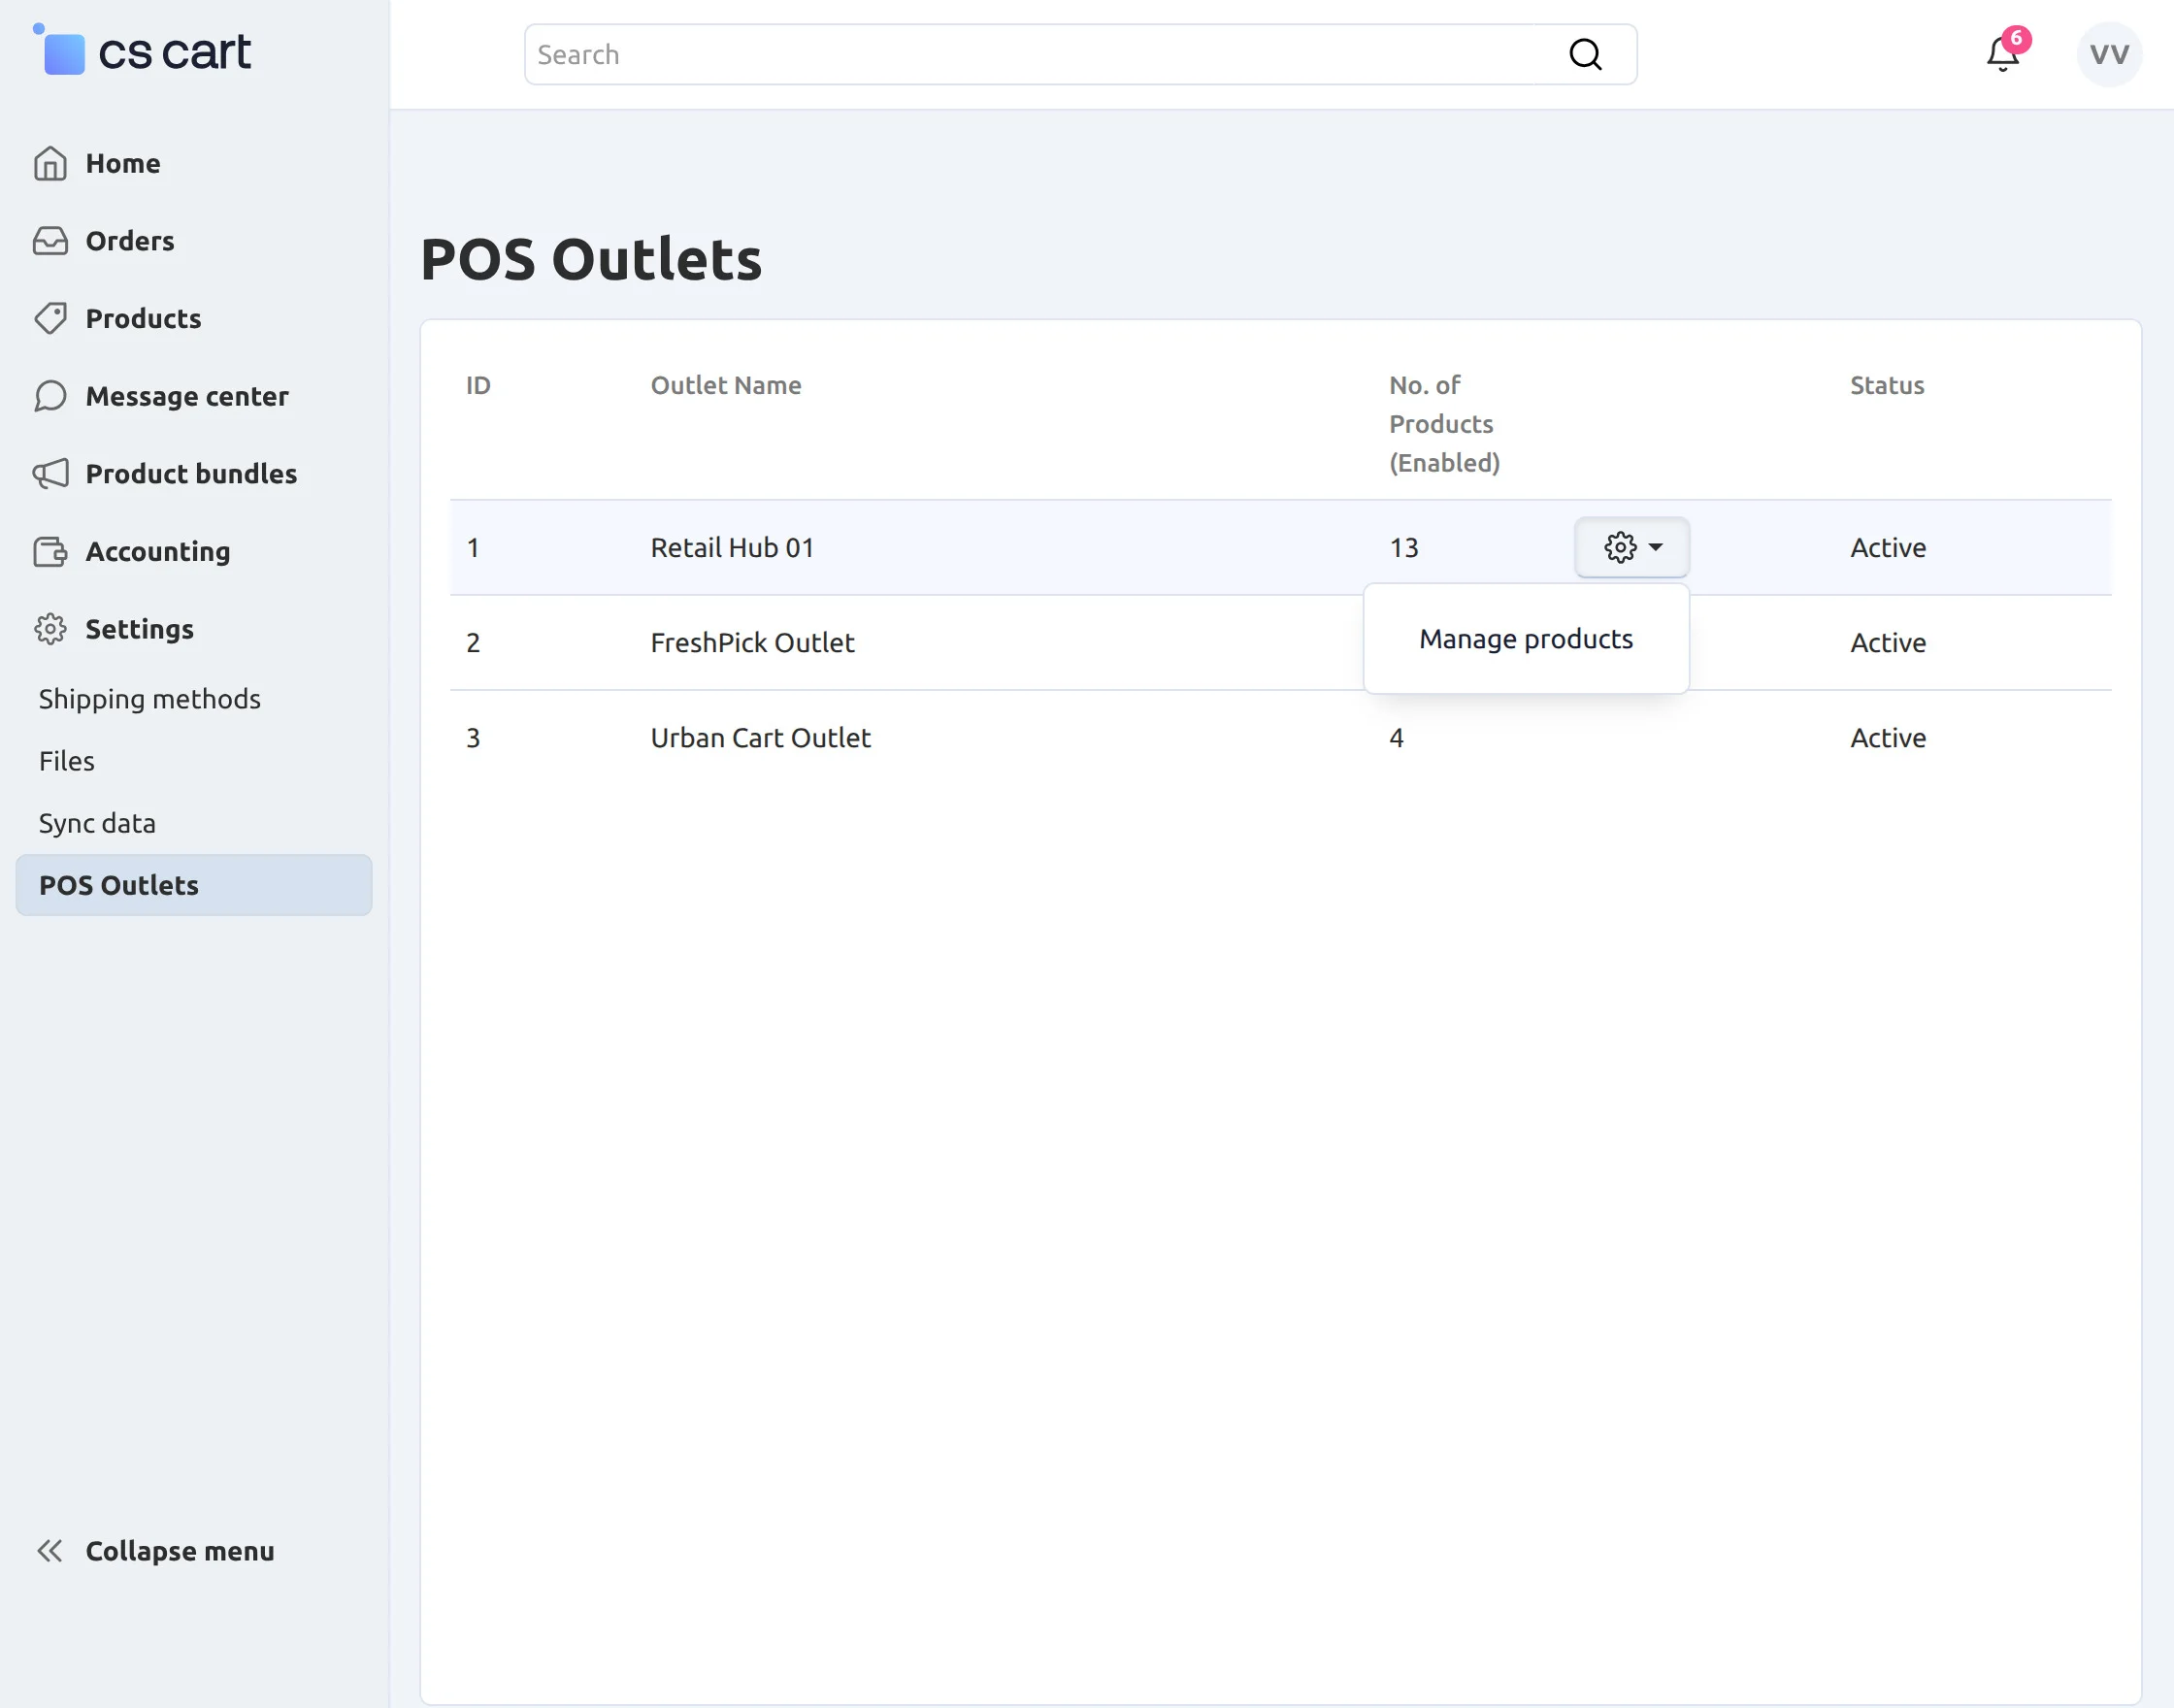
Here, the Vendor can assign all the products to the POS outlet, and also they can also assign and unassign the selected product from the outlet.
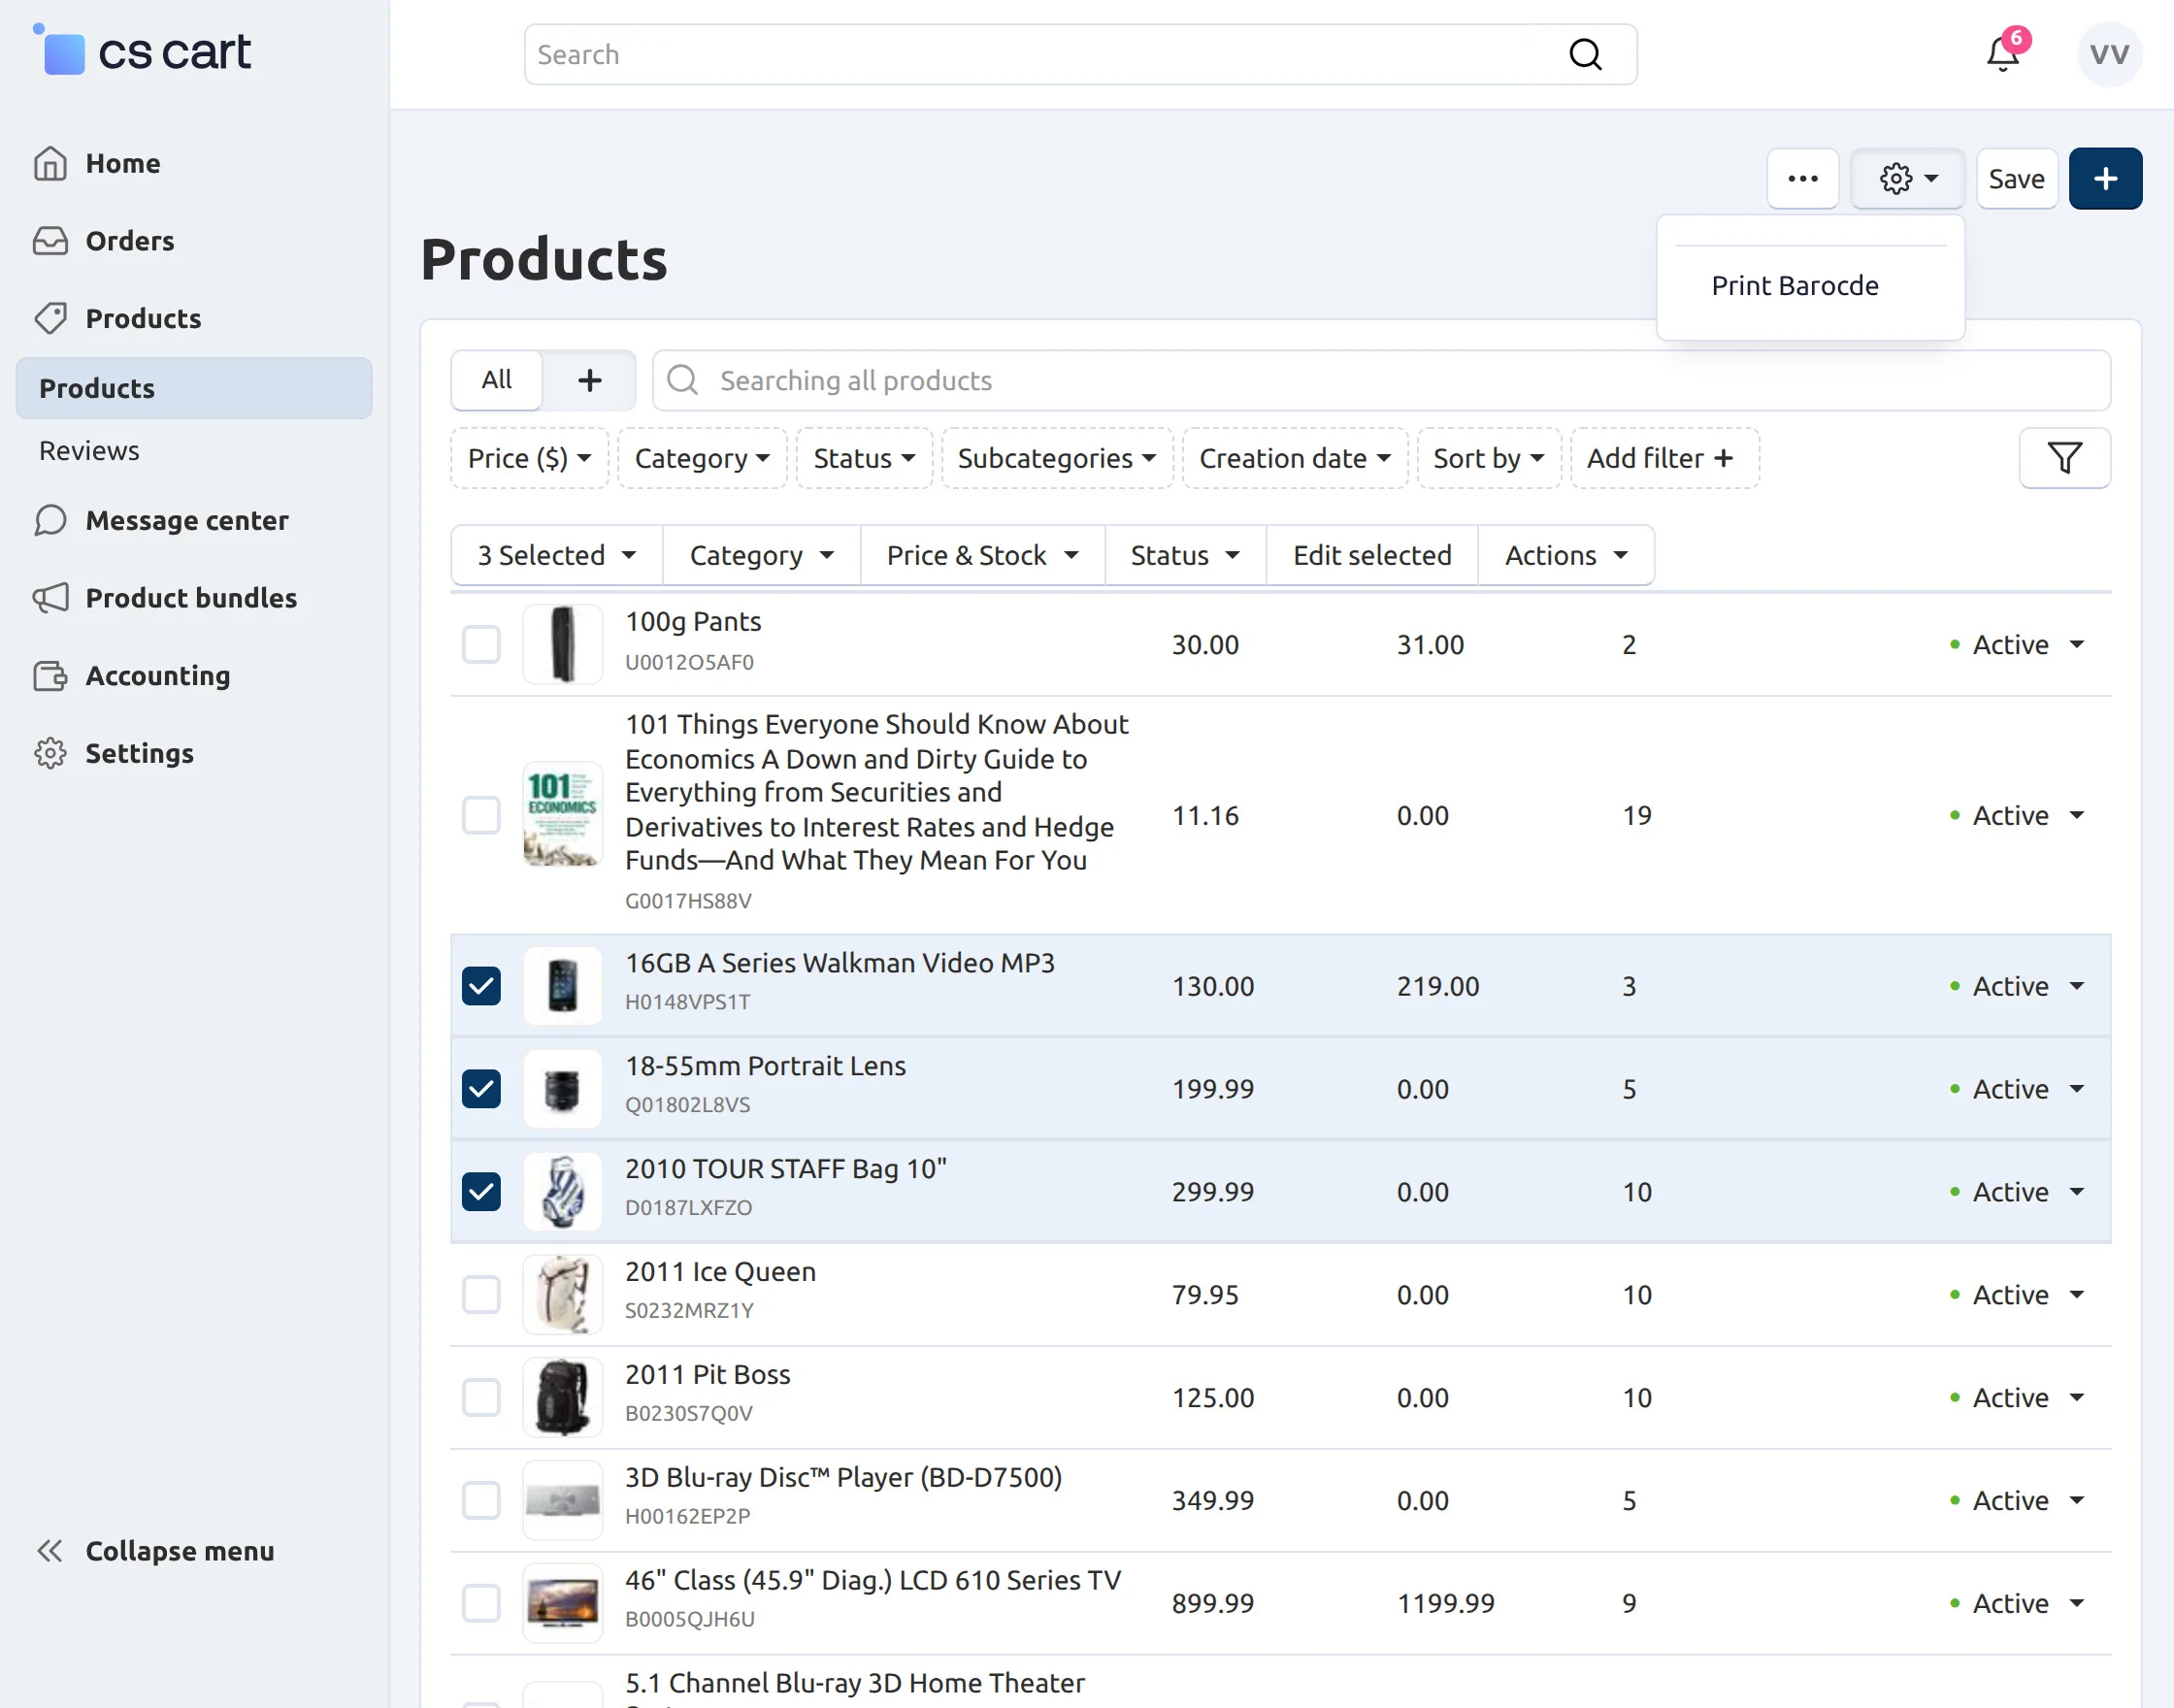
Let’s see how a vendor can generate a product barcode.
CS-Cart Point of Sale (POS) provides a feature to generate multiple product barcodes. To do this:
- Go to Products → Products
- Select the desired products
- Click the gear icon in the top-right corner
- Choose the Print Barcode option
- Once clicked, the system will generate barcodes for the selected products
To print the barcode of the product individually, go to the Product detail page at the backend. Click the gear drop-down and print the barcode as shown below.

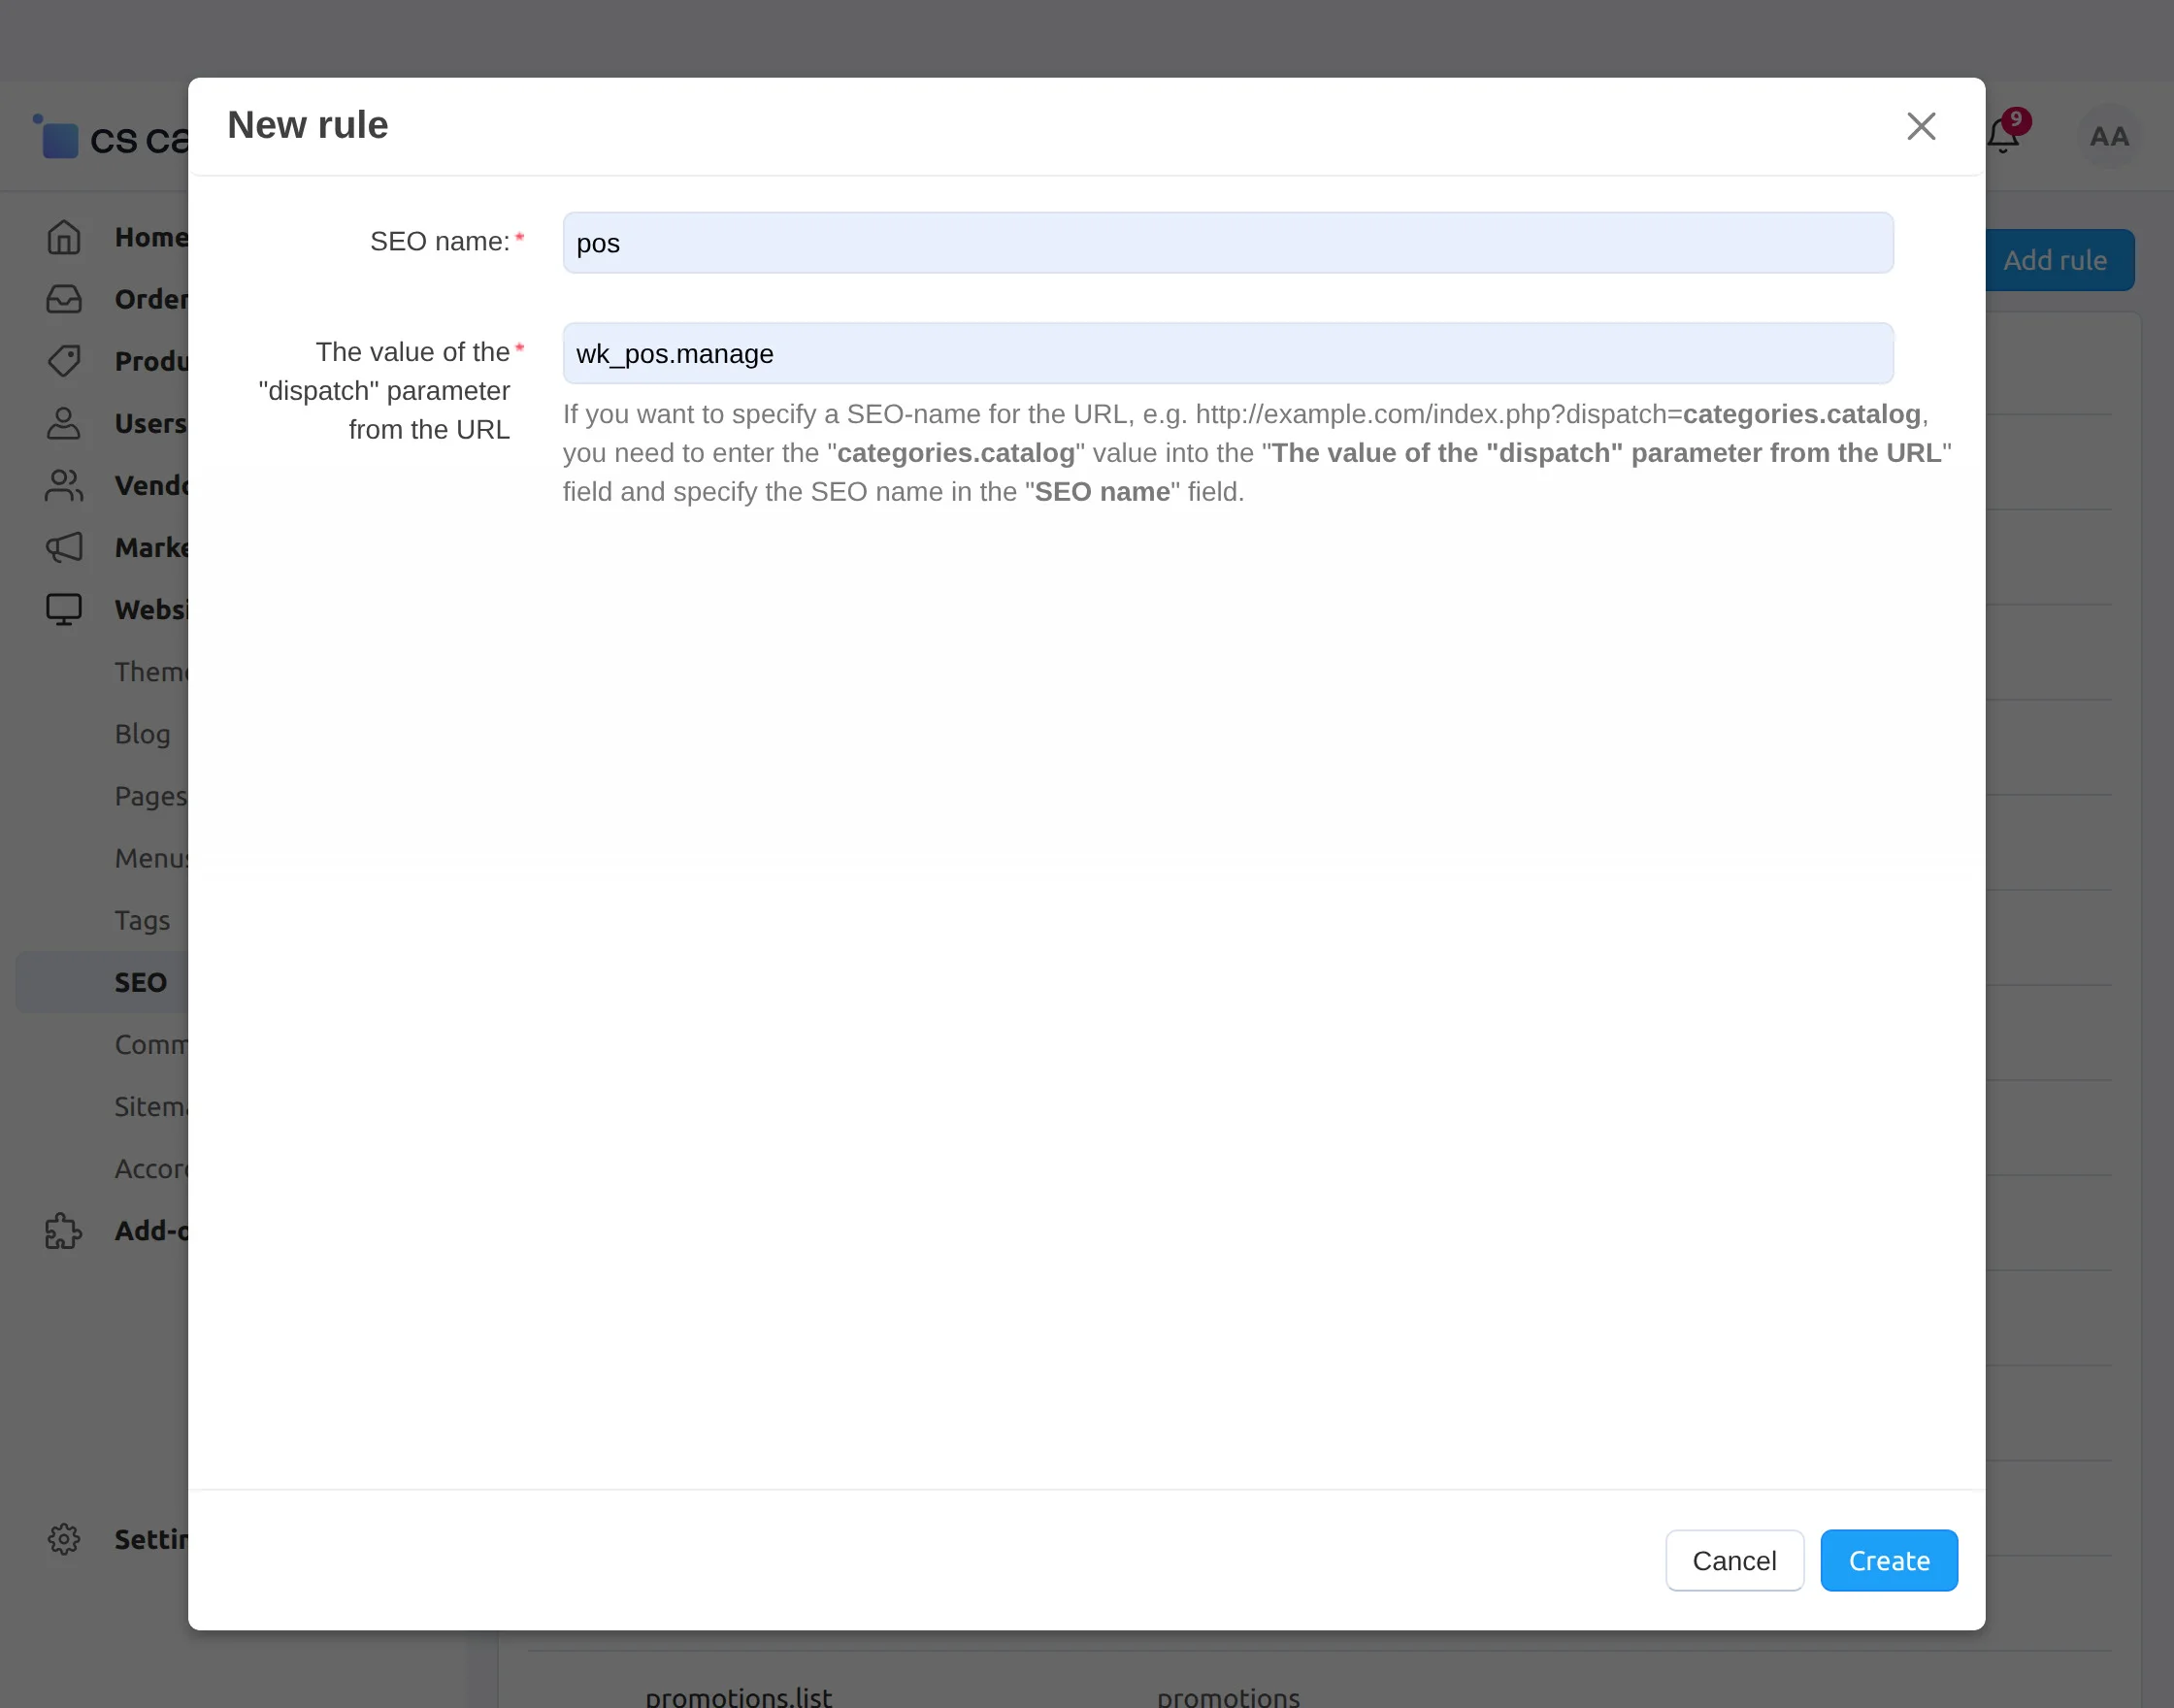
POS Frontend
To get the POS frontend panel URL, just add a new SEO rule with the desired name and “wk_pos.manage” as the dispatch value, as shown below.
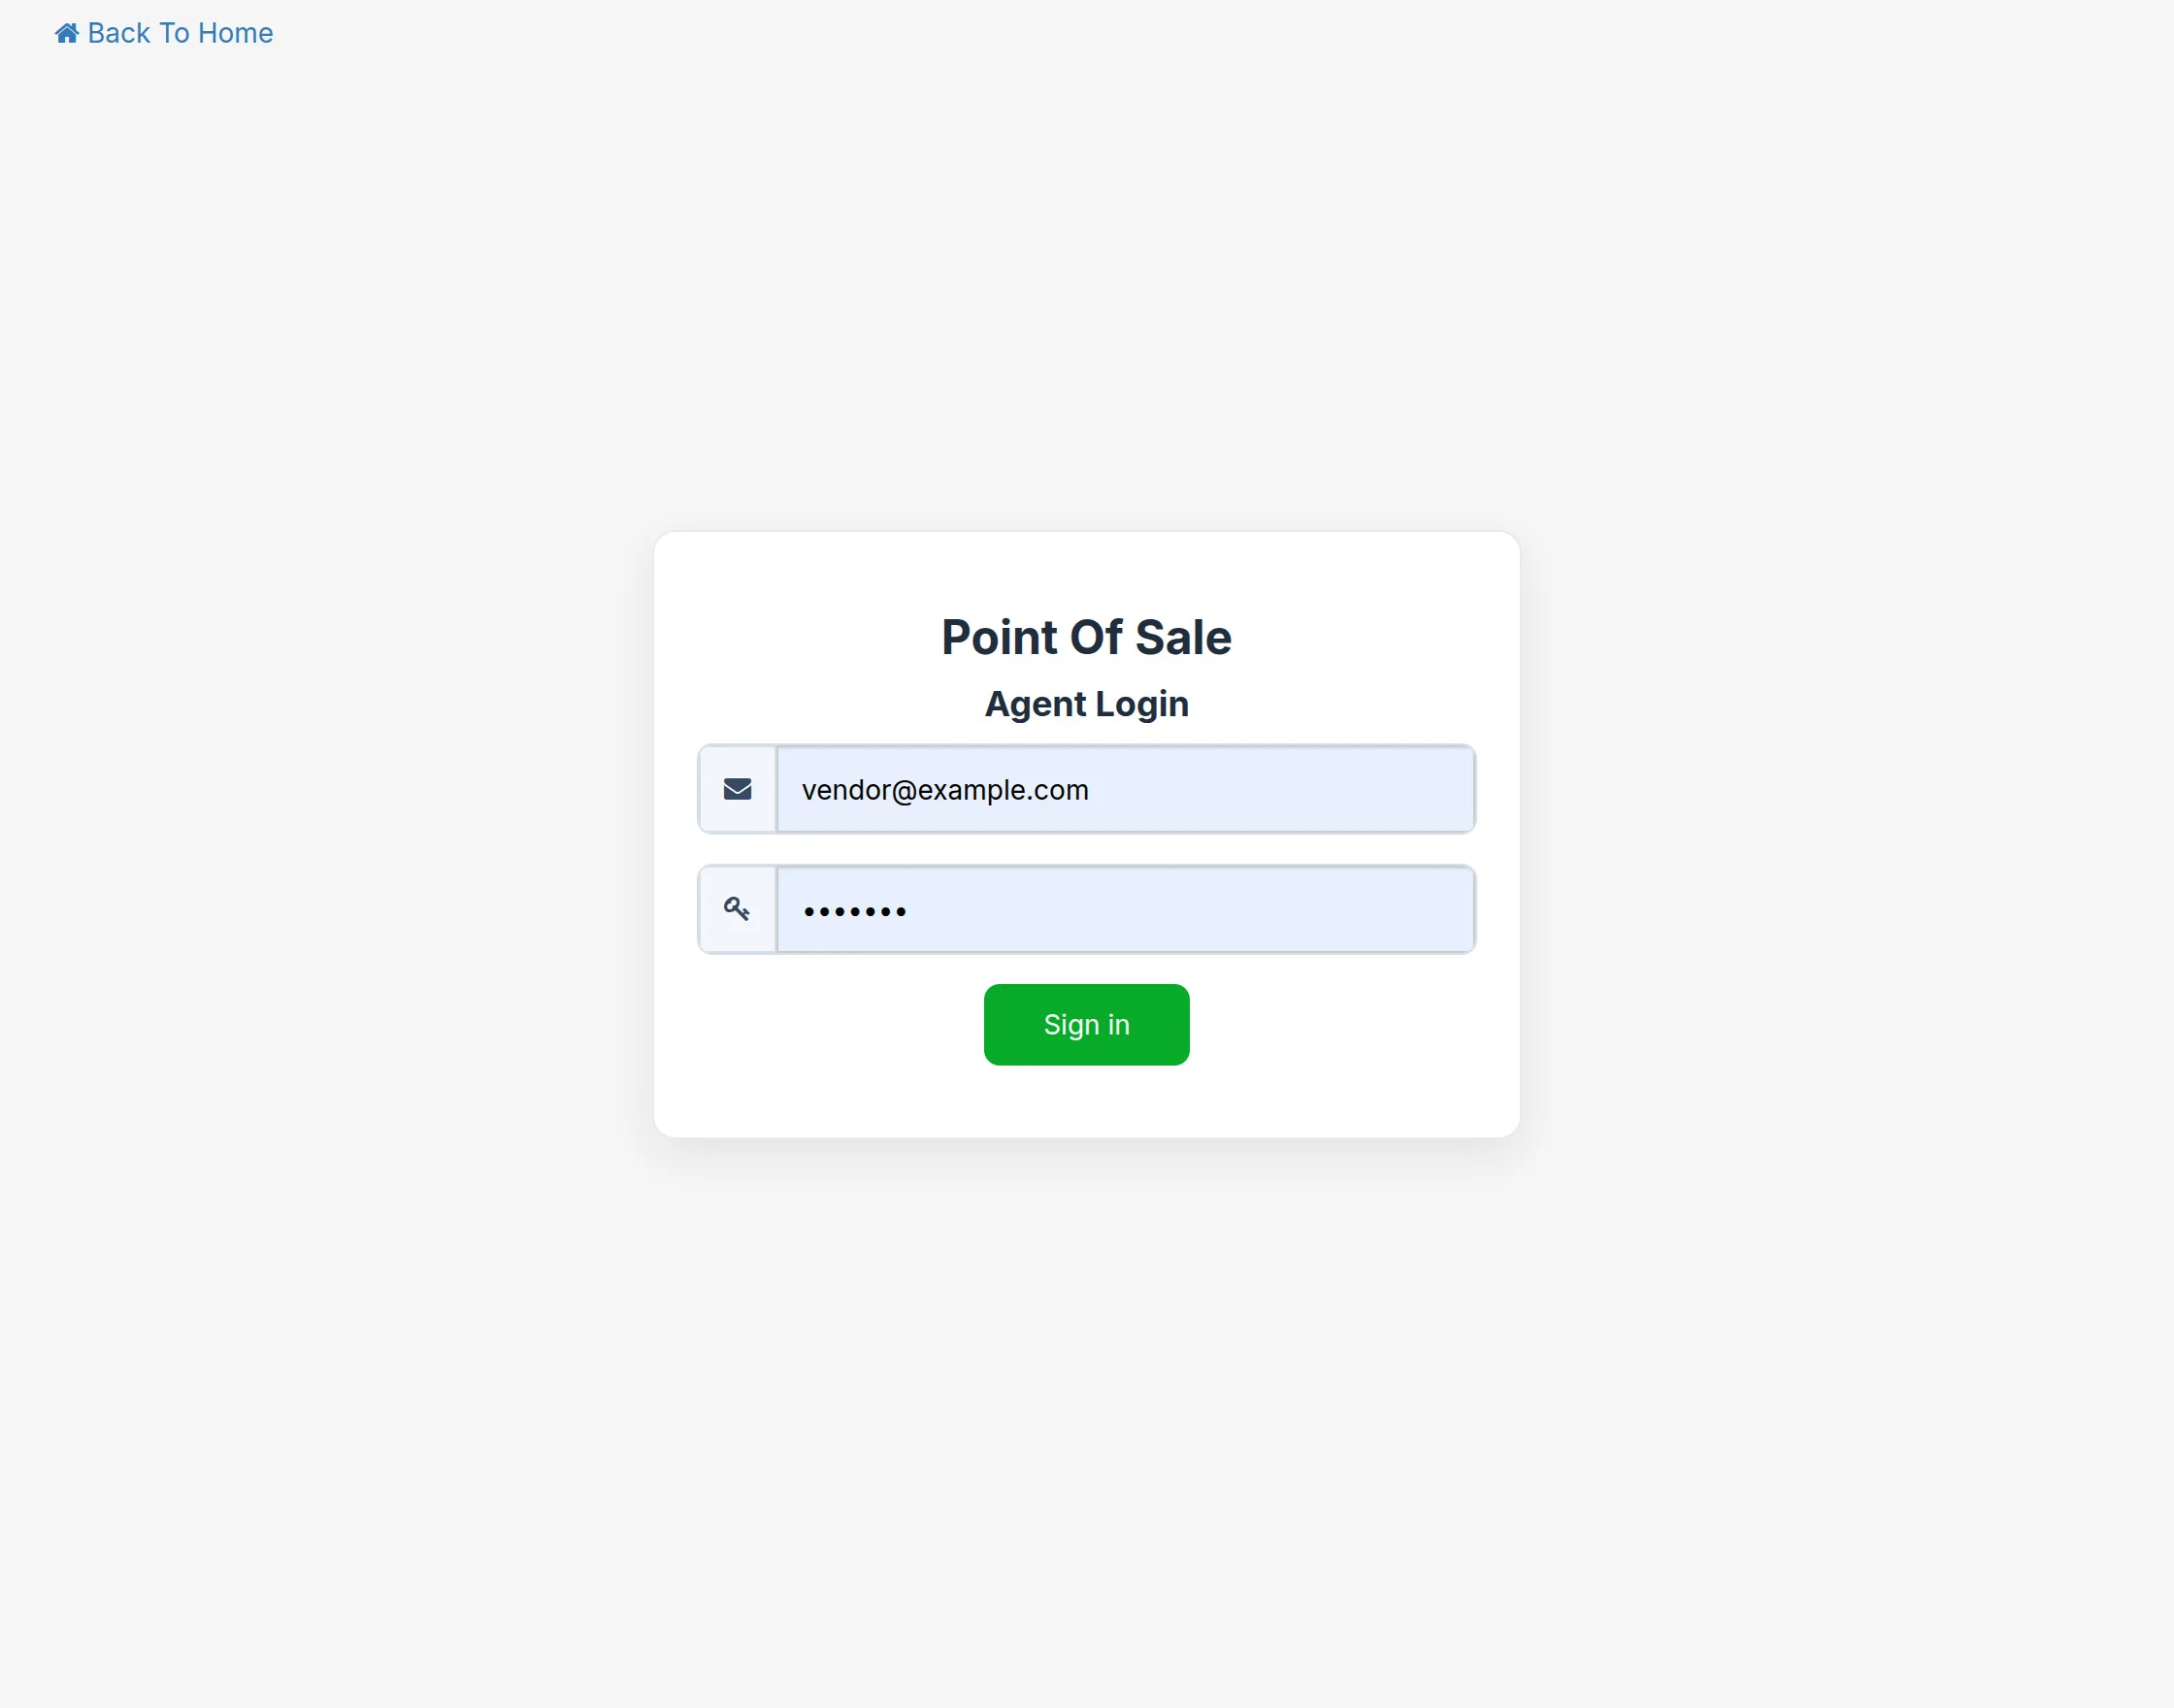
The Login Panel of the POS system allows authorized users to log in. Vendors can select their assigned outlet from a list of available outlets during login.

The authorized user can enter their email ID and password, then click on the Sign In button to log in to the POS system.
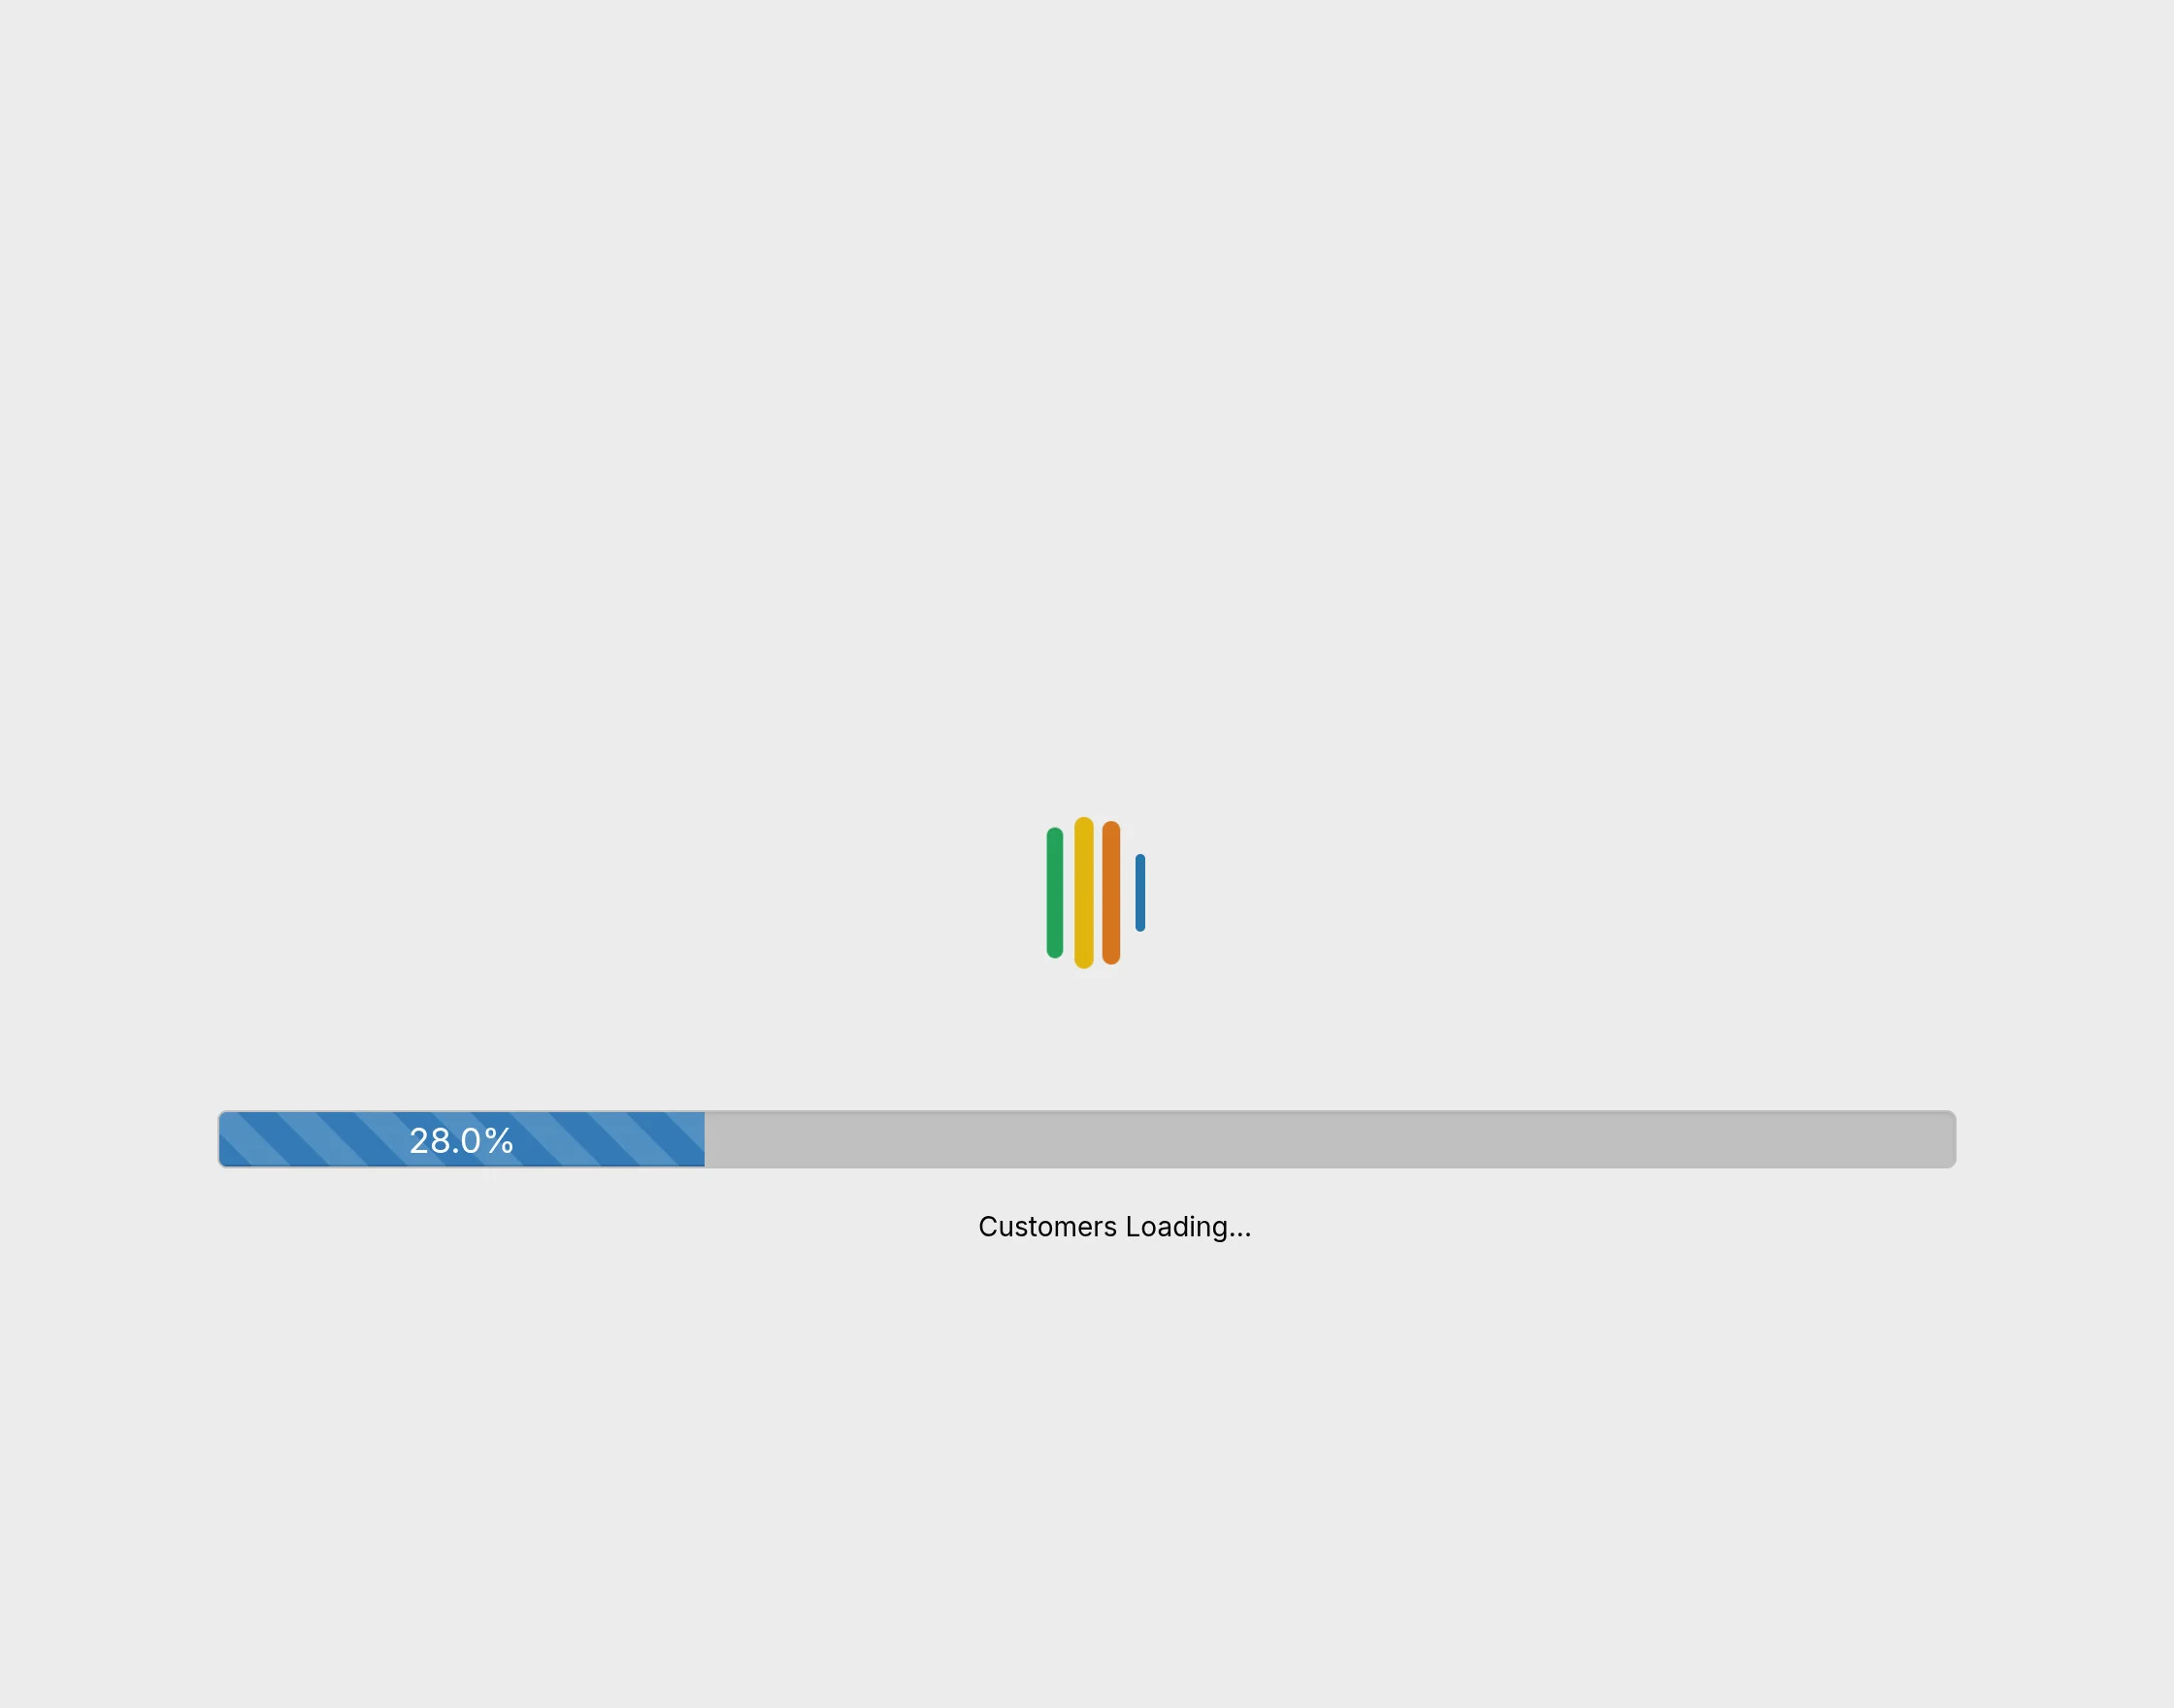
All the CS-Cart POS products (as per the product’s settings at the admin end) will be loaded on the frontend. It will ask to resume the previous session or start with the new session, as shown below.
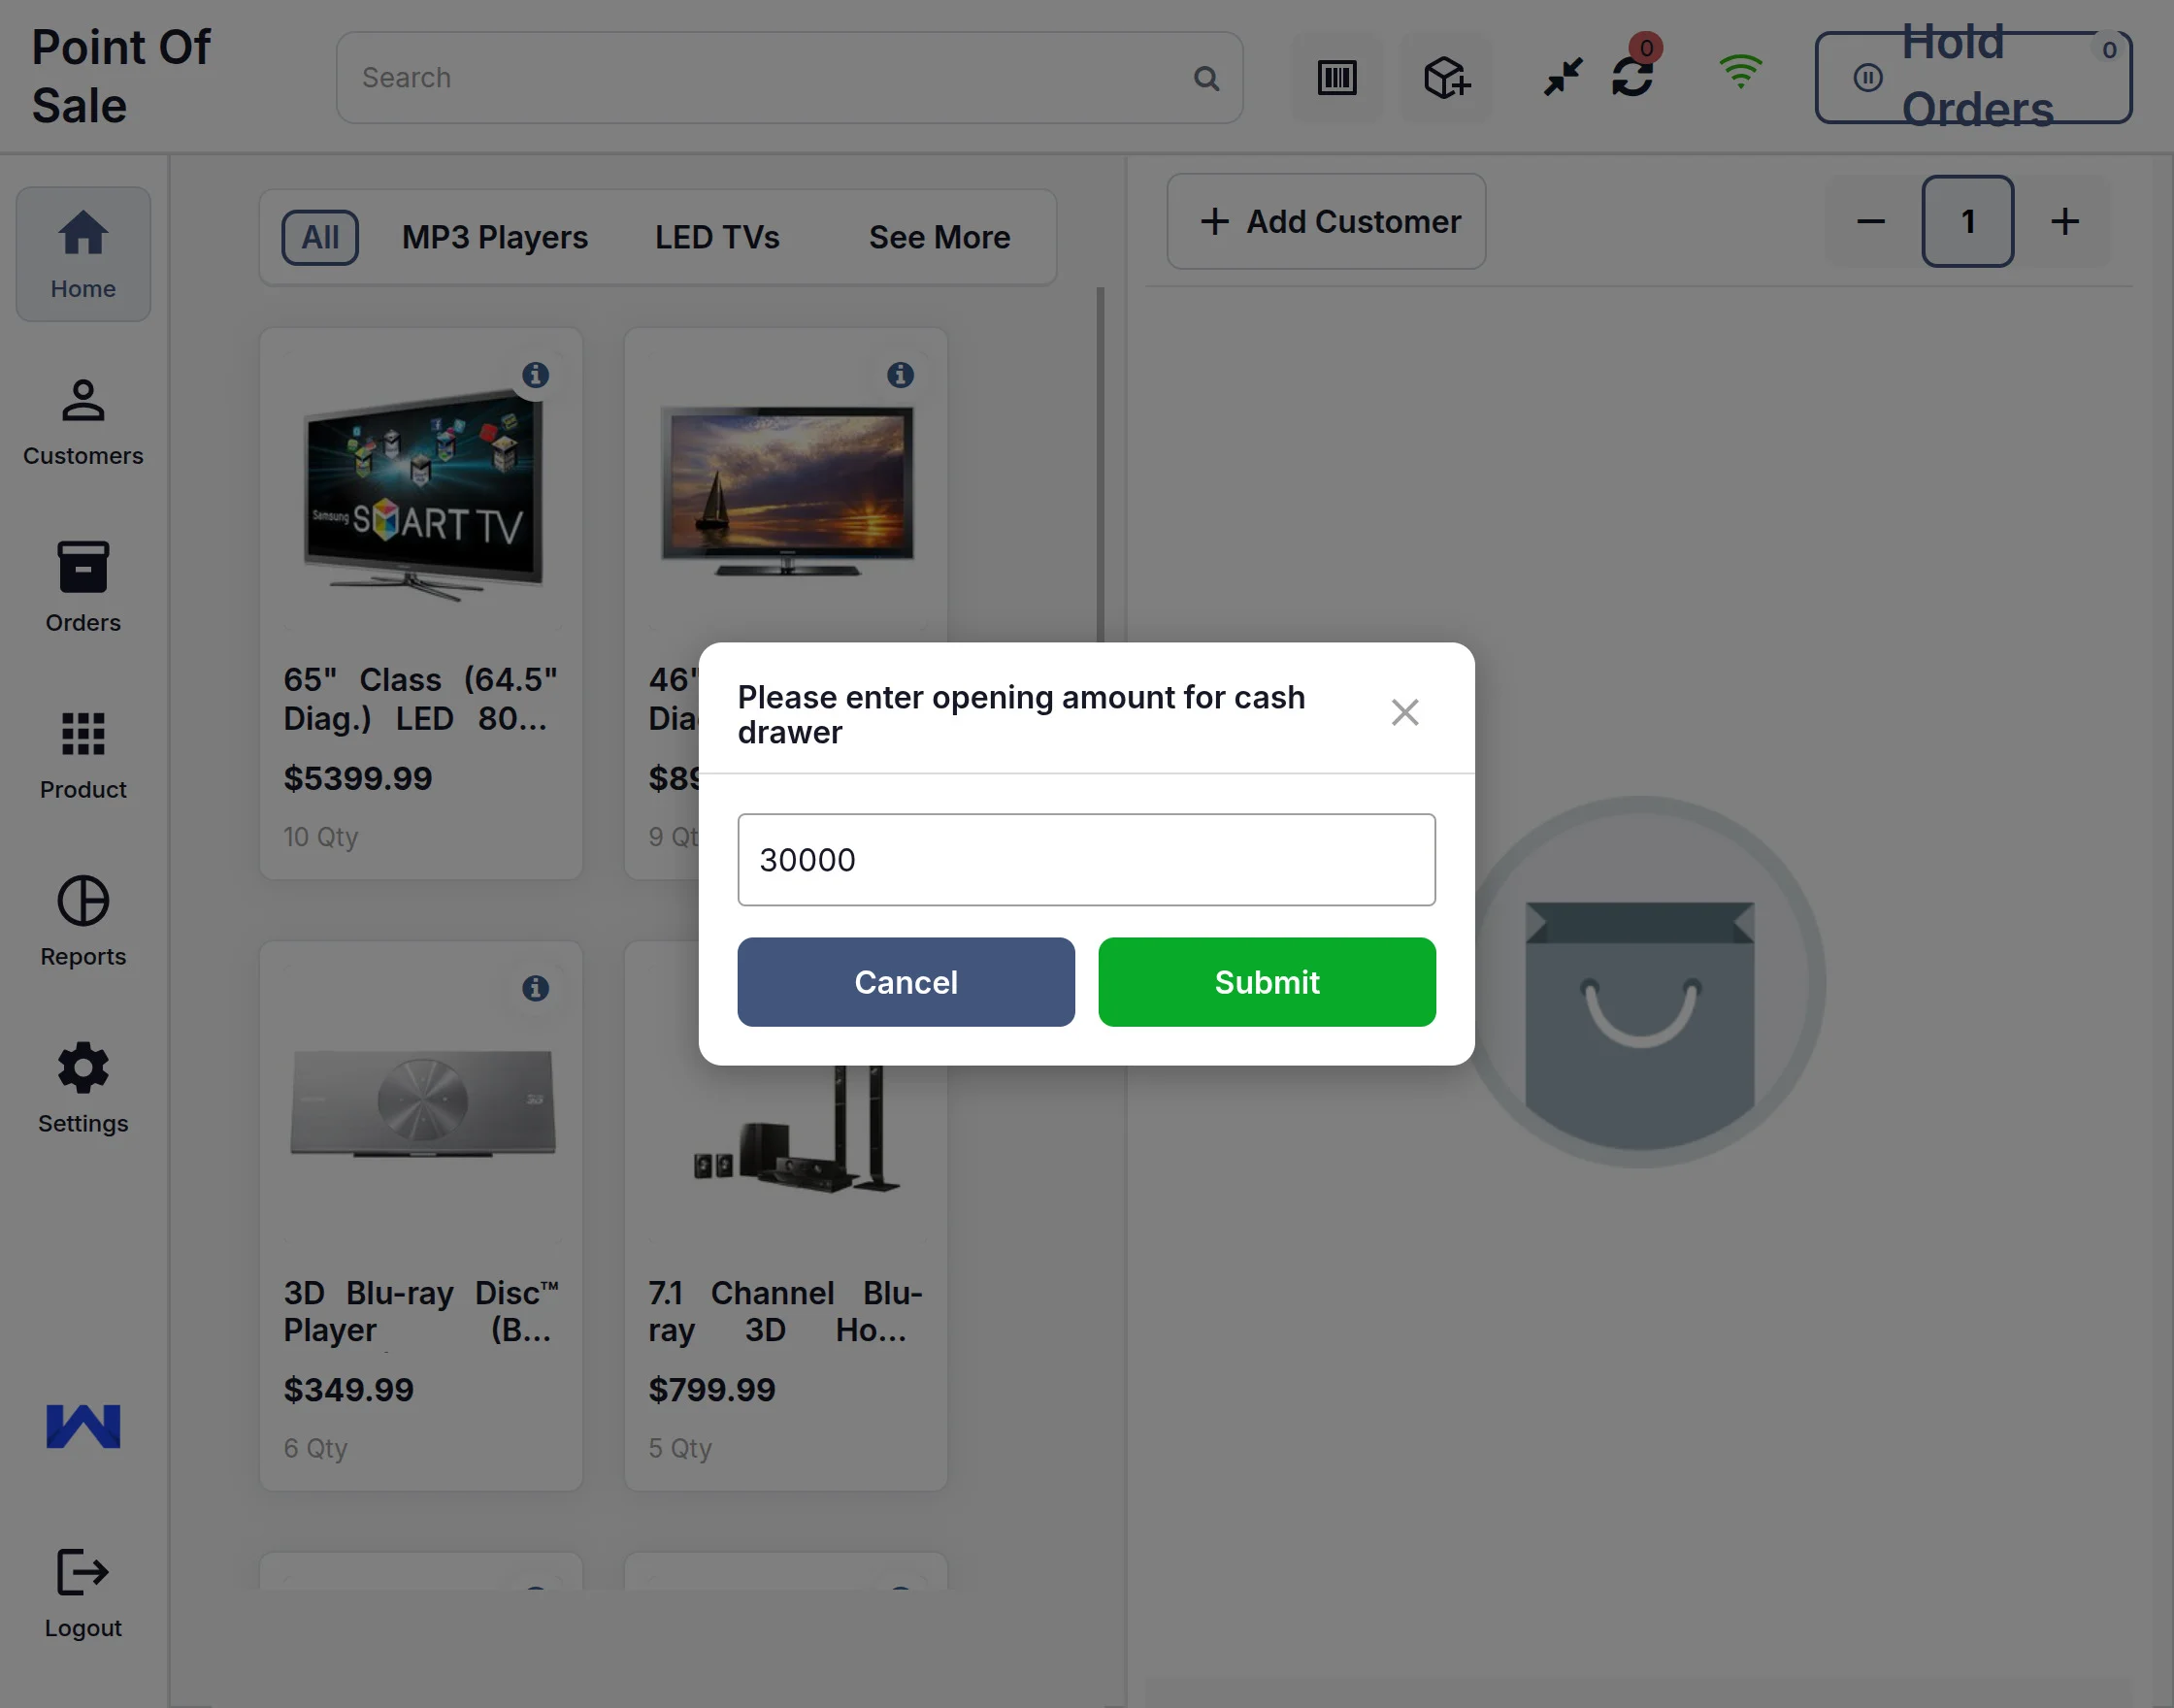
Once it’s completed, the customer needs to enter the opening balance amount for the POS store cash drawer.
There is a product search option where you can enter the search keywords, and search results will be displayed instantly.
Then you can just click on the product to add it to the cart, or you can use a barcode scanner to add the product to the cart.
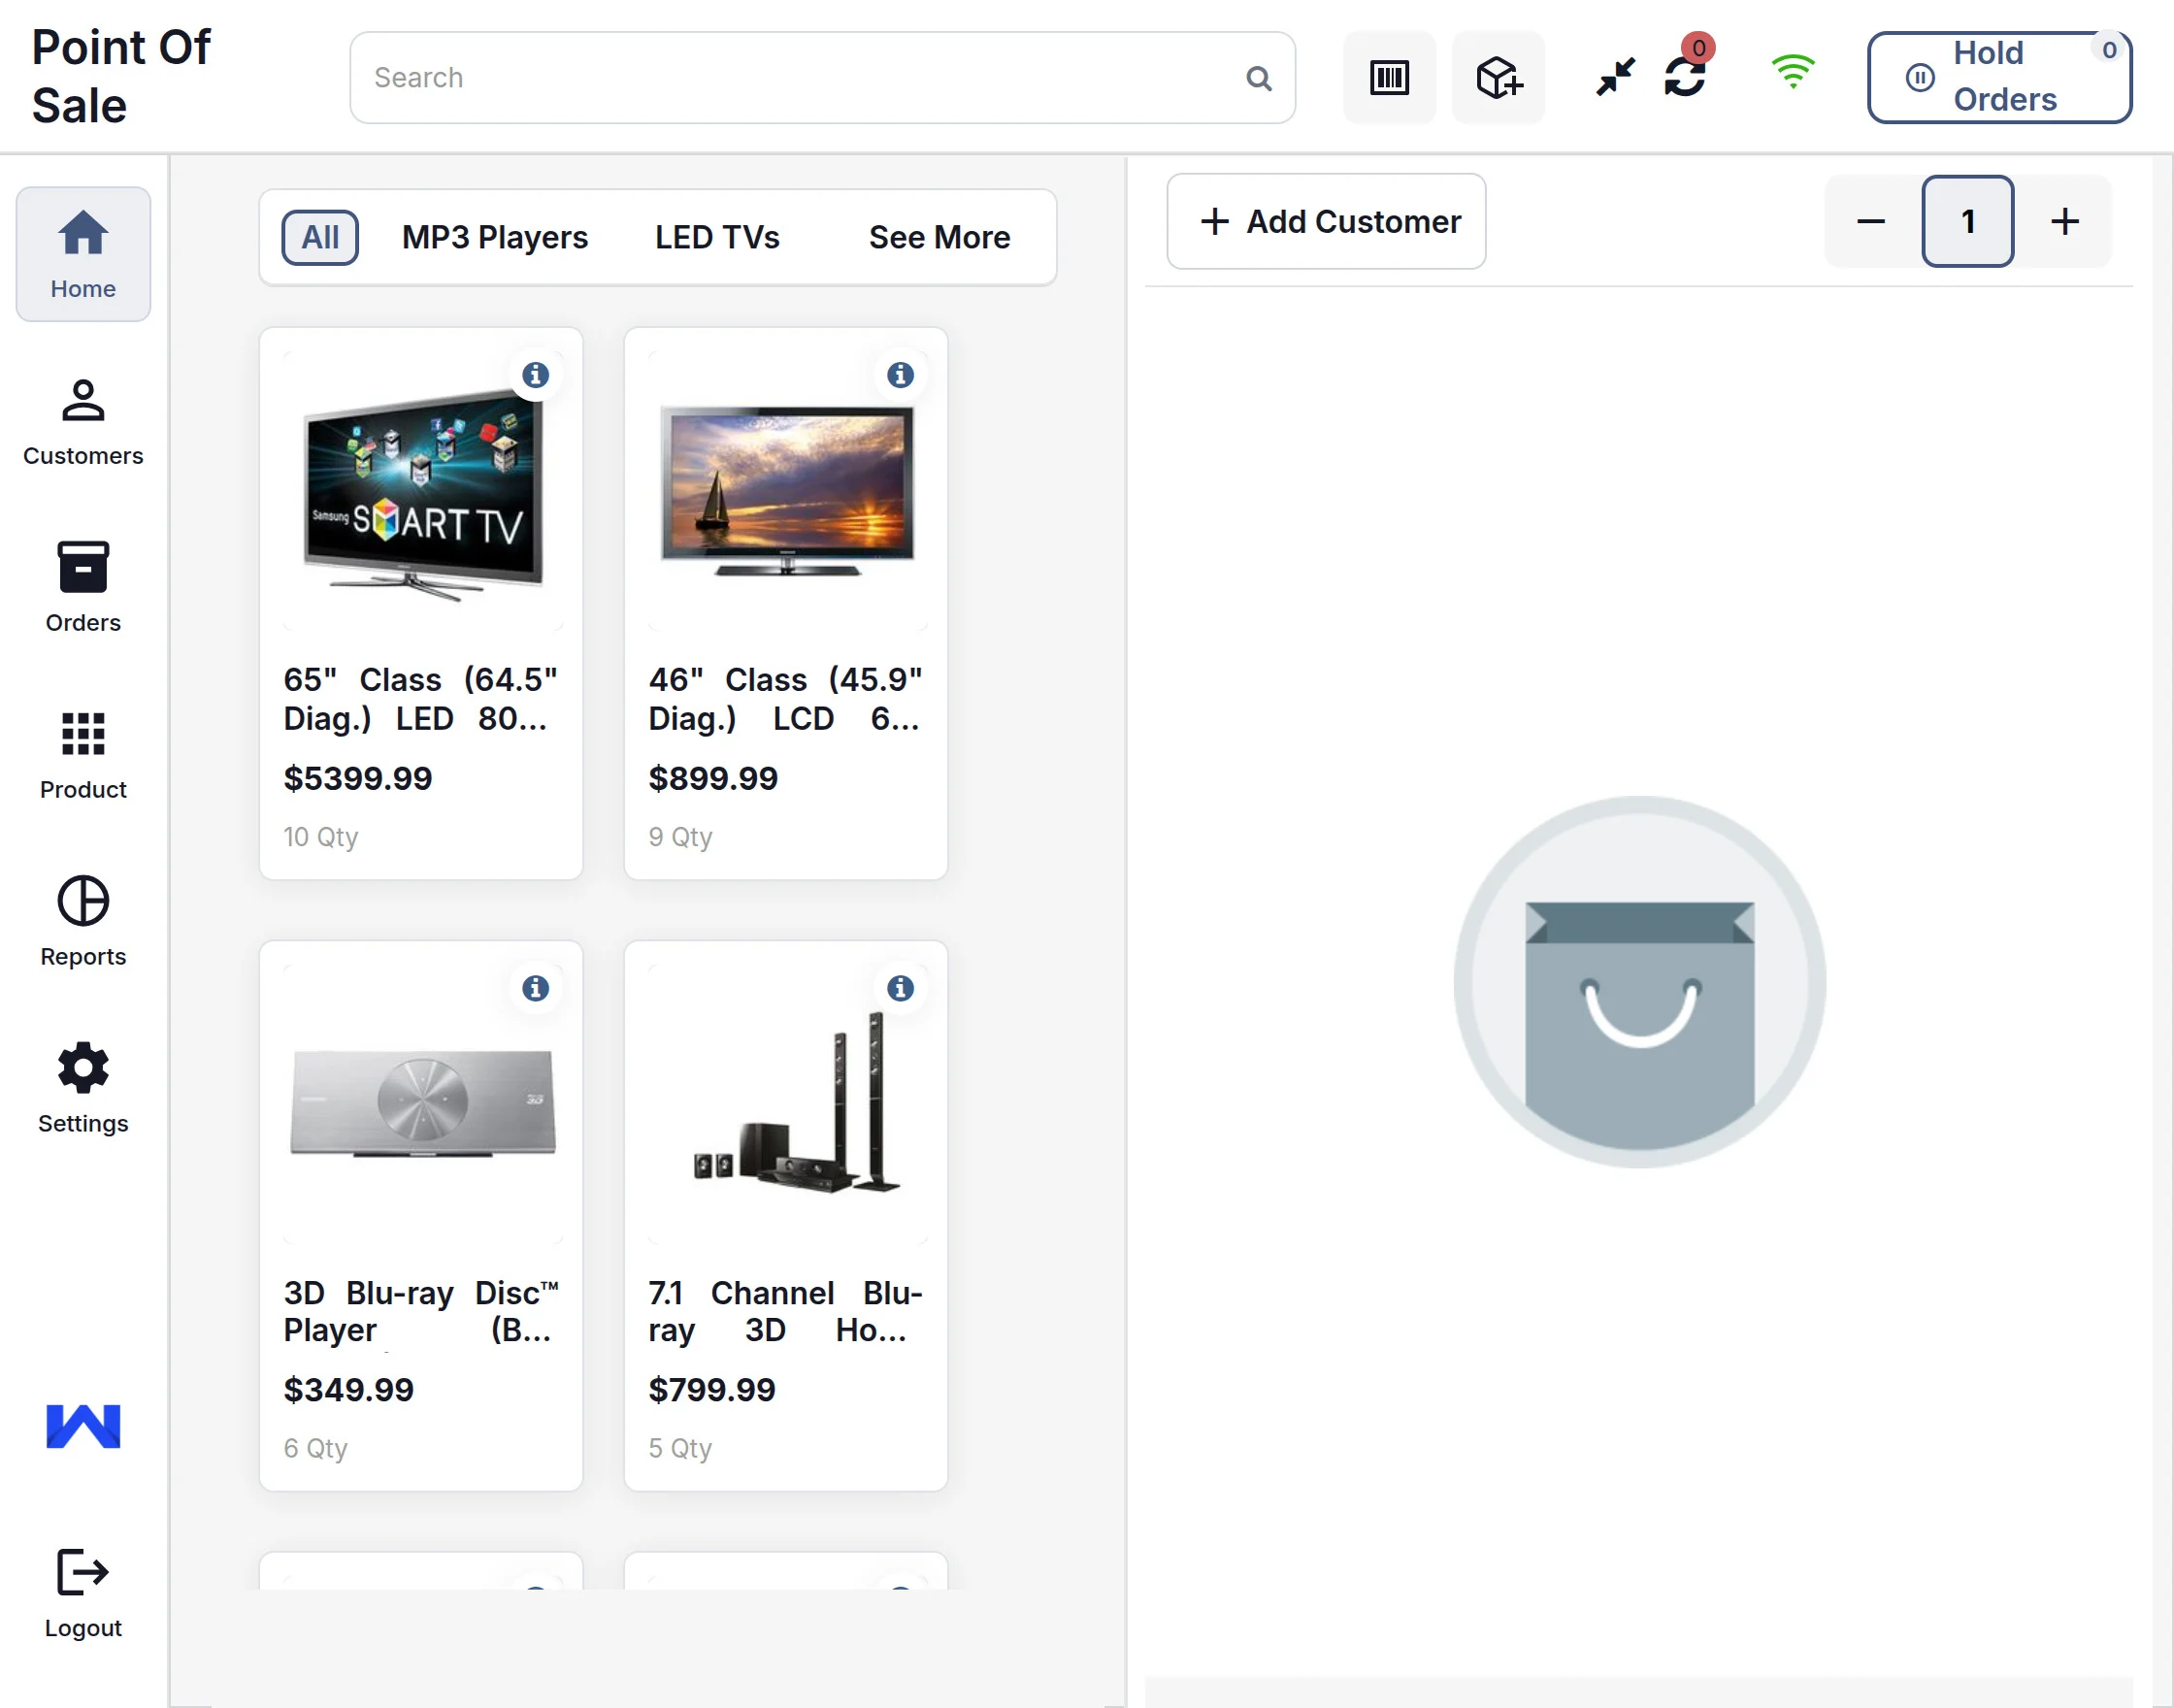
This view has various buttons and options for various functions. Let’s check the functionality of each button one by one.
POS Menu Bar

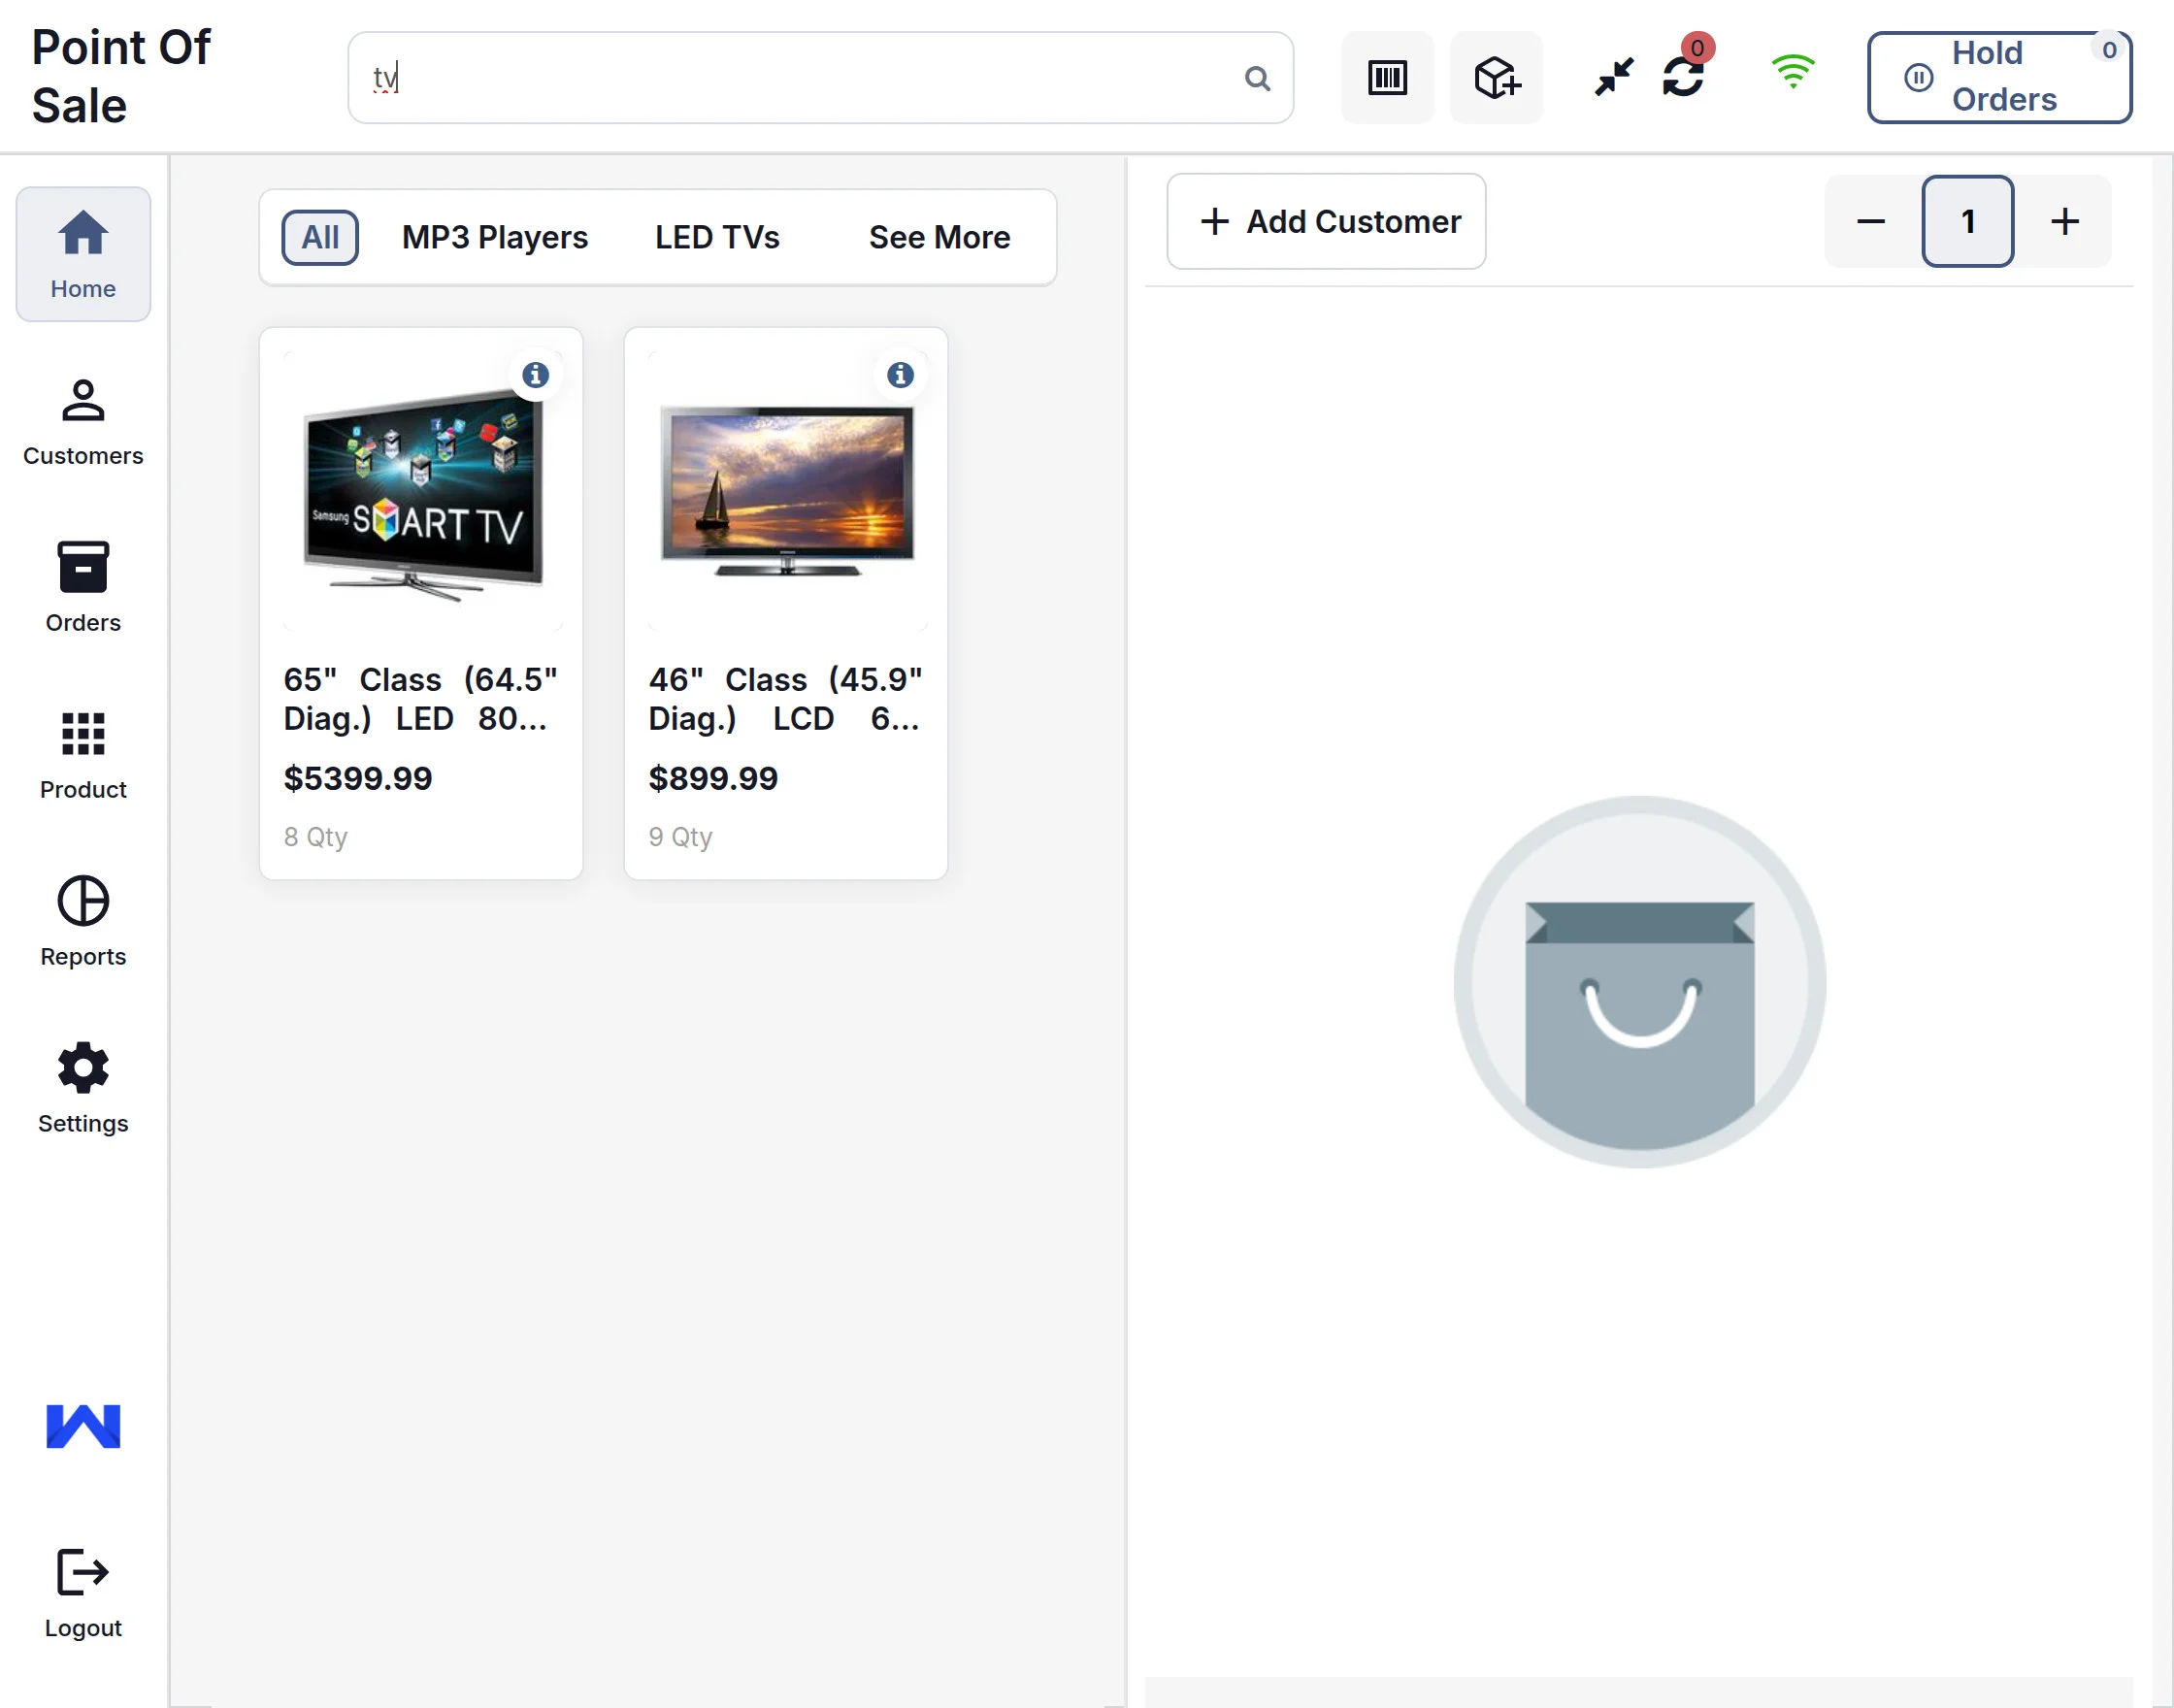
Search Bar:
Users can search for products using the search bar by entering the product name or SKU.
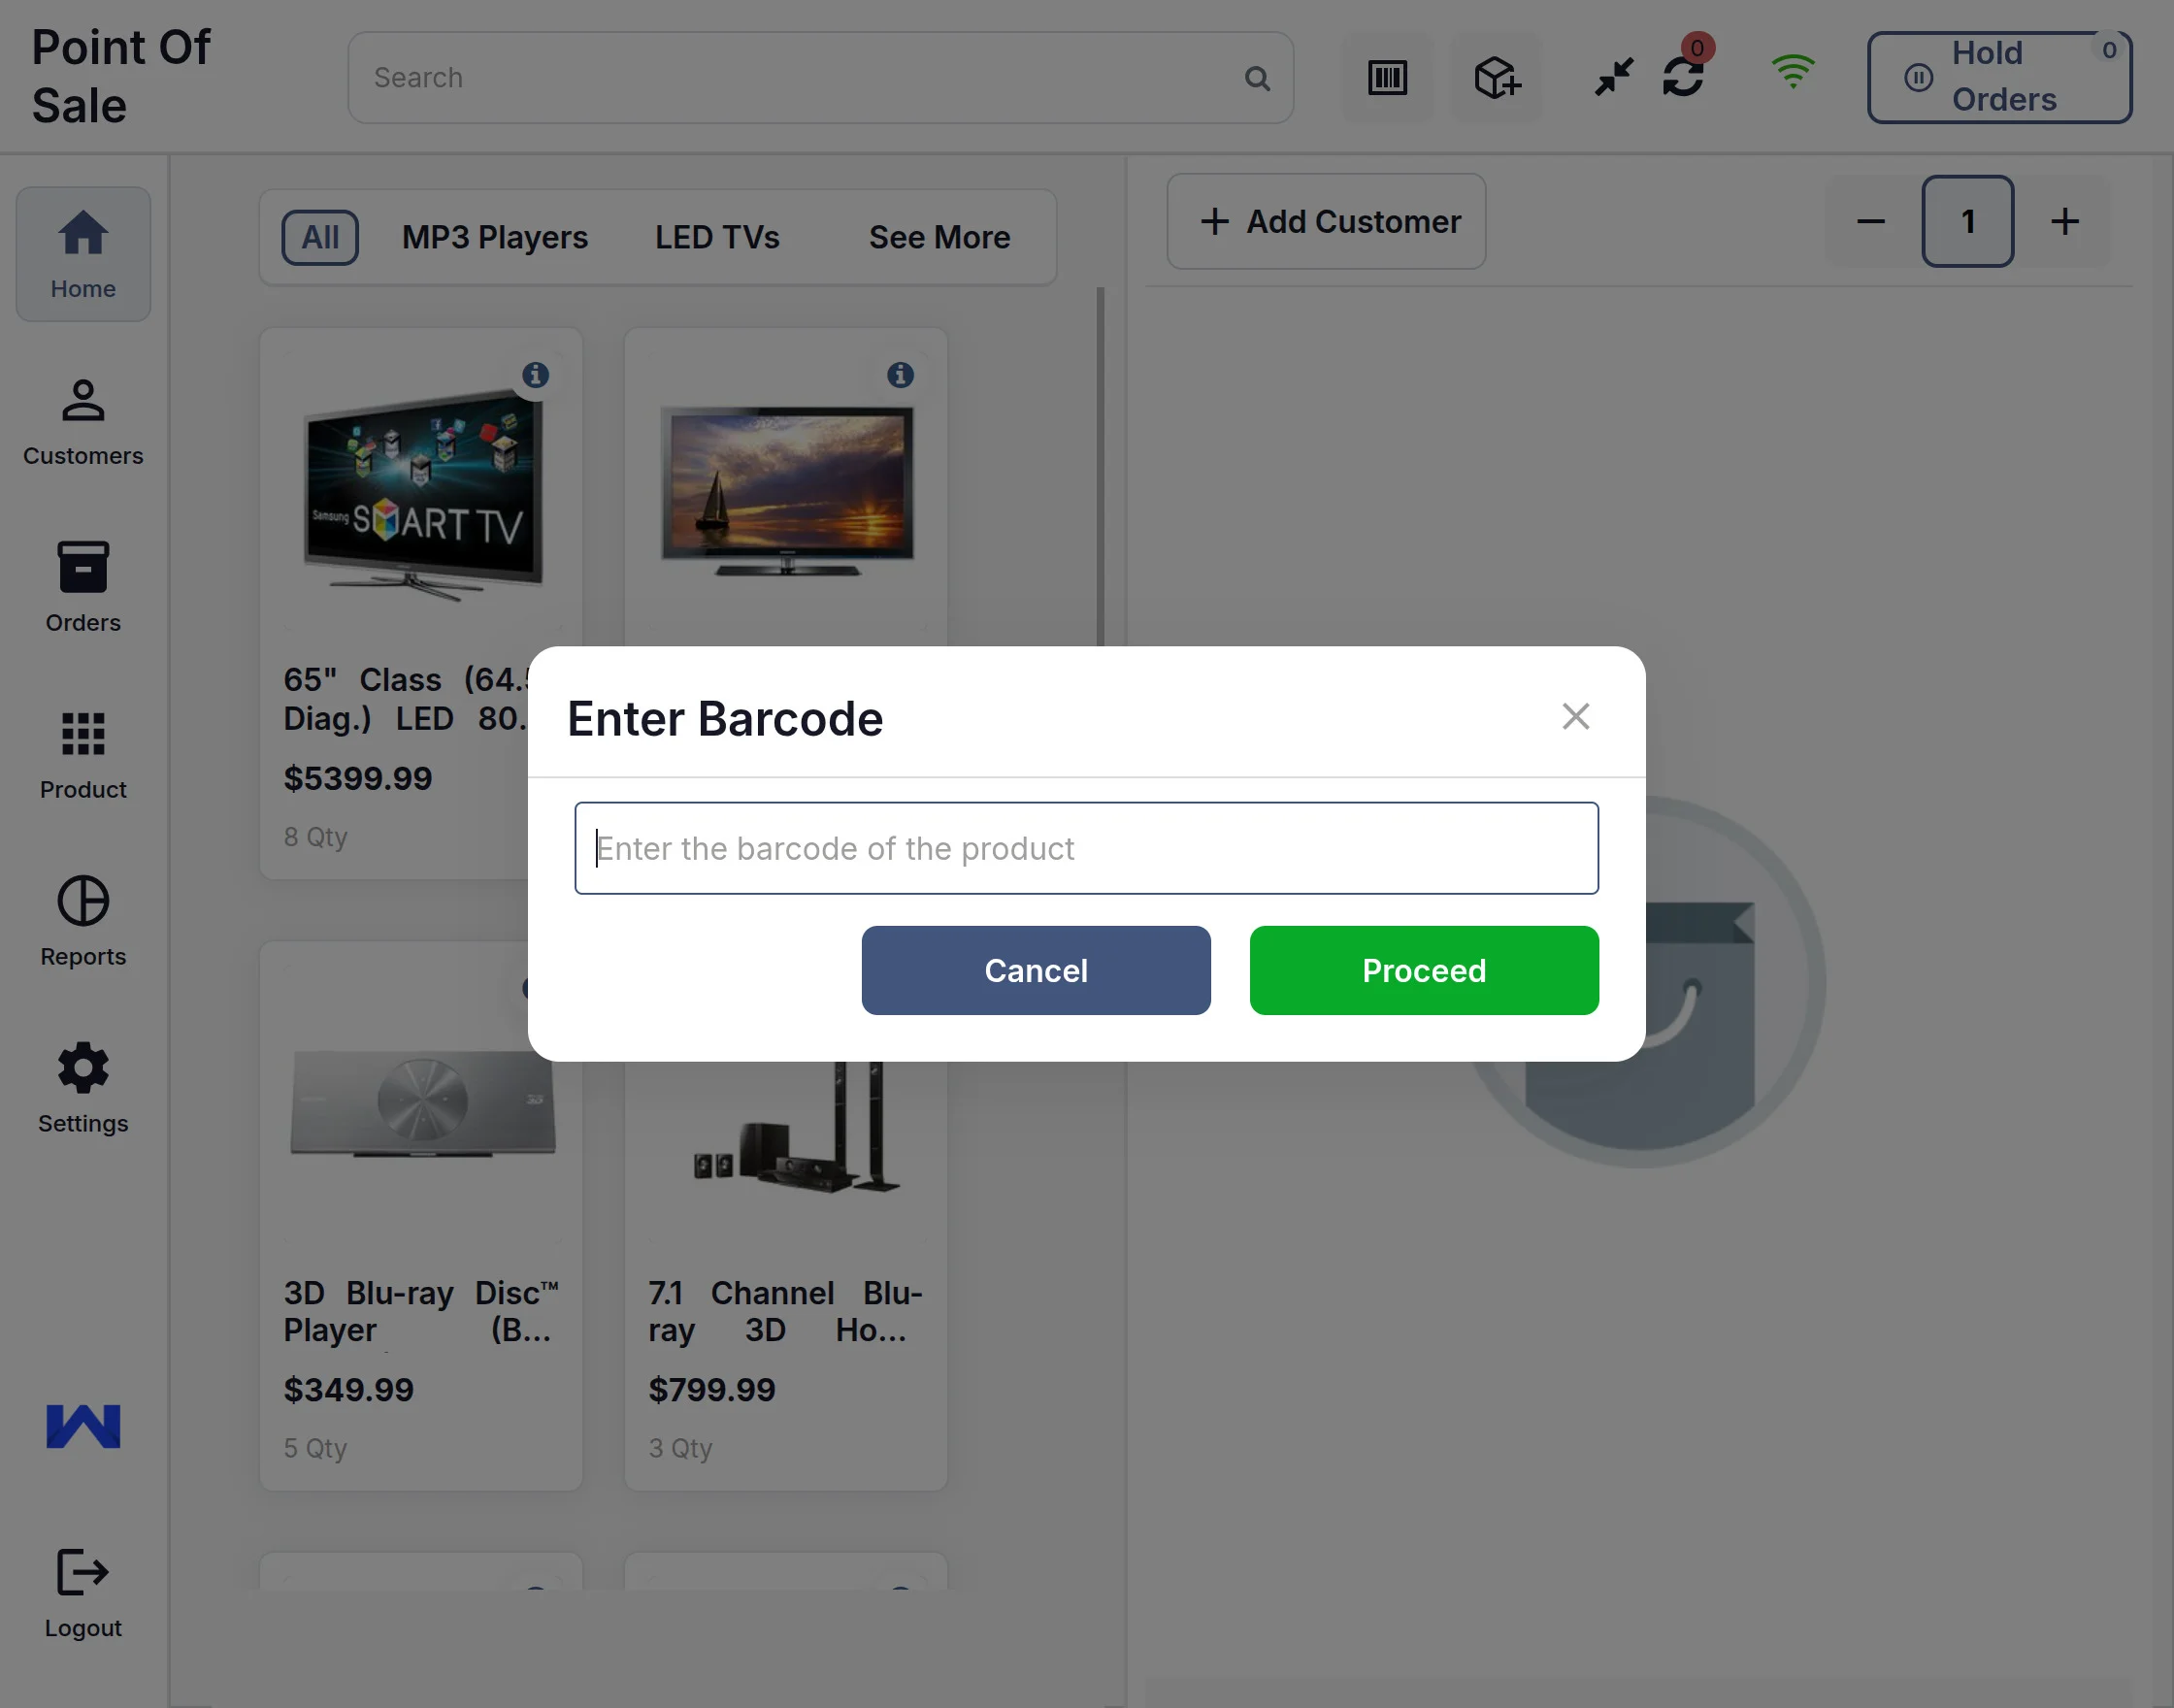
Barcode Reader
Scan the products to add them to the cart. Just scan the barcode, and the product will be added to the cart.
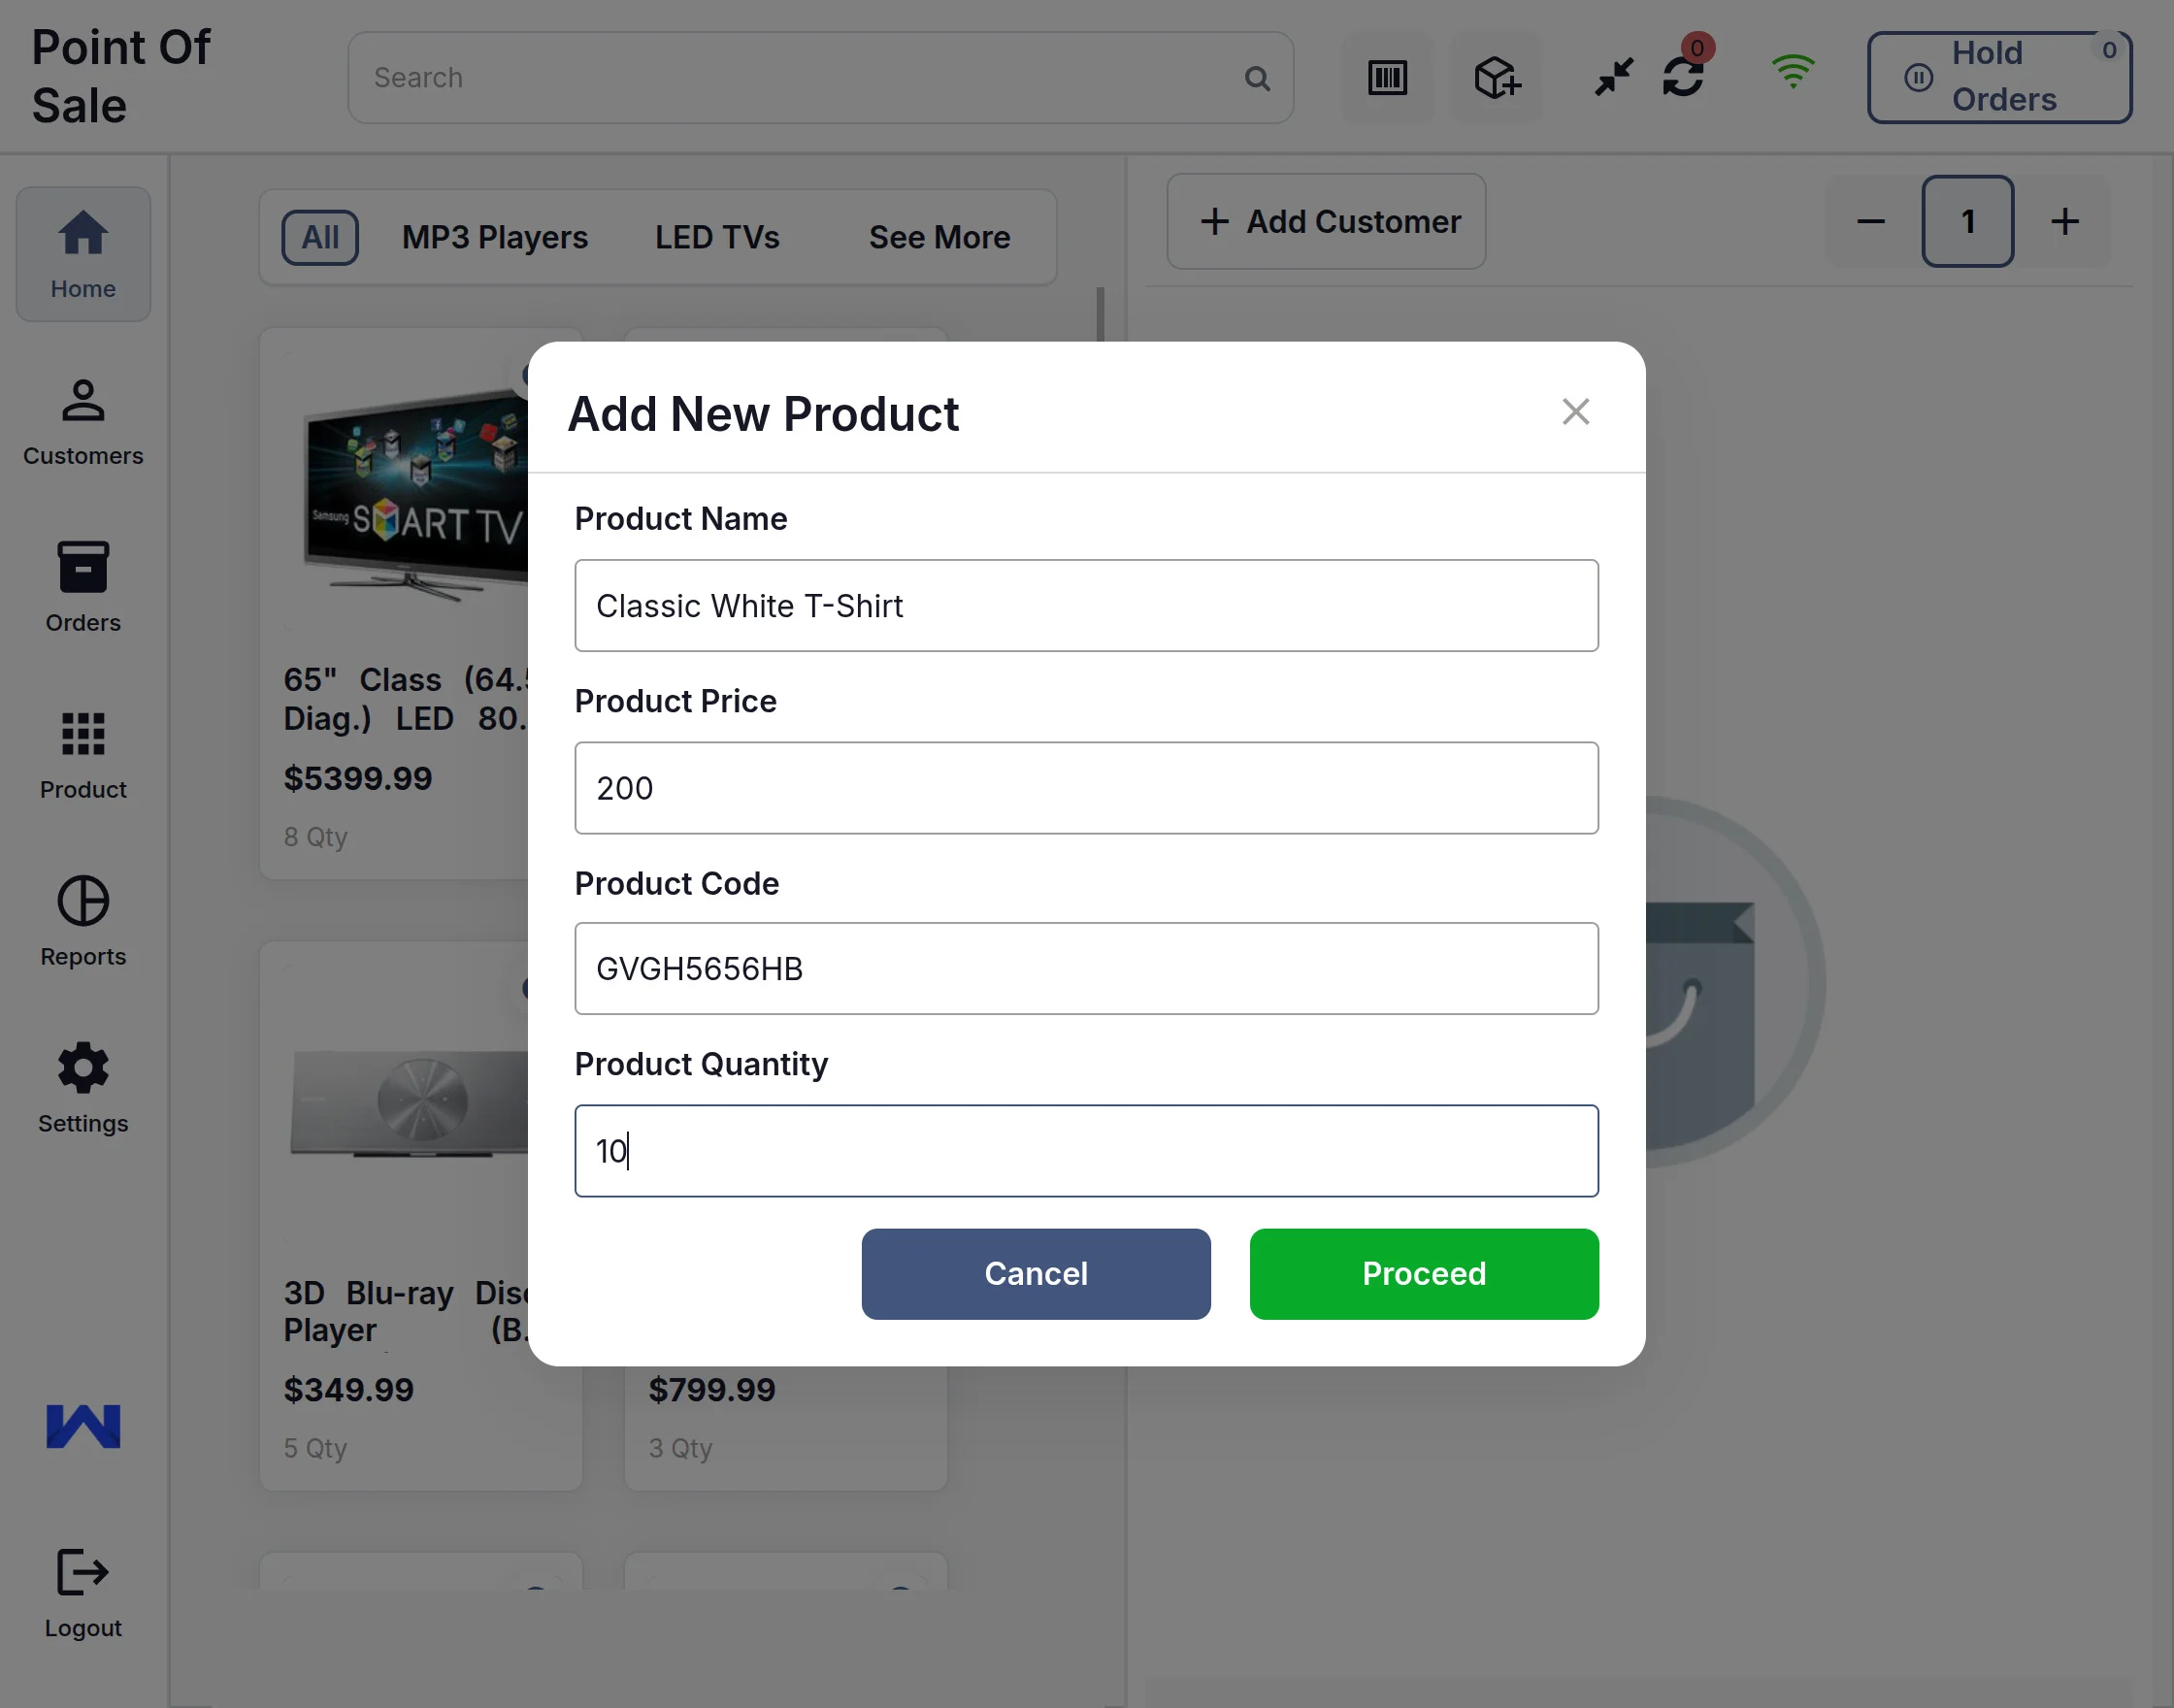
Add Product
To add the new products via POS. A service or a product that is not available in the current inventory at CS-Cart Backend but is present physically can be added instantly to the system.
This will be added to the category selected in the add-on settings.

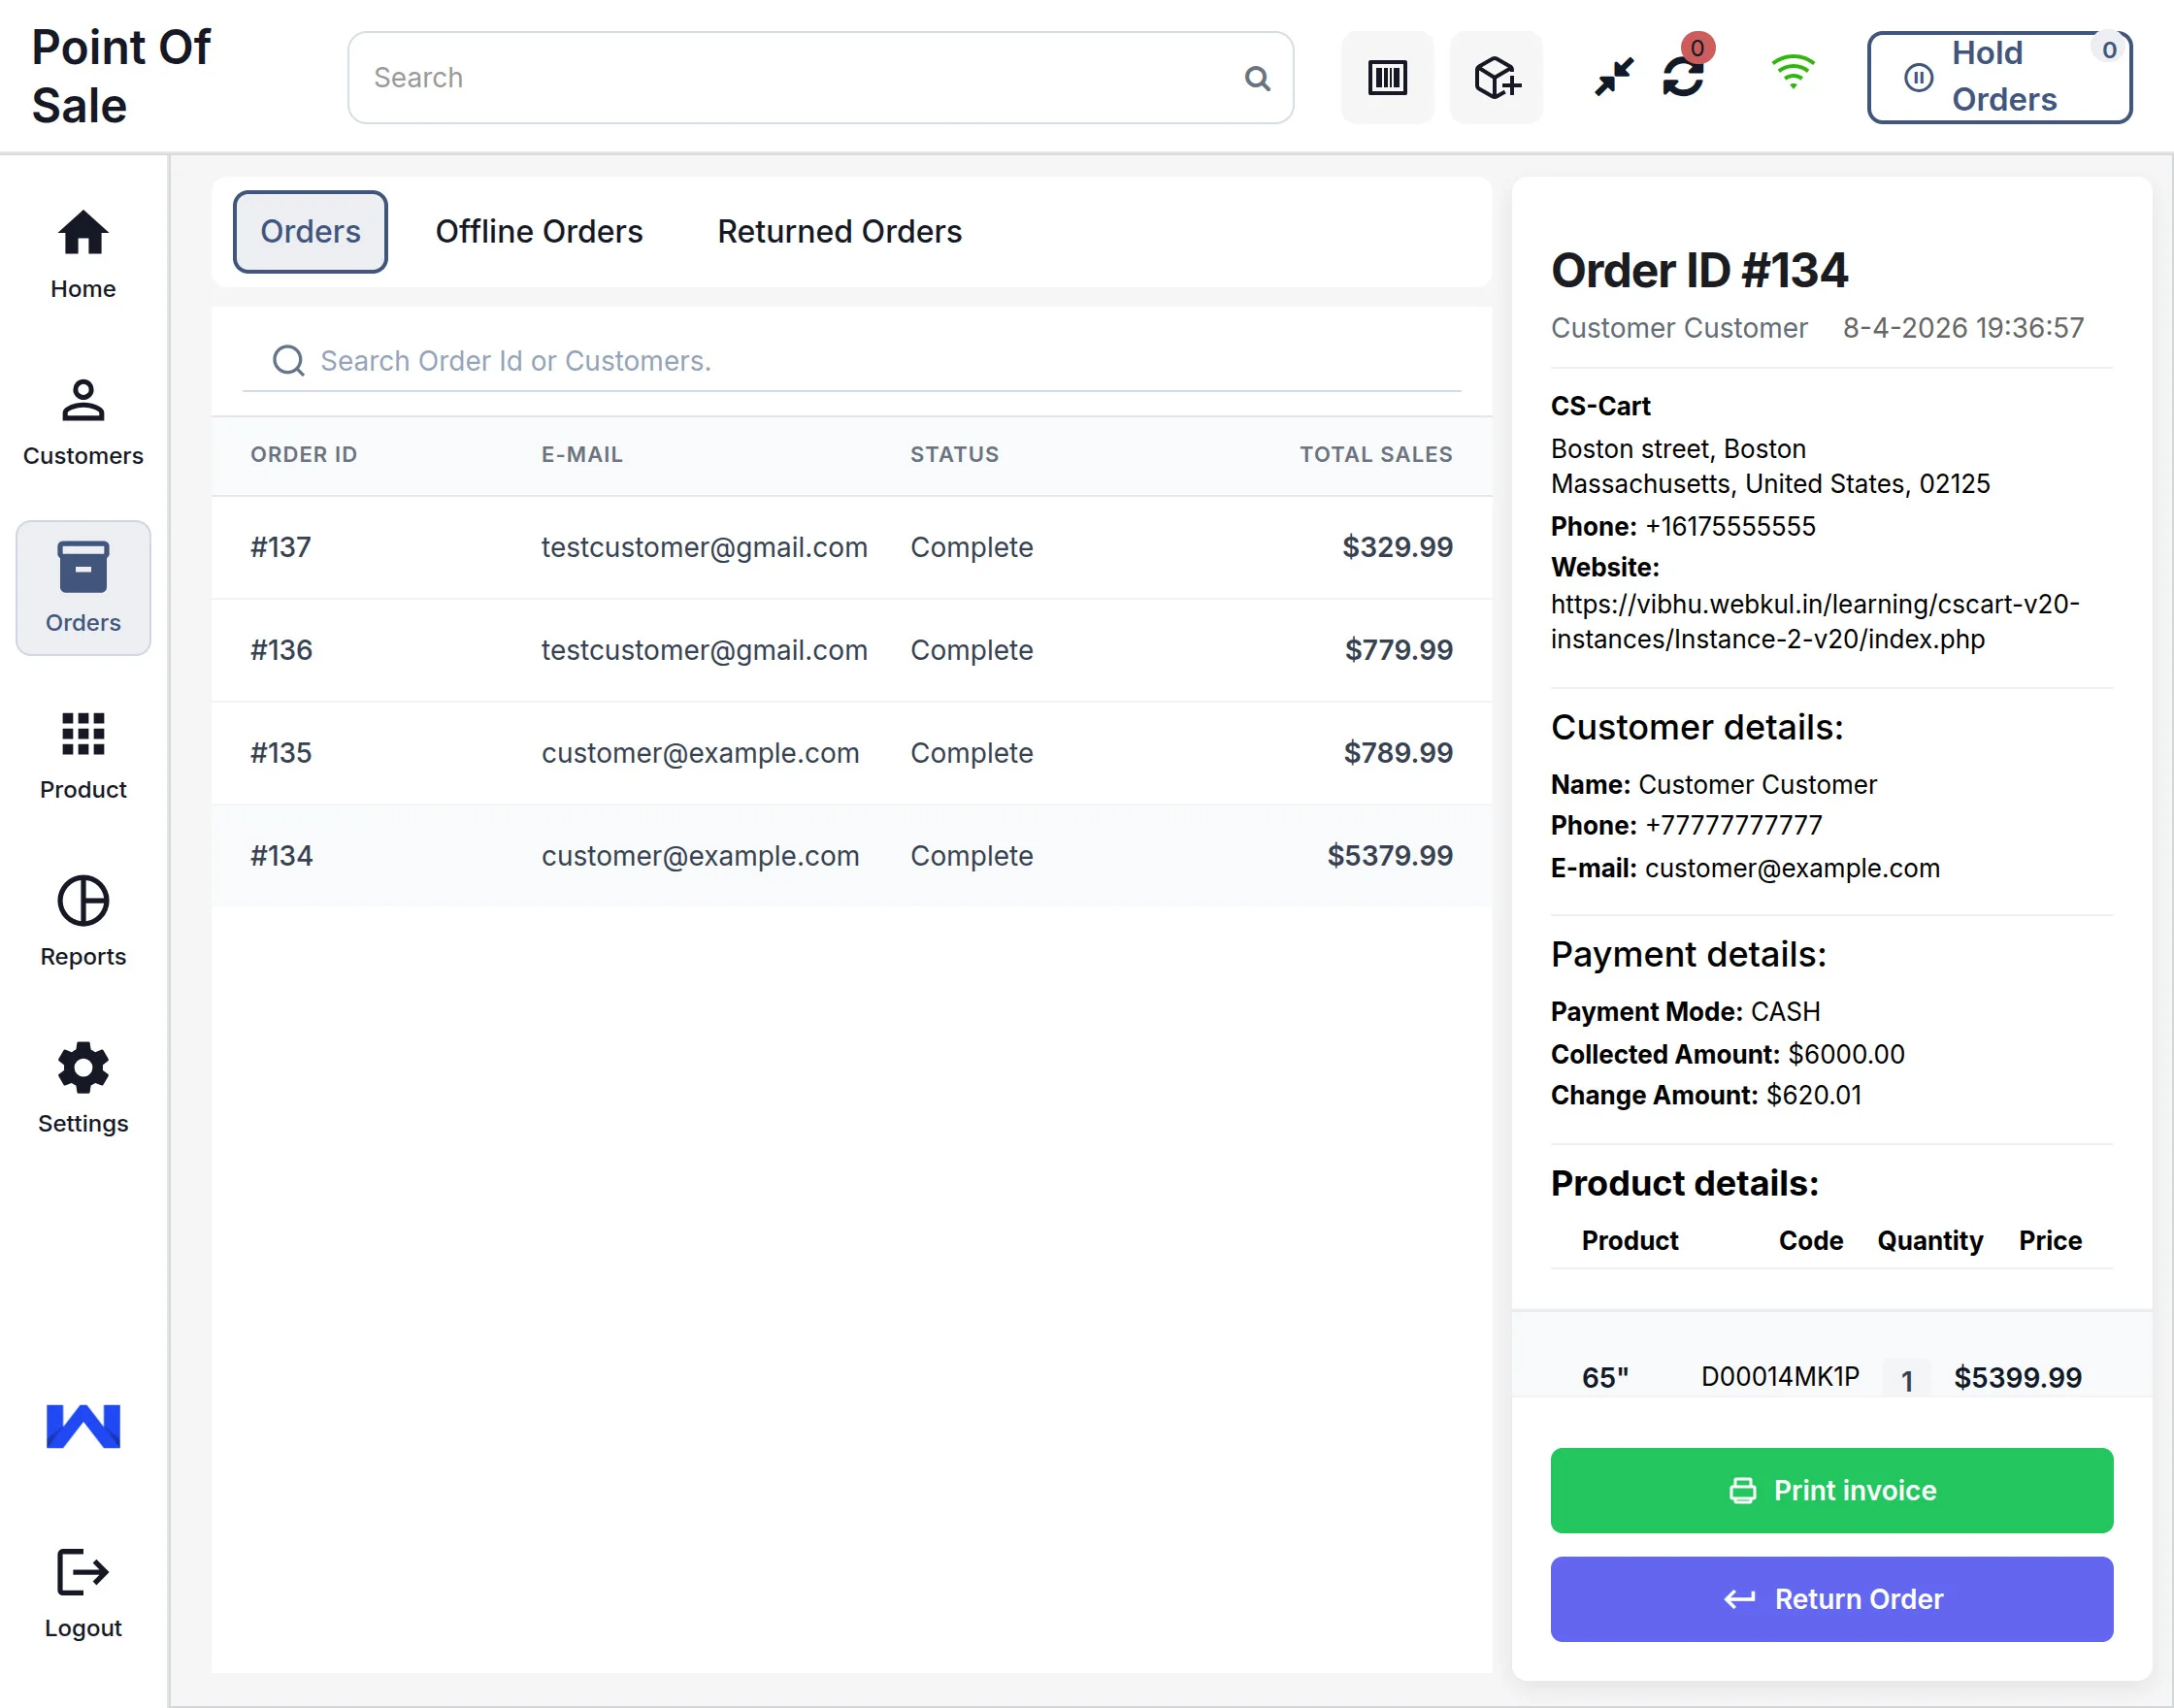
Order History
Online Order
Offline Orders:
All the orders placed in offline mode will be listed here if they are not yet synchronized. Once you are online, all these will be synced automatically & the list here will be empty.
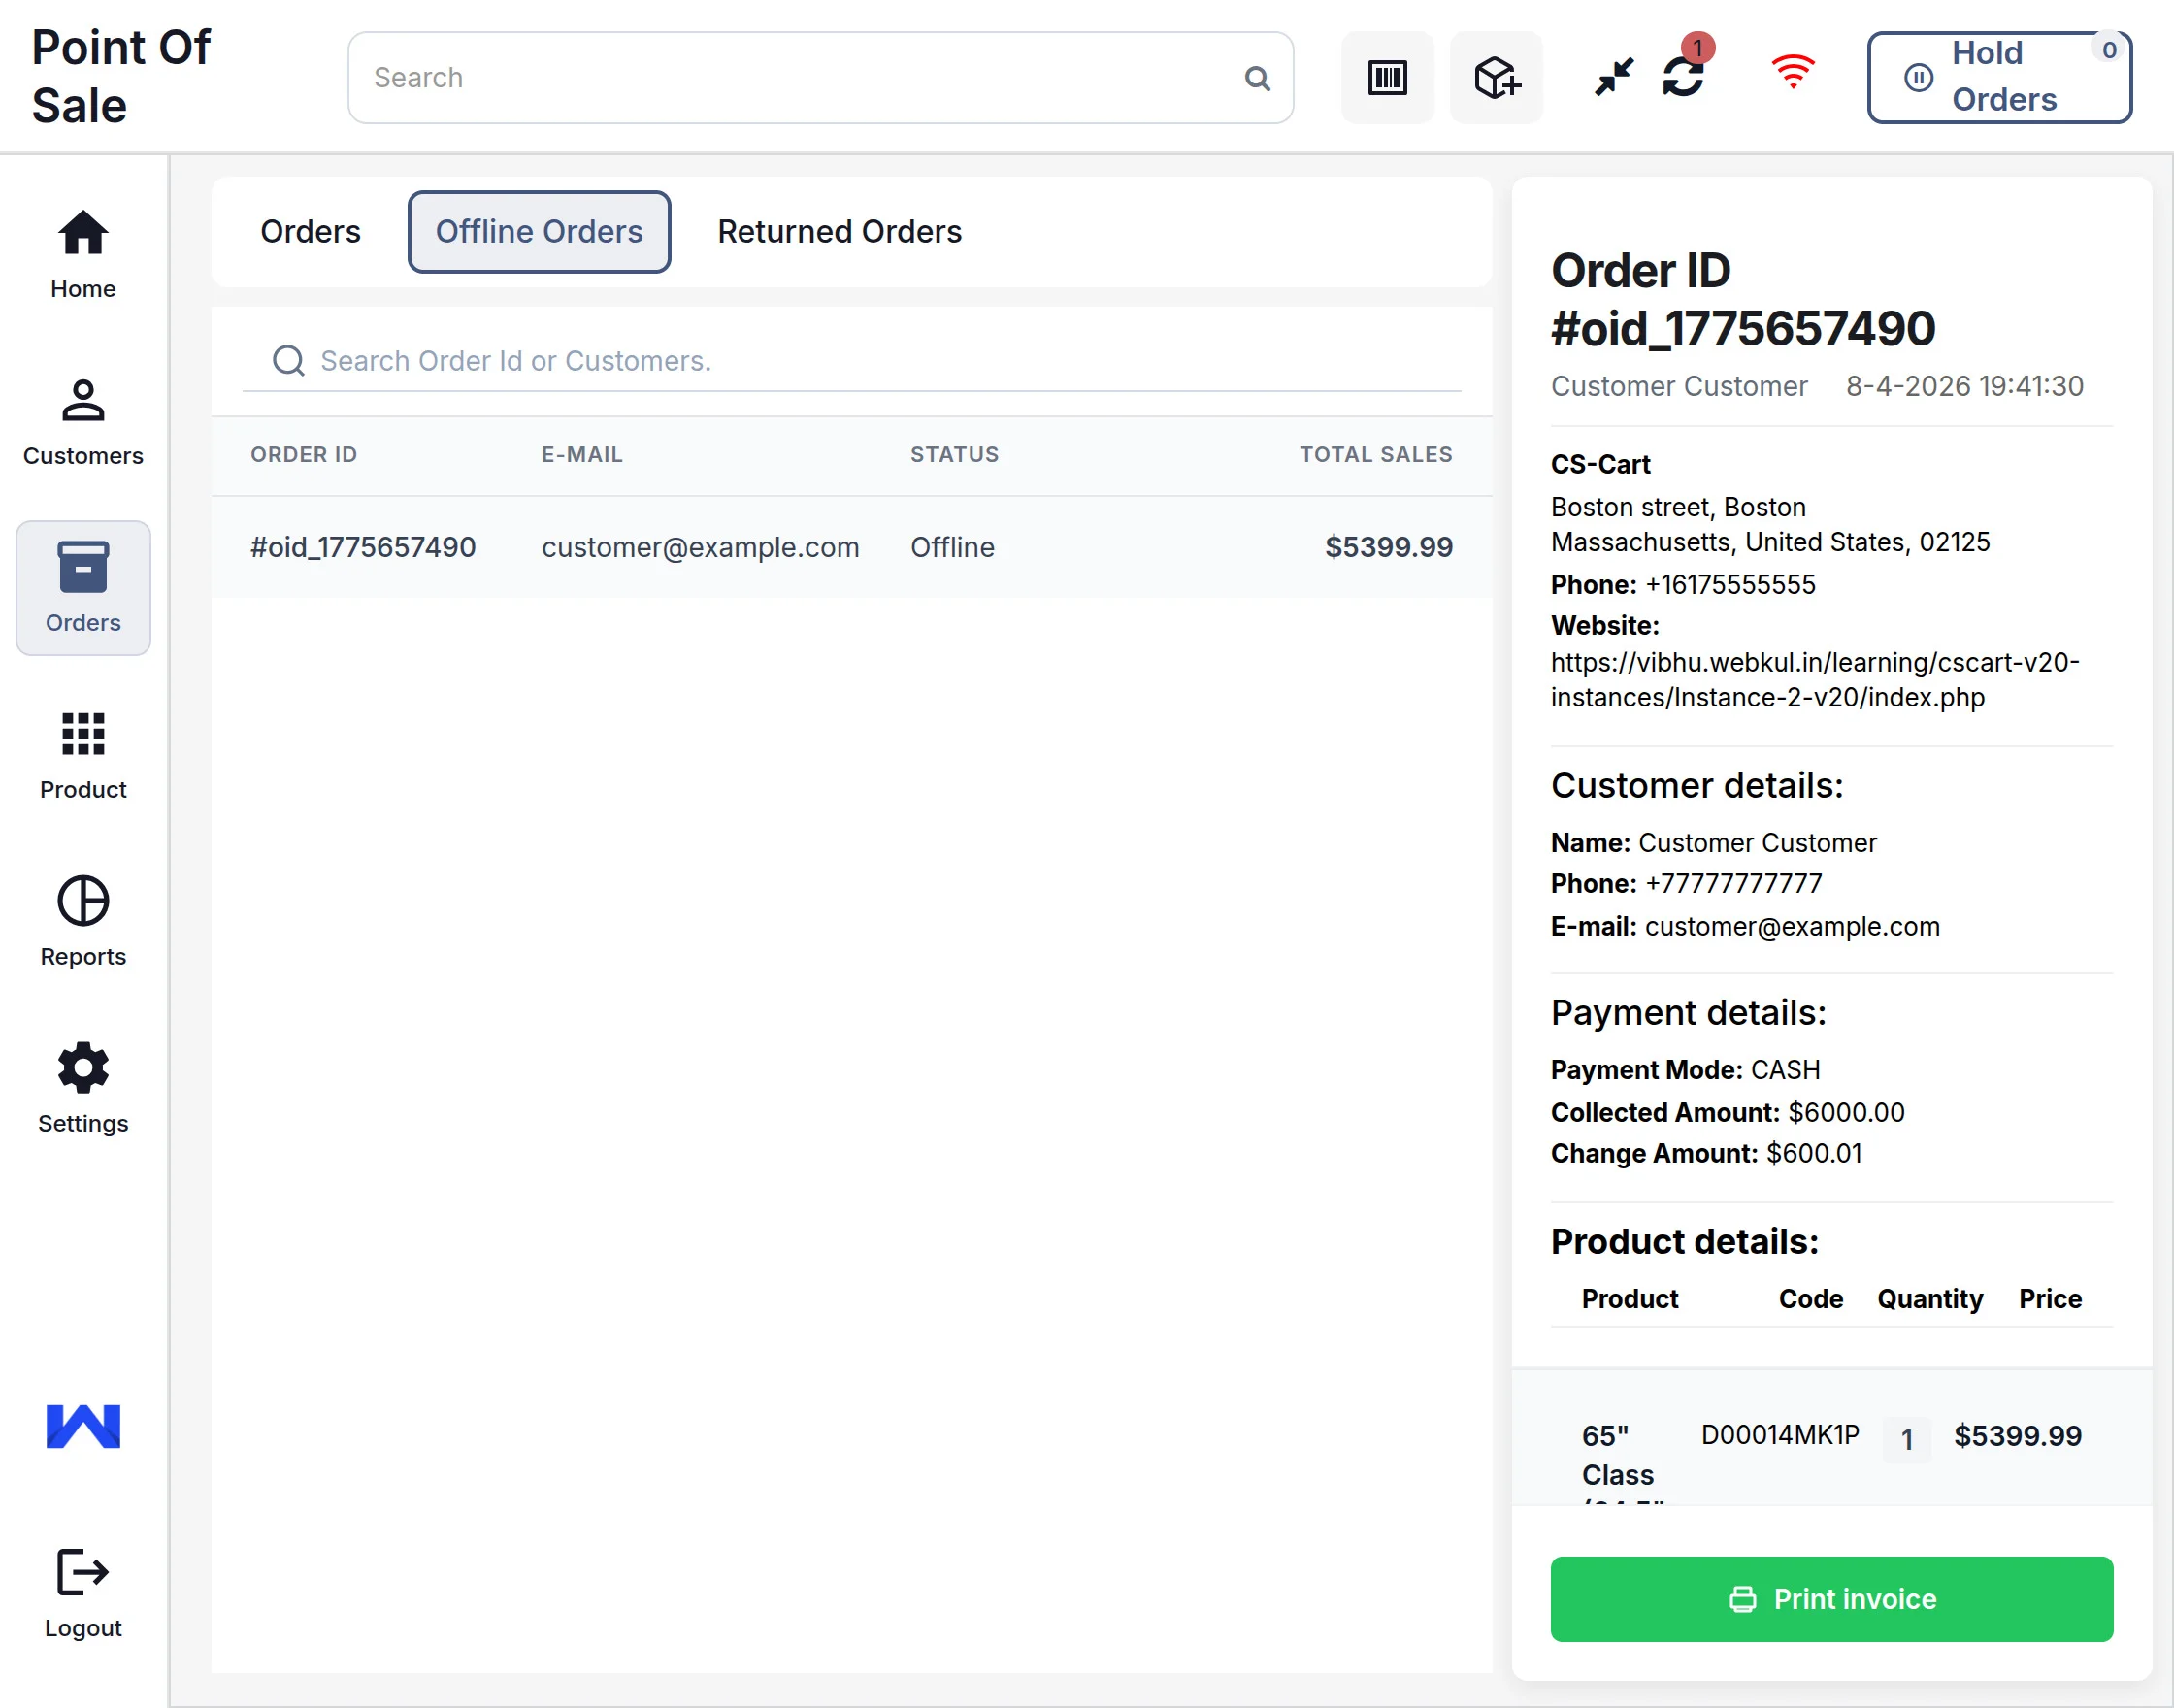
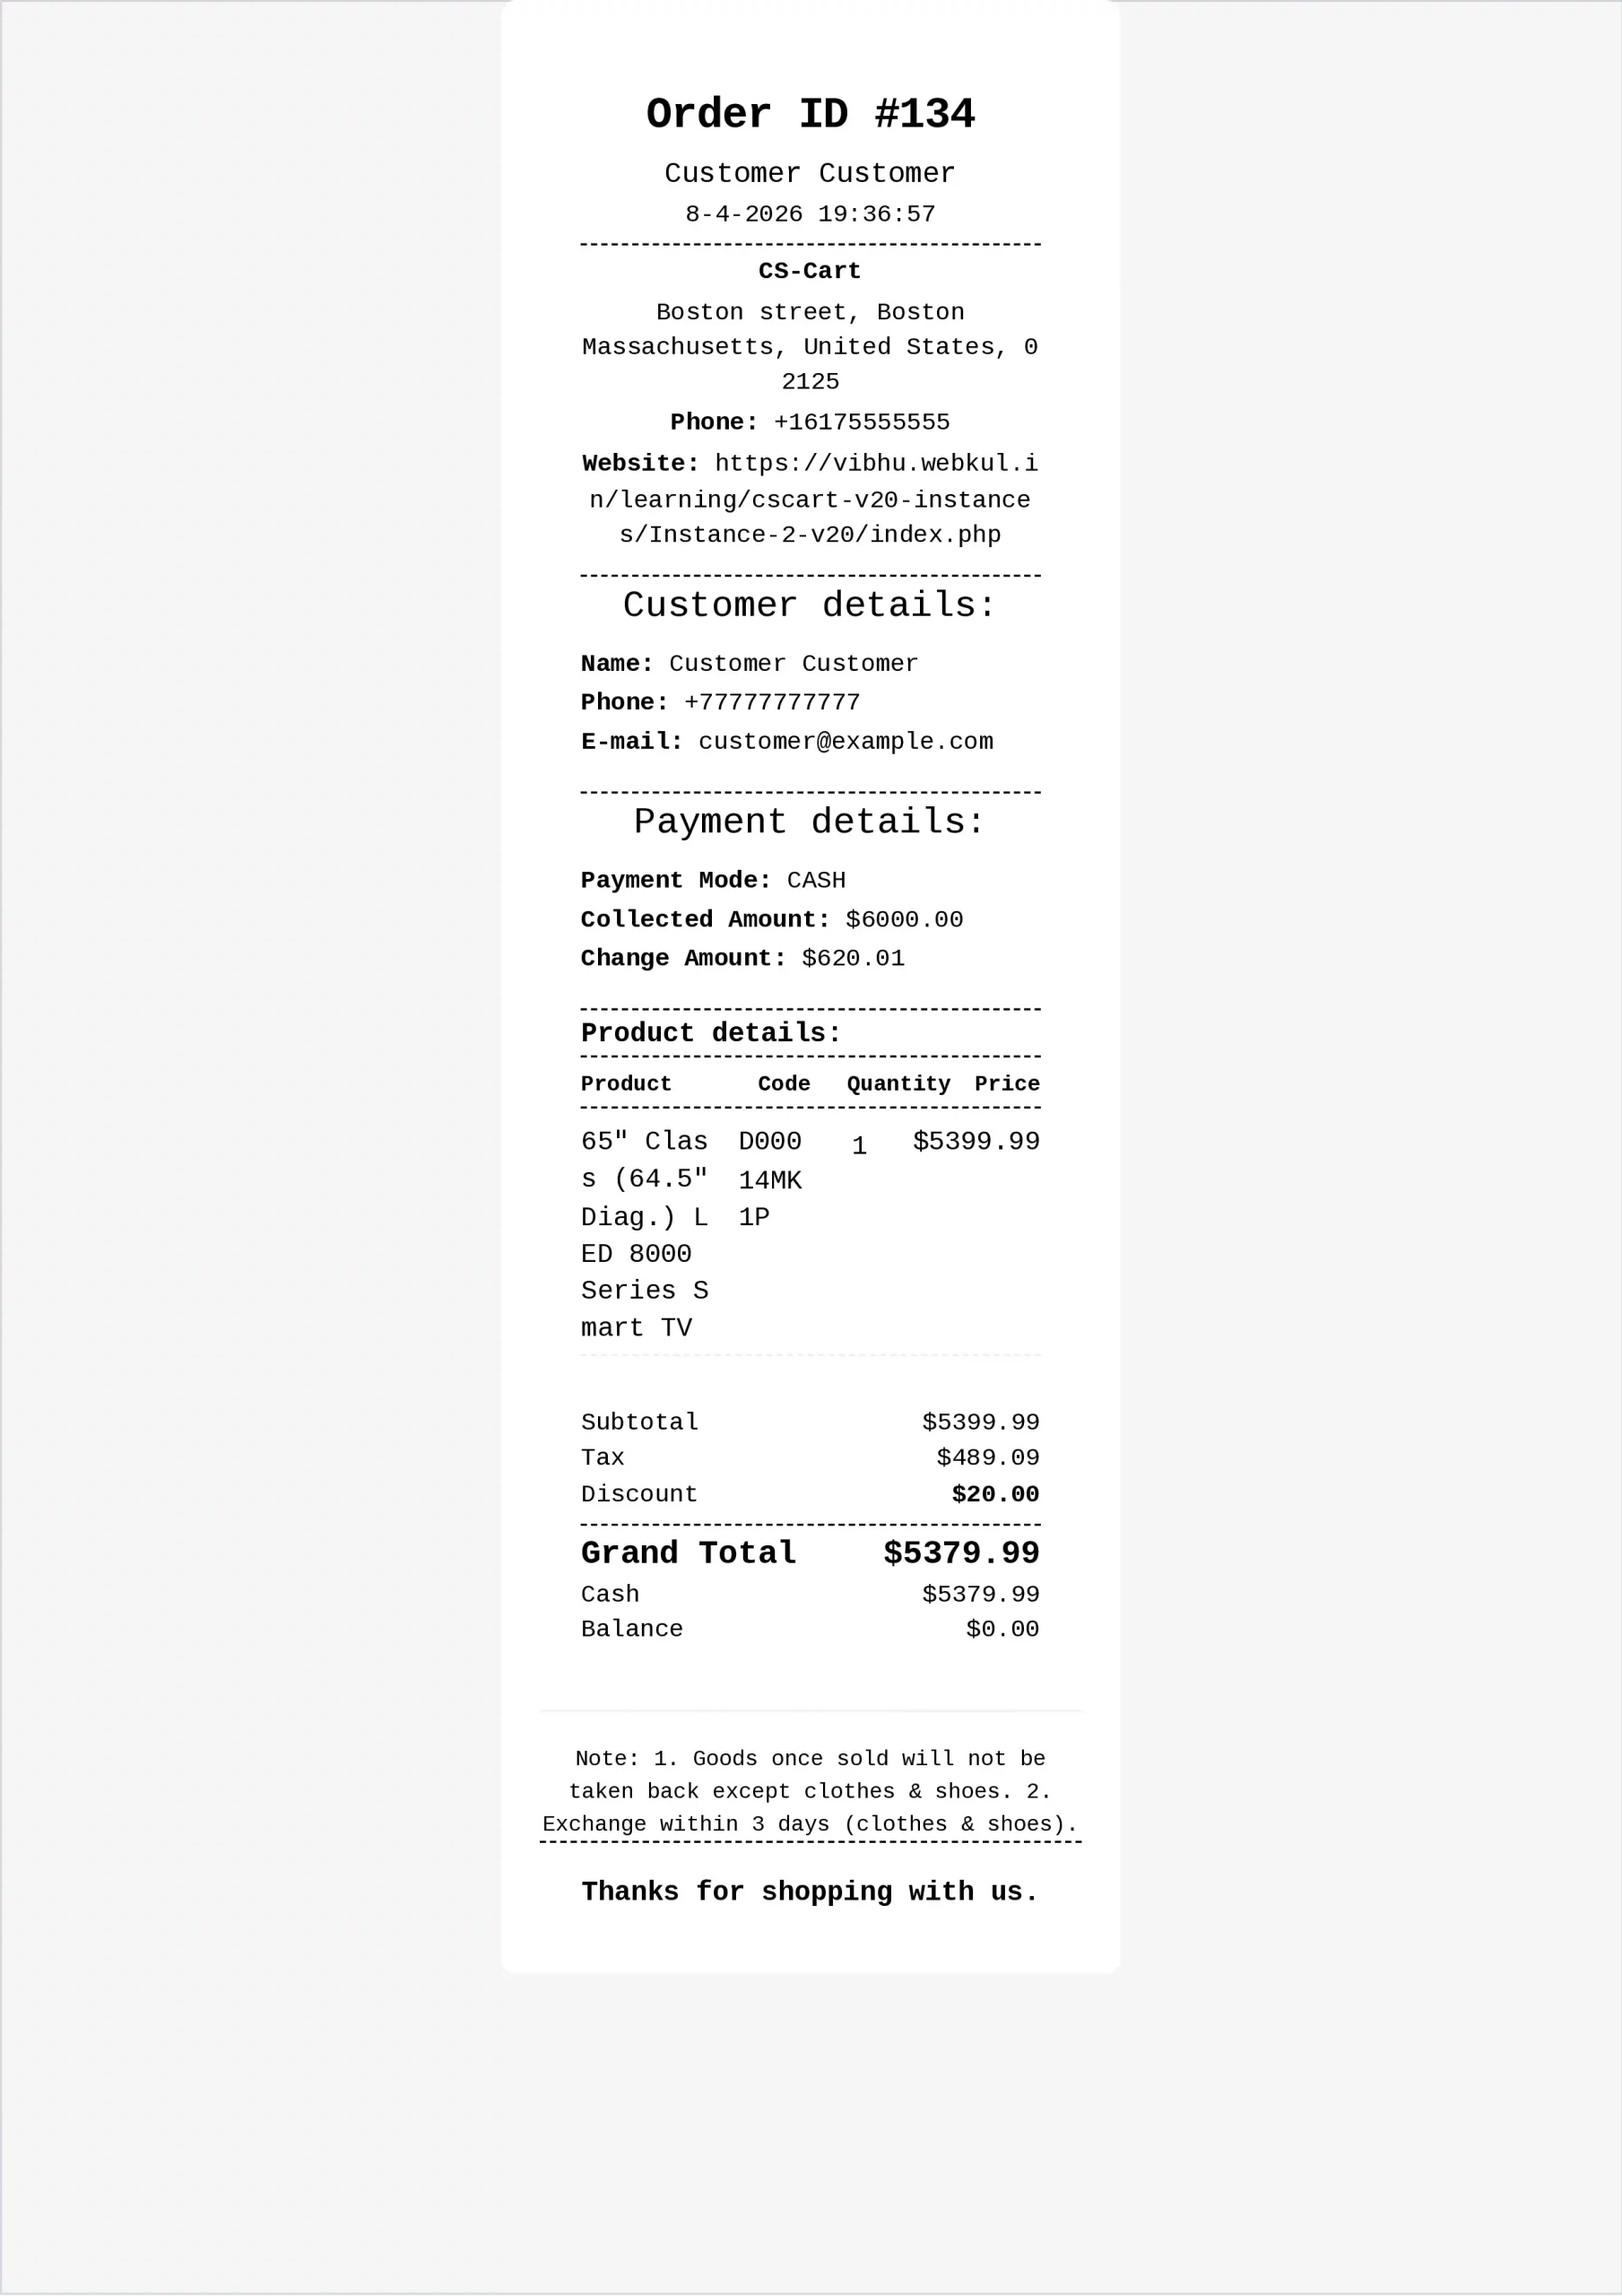
Click on the Print Invoice button to print the order invoice. The printed invoice will appear as shown below.
Returned Orders:
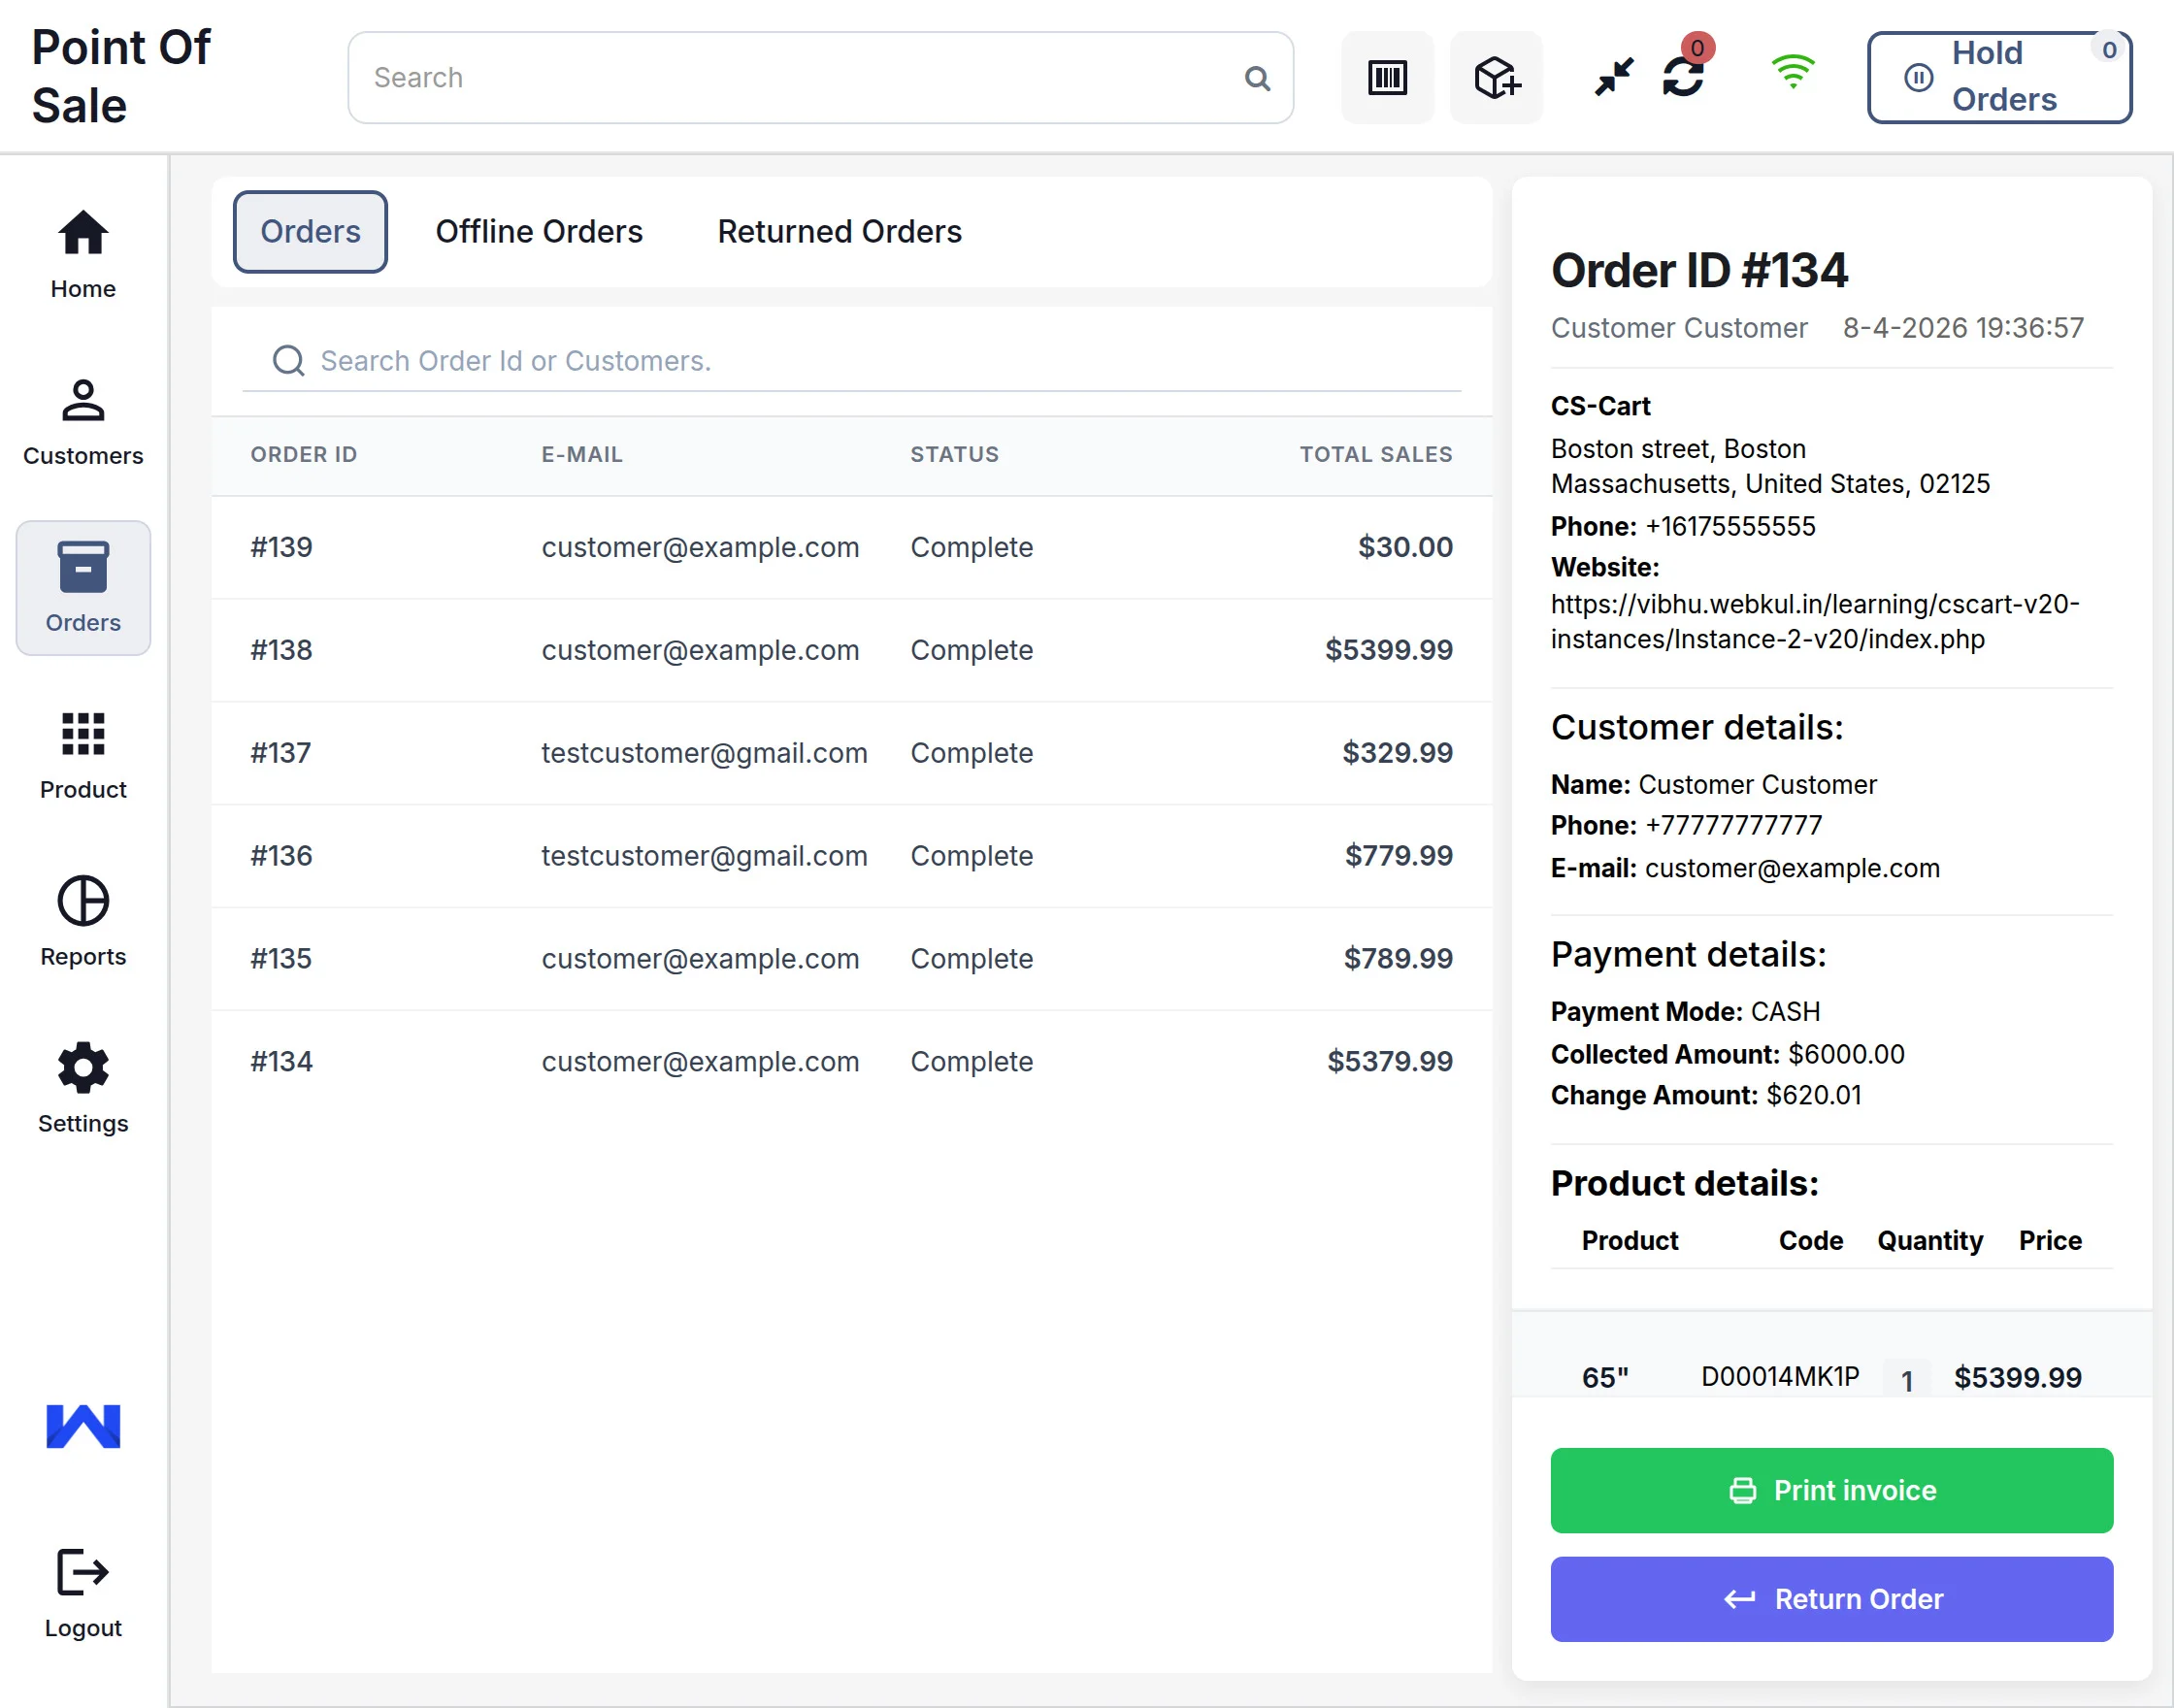
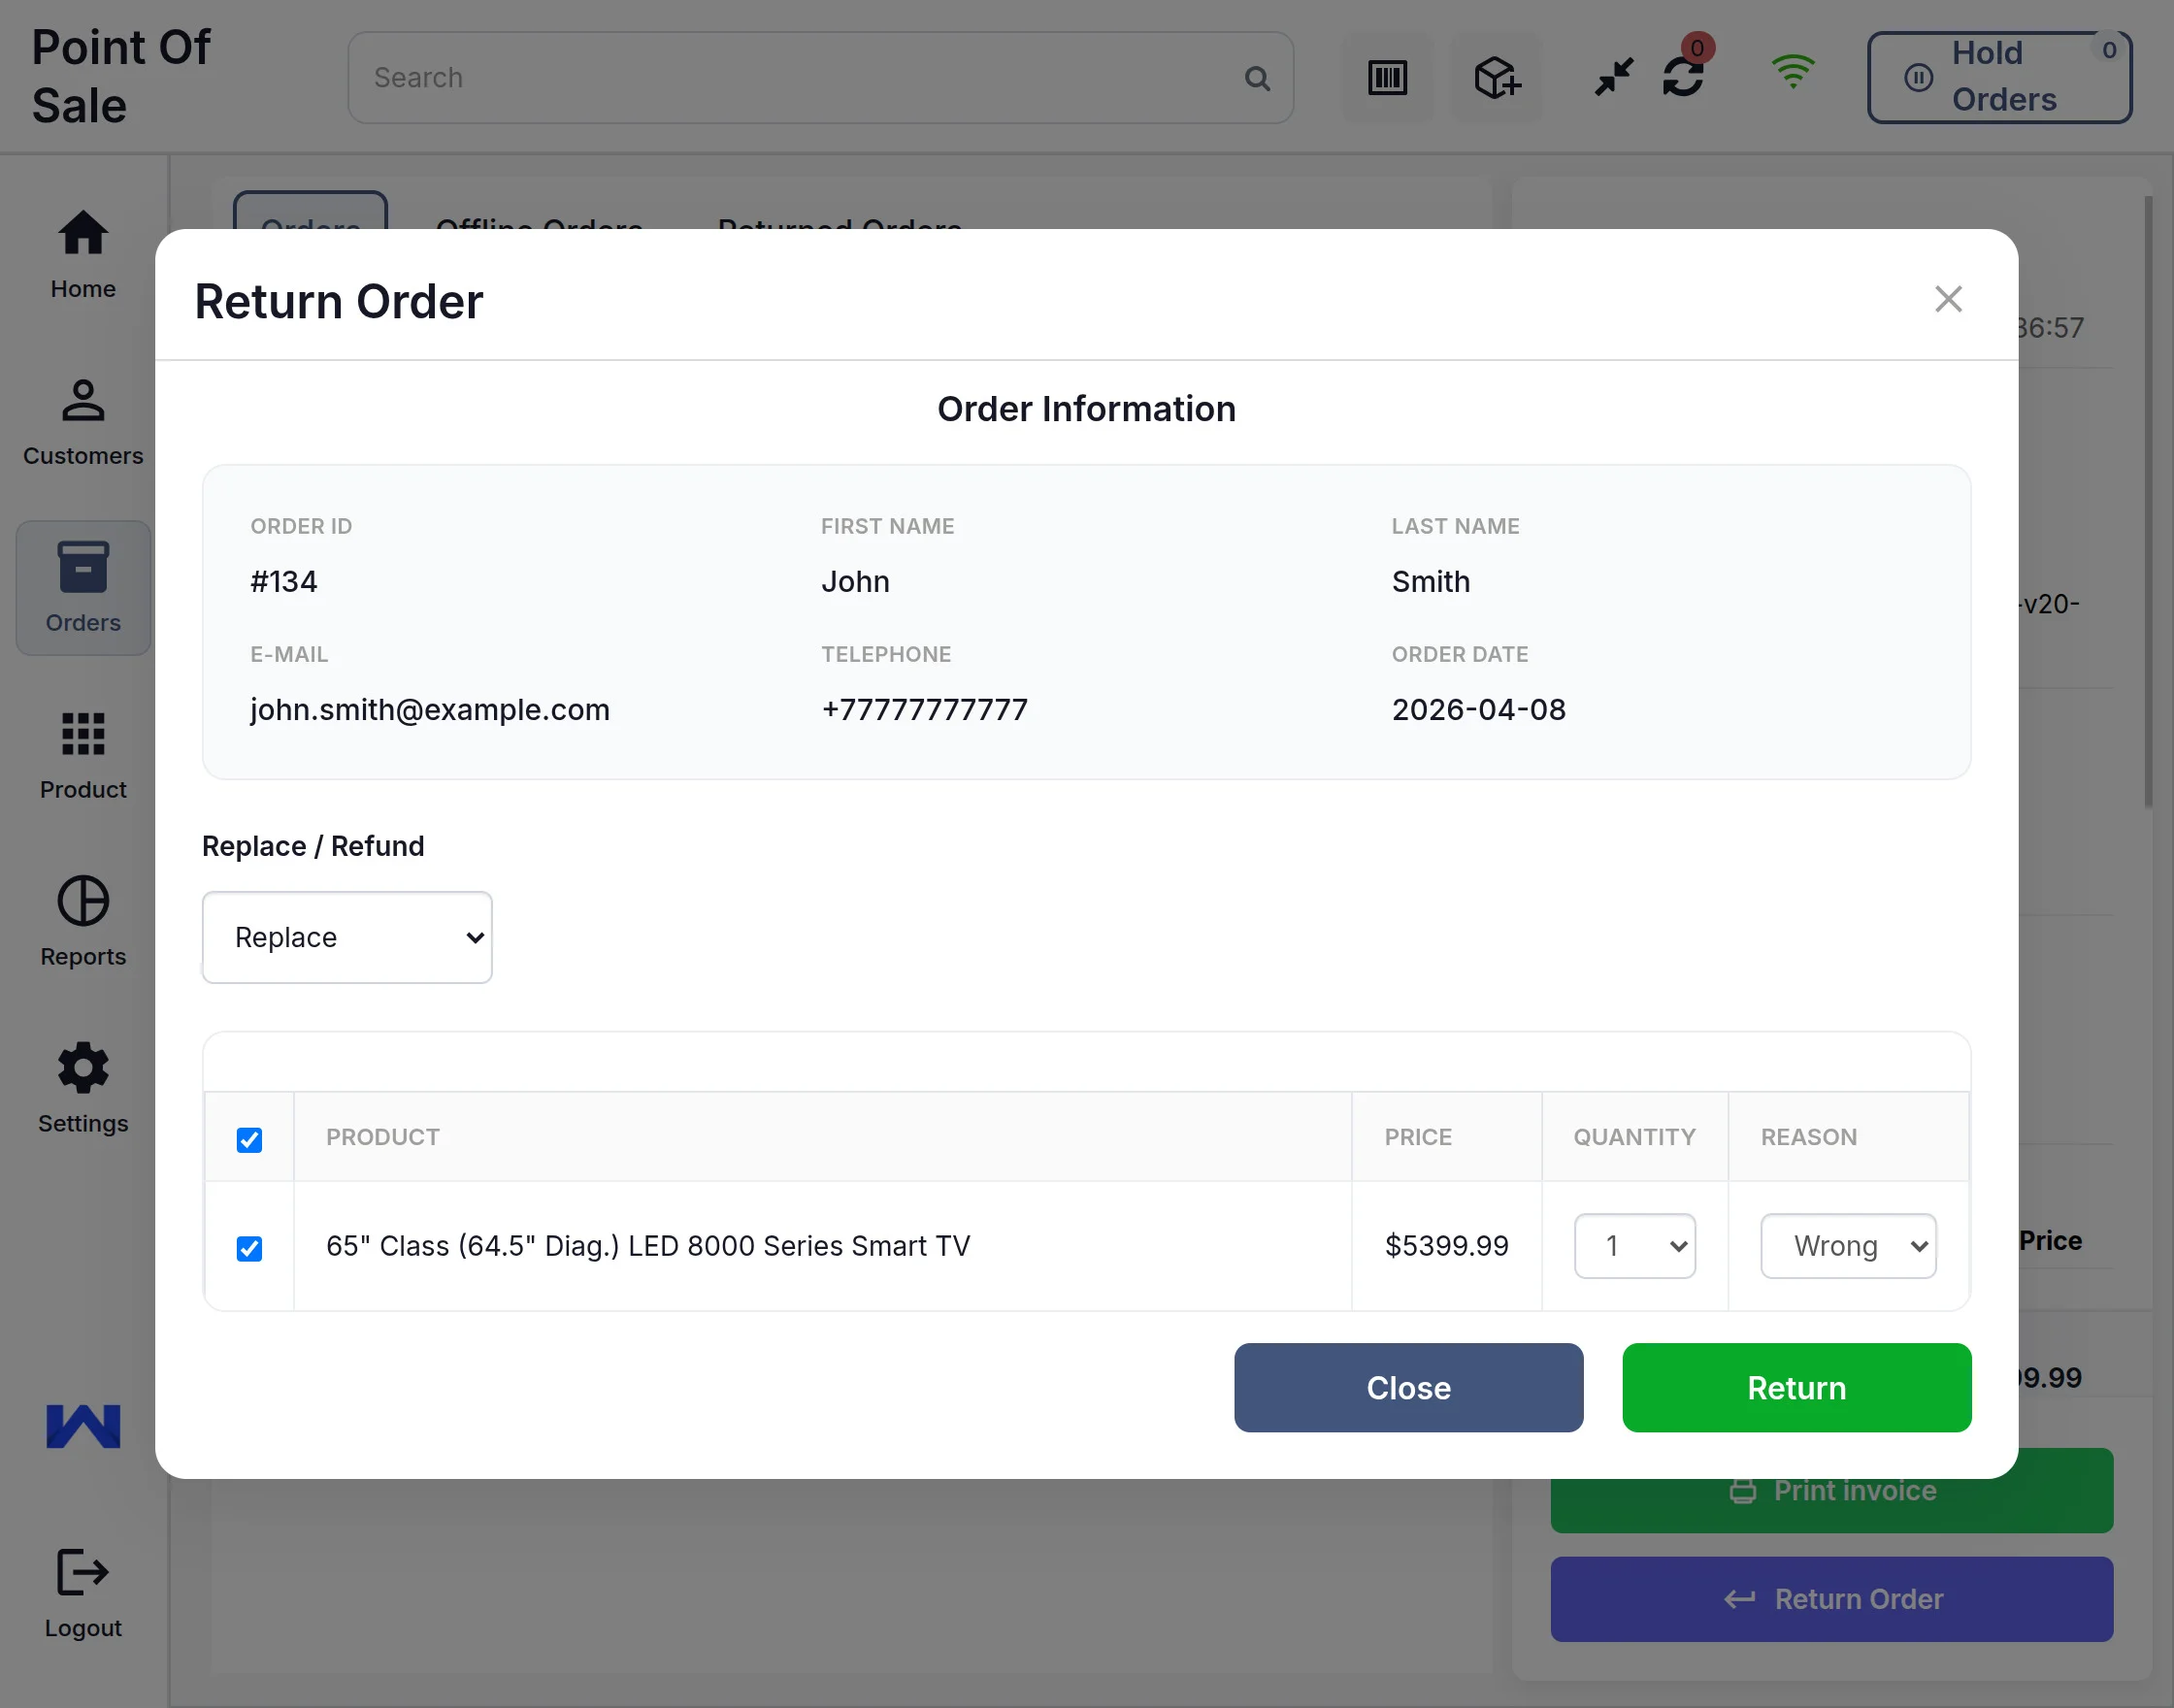
Here are the steps to return an order:
- Select the order and open it
- Click on the Return Order button
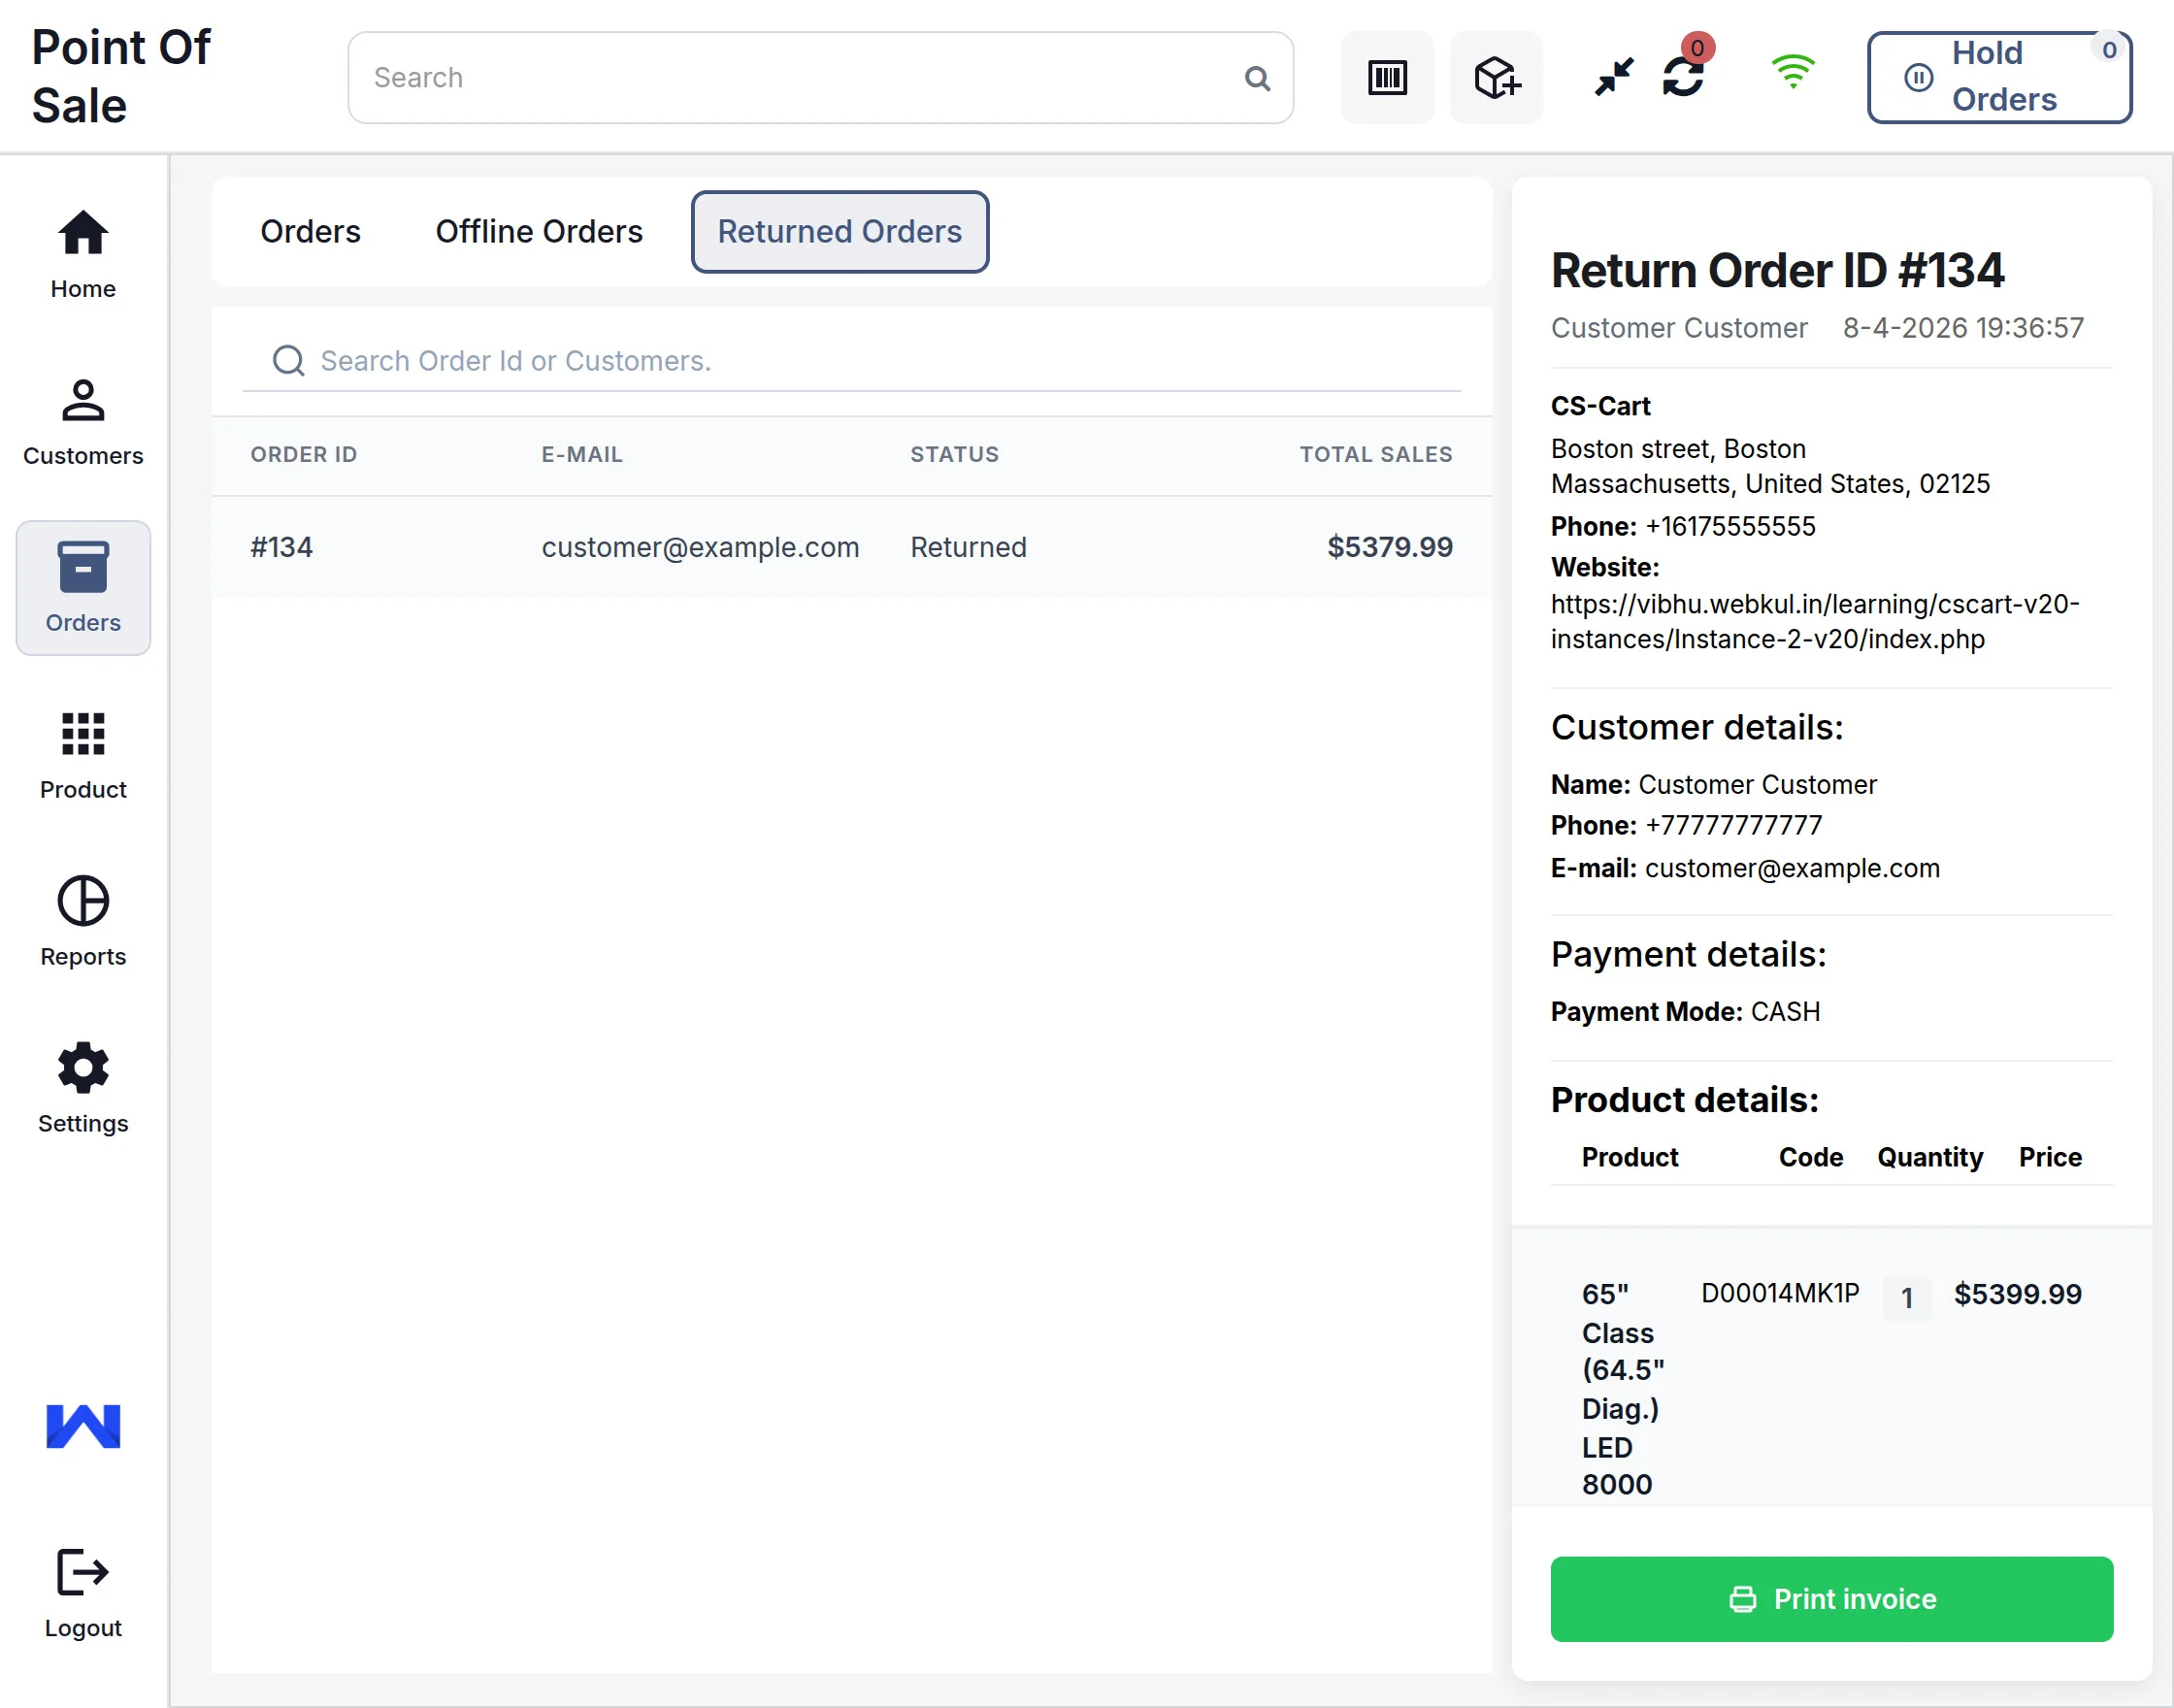
The customer can check the return order history in this tab and also view the invoice for the return.
Note: Make sure the default RMA add-on is activated for order returns.
Cash Drawer / Reports :
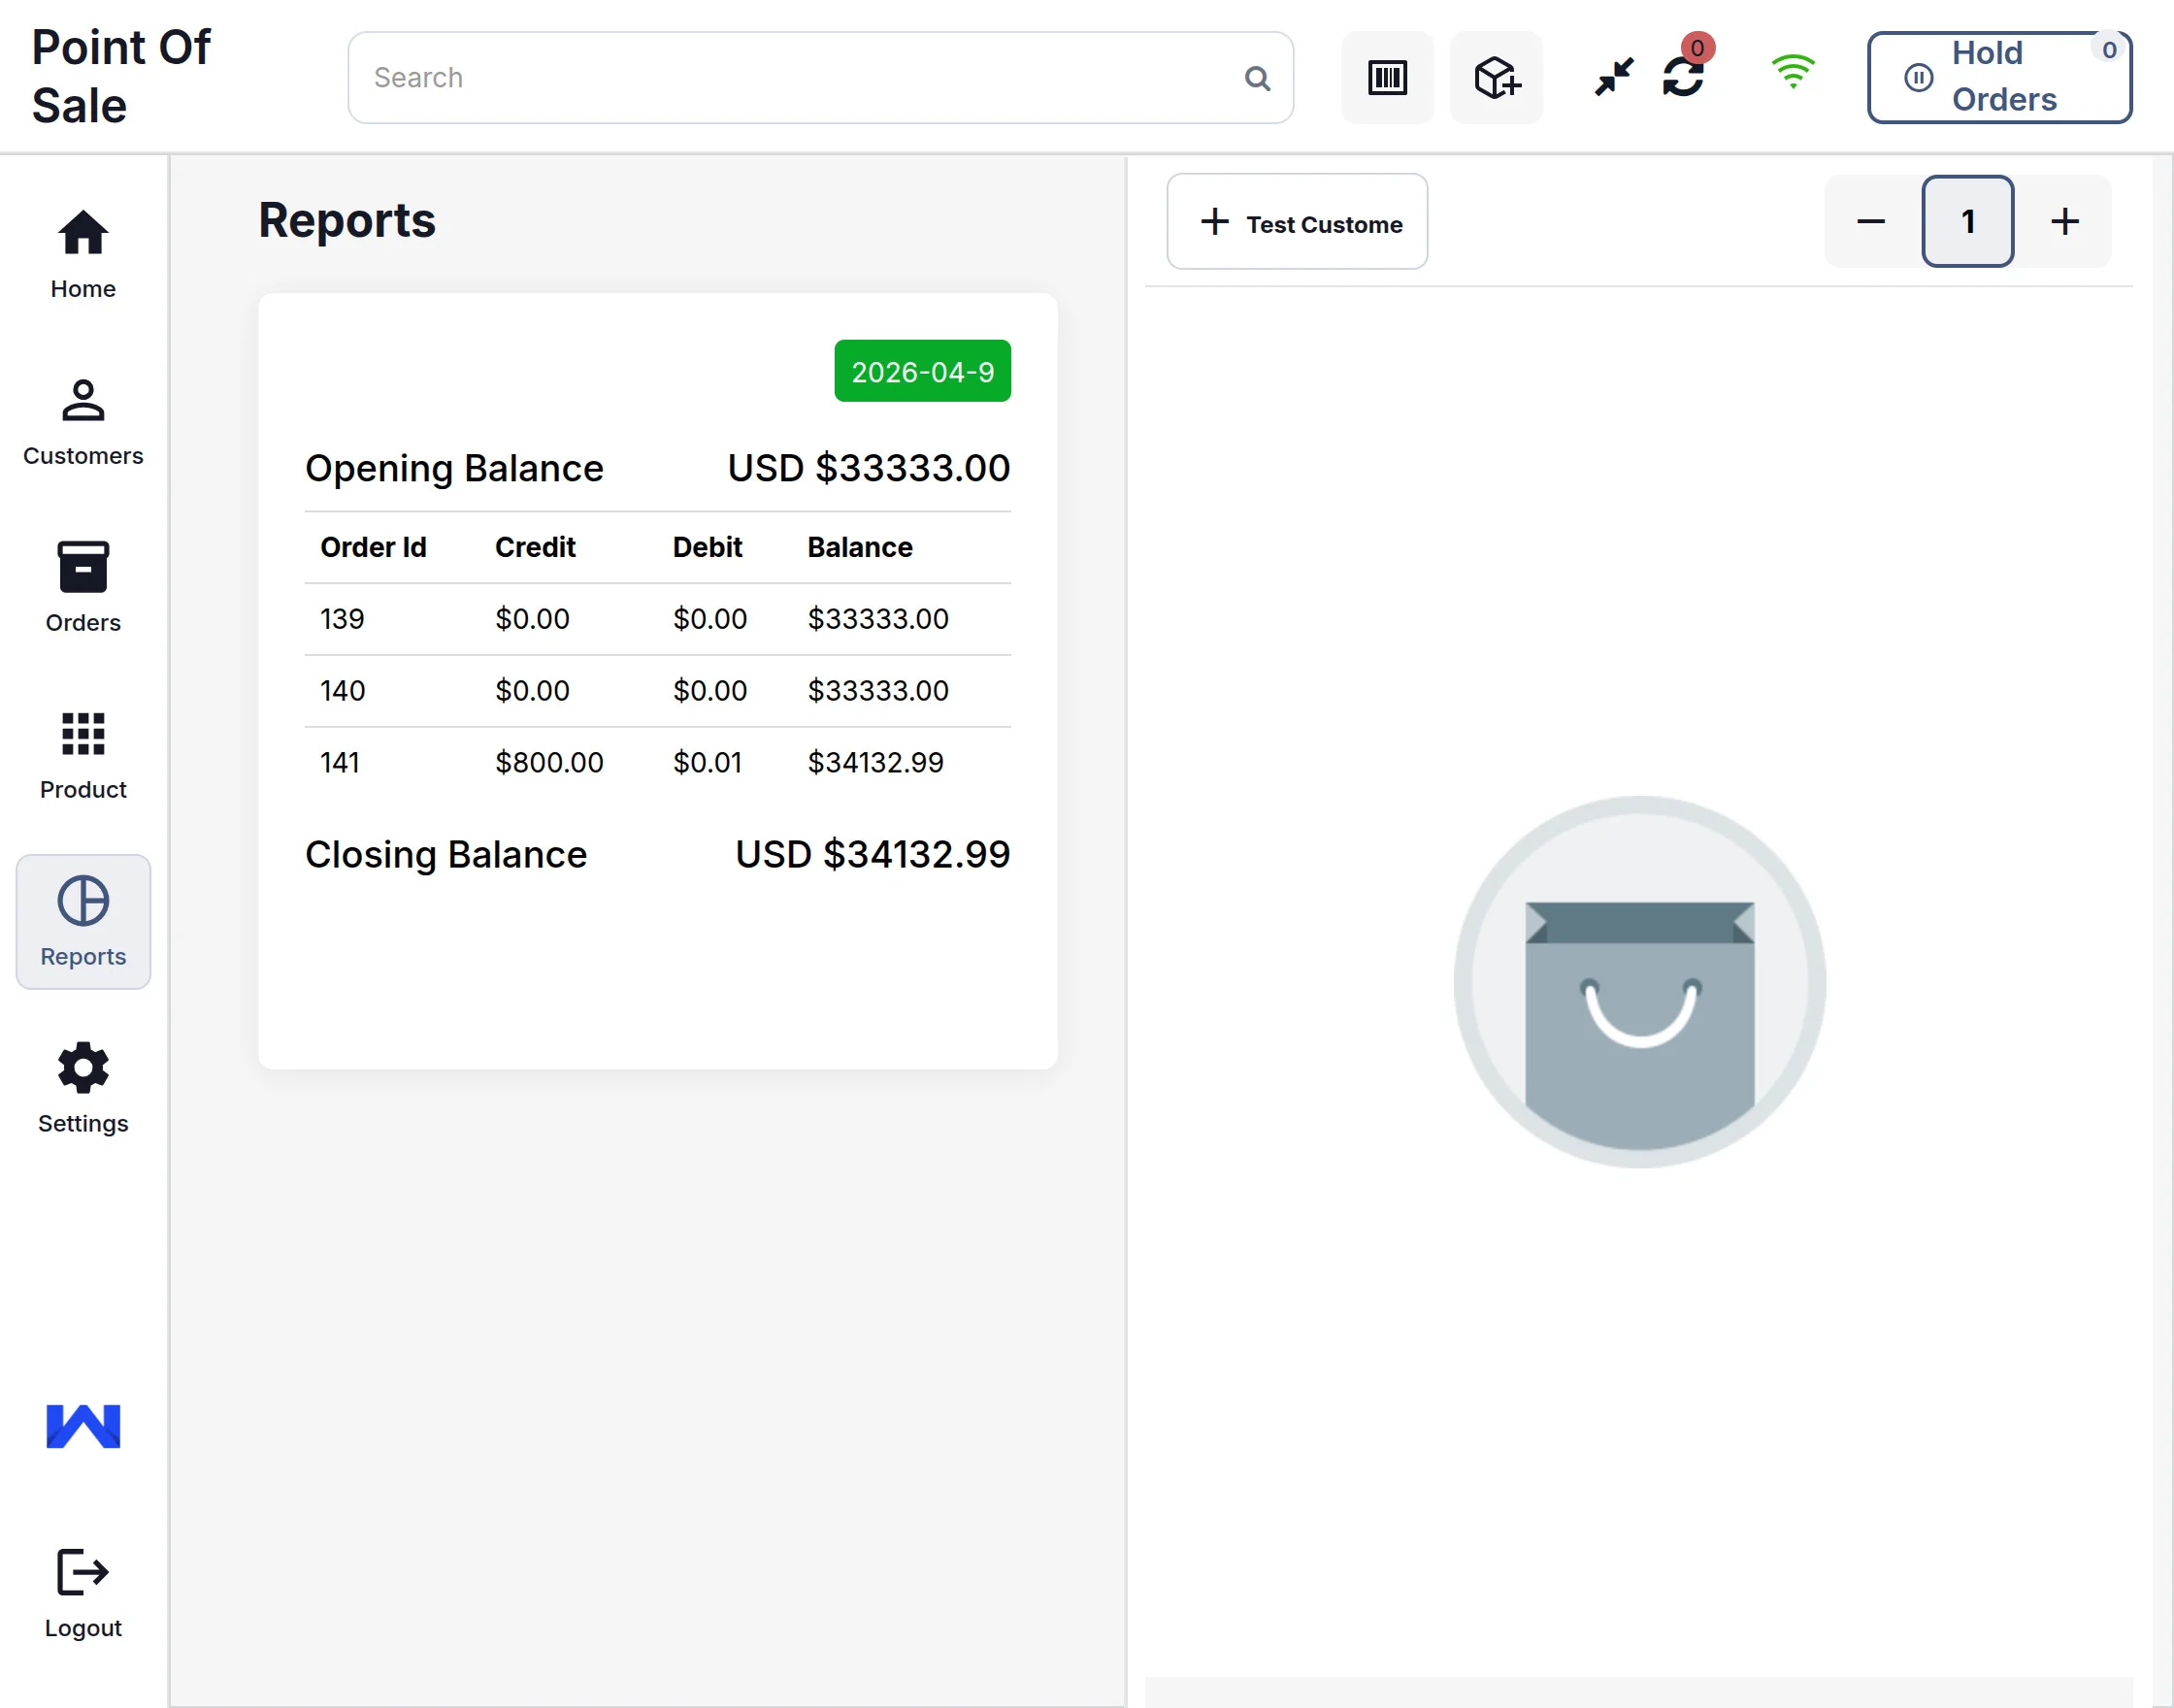
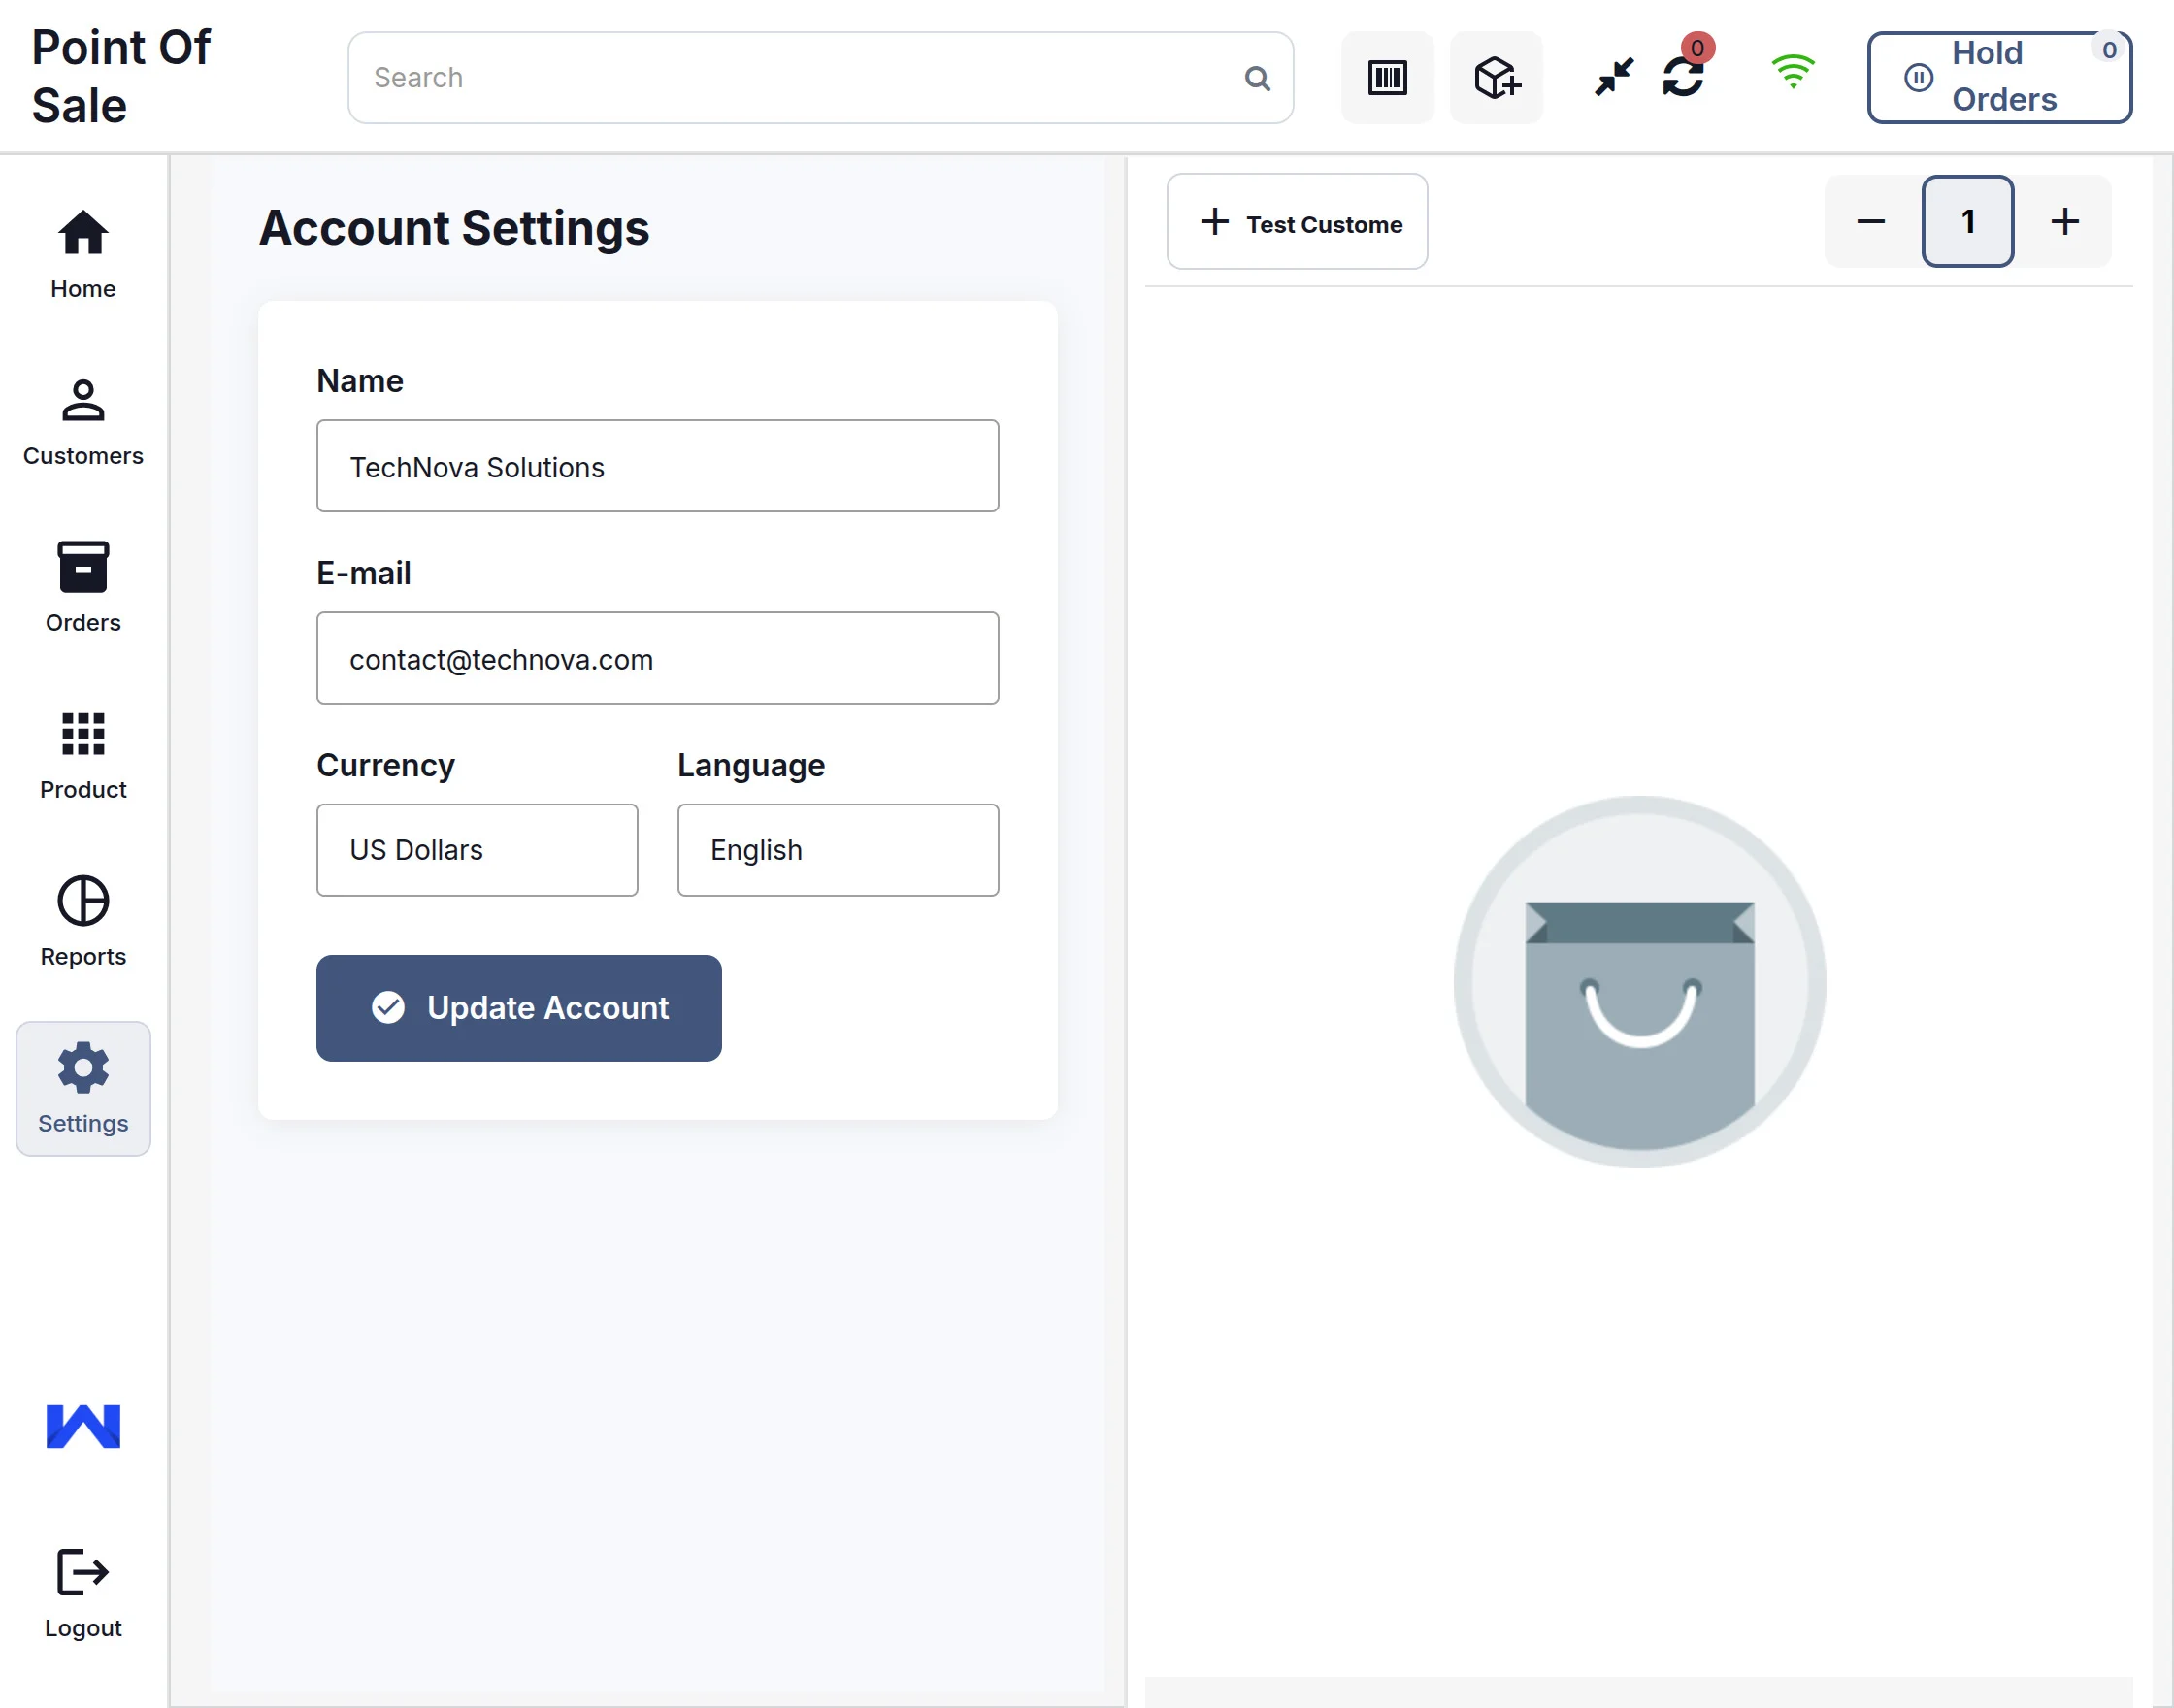
Settings:
The POS user can edit their details from the settings, such as currency and language.
Product Details
Now the users can check the details of any individual product by clicking on the detail icon button.

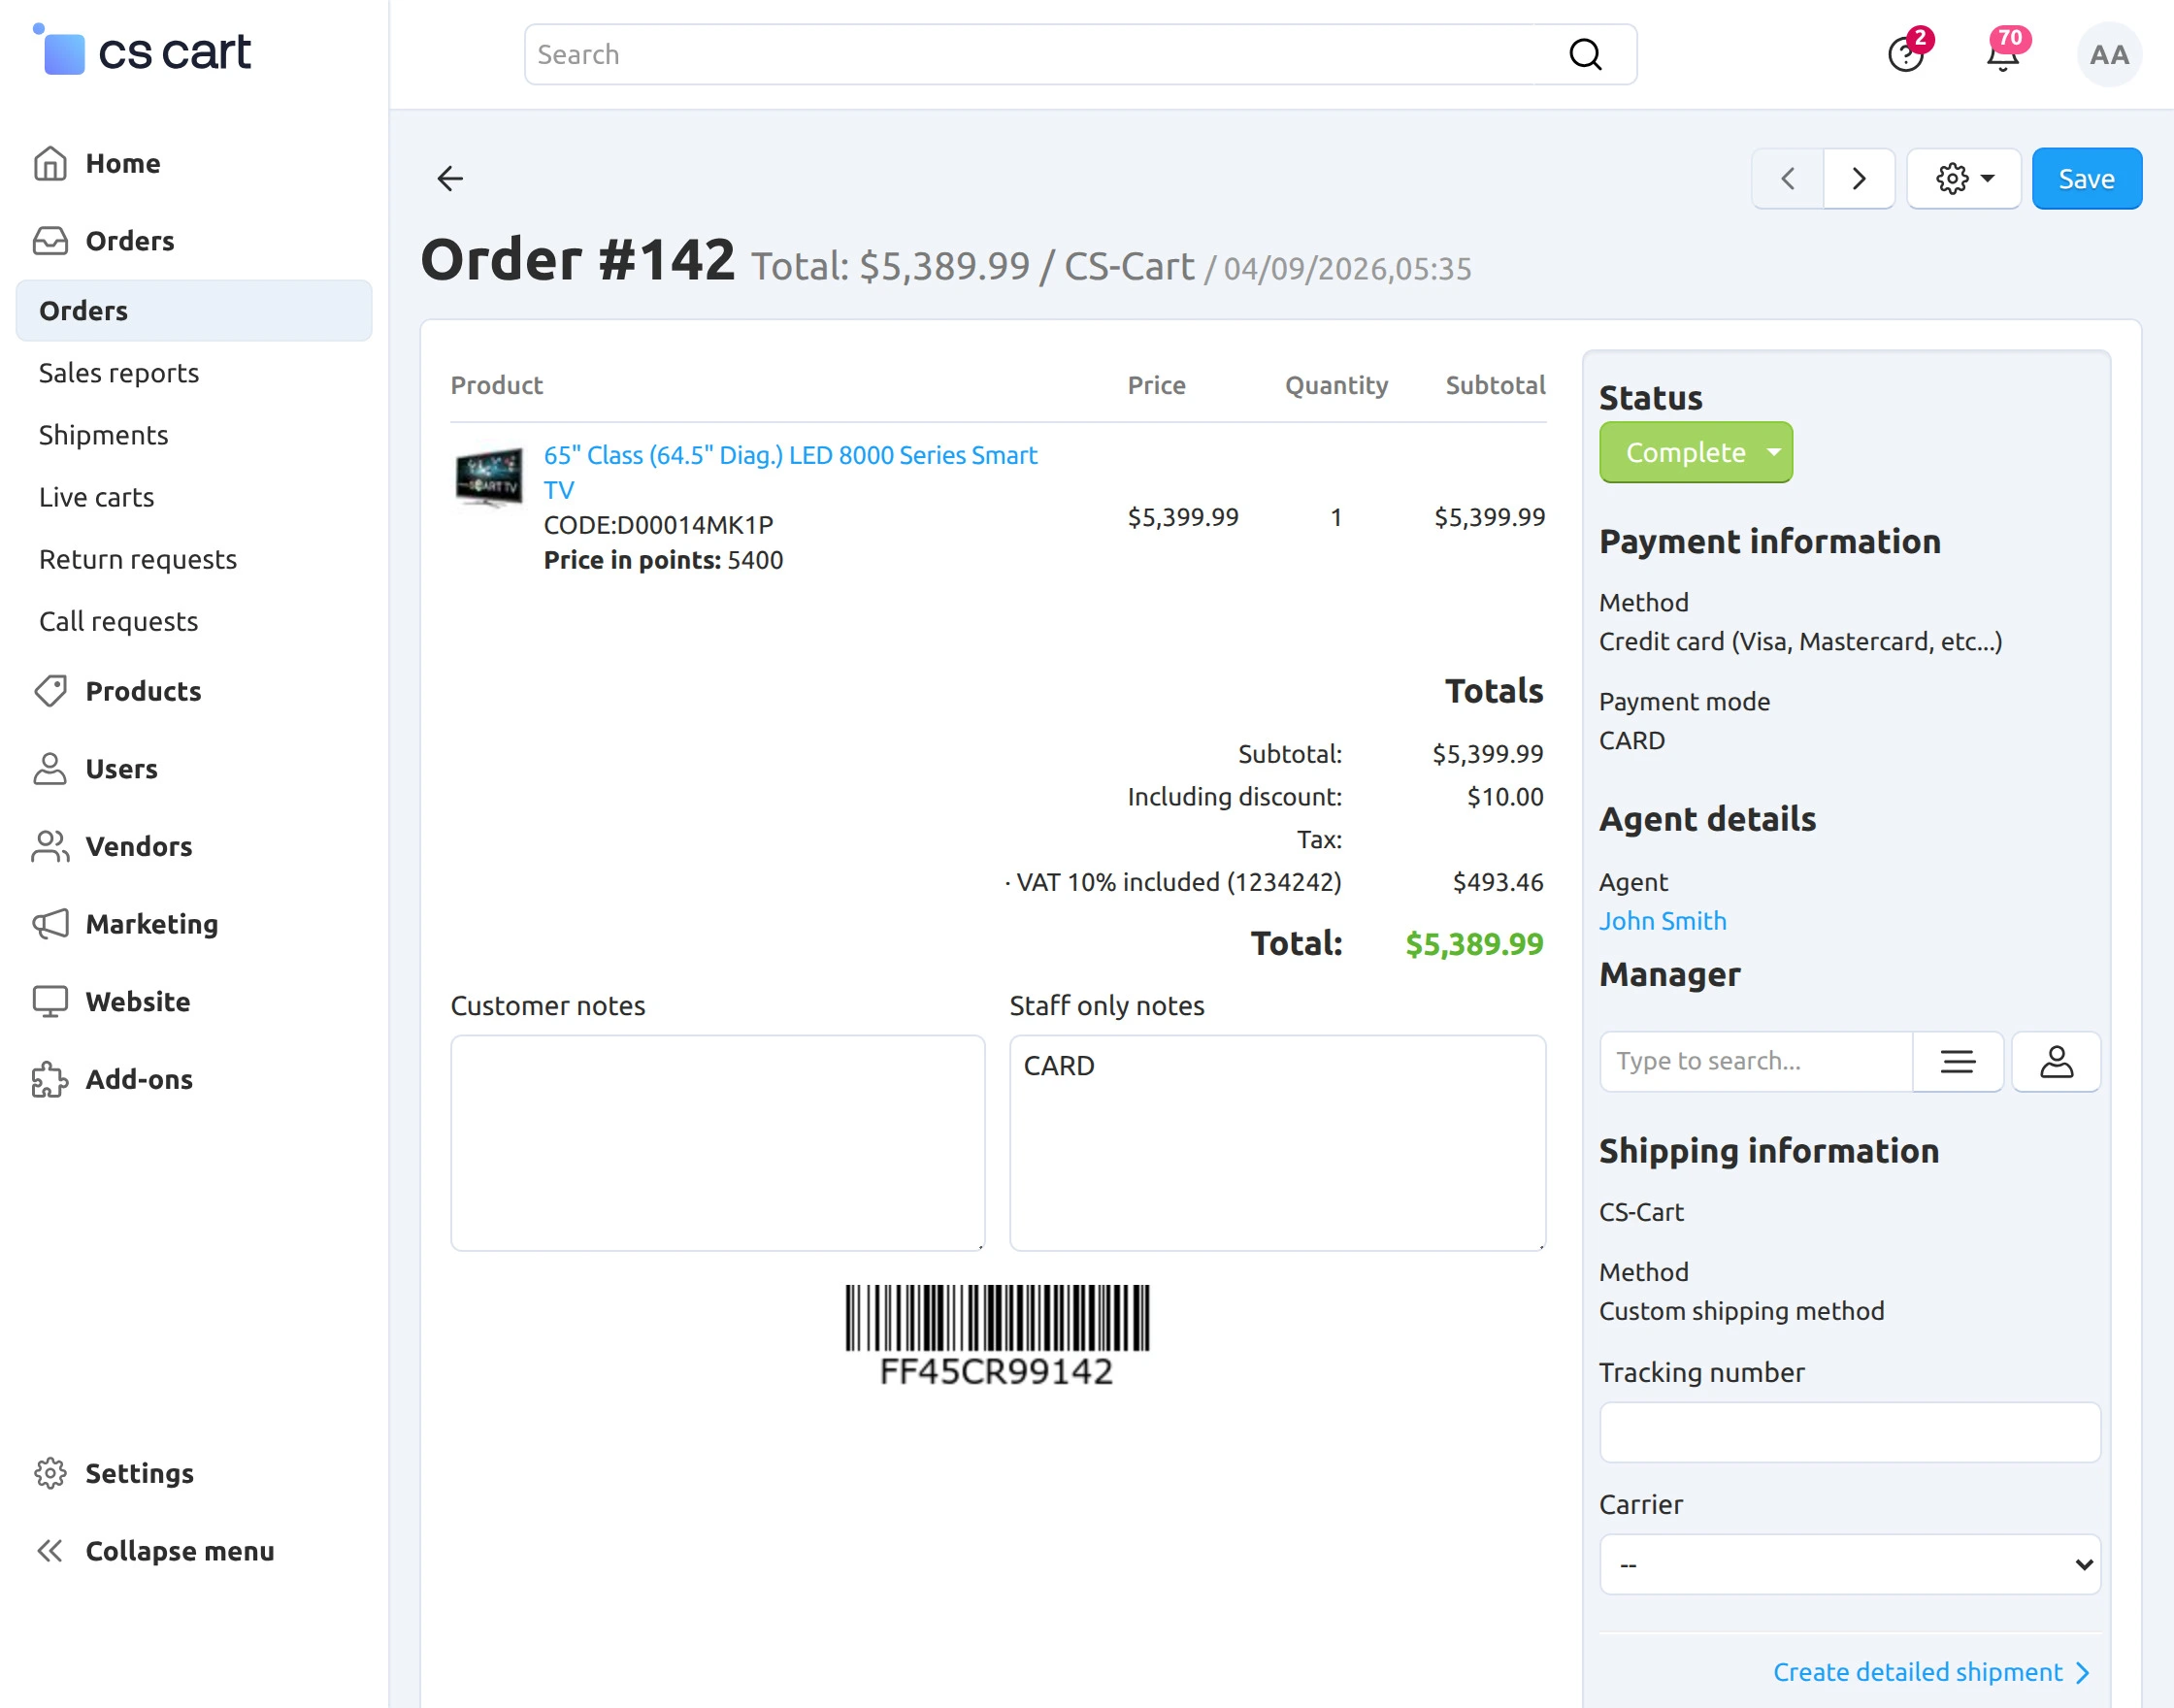
Orders View & Synchronization
Orders details page at the backend-
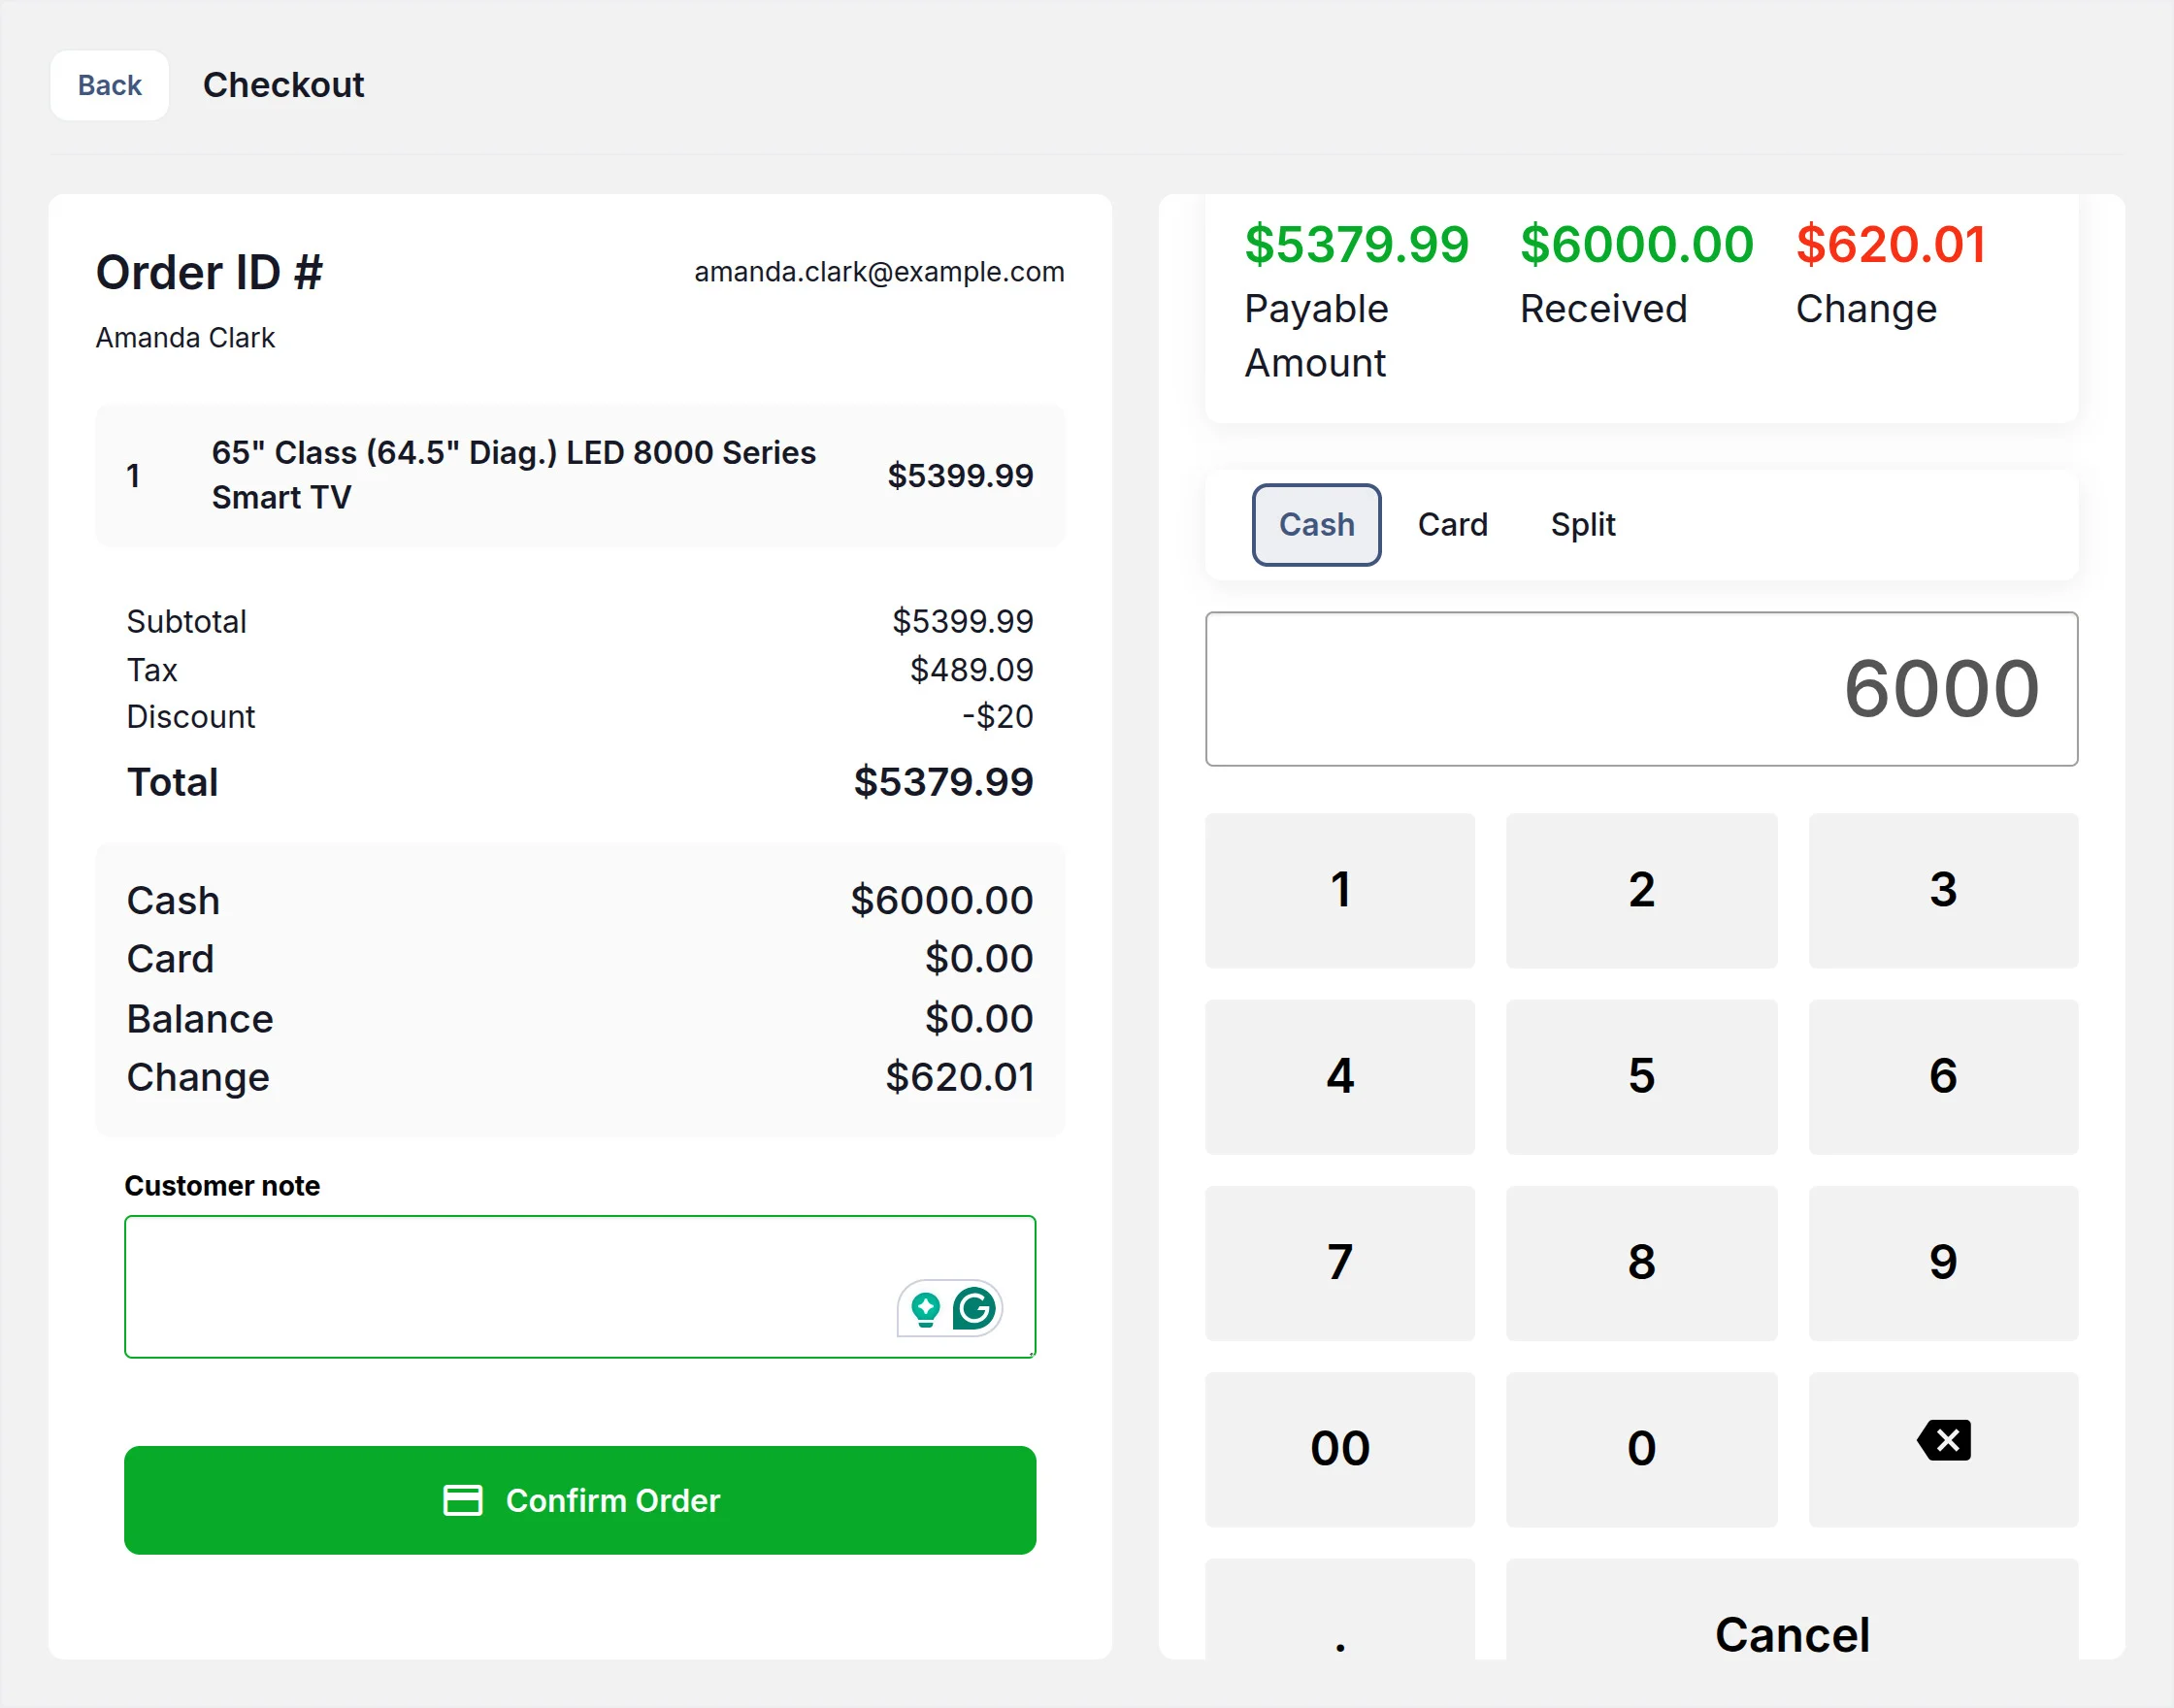
It will display all the details, including taxes and discounts, as shown below.
At last, the user can log out of the POS panel.
Support
That’s all for the add-on. If you still have any issues, feel free to write here http://webkul.uvdesk.com and let us know your views to make the module better.
Please explore our CS-Cart Development Services and Quality CS-Cart add-ons.
Current Product Version - 3.7
Supported Framework Version - Multivendor/ultimate (4.16.x - 4.20.1.x)
