CS-Cart Midtrans Payment Method:
Integrate Midtrans with CS-Cart via add-on CS-Cart Midtrans Payment Method.
Midtrans is an Indonesian Payment system connected to various payment methods.
which include Mandiri Clickpay, KlikBCA, Telkomsel, Cash, Indomaret, Kioson, Indosat Dompetku, Bank Transfer, and Credit Card.
Midtrans optimises online business by providing secure online payment systems and allows your customers to pay via any desired payment method supported by Midtrans.
Features
- Well integrated with CS-Cart and CS-Cart Multi-Vendor.
- Integrates various payment methods supported by Midtrans which includes Mandiri Clickpay, KlikBCA, Telkomsel, Cash, Indomaret, Kioson, Indosat Dompetku, Bank Transfer, Credit Card.
- In addition admin can enable 3D Secure payment at his store.
- Also Safe and secure payment system with a Fraud Detection System.
- Moreover Easy to configure and manage at the admin end.
How To Upload and Install
To install User Guide for CS-Cart Midtrans Payment Method, follow these steps:
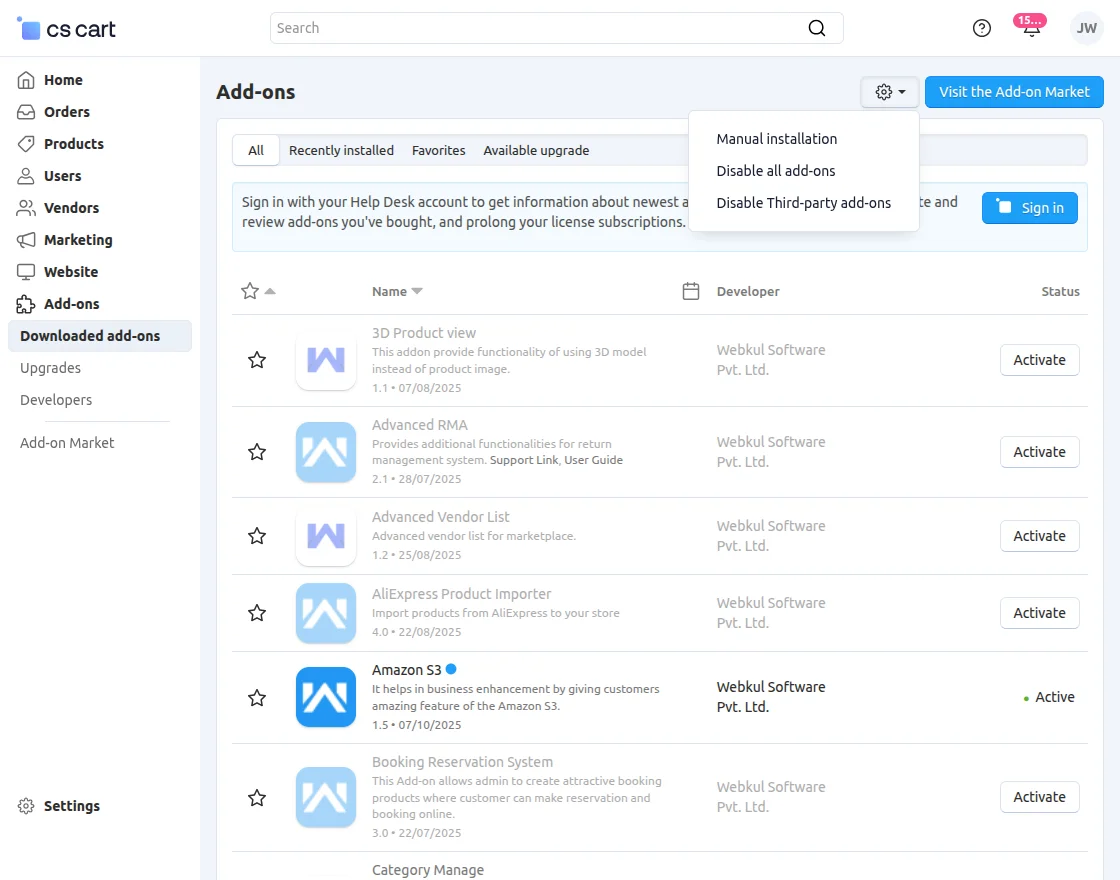
Go to Manage Add-ons, click on the gear drop-down, and select Manual Installation.
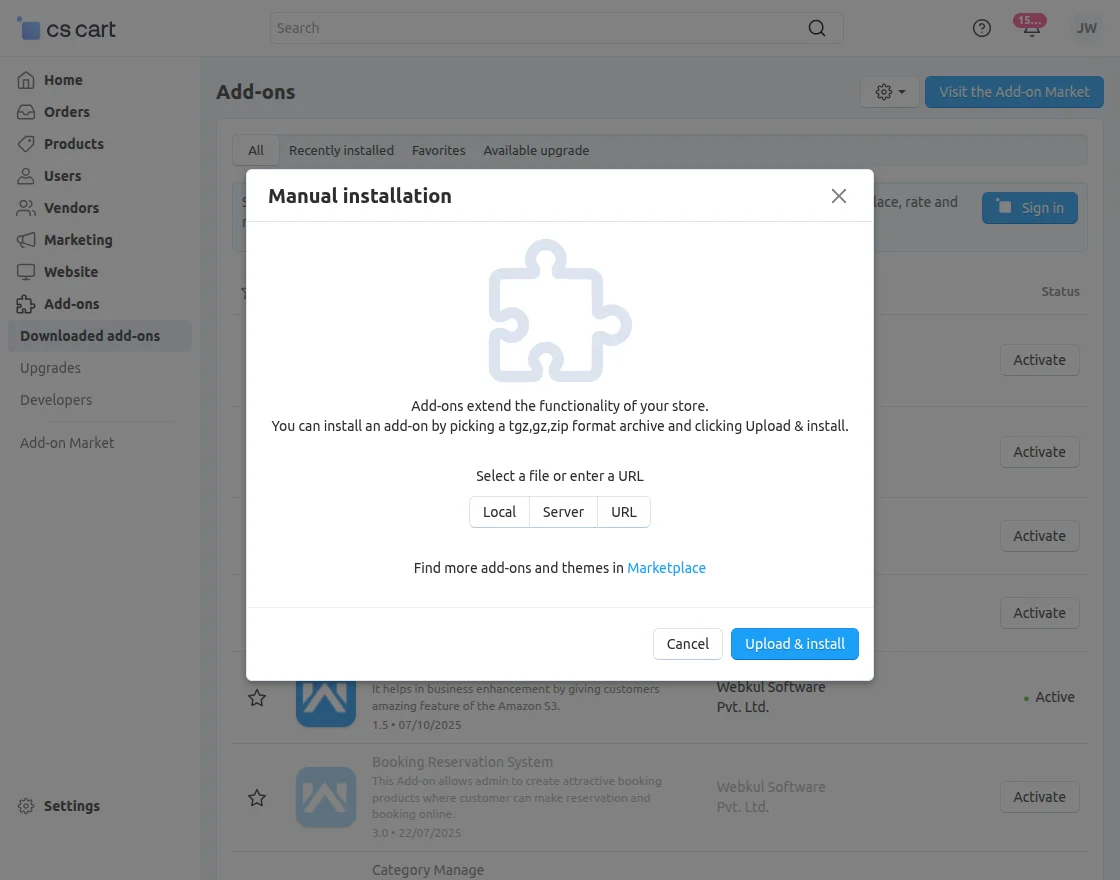
Click on “Local” to browse the zip file and then click on “Upload & Install” as shown below in the snapshot.
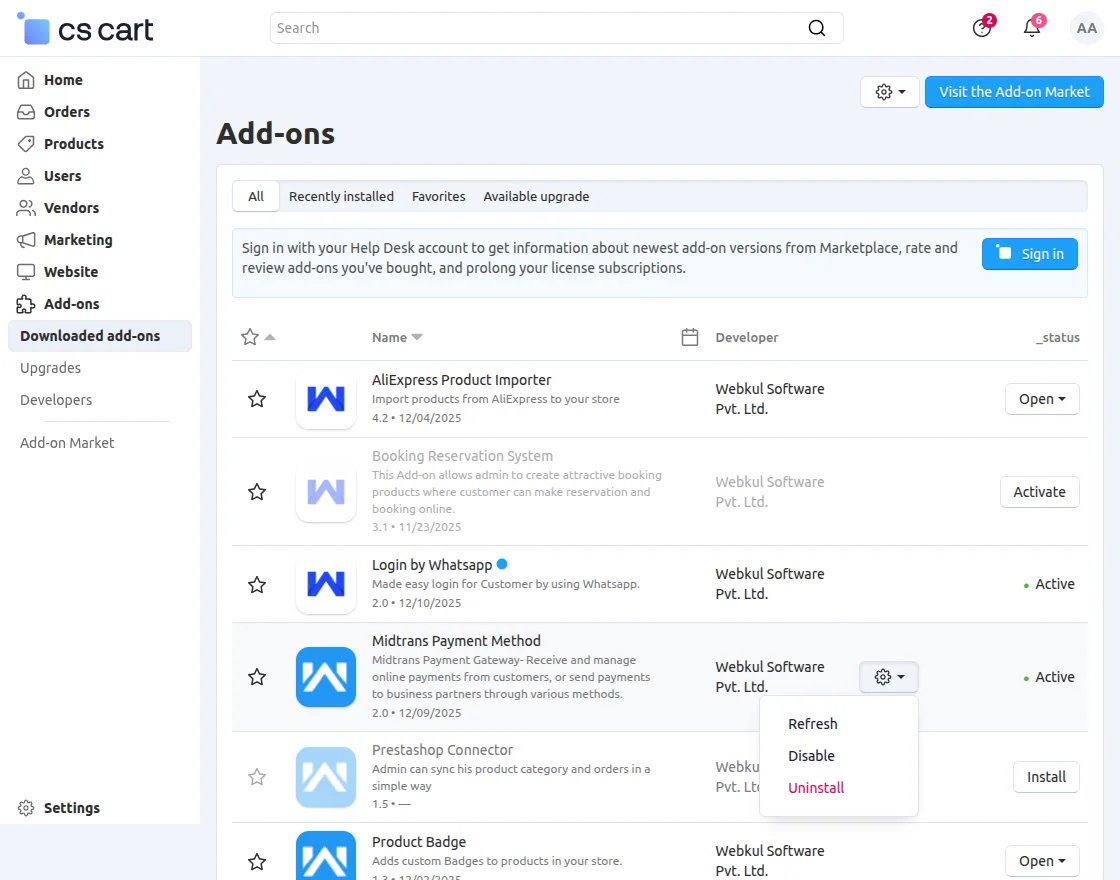
After installation of the add-on, you will find CS-Cart Midtrans Payment Method in the list of available add-ons.
Click on “settings” to enable, disable, install, or refresh.
Payment Method Configuration At Backend
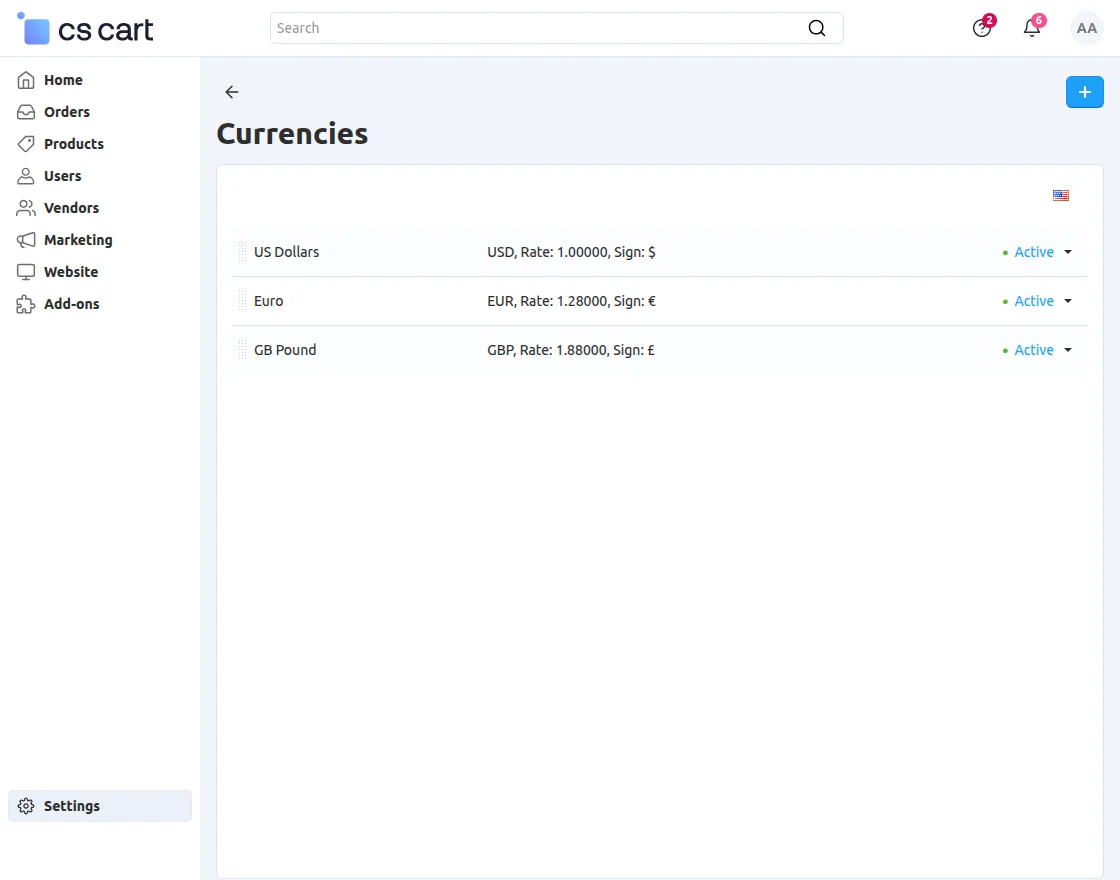
To integrate the Midtrans Payment Gateway into your CS-Cart store, the first required step is to add and enable the Indonesian currency (IDR) in your store’s currency settings.
Midtrans only supports IDR, so without configuring this currency, the payment method settings will not appear or work properly.
Now go to the Settings section in your CS-Cart admin panel, then click on the Currencies option.

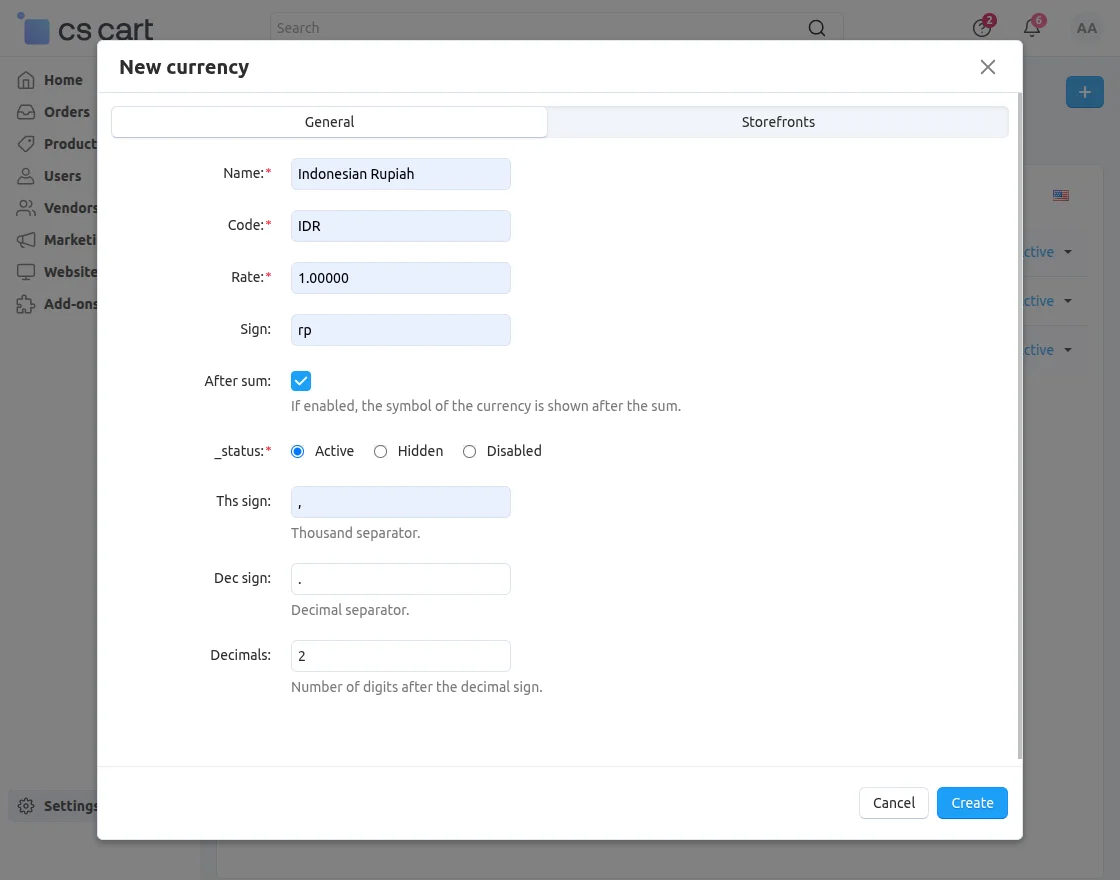
Click on the “+” icon to add a new IDR currency.
Click on “+” to create a new payment method.
After that, provide the following details in the currency settings:
-
Name – Indonesian Rupiah
-
Code – IDR
-
Rate – (Set the exchange rate as required)
-
Sign – rp
-
After sum – Enable if you want the currency sign to appear after the amount
-
Thousand separator – Set the symbol for separating thousands
-
Decimal separator – Set the symbol for decimals
-
Decimals – Enter the number of digits after the decimal point (usually 2)
Then, Click on the Create Button.
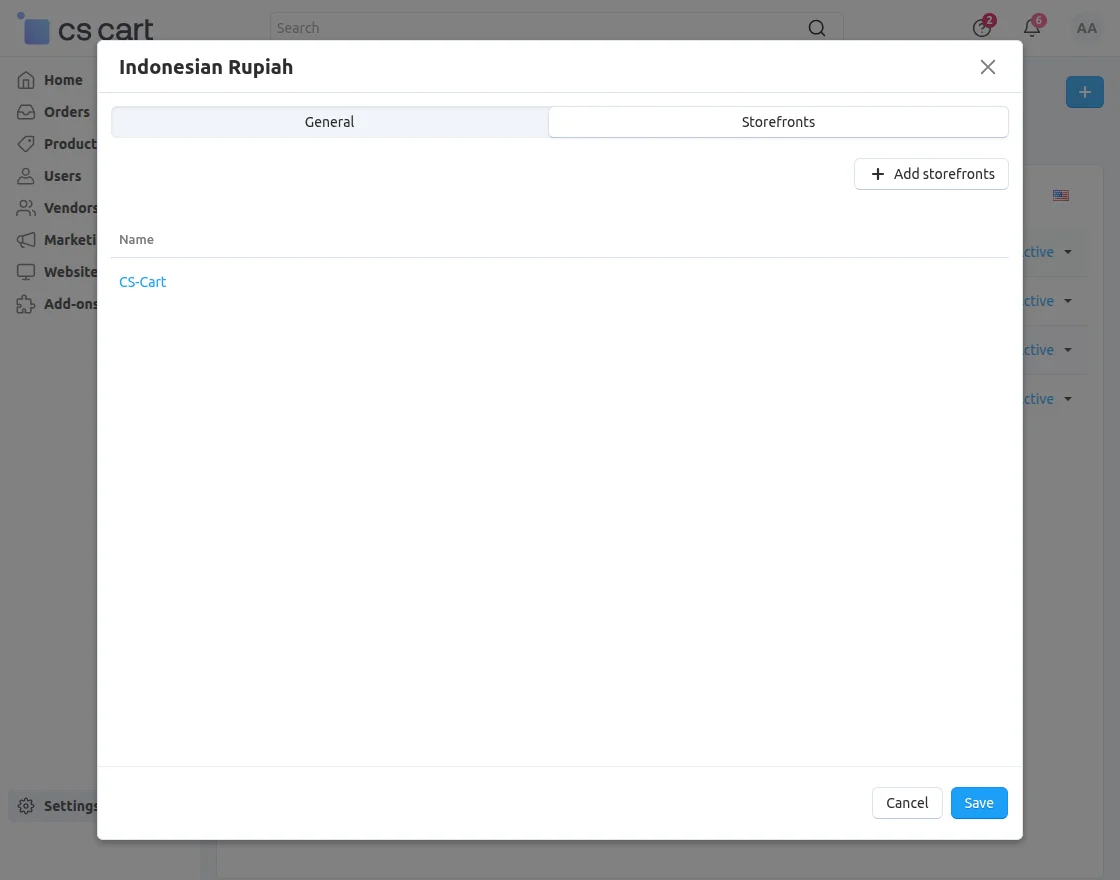
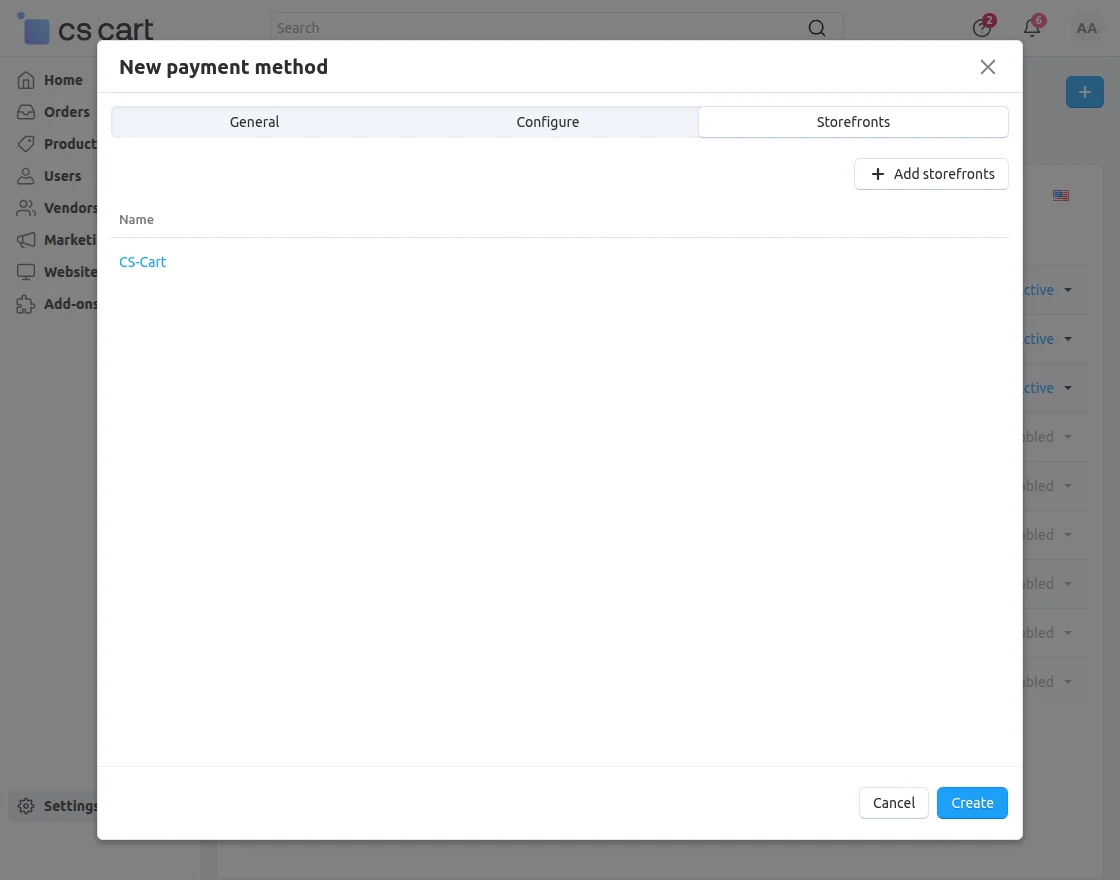
Now, go to the Storefronts section and add your store.
Make sure the correct storefront is selected so the currency and payment method settings apply properly.
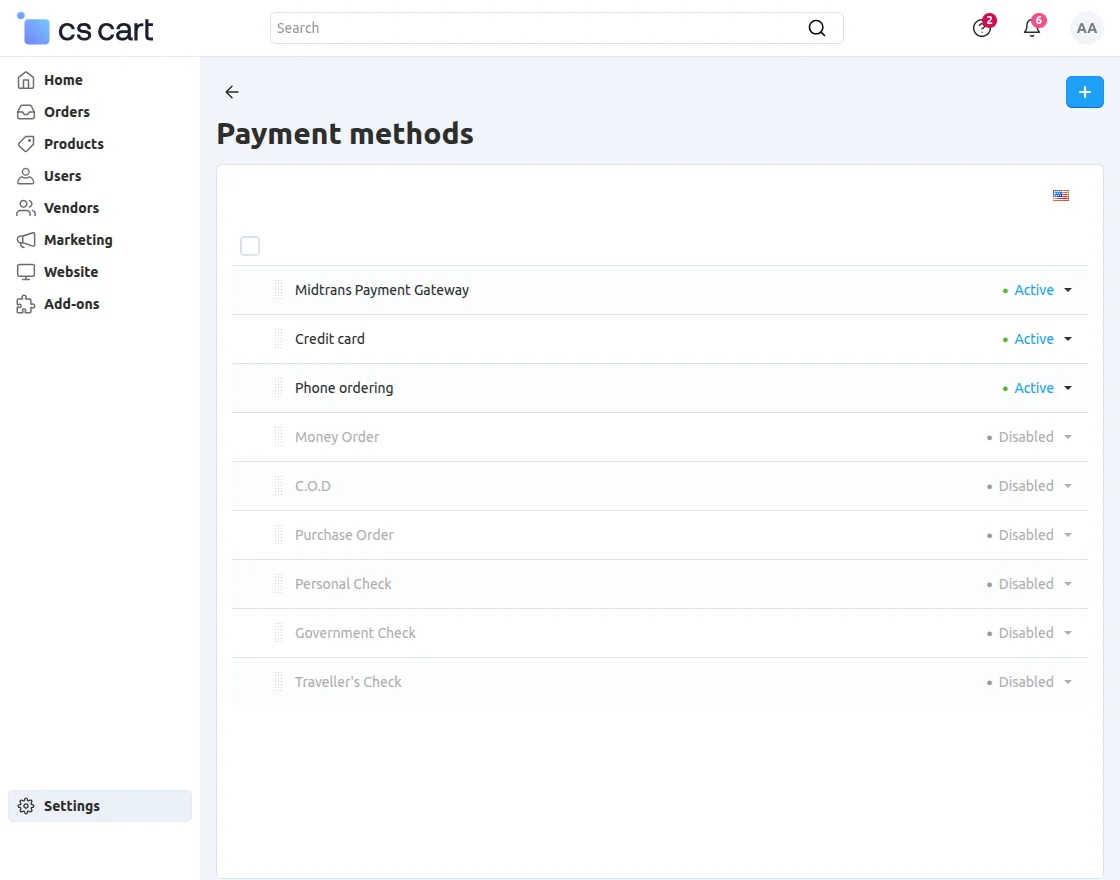
Next, navigate to Settings→ Payment Methods and click on the ‘+’ button to add a new payment method for Midtrans in your store.
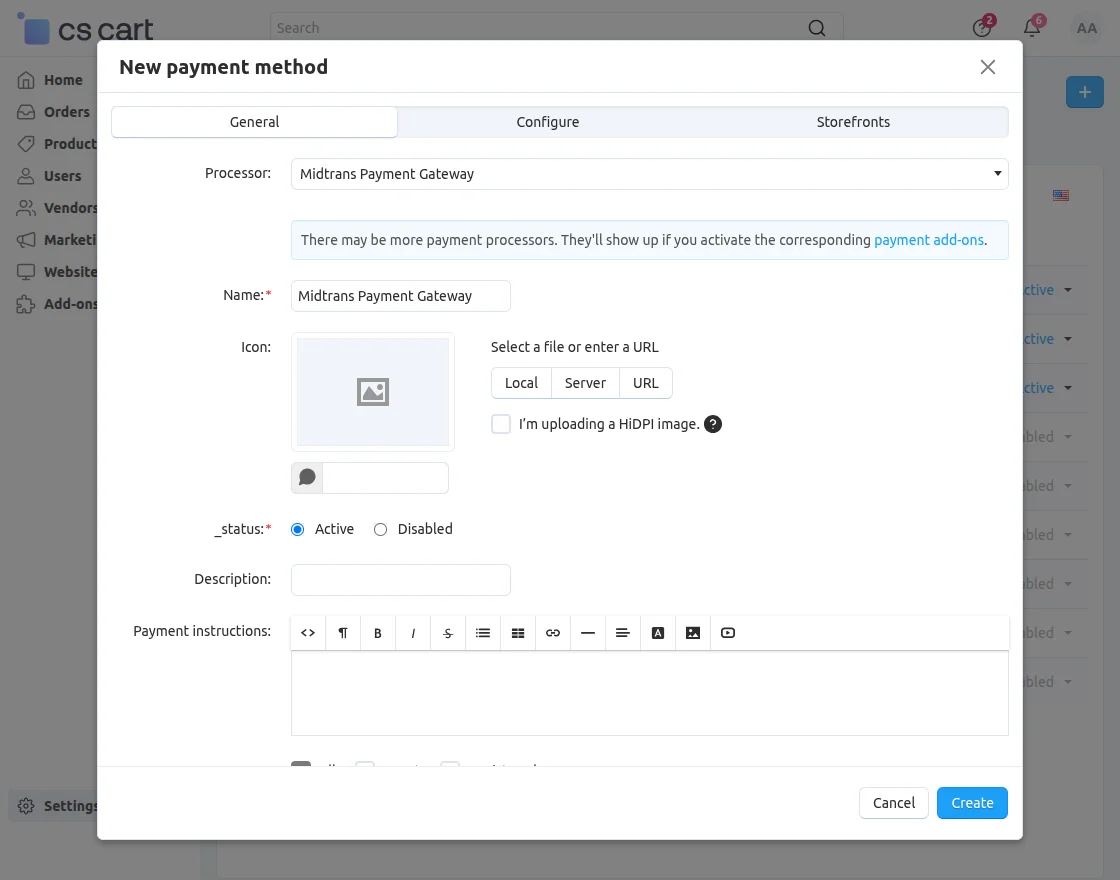
Now, provide the following details while creating the Midtrans payment method:
-
Processor: Select Midtrans Payment Gateway from the processor list.
-
Name: Enter Midtrans Payment Gateway as the payment method name.
-
Icon: Upload an icon from your local system or provide an external image URL.
You may also upload a HiDPI version if required. -
Status: Choose Active to enable this payment method on the store.
-
Description:
Add a short description for internal reference (optional). -
Payment Instructions: Provide instructions that will appear to customers during checkout (optional).
-
User Groups: Select the user groups allowed to use this payment method:
-
All
-
Guest
-
Registered users
-
-
Taxes: If a payment surcharge is taken from vendors, note that taxes will not be calculated.
-
Surcharge:
Add a surcharge if required:-
Fixed amount ($)
-
Percentage (%)
-
Or both
-
-
Surcharge Title:
Leave empty to use the default title “Payment surcharge”.
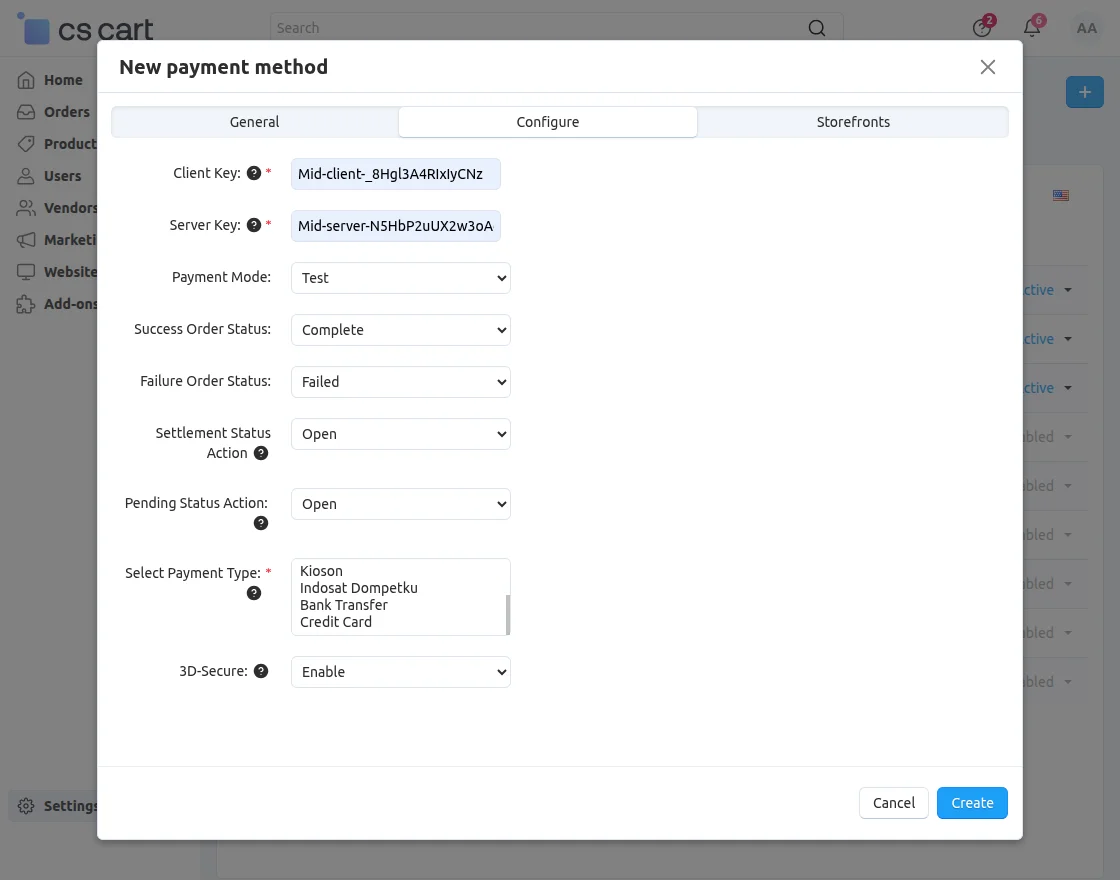
In the Configure section, provide the following details:
-
Client Key: Enter the Client Key provided by Midtrans.
-
Server Key: Enter the Server Key provided by Midtrans.
-
Payment Mode:
-
Test
-
Live
Choose Test while using sandbox credentials and Live for production.
-
-
Success Order Status:
-
Select Complete (orders will be marked complete after successful payment).
-
-
Failure Order Status:
-
Select Failed (orders will be marked failed for unsuccessful payment).
-
-
Settlement Status Action:
-
Choose Open
(When payment is settled, the order status will be updated accordingly).
-
-
Pending Status Action:
-
Choose Open
(Pending transactions will remain in open status).
-
-
Select Payment Type:
Enable the payment types you want to offer:-
Mandiri Clickpay
-
BCA KlikBCA
-
Telkomsel Cash
-
Indomaret
-
Kioson
-
Indosat Dompetku
-
Bank Transfer
-
Credit Card
-
-
3D-Secure:
Enable this option if you want to activate 3D Secure authentication for credit card payments.
Then Click on the Create Button as Shown in the Snapshot below.
Now, go to the Storefronts section and add your store.
This is how you can configure CS-Cart Midtrans Payment Gateway in your CS-Cart Site.
Front End View
Once the payment method is configured, a new payment option will be available for customers at the front end.
For payment, the customer needs to select an option to pay via Midtrans, as shown below, and submit the order.

The customer will get redirected to the outside pay page of Midtrans, as shown below. All payment types activated for the customer will be available here.
The customer can choose any of the desired payment types and submit the necessary details for order confirmation.

Support
If you have any questions, suggestions, or customization requests, feel free to contact us at [email protected] or submit a ticket at webkul.uvdesk.com.
Explore our premium-quality CS Cart Extensions to enhance your store functionality.
You can explore our CS-Cart Development Services and Quality CS-Cart add-ons.
Current Product Version - 1.0
Supported Framework Version - 4.18

Be the first to comment.