Are you allowing the customers to book appointments with you?
For example, If you’re offering:
- Virtual Pilates sessions
- Training sessions
- Doctor appointments
- One to one Therapy sessions
- CA Appointments
- & So-on
Then sending the appointment meeting links automatically become necessary in order to manage the appointments seamlessly.
So Considering this necessity, We have launched another long awaited add-on in our “Booking app for Shopify” name “Google Meet” .
This “Google meet” add-on will allow the merchant to send the automated meeting links when merchants confirm the consumers appointment.
& These meetings will sync with merchant’s Google calendar automatically.
Now, Let’s quickly have a look at the Installation process:
INSTALLATION:
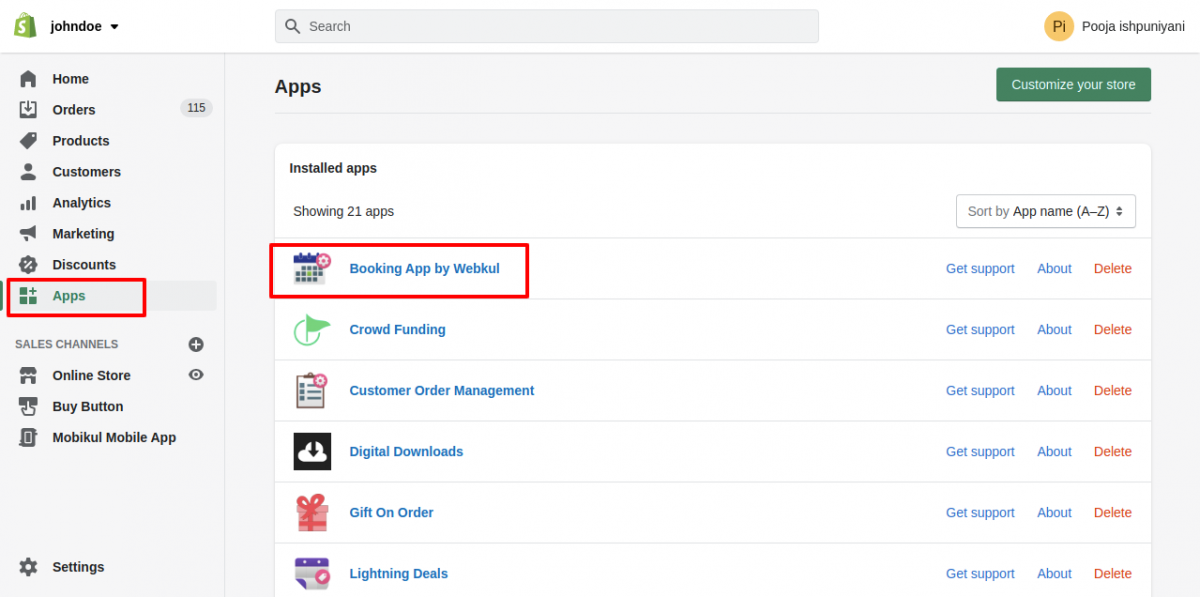
To Install this add-on, Please Visit the Booking app by Webkul backend ->>Click on the “Add-Ons” Menu via the left navigation bar, Then you’ll be redirected to the Add-Ons listing page,
And from here install the “Google Meet” add-on.

Now, The next step is to configure the “Google Meet” add-on & To configure the same, Please visit “Configure” tab & here We need to add the Client ID & Client secret key

Steps To Get Client ID And Client Secret:
- Log-in/Signup to Google Cloud Console: https://console.cloud.google.com/getting-started?pli=1

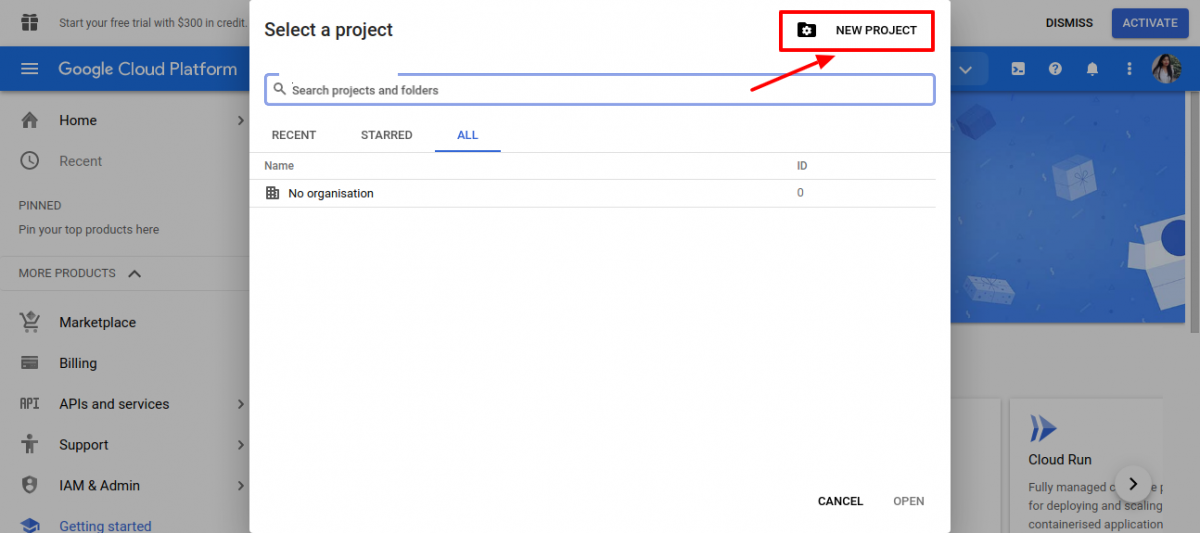
2. Create a project in google cloud & For this, Select the project from header bar just left to search box.
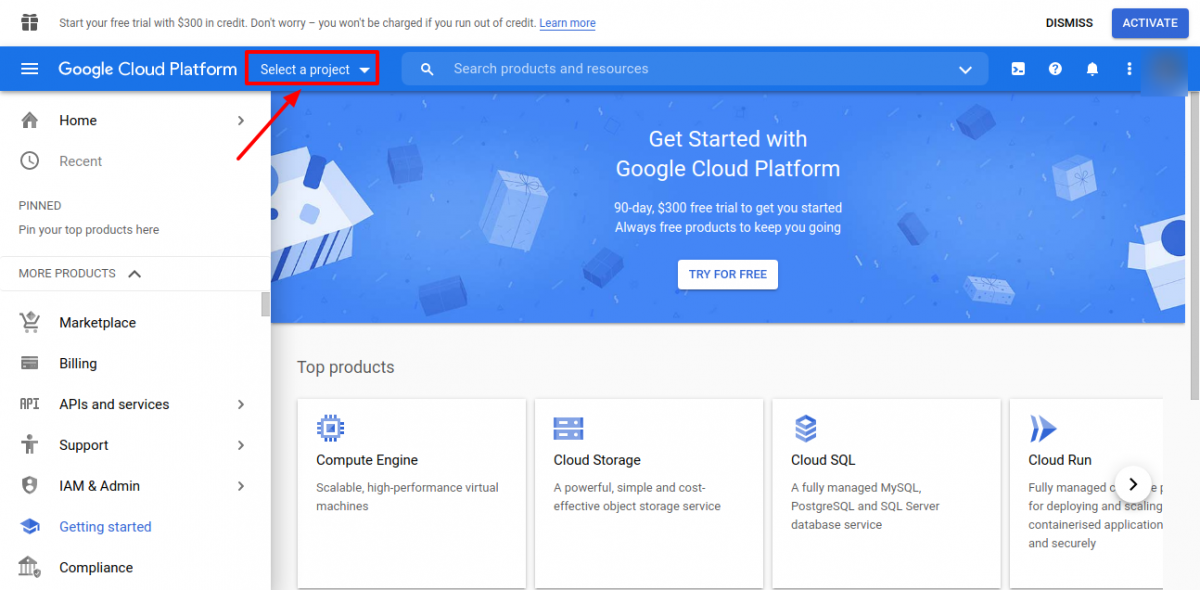
Then click on “New project”:
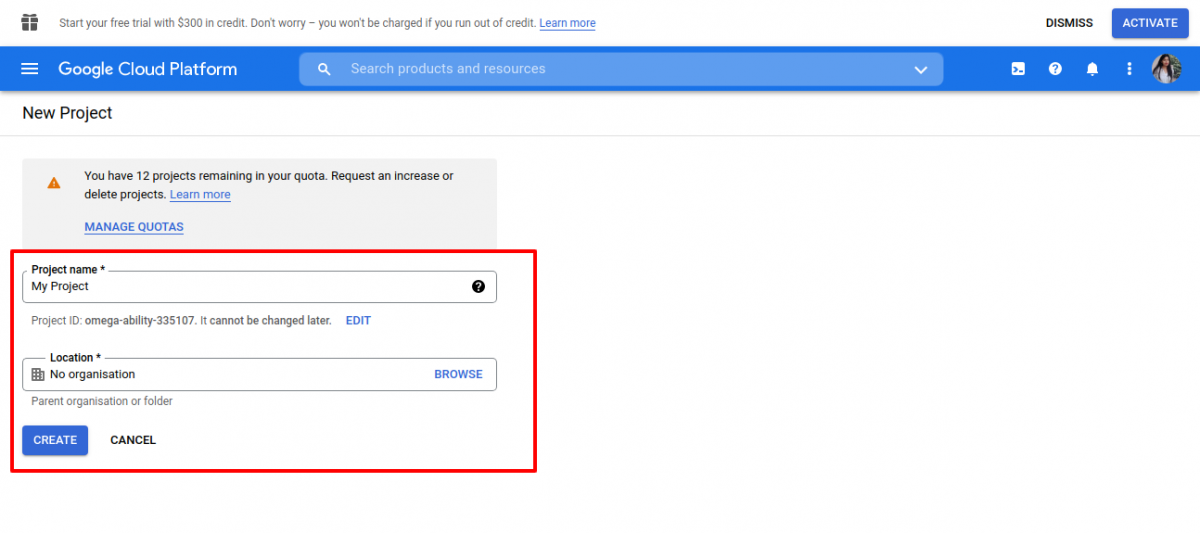
Enter Project Name & Location:
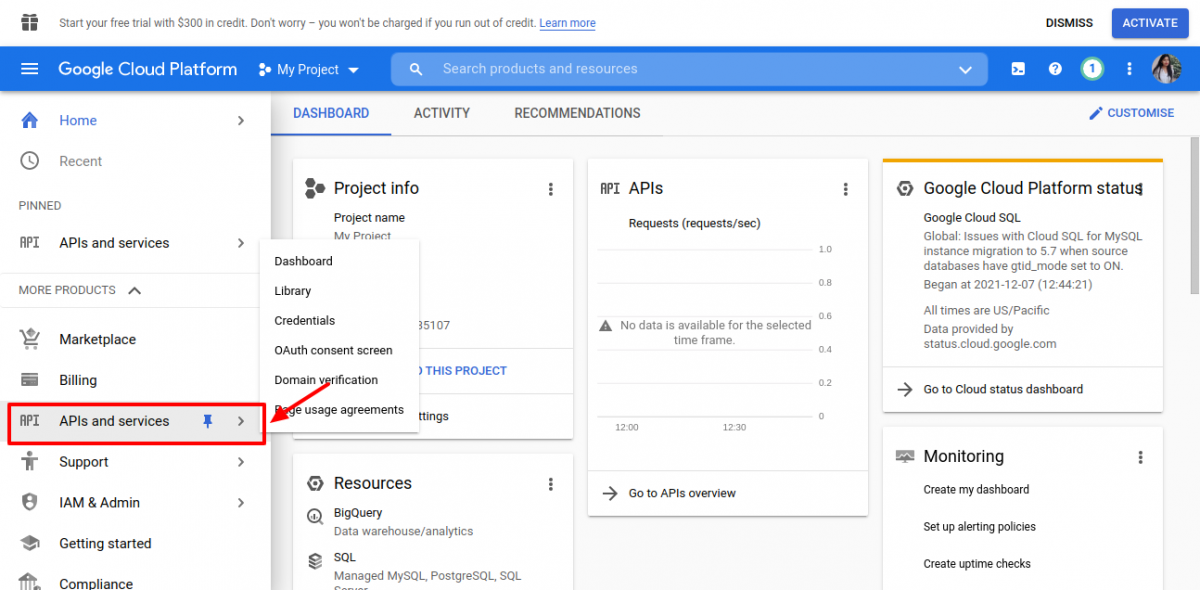
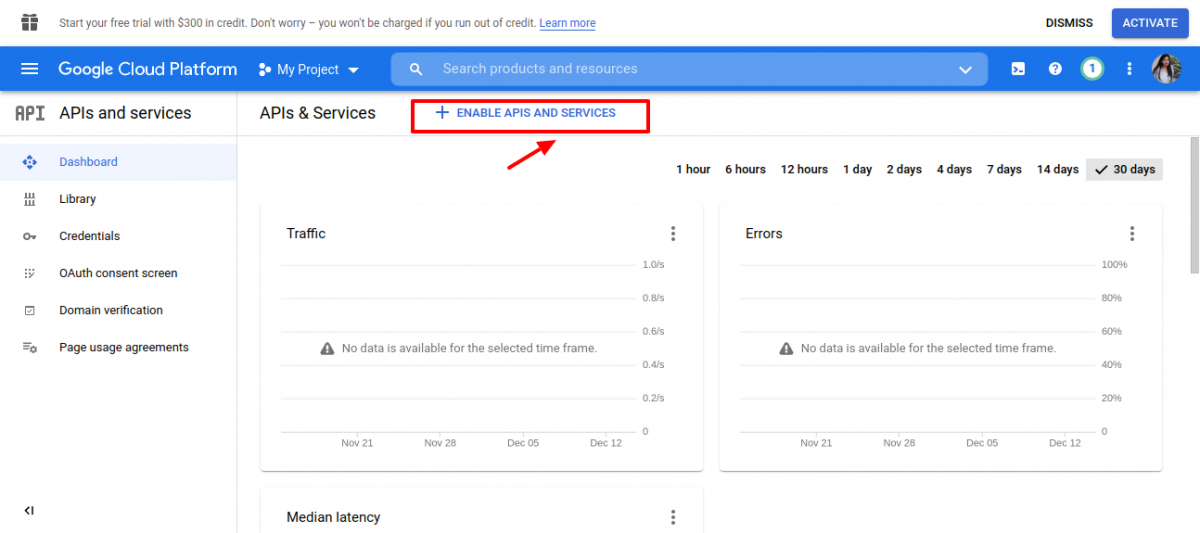
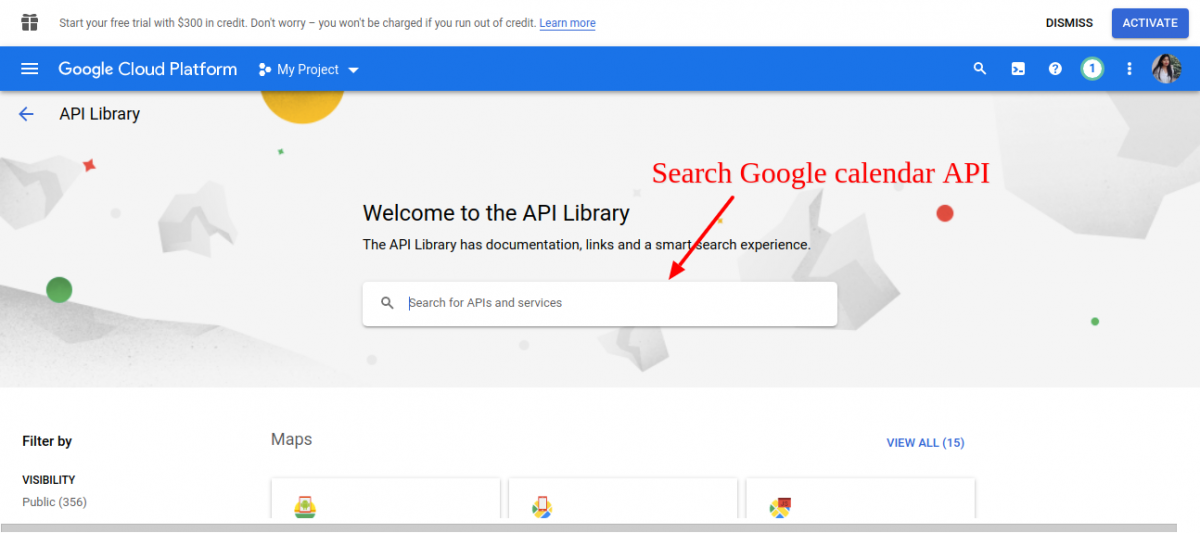
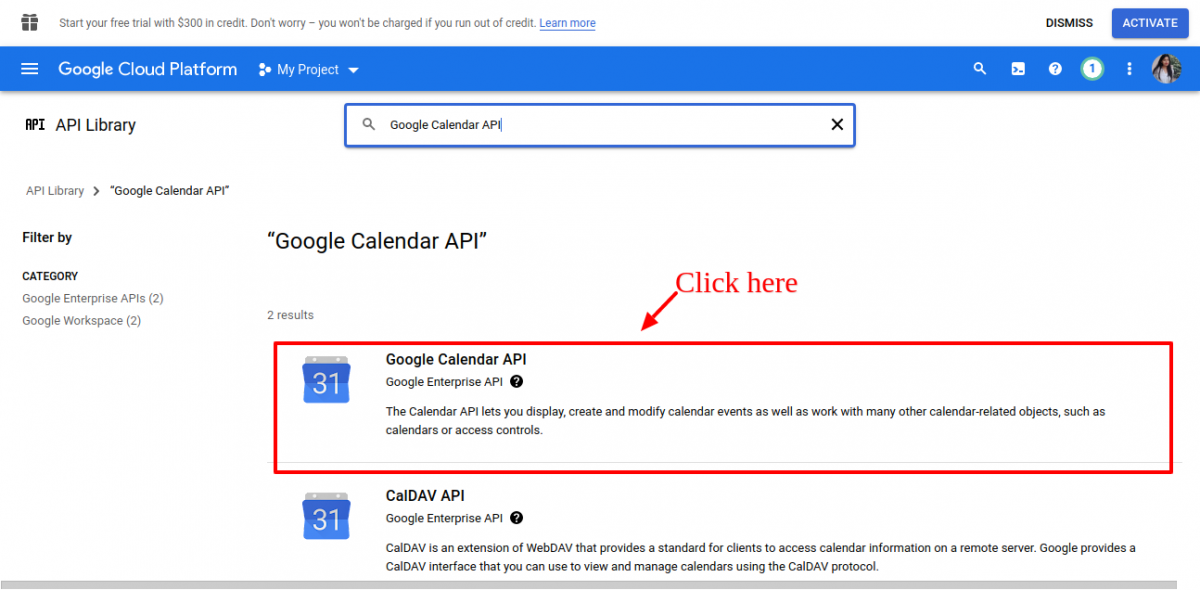
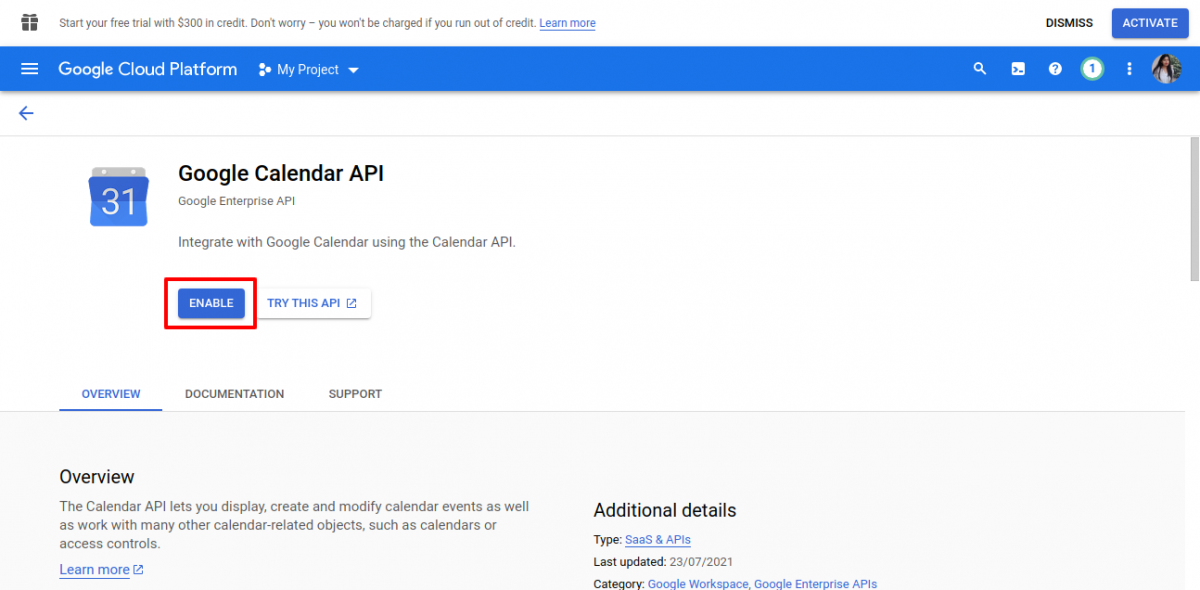
3. Enable Google Calendar API from side menu API & Services(search Google calendar API and enable it).
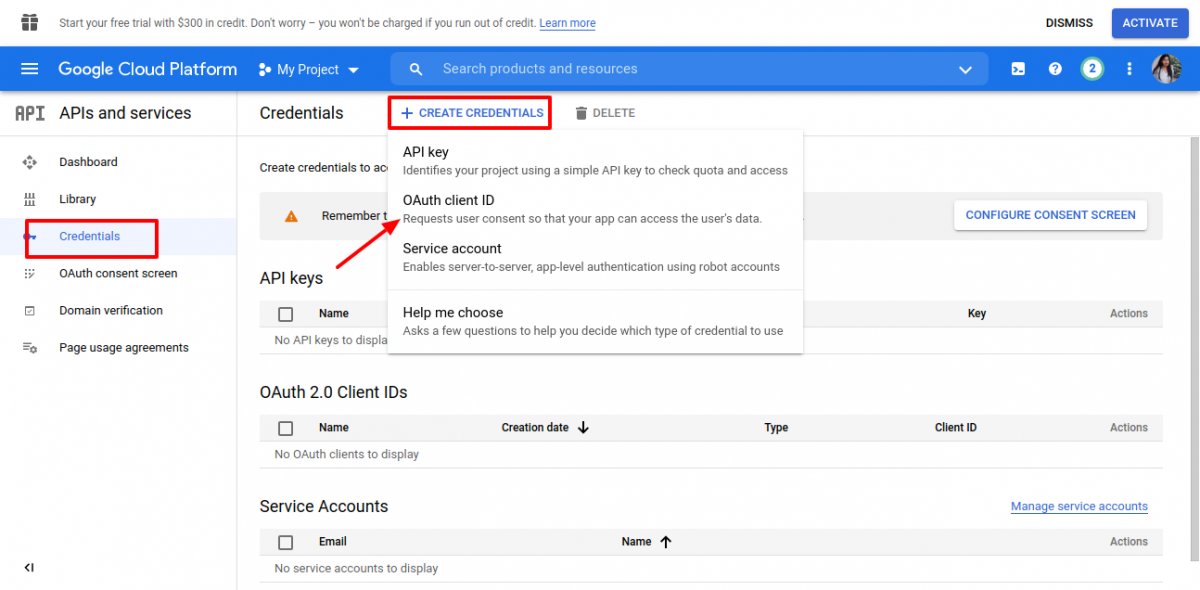
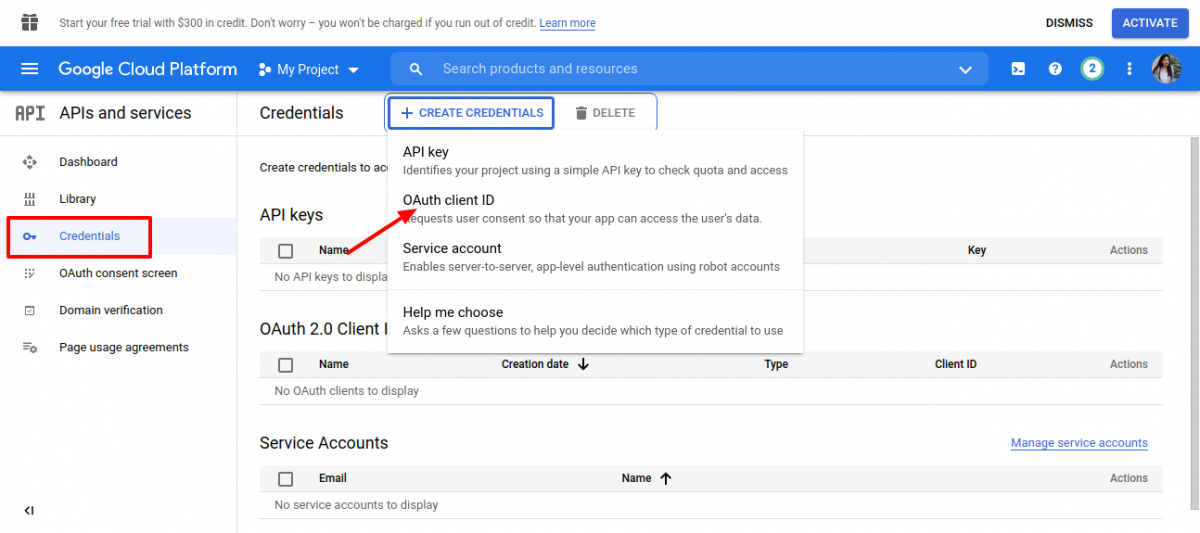
4. Now go to API & Services-> credentials(from side menu), and click on +create credentials->OAth client ID from header in right side
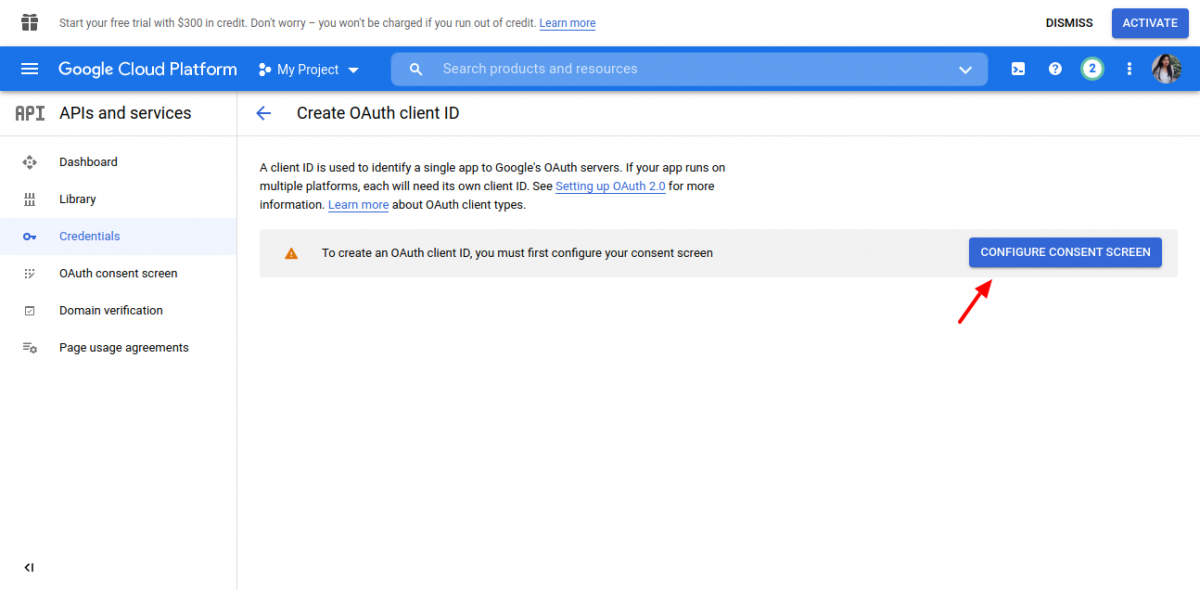
Then We’ll land on below screen & from here Click on “Configure Consent Screen”:
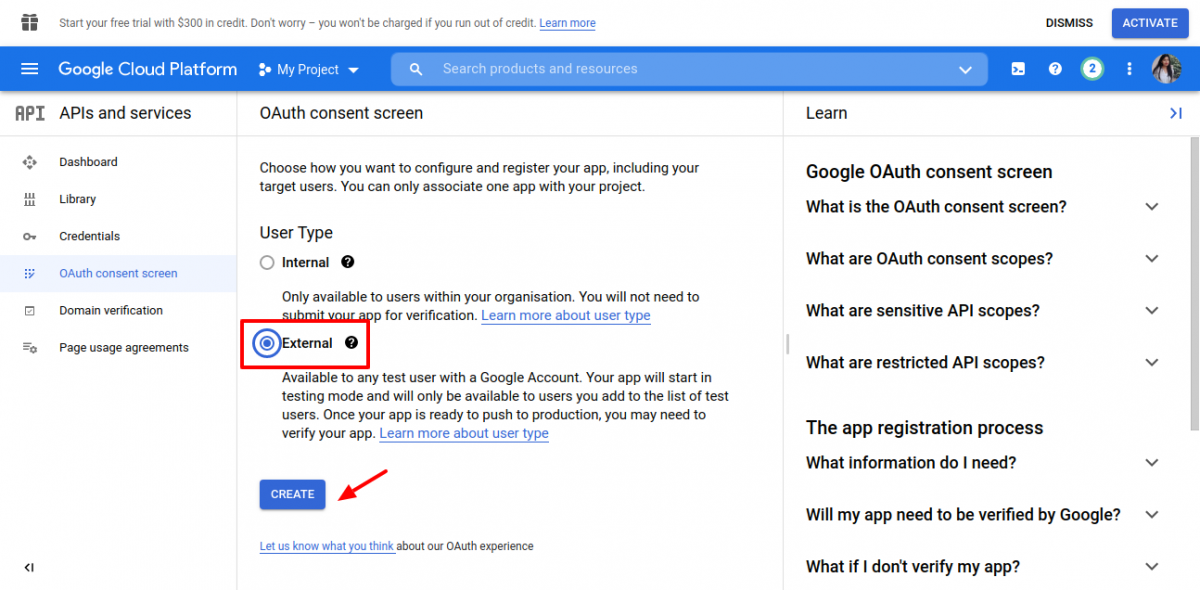
Here Choose user type “External” & Click on “Create” button:
Then Enter app name & fill-up all the mandatory fields & Click on Save on continue:

5. Now again, Go to API & Services-> credentials(from side menu), and click on +create credentials->OAth client ID from header in right side:
Then we’ll redirect on below screen & Here Choose Application Type to “Web Application” , Enter Name & Authorised Redirect URI & Click on “Create” button.
Disclaimer: “Admin will get Authorised Redirect URI from “Configure” section under “Google Meet add-on in”Booking app by webkul

Once the OAuth Client ID gets created, We’ll land on the below screen where we’ll get Client ID & Client Secret:
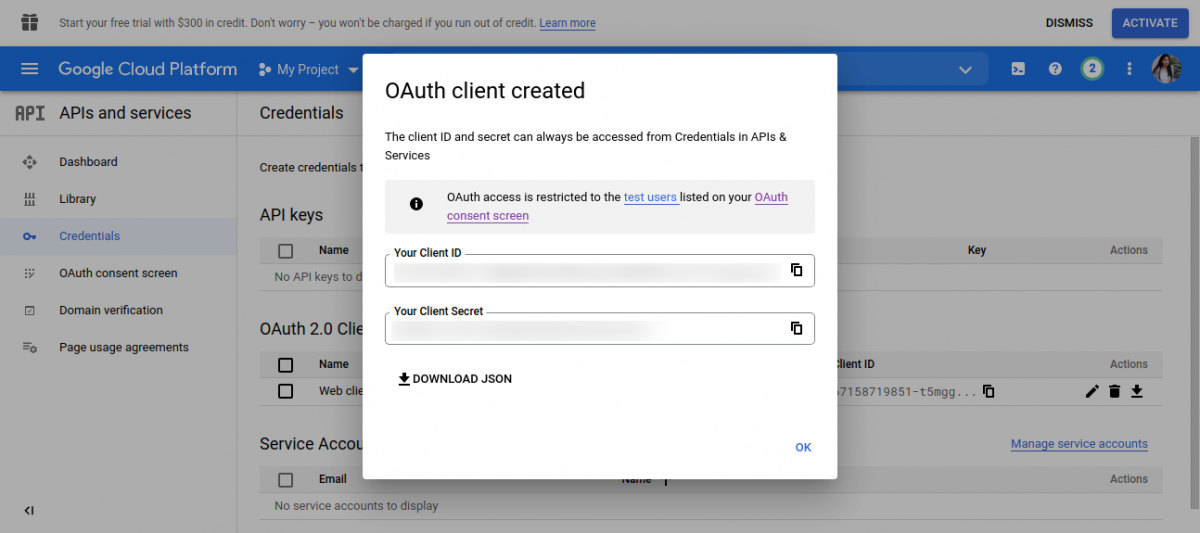
6. Now add the client ID and client Secret in the google meet configuration under “Booking app”:

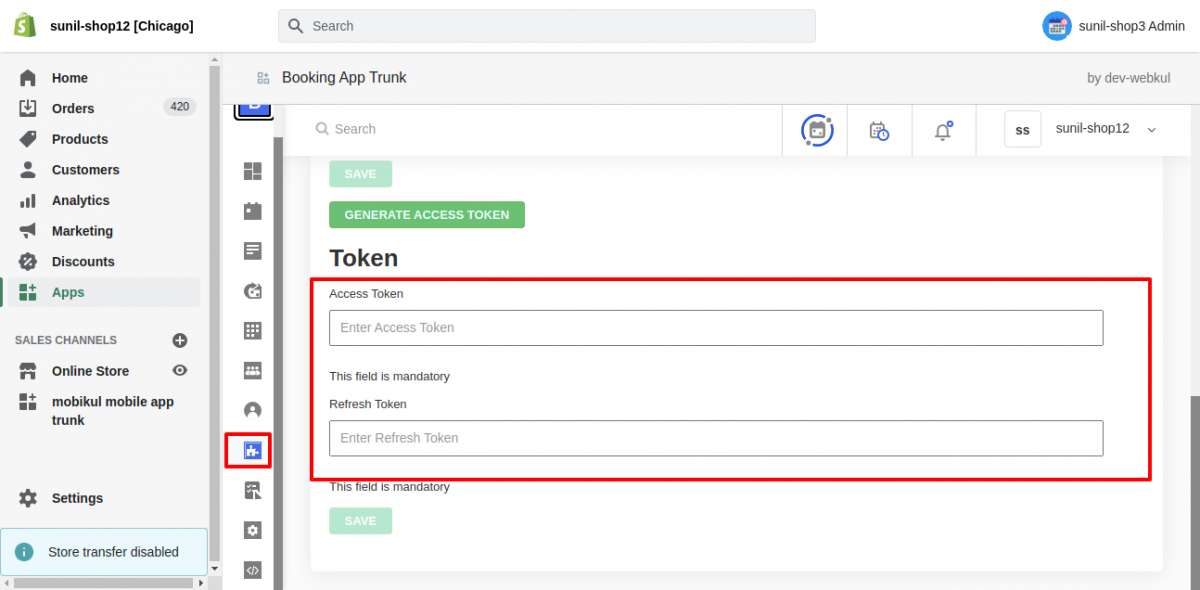
Further, We need to add the the Access Token & refresh Token. Let’s follow the below steps to see “How to get access token & refresh token” :
How To Get Access Token and Refresh Token
Firstly Click on “Generate Access Token” tab & then you’ll be redirected on Google account page & Here merchants need to Sign-in into his/her “Gmail Account”.
Note: “Generate Access Token” tab will be enabled only when we’ll add client ID & Client secret firstly.
Disclaimer: If any merchant don’t have the Gmail account then they can signup from here: https://accounts.google.com/

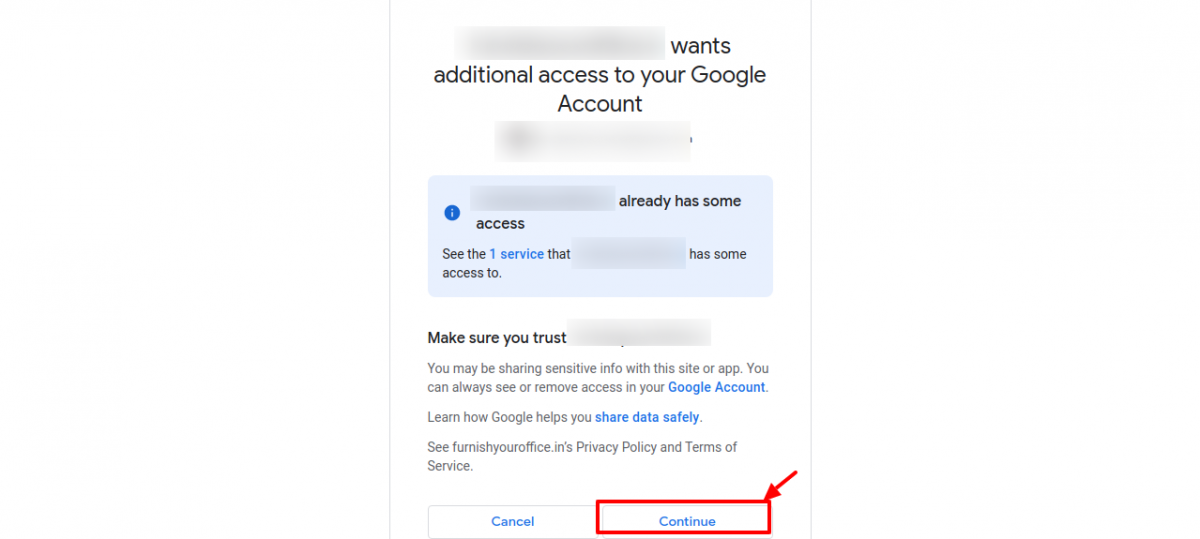
Once the sign-in to “Gmail Account” gets done then you’ll be redirected on the below screen & You just need to click on “Continue” .
These are just some security checks from google end which we can pass by clicking on “Continue” tab.
Then, We’ll get the “Access Token ” & “Refresh Token”.

Now, Add the Access Token & Refresh Token under “Google Meet” Add-on configuration
That’s all for Google Meet Add-on configuration.
To send the Google Meet link, Please understand the below 2 cases:
CASE 1: AUTO-APPROVE TAB TURNED ON
If “Auto-Approve” Tab is turned on then customers will receive the Booking Confirmation email automatically along with Google Meet Link
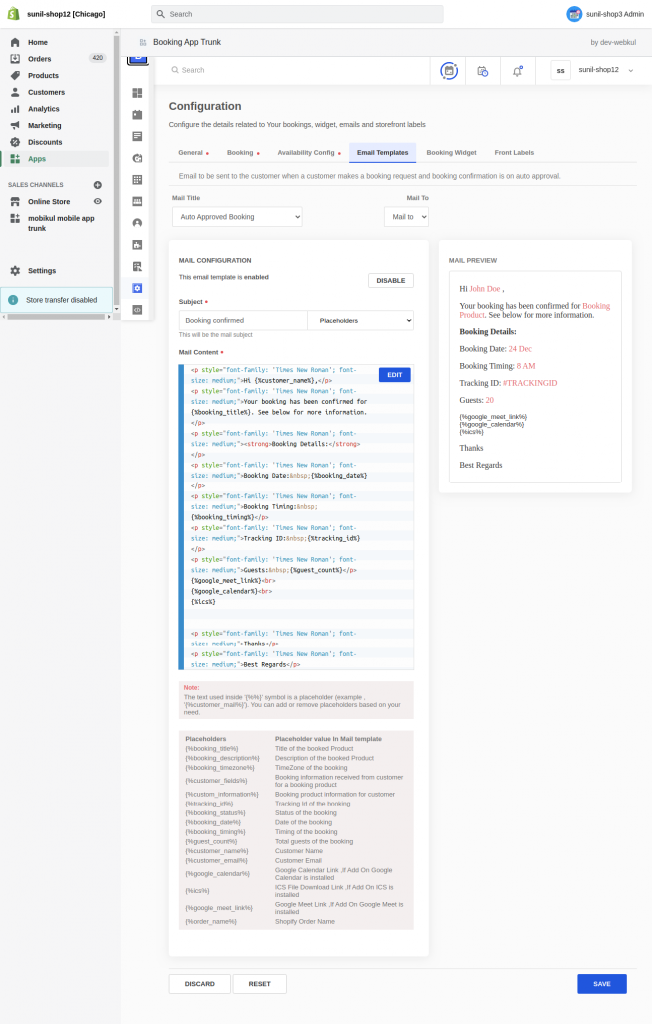
However, To add the “Google Meet” Link in booking confirmation email, Merchants need the add the below variable in “Auto-Approve Booking” email template:
{%google_meet_link%}
Refer the screenshot of email template:
CASE 2: AUTO-APPROVE TAB TURNED OFF
If “Auto-Approve” Tab is turned-off then Merchants manually approve the customer Bookings & In this case, “Booking Approved” mail gets sent to customer.
To add the Google Meet Link in “Booking Approved” , Merchants need the add the below variable in “”Booking Approved” mail template:
{%google_meet_link%}
Refer the screenshot of email Template:

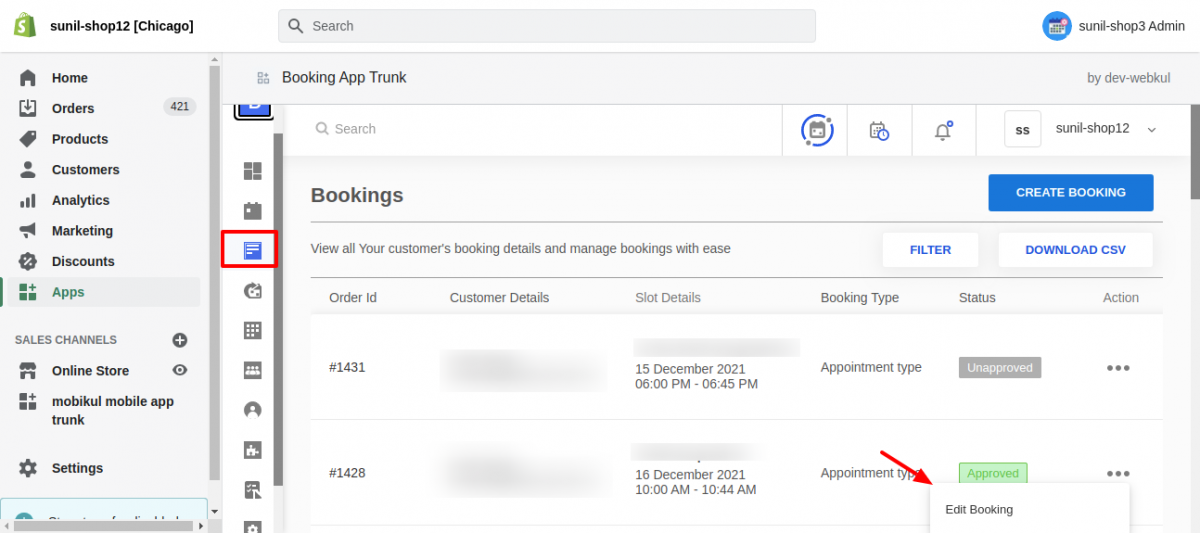
How Merchants Get the “Google Meet” Link:
Merchants can get the “Google Meet” link from “Bookings” section:
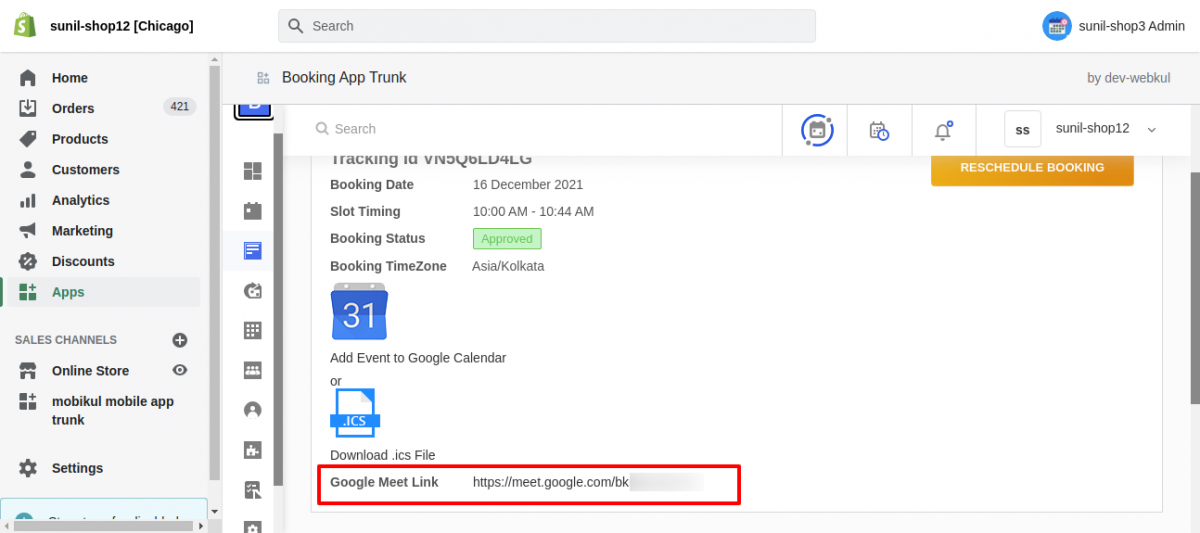
That’s how, Merchants can manage the seamless appointments with automated meeting links.
Merchant can create the bookings on customer’s behalf too & While creating the Bookings, Merchant can enable/disable to toggle checkbox “Share the Google meeting link with customer”.
This way merchants can decide like whether they want to send Google meet link or not while creating bookings.
Refer to the below screenshot:

Need Help?
If you have any further questions, please feel free to reach out to us. We are just a ticket reply away: https://webkul.uvdesk.com/en/

Be the first to comment.