Magento 2 AI Chatbot using Open Source LLM(Adobe Commerce) extension integrates an AI-powered assistant in the Adobe Commerce storefront that helps customers find products, track orders, and resolve queries using advanced LLM technologies and vector-based search.
The chatbot acts as a virtual assistant for the customers on the store. It answers the queries posted by the customers.
The AI powered chatbot answers the queries based on the products listed on the store. The customers ask product related queries and it replies accordingly.
Customers use text such as sentences, phrases and prompts to ask queries from the eCommerce chatbot.
If you would also like to produce content for the products on your store using AI tools, then you can have a look at Magento 2 ChatGPT Extension.
Check a small demo on how the AI Chatbot works in real-time –
Order Tracking and Memory Feature –
Features
- The AI Chatbot provides answers to all of the inquiries customers have about the products.
- Customers can ask whatever they want regarding the features and specifics of the items.
- They can communicate with the AI Assistant instantly, either as a guest or by logging into their account for a more personalized experience.
- Receive immediate information about product links, prices and reviews directly from the chatbot.
- The Chatbot obtains details via product names, searchable attributes along with storefront visible properties and super attributes.
- It will also provide answers based on product configurable options, swatches and attributes.
- The admin has the control to enable or disable the extension.
- A unique name and profile photo can be provided to the chatbot by admin.
- The plugin uses vector storage to store embeddings and perform semantic search. It supports multiple vector storage options, including Default Vector Storage and ChromaDB Storage.
- Search for CMS and FAQs through the Chatbbot.
- Ask order related queries to the Chatbot.
- Track and check summary and details of placed orders.
- Manage FAQ and chat history in admin backend.
- Chatbot supports for Multi Store views.
- Chat on history using pin chat option.
- Enabled vector storage and similarity search using Elasticsearch 8.0.0 / OpenSearch, with optional support for ChromaDB vector storage.
- Implemented an embedding generation service via a Node.js server.
- Integrates with LLM providers like OpenAI, Cerebras, Groq, Gemini AI, OpenRouter, and Cohere to power AI-driven chatbots.
Minimum System Requirement (API Setup)
The following minimum system requirements are needed for this extension,
- Python Version – 3.10
- Server key and cert files (for Flask API)
- Docker (Optional)
- Two ports (5000 and 8000)
- API Key (Gemini, OpenAI etc. for Text Generation)
For Hosted API for Embeddings (OpenAI, Gemini etc.)
- RAM (4 GB)
- Space (4 GB)
- API Key (Gemini, OpenAI etc. for Embedding)
For Self-hosted API for Embeddings
- RAM (4 GB)
- Space (16 GB)
Note: The minimum system requirements may vary based on the data.
To install AI module, we need SSH access. You can also check the AI Models Server Installation Guide and ChromaDB Installation Guide for reference.
Local LLM Deployment (Optional)
If you want to use the LLM locally or self-hosted, you must have a server available to deploy it, and the minimum requirements are as follows:
The exact requirements depend on the model size.
Small to Medium LLMs (≤8B parameters)
- CPU: 8 cores (x86_64 or ARM)
- RAM: 16 GB minimum (32 GB recommended)
- GPU: NVIDIA GPU with 8–12 GB VRAM for acceleration
- Storage: 30–50 GB SSD free space
- OS: Linux
Large LLMs (13B–30B parameters)
- CPU: 16+ cores
- RAM: 64 GB minimum (128 GB recommended)
- GPU: NVIDIA RTX 3090/4090 or A100 with 24–40 GB VRAM
- Multi-GPU support required for 30B+ models
- Storage: 100–200 GB SSD free space
- OS: Linux
Additional Setup Requirement
To run OpenRouter LLMs locally, you need a local inference server capable of hosting the model.
Once set up, you can connect your OpenRouter SDK or API client to your local endpoint, enabling fully self-hosted LLM usage without relying on the cloud.
Installation
The installation is simple just like other standard Magento 2 extensions.
#1 Download Module
Firstly, you need to log in to the Webkul Store, go to My Account>My Purchased Products section. Verify, and then download and extract the contents of this zip folder on the system.
#2 Upload Folder
Once the module zip extracts, follow path src>app and then copy the app folder into the Adobe Commerce root directory on the server.

#3 Run Commands
After uploading the module folder, you need to run the following commands in the Adobe Commerce root directory,
php bin/magento setup:upgrade
php bin/magento setup:di:compile
php bin/magento setup:static-content:deploy
php bin/magento indexer:reindex
php bin/magento cache:flush
php bin/magento generate:embeddings
php bin/magento generate:embeddings -p 1,2,3 -c 1,2,3 -f 1,2,3 -s 1,2,3
Multilingual Configuration
For Multilingual support, please navigate to Store>Configuration>General>Locale. Then, select your desired language from the Locale option.

Thus, in this way, a multilingual configuration can be done.
Language Translation
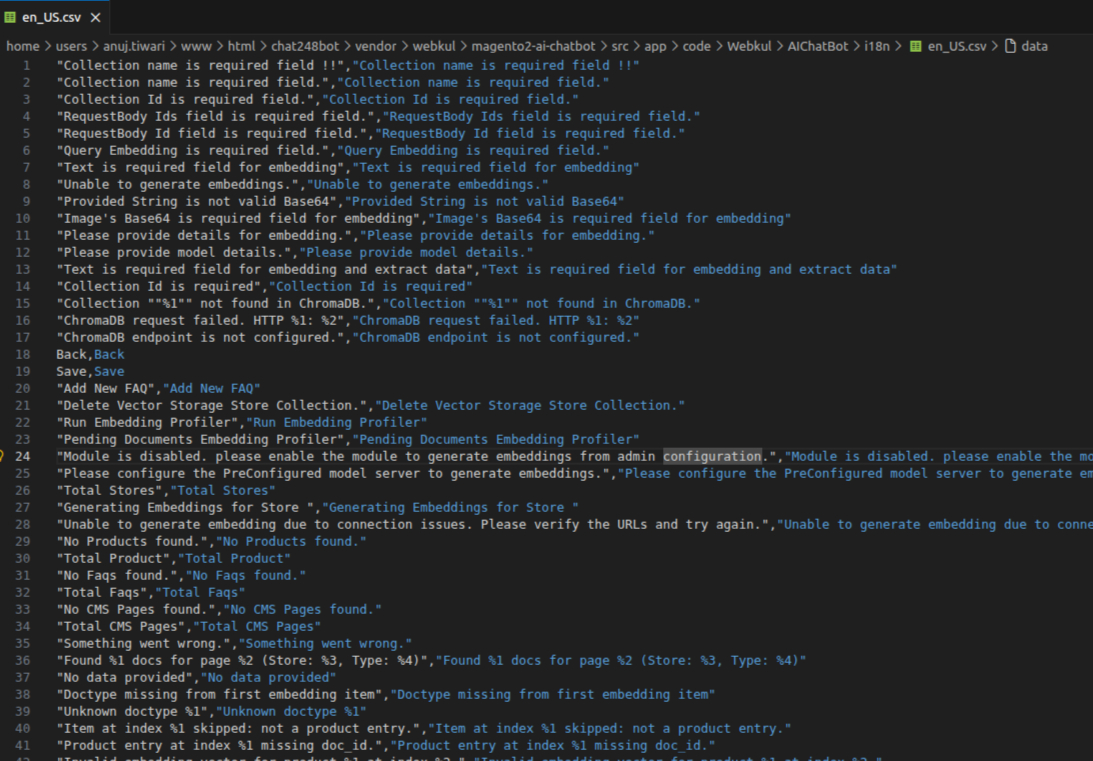
For Adobe Commerce AI Chatbot extension translation, navigate to the following path in your system src/app/code/Webkul/AIChatBot/i18n.
Open the file named en_US.csv for editing as shown in the below screenshot,

Now, upload it to the path src/app/code/Webkul/AIChatBot/i18n where the installation of Magento 2 is on the server. The module gets translated into the desired language.
The user can edit the CSV like the image below,
After editing and translating the CSV file, you need to save the translated file name according to your regional language and country code such as de_DE.CSV.
Followed by uploading the translated file to the same folder from where you have obtained it, Now your module translation is complete.

Admin Configuration of Magento 2 AI Chatbot using Open Source LLM
After the successful installation of the extension, the admin can view the configuration by navigating to Dashboard>Store>Configuration>AI General Configuration.

The following configuration options are available for the admin:
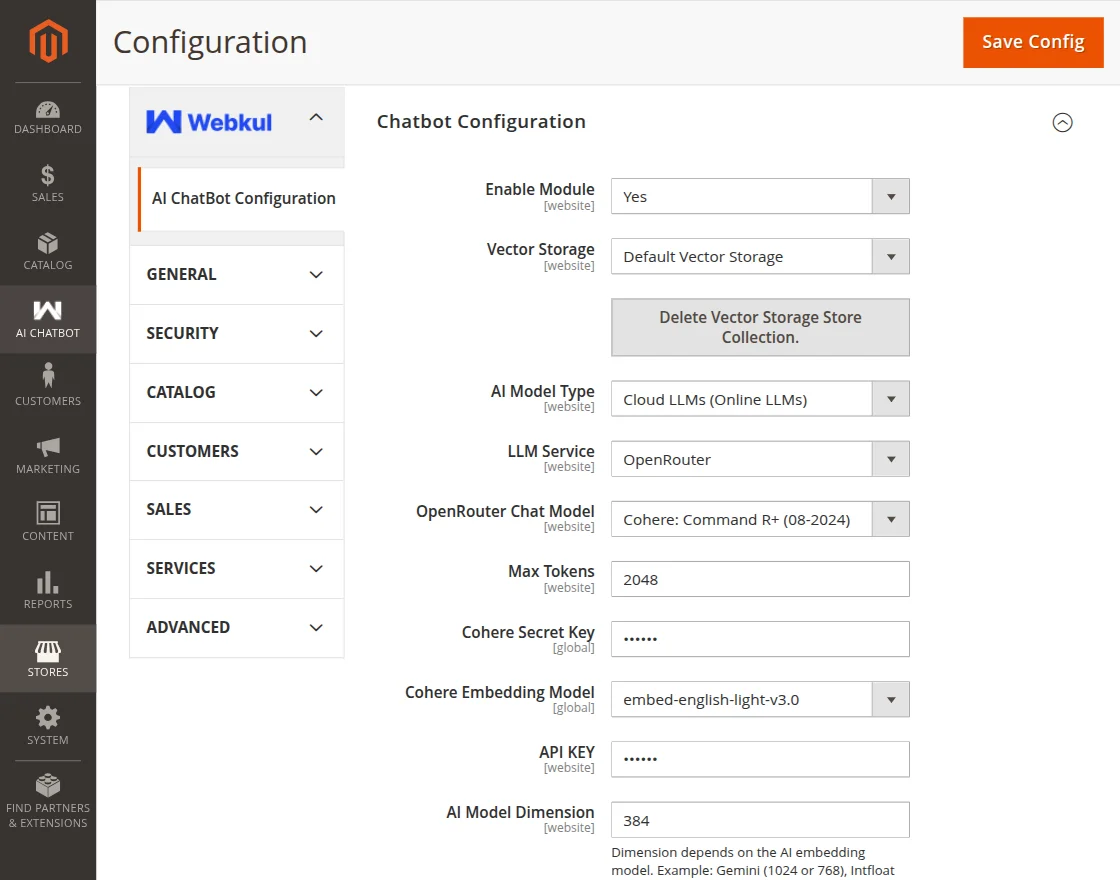
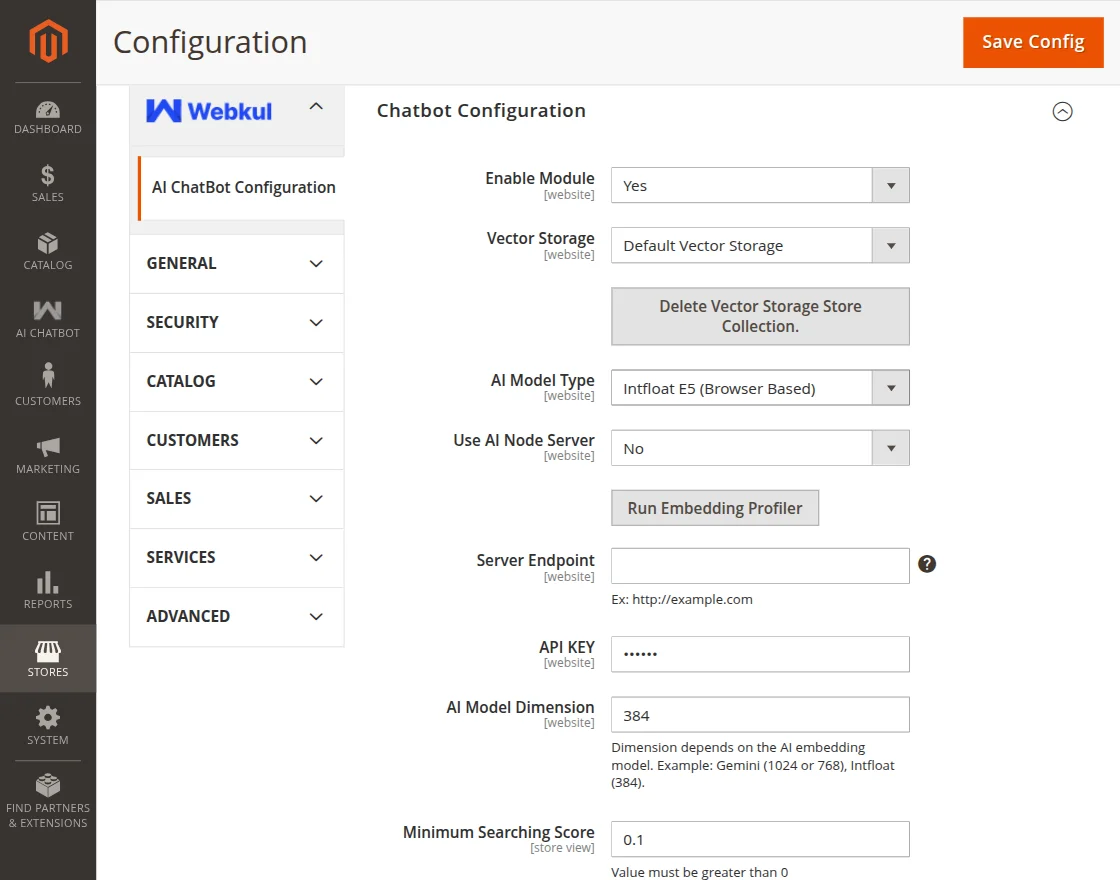
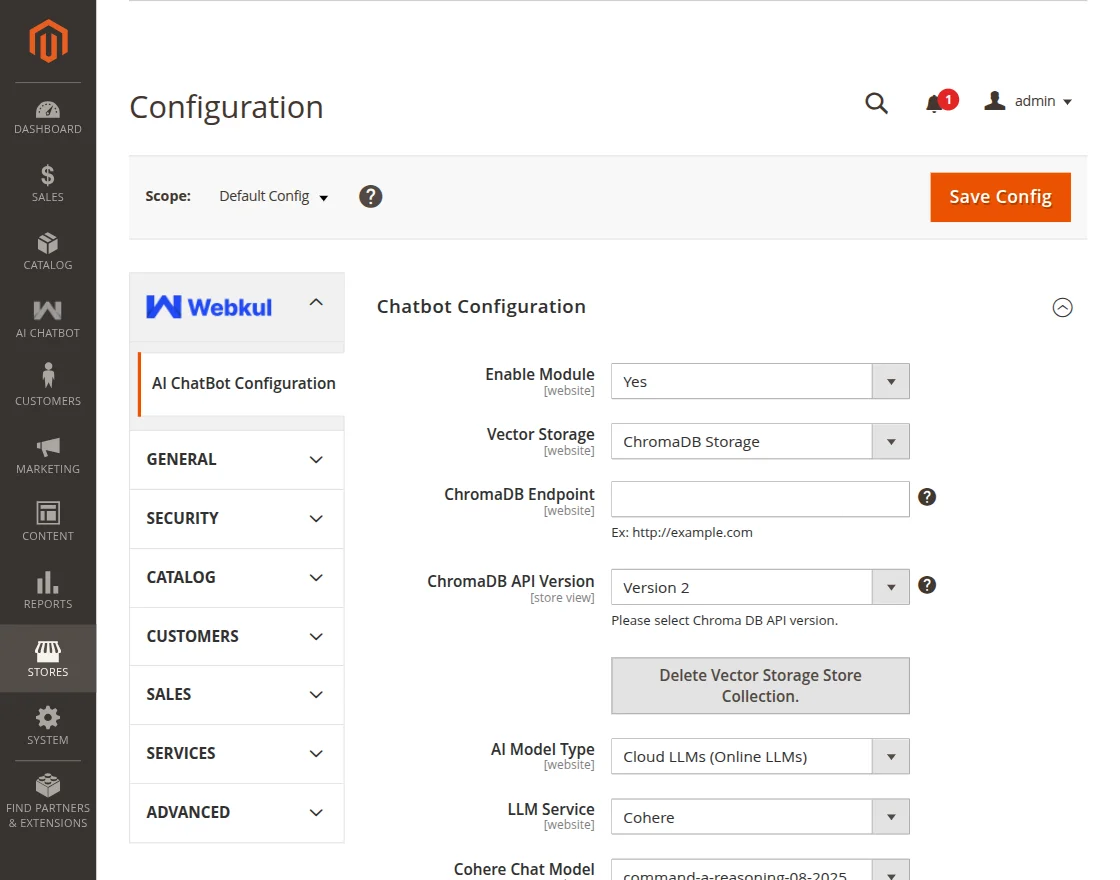
Chatbot Configuration
- Enable Module: Dropdown to enable or disable the extension.
- Vector Storage: Dropdown to select vector storage
- ChromaDB Endpoint: Field to input ChromaDB server address. (This option is available if the Vector Storage is selected as ChromaDB Storage.)
- ChromaDB API Version: Field to select ChromaDB API version. (This option is available if the Vector Storage is selected as ChromaDB Storage.)
- Delete Vector Storage Store Collection: This button deletes the product information saved in Vector Storage.
- AI Model Type: A dropdown option that allows users to choose the AI model type, including Pre-configured Model, Intfloat E5 (Browser-based), and Cloud LLMs (Online LLMs).
- API Key: Enter the API key.
- AI Model Dimension: Field to input AI Model Dimension.
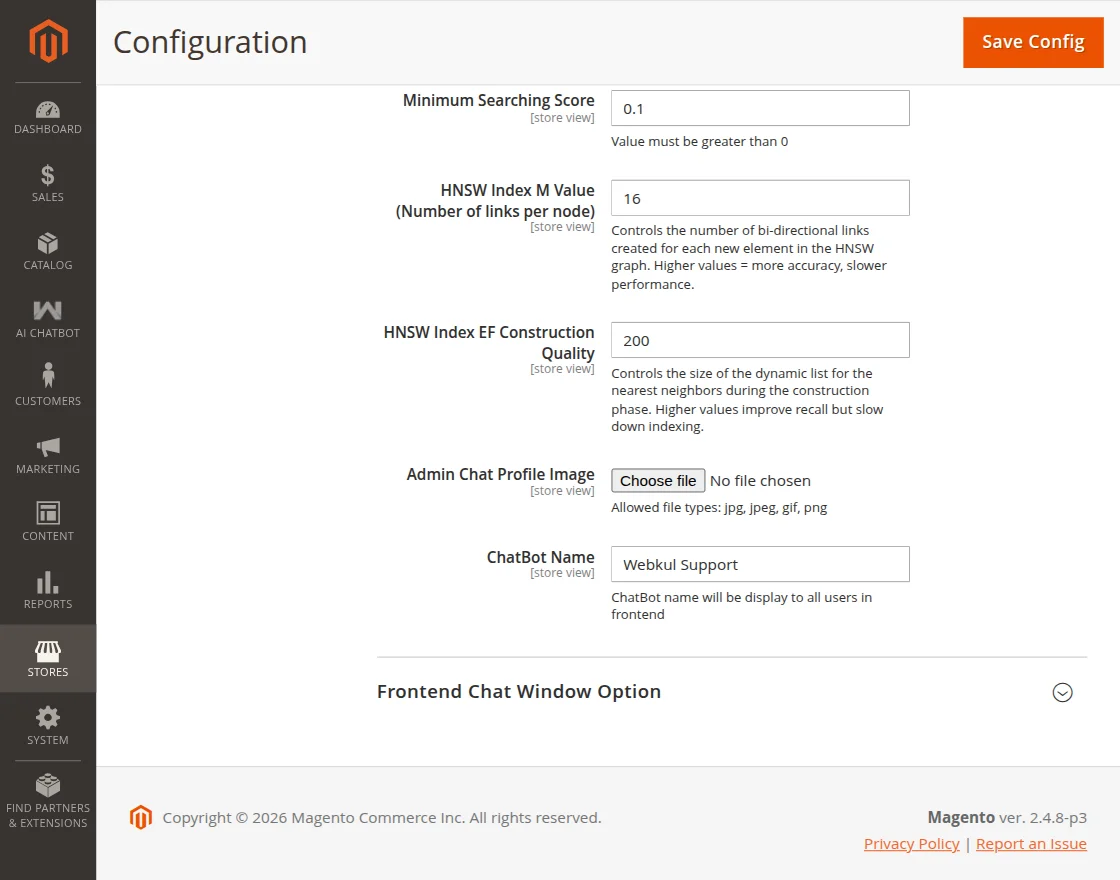
- Minimum Searching Score: Defines the minimum similarity score required for the chatbot to consider a search result relevant.
- HNSW Index M Value (Number of links per node): Controls how many connections each node has in the vector search graph, affecting search accuracy and performance. (Visible when Vector Storage is set to Default Vector Storage.)
- HNSW Index EF Construction Quality: Determines the quality level used during index construction, impacting the accuracy and speed of vector search indexing. (Avaliable when Vector Storage is set to Default Vector Storage.)
- Admin Chat Profile Image: Button to upload image for the profile.
- ChatBot Name: Field to set the chatbot name which will be displayed to users on frontend.
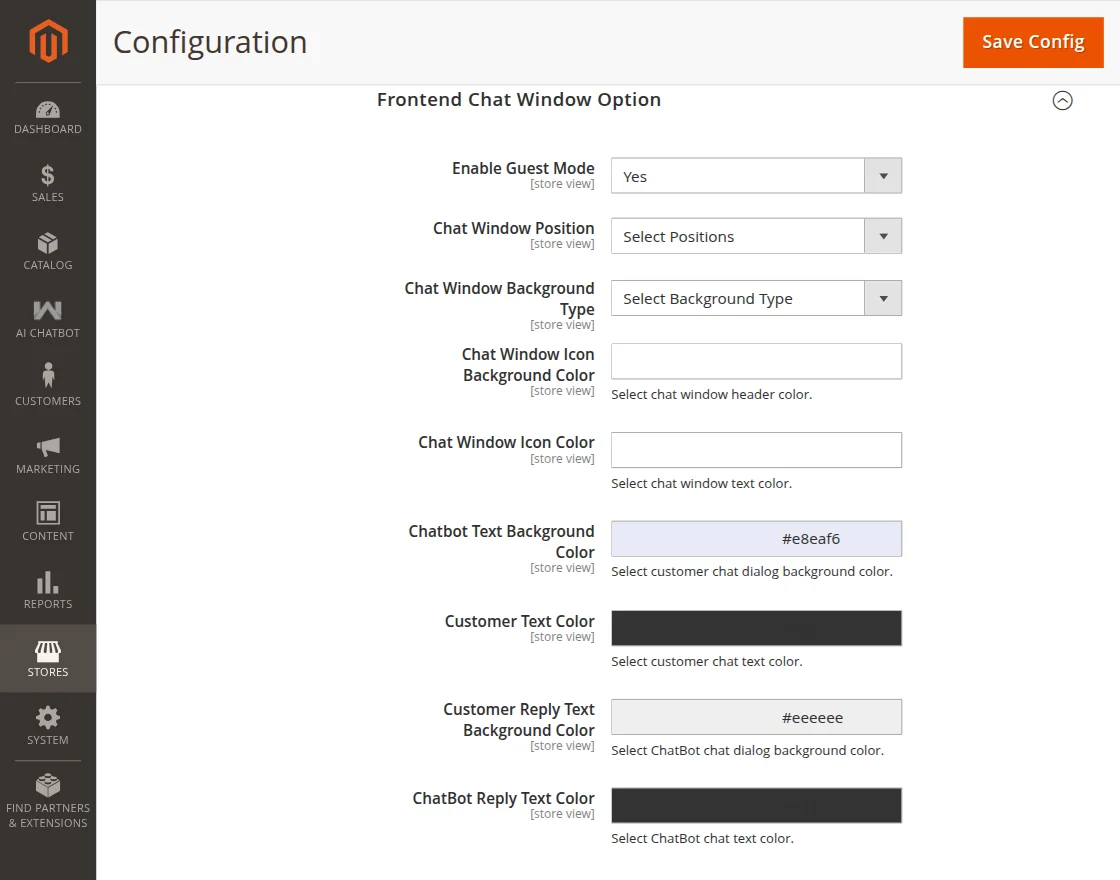
Frontend Chat Window Option
- Enable Guest Mode: Dropdown to enable or disable guest access to the AI chatbot. When enabled, users can interact with the chatbot without logging in.
- Chat Window Position: Dropdown to select the position of chat window.
- Chat Window Background Type: Select a background type (Solid Color or Image) for the chat window.
- Chat Window Background Image: This option is available if the background type is selected as Image.
- Choose Background Color: This option is available if the background type is selected as Solid Color.
- Chat Window Icon Background Color: Select chat window header color
- Chat Window Icon color: Select chat window text color.
- Customer Text Color: Select customer chat text color.
- Customer Reply Text Background Color: Select chatbot chat dialogue background color.
- ChatBot Reply Text Color: Select ChatBot text color.
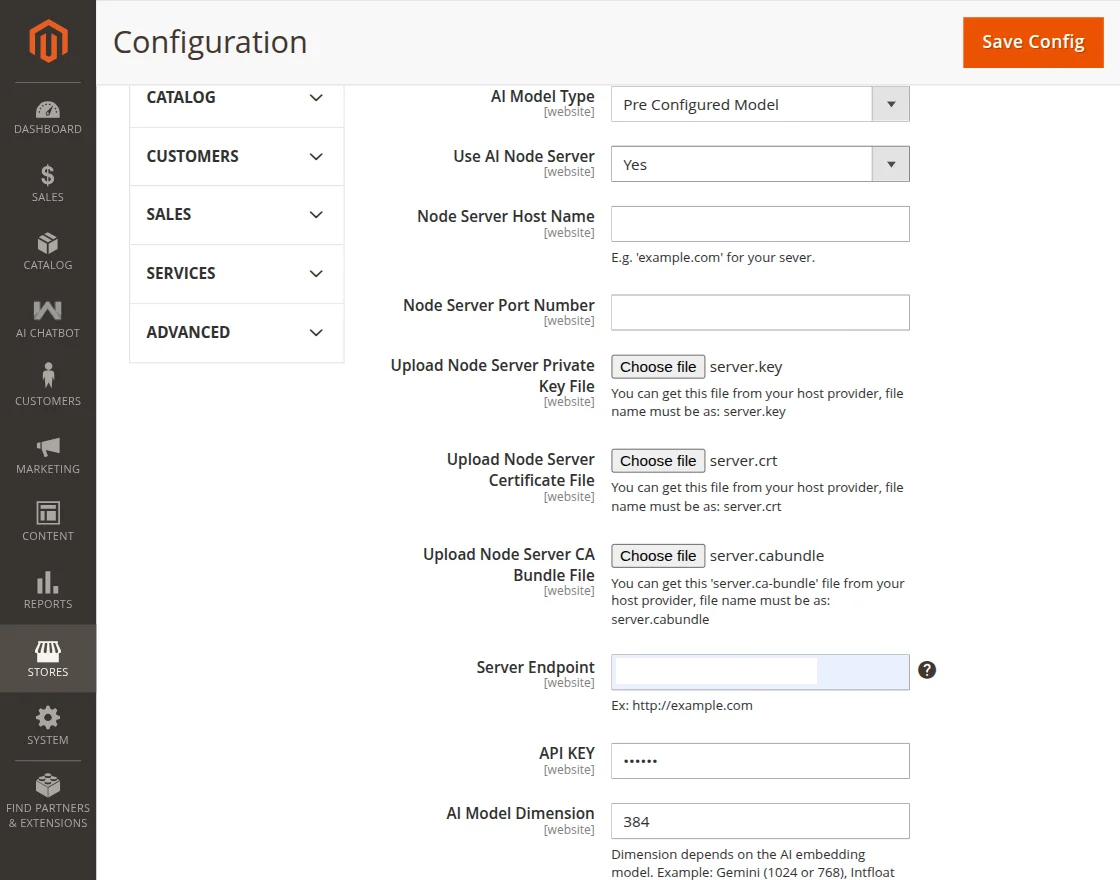
Configuration when Pre Configured Model is selected as AI Model Type
- Use AI Node Server: Dropdown to enable or disable the use of a Node.js server for processing AI chatbot requests.
- Node Server Host Name: Field to enter the domain name or IP address of the Node.js server.
- Node Server Port Number: Field to specify the port number on which the Node.js server listens for requests from the application.
- Upload Node Server Private Key File: Button to upload private key file (server.key).
- Upload Node Server Certificate File: Button to upload SSL certificate file (server.crt).
- Upload Node Server CA Bundle File: Button to upload CA bundle file (server.ca-bundle).
- Server Endpoint: Field to input server endpoint.
Intfloat E5 (Browser Based) AI Model Type Settings
- Use AI Node Server: Dropdown to enable or disable the use of a Node.js server for processing AI chatbot requests.
If Use AI Node Server is set to Yes, the configuration remains the same as when Pre Configured Model is selected.
If Use AI Node Server is set to No, the configuration options will differ and only the browser-based model settings will be used. The below configuration applies when “No” is selected. - Run Embedding Profiler: Button to analyze and test how well product data embeddings perform in the browser when using the Intfloat E5 (Browser Based) AI model.
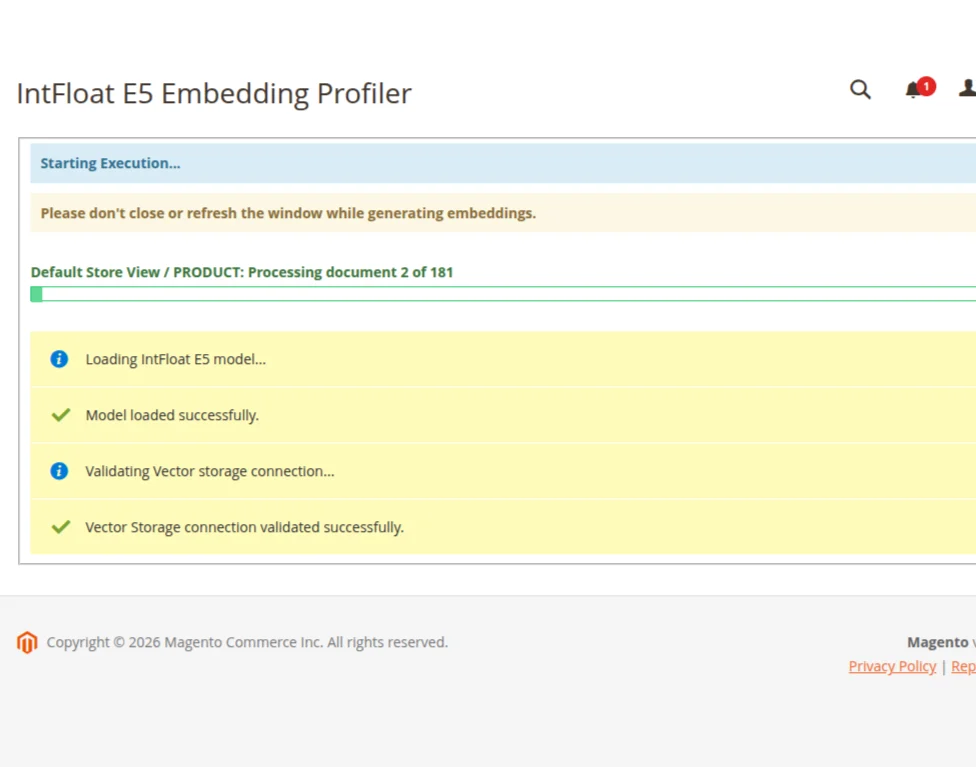
The progress bar displays real-time status, and users should avoid closing or refreshing the window until the process is complete.
Configuration when Cloud LLMs (Online LLMs) is selected as AI Model Type
LLM Service: Choose the Large Language Model service provider that will power the chatbot responses.
Here the admin will get 6 options for LLM Service-
1. OpenAI
2. Cerebras
3. Groq
4. Gemini AI
5. OpenRouter
6. Cohere
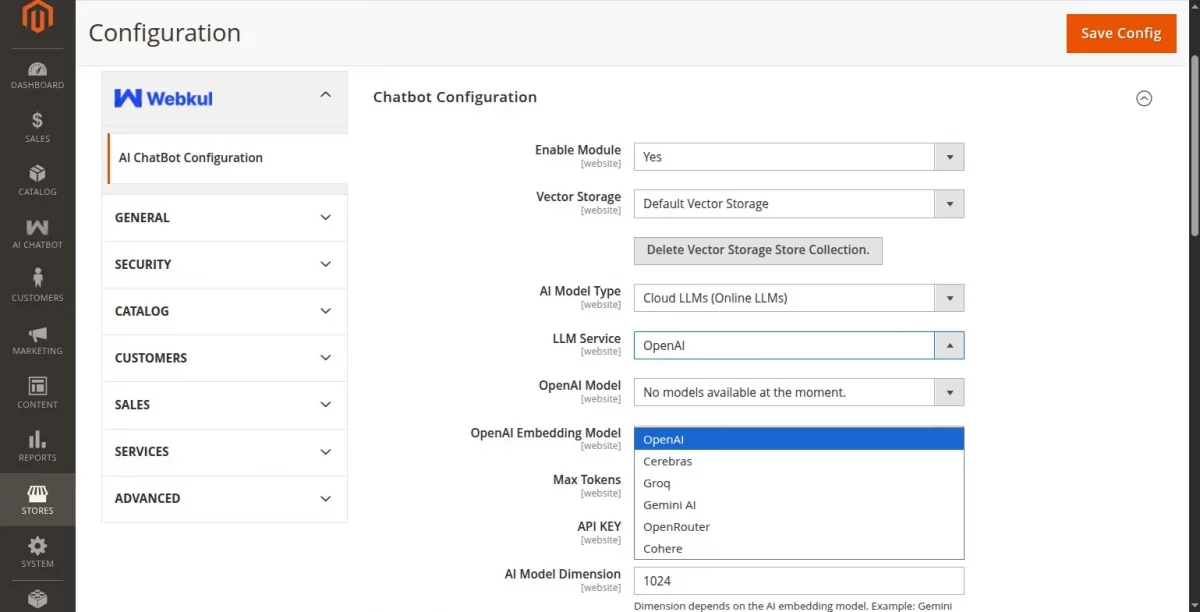
Note: For all Cloud LLMs (Online LLMs), first enter a valid API key and click the Save Config button. Once the configuration is saved, the available models are fetched dynamically from the API and displayed in the dropdown.
Configuration with OpenAI as LLM Service
- LLM Service: Select OpenAI.
- OpenAI Model: Select the specific OpenAI model that will generate responses for user queries.
- OpenAI Embedding Model: Dropdown to select the OpenAI Embedding Model
- Max Tokens: Enter the maximum number of tokens.
- API Key: Enter the OpenAI API key.

Configuration with Cerebras as LLM Service
- LLM Service: Select Cerebras.
- Cerebras Model: Select the specific Cerebras model.
- Max Tokens: Enter the maximum number of tokens.
- Cohere Secret Key: Enter the Cohere Secret Key.
- Cohere Embedding Model: Dropdown to select the Cohere Embedding Model
- API Key: Enter the Cerebras API key.

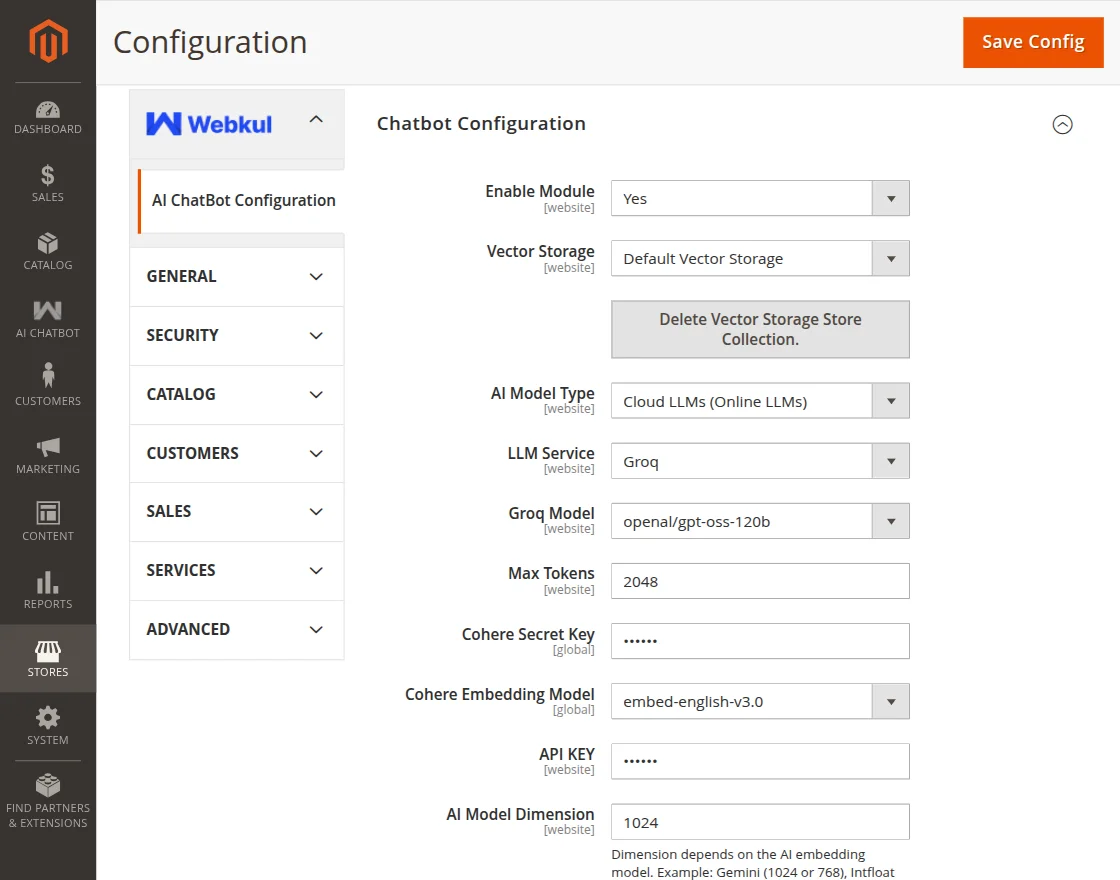
Configuration with Groq as LLM Service
- LLM Service: Select Groq.
- Groq Model: Select the specific Groq model that will generate responses for user queries.
- Max Tokens: Enter the maximum number of tokens.
- Cohere Secret Key: Enter the Cohere Secret Key.
- Cohere Embedding Model: Dropdown to select the Cohere Embedding Model
- API Key: Enter the Groq API key.
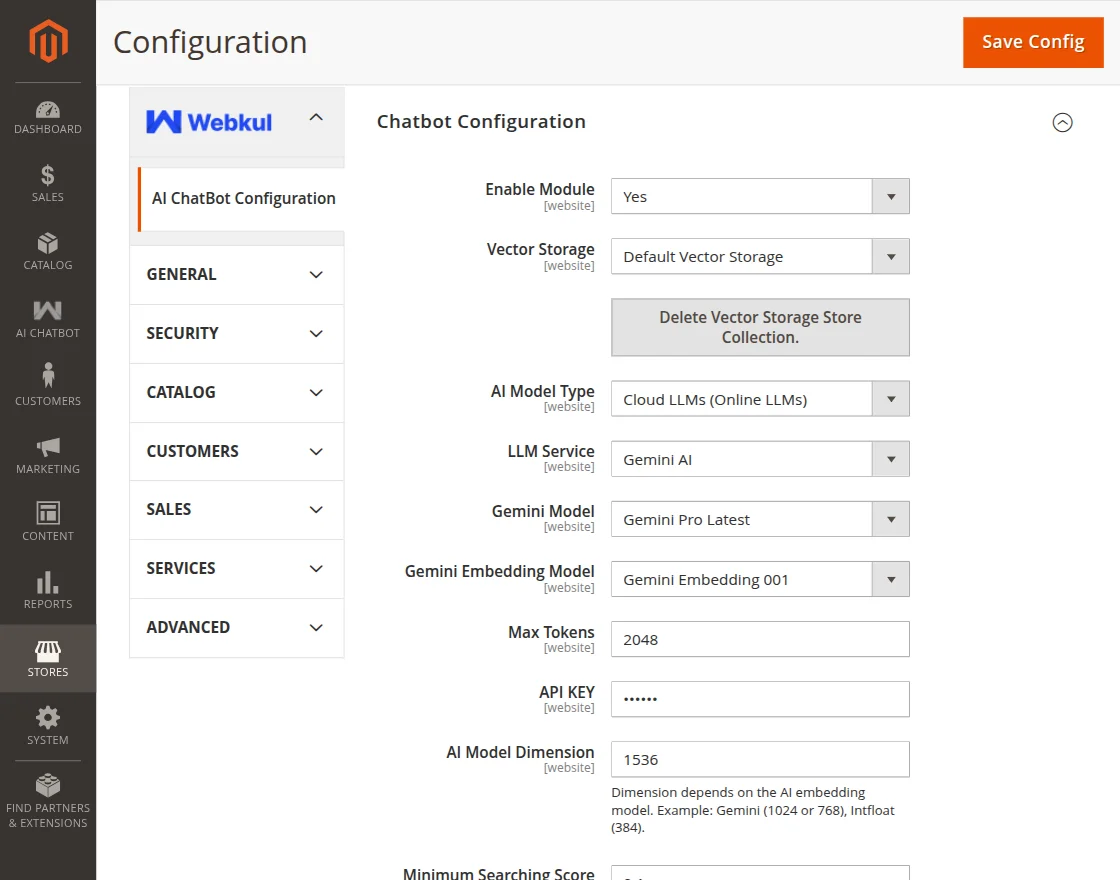
Configuration with Gemini AI as LLM Service
- LLM Service: Select Gemini AI.
- Gemini Model: Select the specific Gemini model that will generate responses for user queries.
- Gemini Embedding Model: Dropdown to select the Gemini Embedding Model.
- Max Tokens: Enter the maximum number of tokens.
- API Key: Enter the Gemini API key.
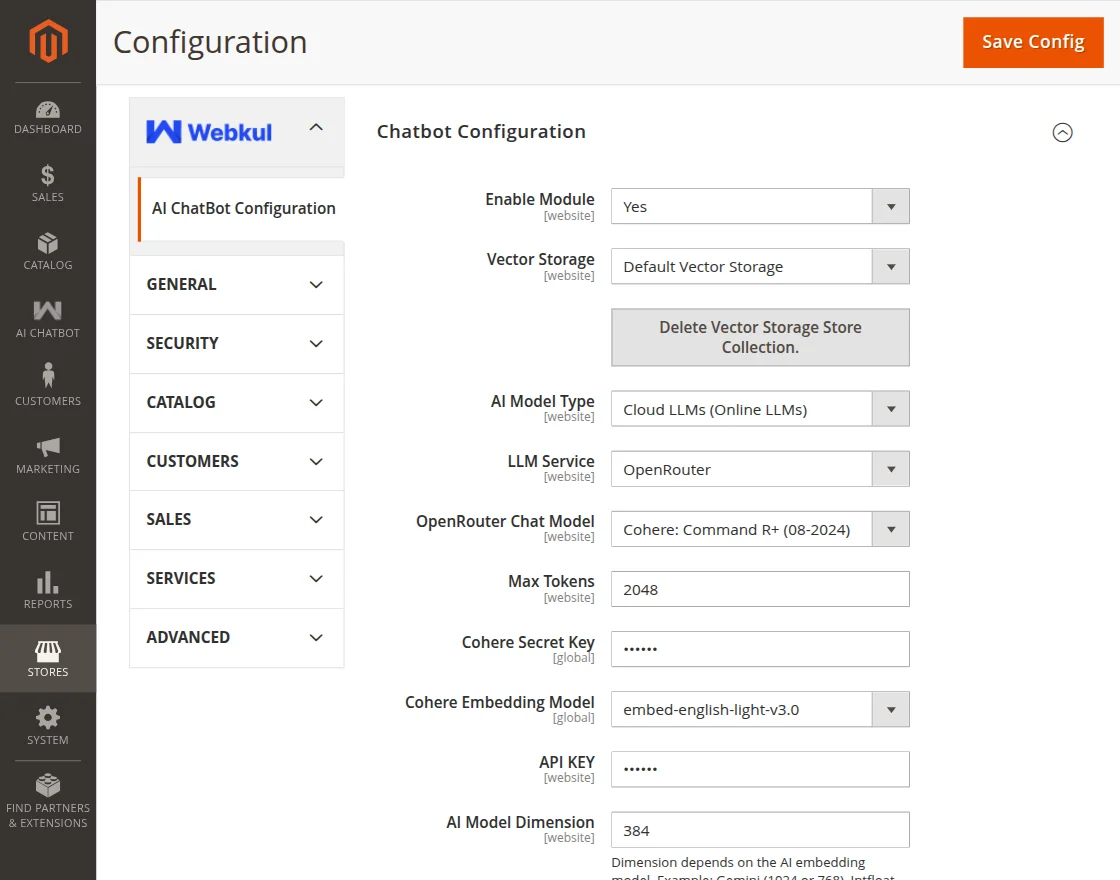
Configuration with OpenRouter as LLM Service
- LLM Service: Select OpenRouter.
- OpenRouter Chat Model: Select the OpenRouter Chat model from the dropdown.
- Cohere Secret Key: Enter the Cohere Secret Key
- Cohere Embedding Model: Dropdown to select the Cohere Embedding Model
- Max Tokens: Enter the max token
- API Key: Enter the API key.
Configuration with Cohere as LLM Service
- LLM Service: Select Cohere.
- Cohere Chat Model: Select the Cohere Chat Model from the dropdown.
- Cohere Embedding Model: Dropdown to select the Cohere Embedding Model
- Max Tokens: Enter the max token
- API Key: Enter the API key.

Frontend – Customer Flow
Once the AI Chatbot has been installed and configured, it’ll be available for customer use on the storefront.
An icon to open the chatbot chat window will be available either on left or right hand bottom of the store page. The positioning of chatbot window can be set from the configurations.
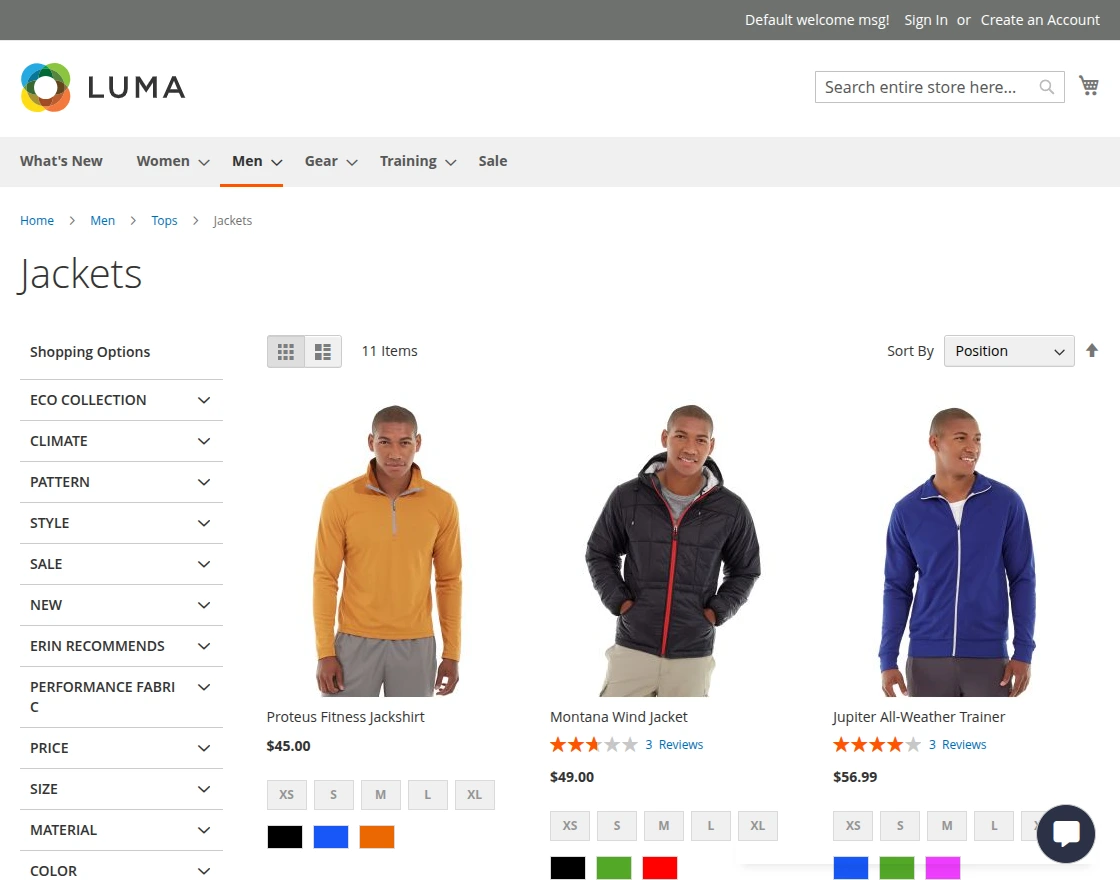
After clicking the chatbot icon, the chat window will open, allowing both registered and guest users to use the chat feature.

Further, the customers can ask various types of queries to the chatbot related to:
- General queries to resolve general problems.
- Track and check summary and details of placed orders (available for logged-in users).
- Search Products within the store.
Some query demonstrations:
- Query by customer regarding rating of a product.

- Customer query regarding product price range.


- Order Related Queries
The customers can ask queries related to their orders by tapping the option – Check your orders.
Click and the same brings up the section where we can get the order related details.
The customers can check more details of the orders, print invoices and track orders.

Tapping the orders option displays the list of items purchased.
Configuration when Intfloat E5 (Browser Based) is selected as AI Model Type
Tapping the item brings up more details for the same.

You can ask regarding the shipping and get the details for the same.

You can also ask about the tax applied on the respective order.

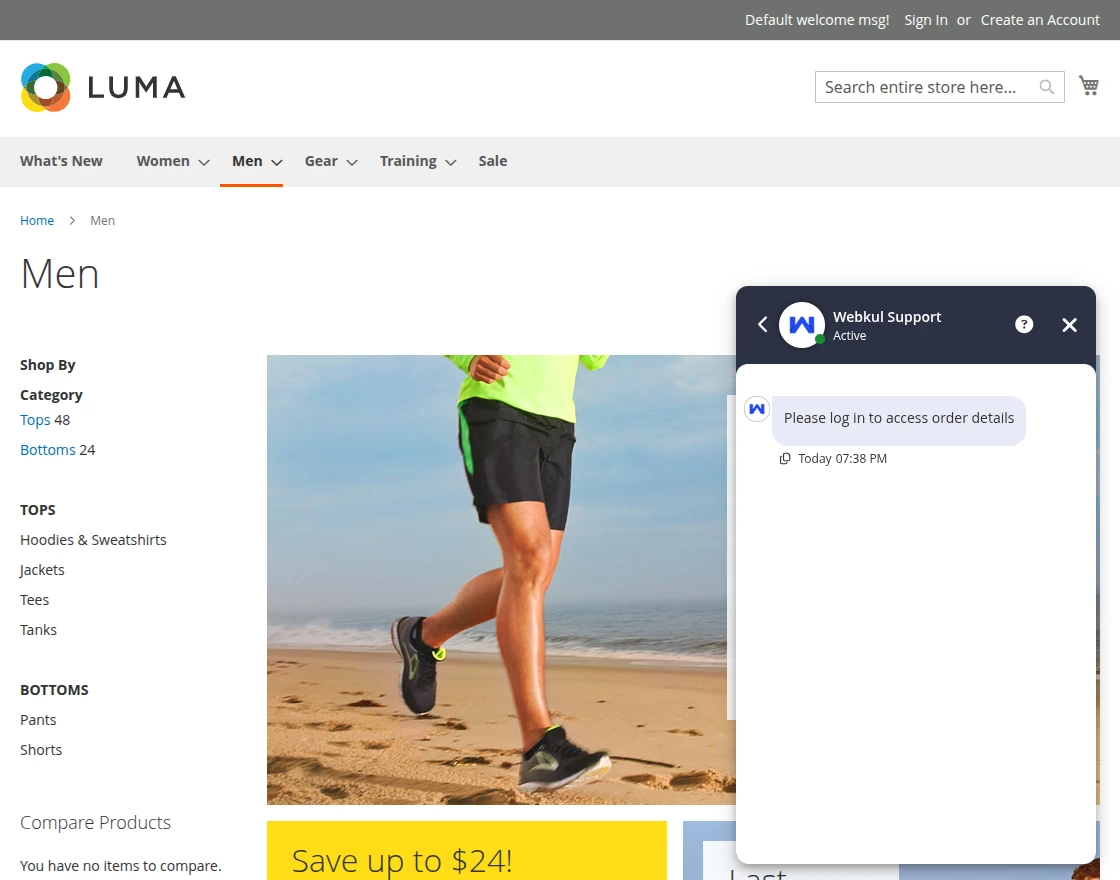
When a guest user tries to access the Check Your Orders section, a message “Please log in to access order details” appears in the chat.
The customers can also pin any of the asked queries to the chatbot by tapping the ping icon.
This allows the customers to make use of the memory feature of the chatbot.
So, after enabling the same they can ask multiple questions to the chatbot regarding the already asked question.

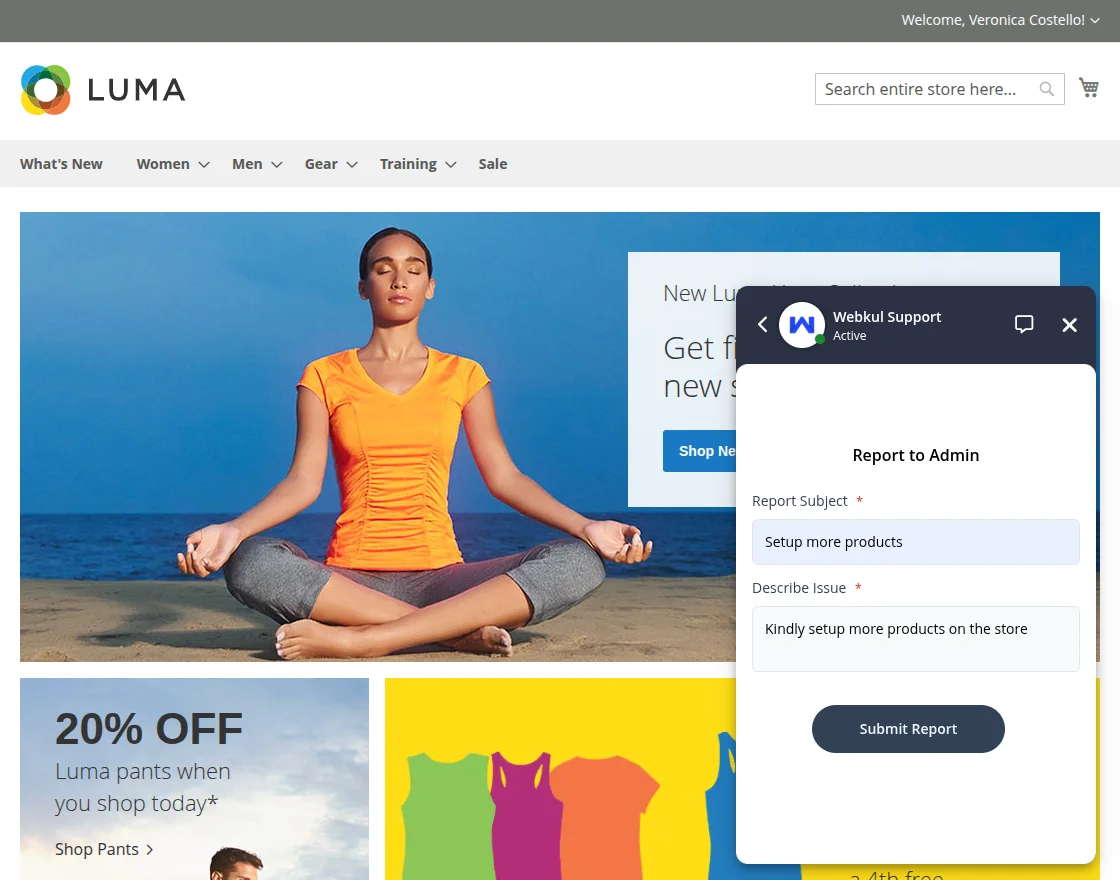
Also, tapping on the ? information icon in the title of the chatbox the customers can report to the admin.

After submit report a success message is displayed and the admin can see the message in the backend.

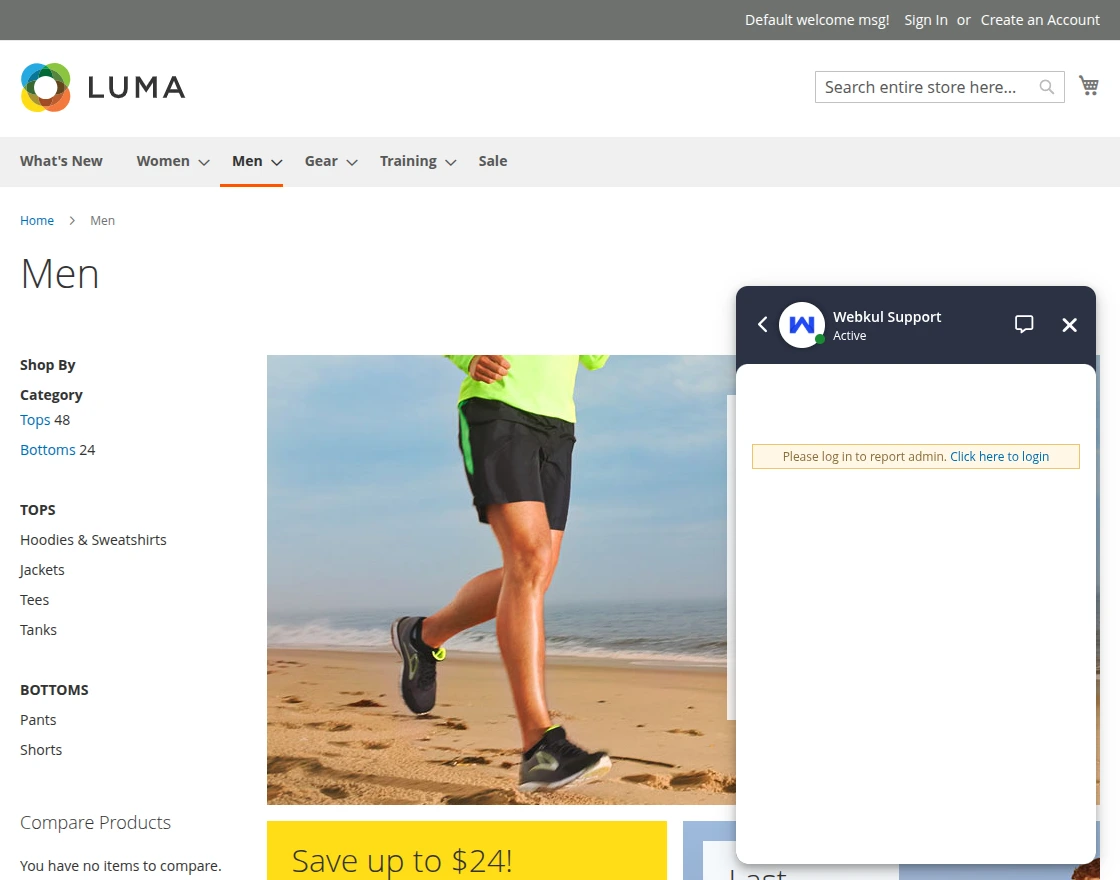
When a guest user tries to access the Report to Admin section, a message “Please log in to report admin. Click here to login” appears in the chat.
The chatbot also replies store view wise:

AI Chatbot Menu Option
Here, the admin will get four options –
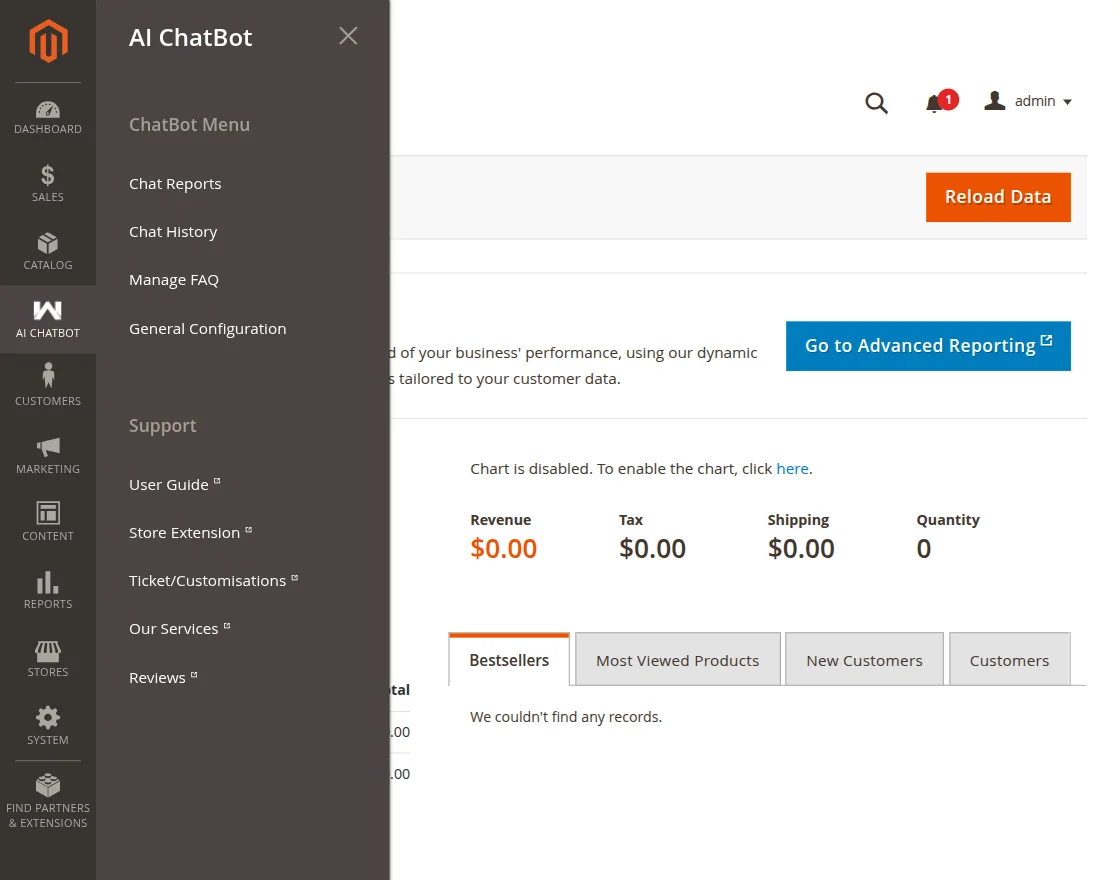
- Chat Reports
- Chat History
- Manage FAQ
- General Configuration
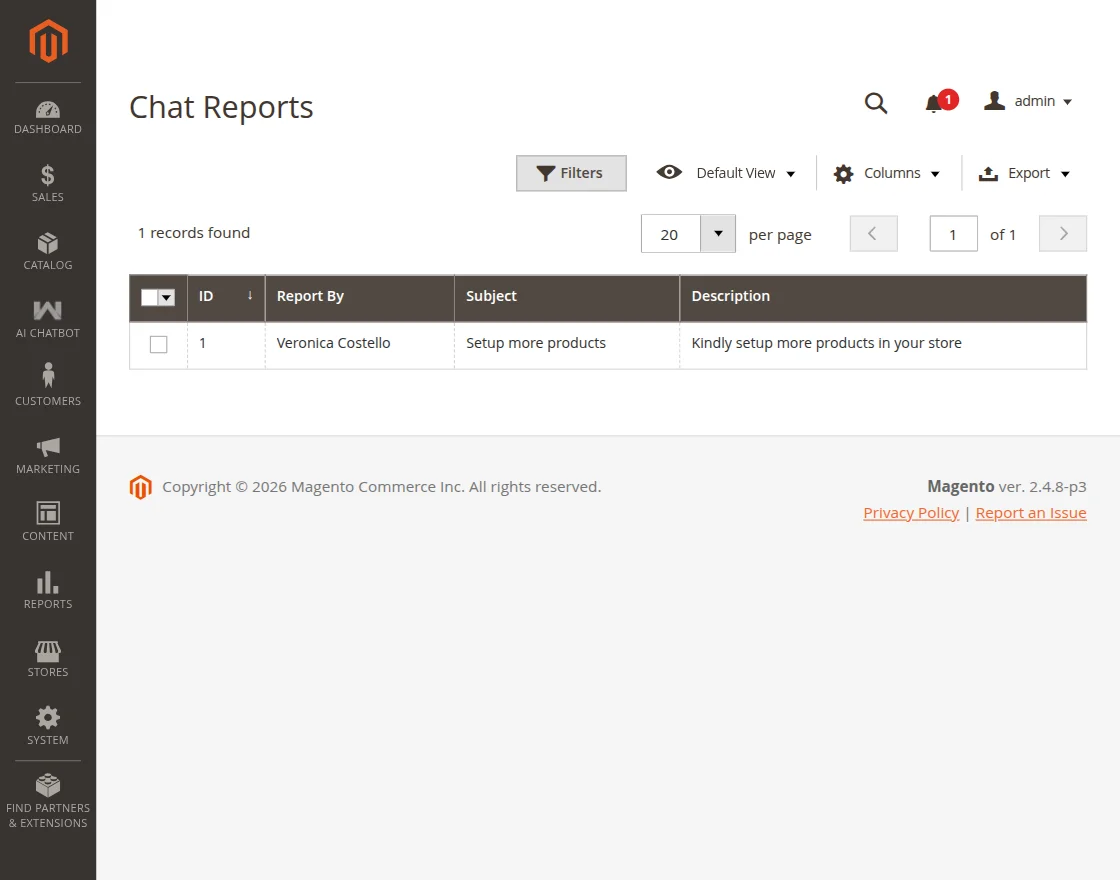
Chat Reports
The customers have the functionality to also ask queries directly to the admin through the AI Chatbot window.
They will input the subject and message query and then press on Submit report.
The queries are visible to the admin in the backend as per the image below.
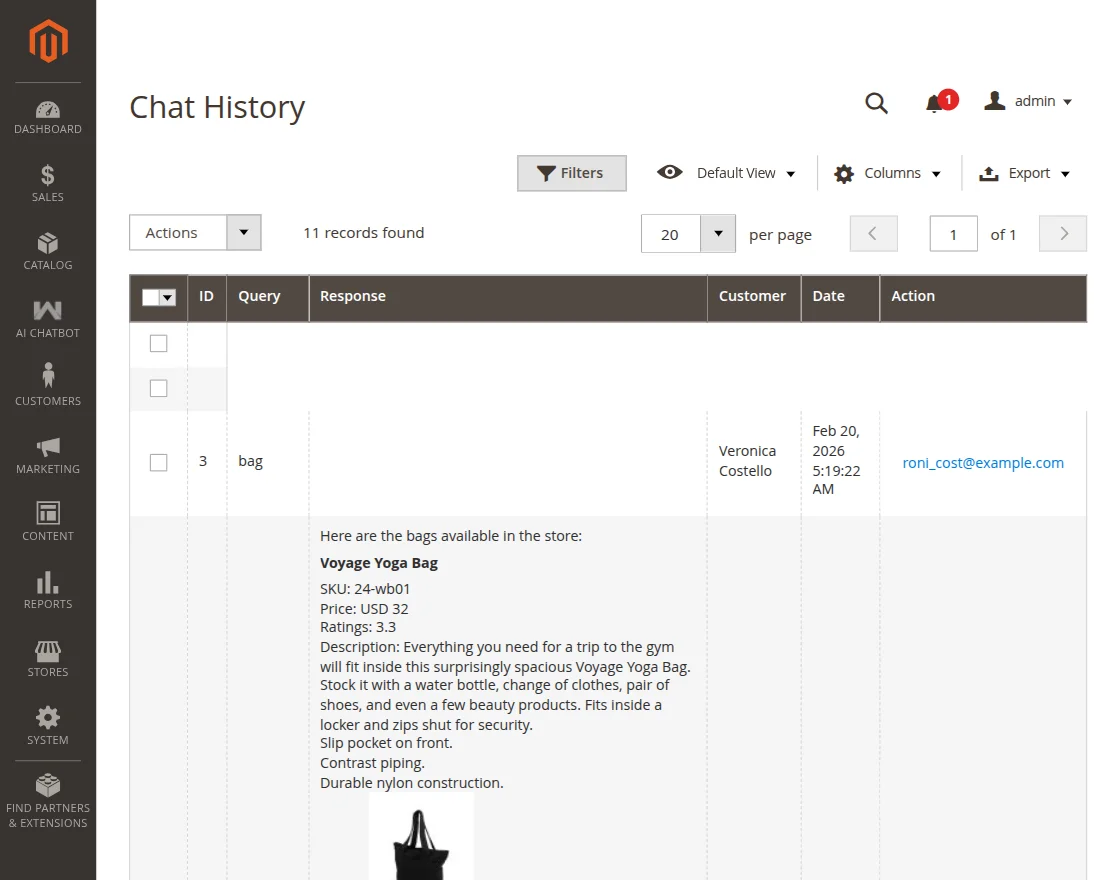
Chat History
Here, the admin can view the complete details of the chat history of customers with the chatbot.
Manage FAQ
Admin can easily add the FAQs from the backend for the chatbot and when a customer asks a relevant faq the result is portrayed to the customers.
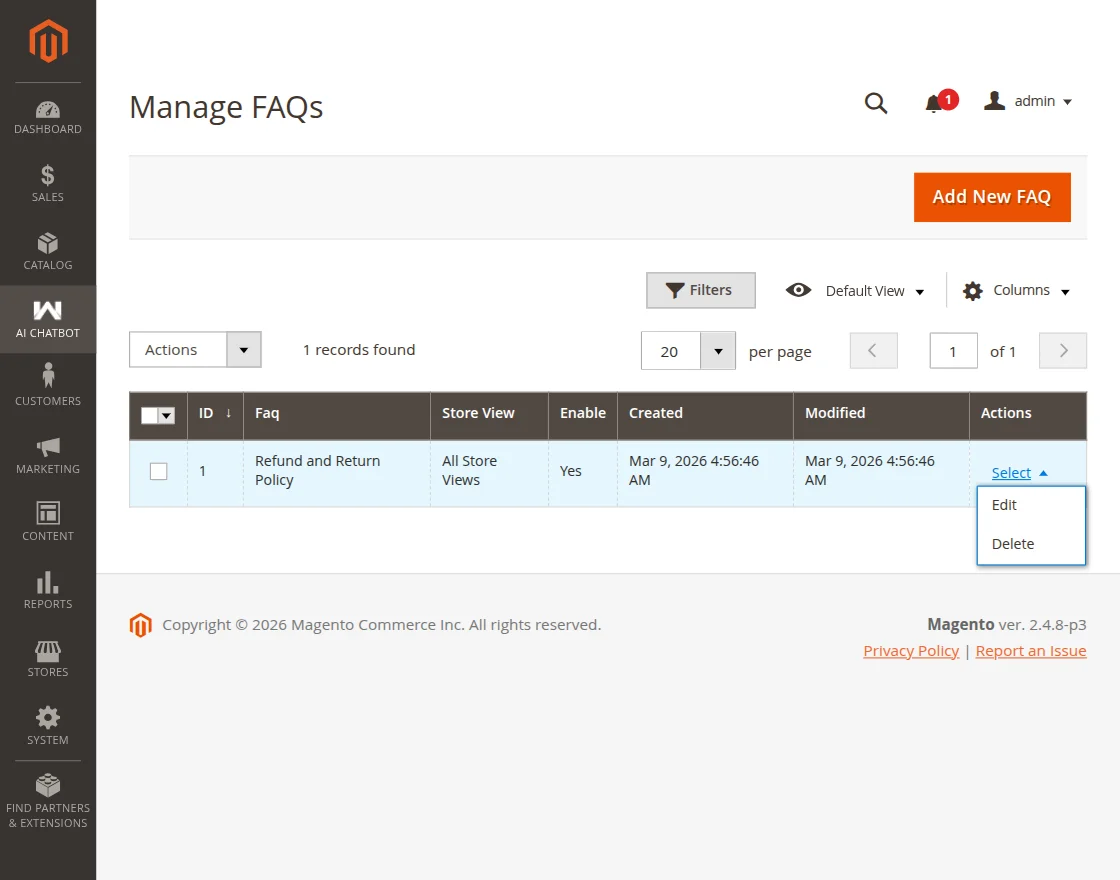
To add a faq tap the Add New FAQ button.
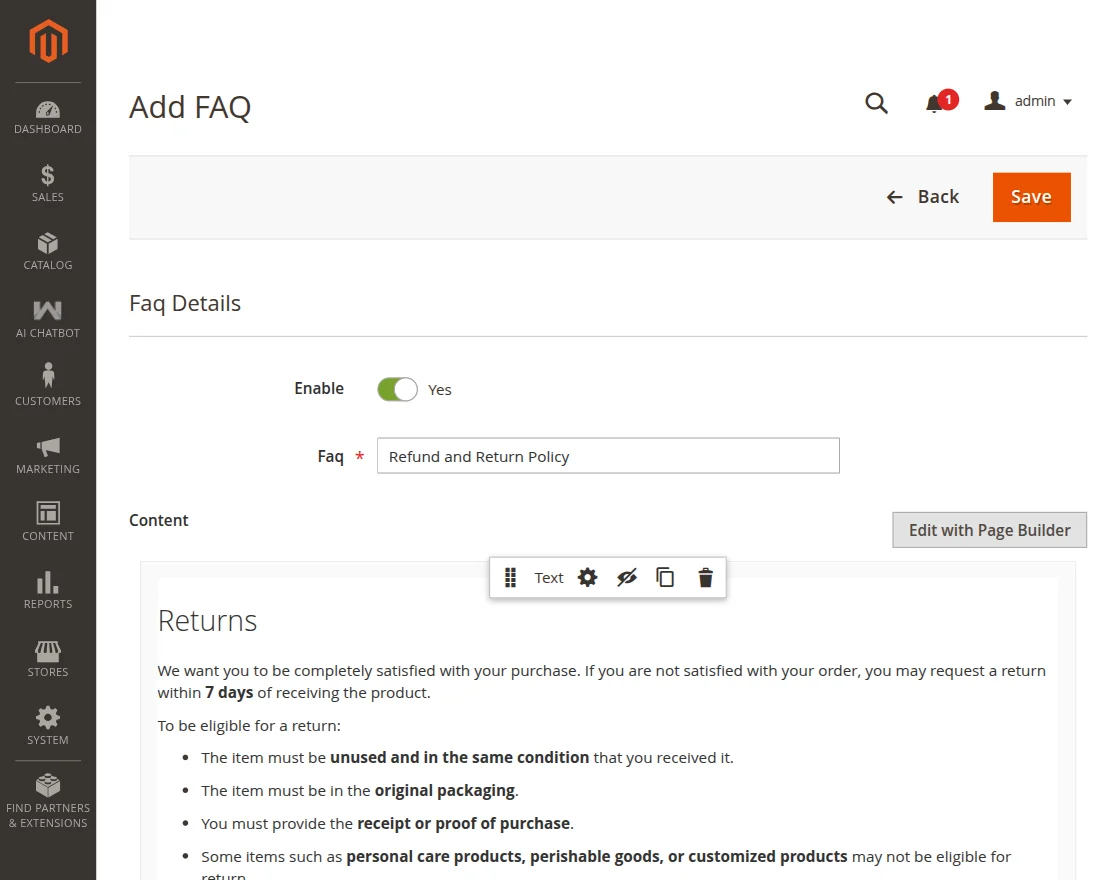
Here, the admin has to –
- Enable the FAQ
- Setup the FAQ
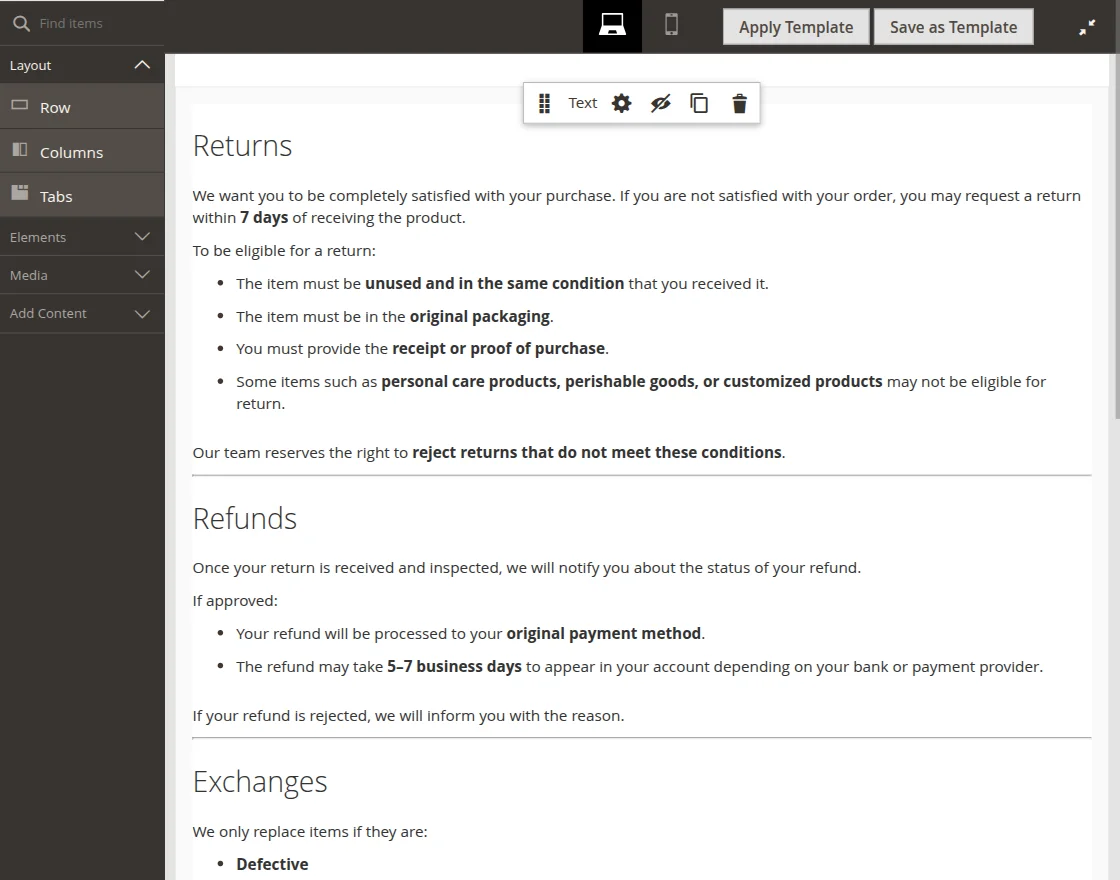
- Enter the rich content for the FAQ using the page builder option
- Choose the store view for which the FAQ will be applicable for
Lastly, save the FAQ.
General Configuration
Here, the admin can navigate to the configuration of the module.
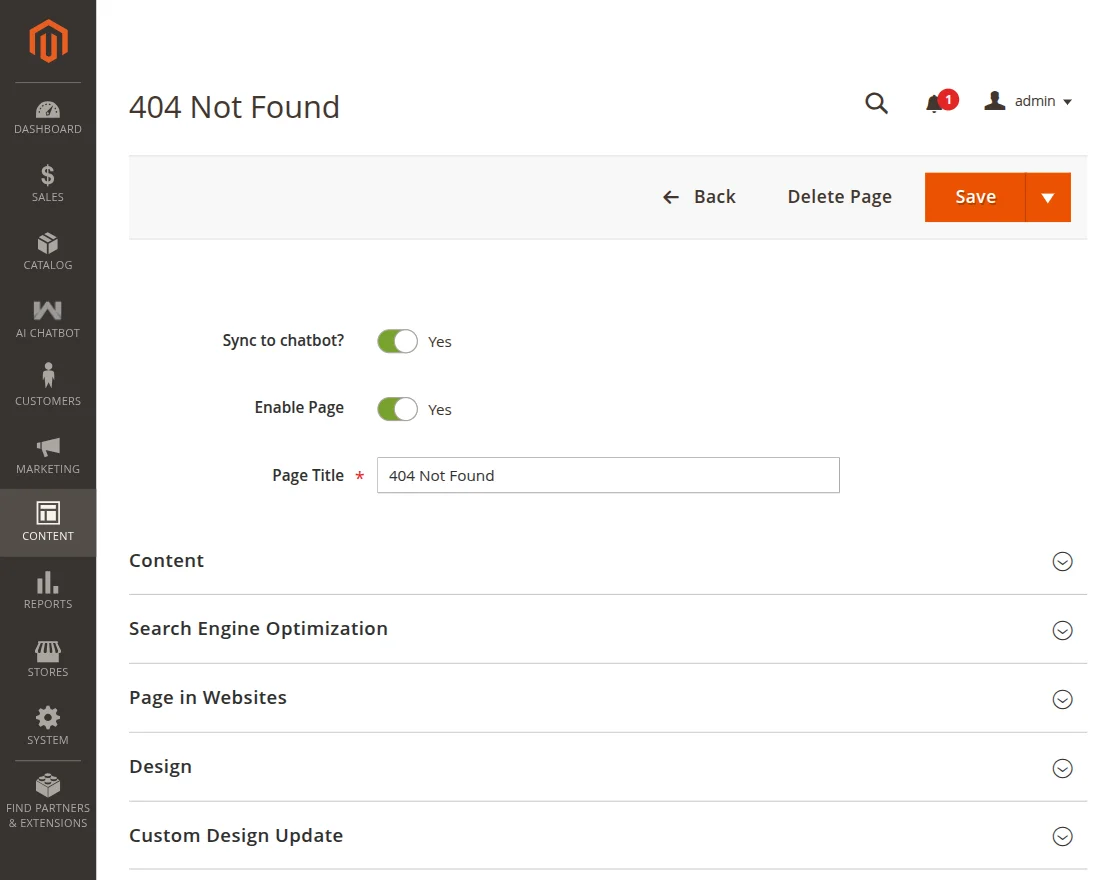
Apart from that, the admin can sync CMS pages to the chatbot as required.
For a respective CMS page, edit it and enable the option sync to chatbot.
So, that’s all for the Adobe Commerce AI Chatbot Using Open Source LLM extension.
Support
If you have any more queries or suggestions regarding AI Chatbot using Open Source, kindly reach out to us through [email protected] or raise a ticket through webkul.uvdesk.com.
You may also check our top-quality Magento 2 AI Extensions.
Current Product Version - 4.0.2
Supported Framework Version - Magento 2.0.x, 2.1.x, 2.2.x,2.3.x, 2.4.x

.Thanks for sharing the info, keep up the good work going…. I really enjoyed exploring