Introduction
Odoo MRP Subcontracting Workorder helps users manage outsourced manufacturing work directly from work orders. As a result, it provides full control over vendors, materials, costs, and subcontracted operations.
Odoo MRP Subcontracting Workorder supports both full outsourcing for main products as well as partial outsourcing for selected components.
All subcontracting activities stay linked to work orders, ensuring better tracking and control. Additionally, with automated purchase orders, delivery tracking, and clear cost views, daily work becomes easier.
As a result, users can manage subcontracted operations without manual steps or separate tracking tools.
Features
- Easy outsourcing of selected work order operations to vendors
- Clear tracking of vendor costs for outsourced manufacturing work
- Automatic creation of purchase orders for subcontracted operations
- Simple tracking of materials sent and products received
- Support for full as well as partial outsourcing at operation level
- Controlled workflow using work order dependency settings
- Clear cost breakdown for each subcontracted work order
Installation
- Once you purchase the App from Webkul store, you will receive a link to download module’s zip file.
- Extract the file on your system after download finishes. As a result, you will be able to see a folder named- ‘mrp_subcontracting_workorder’
- Copy and paste this folder inside your Odoo Add-Ons path.
- Now, open Odoo App and click on the Settings menu. Here, click on Activate Developer Mode.
- Then, open Apps menu and click on ‘Update Modules List.’
- In the search bar, remove all the filters and search ‘mrp_subcontracting_workorder’
- You will be able to see module in the search results. Click on ‘Activate’ to install it.
Workflow
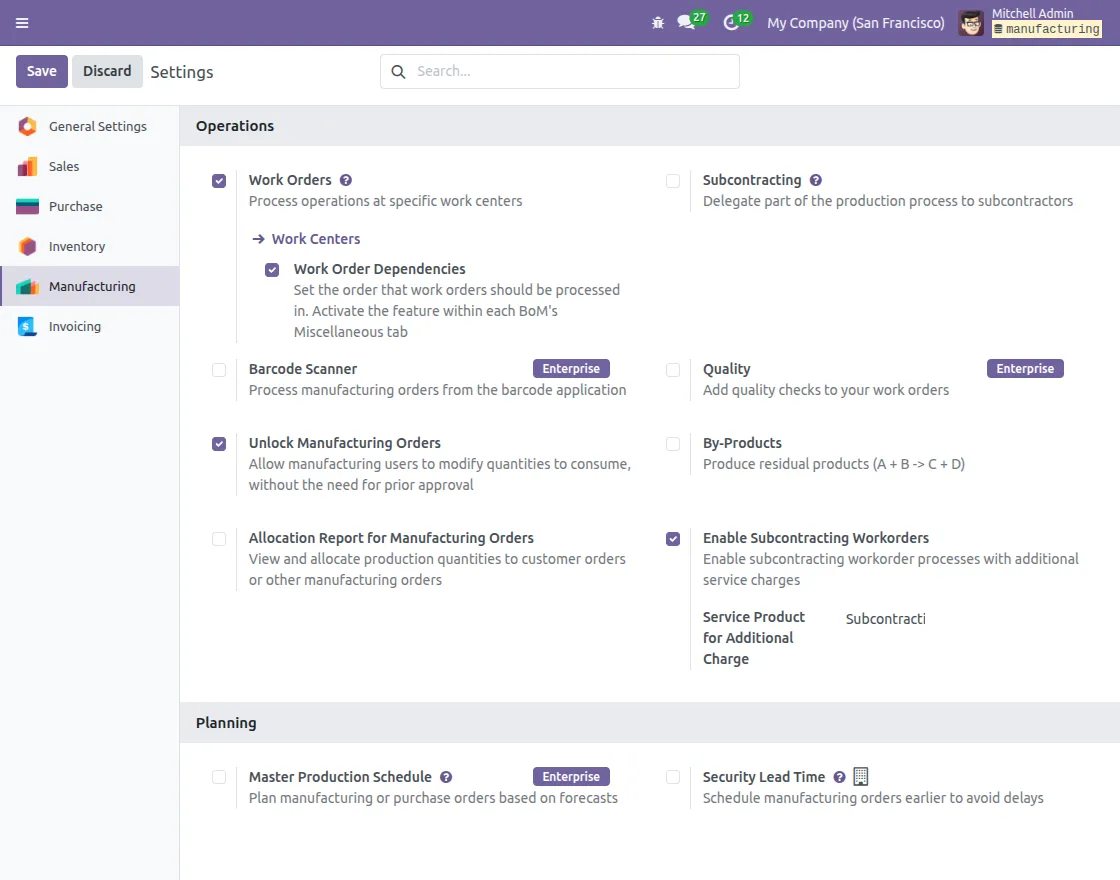
1. Enable Subcontracting Configuration
After installing Odoo MRP Subcontracting Workorder module, Go to
Manufacturing →Configuration → Settings →Under operations section.
- Enable Subcontracting Workorders to allow subcontracted operations.
- Set the Service Product for Additional Charge if required.
- Save the settings to apply the subcontracting configuration.
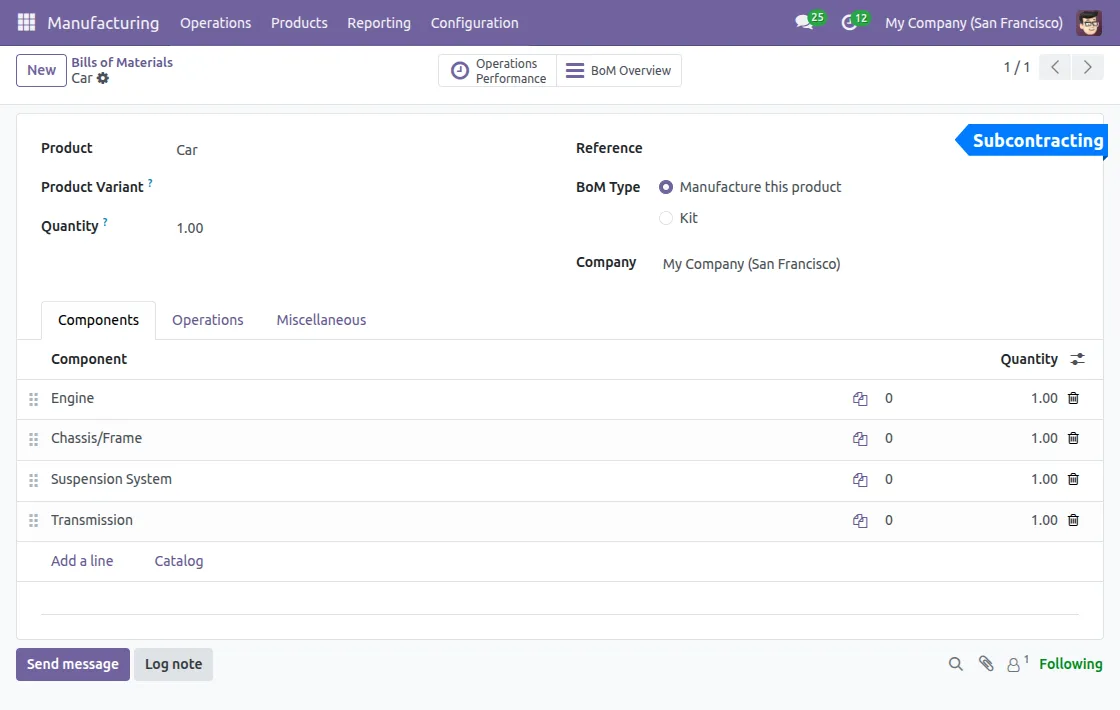
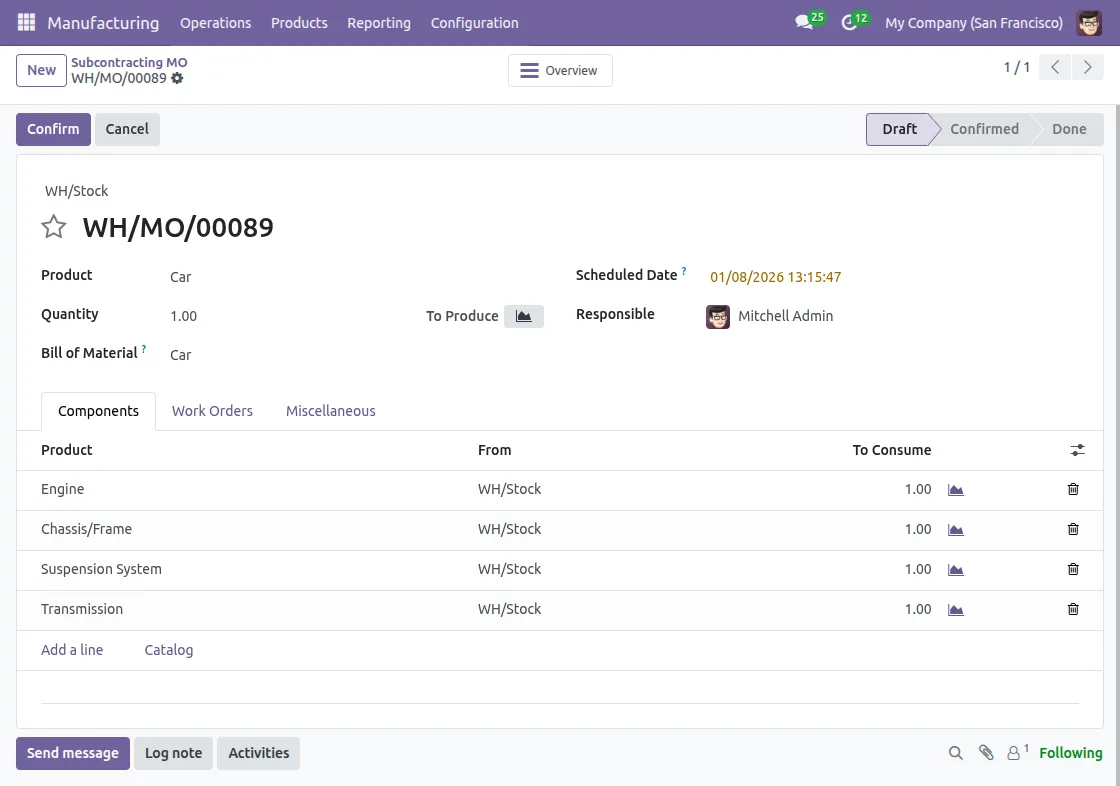
2. Add Components in Bill of Materials
Go to Manufacturing → Products → Bills of Materials and open the required BOM.
- Select the product for which the BOM is created.
- Then, add all components required to manufacture the final product.
- After that, define the quantity for each component clearly.
- Finally, Save the BOM after adding all required components.
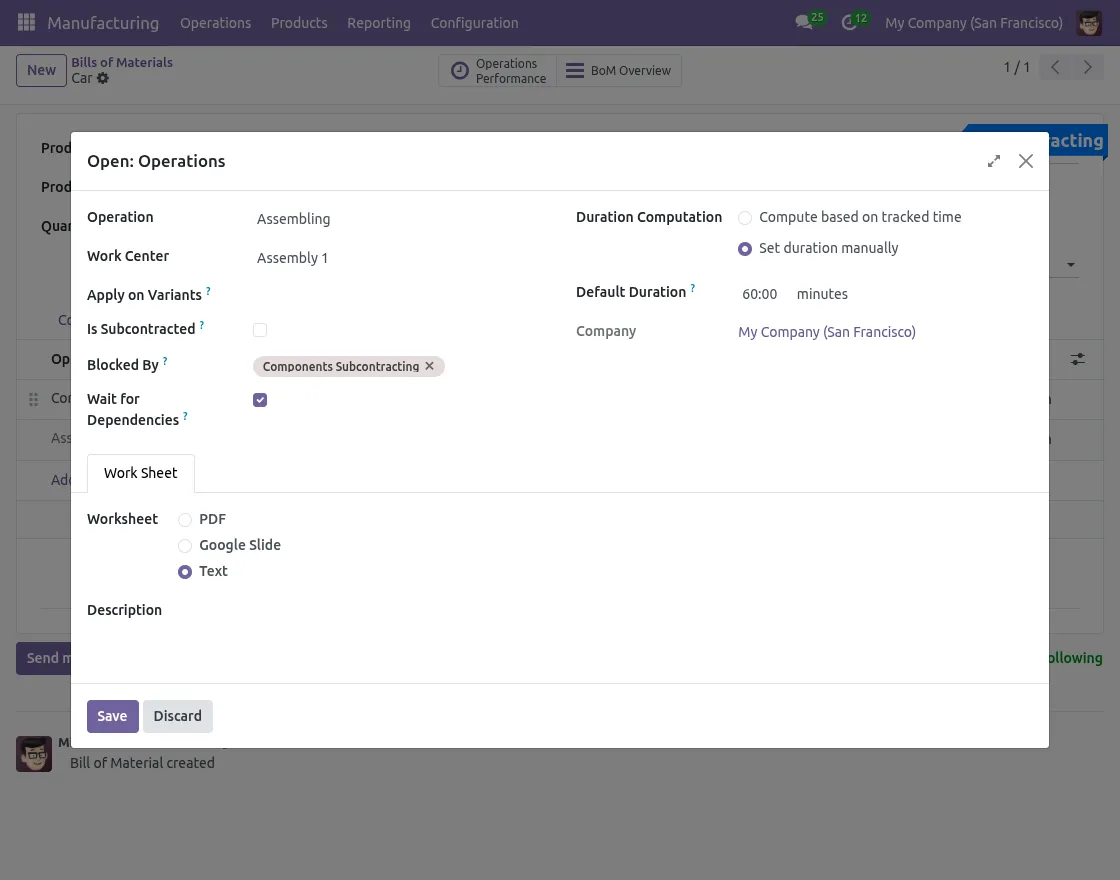
3. Configure Subcontracted Operation
Open the same BOM and move to the Operations tab.
- From there, create a new operation for the subcontracted work.
- Make sure to enable Is Subcontracted for the operation to be outsourced.
- Select the Subcontract Type as Full or Components based on requirement.
- Assign the Vendor, fixed cost, and additional cost if needed.
- Once everything is configured, save the operation to apply the subcontracting settings.
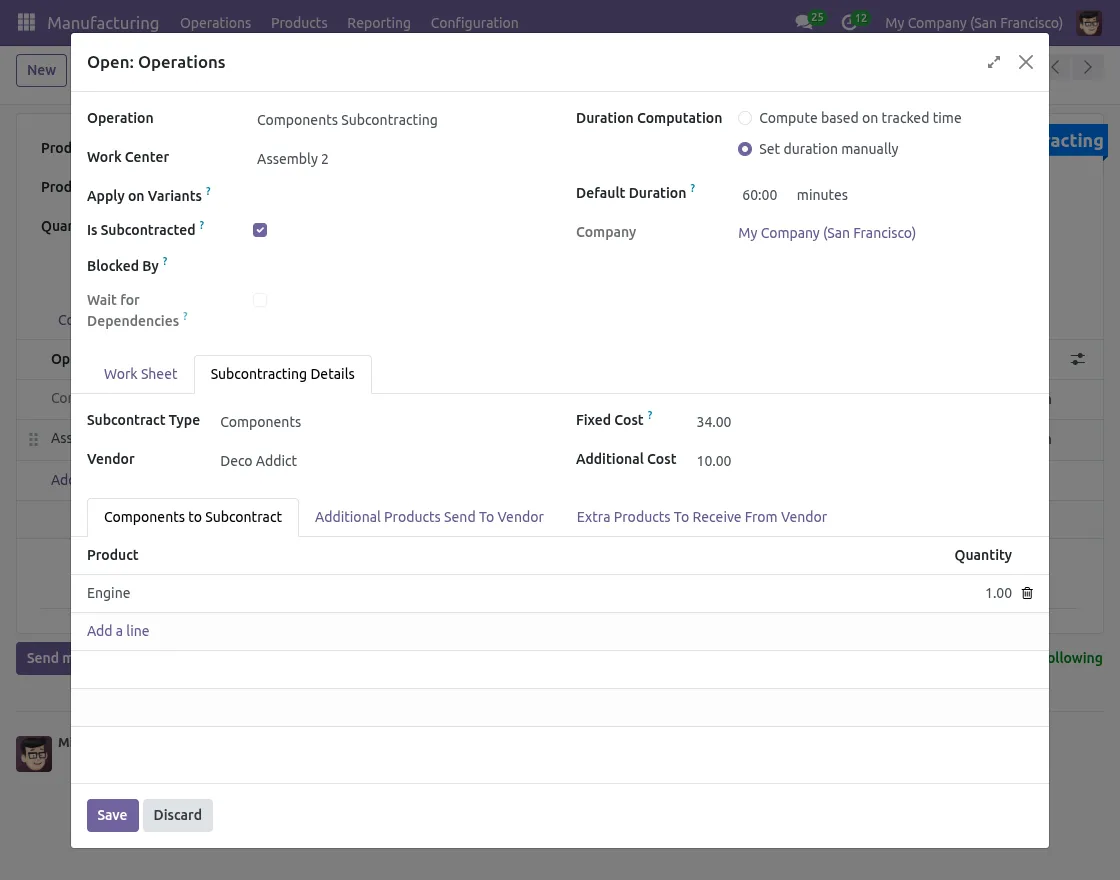
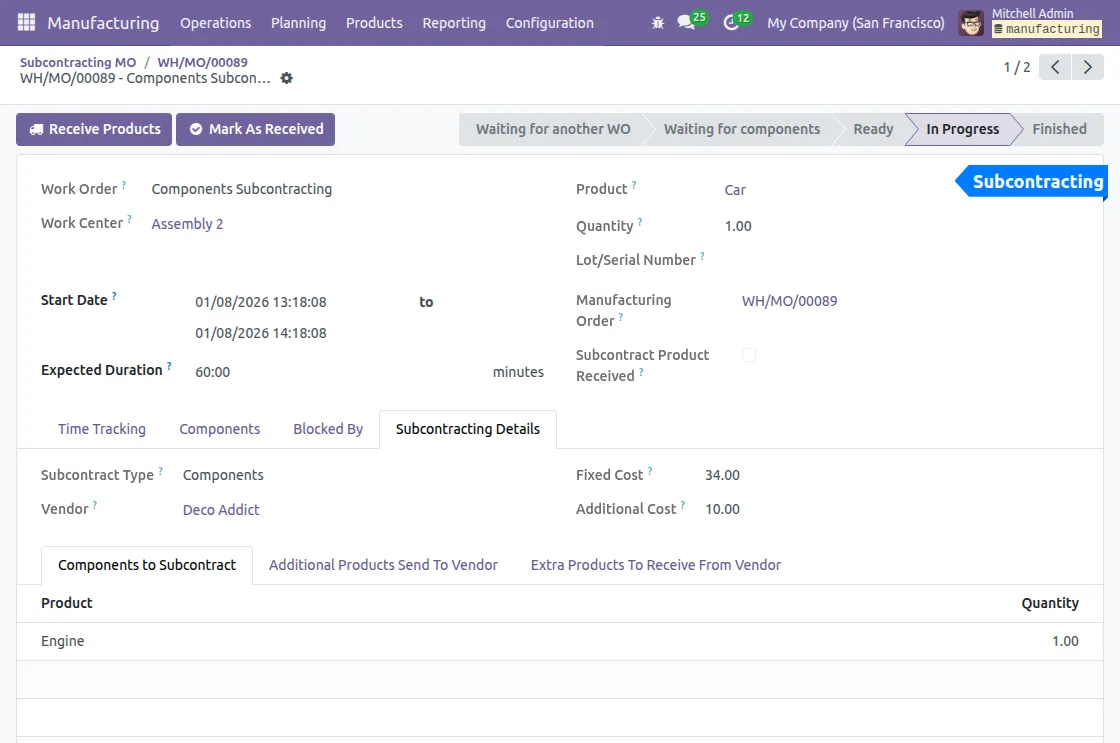
4. Select Components for Subcontracting
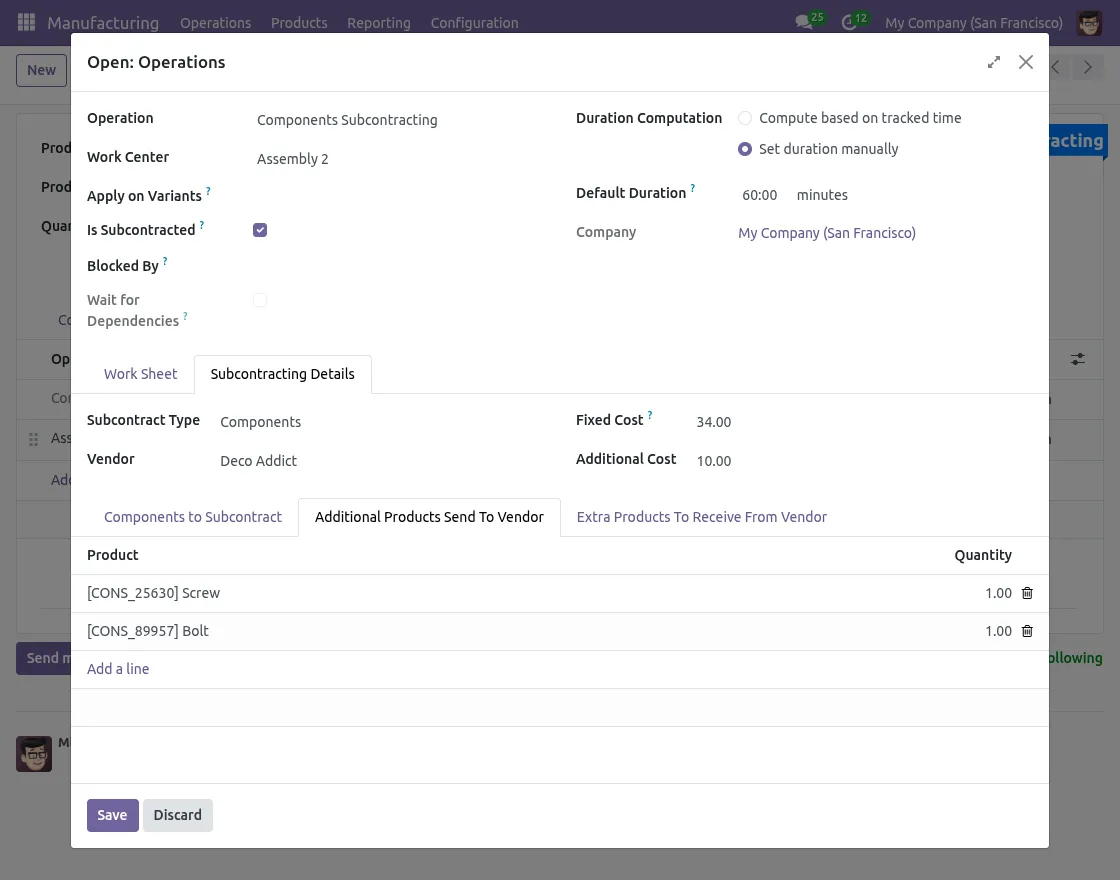
Under the Subcontracting Details tab in the operation:
- Add components that need to be sent to the vendor.
- Add any extra products to send if required.
- Add extra products to receive from the vendor if applicable.
5. Set Work Order Dependency (If Required)
Enable Wait for Dependencies if this work order must start only after another work order is completed.
6. Create Manufacturing Order
Go to Manufacturing → Operations → Manufacturing Orders.
- Create a new Manufacturing Order for the configured product.
- Next, select the correct BOM with subcontracted operations.
- Then, confirm the Manufacturing Order to generate work orders.
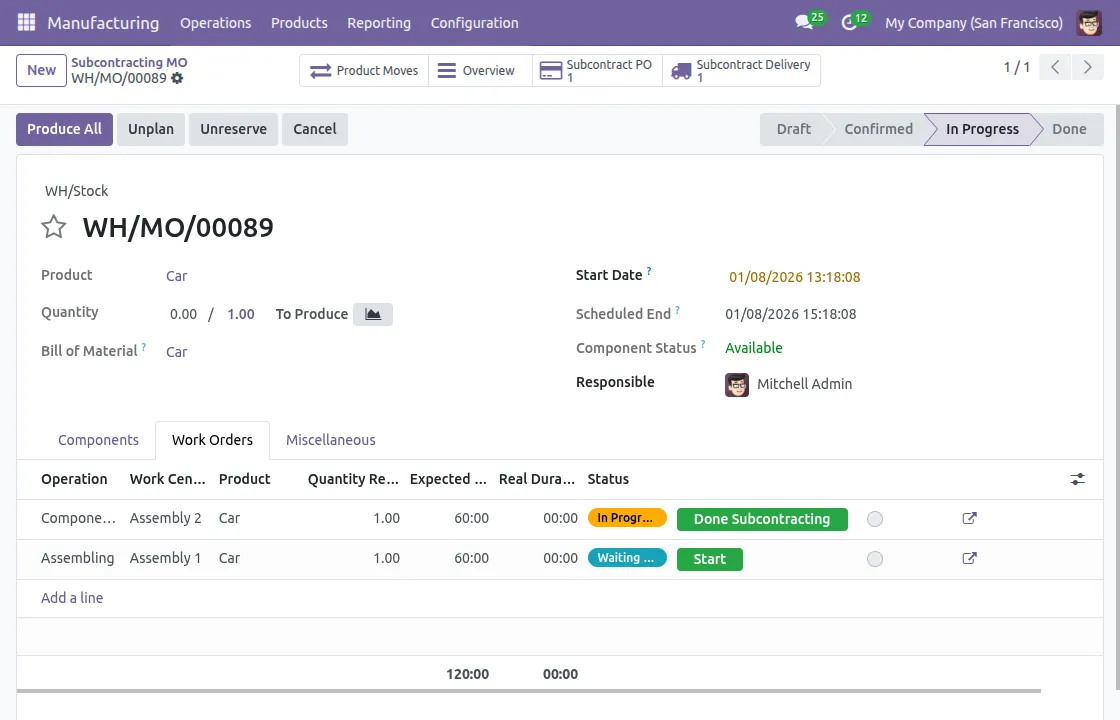
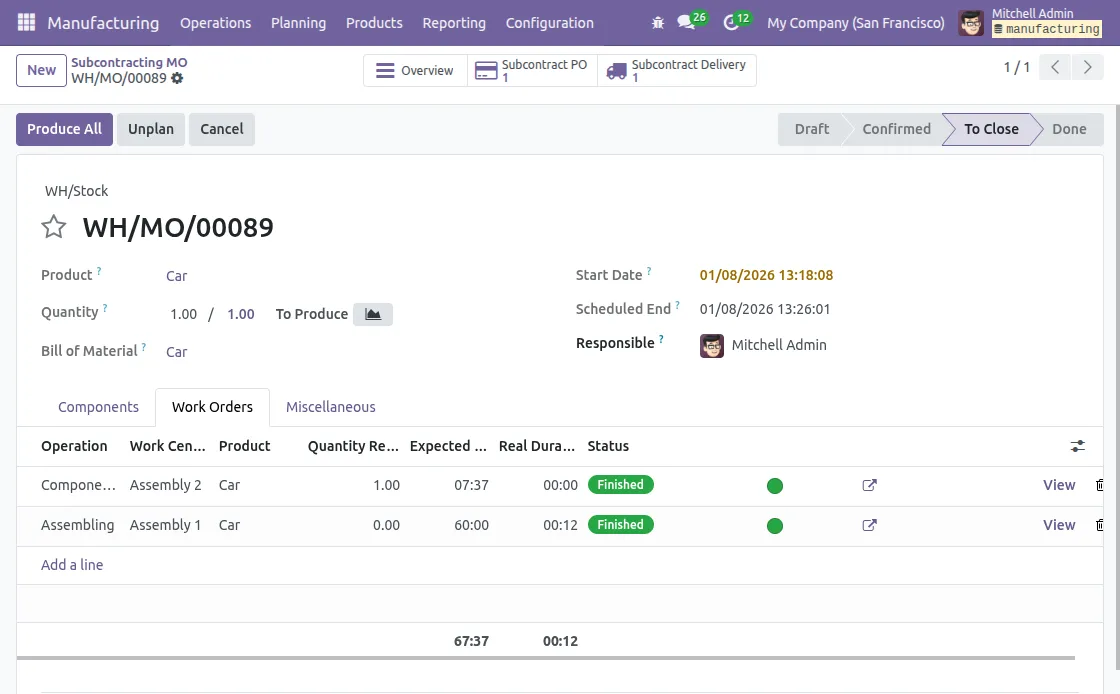
7. Start Subcontracting Work Order
Open the Manufacturing Order and go to the Work Orders tab.
- Identify the subcontracted work order.
- Then, click Start Subcontracting to begin the outsourced operation.
- The system automatically creates related purchase as well as delivery orders.
8. View Auto-Created Purchase and Delivery Orders
From the Manufacturing Order screen:
- Use the Subcontract PO button to open the auto-created purchase order.
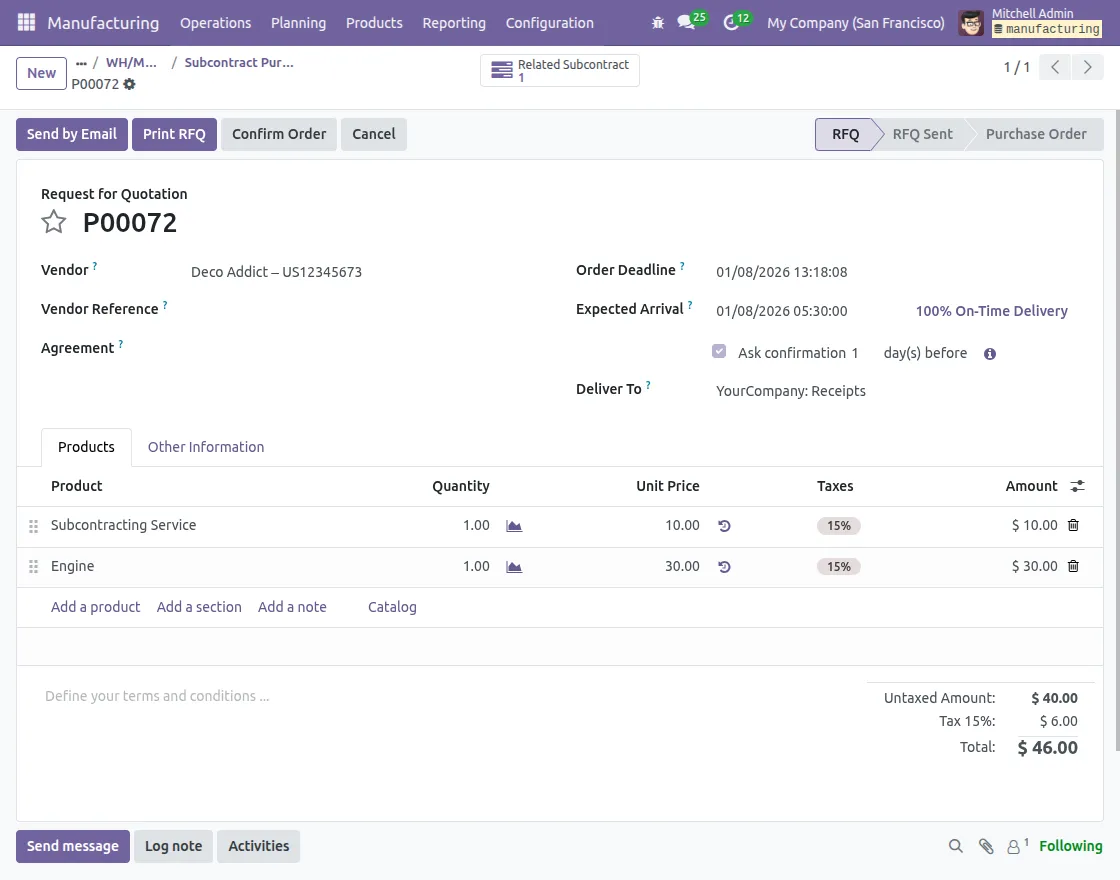
- Use the Subcontract Delivery button to open the delivery record.
- Send required components to the vendor using the delivery order.
9. Complete Subcontracting Work Order
Return to the Manufacturing Order:
- Mark the subcontracted work order as Done Subcontracting.
- Continue or complete any remaining internal work orders if applicable.
- Finally, mark the Manufacturing Order as Done once all operations finish.
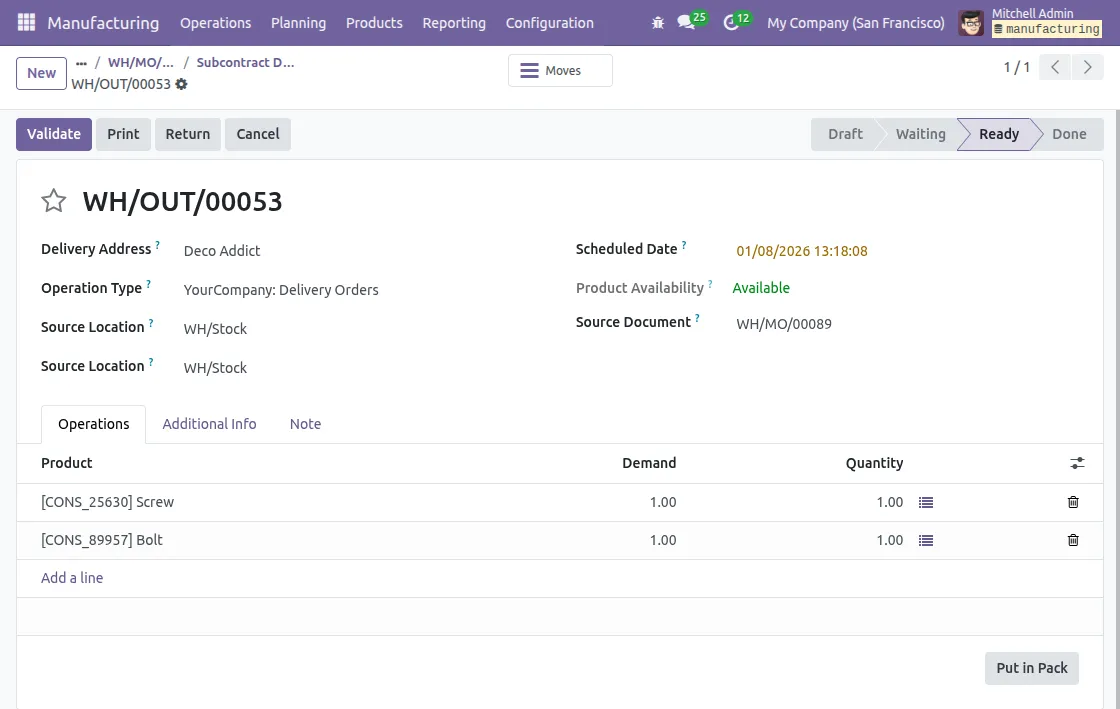
10. Receive Products from Vendor
Once the vendor completes the work:
- Open the Subcontracting Delivery record.
- Then, receive the finished or processed products from the vendor.
- Finally, Validate the delivery to update stock automatically.
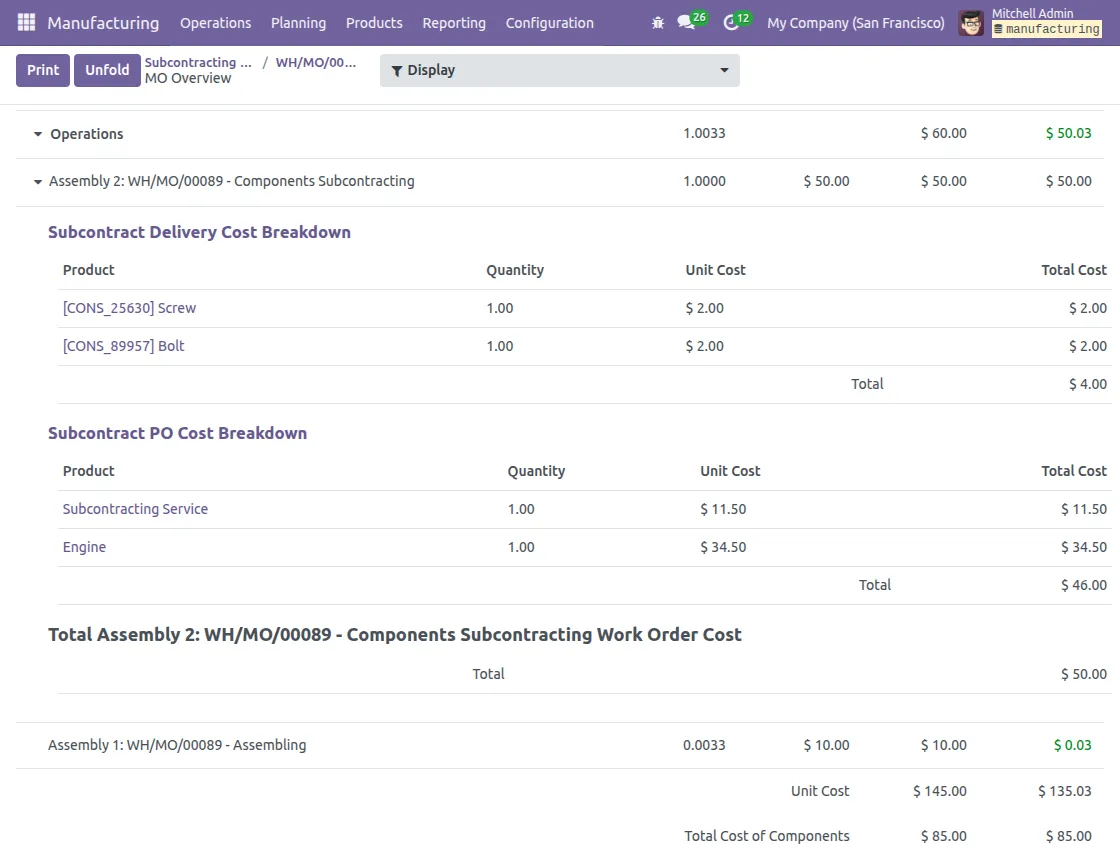
11. View Subcontracting Cost Breakdown
Open the Manufacturing Order Overview.
- View Subcontract Delivery Cost Breakdown for component costs.
- Then, View Subcontract PO Cost Breakdown for service and vendor charges.
- Finally, Check the Total Subcontracted Work Order Cost clearly.
Need Help?
Hope you find guide helpful! Please feel free to share your feedback in the comments below.
If you still have any issues/queries, please create a ticket at the UV Desk.
I hope this helps. In case of any further queries, contact us at our support mail.
Thanks for paying attention!!
Current Product Version - 1.0.0
Supported Framework Version - V17.0, V18.0, V19.0

Be the first to comment.