OpenCart Razorpay Payment is a secure payment solution for OpenCart marketplaces.
It allows customer payments to be automatically split between the admin and sellers, ensuring transparency and efficiency.
Sellers receive their share directly in their bank accounts or via UPI, while the admin manages commissions and payout requests easily.
All transactions are processed securely through Razorpay in INR, and the module supports multiple sellers and real-time payment processing.
It integrates seamlessly with the OpenCart Multi-Vendor Marketplace module, making payments simple, fast, and reliable for both admins and sellers.
Features
- Supports multiple payment methods like UPI, cards, net banking, and wallets.
- Provides real-time and secure payment processing through the Razorpay API.
- Enables automatic split payments between the admin and sellers.
- Allows sellers to manage their payout accounts and requests easily.
- Admin can approve, decline, or process seller payout requests.
- Offers live and test mode options for safe configuration.
- Displays detailed transaction and payout reports in the backend.
- Ensures all transactions are processed in INR for accuracy.
- Seamless integration with the OpenCart Marketplace module.
- Fast, reliable, and PCI DSS-compliant payment solution.
PCI DSS stands for Payment Card Industry Data Security Standard.
It’s a global security standard designed to ensure that all companies that process, store, or transmit credit card information maintain a secure environment.
Installation of OpenCart Razorpay Payment
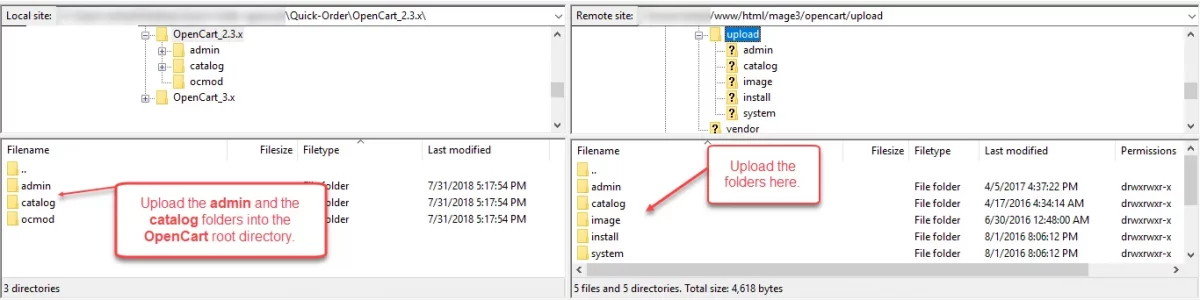
Step 1: Extract the downloaded zip file.
Step 2: After that, open the correct Opencart Version Folder. According to Opencart Version installed in your system.
Now, Step 3: upload the admin, Catalog and System folder in the Opencart root directory.
The admin can install the OpenCart Razorpay Payment module by uploading the wk_razor.ocmod.zip file.
Through Extension> Extension Installer> Upload.
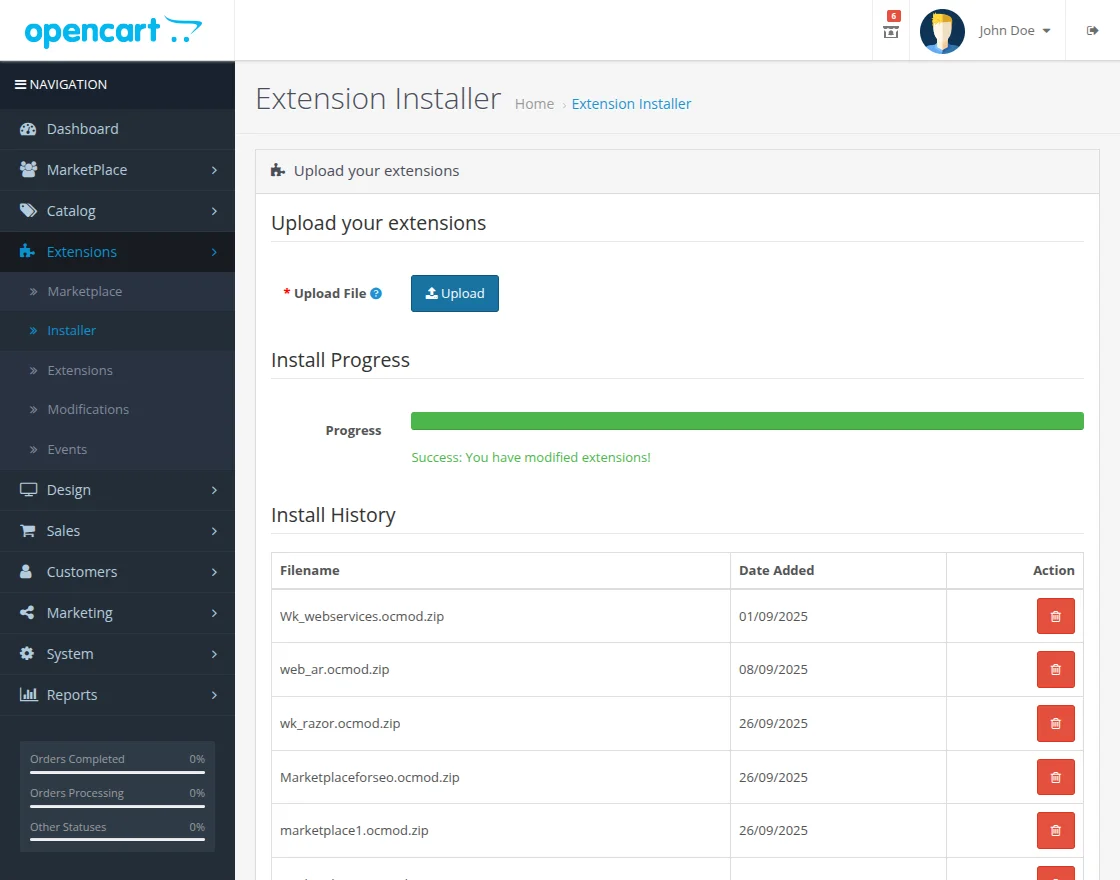
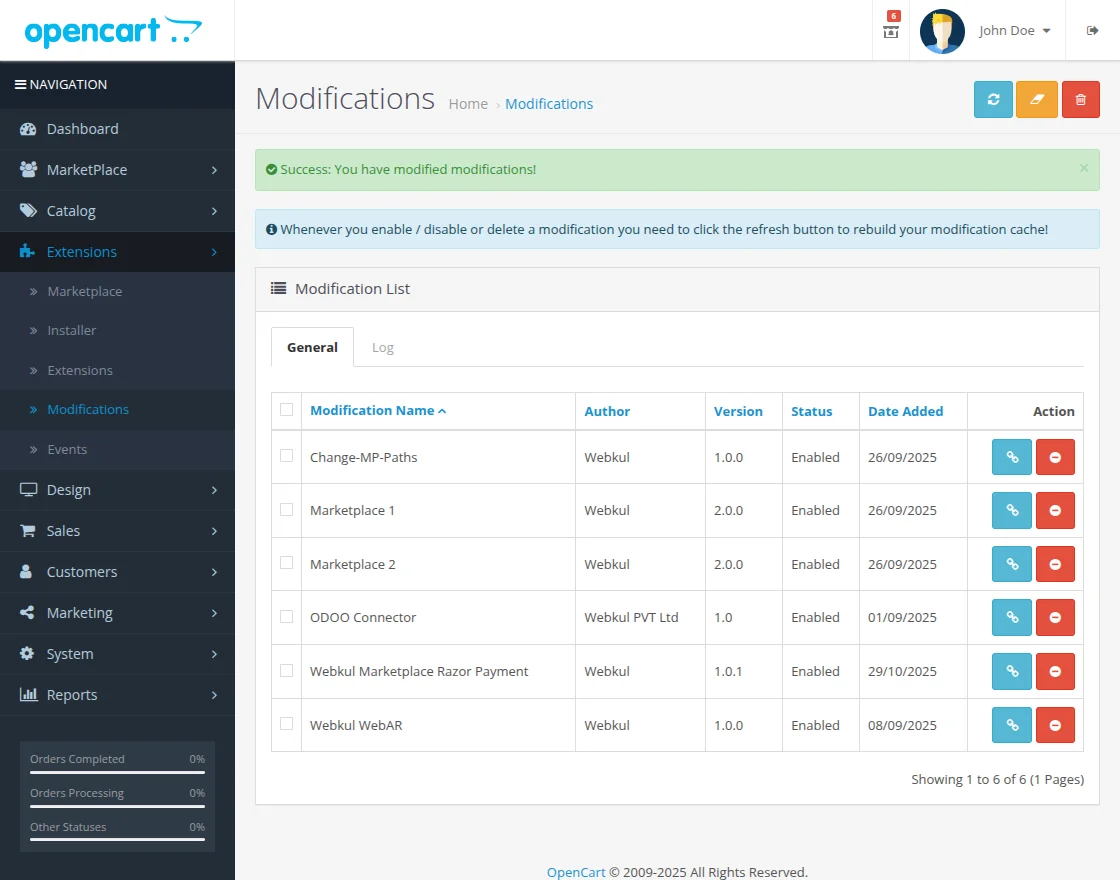
After the upload is completed, the admin can log in and go to Extensions> Modification.
Click on the refresh field.
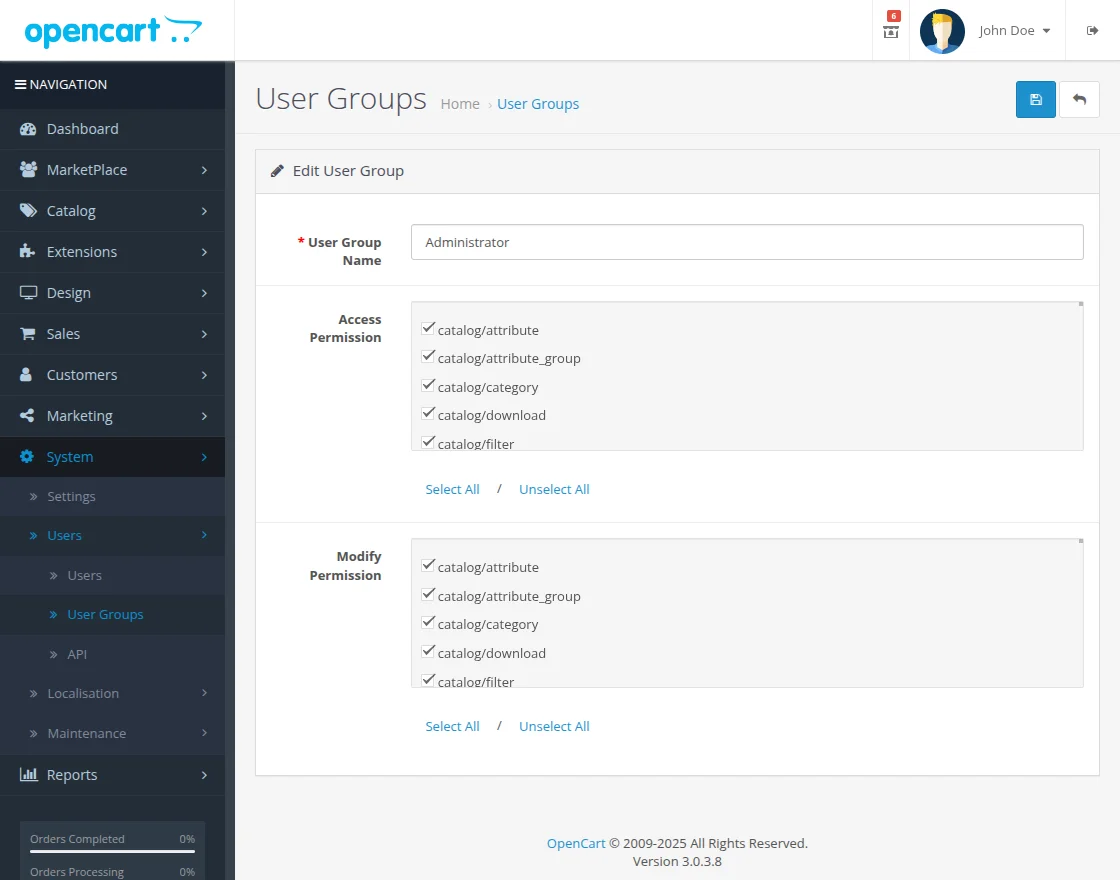
Now, in the admin panel, go to System> Users> Usergroup and edit ‘Administrator’ and select all for both Access, then Modify Permission then save it.
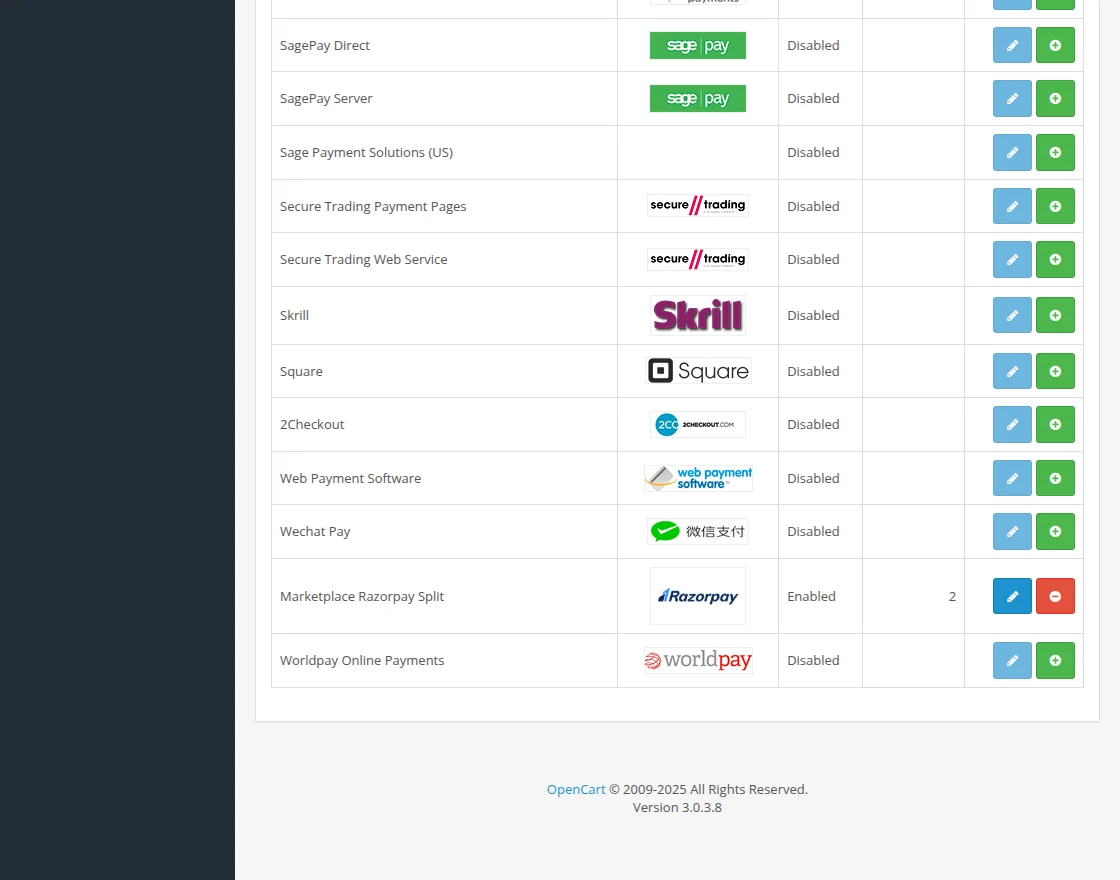
After that, under Extensions > Payments, install the Marketplace Razorpay Split Module as shown in the image below.
The admin can install/uninstall or edit this module.
Note: For generating Razorpay API credentials and setting up webhooks, refer to the official Razorpay documentation.
Module Configuration
After installing OpenCart Razorpay Payment module, the admin can configure the following settings:
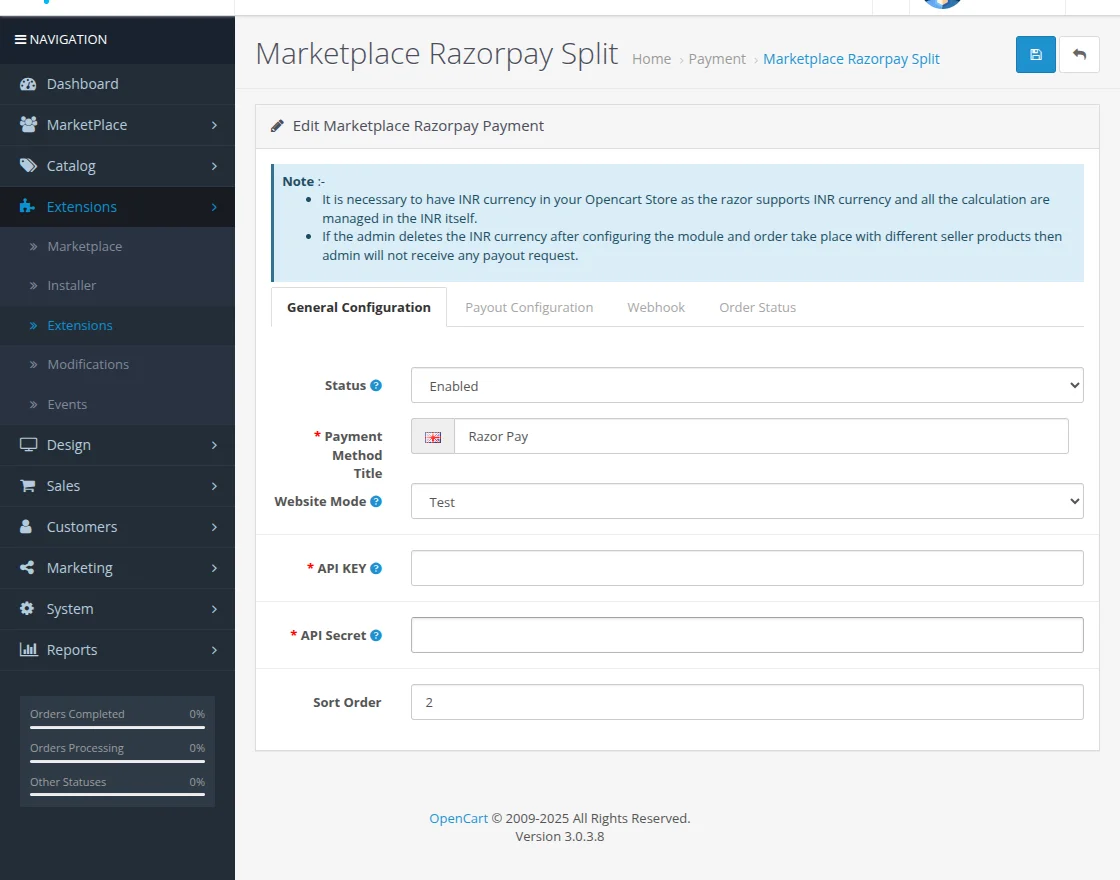
General Configuration:
- Sort Order – Define the display order of the payment method during checkout.
- Status – Enable or disable the Razorpay payment method.
- Payment Method Title – Set the title of the payment method to display on the checkout page (e.g., Razor Pay).
- Website Mode – Choose between Live or Test mode for transactions.
- API Key – Enter the Razorpay API Key provided in your Razorpay Dashboard.
- API Secret – Enter the Razorpay API Secret for authentication.
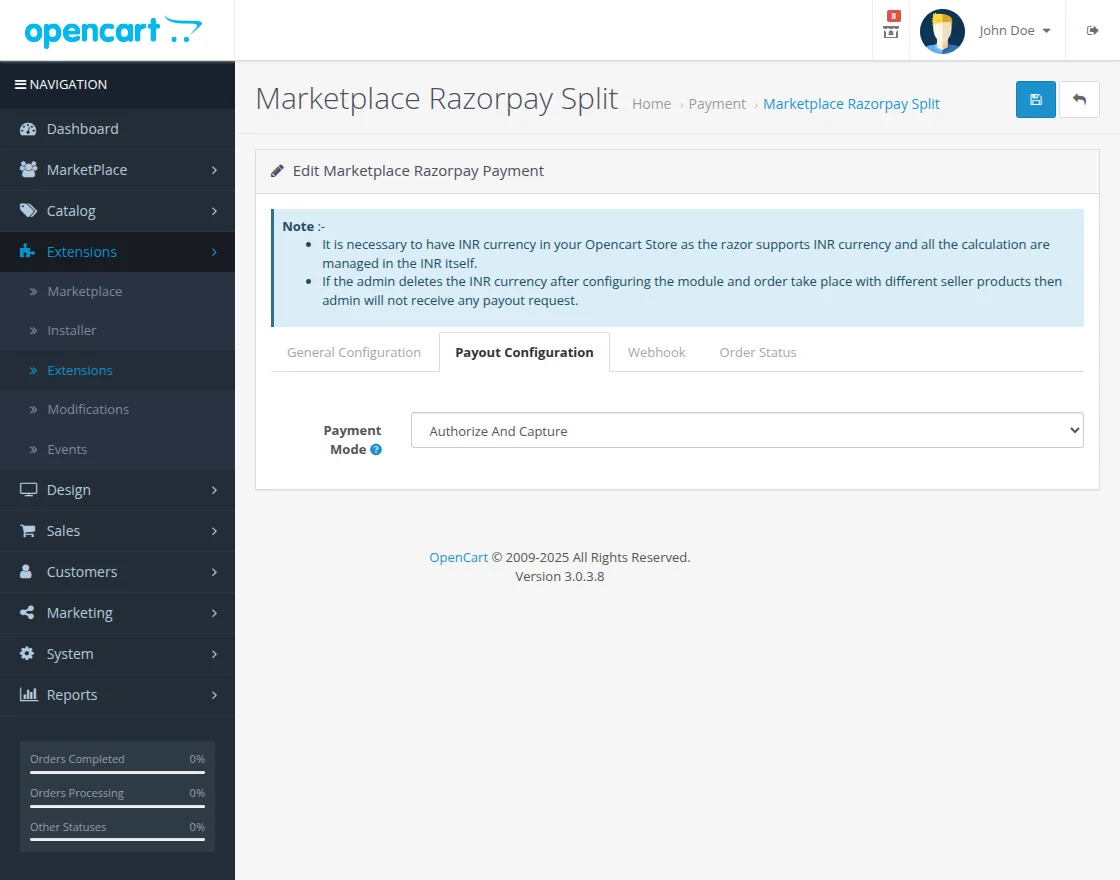
Payout Configuration:
In the Payout Configuration section, the admin can choose between the following two options:
- Authorize and Capture – The payment is authorized and captured simultaneously.
- Authorize – The payment is authorized first, and the amount is captured manually later by the admin.
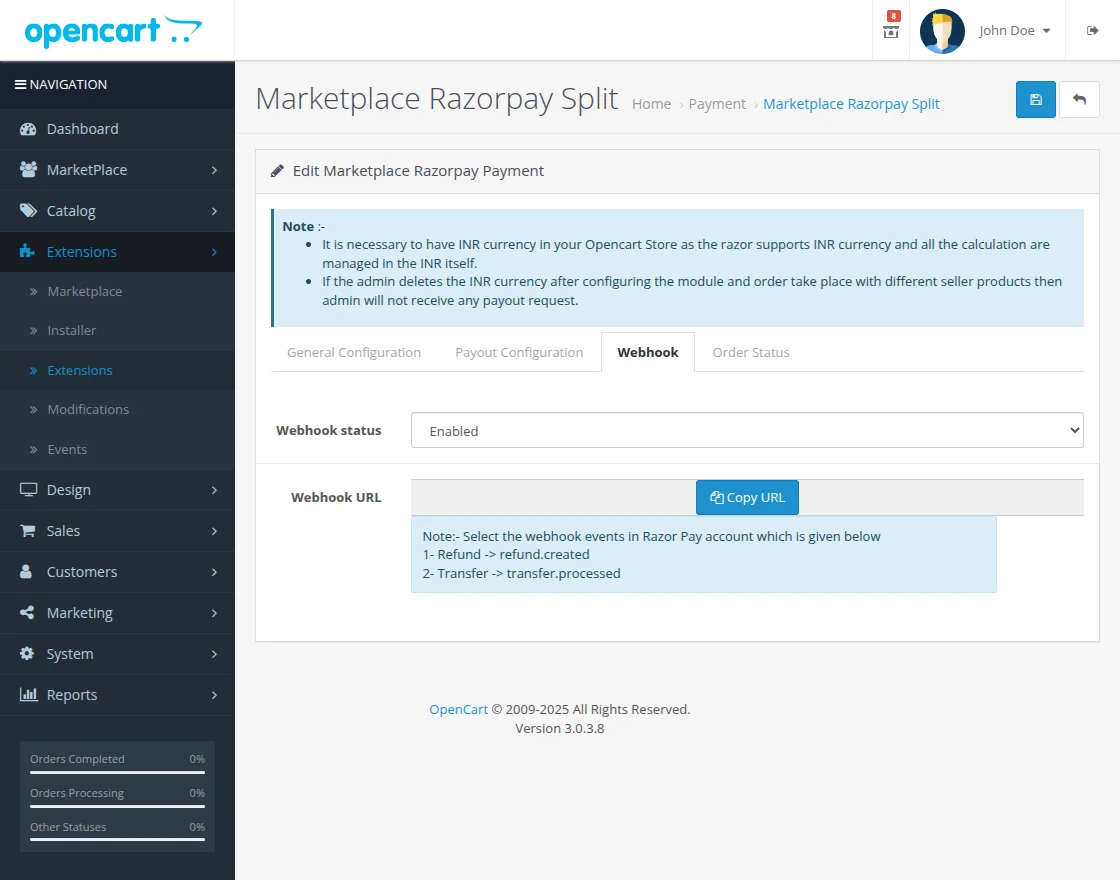
Webhook Configuration
In the Webhook section, the admin needs to configure the following settings:
- Webhook Status – Enable this option to activate the webhook functionality.
- Webhook URL – Enter the webhook URL generated in the module.
Note:
In the Razorpay account, select the following webhook events to ensure proper synchronization:
- Refund →
refund.created - Transfer →
transfer.processed
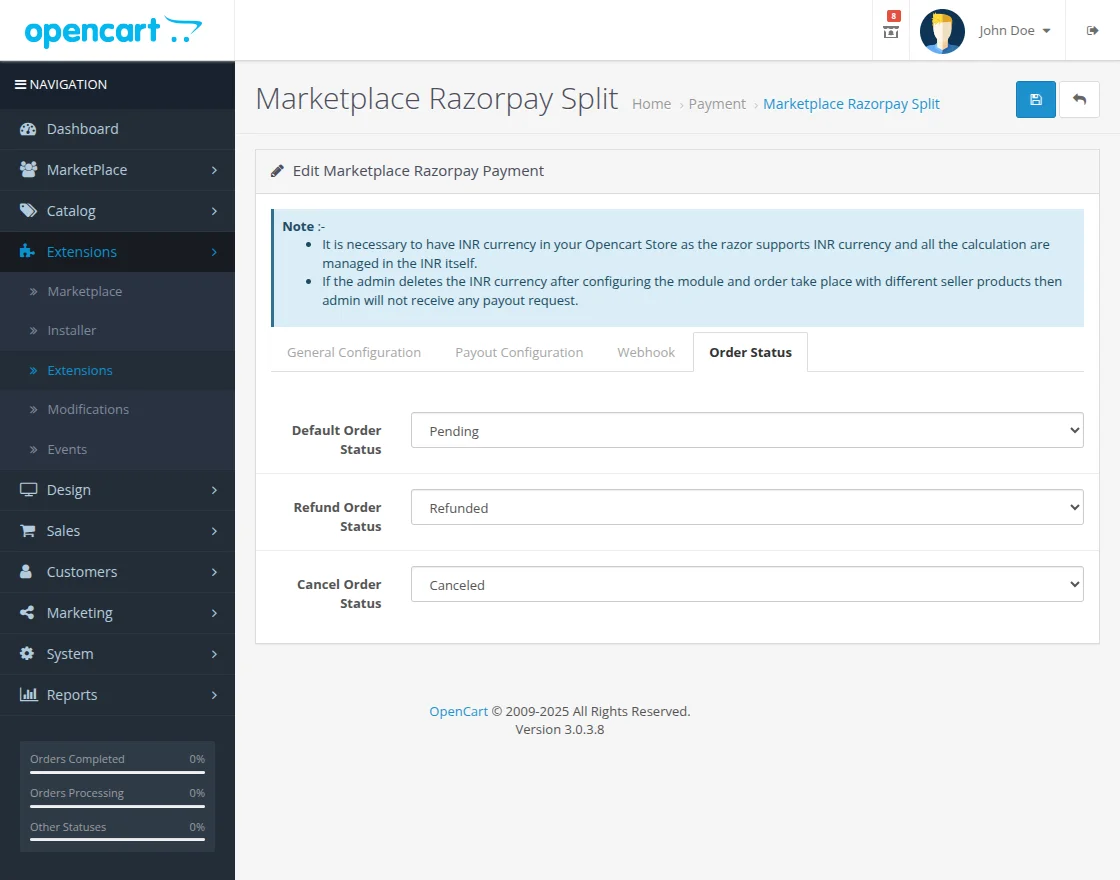
Order Status Configuration
In the Order Status section, the admin can set the following options:
- Default Order Status – Set to Pending for newly placed orders.
- Refund Order Status – Set to Refunded for successfully refunded orders.
- Cancel Order Status – Define the status for canceled orders.
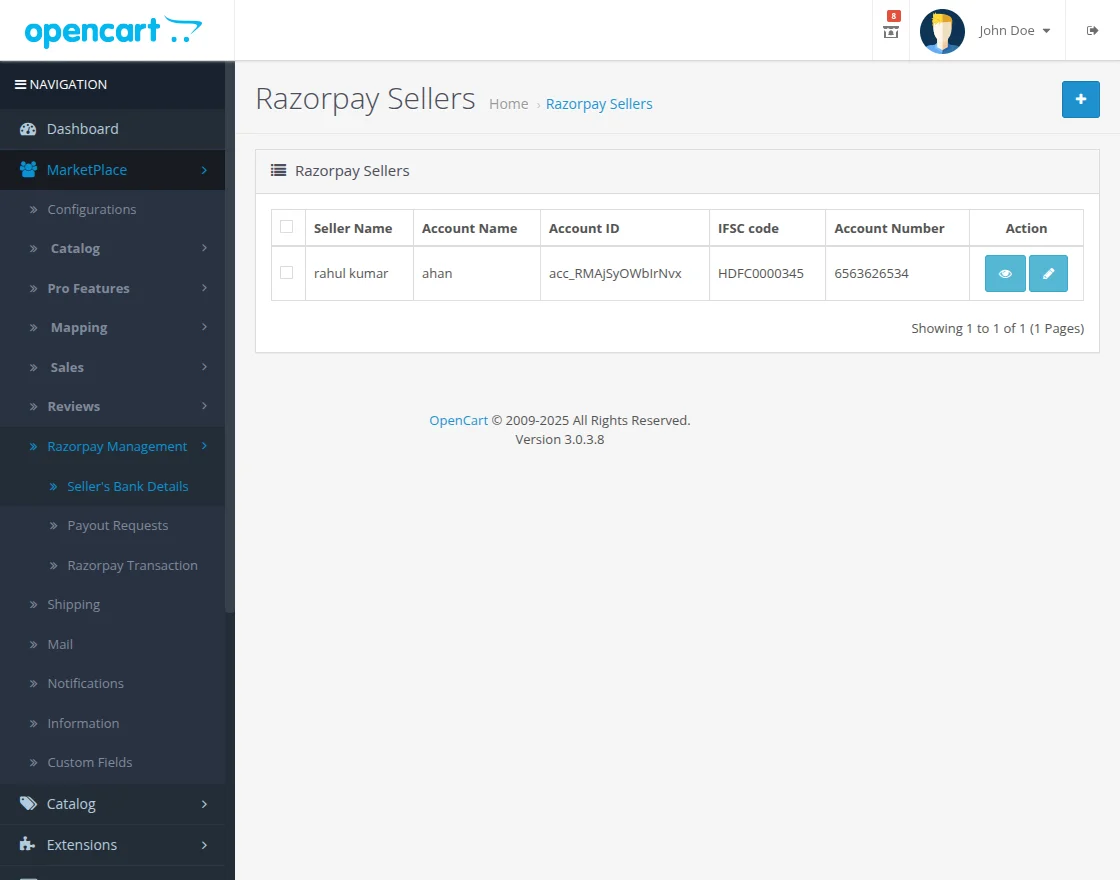
Razorpay Management
This section consists of three main parts:
- Sellers Bank Details – Displays all registered sellers’ bank and UPI account details used for receiving payouts.
The admin can view and edit the seller’s bank details in this Section.
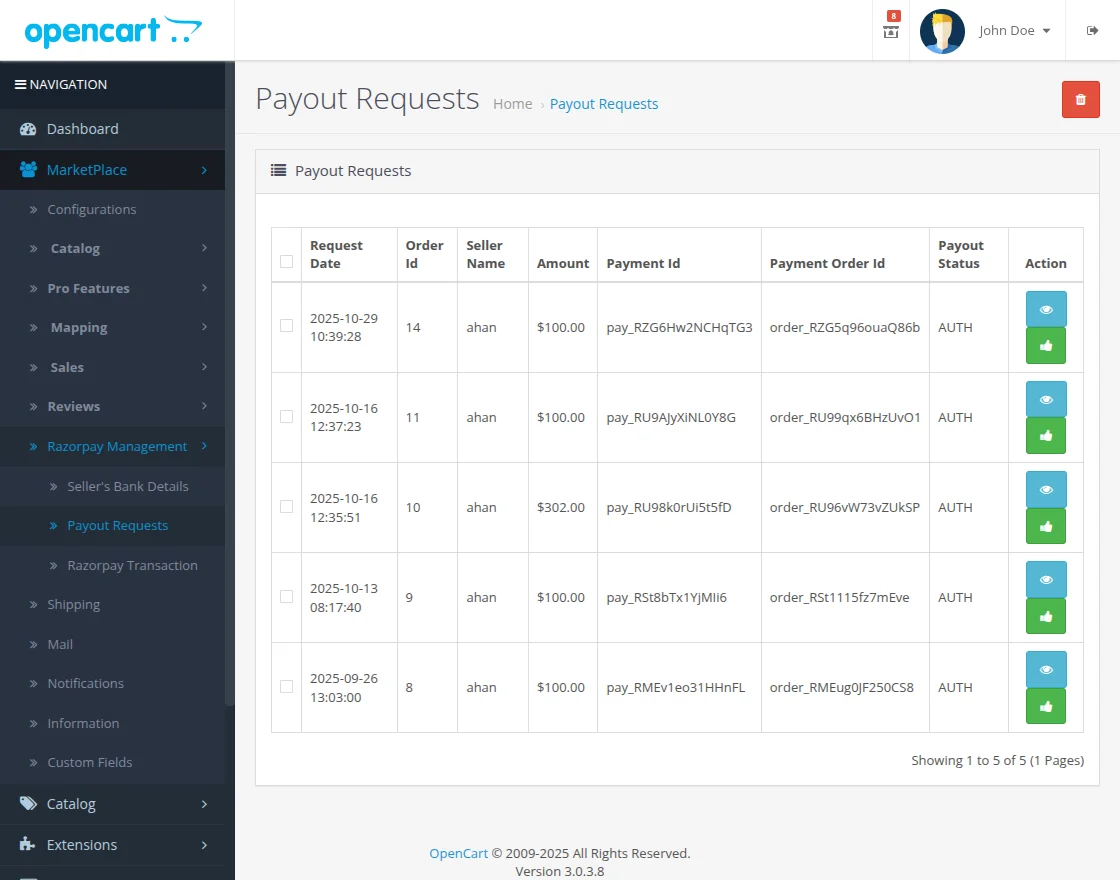
- Payout Requests – Lists all payout requests raised by sellers. The admin can approve, decline, or view these requests directly from this section.
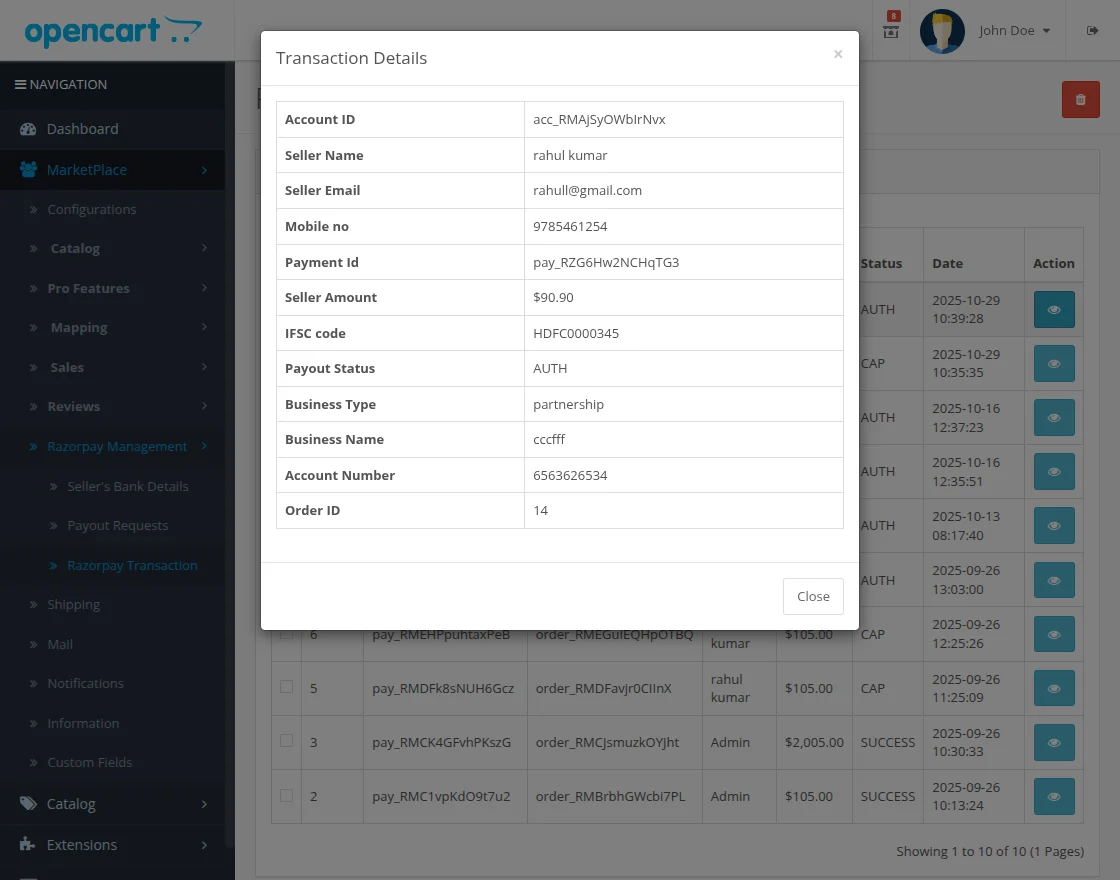
- Razorpay Transactions – Each transaction record in the Razorpay Management section displays complete information related to the seller’s payout.
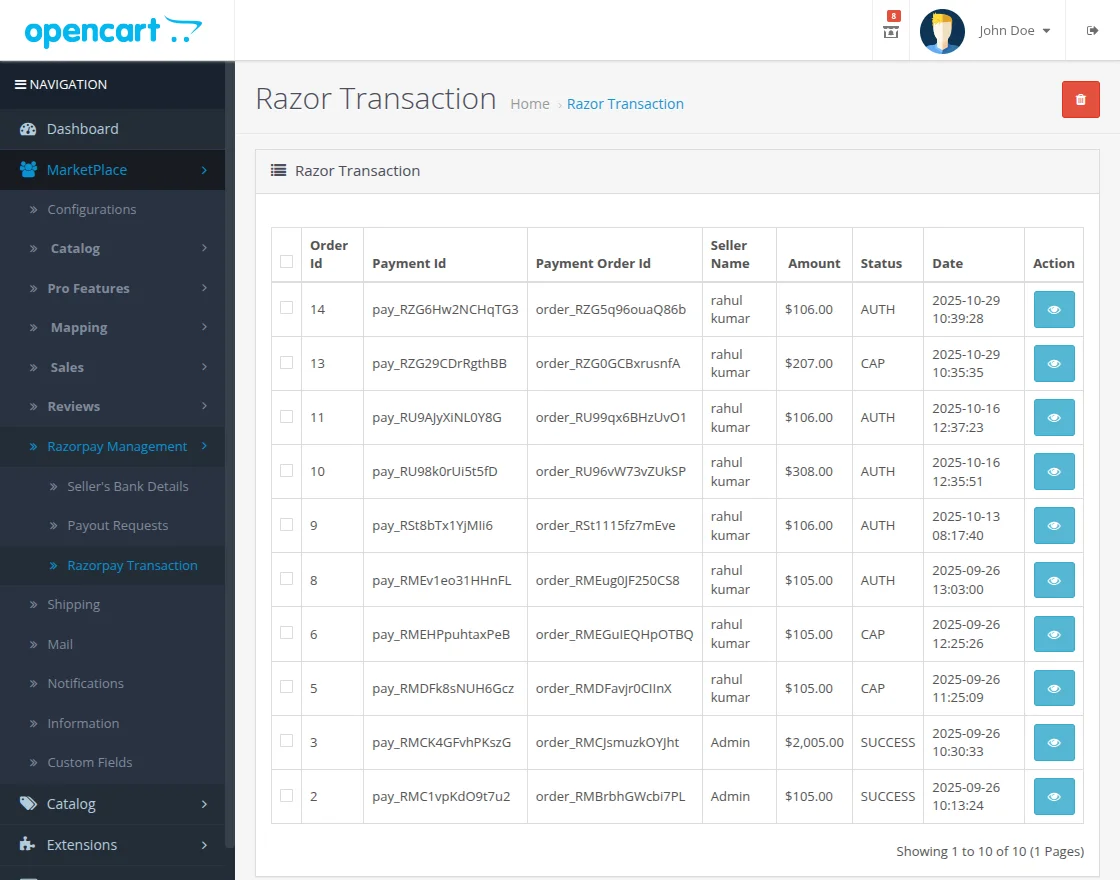
The admin can view complete transaction details,
Such as Account ID, Seller Name, Seller Email, Payment ID, Seller Amount, IFSC Code, Payout Status, Business Type, Business Name, Account Number, and Order ID.
Customer End
Now, the customer can easily check out using the Razorpay Payment Gateway.
To do this, the customer needs to:
Add the desired products to the cart. Proceed to the checkout page.
Select Razorpay as the payment method.
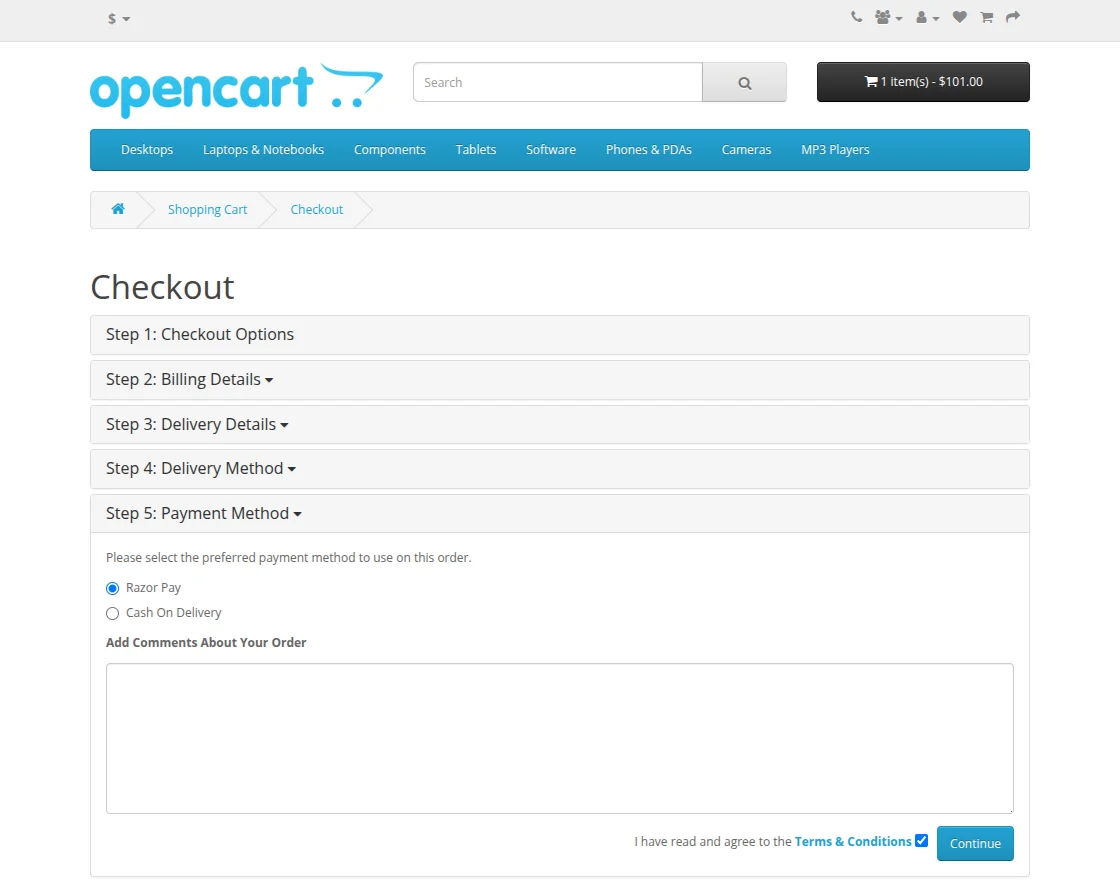
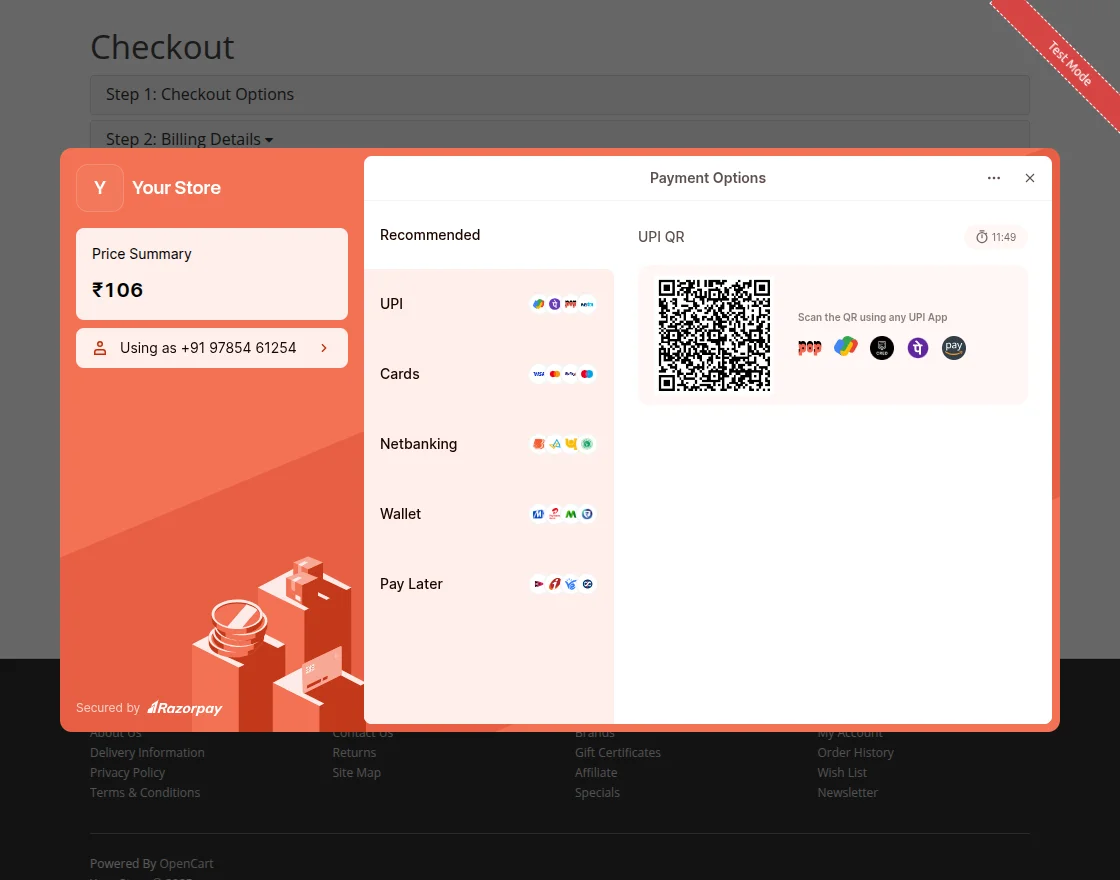
Complete the payment securely using UPI, Cards, Net Banking, or Wallets.
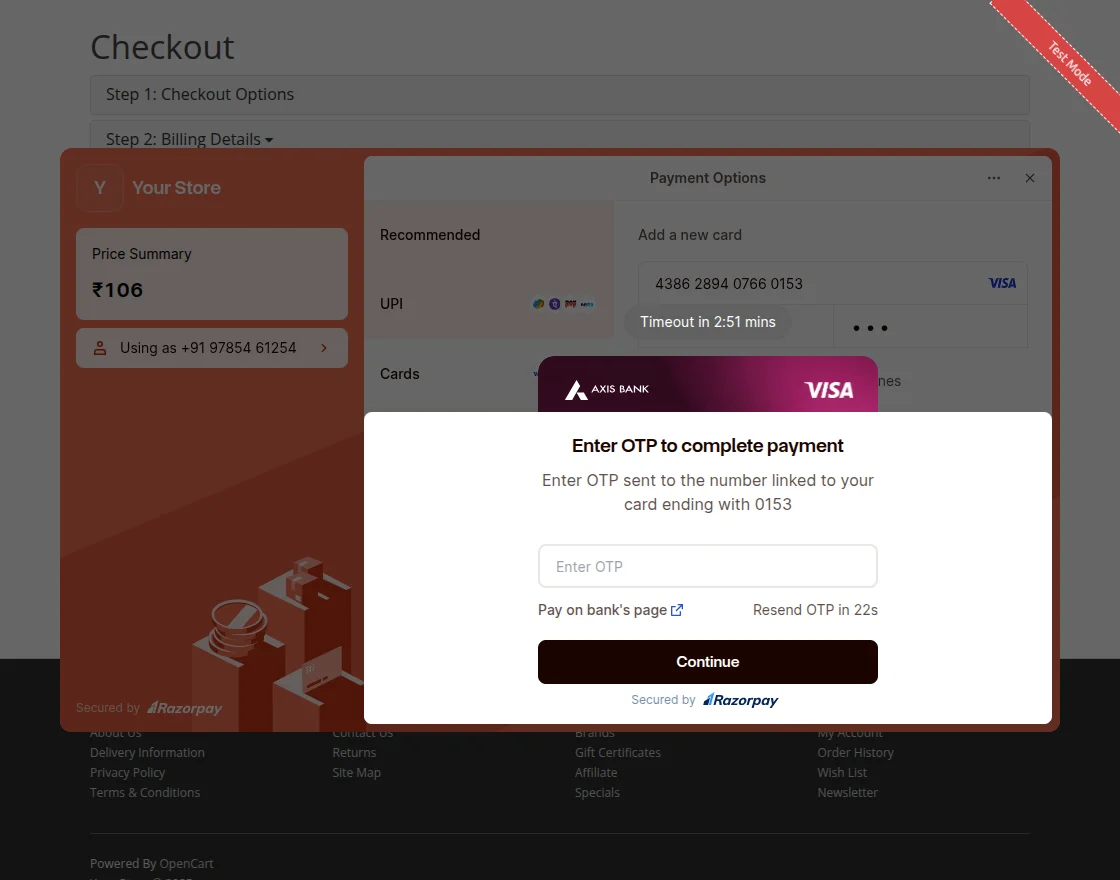
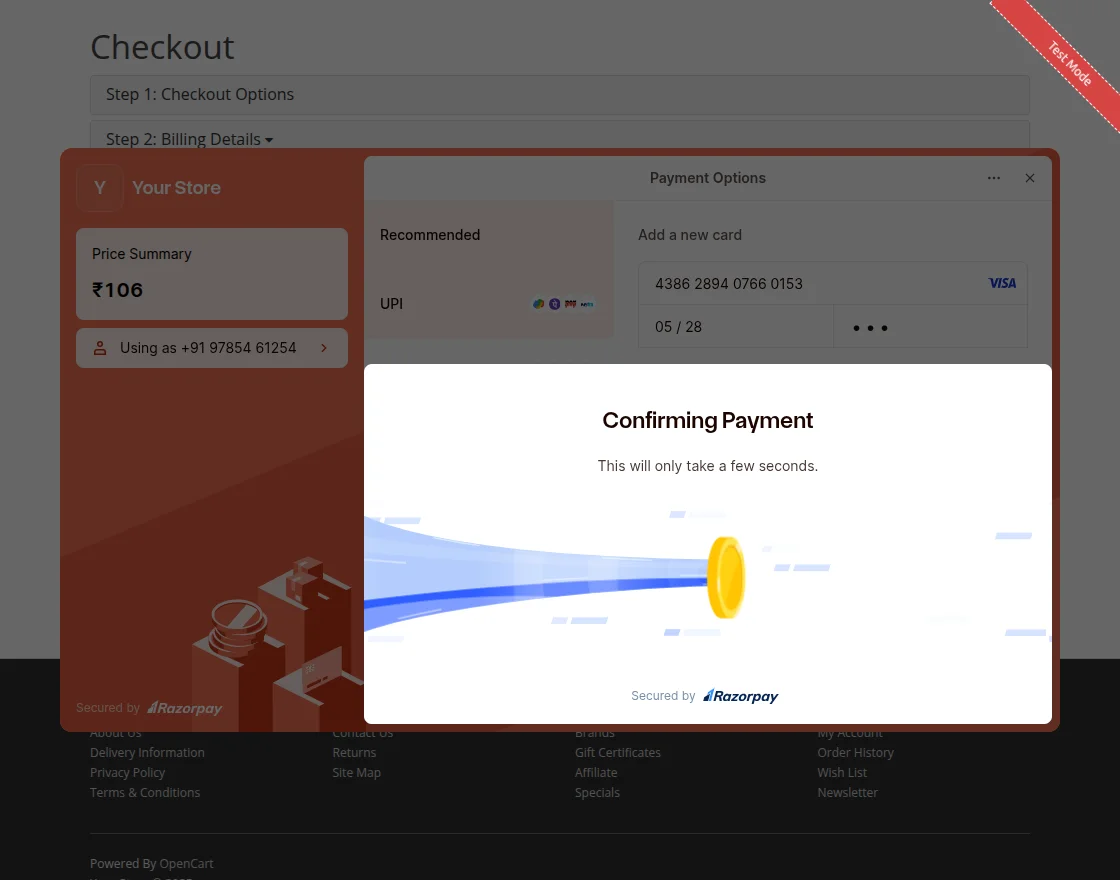
If the customer chooses Card as the payment option, they need to:
- Enter their card details – Card Number, Expiry Date, and CVV.
- Click on Pay Now to proceed with the transaction.
- Complete the OTP verification for secure payment.
After completing the OTP verification, the Payment Confirmation page will appear.
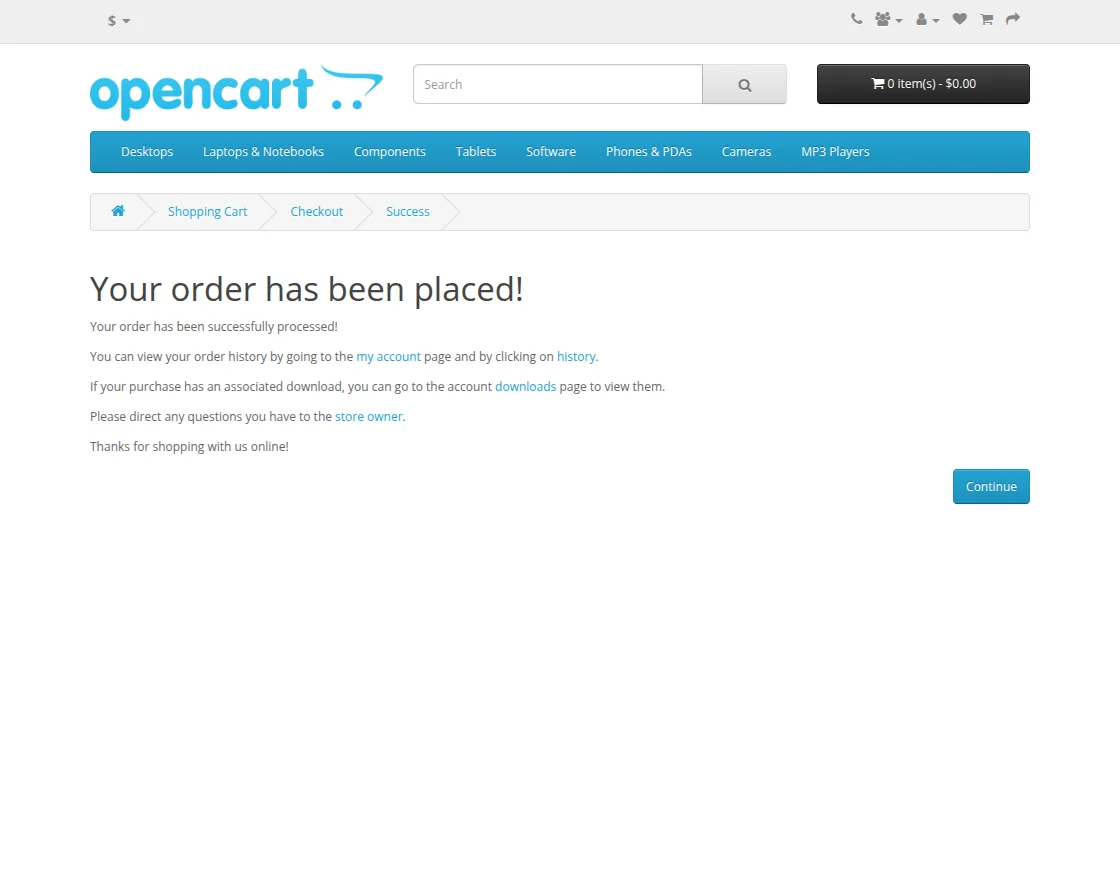
Once the payment is successful, the customer will be redirected to the order success page, and the order status will update automatically
That’s all for the OpenCart Razorpay Payment. Still, if you have any issues, feel free to add a ticket and let us know your views to make the module better https://webkul.uvdesk.com/.
Current Product Version - 1.1
Supported Framework Version - 3.x.x

Be the first to comment.