Magento 2 Marketplace USPS Shipping Management provides USPS(United States Postal Service) shipping service for shipping the products. USPS shipping service ships products all over the world. Further, the Magento 2 USPS Shipping Marketplace Add-on calculates the shipping rate according to the seller’s product weight and the seller’s origin address. Using this module, the admin can enable the option of USPS shipping method for the seller’s products. Moreover, this allows the customers to choose the USPS shipping method on the checkout page if the seller has provided the USPS shipping method for their product. NOTE: This module is an add-on to the Magento 2 Marketplace Module. To use this module you must have installed Webkul Magento 2 Marketplace Module first. Check the plugin working and overview at the storefront in the video mentioned below –
Features
- The admin can enable or disable the USPS Shipping method.
- The admin can set/change the USPS shipping method name that will be shown on the checkout page.
- The sellers can download and print the USPS Label.
- The admin can allow sellers to save his/her USPS Credentials.
- The sellers can set/change their USPS details to manage the shipment of their orders.
- USPS Shipping method will work with both admin’s/seller’s product.
- Allow customers to choose the seller USPS shipping method.
- Fully admin management.
- The dynamic shipping method for freight calculation.
- USPS Shipping method is available only for Regular and Large size products.
- This module allows the admin to select the applicable countries for this shipping method.
- The admin can also select the operation for handling fee i.e. Fixed or percentage.
- Using this module the admin can either add the handling fee Per Package/Per Order.
Install Extension from Webkul Store
#1 Download Module
Firstly, you need to log in to Webkul Store, go to My Account>My Purchased Products section, verify and then download and extract the contents of this zip folder on the system.#2 Upload Folder
Once the module zip is extracted, follow path src>app and then copy the app folder into the Magento 2 root directory on the server as shown below:
#3 Run Commands
After uploading the module folder, you need to run the following commands in the Magento 2 root directory:php bin/magento setup:upgrade
php bin/magento setup:di:compile
php bin/magento setup:static-content:deploy
php bin/magento indexer:reindex
php bin/magento cache:flush
Install Extension from Magento Marketplace
If you have purchased this extension from the Magento Marketplace then please follow the below process or visit this link.#1 Get Access Keys
You need to get access keys, navigate to My Profile in Magento Marketplace, then choose Access Keys in the My Products section.


#2 Update composer.json File
To know the component name and version number, go to your Magento Marketplace account section, My Profile>My Purchases, then find this extension to view the details. Please note – Below is an example image, every extension will have its unique component name and version.
#3 Enter Access Keys
Now you will need to enter the Access Keys that you obtained as explained in the first step #1 Get Access Keys. Wait for Composer to finish updating your project dependencies and make sure there aren’t any errors.#4 Run Command
You need to run the following commands:php bin/magento setup:upgrade
php bin/magento setup:di:compile
php bin/magento setup:static-content:deploy
php bin/magento indexer:reindex
php bin/magento cache:flush
How to create USPS Shipping account
 After submitting the form successfully, the user will see a confirmation message as shown in the image below.
 Now the user will get an email with all the credentials to access the USPS server as shown in the image below.

Configuration Of The Module By Admin
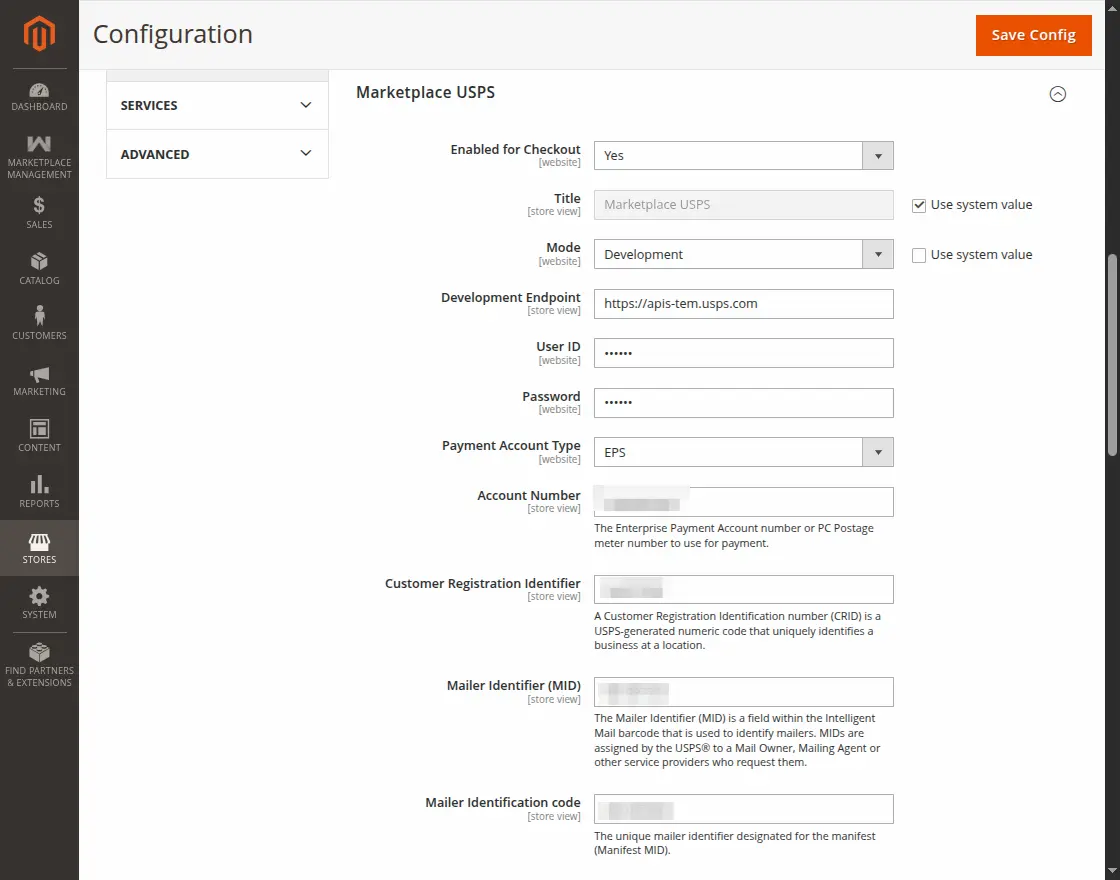 Enabled for Checkout: Set Enabled for Checkout as Yes to enable USPS Shipping method.
Development Endpoint: Enter the USPS sandbox API URL provided in the confirmation email after registering for a USPS Web Tools or Shipping API account.
Title: Enter the Title for the name of the shipping method that is shown during the checkout process.
User ID and Password: Enter the User ID and Password from your USPS account.
Mode: Choose one of the following options here:
Enabled for Checkout: Set Enabled for Checkout as Yes to enable USPS Shipping method.
Development Endpoint: Enter the USPS sandbox API URL provided in the confirmation email after registering for a USPS Web Tools or Shipping API account.
Title: Enter the Title for the name of the shipping method that is shown during the checkout process.
User ID and Password: Enter the User ID and Password from your USPS account.
Mode: Choose one of the following options here:
- Development – Runs USPS in a test environment.
- Live – Runs USPS in a live production environment.
- EPS
- PERMIT
- METER
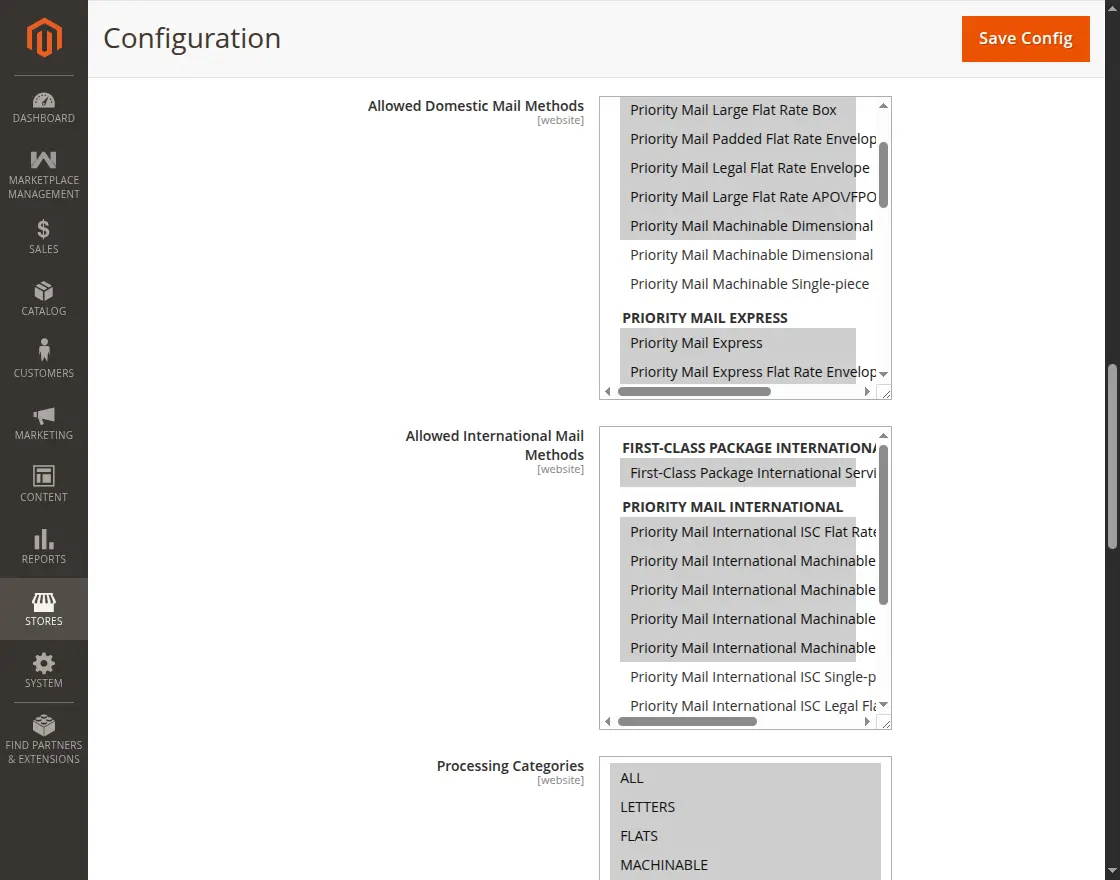 Allowed International Mail Methods: This section lets you choose which USPS services are available for international shipping.
Processing Categories:Choose the Processing Categories as the following:
Allowed International Mail Methods: This section lets you choose which USPS services are available for international shipping.
Processing Categories:Choose the Processing Categories as the following:
- ALL
- LETTERS
- FLATS
- MACHINABLE
- NONSTANDARD
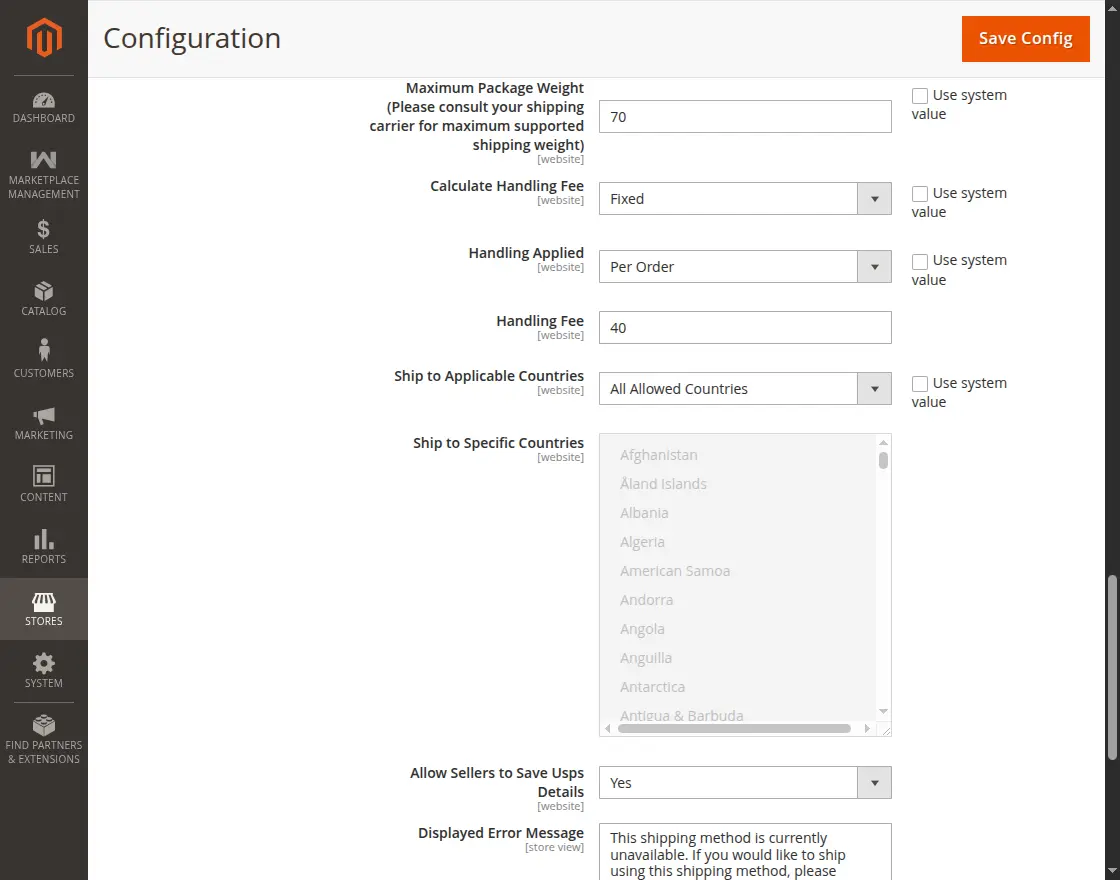
- Fixed
- Percent
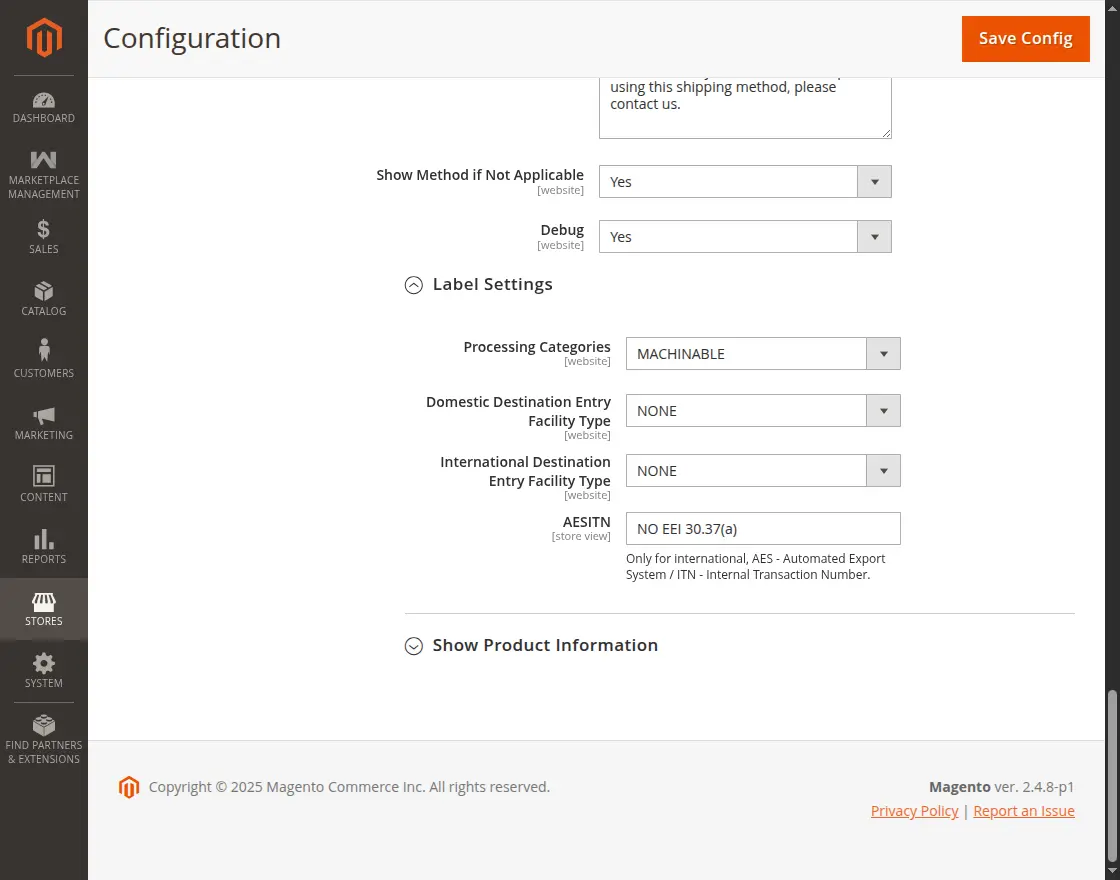
Label Settings
Admin’s End Workflow
USPS(United States Postal Service) Shipping Method Marketplace add-on works for the admin’s product as well.
The admin can save USPS configuration details from the admin panel as discussed above. When the buyers place an order, they can see the Webkul USPS Shipping method on the shopping cart page, as shown below: The customer can choose to purchase the admin’s product and can place an order for the same by opting for Webkul USPS Shipping as the delivery method on the shopping cart page.
Further, the admin can manage the order and can generate shipping.
The customer can choose to purchase the admin’s product and can place an order for the same by opting for Webkul USPS Shipping as the delivery method on the shopping cart page.
Further, the admin can manage the order and can generate shipping.

 This is how the created Shipment will appear.
 In the end, the admin can successfully print the Shipping Label for the order to be shipped by USPS Shipping Method.

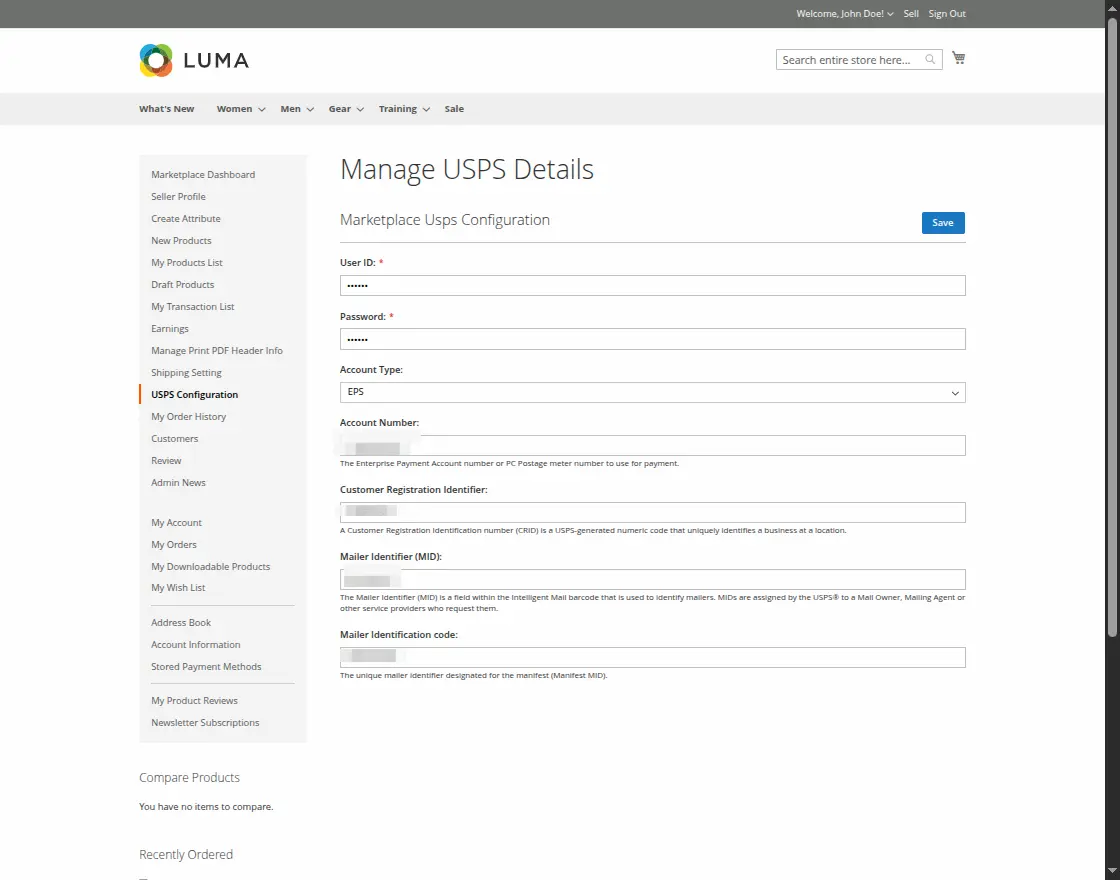
Seller Settings – Magento 2 Marketplace USPS Shipping
-
USPS User ID
-
USPS Password
-
Account Type
-
Account Number
-
Customer Registration Identifier
-
Mailer Identifier (MID)
-
Mailer Identification Code
 The seller will now add the shipping origin address to his account by navigating to Shipping Setting menu option as per the below image.
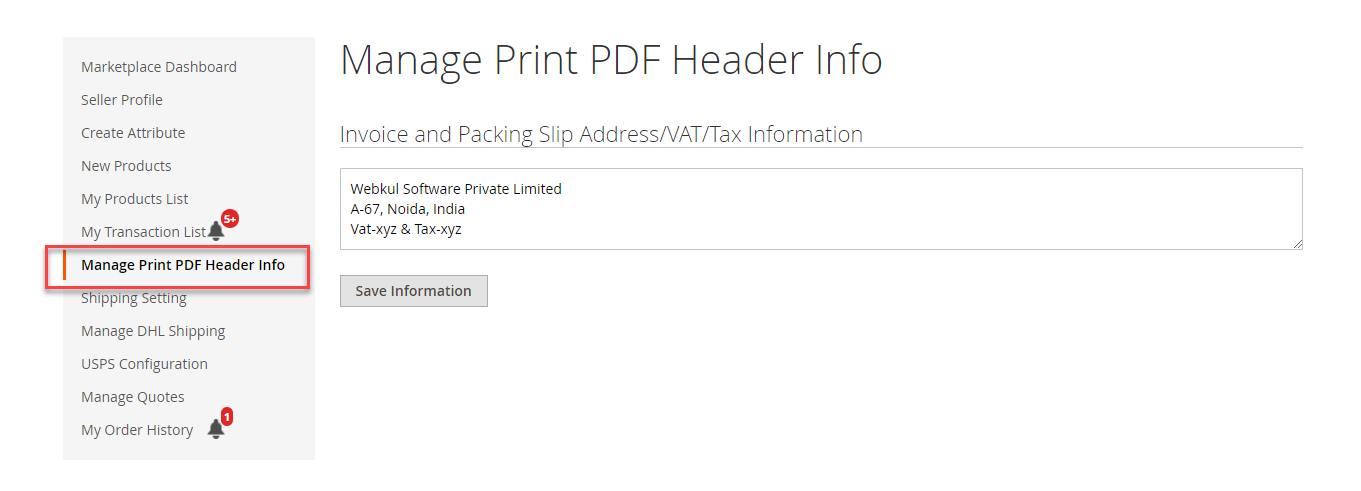
 Also, the sellers can add Shipping, Invoice, Tax, Vat information under Manage Print Pdf Header Info as shown below.
 NOTE: The “USPS Configuration” option in the seller panel will only be visible when admin sets the “Enabled for Checkout” and “Allow Sellers to Save Usps Details” to “Yes” in the admin panel else not.
Buyer Select USPS Shipping Method At Checkout
 Buyer can also see the selected shipping method under Order Summary section as shown below.
 Note:
Note:
- In Magento 2 Marketplace USPS Shipping module, the shipping rate will be calculated according to seller’s product weight and seller origin(Billing address) address through API.
- Magento 2 Marketplace USPS Shipping doesn’t work for the admin/seller’s product with more than one warehouse for a product.
Marketplace USPS Shipping Management By Seller
 If admin sets the “Allow Seller to Manage Order” option to “Yes” then the seller can manage the orders from the front-end.
This enables the seller to generate invoices, tracking number, and shipment for the orders of their products.
If admin sets the “Allow Seller to Manage Order” option to “Yes” then the seller can manage the orders from the front-end.
This enables the seller to generate invoices, tracking number, and shipment for the orders of their products. Even the seller can notify the customers by sending them emails, cancel/refund the order and even print the order.
To generate the USPS shipping label sellers need to check the checkbox for USPS shipment as shown below.
Even the seller can notify the customers by sending them emails, cancel/refund the order and even print the order.
To generate the USPS shipping label sellers need to check the checkbox for USPS shipment as shown below. Once the seller generates the shipment and invoice, the seller will able to see complete order details.
Shipment Information:-
Here, the sellers will be able to print the Shipment Slips and send tracking information. The seller can click on USPS Shipment slip to print USPS Label as shown below.
USPS Label:
INVOICE SLIP:

SHIPPING SLIP:

MY ORDER HISTORY

Download all Invoice Slips:
After clicking on download option a pop-up window will appear, here you will enter the date up to which you want to download the Invoice Slips.
Download all Packaging Slips:
Similarly, you will enter the date up to which you want to download the Packaging Slips. That’s all for the Magento 2 Marketplace USPS Shipping, still, have any issue feel free to add a ticket and let us know your views to make the module better at HelpDesk System.
Current Product Version - 5.0.4
Supported Framework Version - Magento 2.0.x, 2.1.x, 2.2.x,2.3.x, 2.4.x

Be the first to comment.