Magento 2 Two Factor Authentication extension adds extra security features to the account. It provides two-factor authentication for the website.
Magento 2 Two Factor Authentication is verified in two cases i.e creation of a new account and login into the account of existing customers.
It is one of the most reliable processes for the security of account purposes.
Also, Magento 2 Security extension helps secure your website form various attacks and hacks.
Go through the brief overview of the module –
Features
- At the time of registration, Auth Code will be sent to the mobile number entered. However, it will be verified after the account will be created.
- Admin can enable/disable the TwoFactorAuth module from the admin configuration.
- Admin can enable/disable TwoFactorAuth verification of the customers at the time of registration.
- Customers have to verify to access the account.
- The admin generates backup codes for customers and notifies customers through mail.
- The verification code expiration time period can be changed by the admin.
Install Extension from Webkul Store
#1 Download Module
Firstly, you need to log in to Webkul Store, go to My Account>My Purchased Products section, verify and then download and extract the contents of this zip folder on the system.
#2 Upload Folder
Once the module zip is extracted, follow path src>app and then copy the app folder into the Magento 2 root directory on the server as shown below:

#3 Run Commands
After uploading the module folder, you need to run the following commands in the Magento 2 root directory:
composer require twilio/sdk
composer require sendgrid/sendgrid
composer require pragmarx/google2fa
composer require pragmarx/google2fa-qrcode
php bin/magento setup:upgrade
php bin/magento setup:di:compile
php bin/magento setup:static-content:deploy
php bin/magento indexer:reindex
php bin/magento cache:flush
Install Extension from Magento Marketplace
If you have purchased this extension from the Magento Marketplace then please follow the below process or visit this link.
#1 Get Access Keys
You need to get access keys, navigate to My Profile in Magento Marketplace, and then choose Access Keys in the My Products section.

Go to Magento 2 and then you need to copy both the Access Keys – Public Key and Private Key. These access keys will be needed in the next steps for authentication.

If access keys are not created earlier, click Create A New Access Key, enter any name and click OK.

#2 Update composer.json File
To know the component name and version number, go to your Magento Marketplace account section, My Profile>My Purchases,
then find this extension to view the details. Please note – Below is an example image, every extension will have its unique component name and version.

After that, navigate to your Magento project directory and update your composer.json file in the following format.
composer require <component-name>:<version>
For example, to install version 5.0.0 of this extension you need to run the following command:
composer require webkul/2fa:5.0.0
#3 Enter Access Keys
Now you will need to enter the Access Keys that you obtained as explained in the first step #1 Get Access Keys.
Wait for Composer to finish updating your project dependencies and make sure there aren’t any errors.
#4 Run Commands
You need to run the following commands:
composer require twilio/sdk
composer require sendgrid/sendgrid
composer require pragmarx/google2fa
composer require pragmarx/google2fa-qrcode
php bin/magento setup:upgrade
php bin/magento setup:di:compile
php bin/magento setup:static-content:deploy
php bin/magento indexer:reindex
php bin/magento cache:flush
Multi-Lingual Support
For multilingual support, the admin will navigate through Store > Configuration > General > Locale Options.
Now select the locale as English (the language into which the admin wants to translate his store content).

Admin Configuration
Once the module of Two Factor Authentication for Magento 2 (Adobe Commerce) is installed completely.
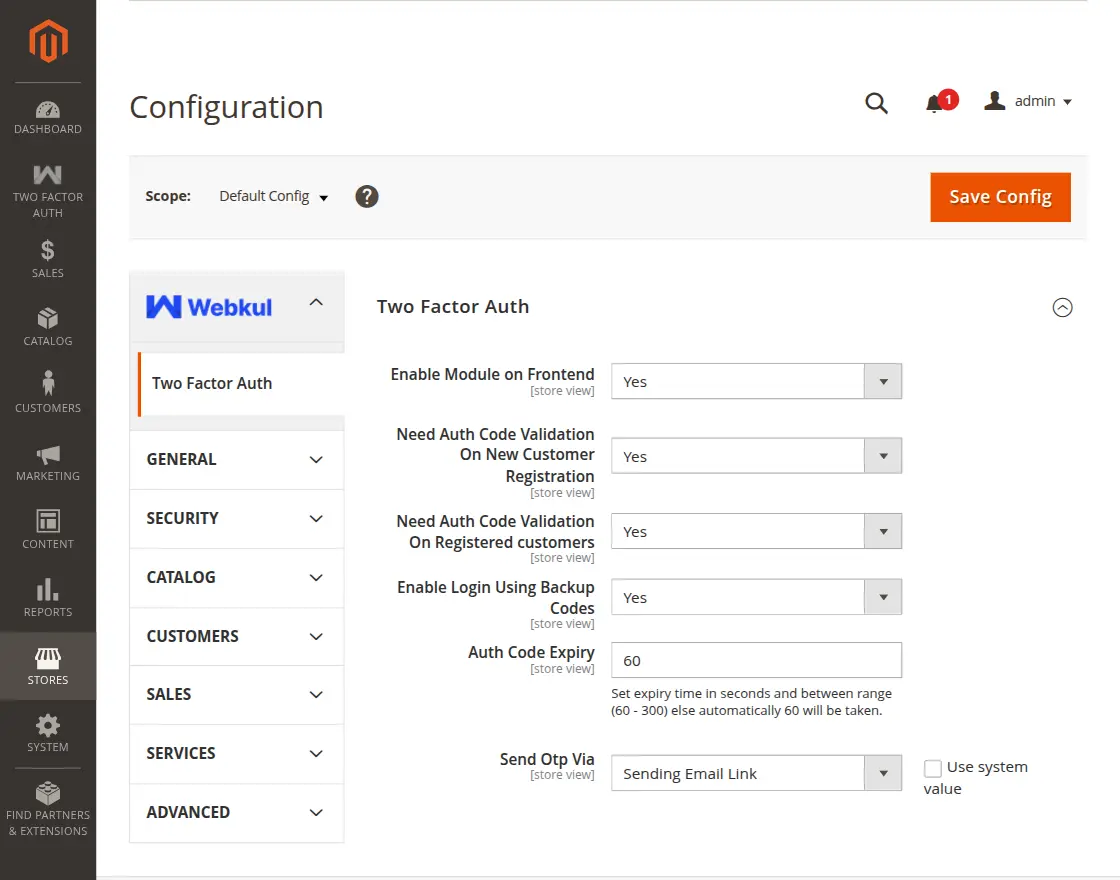
Now the admin will manage the feature from the backend by navigating to Stores > Configuration > TwoFactorAuth.

In configuration settings, the admin can enable and disable the twofactAuth.
- Enable Module on Frontend:- Admin can enable and disable the module by YES/No
- Need Auth Validation On New Customer Registration:- Set YES/NO to auth validations for a new customer.
- Need Auth Validation On Registered Customers:- Set YES/No to auth validations during login for the existing Customer.
- Enable Login Using Backup Code:- Set the backup codes to yes/no.
- Auth Code Expiry:- OTP duration is between 60 to 300 sec.
- Send OTP Via:- Mobile, Email, Sending Email Link, Push Notification, TOTP/Authenticator.
Twilio Auth
“Twilio” is a communications platform for sending and receiving text messages using its web service APIs.
The admin can signup for the Twilio services and register to Twilio. To register, the admin can visit Twilio and then click on the login button.
Now, from the Twilio account, the admin can access the information required in the admin dashboard.

Magento 2 Two Factor Authentication – Workflow
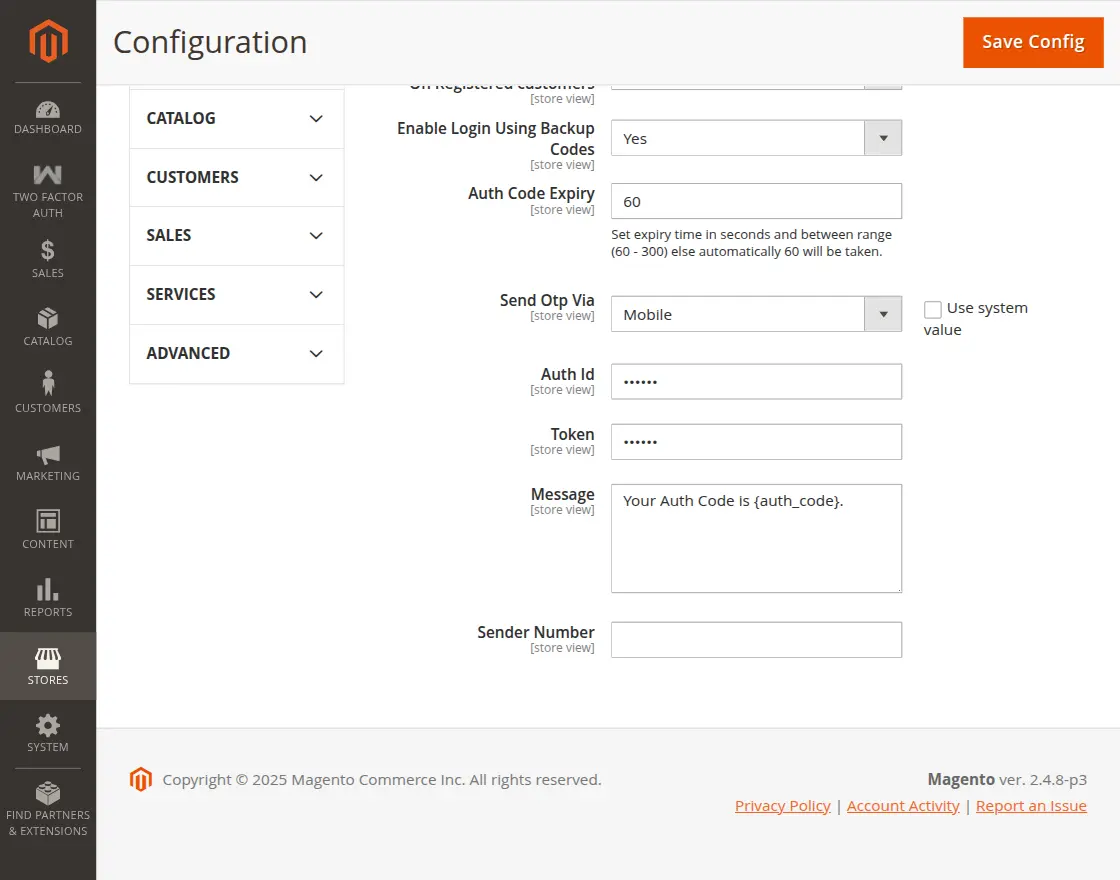
Send OTP Via Mobile
In the module configuration, the admin set Send OTP Via to Mobile.
- Auth ID:- Enters the Auth ID
- Token:- Enters the Token
- Message:- Enters the customized msg sent to the user.
- Sender Number:- Enters the senders’ Number.
At the time, when a new account is created by the customer. The user will enter their details.

The OTP will be sent to the customer’s mobile number.
Now customers have to go through the two-step verification.

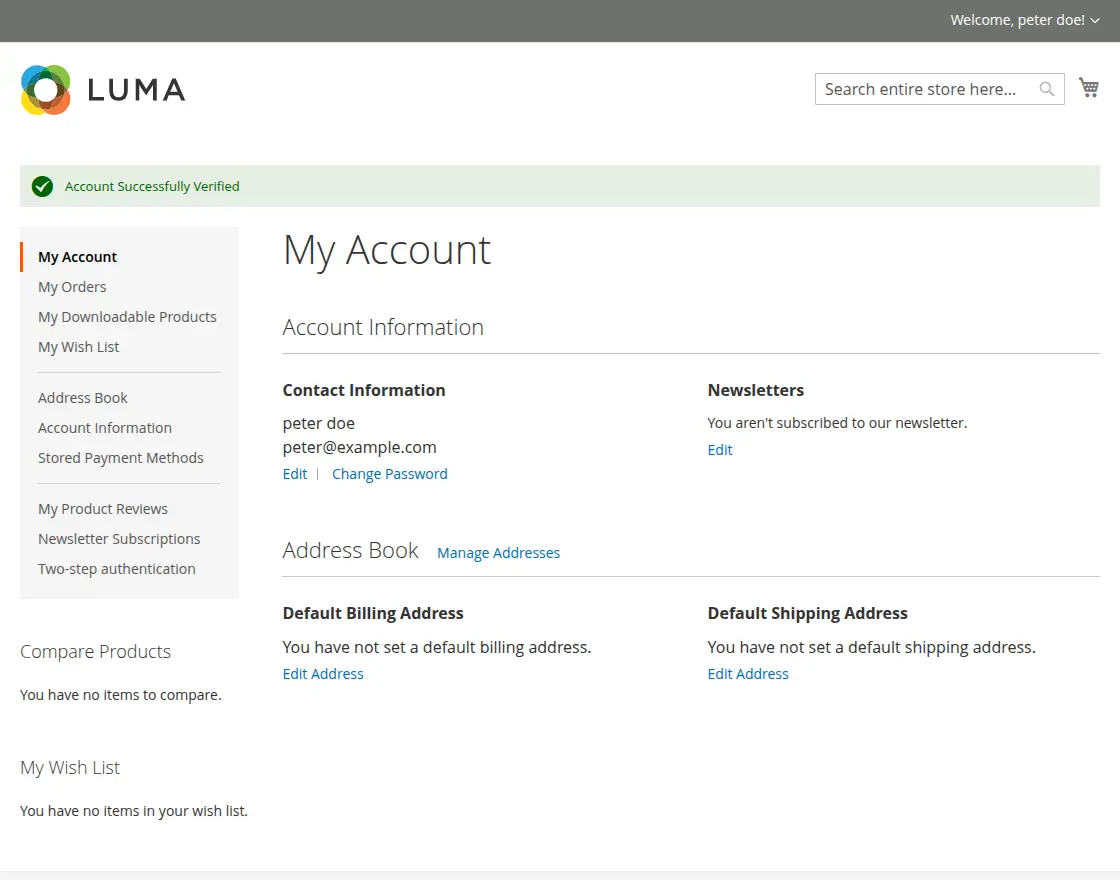
Enter the OTP sent on the registered mobile number. After verifying the OTP, the account is created successfully.
Existing Customer
TwoFactAuth is applicable for the existing customer. Every time when the customer does the login. He will receive the OTP.
Customer enters their login credentials. Then click on Sign In.

After entering the OTP they can use their account after verification.

Thus, the customer receives the OTP (SMS) on the mobile, as shown in the image below.

Enter the OTP sent on the registered mobile number. After verifying the OTP, the customer will successfully log in to their account.

Send OTP Via Email

Customer End
At the time, when a new account is created by the customer. The user will enter their details.
After entering the credentials the customer will receive the OTP in the mail, as shown below in the snapshot:

The customer will enter the OTP and log in to the Web store.

For Customer login
The customer will enter the email ID and password on the login page.

After entering the credentials the customer will receive the OTP in the mail, as shown below in the snapshot:

By entering the OTP the customer can log in to the Magento 2 store.
Send via Sending Email Link
Customer End
At the time, when a new account is created by the customer. The user will enter their details.
After entering the credentials the customer will receive the OTP in the mail, as shown below in the snapshot:

By clicking on this link customers will register to the Magento store.
For customer login
The customer will enter the email ID and password on the login page.

Once entering the credentials the customer will receive the link as mentioned below in the snapshot.

By clicking on the link the customer can log in.
Send OTP Via Push Notification
Admin End
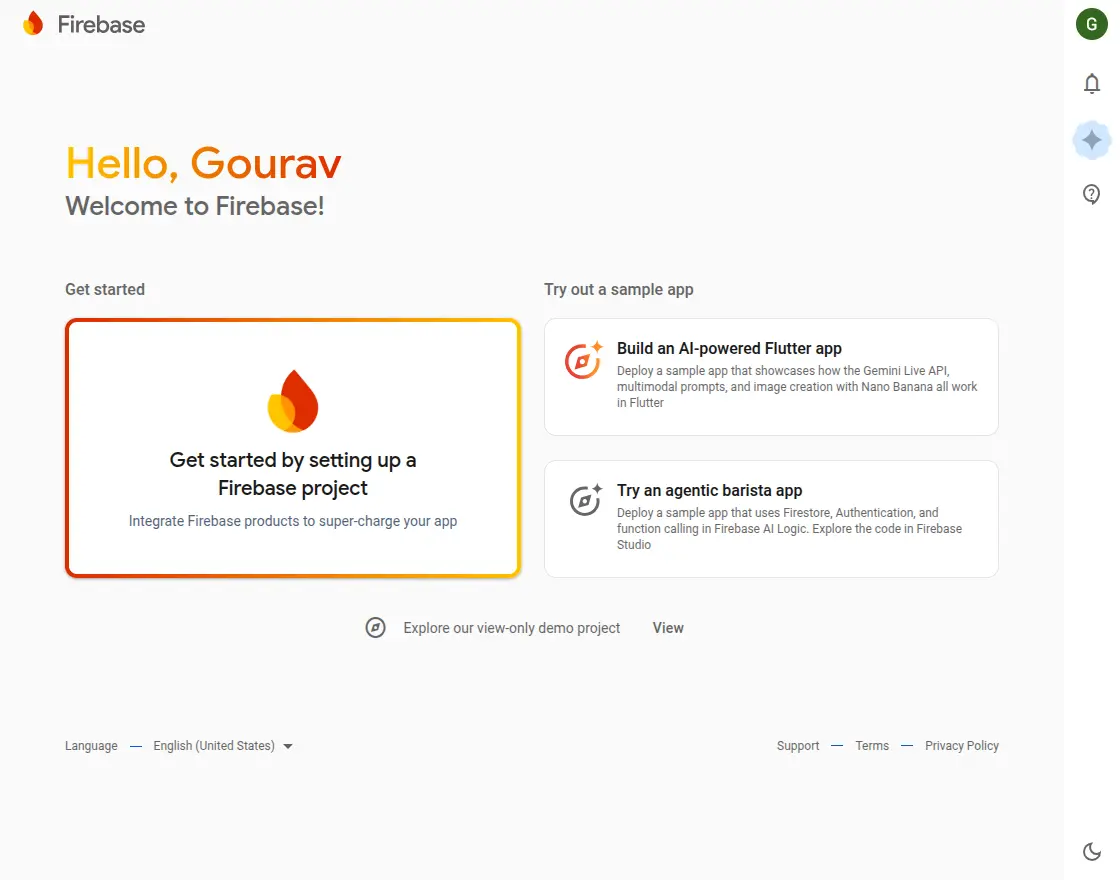
The admin needs to create an account on Firebase, Please click here and create a new project with your Google account.
1. After opening the Firebase page. Please create a project by clicking Get started by setting up a Firebase project button.
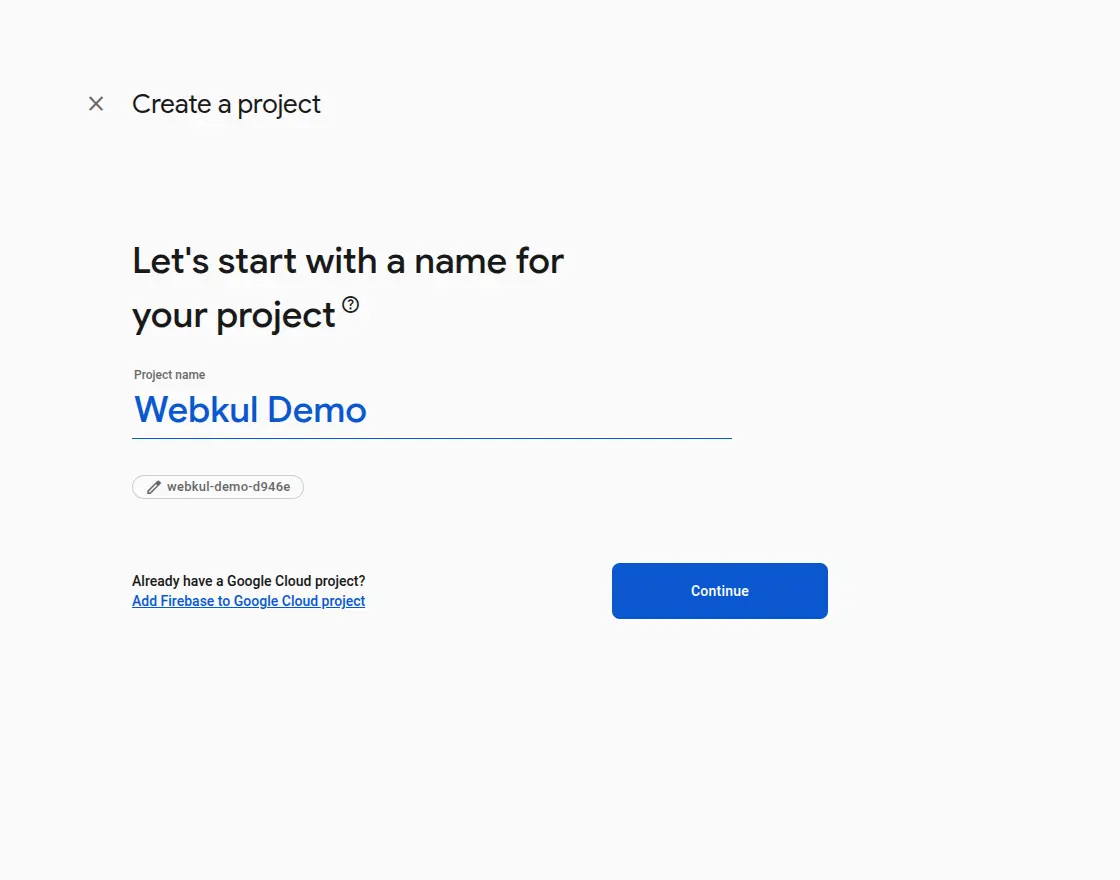
2. Then, create a new project, enter the name of the project, and click continue.
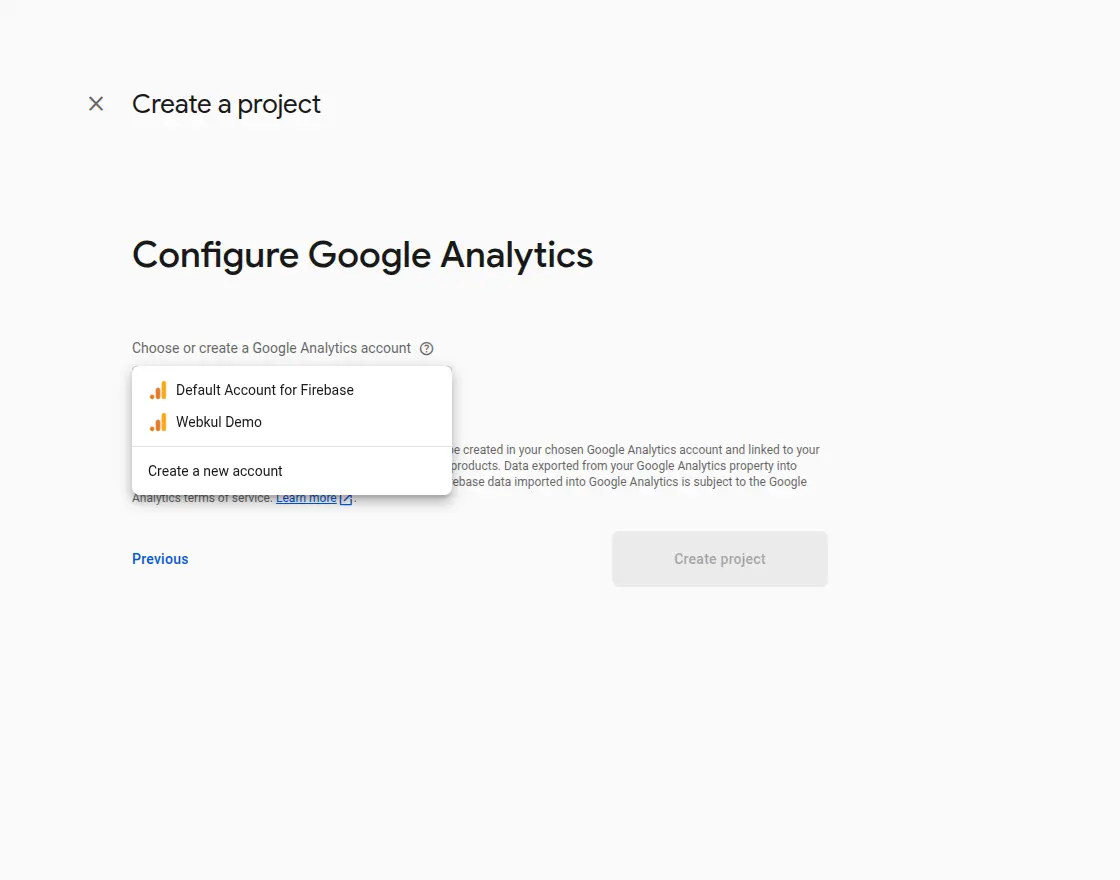
The next step will ask you to set up Google Analytics. Let’s go ahead and set it up.

(Optional) Enable Google Analytics
Enable Google Analytics for your project, then follow the prompts to select or create a Google Analytics account.
if you don’t want to set Google Analytics disable the toggle button or you can click “Continue” and you will be taken to the project home page.
Choose or create new Google Analytics, and click “Create a new Account”.
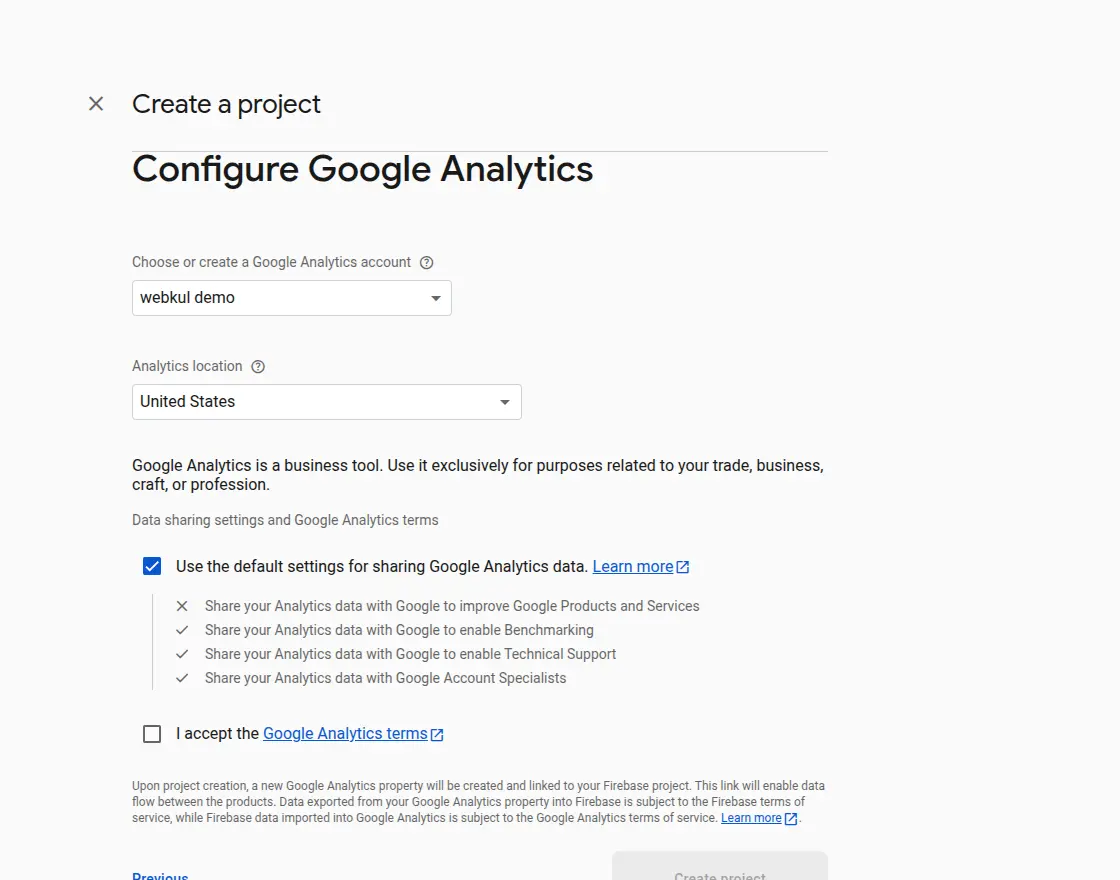
Finally, select your Google Analytics location (the United States by default) and read and configure the sharing settings. Finally, accept the Google Analytics Terms of Use and create a project.
The process only takes a few seconds. When finished, click “Continue” and you will be taken to the project home page.
3. After creating your new project, click on the Settings menu and then select the Project Settings option. A new Project Settings page will open.
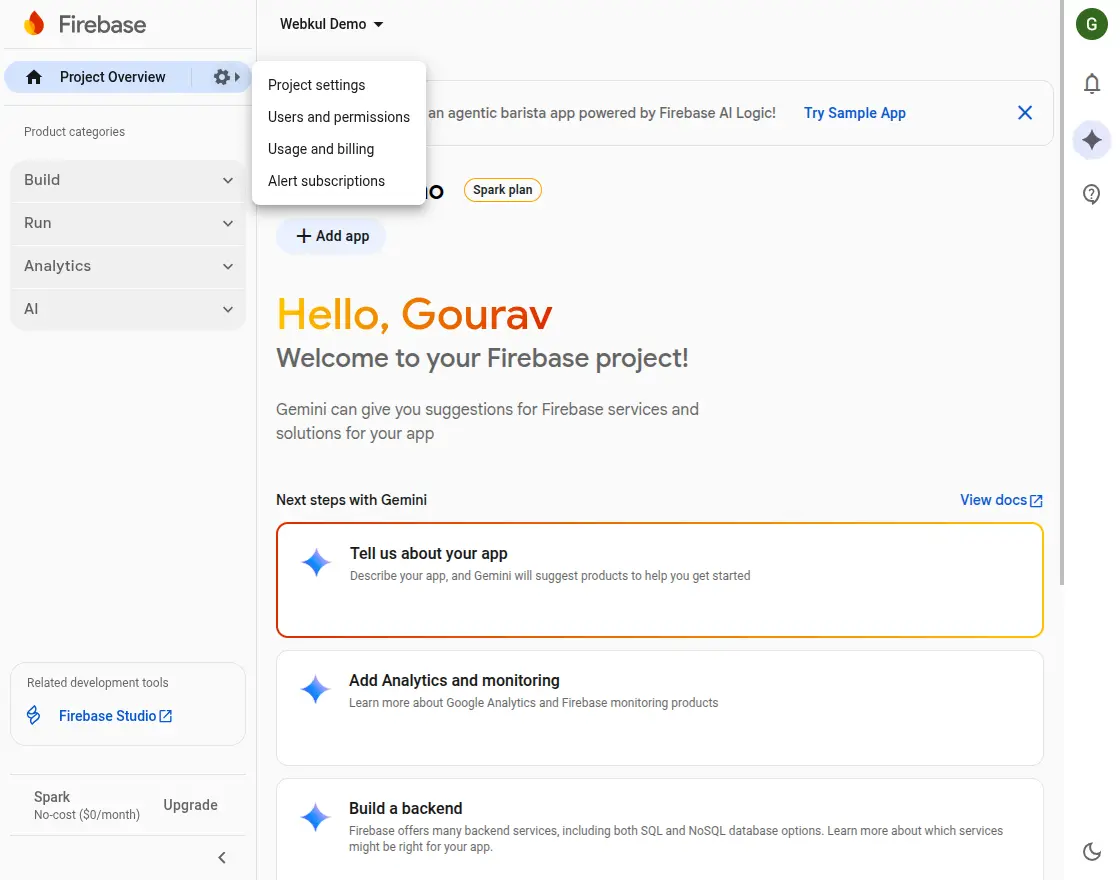
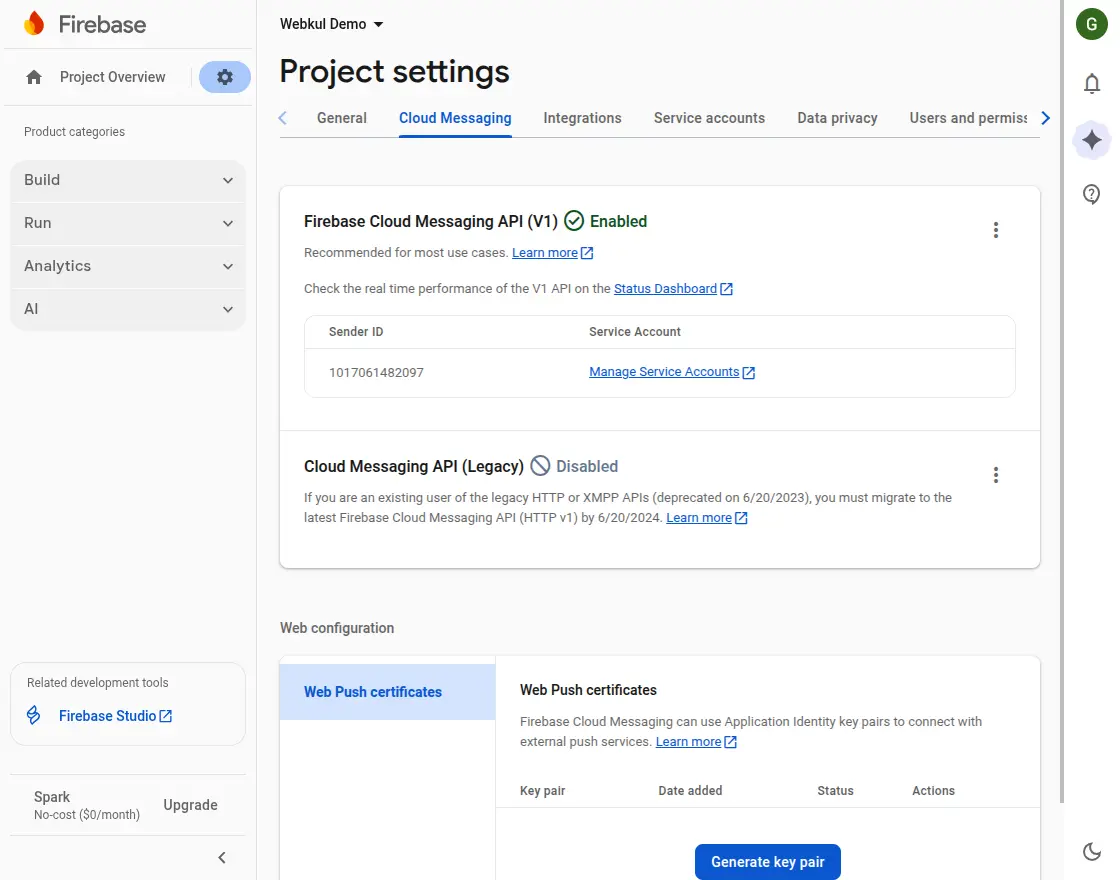
4. After entering the Project Settings page, go to the Cloud Messaging tab.
Further, from here you will find your project credentials. Copy and save your Server Key and Sender ID as shown in the snapshot below.
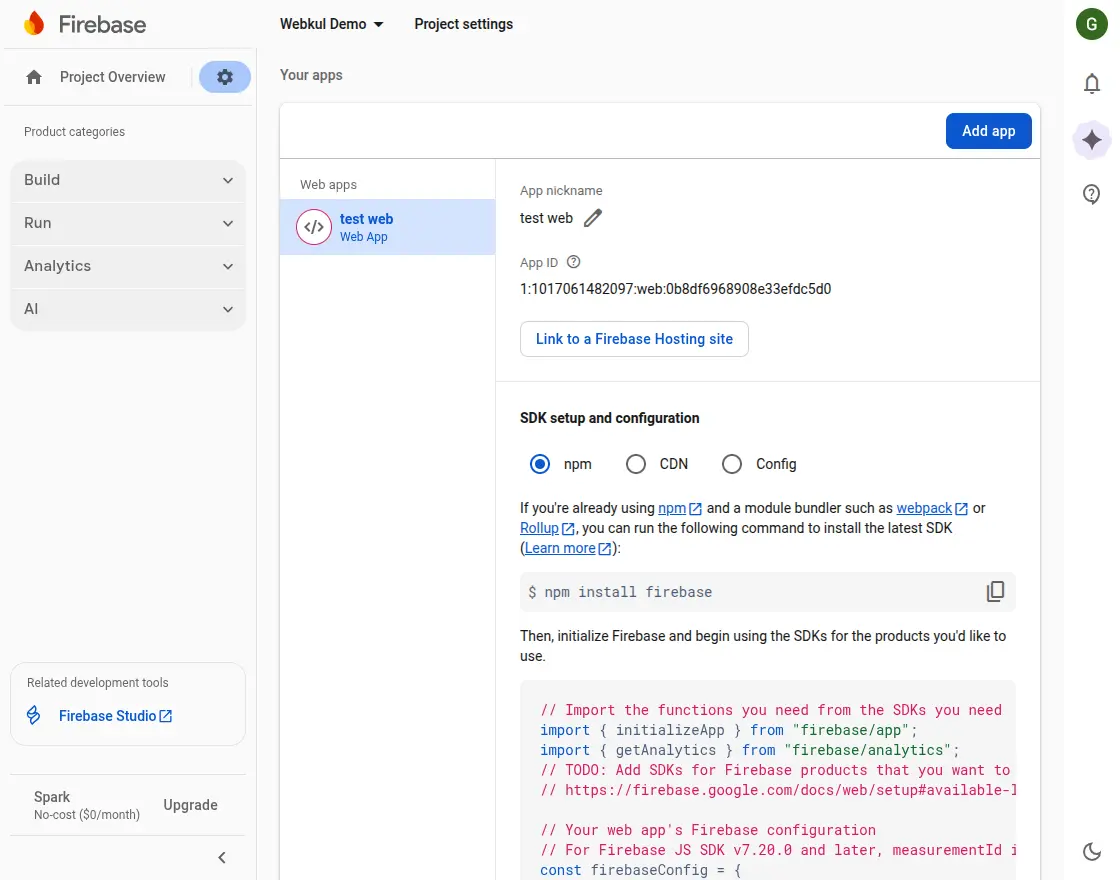
5. Moreover, navigate through Project Settings > General will find the other Firebase Project Credentials under web apps. You need to enter these credentials into the admin configuration.
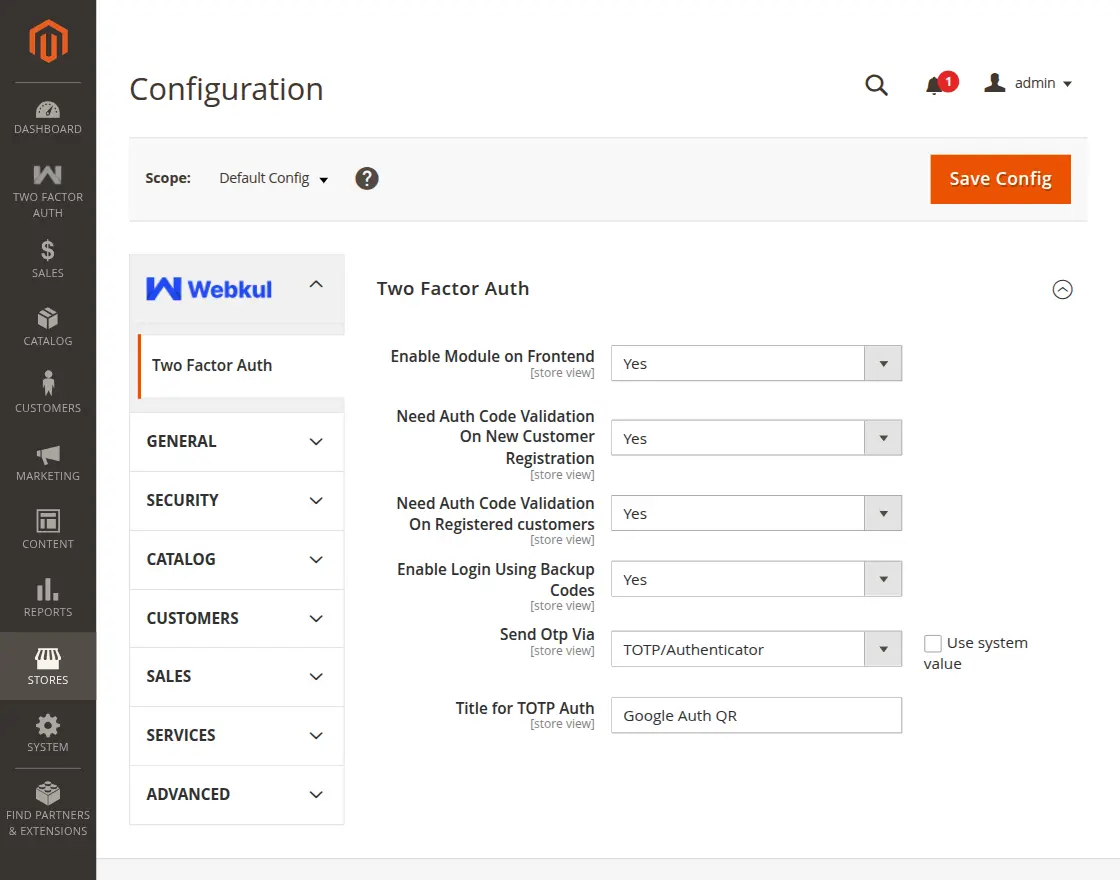
Configuration Settings
After receiving all the credentials, the admin needs to enter them in the Configuration as mentioned in the snapshot below:

Customer End
For Registration
At the time, when a new account is created by the customer. The user will enter their details.
The customer has to allow the show notifications popups then only the customer will receive the push notifications.

Then the customer will receive a pop-up notification on their device.
Then the customer will enter the received OTP.

For Customer Login
Now customer Will to enter the login credentials like email and password on the login page.

After allowing the show notifications popup, customer will receive a push notification as mentioned below in the snapshot:

From the push notification, the customer will receive the one-time verification code and by entering that, the customer can log in.
Send OTP Via TOTP/Authenticator
First, the admin needs to configure the module for TOTP/Authenticator.
Customer End
At the time, when a new account is created by the customer. The user will enter their details.
After entering the credentials there will be a popup in which the barcode will be there the customer can scan the barcode using Google Authenticator Application.

Once the customer scans the barcode, he will get the OTP.

By entering the OTP, the customer will register themselves to the Magento 2 Store.

For Customer Login
If the admin selected Send OTP Via TOTP/Authenticator from the configuration page. The customer will enter the credentials on the login page


The customer will get the OTP on the Google Authenticator.
By entering the OTP customer will login to the Magento 2 Store.

To update TOTP Authenticator App
To update the Authenticator App, the customer must log in to the Magento 2 Store
Then the customer will navigate to Two- Step Authentication

Then click on Update button.

Enter 6-digit OTP received on the authenticator. Then click on submit.
Now, the customer scans the QR code from their authenticator.

Then enter the Auth Code and click on verify.

The Authenticator App is successfully updated.
Login Via Backup Code
The Customer can also log in through the Backup code that is provided during the registration.
Note: Backup code is available for the customer during registration only if the admin enables it from the module configuration.
To enable it, the admin will configure the module.
Enable Login Using Backup Code:- Set the backup codes to yes.
The Customer will get 12 backup codes during registration.

The customer can save the backup codes in case the customer doesn’t have access to the auth code on the mobile phone or email, then the customer can use the backup code and log in to the panel.
The customer also gets the backup code on their registered Email ID.

For Customer Login
During login, customers can choose the option to Sign In another way, if they don’t have OTP.
Now the customer will enter the Backup codes to log in to the Magento 2 store.
One code can be used only once, if the customer has used one backup code, then that backup code can’t be used again.
After entering the backup code the customer is successfully logged in to the Magento 2 store.
Note: The customer can request the admin to generate the backup codes for the customer.
Admin Creating Backup code
If all the backup code is used by the customer then it shows the message on the notification.

To create the backup code for the customer, the store admin navigates to Customer -> All Customer -> Edit Customer -> Two Fact Auth.

Then click On the Generate Button.

After click on the generate button the new backup code will generated.

Support
So, that is all about the Magento 2 Two Factor Authentication extension. If you have any queries regarding the plugin, please get in touch with us at Webkul Support System.
Explore the Adobe Commerce Cloud development services by Webkul. You may also browse our quality Magento 2 extensions.
Current Product Version - 5.0.5-p1
Supported Framework Version - 2.0.x, 2.1.x, 2.2.x,2.3.x, 2.4.x

Be the first to comment.