INTRODUCTION
Get Summarized details of Odoo POS Session!
Now you can check the Session Report in Odoo POS anytime. Odoo POS Session Report facilitates you to know the summarized details of POS session.
The report specifies details like sessions summary, order details, the total amount to be paid, products etc.
The report helps you to keep track of the session which helps you to remind the transactional flow.
It helps you to get the stats for the sale of each product individually so that you can know the demand for the products. Additionally, you also get the statement details in the pos session report.
FEATURES
- Prints details of the current session report.
- You can also send reports via emails to the responsible user from POS Backend.
- The report displays information about the details of the products sold.
- A salesman can print the details of the session report with opening balance, total sale, tax collect, discount, return, total item and payment details.
- Print the session summary either in form of XML receipt or in PDF form.
- The summary shows the ordered quantity of the products.
- Statement of summary displays the total amount of all the transactions.
INSTALLATION
- Once you purchase the Module from Webkul store, you will receive the link to download the zip file of the module.
- Extract the file on your system after the download finishes. You will be able to see a folder named- ‘pos_session_report_analysis’.
- Copy and paste this folder inside your Odoo Add-Ons path.
- Now, open the Odoo and click on the Settings menu. Here, click on Activate the Developer Mode. One can also activate the developer mode by typing ‘debug=1’ after ‘web?’ in the URL.
- Then, open on Apps menu and click on ‘Update Modules List’.
- In the search bar, remove all the filters and search ‘pos_session_report_analysis’.
- You will be able to see the module in the search result. Click on ‘Install’ to install it.
WORKFLOW
1) Firstly, log in to your Odoo database and go to the POS(Point Of Sale)
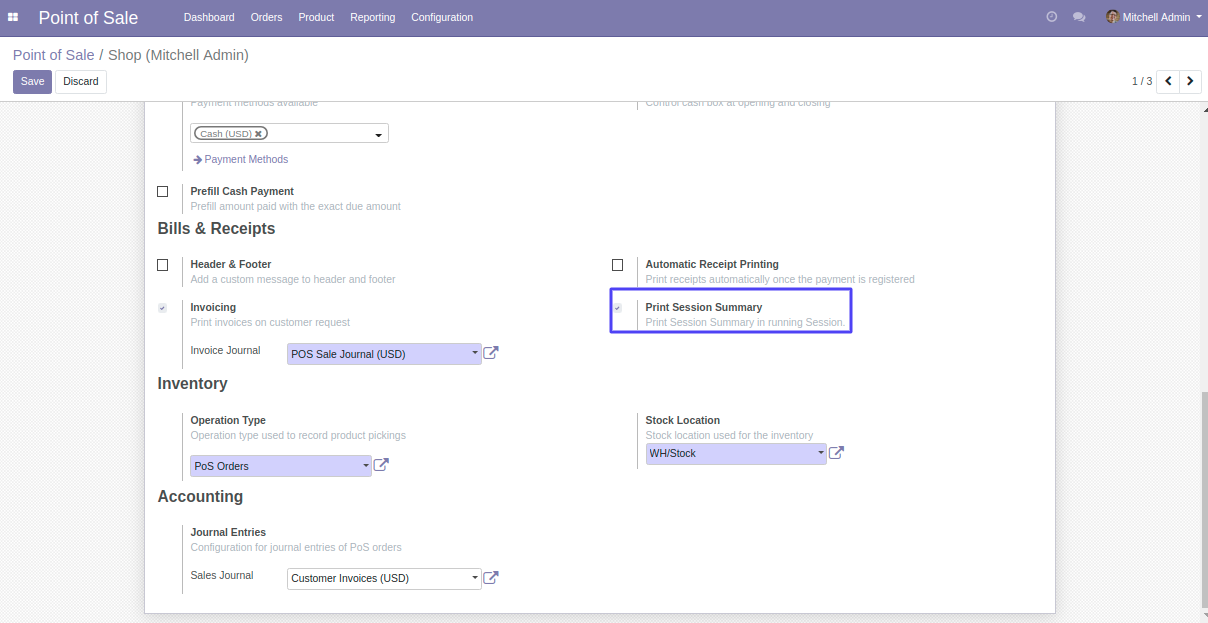
2) You can enable/disable the setting of POS Session Report for each POS uniquely. Click on the three dots of Point Of Sale and then go to the settings.

3) Now, scroll down to the Bills & Receipts to enable the ‘Print Session Summary’ setting.
4) Start a POS session and click on the ‘Print Session Summary’ button to print the Session Summary in Odoo POS.

5) You will get Summary in XML receipt if the POS Box is connected to your Odoo otherwise you will get the print as PDF.


6) Go to POS Backend then navigate to ‘Orders’ >> ‘Session’ to send the POS Session Summary via mail.
7) Select the session report which you want to send via e-mail or want to print.
8) Click on the Print or Send By E-mail for respective operations.

Also Read The User Guides For The Other Modules
NEED HELP?
Did you find the guide helpful? Please feel free to share your feedback in the comments below.
If you have any issues/queries regarding the module please raise a ticket at
https://webkul.uvdesk.com/en/customer/create-ticket/
For any doubt contact us at [email protected].
Thanks for paying attention!!
🙂
Current Product Version - 1.0
Supported Framework Version - Odoo V19, V18, V17

Be the first to comment.