Magento 2 Seller Locator Marketplace add-on will allow the buyer to search and filter the Products based on Location and Product name using an interactive Google map.
Marketplace vendor Locator extension will display vendor location in Google Maps and customers can easily search the sellers located in the nearby positions.
Note:
- This module is an add-on to Webkul’s Marketplace Module. To use this module, you must have purchased and installed Magento 2 Multi Vendor Module first.
- Geolocation is used in our module. To have these services you must have the Google API Key to make use of this extension. You can generate one by clicking here
- You need to enable billing for your google account project under which the API Key is created. For more information please visit here
Check a brief overview of the plugin-
Features
- The seller can add/edit their location.
- The Admin can add/manage the seller’s location.
- The Admin can set the default location to cover the distance.
- Allow customers to search the seller by product name.
- Similarly, allow customers to search the seller by Town or City.
- Dynamic Map addition.
- The customer can search for sellers/vendors in their nearby locations.
- The buyer can filter the search using Map.
- Seller location will display on Google map as a flag then clicking on that flag will expand the list of sellers within that country.
- A customer can find the Seller’s profile on Google Maps.
- The Admin can manage Searching Templates.
- Magento 2 Multi Vendor Seller Locator is compatible with the Hyva Theme.
Installation
Customers will get a zip folder then they have to extract the contents of this zip folder on their system.
The extracted folder has an src folder, inside the src folder you have the app folder. You need to transfer this app folder into the Magento 2 root directory on the server as shown below.

After the successful installation, you have to run these commands in the Magento 2 root directory:
php bin/magento setup:upgrade
php bin/magento setup:di:compile
php bin/magento setup:static-content:deploy
php bin/magento indexer:reindex
php bin/magento cache:flush
Multi-lingual Support
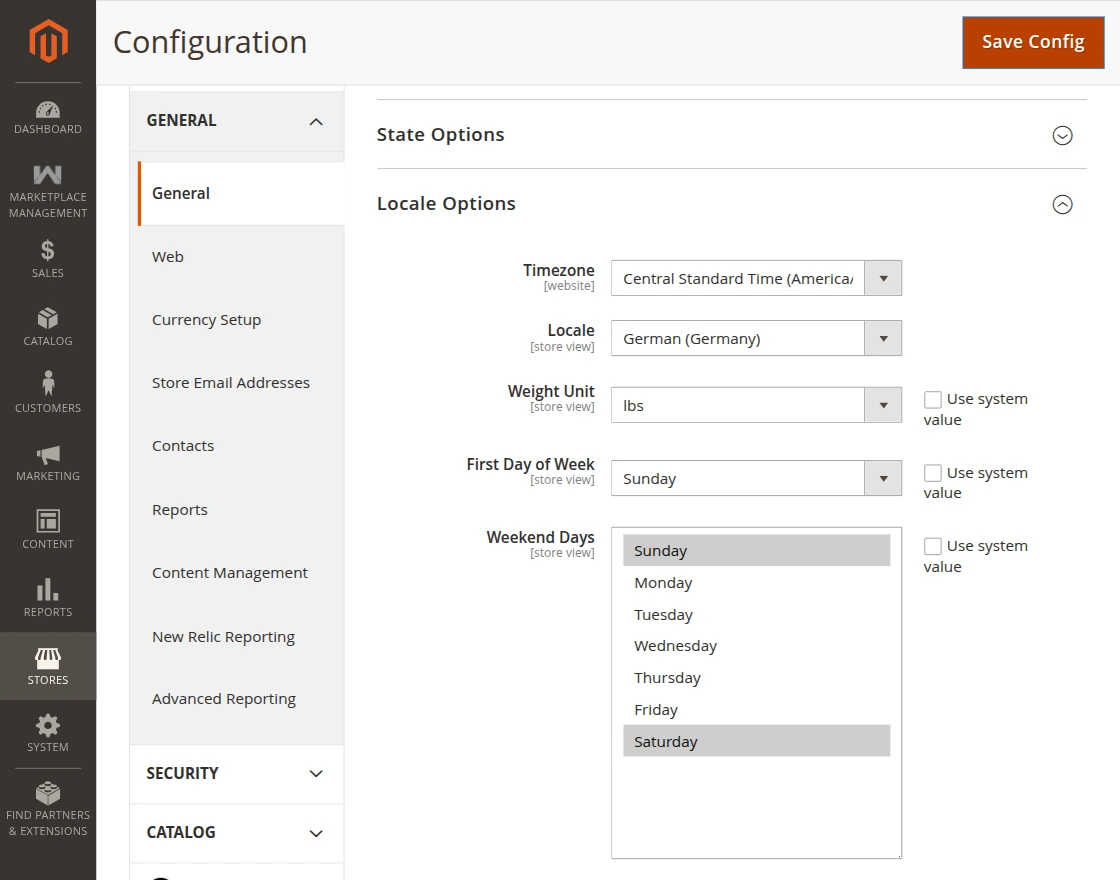
For the multilingual support, the admin will navigate through Store->Configuration->General ->Locale Options and select the locale as German
(the language into which the admin wants to translate his store content).
Seller Locator Translation
If a user wants to translate their module from English to German,
they need to follow the path app/code/Webkul/MpSellerMapLocator/i18n in their unzipped folder and get a CSV file with the name “en_US.csv”.
Now they will rename that CSV as “de_DE.csv” and translate all right side content after the comma in the German language.
After editing the CSV, save it and then upload it to the path app/code/Webkul/MpSellerMapLocator/i18n where they have installed Magento 2 on the server.
The module will get translated into the German Language. It supports both RTL and LTR languages.


The user can edit the CSV like the image below.

Module Configuration
The Admin can set the location cover distance. By default, the cover distance is 1000 and admin can change it according to their need.
Above all, to set the distance, navigate through Stores > Configuration > Marketplace Seller Map Locator.
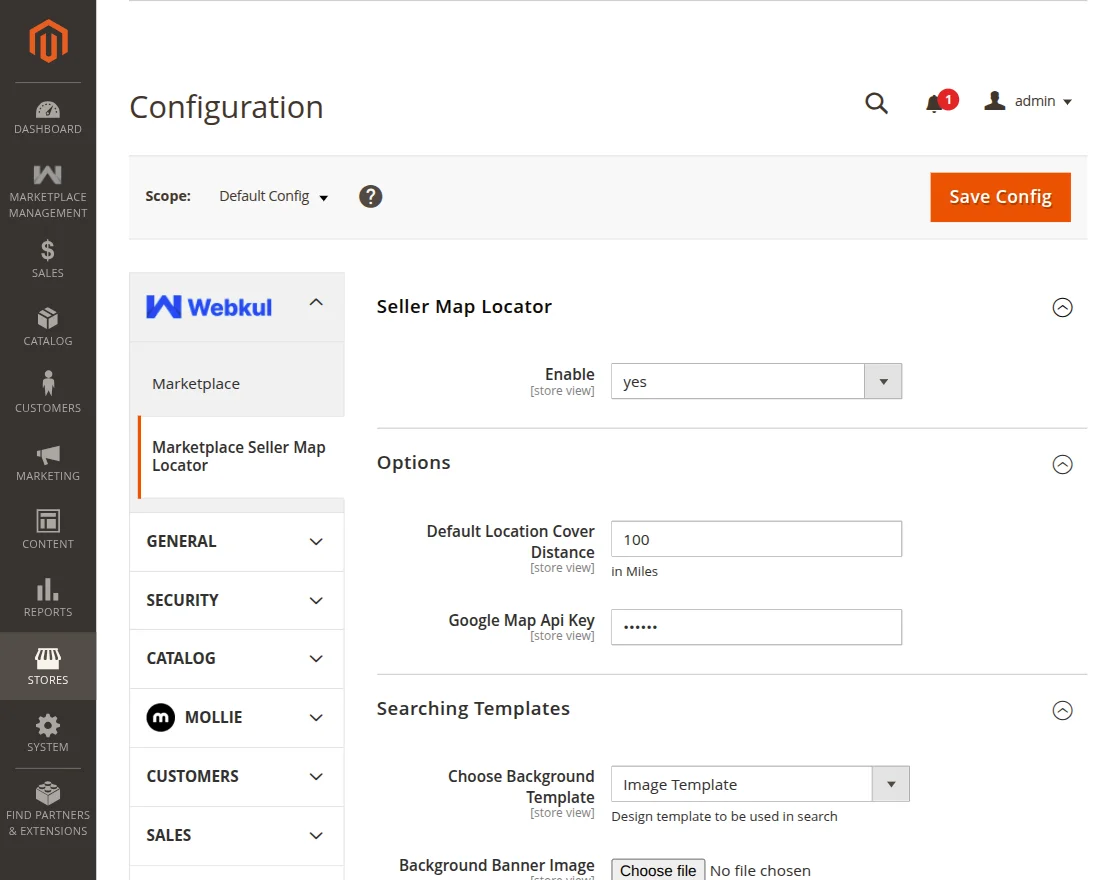

Here the admin will set in:-
Seller Map Locator
The admin can set this field as Yes/No to enable or disable the Seller map locator functionality of the module.
Options
- Default Location Cover Distance(Admin can set the radius for the search location).
- Google Map API Key(Admin can set the Google Map API for showing the Map at the frontend).
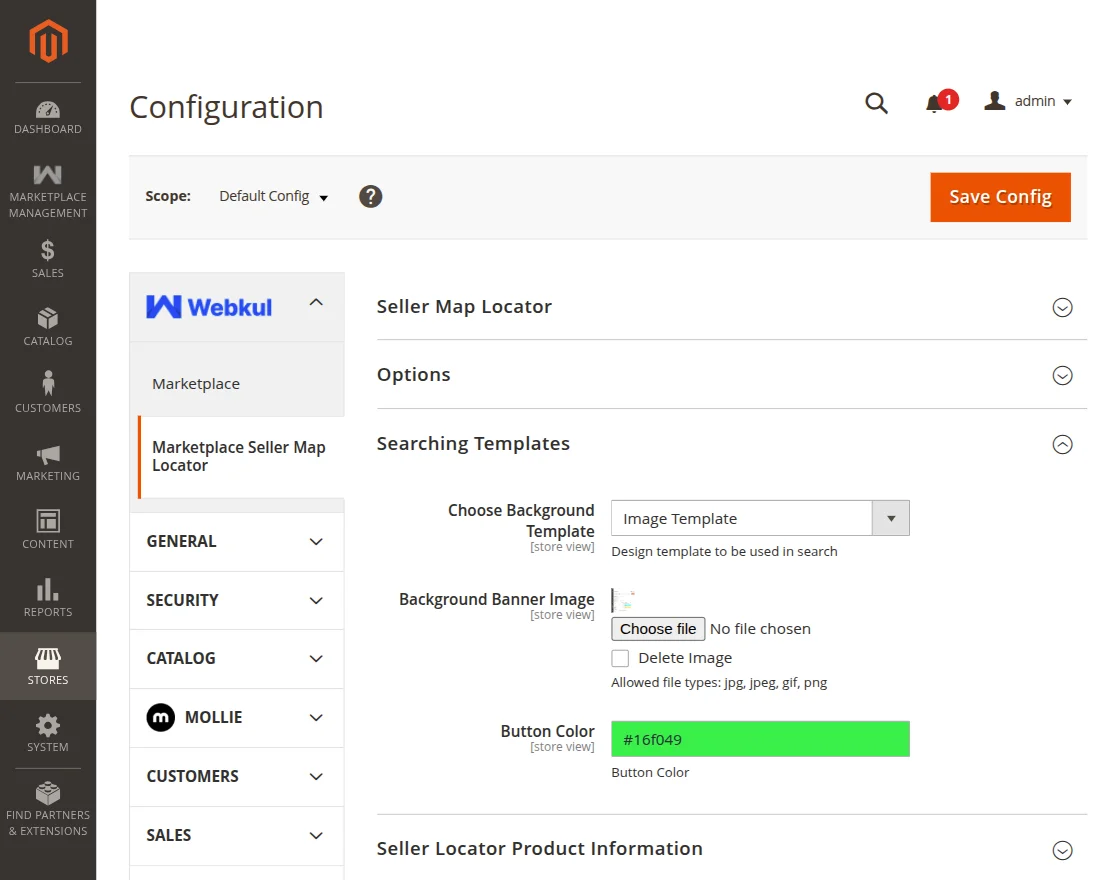
Searching Templates
Here you can customize the look of the Searching template on the store front end.
- Choose Background Template i.e (Blank Template , Color Template & Image Template).
- Add Background Image in case if Image Template has been selected.
- Add Background Color In case if Color Template has been selected.
- Can Choose Different Button Colors.
If you choose the background template as ” Blank Template “ and after, by adjusting the desirable “Button color” save the configuration.
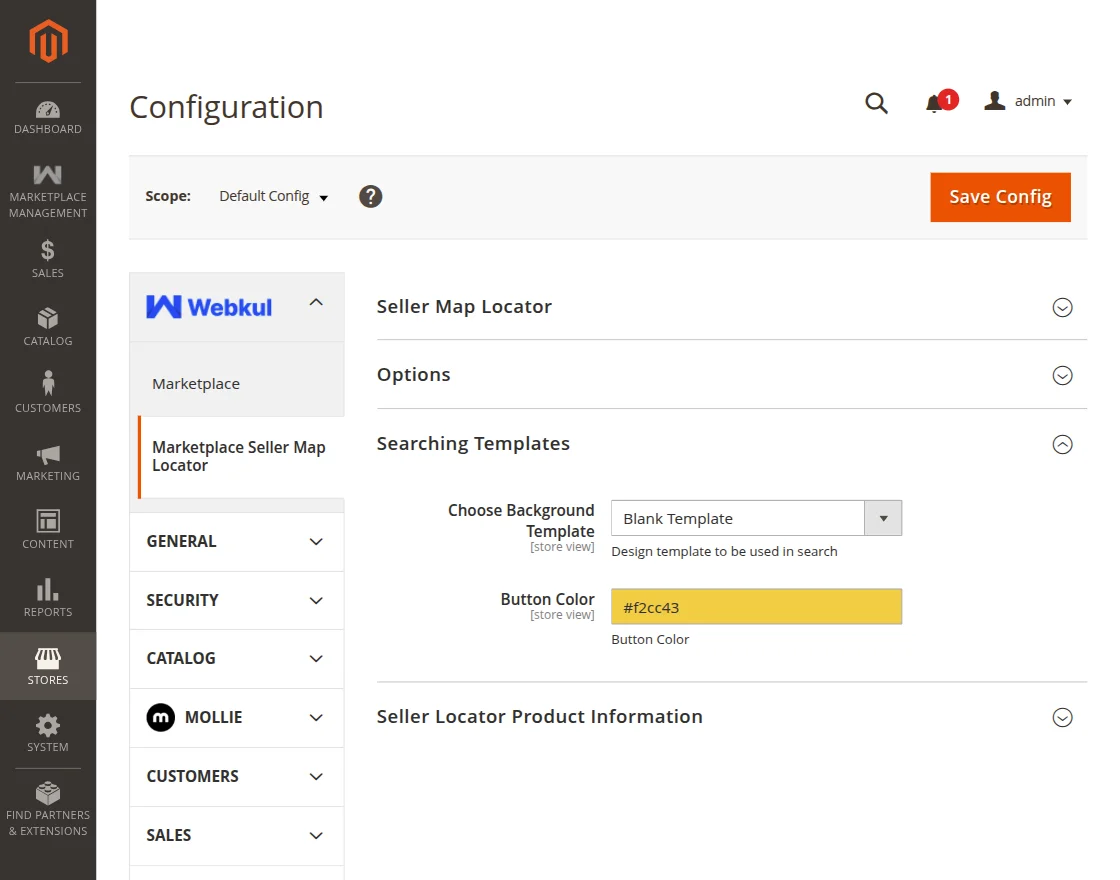
At the storefront, the Template looks like the picture shown below.
After that, choosing the background template as ” Color Template “ and adjusting to a desirable Background color and Button color save the configuration.
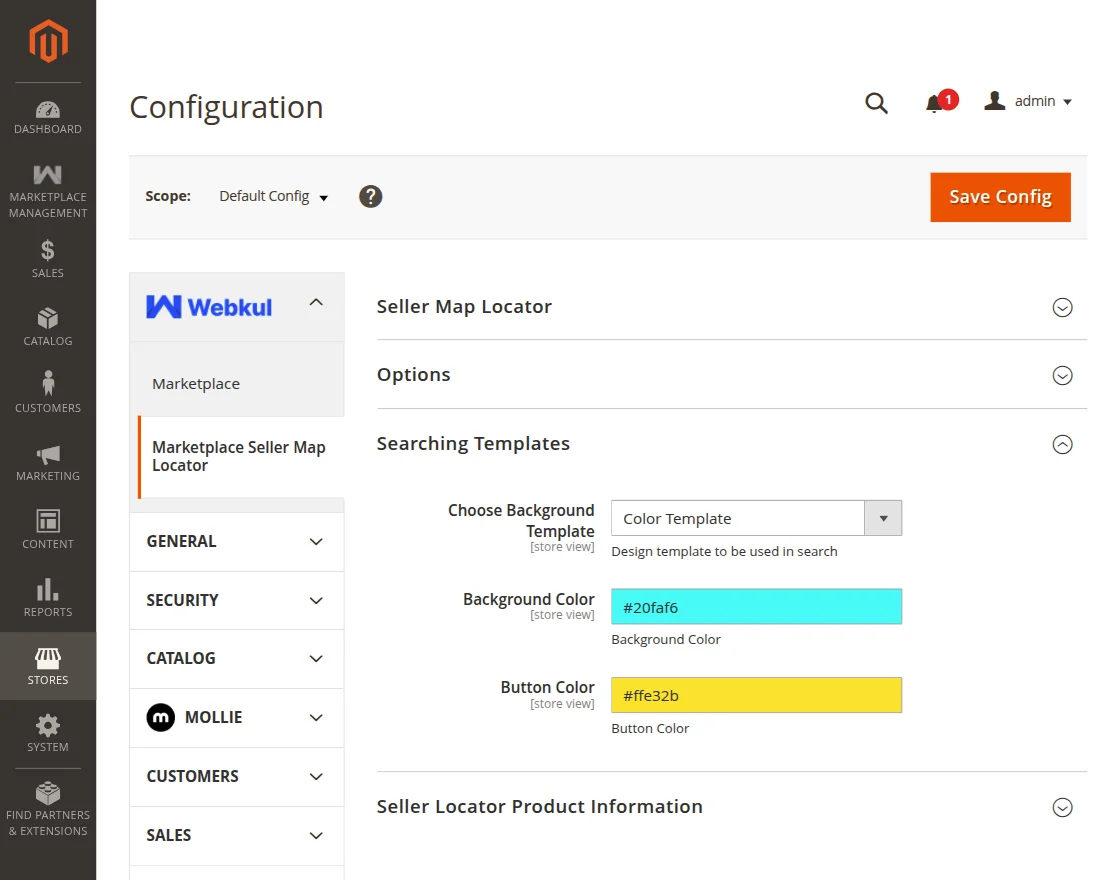
And now at the storefront template looks like as in the picture shown below.

Now if you choose the background template as “Image Template” in the next step you have to choose a file from your local storage,
which get display in the background on the search template and by adjusting the Button color save the configuration.
similarly, for now, at the storefront, the Template looks like the picture is shown below.

How to Add Widget
To enable the customer to use the specific component and services. Admin adds a widget of a particular type from the backend,
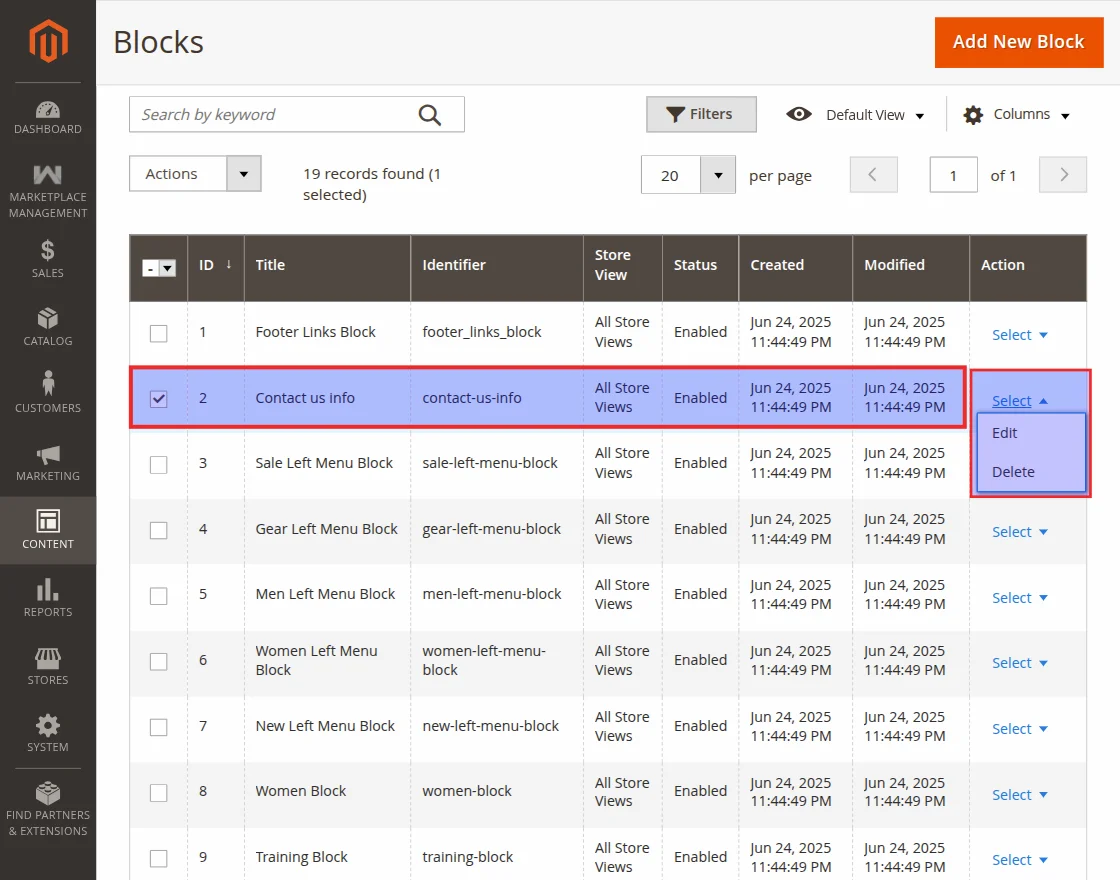
for this admin navigates into Content >Elements >Block.
After that, the admin select the specific block in which he has to insert the widget by selecting Action >Select >edit
Here the content of the specific block is visible & to show further editing options admin clicks on Edit with Page Builder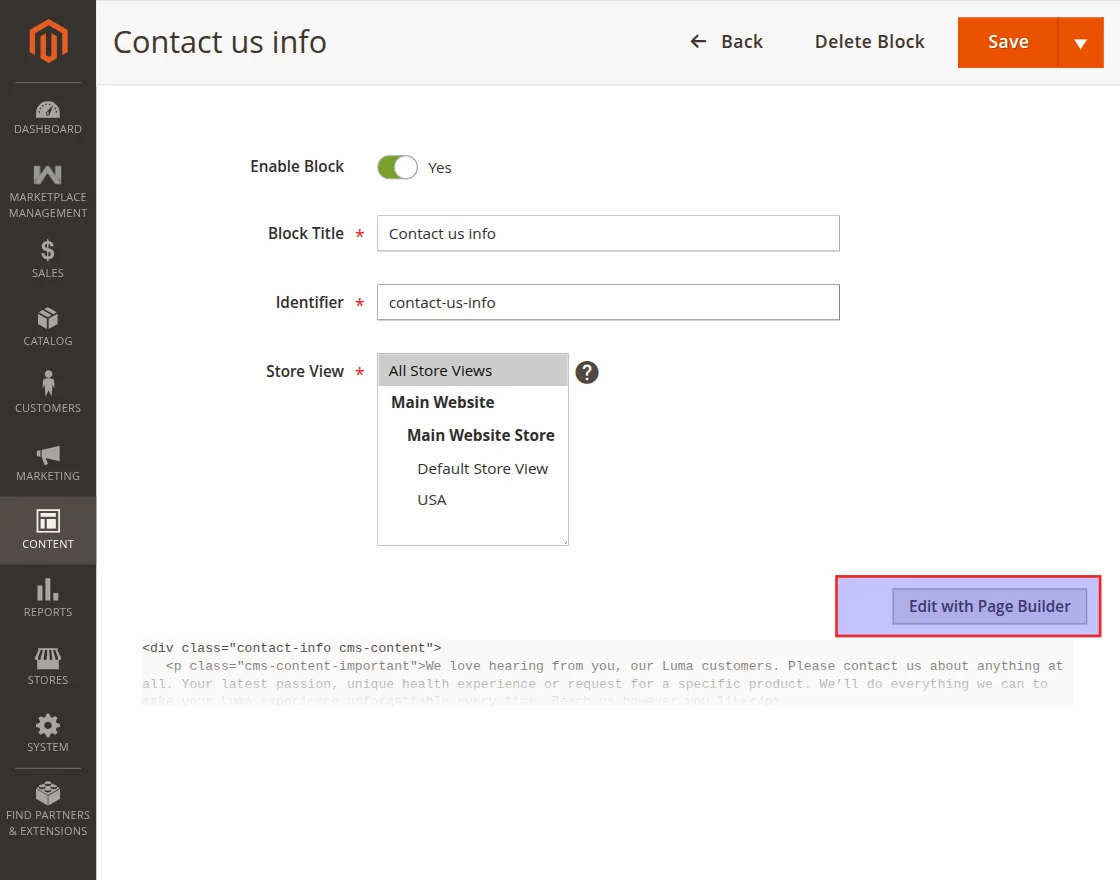
Open the Page Builder interface. Hover over the content section to reveal the Page Builder options, then click the gear icon
![]()
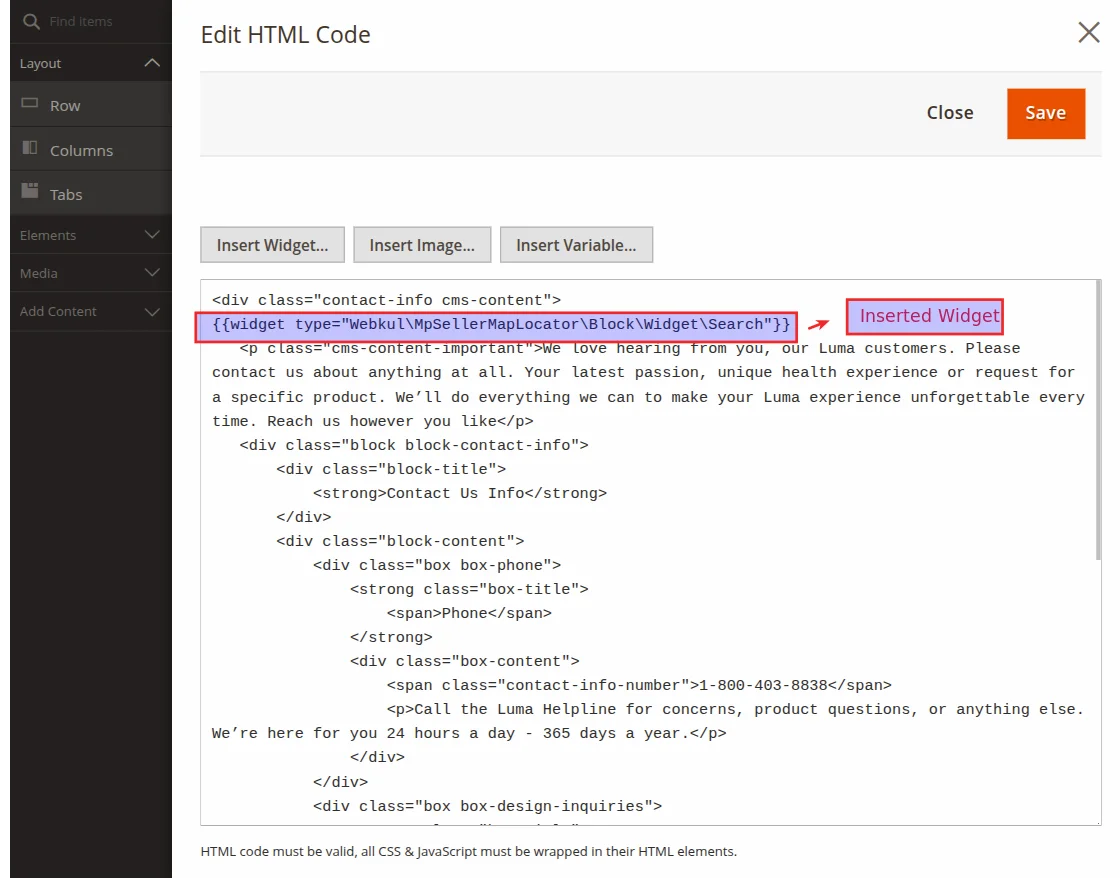
which opens options for inserting widgets, inserting images, and variables in the block
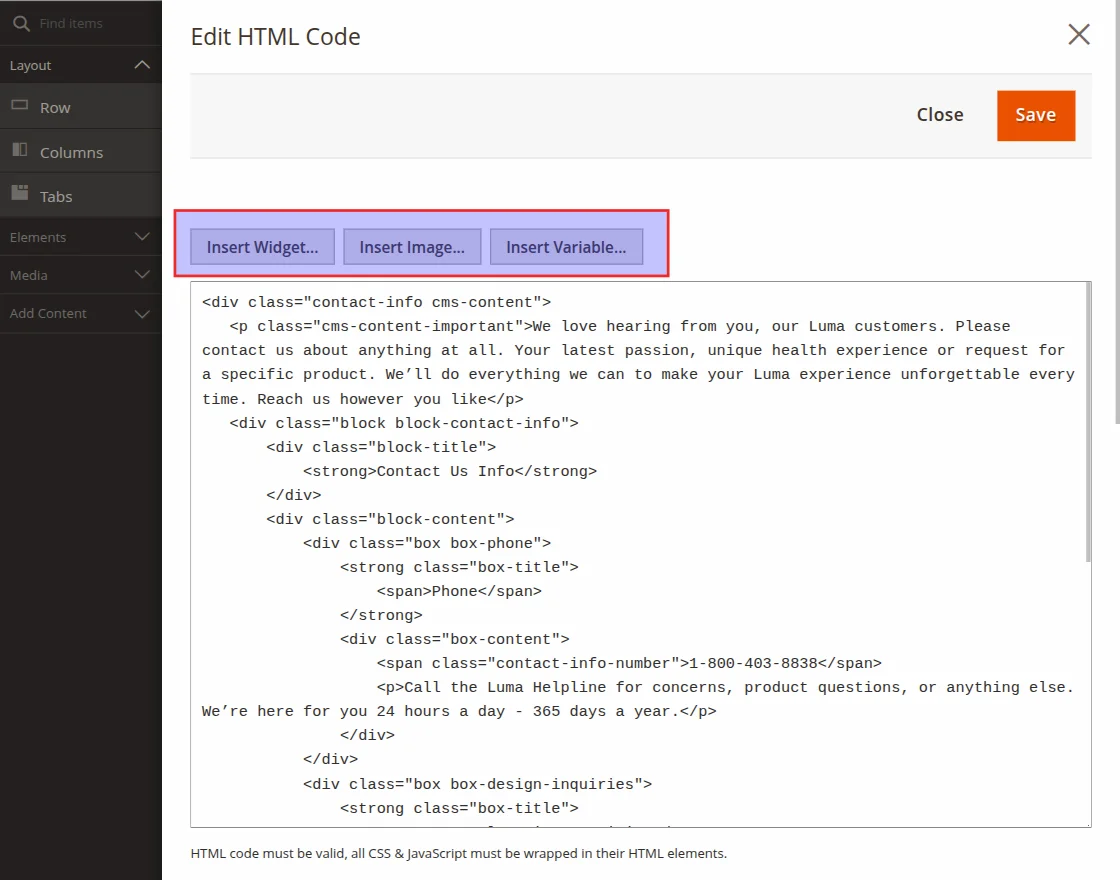
Now to insert the widget, the admin selects the Insert Widget icon which shows different types of widgets to be added to that particular block.
After selecting it click on Insert Widget

After this, the code of the widget is visible in the editor, Now Save Block.
Now on the Website Homepage Scroll down to Contact Us, select it

Now the customer can find the Widget on the contact us Block also.

Manage Seller Location
After that, here the admin can Add/Edit the seller location under Marketplace Management >Manage Seller Location > Add Location.

The admin can view the list of all seller locations under Manage Seller Location as shown below.

How To Use Magento 2 Marketplace Seller Locator
It is pretty easy to use this module, the current location of the seller will get autofilled on the map after seller registration.
The seller can also change their location under the Marketplace “Seller Profile” tab.
Here the seller can add his location and everything will be handled by the module automatically.
As soon as the seller selects the location the latitude & longitude will be updated automatically.

Front-View For Seller Locator
Under the full map, it will show a marker for the country and shops within the country. and the center of the map will be set to your current location.
In addition, when you will zoom on it, it will show the individual seller shop marker. If you will click on a shop from the shop list, it will show you that particular seller’s shop.

After that, click on the seller shop from the shop list, you will see that particular shop on the map with product and profile info.

Search For Store
Buyers can search the store using Product name or Location or using both of them.
Location Search

Product Search

Both Product and location search

That’s all for the Magento 2(Adobe Commerce) Marketplace Seller Locator extension.
However, if you still have any issues feel free to add a ticket and let us know your views to make the module better at Webkul.uvdesk.com
Current Product Version - 5.0.7
Supported Framework Version - Magento 2.0.x, 2.1.x, 2.2.x,2.3.x, 2.4.x

2 comments
Sorry for the delayed revert. Yes, it is compatible with 2.3.x framework version.
For more queries and suggestions, please get back to us at [email protected].
Thanks!