Introduction
Mobikul Point Of Sale System is a system where the sellers can create the order for the physical store.
This basic functionality of POS is to create order in front of customers so that they can purchase goods and services from a physical store.
Mobikul POS system will provide you a POS system that doesn’t users Server to extract data.
As it is a standalone application, the user can simply download the application and start selling the products.There would be no dependence on any of the online website.
Features
- POS application has Cash drawer in which monetory transactions are saved on the daily basis.
- The POS User can add, edit, and enable/disable the products and assign them to categories.
- The Categories here can be added, edited or enable/disabled by POS User. It can be even Included or excluded from Drawer Menu.
- New Customer can be add in the POS, which can be chosen at the time of checkout by POS User.
- The POS User can easily manage customers by cart on hold functionality.
- Order management is possible by viewing and sending the invoice.
- POS User can even manage the account information.
- Custom discount can be added at the time of checkout.
- Tax rates can be added to the POS, which is implemented in the product.
- POS User can add the product to the cart by clicking on the product or scanning the barcode.
- The database of the application can be imported and exported from one user to another.
- The application even gives sales report for sales monitoring.
- The application has multi-currency and multi-lingual support.
Sign In/ Sign Up
Sign UP-
Post installation of the application successfully the POS User can enter the details and Create An Account.

Sign In-
After, the first Sign Up, whenever the POS User will open the application they will be getting a Sign In page where they need to fill in –
- E-mail Address- The address which POS User has entered while registering for the application.
- Password- The Password set by POS User at the time of Registration.

Cash Drawer
As the POS User Sign in, a pop-up appears in which the opening amount of the day needs to be filled. This amount by which a day’s monetary transactions start, that is, it facilitates POS user to give change to the customer.

However, POS User can see the cash drawer for his complete daily transaction information, by following the navigation- More> Cash Drawer.


- The cash drawer provides the revenue generated, according to the Date.
- The Net Revenue is the net amount added to the cash drawer after addition of collected amount and subtraction of Refunded amount.
- Opening Balance is the starting balance amount in the cash drawer which helps POS user provide change to its customer. each POS user is provided with the particular opening amount for the commencement of monetary transactions of POS.
- Closing Balance is the closing amount is the cash drawer after a set of work hour.It is the final amount post deduction amount returned and the addition of amount collected.
- The cash drawer section even contains the detail of Orders with the amount collected and returned information and Net revenue generated due to the order.
Homepage
The application opens up to a page where POS User can view all his/her product is a listed format.This makes the store look organized and POS User can easily find the products in such format.

Add Product
The POS User can add new products by following navigation- More>Products, from here the products can be added by clicking on the ‘Plus Sign’.The Product list page contains all the product in a store.The POS user can easily search for the product via typing related keywords or Voice search.

Here, POS User needs to click on the ‘Plus Sign’ in order to add new products to the POS system.


Here, the POS User needs to enter following details related to the Product-
- Product Image- The Image of product which could be clicked by your device camera at the very moment of creation of the product.
- Enable Product- The Product needs to be Enabled to be visible in homepage page product list area.
- SKU- The unique identification number of the product.
- Product Name- The name of the product you require to be seen everywhere in the module.
- Price- The selling price you wish to charge for the product.
- Special Price- The discounted price of the product which is shown for our special customer, or at the time of any offer running on the store.
- Taxable Goods- Admin can set the ‘Yes, Taxable goods’ button as On or OFF, as per the wish of the admin and select from multiple which is created from Taxes tab.
- Barcode-The barcode here is auto-generated.
- Track Inventory- The toggle of tracking the inventory record can be set to ‘On/OFF’.
- Quantity- The quantity of a product which is available with the admin can be entered here.
- In Stock- This must be set to On if the product is in stock.
- Weight- The net weight of the product which admin wishes to sell.
- Option- These are options for the customizable product.
- Categories- The product must be assigned to a category so that they can be easily found the time of the search.
Option
The functionality of option will provide you to add the product that has got options to select from at the time of adding them to cart. This can be done by following the navigation as More>Option.


How To Use Option in Product?
The options functionality can be added to the product by editing, these options can be selected by POS user at the time of adding them to cart and finalizing the checkout process.


Here, the POS user at the time of addition of the product to the application can select options to link to the product by clicking on Choose Options. The options can have extra amount attached which will be added to the product total amount.
Taxes
The POS User can create multiple tax rules and add them to the product according to requirement. For creating Tax Rule he/she needs to follow the following navigation- More>Taxes


The admin can click on Add New Tax Rate to create a tax. He will enter following details with regard to tax-
- Enable the tax- In order to make tax rates appear on product page, he needs to enable the tax rate.
- Tax Name- The name of the tax must be entered with which the tax will be identified.
- Type- The type of tax rate can be as ‘fix amount’ or ‘percent’ of the total amount.
- Tax Rate– The amount or percentage of tax can be entered here.
Implementation Of Taxes On Product
The taxes can be implemented on the product by editing the product and assigning the tax rate to the product. For this, we need to enable the ‘Yes, Taxable Good option‘, which will display the list of all taxes created in the application. The POS user can easily select on of tax rate for the product as per the requirement.

Add Categories
The POS User can easily add new categories for this Admin needs to navigate to More>Categories

Then, POS User can click on Plus icon to add new categories.

The POS User can enter following details-
- Category Name- The Name of the category as appears in the category list.
- Enable Category- Make the category visible.
- Include in Drawer Menu-If admin wishes to show the category in the drawer menu.
My Account Info
The POS User can edit the account information, by following the navigation- More>My Account Info

Here, Admin can add various information which he/she wishes to see on the POS-
- First Name- The first name of the POS admin.
- Last Name- The family name of the POS admin.
- Username- The name with which the admin will log in the system.
- Email- The mailing address of the admin.
- Country- The residing country of the admin.
- State- The residing state of the Admin.
- Locale- The language in which the Admin wishes to see the POS.
- Timezone- The time-zone in which admin wish to operate the POS.
- Currency- The currency in which admin wishes to operate the POS.
- Old Password- The feature is present if admin wishes to change the login password, he/she needs to enter the last operating password, that is, the password to which he/she used to login.
- New Password- This is the changed password which admin wishes to use.
Add New Customers
The POS User can add customers, which could be selected at the time of checkout.POS User can add customers by following the navigation- More>Customers

The POS User can click on Plus Sign to Add the customer details and make the registered customer.

Add Products To Cart
Add Product Via Clicking On Product-
The POS User can easily Add products to cart Via clicking on the product.The number of clicks on a product is the number of units of that product added to the cart.

Adding Product Via Barcode-
The product can be added to the cart by simply scanning the product barcode from our devices.This can be done by clicking the barcode scan button present in the top left part of the home screen.The barcode is an optical, machine-readable representation of data; the data usually describes something about the object that carries the barcode.

Completing Order
After the customer has been added to the cart for creating an order, the POS User will complete the order by placing the order to generate the invoice.
- If the customer is registered then select the customer from the registered customer list and click on “Confirm And Accept Payment” button.
- If the customer is not registered then Click on ‘Plus Sign’ and add the customer.

Then, POS User can head to Choose the Payment method.

After, this POS User can enter the-
- Collected cash- The amount paid by the customer in exchange for goods or services.Here, if the amount paid is more then due amount, a field with Change Due will be reflected which states that this amount is needed to be returned back to the customer.
- Add Custom Order Entity Note- This is a message which admin can enter with respect to the order.
Then, click on Done.

This will lead POS User to the Order page with a message of Success placement of order, and POS User will have to option either to Print invoice or Email Invoice.

The Invoice PDF can be in the below format as shown in the screenshot below-

Cart On Hold
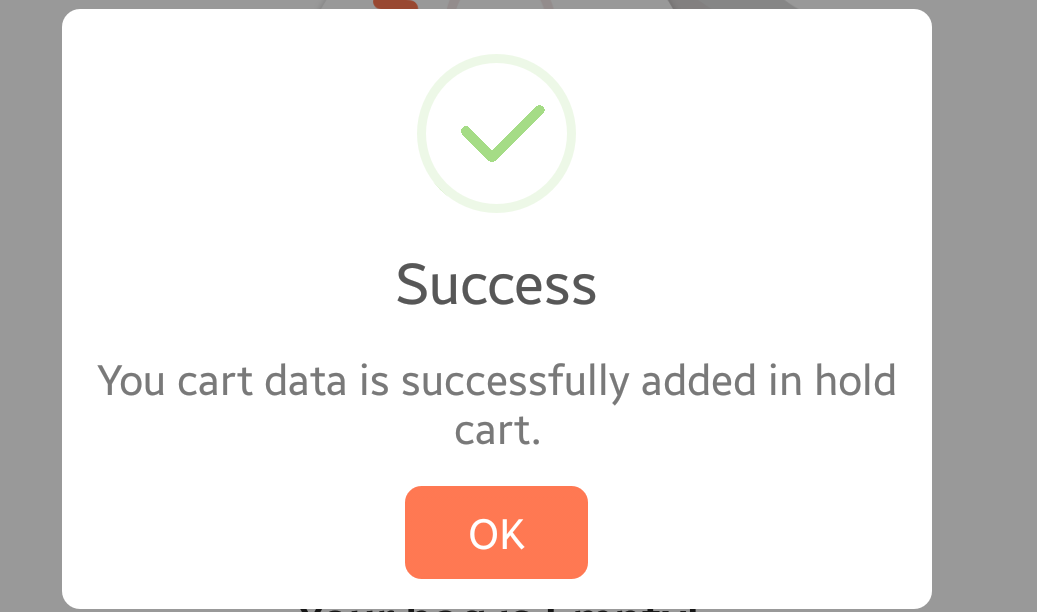
The POS User can put the cart on hold for the later processes and can continue to process on the held cart when required. The POS User can put a cart on hold by clicking on “Hold” icon situated on the right side of the header in cart page.

A success message will appear as soon as we click on Hold cart.
View Cart On Hold
POS User can view the cart on hold, by Clicking on ‘Hold’ icon.
- This will display List of orders on Hold.
- On can click on the held order and bring the order to cart.

Orders
The list of Orders in the POS can be viewed from Orders Icon. Here, POS User can search for an order by clicking the search icon on the right-top bar.

Others
The POS gives you a functionality to share the data between different POS User can be done by following the navigation- More> Other.

This section has three sections-
- Export Database-All the database from one application can be exported to another, for this the POS user can click on Export Database which will create a zip that can be shared with other POS users.

- Import Database- The database can be even imported from other users by clicking on import database and then selecting the zip file which was shared by other POS User.
- Low Stock Products- Here the cumulative representation of data which are low in stock can be seen with a low stock indicator.
For any query or suggestion/customization request get back to us at [email protected] or raise a ticket at webkul.uvdesk.com
Current Product Version - 1.2
Supported Framework Version - Android- 4.2 and up

2 comments
If you are facing the issues (if any) please email us at [email protected] and we will be happy to help you under the support policy.
Thank You