Introduction
In this dev blog, we’ll explore how to harness the power of WooCommerce admin tooltip for custom plugin to help the backend user.
WooCommerce, the popular WordPress Woocommerce plugin for e-commerce, offers a plethora of customization options to tailor your online store to your specific needs.

One often overlooked but incredibly useful feature is the WooCommerce Admin Help Tooltips.
These tooltips provide valuable information and guidance to users navigating the admin interface, ensuring a smooth and efficient user experience.
We’ll dive into the mechanics of using the woocommerce_screen_ids hook and the handy wc_help_tip() function to create informative and user-friendly tooltips.
Understanding WooCommerce Admin Help Tooltips
Before we delve into the practical implementation, let’s briefly understand what WooCommerce Admin Help Tooltips are and how they can enhance the usability of your custom plugins.
Admin Help Tooltips are contextual information boxes that appear next to specific elements in the WordPress admin interface.

These tooltips aim to provide users with relevant and helpful information about the various features and functionalities within WooCommerce.
By integrating these tooltips into your custom plugins, you can offer guidance and assistance to users, reducing confusion and enhancing the overall user experience.
Now, let’s move on to the step-by-step process of implementing WooCommerce Admin Help Tooltips in your custom plugin.
Step 1: Hook into WooCommerce Screens with woocommerce_screen_ids
The first step in leveraging Admin Help Tooltips is to identify the screens where you want to display your tooltips.
WooCommerce provides the woocommerce_screen_ids filter hook, which allows you to add your custom screen IDs to the list of WooCommerce screens.
Here’s an example of how you can use the woocommerce_screen_ids hook to add a custom screen ID:
function wk_custom_plugin_add_screen_id($screen_ids) {
    $screen_ids[] = 'my_custom_screen';
    return $screen_ids;
}

add_filter('woocommerce_screen_ids', 'wk_custom_plugin_add_screen_id');
In this example, we’ve added a custom screen ID, ‘my_custom_screen.’ You’ll replace this with the actual ID of the screen where you want to display your tooltips.
Step 2: Create a WooCommerce Help Tooltip Function with wc_help_tip()
Now that we’ve identified the screens where our tooltips should appear, it’s time to create the tooltips themselves. WooCommerce provides a helpful function called wc_help_tip() for this purpose.
Here’s a basic example of how you can use wc_help_tip() to create a simple tooltip:
function wk_custom_plugin_tooltip() {
    echo wc_help_tip('This is a helpful tooltip for your custom feature.');
}

add_action('admin_notices', 'wk_custom_plugin_tooltip');
In this example, the wc_help_tip() function takes a string parameter containing the text you want to display in the tooltip.
The wk_custom_plugin_tooltip a function is hooked into the admin_notices action, ensuring that the tooltip is displayed on the admin screens.
Step 3: Integrate WooCommerce Help Tooltips with Custom Plugin Features
Now that you have a basic understanding of adding screens and creating tooltips, let’s integrate these tooltips with specific features in your custom plugin.
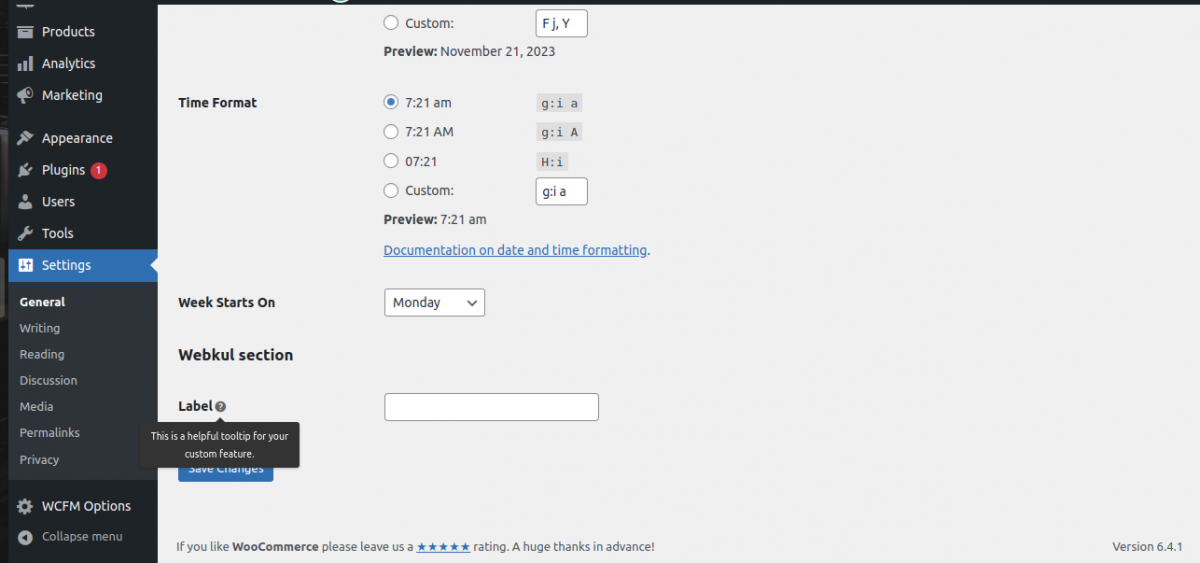
Suppose you have to add a custom field in the WordPress general setting. With the help of your custom plugin users might find it confusing without additional guidance.
You can use the wc_help_tip() function to provide helpful information within the WordPress admin interface.
add_filter( 'woocommerce_screen_ids', 'wk_set_wc_screen_ids' );
function wk_set_wc_screen_ids( $ids ) {
	array_push( $ids, 'options-general' );
	return $ids;
}

add_action( 'admin_init', 'wk_general_setting_section' );
function wk_general_setting_section() {
	add_settings_section(
		'wk_settings_section',
		'Webkul section',
		'',
		'general'
	);

	add_settings_field(
		'option_1',
		'Label' . wc_help_tip( 'This is a helpful tooltip for your custom feature.' ),
		'wk_textbox_callback',
		'general',
		'wk_settings_section',
		array(
			'option_1',
		)
	);
}

function wk_textbox_callback( $args ) {
	$option = get_option( $args[0] );
	echo '<input type="text" id="' . $args[0] . '" name="' . $args[0] . '" value="' . $option . '" />';
}
In this example, we assume that you’ve added a custom setting field within WordPress general setting. When this field is rendered, the wc_help_tip() function will display a helpful tooltip next to it.
Conclusion
Integrating WooCommerce Admin Help Tooltips into your custom plugin is best way to enhance the user experience and provide valuable guidance to users navigating your WooCommerce-powered online store.
By utilizing hooks like woocommerce_screen_ids and the wc_help_tip() function, you can seamlessly integrate tooltips into specific screens and features, ensuring that users have the information they need at their fingertips.
Remember to tailor the content of your tooltips to be clear, concise, and relevant to the features they accompany.
This will go a long way in helping users make the most of your custom plugin and contribute to a positive user experience.
Support
That is all for the WooCommerce admin tooltip in the custom plugin dev blog post. If you need any technical assistance, please reach us by mail at [email protected] or Hire WooCommerce Developers for your next project.

Be the first to comment.