Convert your WooCommerce website into a PWA (Progressive Web App) instantly. The store visitors will experience the high-performance benefits of the PWA, which is based on a headless architecture.
The customers will be able to come back to your website by launching the app from their mobile home screen and can interact with your website through an app-like interface.
Progressive Web App for WooCommerce uses modern web technologies to deliver an app-like experience to users right within their web browsers.
This Woocommerce Mobile app is built on top of the React.js library, which makes it even more powerful, flexible, fast, and scalable.
Note:
- Your website must be https:// enabled for offline caching to work.
- Progressive Web App for WooCommerce is compatible with multisite.
- Convert PWA into APK / IPA files and publish on Google Play and App Store.
- NOTE:We will provide with the APK file, which you can use to publish your app on the Google Play Store. Please note that publishing on the Play Store is a paid service.
- We provide a production version of the plugin. If you want a development version then you can get it at an additional cost. Please contact [email protected] for it.
- Supports Slow Internet
- Less data usage
- Faster loading times
- Improved performance
- Engaging user experiences
- Always updated app
- Lightweight Progressive Web Application for fast performance.
- Easy to customize and maintain.
- Customizable app icon text displayed on the user’s mobile device.
- Fast loading with optimized performance and responsiveness.
- Fast loading with optimized performance and responsiveness.
- Automatic background updates without requiring manual user intervention.
- Customizable app icon text displayed on the user’s mobile device.
- Improved user engagement with an enhanced mobile shopping experience.
- Simple installation and configuration.
- Optimized to perform smoothly on slow and low-bandwidth internet connections.
- Shimmer loading effect for a modern loading experience.
- Native app-like user interface and experience.
- Seamless integration with WooCommerce.
- Responsive design compatible with modern mobile devices.
- Offline support for cached content and resources.
Installation
- General
- Firebase
- Sliders
- Categories
- Pages
- Enter the name of the Progressive Web App.
- Set the short name for the PWA app shortcut on the mobile device after installation.
- Set the theme color of the PWA.
- Choose the background color of the PWA.
- Enter the app endpoint for accessing the PWA on mobile devices.
- 48*48
- 96*96
- 144*144
- 192*192
- 512*512
- Set the Google server key
- Enter the Google API key
- Set the Google Authentication Domain
- Enter the Google database URL
- Google measurement id needs to be entered
- Google project ID has to be entered
- Enter the Google storage bucket
- Set the GCM sender ID
- Enter the Google app ID
- Setup the Web push certificate key
- Enable or disable the slider
- Upload the image for the slider
- Add a link for the slider image, tapping on which the customer gets redirected to the added link.
- Enable the category by toggling the button to enable position.
- Upload the top category icon.
- Choose a category to make it a top category.

- Enable the page
- Choose the page where the customer should be redirected after tapping on the respective page.
- Enter the title of the notification
- Set the status of the notification as enabled
- Enter the content of the notification
- Upload an image for the notification
- Choose the type of notification as Product, Category, or Custom as required

- According to the chosen type of notification choose the product, category, or enter the custom link as required.
- Slider
- Search Icon
- Top Categories
- New Arrivals
- Featured Products
- On Sale Products
- Home Page Option
- Categories Option
- SignIn Option
- Cart Option
- Theme Mode
- Personal information
- My Orders
- My Address Book
- Custom Pages(Like – Sample Page)
Check the backend configuration –
Check the mobile end workflow –
Also check out the Shopify Headless React-based e-commerce.
What is a Progressive Web App?
A Progressive web app is a website that looks and feels like an app on your mobile device.
What this means is that the users can access all information and capabilities without downloading and installing the mobile app.
Why go for Progressive Web Apps?
Progressive web apps are helping businesses to increase their conversions, page visits, and session lengths.
PWAs also provide a better web experience to mobile users and are also a good option for businesses that don’t have much investment in developing their mobile apps.
To sum up, here are some of the benefits to reap –
Features
Features
1st Step: Log in to WordPress Admin Panel and navigate through ‘Plugins->Add New‘.

2nd Step: Click on the ‘Upload Plugin‘ button on the top of your page to upload the zip file.

3rd Step: Now, tap the ‘Choose File‘ button to browse for the zip file.
 4th Step: After selecting the zip file, tap the ‘Install Now‘ button to install the plugin.

5th Step: After successful installation, a success message is visible along with an option to ‘activate‘ the plugin. Tap on ‘Activate Plugin‘ to activate the installed plugin.

Module Translation
To know how to translate the module, you can click here.
Creating Firebase Product Credential
In order to use this module, you need to have Firebase Project Credentials, which will be used in the backend configuration for setting up the module.
Please visit this link and create a new project with your Gmail account.

1. After opening the Firebase website, please click on the Create a Firebase project button.
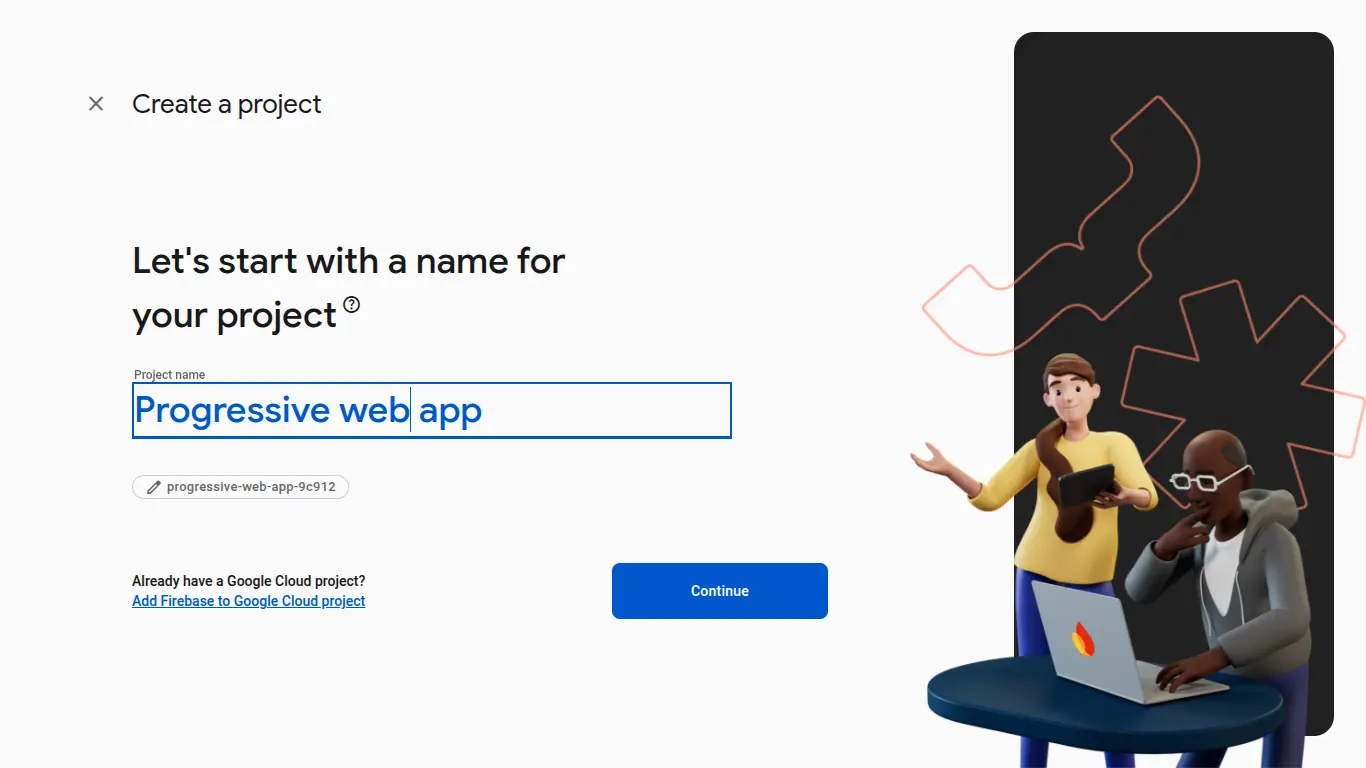
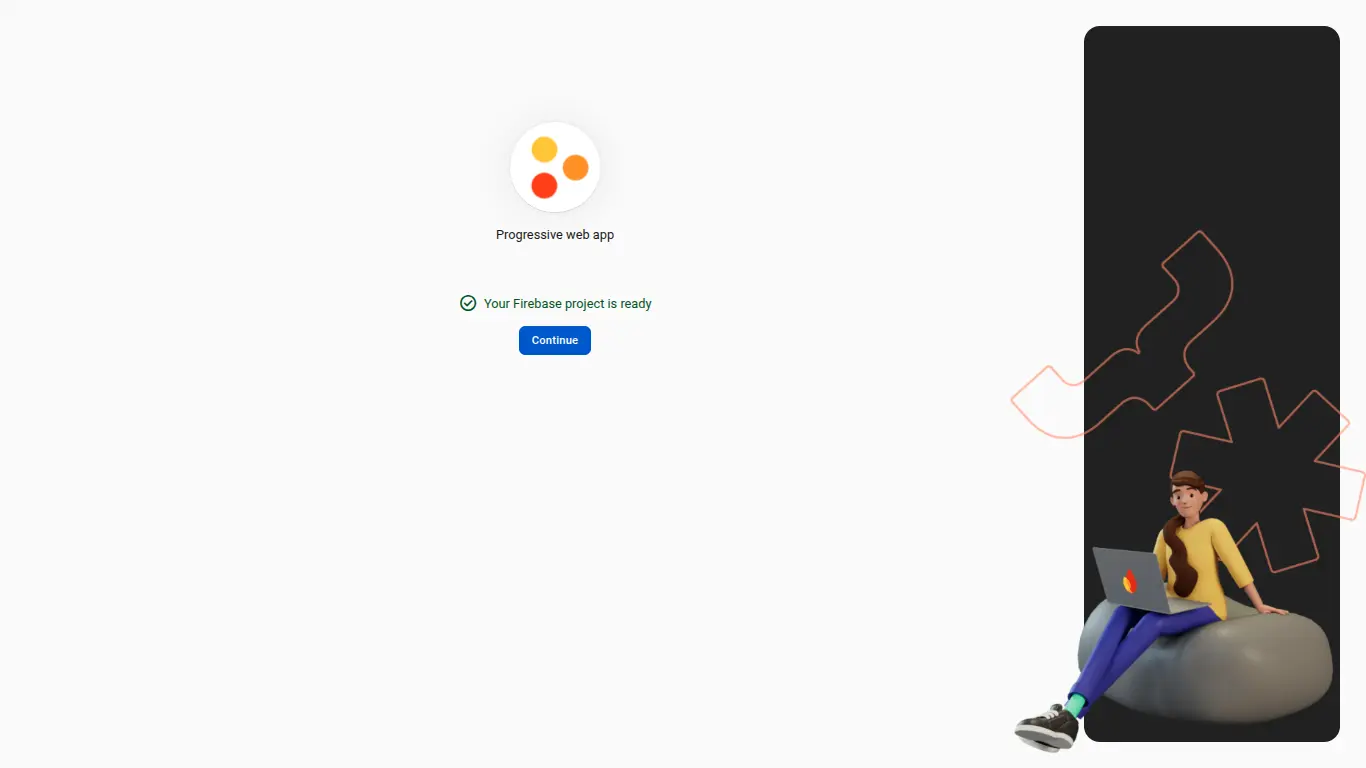
2. A new page will open the as shown below image, here you have to enter your Project Name. Then click on the “Continue” button.
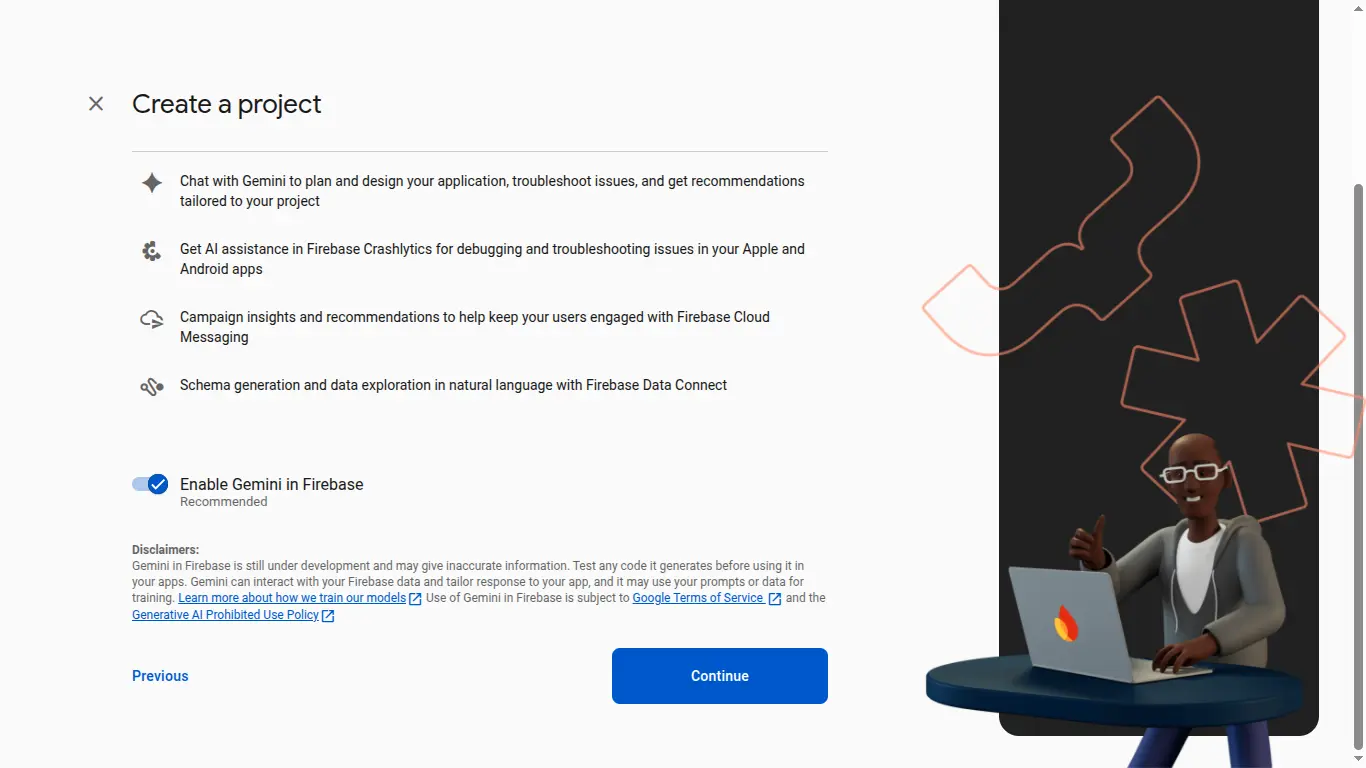
3. Now click on the “ Continue” button.
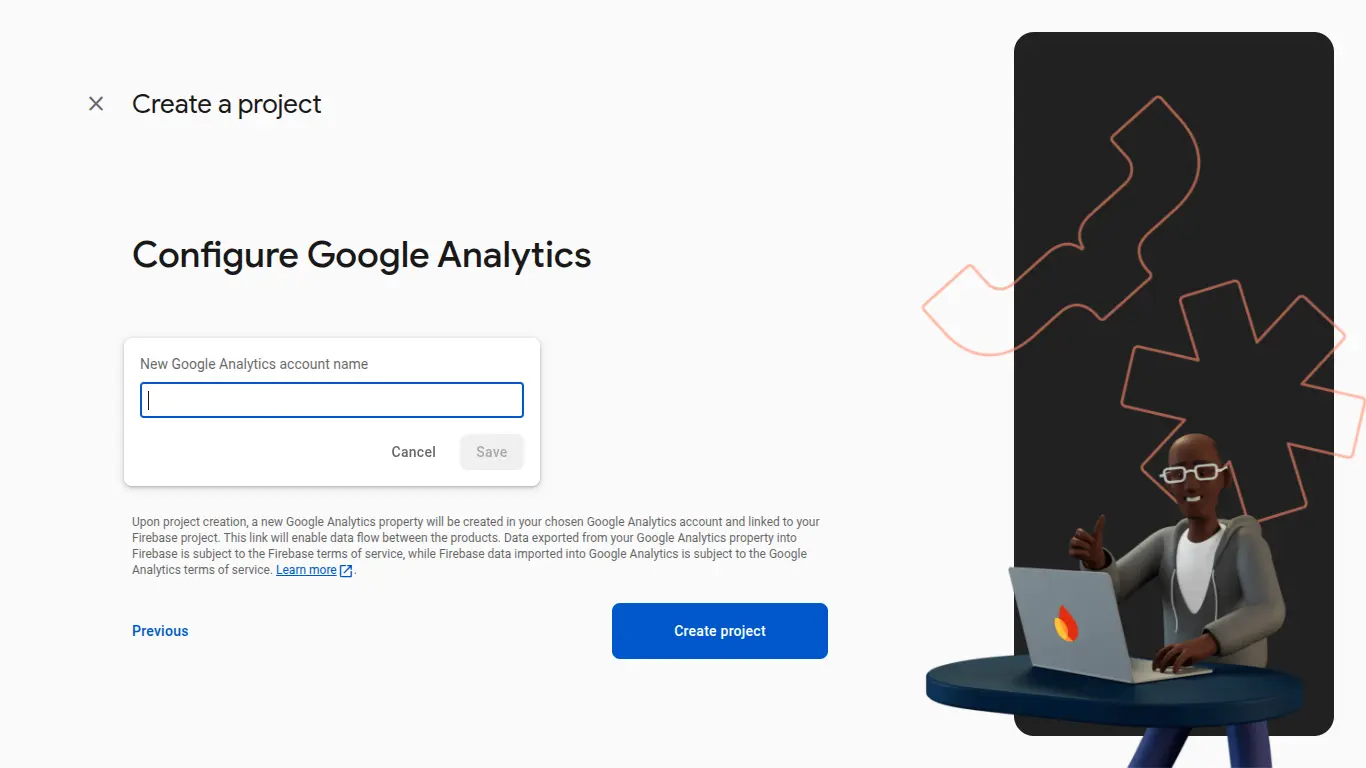
4. Now you need to configure the Google Analytics. Here you need to mention the account name . Then click on the “Create project” button.
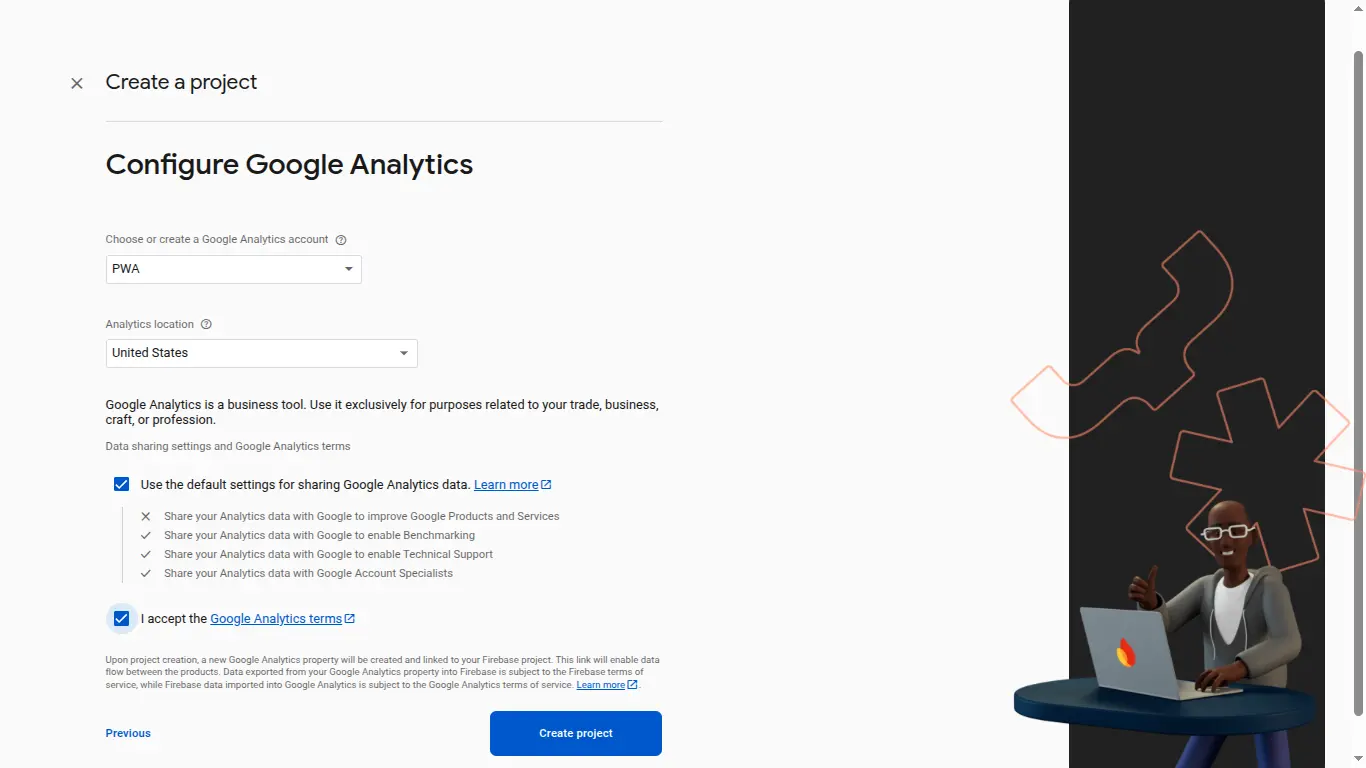
Here you need to mention the analytics location. Then click on the “Create project” button.
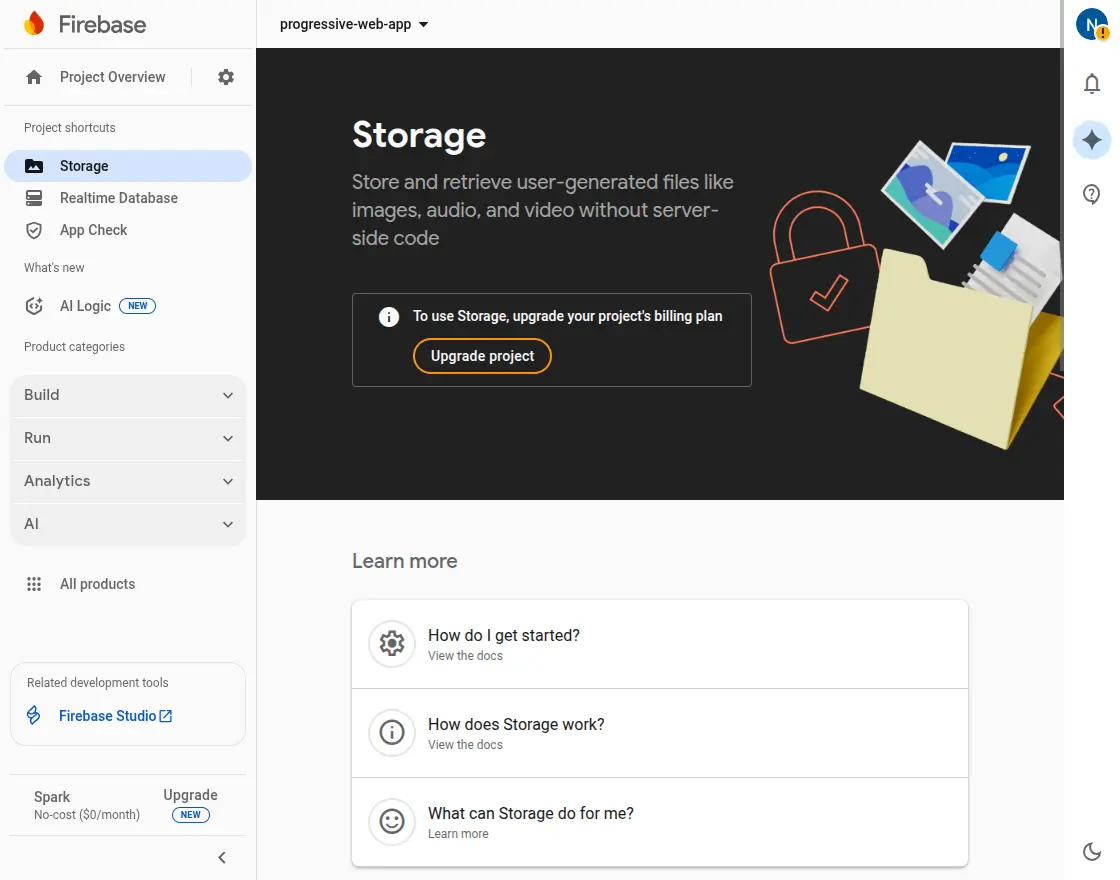
4. After creating your new project, click on the Storage.
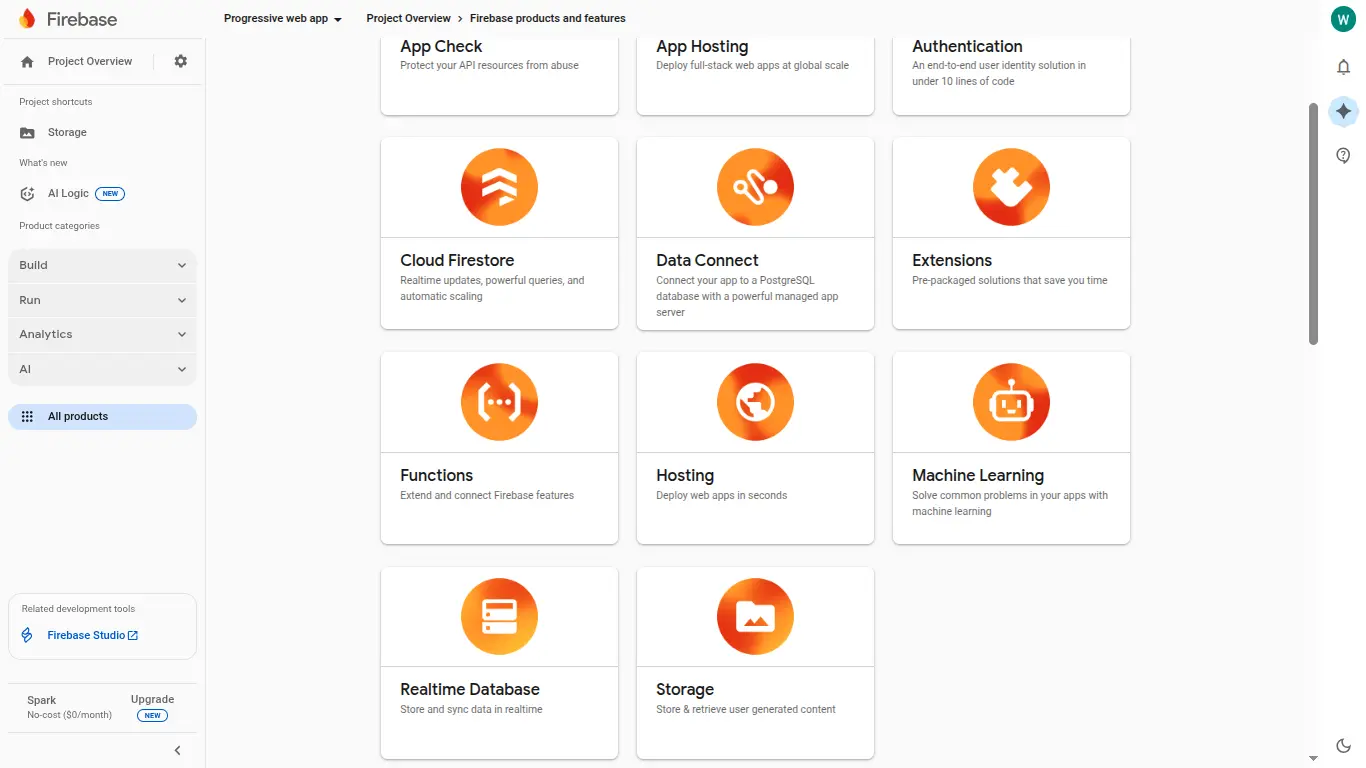
Now click on Storage and then click on Realtime database
Now you need to configure the database settings 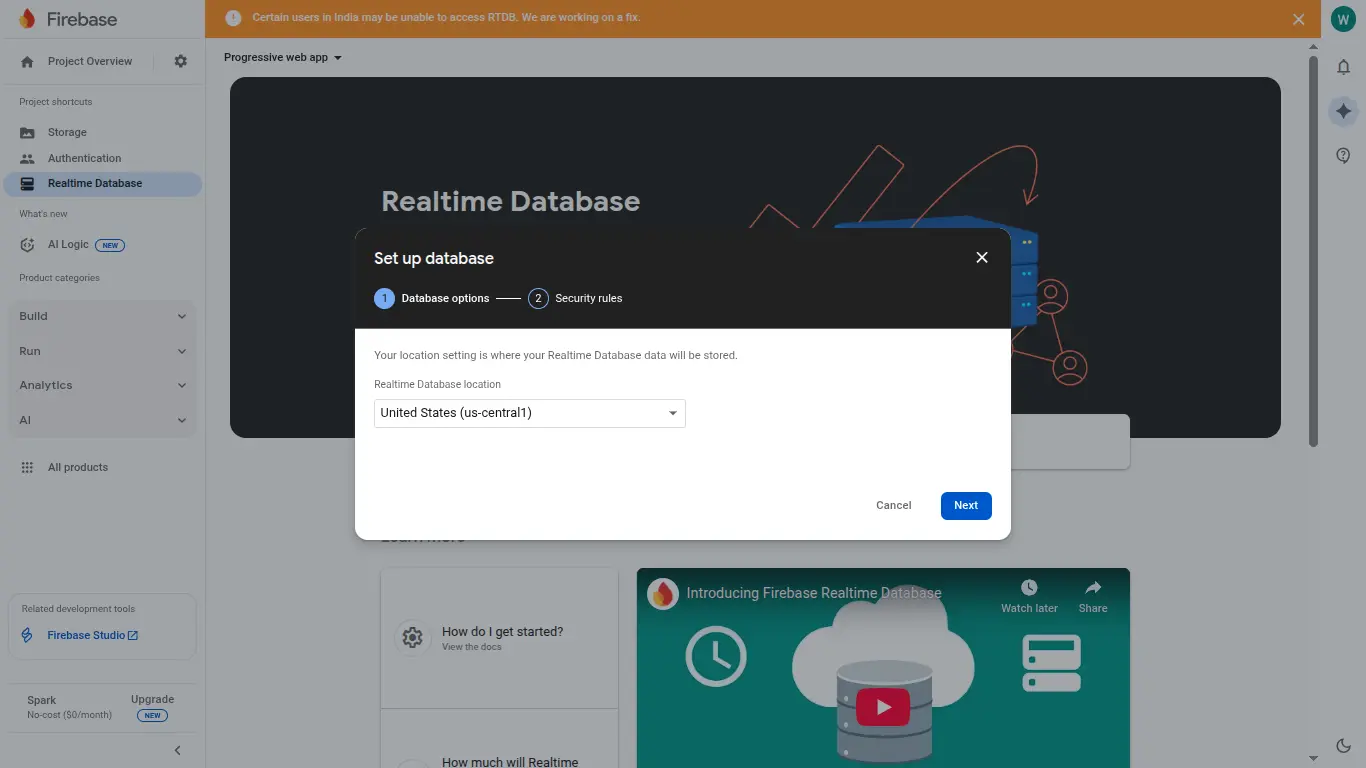
5. Now navigate to the project overview
Then click on the (</>) button 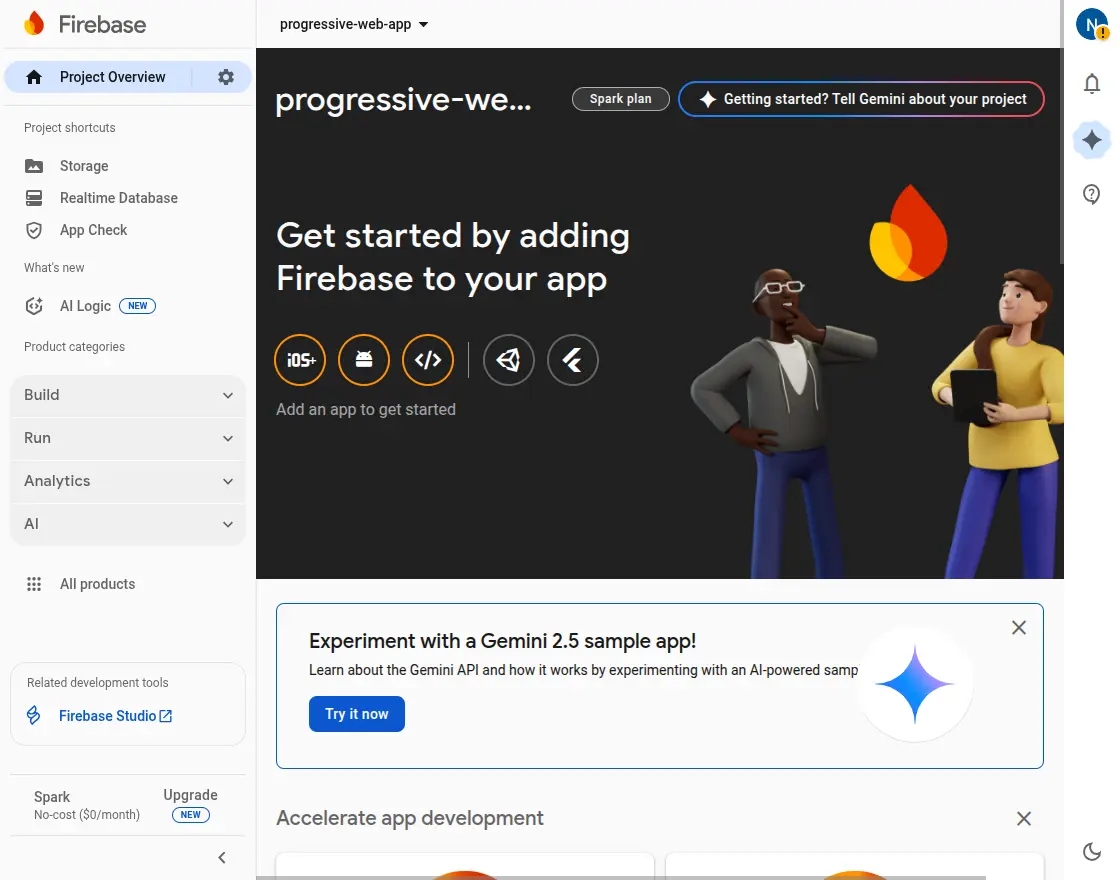
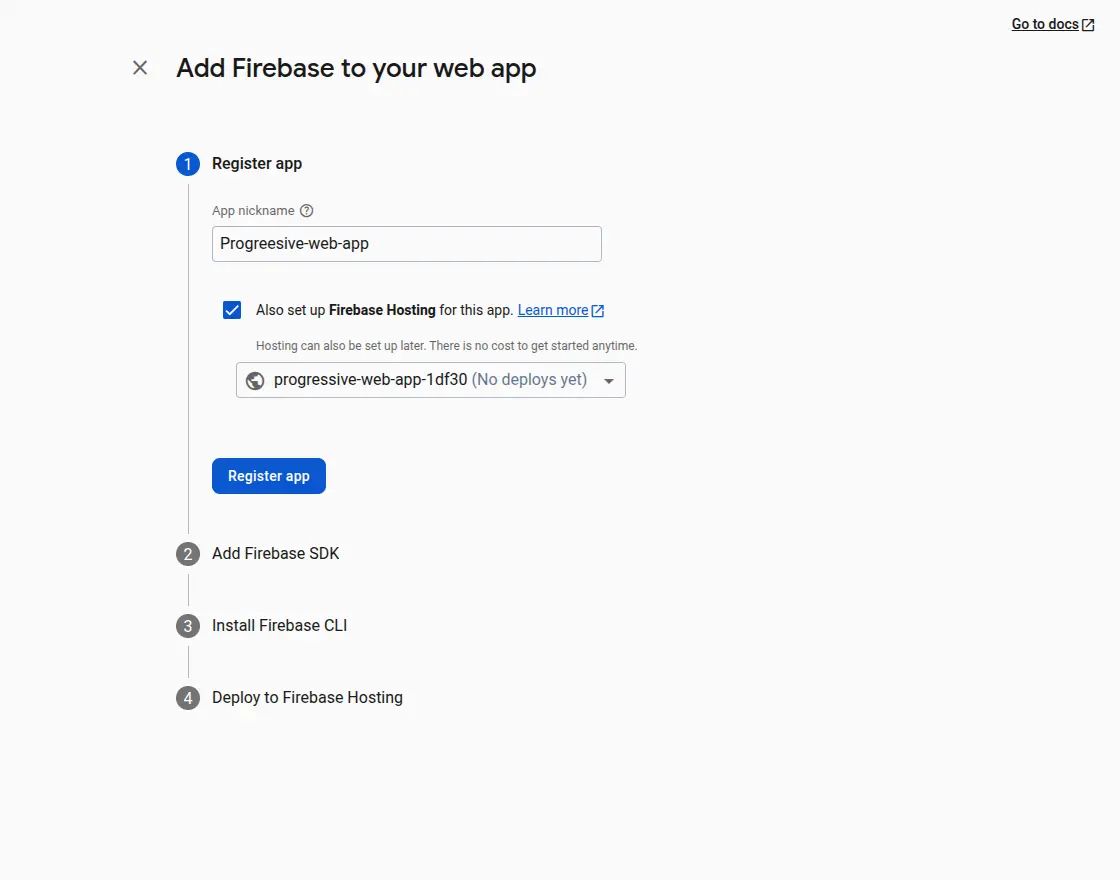
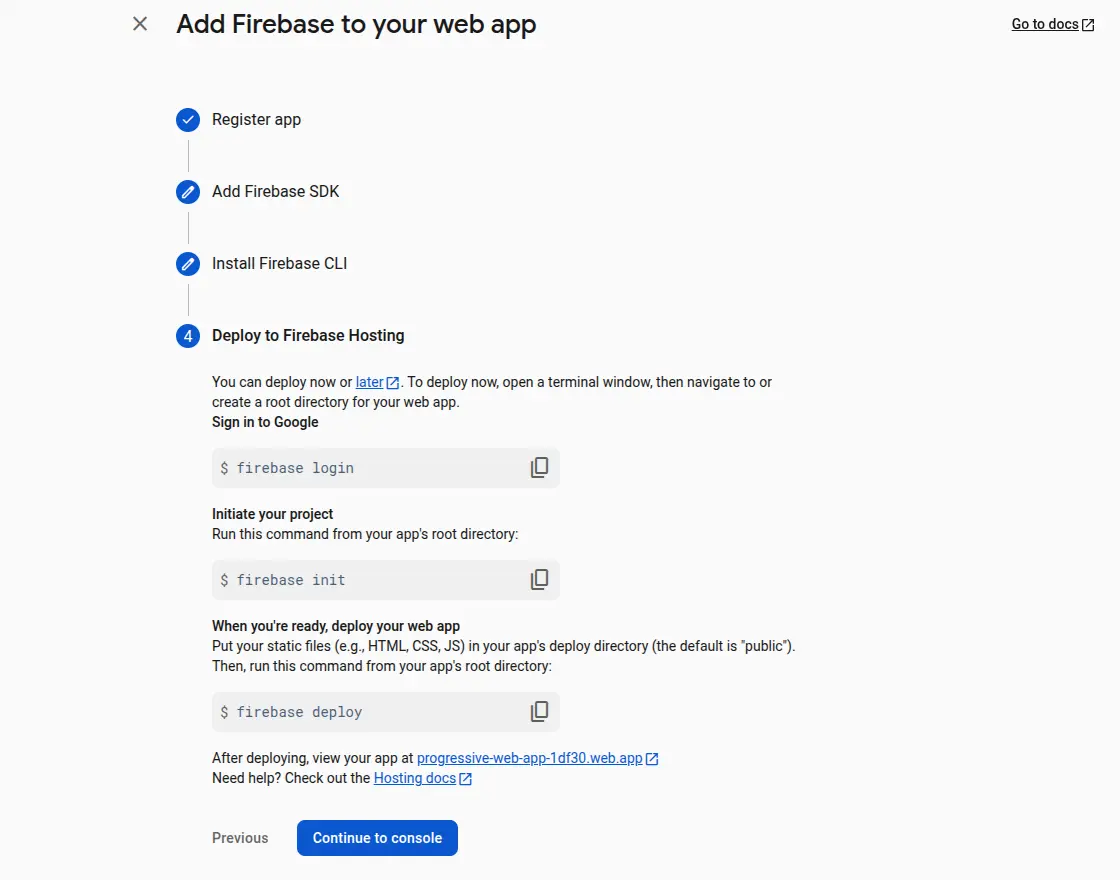
Now, after clicking on the button then we need to give the app nickname and register our app .
1st Step –
2nd Step -The following credentials will be used for configuration:
API Key, Auth Domain, Database URL, Project ID, Storage Bucket, App ID, and Measurement ID.
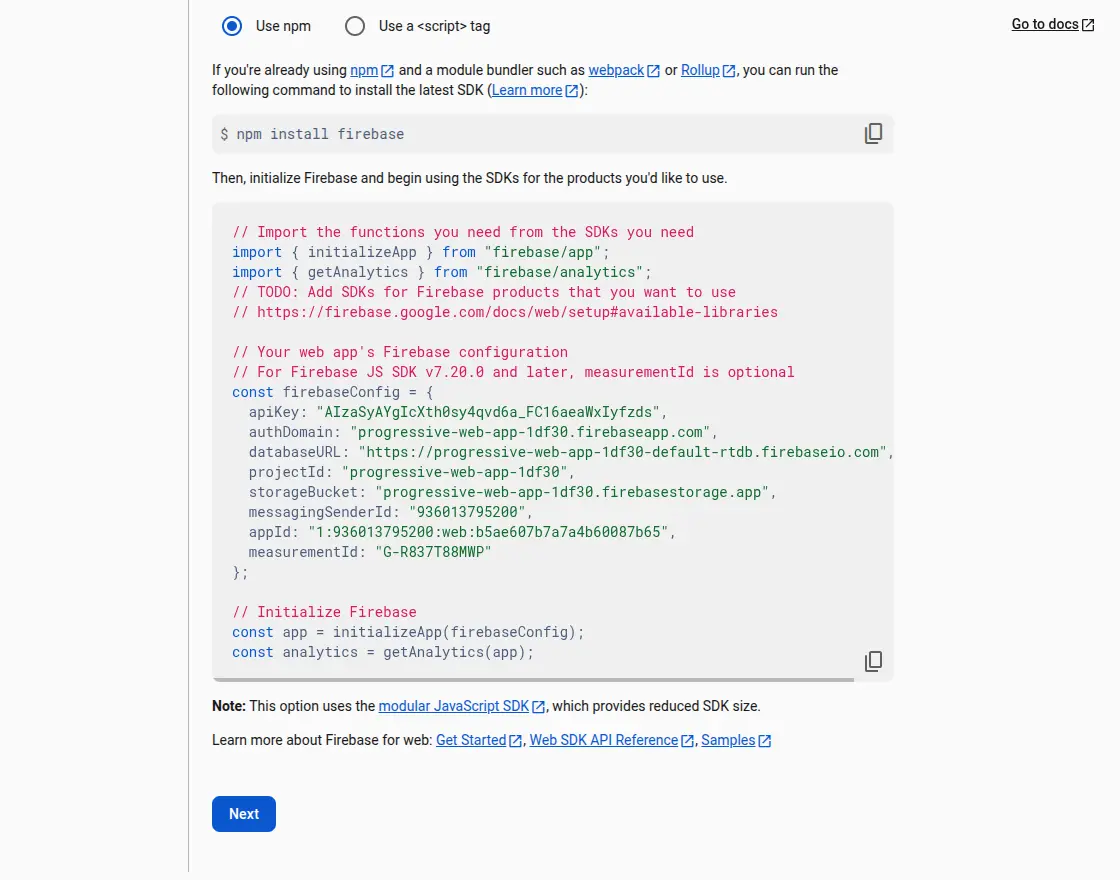
3rd Step –
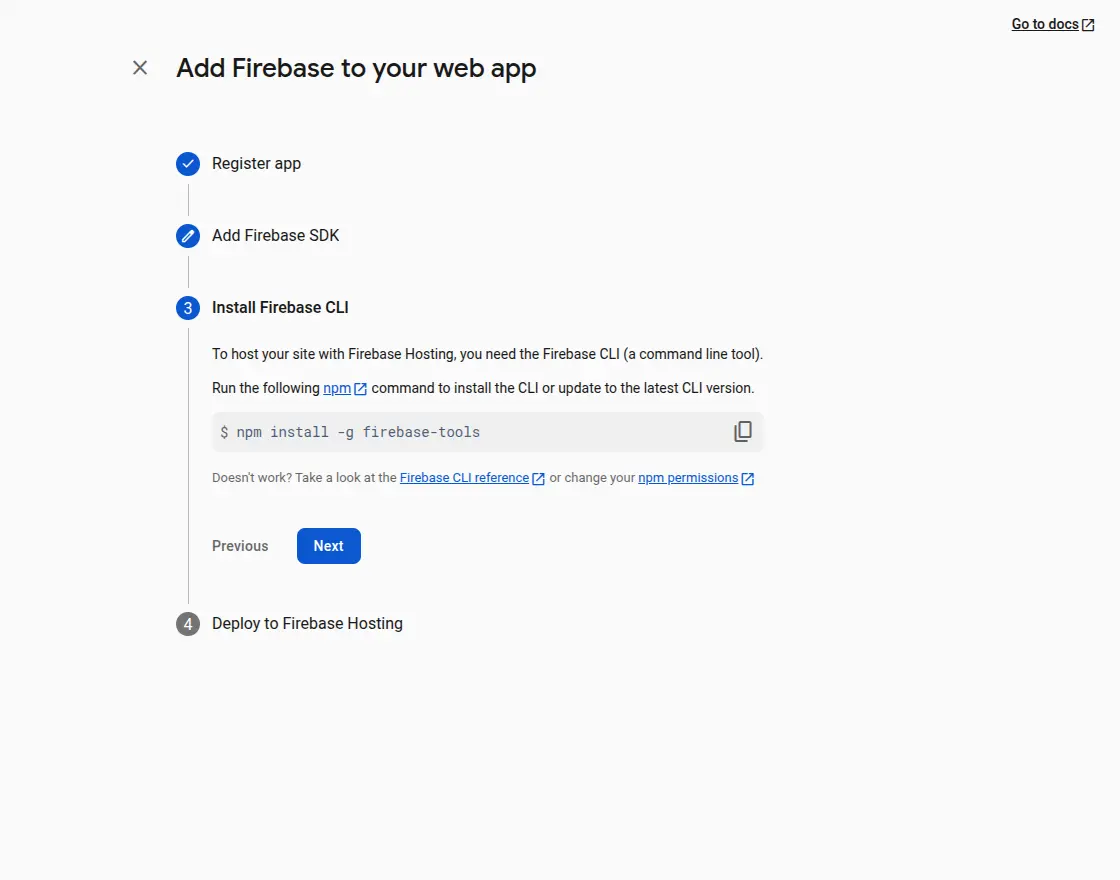
4th Step –
Basic Configuration Settings – PWA
After the successful installation of the extension, the admin will navigate through PWA Application->Configurations. Here, we have five different tabs to configure –

Under the General tab, the admin will configure the App Configs and App Icons.
App Configs:
Here, the admin will –
App Icons:
Here, the admin will upload the PWA App Logo and the app icons in various sizes as mentioned below –
After making the above settings, tap the Save button at the bottom to save your general settings.
Under the Firebase tab, the admin will configure the Firebase and Google credentials.

Here, the admin will –
Lastly, tap the save button at the bottom.
Sliders:
Under this section, the admin will be able to see the added sliders and can add sliders for the PWA app as required.

To add a new slider, tap the Add Slider button. Here, the admin can –
Lastly, tap on the save button to save the sliders.
The slider with the images is visible in the PWA app as per the snapshot below.

Categories:
Here, the admin can add the top categories that will then be visible on the PWA App.

To add a top category, tap the Add Category button. After that the admin will –
Lastly, save the top category by tapping the Save button at the bottom.
After adding the top category, the top categories are visible on the PWA.

Pages:
Here, the admin can add custom pages for the PWA app.

To add a page, the admin will tap the Add page button. Thereafter, the admin will –
Lastly, tap on the Save button.
Now, after a customer has logged in to the PWA, under his account panel options he can see the added custom pages.

Notifications:
Here, under this section, the admin can create and send notifications as required.

To add a notification, tap the Add Notification button at the top and the below-shown section appears.

Here, to add a notification, the admin will –
Lastly, tap the save button to save the notification.
To send the notification tap the Send Notification button.

After sending the notification, the same is visible on the PWA.
If you require expert assistance or want to develop custom unique functionality, check out our WooCommerce mobile app development services.
How to use – PWA for WooCommerce?
For Android Devices:
1st Step: Navigate to the URL – https://wcpwa.webkul.com/ on your desktop and scan the QR Code available on the page using your Android mobile device.
**Note: You can also directly scan the QR Code from the image displayed below.

2nd Step: After scanning the QR Code, you will be redirected to the Progressive Web App for WooCommerce.
Tap the ‘Add PWA to Home Screen‘ notice(from the bottom of the screen) to add a shortcut of the PWA to your mobile home screen.

3rd Step: This brings up a pop-up. Tap the ‘Add‘ button on the right. Now, the PWA shortcut is added to your mobile home/app screen.


For iOS Devices:
1st Step: Navigate to the URL – https://wcpwa.webkul.com/ on your desktop.
2nd Step: Open the camera on your iOS device and scan the QR code. Tap the pop-up to open the website URL.
**Note: You can also directly scan the QR Code from the image displayed in step 1.

3rd Step: Now, you can see the Progressive Web App for WooCommerce. Tap the ‘Share ‘ button to add a shortcut to your mobile home screen.

4th Step: Select ‘Add to Home Screen‘ option to add a PWA shortcut.

5th Step: Now rename the PWA shortcut to something you can recognize and after that tap ‘DONE‘.

6th Step: PWA shortcut is visible on your home screen.

PWA For Users —
On your mobile home screen tap the PWA icon to open the Progressive Web App for WooCommerce.

Tapping the icon brings up a splash screen. After that, the home screen of the PWA is displayed to the users.


The users can see the home screen displaying the –
Within the PWA for WooCommerce, the users can navigate to the home page of the PWA by tapping the Home icon in the lower left-hand corner.
If you require ongoing support and maintenance services for your WooCommerce store, check out our WooCommerce Support and Maintenance Services.

Search Products:
The users can search for the products within the store by tapping on the search icon in the top right-hand corner.
In the search section just enter the 3 or more search letters to search the product within the store.

Register/Login:
Navigate to the profile section within the PWA and you will find the option to log in to your account if you already have one.

If the user wants to register then he can tap on the Sign Up option in the profile section. After that, the user can enter the details and register himself as a customer within the PWA.

The user who is already registered and forgets his password can make use of the Forget password option to reset his password.
The user needs to enter his registered email address or user name and tap on the Reset password button to reset the password thereafter.

Now, the customer can enter his details again and will be logged in.

After Sign In, the customer has the following account options –
Let’s go through each section’s overview.
Theme Mode:
Here, the users can change the theme to light and dark modes for the PWA as required by tapping on the crest icon, and tapping on the light icon brings back the light theme.


Personal Information:
Under this section, customers can alter their information as required. Apart from that, the customer can add a Gravatar as required for his profile.


My Orders:
Under this section, the customers can see the complete list of orders that they have placed. Apart from that, they can view the details of a particular order as well.


My Address Book:
Under this section, the customers can see their added addresses and can edit the addresses as well as required.


Custom Pages:
Here, the customers can see the custom pages added by the admin from the configuration settings of the PWA. Tapping on the particular custom page displays the content of the page.


Categories:
Here, the customers can see the complete list of store categories and can navigate within them as required. Tapping on a particular category brings up the products within the same.


Apart from that, the customers can sort and filter the products as per the available options.


The admin can change the category banners from the backend. To do so, navigate through Products->Categories and then edit a particular category to add the category banner.

Also, the customer can easily make a checkout. To do so, the customer will navigate to the product and add it to the cart.


After adding to the cart the customer will go to the bag. Here, the customer will be able to apply a coupon as well and can change the delivery address as well as per requirement.
After that, the customer will tap on the place order button and will be taken to the page where the customer needs to select the payment method.
After selecting the payment method, the customer will tap the complete order button.


Completing the order the customer will see the success section for the placed order.

Apart from placing the orders, the customers can also make ratings and reviews on the products. For the same, the customer will navigate to the product page and tap on the ratings and review option.
After that, the customer will see the option to write a review.


Tap the Write Review button and give the rating and enter your review description for the product. Lastly, tap the Submit Review button.
After approval from the admin, the review will be visible on the product page.

How to Integrate – WooCommerce Stripe Payment Gateway for PWA
After the successful installation of the PWA for WooCommerce you need to navigate through Plugins and search for Stripe as per the below snapshot.

Now, install and activate the Stripe payment gateway within your WooCommerce store.
After the above step, at the header, you can see a message displaying the details of installing and configuring the Stripe Payment gateway with the PWA application.

Tap the button to integrate the payment method with the PWA app and activate it as well.

After activating you can see a success message as well.

Now, customers can see this payment gateway at checkout time in the PWA app after you have configured the payment gateway.
You can also checkout Multi Vendor Stripe Payment for WooCommerce plugin to accept payments from all over the world for your e-commerce store.

Support
For any technical assistance kindly raise a ticket or reach us by email at [email protected]. Thanks for Your Time! Have a Good Day!
Also, discover various solutions to add more features and enhance your online store by visiting the WooCommerce plugins.
Current Product Version - 2.2.2
Supported Framework Version - Wordpress - 6.2.2, WooCommerce - 7.8.0

12 comments
We have created a ticket on your behalf and our team will soon revert to your queries over it.
Thanks.
By default, you’ll get only default WooCommerce Payment methods. We need to integrate online payment methods to use in the PWA by the help of customization only.
We also do provide one online payment method integration for free with our PWA plugin.
To know more kindly email us at [email protected]. So, we can assist you faster and better.
Thanks
Greetings for the Day! Thanks for dropping by and going through the blog.
Kindly go through the PWA app(by installing it on your device) by scanning the QR code via this snap – https://prnt.sc/TT-X04tvyZ_M & check the backend configuration as well.
PWA Backend link – https://wcpwa.webkul.com/wp-login.php?redirect_to=https%3A%2F%2Fwcpwa.webkul.com%2Fwp-admin%2F&reauth=1
Further, you can mail us at [email protected] with your complete requirements so that we can assist you accordingly.
Thanks & Regards,
Webkul Team
Currently, Composite and bundle products type are not available on default Woocommerce. This module will work for products of default Woocommerce. Further, you can mail us at [email protected] with your complete requirements so that we can assist you accordingly.
Thanks & Regards,
Webkul Team
If you want to remove the billing address, then it can be done through customization. Regarding third-party plugin integration, if you want to integrate third-party plugin like email subscription pop up, sales pop up and countdown timer then these can also be integrated through customization.
You can share your complete requirements at [email protected] so that we can assist you accordingly. Thanks!