PrestaShop EasyPost Shipping is a flexible shipping solution that allows you to integrate FedEx, DHL, UPS, USPS, and other major shipping carriers with your store.
Streamline the creation of shipment labels and enable customers to track their packages right from their accounts.
- Display live shipping rates on the checkout page.
- Provides access to major shipping carriers.
- Generate shipping labels in the Prestashop back office.
- Enables shipment tracking for admins as well as customers.
- Multiple shipping methods are available for customers.
Note: PrestaShop EasyPost Shipping module is compatible with PrestaShop version 9.x.x and multi-store feature.
Features of Prestashop EasyPost Shipping
- Easily integrate your EasyPost account with the Prestashop store.
- Customers can view live shipping rates on the checkout page.
- Configure shipping carriers for your store from the Prestashop back office.
- Generate shipping labels from within the Prestashop orders page.
- Admins and customers can track packages for the orders placed on the store.
- Admin can create a shipment in the back office order details page.
- Specify the address from where your parkages will be shipped.
- Configure the default package dimension and weight.
- Display all the available shipping services of the configured carrier on the checkout page.
- Set the plugin to sandbox mode to test your setup before going into production.
- Configure the dimensions of the boxes used to ship orders.
- Option to choose the format (PDF, PNG, ZPL, EPL2) for downloading the shipment labels.
How to Install Prestashop EasyPost Shipping
- Firstly, go to the module manager in the back office and click on ‘upload a module’.
- After that, drag and drop the module file or select the file from the system.
- In this way, the module installation will be successful.


Module Configuration
After the installation of the module, you need to configure it. The module consists of five sections:
- General
- Dimension & weight
- Source address
- Carrier account
- Custom boxes
General Settings
Under General settings, you have to:
- Select the mode in which you want to use the module. You can choose either Production or Sandbox (Test) mode.
- Specify the API Key that you obtained after creating an account on EasyPost. API key is used to connect your Prestashop store with Easypost account.
- Choose the format in which you want to generate the shipping label.

Note: You can access the content of other tabs only after specifying the API Key.
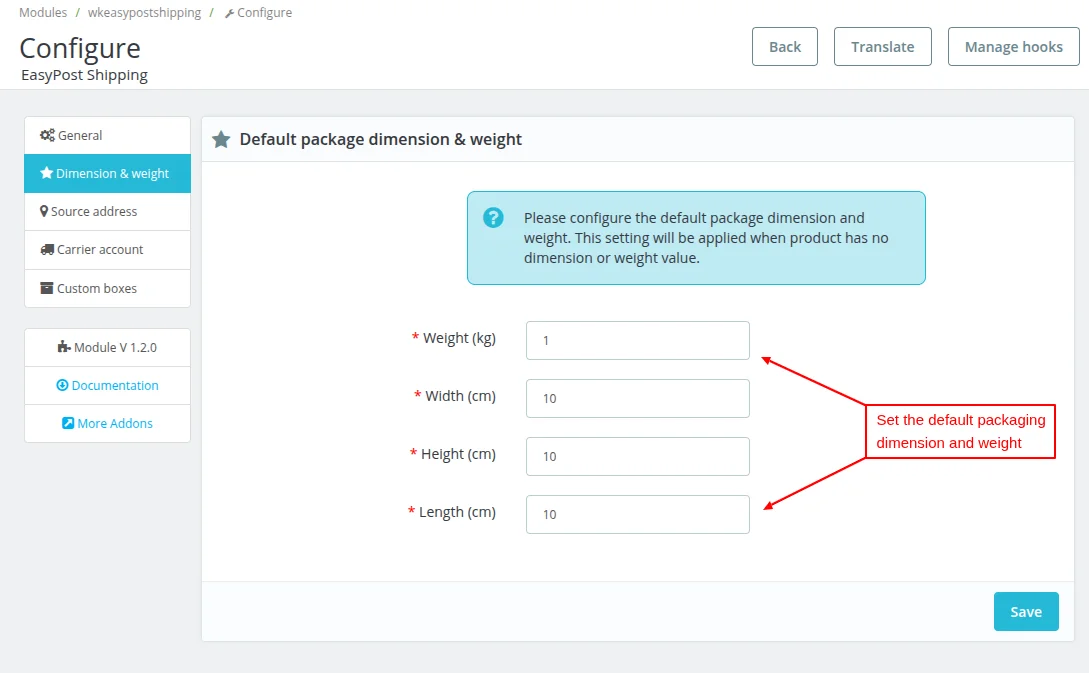
Dimension & weight
Under Dimension & weight, you can set the default package dimension and weight.
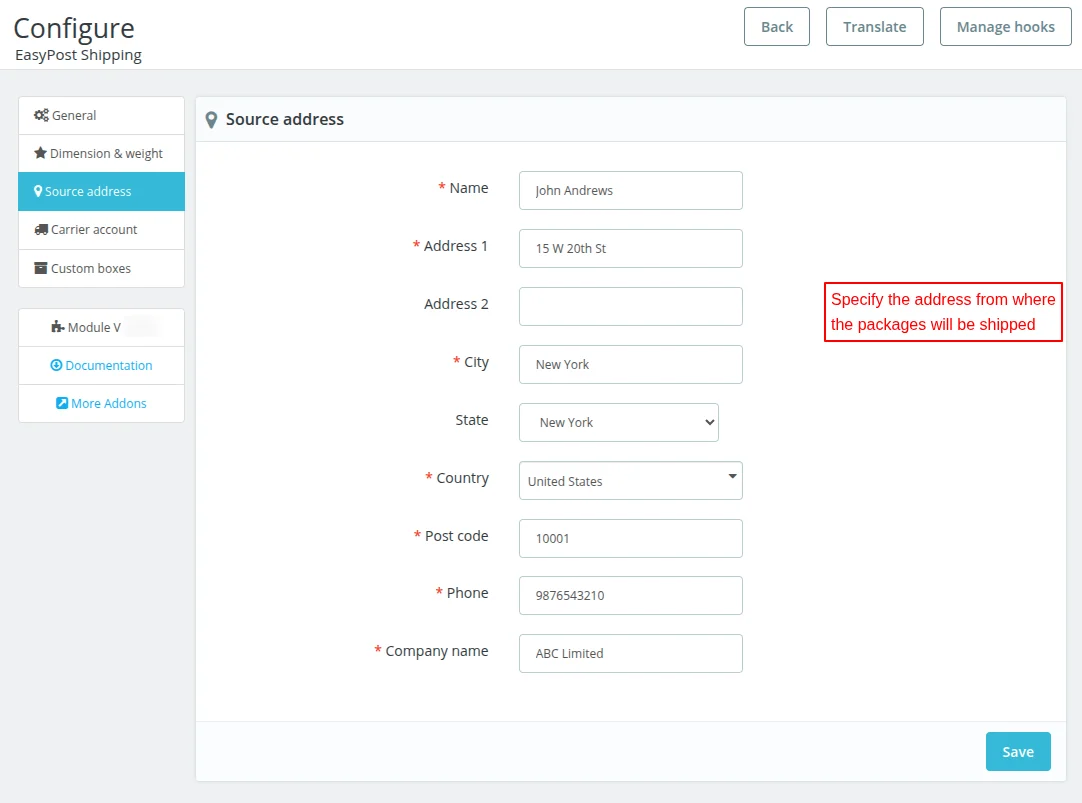
Source Address
Under Source Address, you need to specify the originating address for the shipment of parcels.
Carrier Account
Under this tab, you can configure the carriers for your PrestaShop store. For creating the carriers in your store, you need to specify the account ID and select the predefined package.
All the carriers enabled by you will be available for the customers on the checkout page. You can get the account ID of the carriers from your EasyPost account.
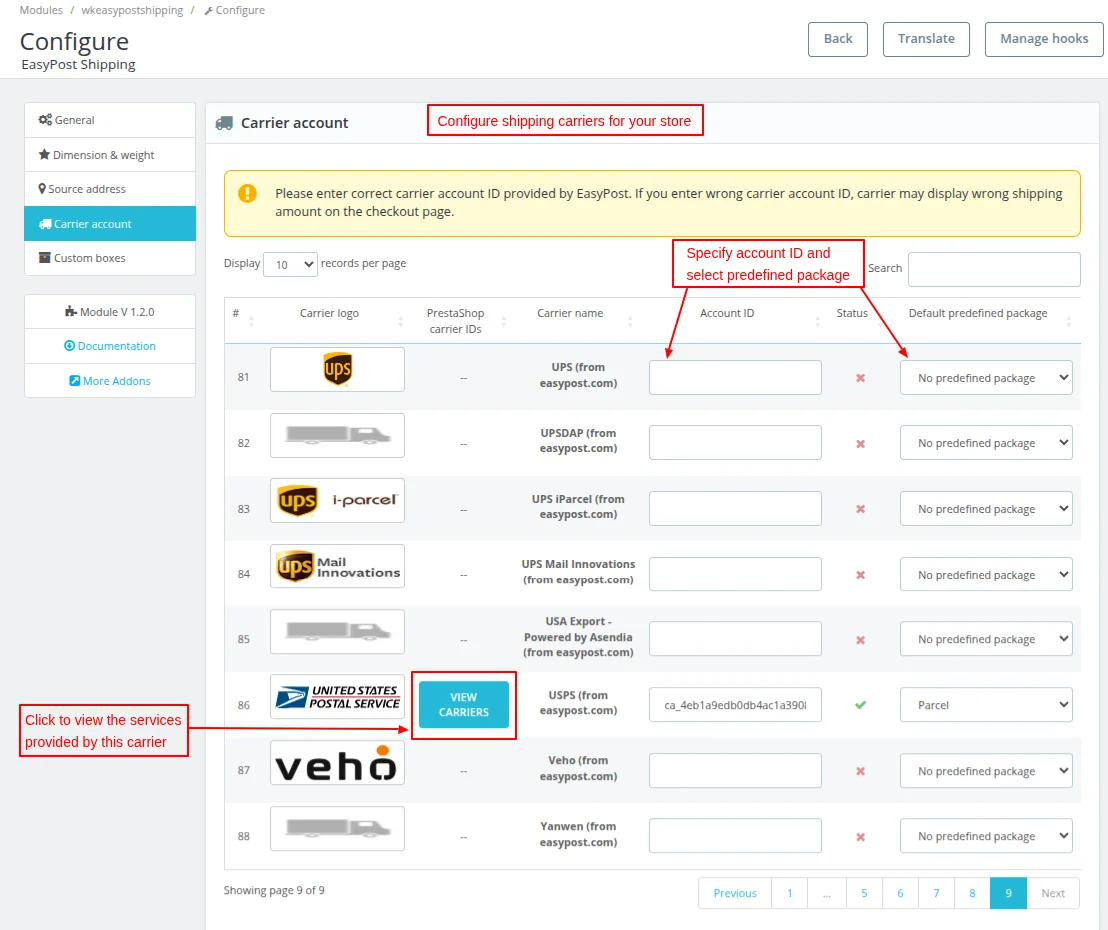
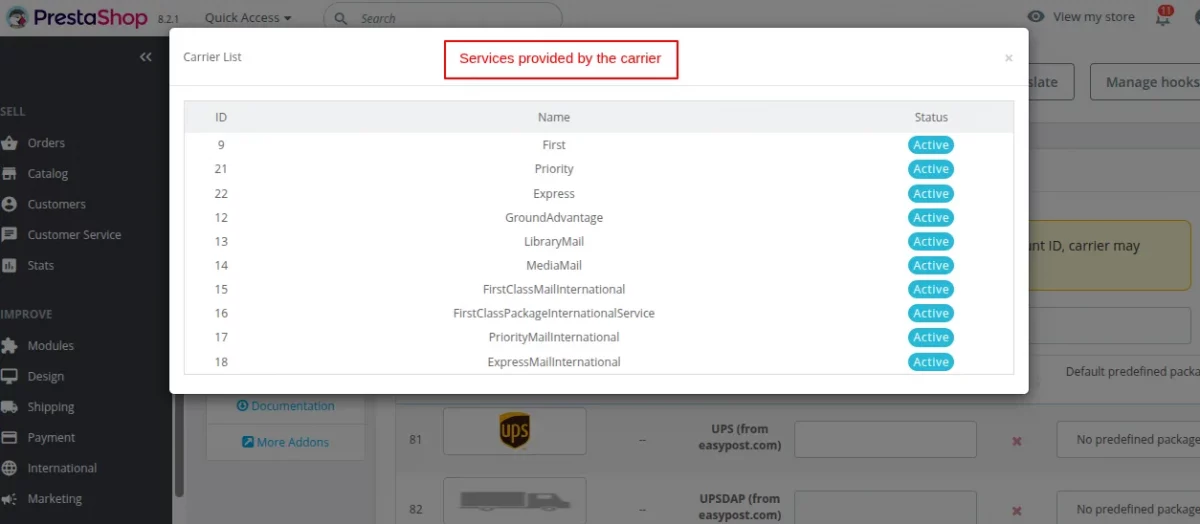
When you click the ‘View Carriers’ button, a pop-up appears on the page displaying the services provided by the carrier.
Note: When a carrier is enabled, all its services will be enabled and vice versa.
Custom Boxes

When you click on the Add custom box button, a popup appears on the page. In the popup, you need to specify the name, height, length, and width of the box.

After entering the dimensions, click on Add button to add the custom box.

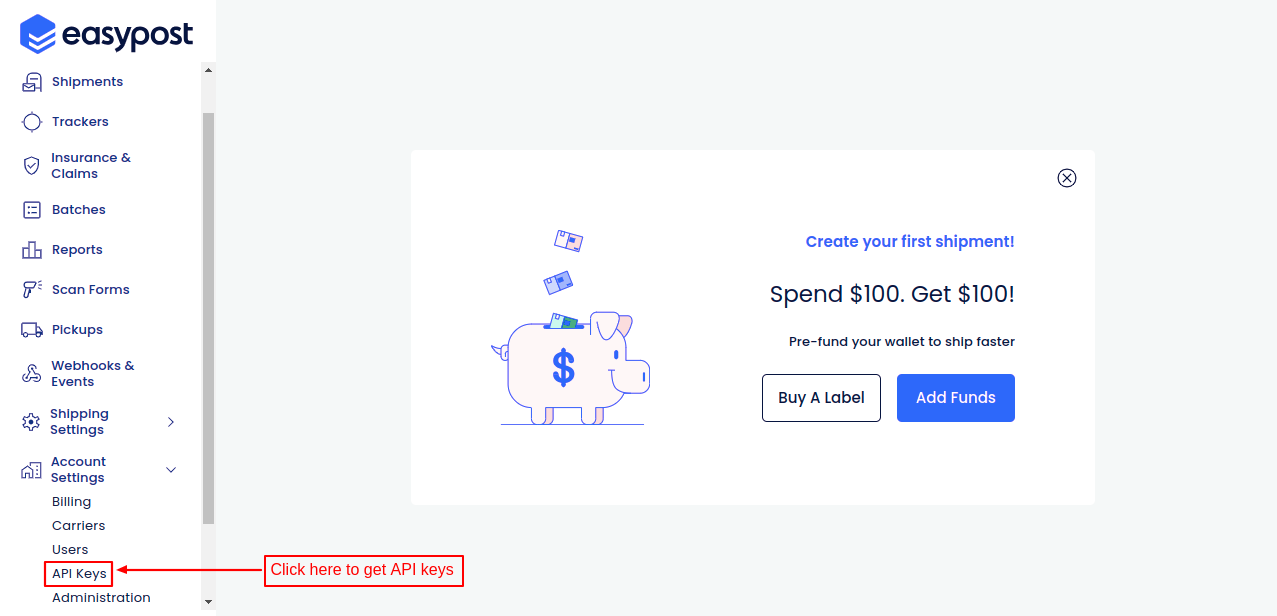
How to get API key
To obtain the API key, you need to create an account on easypost site.

Enter the required details such as name, email id, phone number, and password to create an account on easypost.


After creating the account, click on the API Keys tab on the home page.
On clicking the API Keys tab, you will find the production and test API keys.
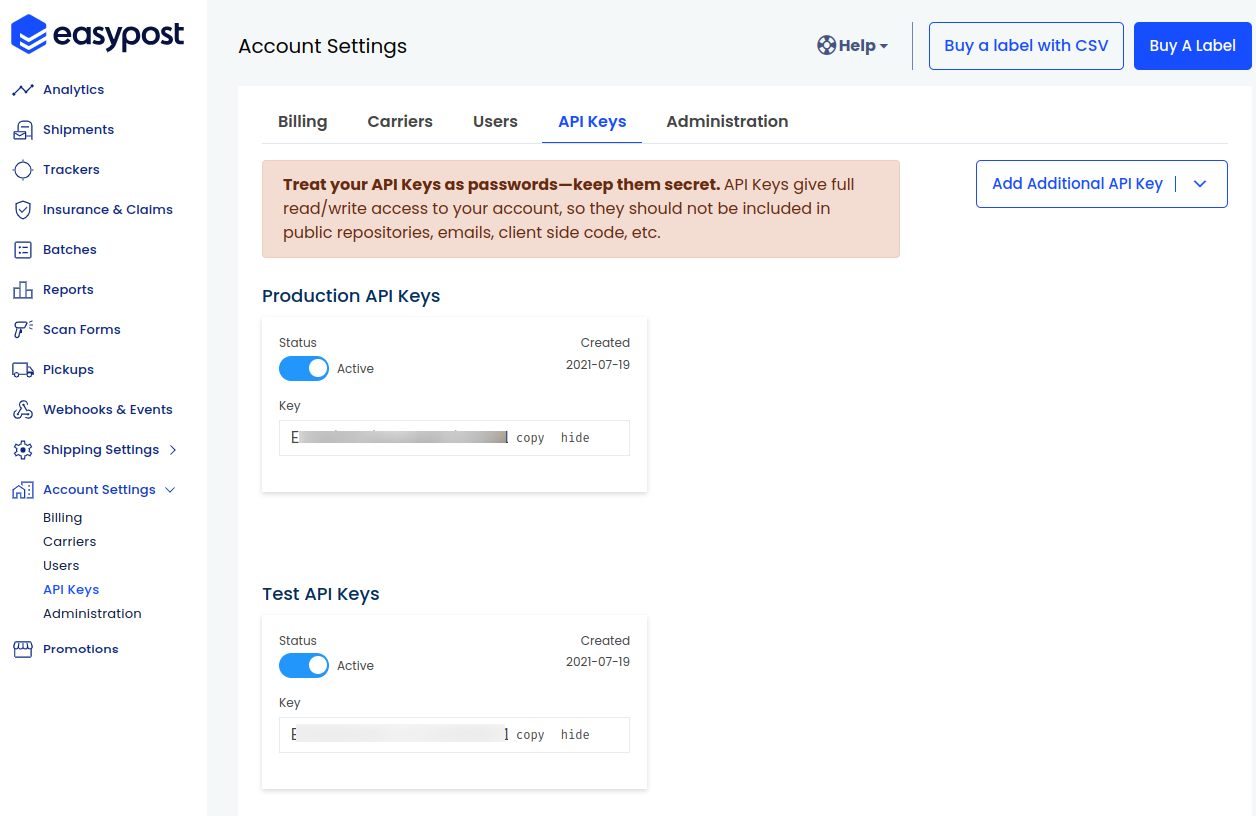
You need to specify the API key as per the selected mode to integrate your Prestashop store with the EasyPost account.
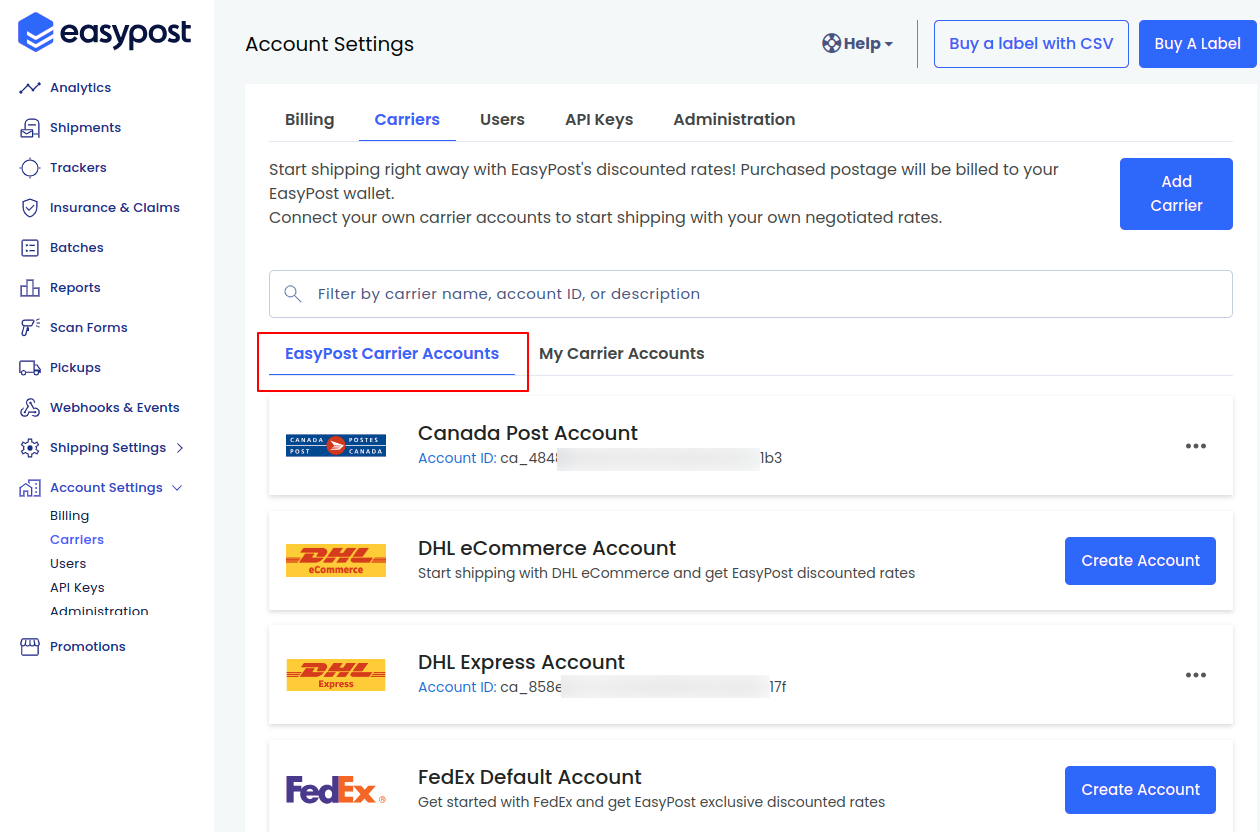
EasyPost Carrier Accounts
Under EasyPost Carrier Account, the admin can fetch the account ids for carriers and enter these Ids in PrestaShop back office.
Note:
- EasyPost changes the UI of their portal from time to time, so you may see a different UI compared to images shown in this blog.
- If the “API Key” tab is not available in your “Account Settings”, then please contact the EasyPost Support team, as new accounts may be put on hold until they pass EasyPost security.
Front End Workflow
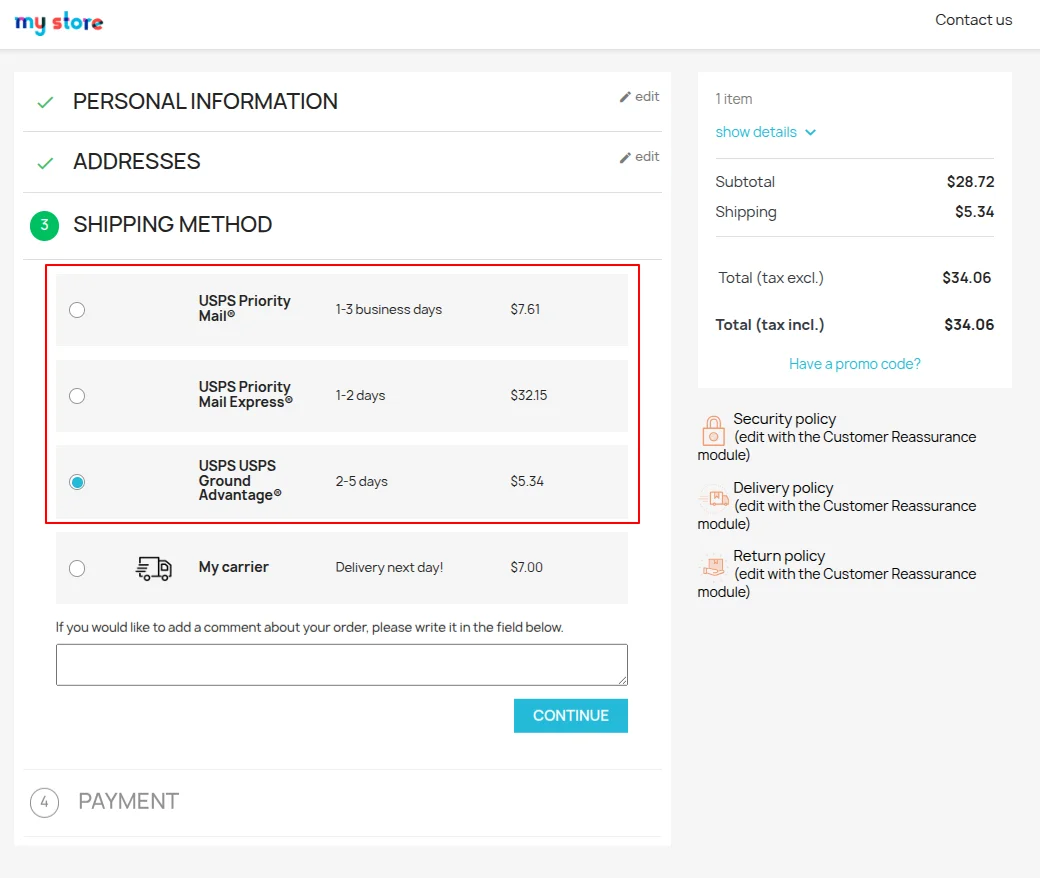
When a customer adds a product to the cart, he can view the shipping carriers and rates on the checkout page.
Once the order is placed successfully, you can view the shipping carrier chosen by the customer with the shipping rate under the order details in the back office.

After placing an order, the shipment gets created automatically based on the cart product dimensions & weight.
In the above screenshot, you can see box dimensions and weight are pre-filled. You can modify the dimensions and create the shipment again.
Also, you can select the predefined package. In this case, you only need to specify the weight of the box.

Create the shipping label by clicking on the Buy label button.
Once the shipment label is created, a link to track the package gets available for both the admin and a customer on the order details page.


You can see the shipping label by clicking on the View label button.

This was all about Prestashop EasyPost Shipping Module. I hope this document will help you in checking the functionality of the module in a better way.
Also, do let us know about your views in the comments.
Support
For any kind of technical assistance or query, please raise a ticket or send us a mail at [email protected]
Also, please explore our Prestashop development services and vast range of quality Prestashop addons.
Current Product Version - 1.2.0
Supported Framework Version - 9.x.x, 8.x.x, 1.7.x.x

Be the first to comment.