Want to pay your Seller through your Razor PayX account. Then you can enable this feature in Multivendor Marketplace.
Purpose of this feature:
This feature allows the merchant to use the Razor PayX gateway to pay their Sellers through the Multivendor app.
Note: This feature only works for the Merchant and Seller based in the India only.
How to configure the Razor PayX feature?
First, go to Multi vendor Marketplace Admin Panel > Payment > Select Payment Methods

Note: Whenever you update the configuration, the previous orders will not remain eligible for payout anymore.
For example, if we make changes to the Razor PayX details, only the upcoming orders will be eligible for payout and not the previous ones.
Now on the redirected page go to Razor PayX and Click on “three dots” > Select Admin Payment Configuration

Admin will get a pop-up for Admin RazorpayX Configuration

You need to fill in this information and then save only then you would be able to “Enable” the razor payx on your Multivendor app.
If you enable the Razor PayX without providing the details then Seller won’t be able to add their Razor PayX method at their Seller panel.
Auto Pay Configuration
You can enable Razor PayX auto pay configuration to automatically pay to your Sellers

You can select Pay After Delivery or fulfill so whenever the Seller marks the order as Delivered or Fulfilled as per the configuration. The payment to Seller will automatically be initiated.
In case you have enabled the Cashable amount the payment will be initiated after the refund days.

How to integrate Razor PayX with Multivendor app.
Key ID and Secret Key
To get your Razor PayX Key ID & Secret Key, you need to login to your Razor PayX account by visiting the following link: https://x.razorpay.com/auth

After logging in to your account go to My Account & Settings

On the redirected page please go to Developer Controls and click on Generate Key

Please remember the key you have added would be live or test.
So in case you want to perform some tests first then please add the Test Mode Keys or if you are okay go on live mode then please provide the live credential.
On you click on the Generate key you will get the Secret key and Key ID.
Note: If the Admin is using the live key, then he/she will need to add their public IPs.
18.138.8.137
54.179.1.53
54.255.33.47
54.254.202.145
To Add the IPs kindly refer to the link below:
https://razorpay.com/docs/x/dashboard/allowlist-ip
Account Number
Now to Get the account Number you need to Select Banking as shown in the below image

Register your Webhooks
Now the final step that Admin needs to do is register the Webhooks In the Razor PayX
We need to go back to Razor PayX Myaccount & Settings sections once again > Developer Controls and select “Edit Webhooks”.
In the Webhook URL please add the link: https://sp-seller.webkul.com/razorpaywebhook/payout.php
Add “payout.processed” and “payout.reversed” as active events.

Save
That is not for the admin Side now Seller needs to configure the Razor PayX at their Seller panel side.
Configuration for Seller’s Panel
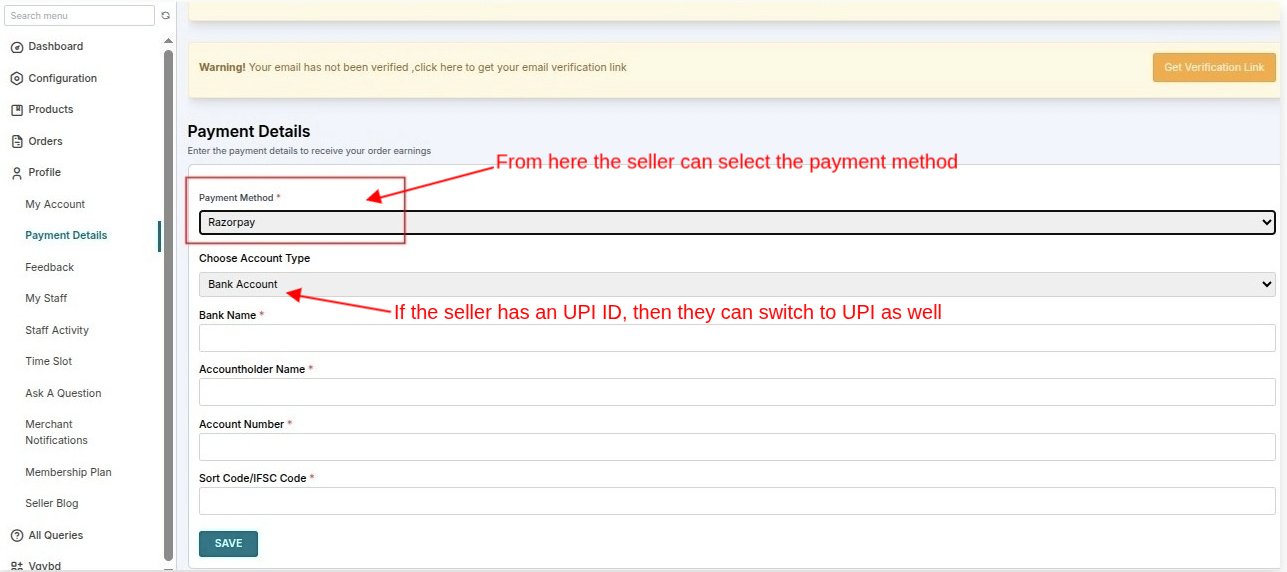
Sellers need login to their Seller Panel > Profile > Payment Details > In Payment Method > Select RazorPayX
Note: This payment method will only work if the Seller’s address is from India as Razor PayX is not compatible with any other country.
Once they select the Payment Method as RazorPayX they will get a form to fill in their bank details as shown in the below image:
Note: In case of testing you can add any random number for the account number and valid IFSC code but please make sure you provide the correct number of digits.
For example: If you have added SBI as your Bank name then please add 10 digit number for the account.
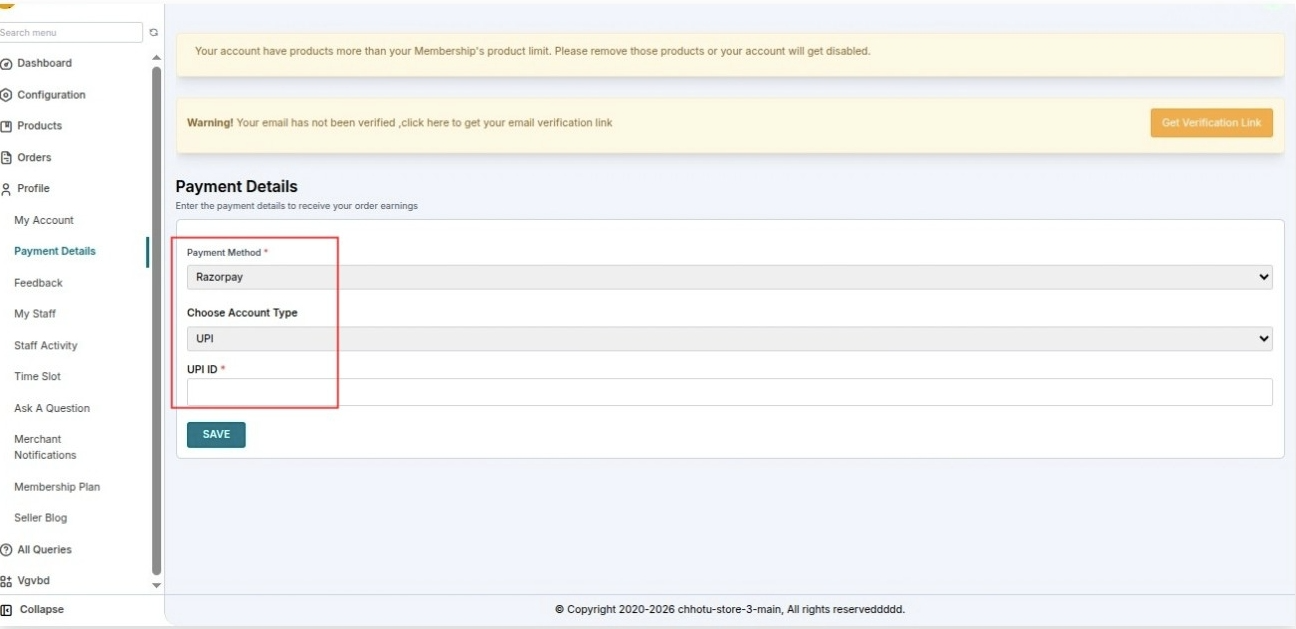
In the case of UPI
Sellers need to Provide their UPI id as shown in the below image:
Once the Seller saves Account details successfully. Contact will be created at the Admin Razor PayX account as shown in the below image:

Note: Please make sure that you don’t make any changes here in the contact from the Razor side as it won’t be synced with the Multivendor app.
Payment Flow
Now as per the Multivendor Payment Flow when Admin Pays the Seller due amount through RazorPayX.

So when Admin pays the Seller the amount will be gone into transit state at the Multivendor and Razor side.


Once the status is updated from the Razor dashboard then it will automatically will gets updated at Multivendor App.


In case due to some reason the amount is reversed then it also gets updated as refunded in the Multivendor app.


From the Seller Payment section of the app, the admin can view the complete details of all the transactions that take place.
To pay the seller for each order
Select seller payment type as ” pay order wise” in payment configuration section.
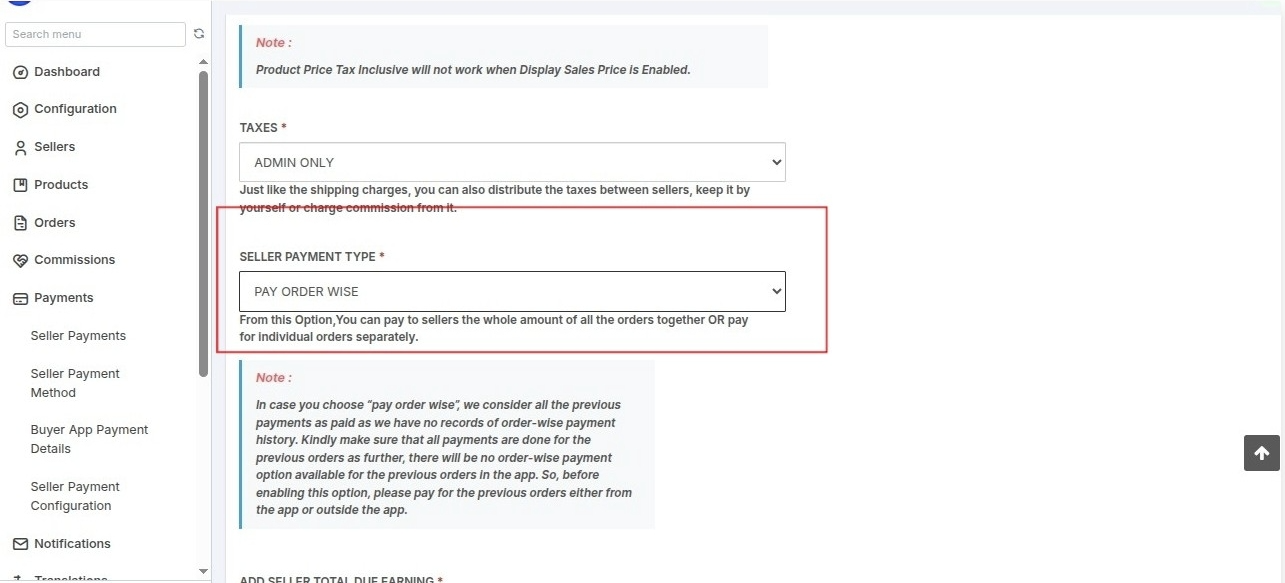
You will have the option to pay via razor pay on the order description page.
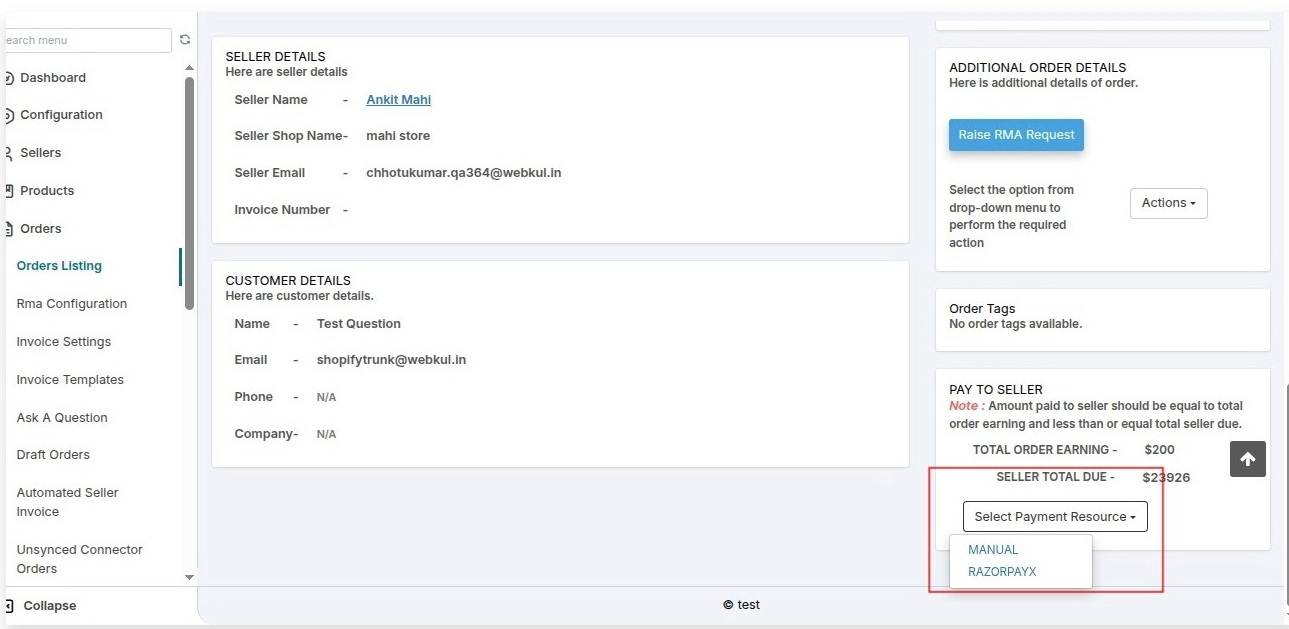
Navigate to marketplace Admin panel >> orders >> order listings >> click on the three dots “…” for the selected order >> View
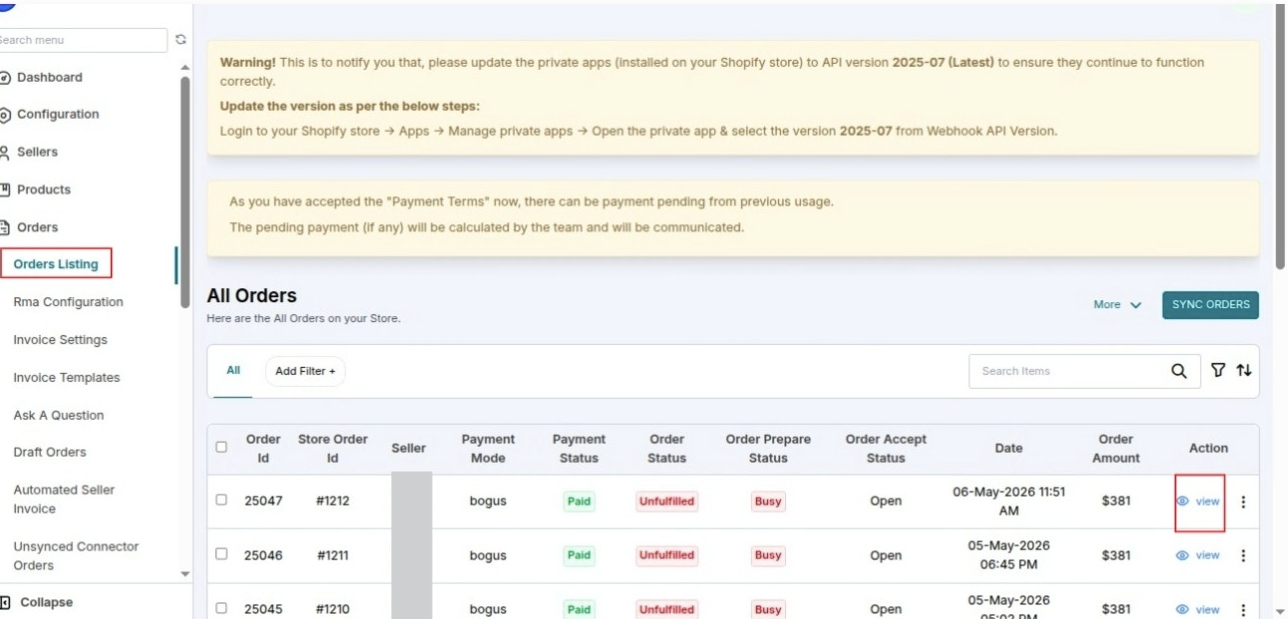
Pay to seller >> select payment resource >> Razorpayx
This is all for the Razor payment method for your Multivendor app for Shopify.
SUPPORT
Furthermore, if you need any kind of support/Consultancy then please raise a ticket at http://webkul.uvdesk.com/ or drop a mail at [email protected]

Be the first to comment.