You might be using the Mobikul Mobile App for Shopify to provide your customers with an incredible & seamless mobile app experience with Google Maps.
Due to the great success of this app, we worked on the app’s enhancement and came up with a few good features.
One of them is the Google Maps Settings.
Google Maps Settings
This feature is basically used for calculating the current location.
Google maps is the way that makes your work easier and more helpful by saving time.
Allow people to fetch the current location quickly.
Activate the Feature of Google Map Settings :
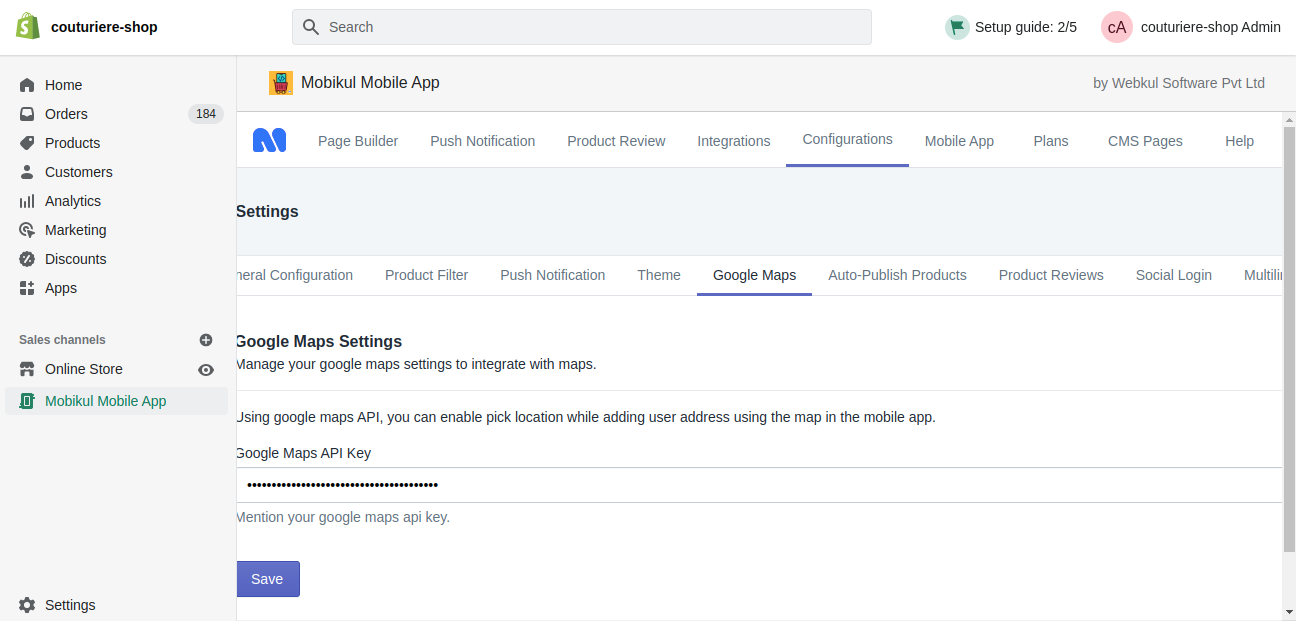
To enable these features, you need to visit the Mobikul Mobile App backend and then click on the configurations section as shown in the below snapshot.

Under the configuration tab you will get an option of Google Maps, just need to fill in the required details here.
Need to mention the Google Maps API key, to get the Google API key the steps are mentioned in the next flow of the Blog.
How to Get Google API
To get the Google API key, the admin needs to follow these steps as mentioned below:
Step 1. Go to console.developers.google.com and log in using your Gmail ID. After that, click on select a project.

Step 2. Click on New Project Button. After that, need to enter the name of the project and Browse the location of the organization.

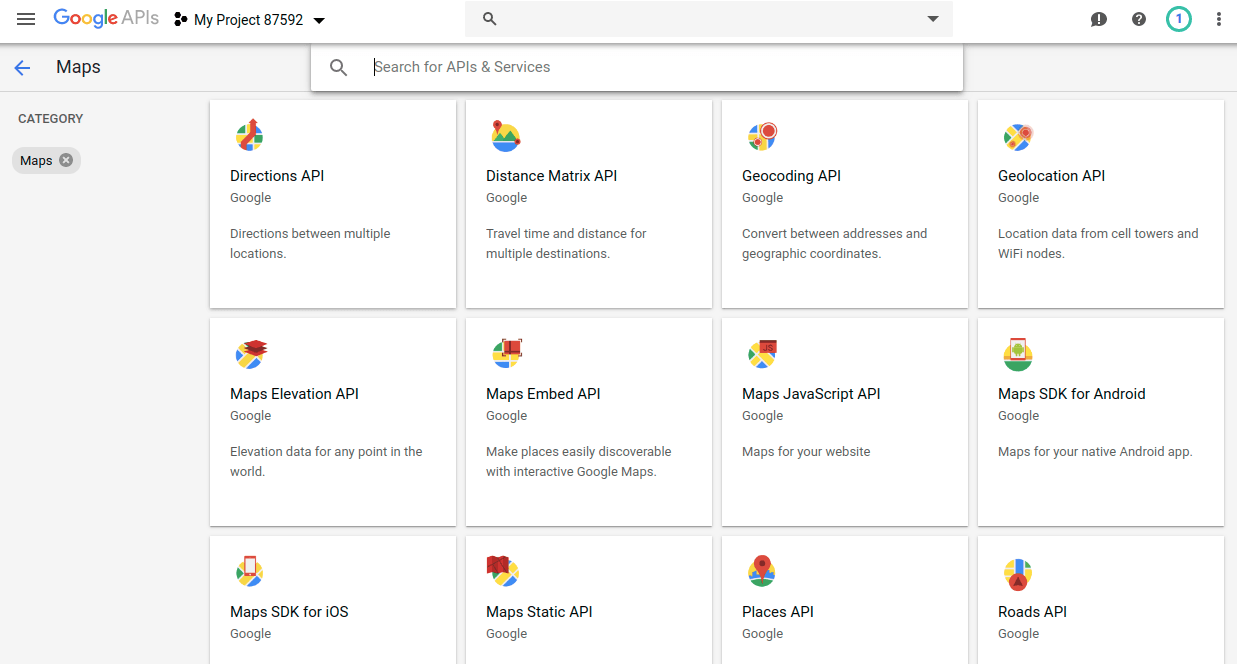
Step 3. Once the project is created successfully, click on the Enable API And Services.

Step 4. Then click on the Maps JavaScript API to get the API key.
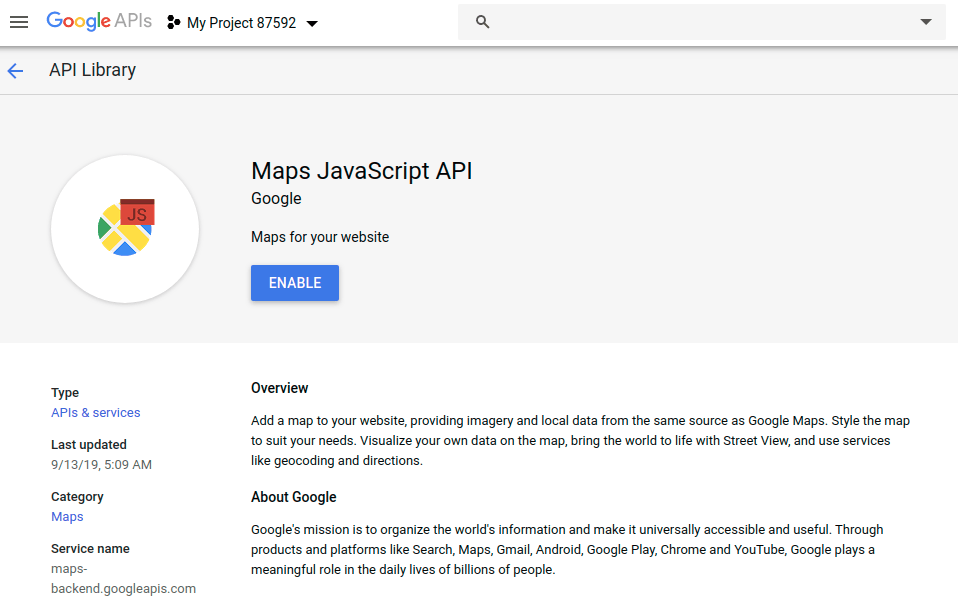
Step 5. After clicking on the Maps JavaScript API, you just need to tap on the ENABLE button.
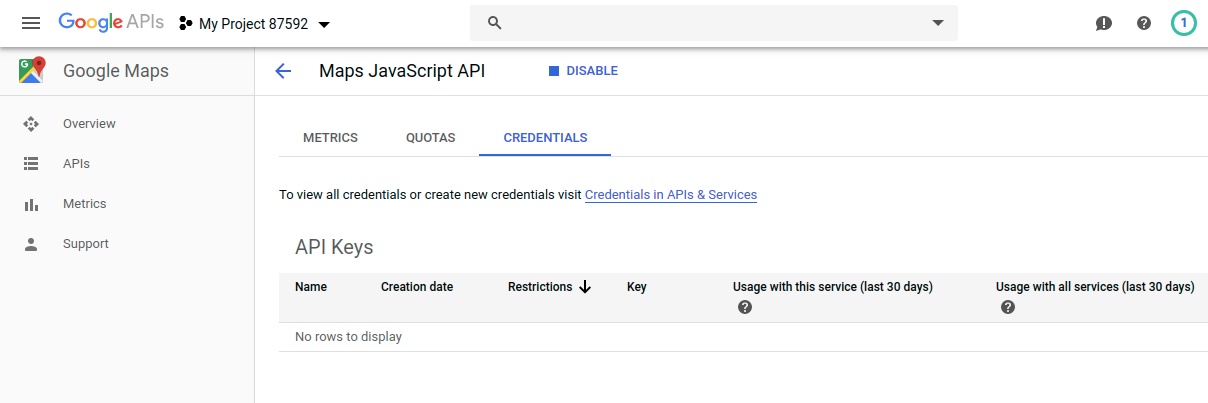
Step 6. Once you have enabled the API then you need to navigate through Credentials> Credentials in APIs & Services.
Step 7. After that, you need to click on the create credentials and select the API key.

Step 8. Now you can copy the generated API key.
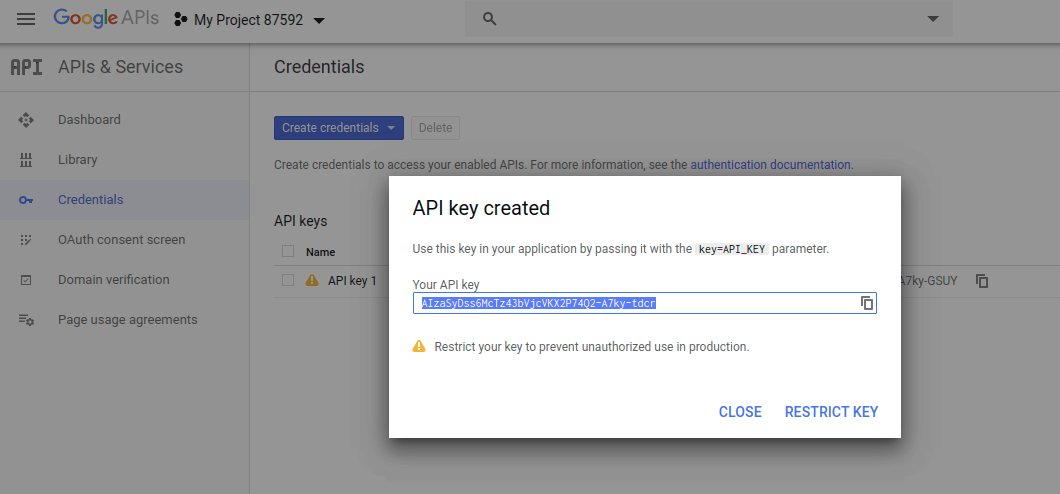
Therefore the Google API key is created successfully.
Admin End Configuration :
After that, copy the generated API Key and put it into the configuration section of the Shopify backend, as shown below :
Once Google Maps settings are configured successfully, you can able to detect your current location accordingly.
How Google Detector works at the Customer End :
Now, the Customer just needs to log in to their account, once logged in they just need to visit inside the profile section, as shown below :
After this customer needs to visit inside the address option to set the current location via Google map detector.
Therefore customers get the option to add a new address, at the top right corner a location detector symbol is displayed, custom just simply needs to tap over that, and accordingly, it will detect the live location.
After this just need to tap on the right corner to get the location auto-detect, now just need to hit the save button as shown below in the snapshot.
After this just need to tap on the right corner to get the location auto-detect, now just need to hit the save button as shown below in the snapshot.
That’s all about Google Maps Settings for Mobikul Mobile App.
Need help?
Drop your query/suggestion at [email protected] or create your ticket at Webkul UV Desk.

Be the first to comment.