Magento 2 Marketplace Iyzico Payment Gateway allows the store owner to integrate the Iyzico payment gateway in Magento 2 (Adobe Commerce)Marketplace.
The add-on helps the marketplace vendors to accept payments online by enabling the Iyzico payment method for the product purchase.
This module supports split payments functionality, where the amount is automatically divided between the sellers and store owners at the time of checkout.
Customers can use the Iyzico payment method to pay for their purchases during checkout with ease as the payments done through this gateway are fully secure.
Note:
- This module is an add-on of Webkul’s Marketplace Module. To use this module, you must have purchased and installed the Magento 2 Multi Vendor Module.
Features – Marketplace Iyzico Payment Gateway
- The admin can enable or disable the Iyzico Payment Method from the admin panel.
- It supports Split Payment functionality due to which both admin and the seller receive the payment at the time of checkout.
- The seller can become a sub-merchant by entering the necessary information to receive funds when payment is done using Iyzico Payment Gateway.
- The admin can refund the invoice amount.
- The sellers can refund Iyzico transactions online.
- Fully PCI Compliant, no card details submitted to the client-server.
- The extension is compatible with the Hyva Theme.
Installation – Marketplace Iyzico payment gateway
The installation is quite simple just like the standard Magento 2 extensions.
Customers will get a zip folder and they have to extract the contents of this zip folder on their system.
The extracted folder has an src folder, inside the src folder you have the app folder.
You need to transfer this app folder into the Magento 2 root directory on the server as shown below:

Run Commands
After uploading the module folder, you need to run the following commands in the Magento 2 root directory:
composer require iyzico/iyzipay-php:2.0.*<br /><br />php bin/magento setup:upgrade
php bin/magento setup:di:compile
php bin/magento setup:static-content:deploy
php bin/magento indexer:reindex
php bin/magento cache:flush
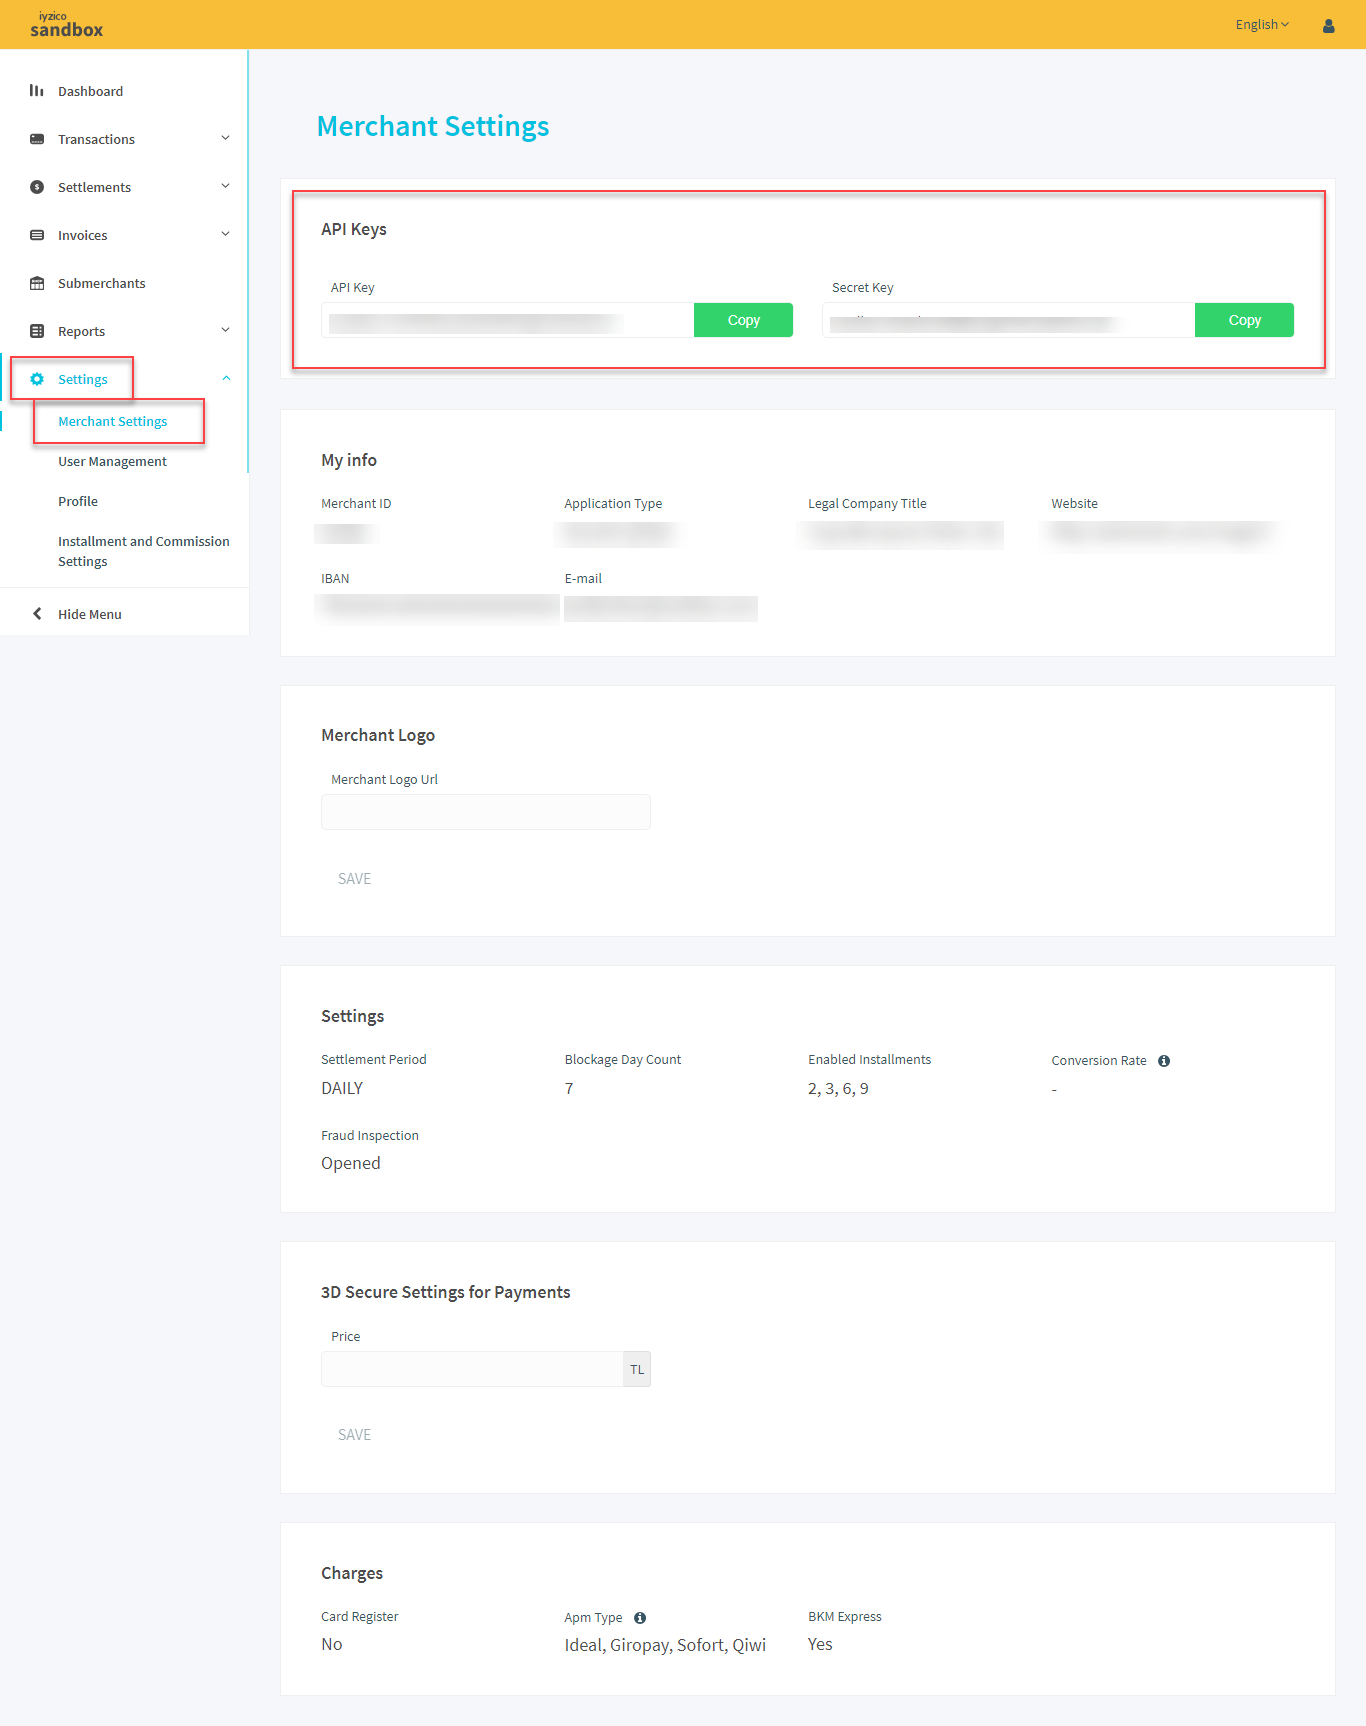
Iyzico Account Payment- How to get API Key and Secret Key
In case of a sandbox account, you have to open https://sandbox-merchant.iyzipay.com/login?lang=en and enter your email id and password and click on Log In.

Once you have logged in account, then under settings you will get API Key and Secret Key.
Module Configuration
After the successful installation of this extension on the web store, the admin has to navigate through Stores -> Configuration -> Sales -> Payment Methods -> Iyzico Payment.
Otherwise, you can navigate to Marketplace Management-> Iyzico configuration.

The admin set the Marketplace Iyzico Payment configurations as under:

Enable– The admin can enable or disable the module from here.
Enable Testing Mode– The admin can enable or disable a testing mode. Testing mode is a mode in which the admin make transactions using Iyzico Payment Gateway test cards. Everything in this mode is done for module testing.
Method Title– In this field, the admin has to enter the title for the Iyzico Payment Method which shall display in the front-end during checkout.
API Key or ID and API Secret– In these fields, the admin has to enter the API Key secret key which will be provided by Iyzico Payment Gateway.
Iyzico Form Layout- Admin can choose layout Responsive or Popup.
The add-on is purely meant for marketplace sellers.
If the admin wants to sell his own products on the web-store then he has to register as a sub-merchant.
Register as Sub-merchant:
For registering as a sub-merchant the admin will click on the Register As Sub-merchant button.
This will display the popup and has to enter the details shown in the screenshot below.

The admin firstly needs to select the sub-merchant Types like Personal, Private Company or Limited or Joint Stock Company from the dropdown option. After selecting the desired type, the admin needs to enter personal information respectively as per the selected type.
After entering all the details, the admin has to click on Accept Iyzico Platform User Agreement and save.
This is also required if the vendors are using admin’s shipping method because without admin’s registration as a sub-merchant, the customers will not be able to check out from the cart if the cart contains the seller products with admin shipping.
Sort Order– Here the admin has to enter the Sort Order for the Payment Gateway.
WorkFlow at Seller’s End
First of all the seller has to register himself as a sub-merchant under the Iyzico Onboard Sub-Merchant tab.
On clicking Iyzico Onboard Sub-Merchant tab, a form will appear on the screen.
The seller firstly needs to select the sub-merchant Types like Personal, Private Company or Limited or Joint Stock Company from the dropdown option. After selecting the desired type, the seller needs to enter personal information respectively as per the selected type.
After entering all the details, the seller has to Accept Iyzico Platform User Agreement and click on save button.
It is mandatory for all the marketplace vendors to register as sub-merchants.
If the vendors do not register themselves, then they will not receive the payment from Iyzico Payment Gateway and the admin has to manually transfer the payment into seller’s account.
Customer’s End
In the front end, when a customer adds a product to the cart and clicks on proceed to checkout and fill in the shipping address details as shown in the image below.

On the Order Review & Payments page, Iyzico Payment Method will be visible on the upper left side of the web page.
On clicking the Iyzico payment method a payment form will appear on the screen.
If the admin has set Payment Form as Responsive, then a payment form will appear on the screen as shown below.

If the admin has set the Payment Form as Popup, then a payment form will appear on the screen as shown below.

Further, the customer will have to add the card details and proceed to PAY in a usual way or using 3D Secure.
The customer will have to check the 3D Secure and click on PAY.
It redirects the customer to the page as shown in the image below. The customer needs to add the SMS Code and Submit so as to make the payment with 3D Secure.
 Thereafter, a success notification will display for the customer as shown in the image below.
On clicking the given order number the admin can view the Order Details for the respective order.
 The customer can check the order details under My Orders tab as shown in the image below.
The customer can see two invoices, as one invoice is for the seller’s transaction of product purchase and the other invoice is for admin shipping transaction.
On placing the order, the seller can also check the order details under My Order History tab.
View Order and Transaction Details
The admin can view orders by navigating through Sales -> Orders, as the order is placed and click on view option to view the complete order information.


The admin can see the invoices and the transactions by clicking the View option.

The first invoice is for the product and the second invoice is for shipping.
The admin can view the transaction details by making a click on Transactions option.
By clicking on a transaction, the admin can view details such as Iyzico commission amount, sub-merchant price, merchant commission, sub-merchant key etc. respectively for both product transaction and shipping.

Approve Seller Payments
Now from here the admin can easily Approve/ verify the payment made by the customer to the seller by clicking on Approve button.

After approving the payment, the admin can see a notification ” Seller Payment Approved” on order page.
Order Details – Iyzico End
You can also view the transactions on Iyzico Payment Gateway site under the Transactions tab.

On clicking Payment ID you can check the details such as payment status, transaction details, card details of a buyer and buyer information.

Refund Process
By the help of this add-on, both the admin as well as sellers can process the refund of an order.
Note:
- The sellers can process a refund if admin allows the sellers to manage orders from the admin panel.
To initiate a refund, the admin has to navigate through Sales -> Invoices. The admin can view the invoice and click on the Credit Memo button.
Now in order to proceed with the online refund, the admin will click on the Refund button.
You can also check the refund details by logging into Iyzico Payment Gateway site. Under the transactions tab, you have to click on Payment ID and from there as well you can refund for the order.


The refund details and the exact refund amount for both, seller and admin are visible here.
That’s all for the Magento 2(Adobe Commerce Cloud) Marketplace iyzico Payment Gateway. Still, have any issues please raise a ticket or get back to us at [email protected]
Current Product Version - 5.0.2-p1
Supported Framework Version - Magento 2.0.x, 2.1.x, 2.2.x,2.3.x, 2.4.x

Be the first to comment.