INTRODUCTION
Manage product exchange and return in Marketplace with Odoo Marketplace RMA!
One of the difficulties of Odoo Marketplace is that after buying products customers can’t return or exchange them, as per the default setting. Further, they need these to exchange or return products if they receive a wrong or defective product.
Hence, to make the return and exchange process available and convenient for customers, you need a module that permits you to accept Marketplace return and exchange requests and process them seller-wise.
Odoo Marketplace RMA allows customers to create return and exchange requests by a form. Moreover, this module enables sellers to verify the request and process it according to it. However, the refund request from customers needs to be approved by the seller and the final approval for refund will be from the Admin.
NOTE: Odoo Marketplace RMA Module works in conjunction with the following module:
Odoo Return Merchandise Authorization (RMA)
You would require to install these modules first for Odoo Marketplace RMA to work correctly.
FEATURES
- The module creates a separate menu for the admin to view and manage returns and exchanges in Odoo.
- Helps to keep things organized in your Odoo backend.
- View all the RMA requests at every seller’s end.
- Track the status of every RMA raised at your Marketplace.
- Create and manage different stages for return and exchange, respectively.
- Create a variety of RMA reasons for the customer to choose from.
- RMA reasons are used by customers while filling out the RMA form.
- From the Odoo backend, only the admin can create new RMA requests.
- Admin can see every RMA request from the marketplace customer.
- Also, they can track them from the backend.
- Needs admin approval to process an already approved refund request from the seller.
- Admin can also view all the attached images and messages in an RMA request.
- Further, the admin can message the customer in the same thread.
- Admin set the return policy for their Odoo marketplace.
- Moreover, set the return window based on the delivery date or order date.
- Set the global return policy for all sellers.
- Or admin can set different return policies for each Marketplace seller.
- From the seller dashboard, each seller can manage their RMA requests.
- Set status/stages to an RMA request.
- Sellers can approve/reject exchange requests for their products.
- Additionally, the seller can create a new delivery for an approved exchange request.
- Seller can only create a confirmation request for a refund.
- Seller can ask questions from the customers from RMA requests via chatter.
- Moreover, customers can view the messages on their website portal.
- Customers can create the RMA requests from the website portal.
- The return request is created from the respective product order.
- Customers can add relevant product images with the RMA request to the sellers.
- Customers can check the current stage of their RMA requests.
INSTALLATION
- Once you purchase the App from Webkul store, you will receive the link to download the zip file of the module.
- Extract the file on your system after the download finishes. You will be able to see a folder named- ‘marketplace_rma.’
- Copy and paste this folder inside your Odoo Add-Ons path.
- Now, open the Odoo App and click on the Settings menu. Here, click on Activate the Developer Mode.
- Then, open the Apps menu and click on ‘Update Modules List.’
- In the search bar, remove all the filters and search ‘marketplace_rma.’
- You will be able to see the module in the search result. Click on ‘Install’ to install it.
WORKFLOW CONFIGURATION
BACKEND CONFIGURATION
1. Firstly, Log in to the Odoo backend and go to ‘Settings> Marketplace> Other Settings> RMA’ and define the date for accepting product returns and the basis of the return date.
The return date can be calculated on two bases:
1.1. Order Date- The return date will be considered from when the customer placed the order.
1.2. Delivery Date- The return will be considered from when the customer received the orders.

2. Next, on the settings page, go to ‘RMA.’ From here also, the admin can configure the return policy period. Further, they can allow ‘Quotes Cancellation,’ which lets you cancel quotes and write your terms and conditions or use the default.

3. Log in as admin, go to ‘Seller Dashboard> RMA> Exchange RMA.’

4. You can view every exchange request by customers sorted according to different sellers on the new page.

5. On clicking an exchange RMA, you will be able to view all its details. Also, you can validate the return of a product from here by clicking on ‘Receive Products.’

6. O clicking the ‘Recieve Products,’ a popup will appear containing relevant details of the order and RMA order necessary for return.

7. On selecting ‘Return RMA’ under ‘RMA,’ the admin can view every return order request.

8. Click on the return RMA to view all its details, as shown in the image below.

9. After that, go to RMA, and on the first page, you can see all the RMA requests, both exchange, and return requests.

10. Next, click on the ‘RMA> RMA Stages’ to view all RMA stages and click on the ‘Create’ button to create a new stage.

11. Once done, click on the ‘RMA> RMA Reasons’ to view every created reason. Also, you can create new reasons by clicking the ‘Create’ button.

FRONTEND VIEW
12. On the Marketplace website, go to ‘My Account> Sale Orders.’

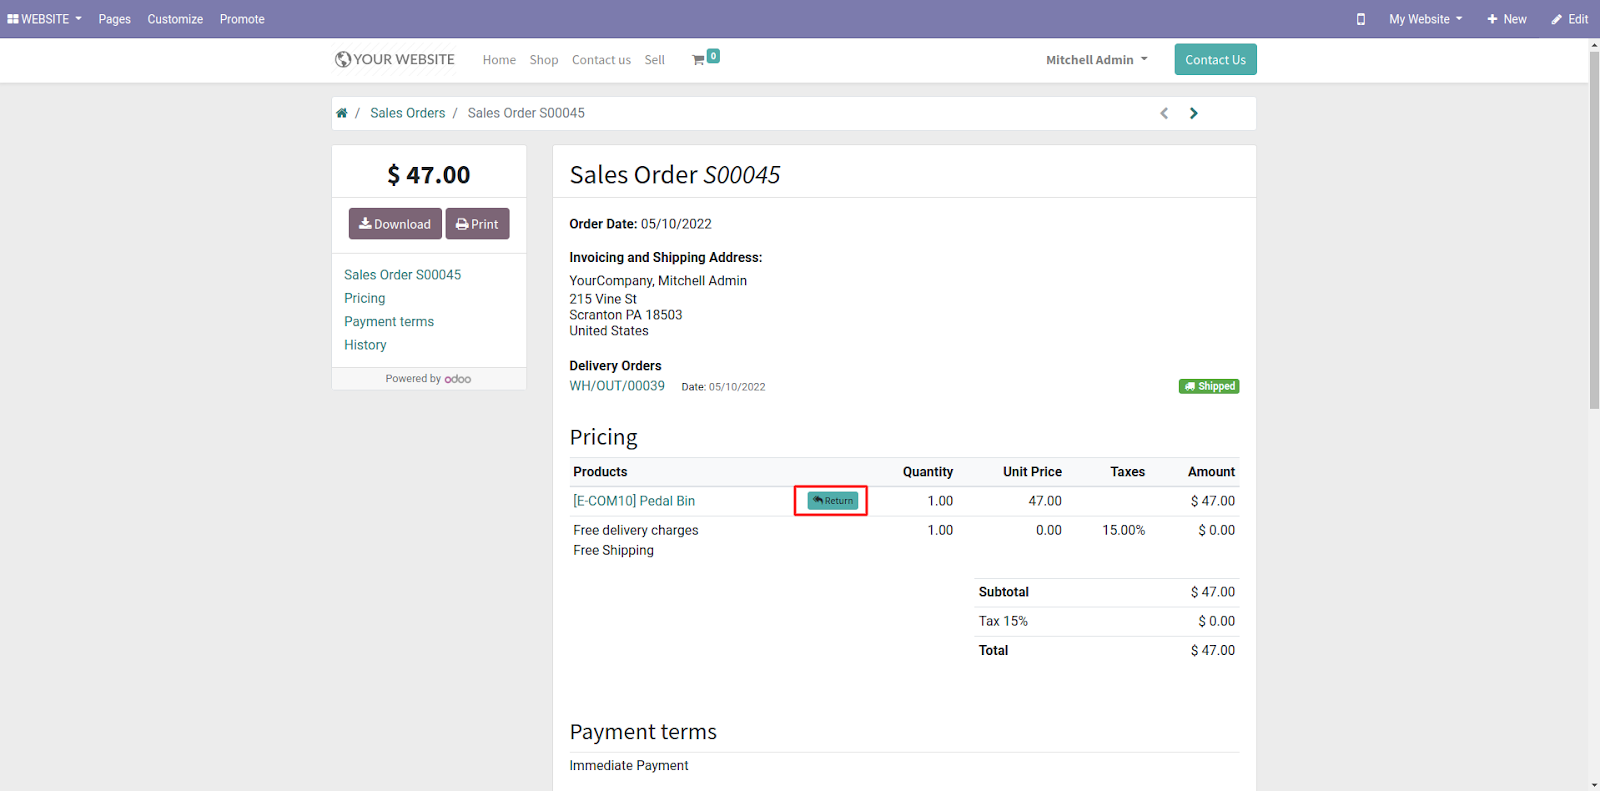
13. On the Sales Order page, you can view all the sales orders, click and open an order.

14. On the order page, you can see the ‘Return’ button next to a product, click on it to process the return order.
15. After that, a popup will appear on which you fill in the details and click the ‘Create’ button.

16. After creating a request, ‘View RMA’ will appear in place of ‘Return’ next to the product.

17. Also, you can view the RMA request from my account page. Click ‘My Account> RMA Requests’ to open all ‘RMA Requests.’

18. On the page, you can see all the RMA requests. Click on any to open and view the details of all the RMA requests.


19. Also, customers can communicate with sellers by the ‘Chatter’ present at the bottom of the page. Also, they can attach images of the product as well.

20. In the backend, the admin and seller both can view the message and reply to the customer.

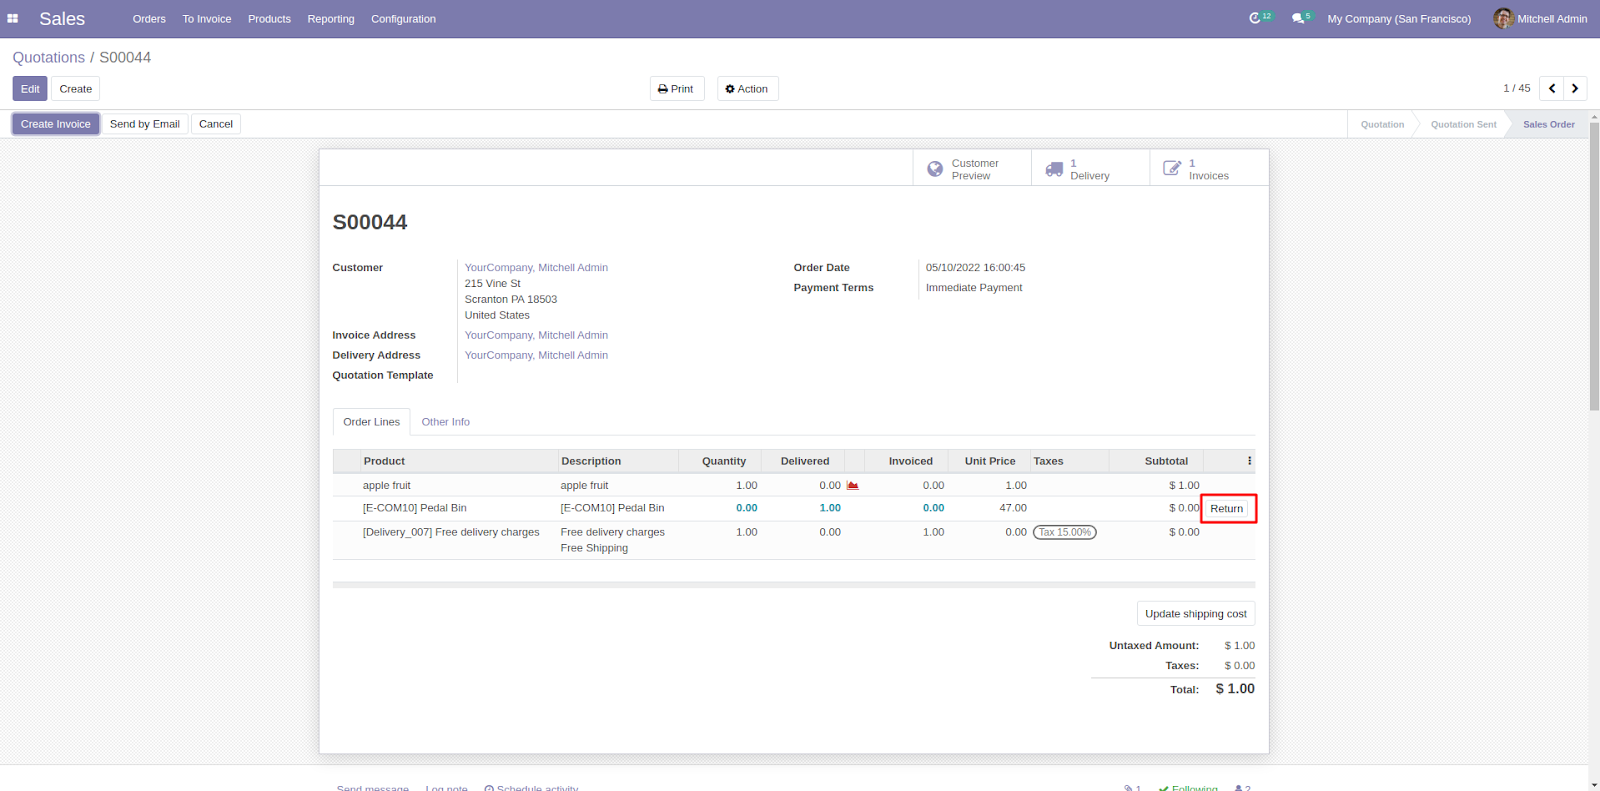
21. Moreover, from the Odoo backend, the admin and seller can also create a return request for a product.
OTHER ODOO MODULES
- Odoo Marketplace Vouchers
- Odoo Marketplace Membership
- Marketplace Google Shop
- Odoo eLearning Marketplace
- Odoo Marketplace Seller Badges
- Marketplace POS Extension
- Odoo Marketplace Product Tags
- Odoo Marketplace SMS Notification
- Marketplace Events Management
- Odoo Marketplace Seller Slider
- Odoo Marketplace Theme Amenities
- Marketplace Advertisement Manager
NEED HELP?
Hope you find the guide helpful! Please feel free to share your feedback in the comments below.
If you still have any issues/queries regarding the module, please raise a ticket at https://webkul.uvdesk.com/en/customer/create-ticket/.
Also, please explore our Odoo development services & an extensive range of quality Odoo Apps.
For any doubt, contact us at [email protected].
Thanks for paying attention!!
Current Product Version - 1.0.0
Supported Framework Version - V15, V14, V13, V12

Be the first to comment.