INTRODUCTION
Supervise clients with an appointment “Odoo Appointment Management System!“
Appointment management is a hectic job and even more frenzied when you do it manually. You must create appointments, send updates to the customer and appointee, and much more.
But what if there is a way to manage all appointments efficiently without any problem?
Odoo Appointment Management System helps ease your appointment management in Odoo. The module enables you to manage your appointments and bookings, and the Odoo calendar will show all the booked appointments.
Further, the appointment module eases the process of appointment booking in Odoo. The module allows you to create customer groups for similar appointment types. Send reminders to customers and make an appointment record and invoice from the backend that the admin can print to provide to customers.
FEATURES
- Effortlessly create, schedule, and manage appointments within Odoo Appointment Management System.
- Define and assign customizable time slots for each appointee.
- Track appointment statuses with an improved dashboard and real-time calendar view.
- Filter earnings and appointments by appointee or time range for better insights.
- View detailed graphs and charts to analyze appointment trends and performance.
- Automatically send email notifications and reminders for upcoming appointments.
- Set and manage unique appointment charges for each appointee or group.
- Download, print, and analyze detailed appointment reports and earnings summaries.
INSTALLATION
- Once you purchase the App from Webkul store, you will receive the link to download the zip file of the module.
- Extract the file on your system after the download finishes. You will be able to see a folder named- ‘wk_appointment.’
- Copy and paste this folder inside your Odoo Add-Ons path.
- Now, open the Odoo App and click on the Settings menu. Here, click on Activate the Developer Mode.
- Then, open the Apps menu and click on ‘Update Modules List.’
- In the search bar, remove all the filters and search ‘wk_appointment.’
- You will be able to see the module in the search result. Click on ‘Activate’ to install it.
WORKFLOW
After Installation, Configure and use Odoo Appointment Management System as follows:
CONFIGURATION
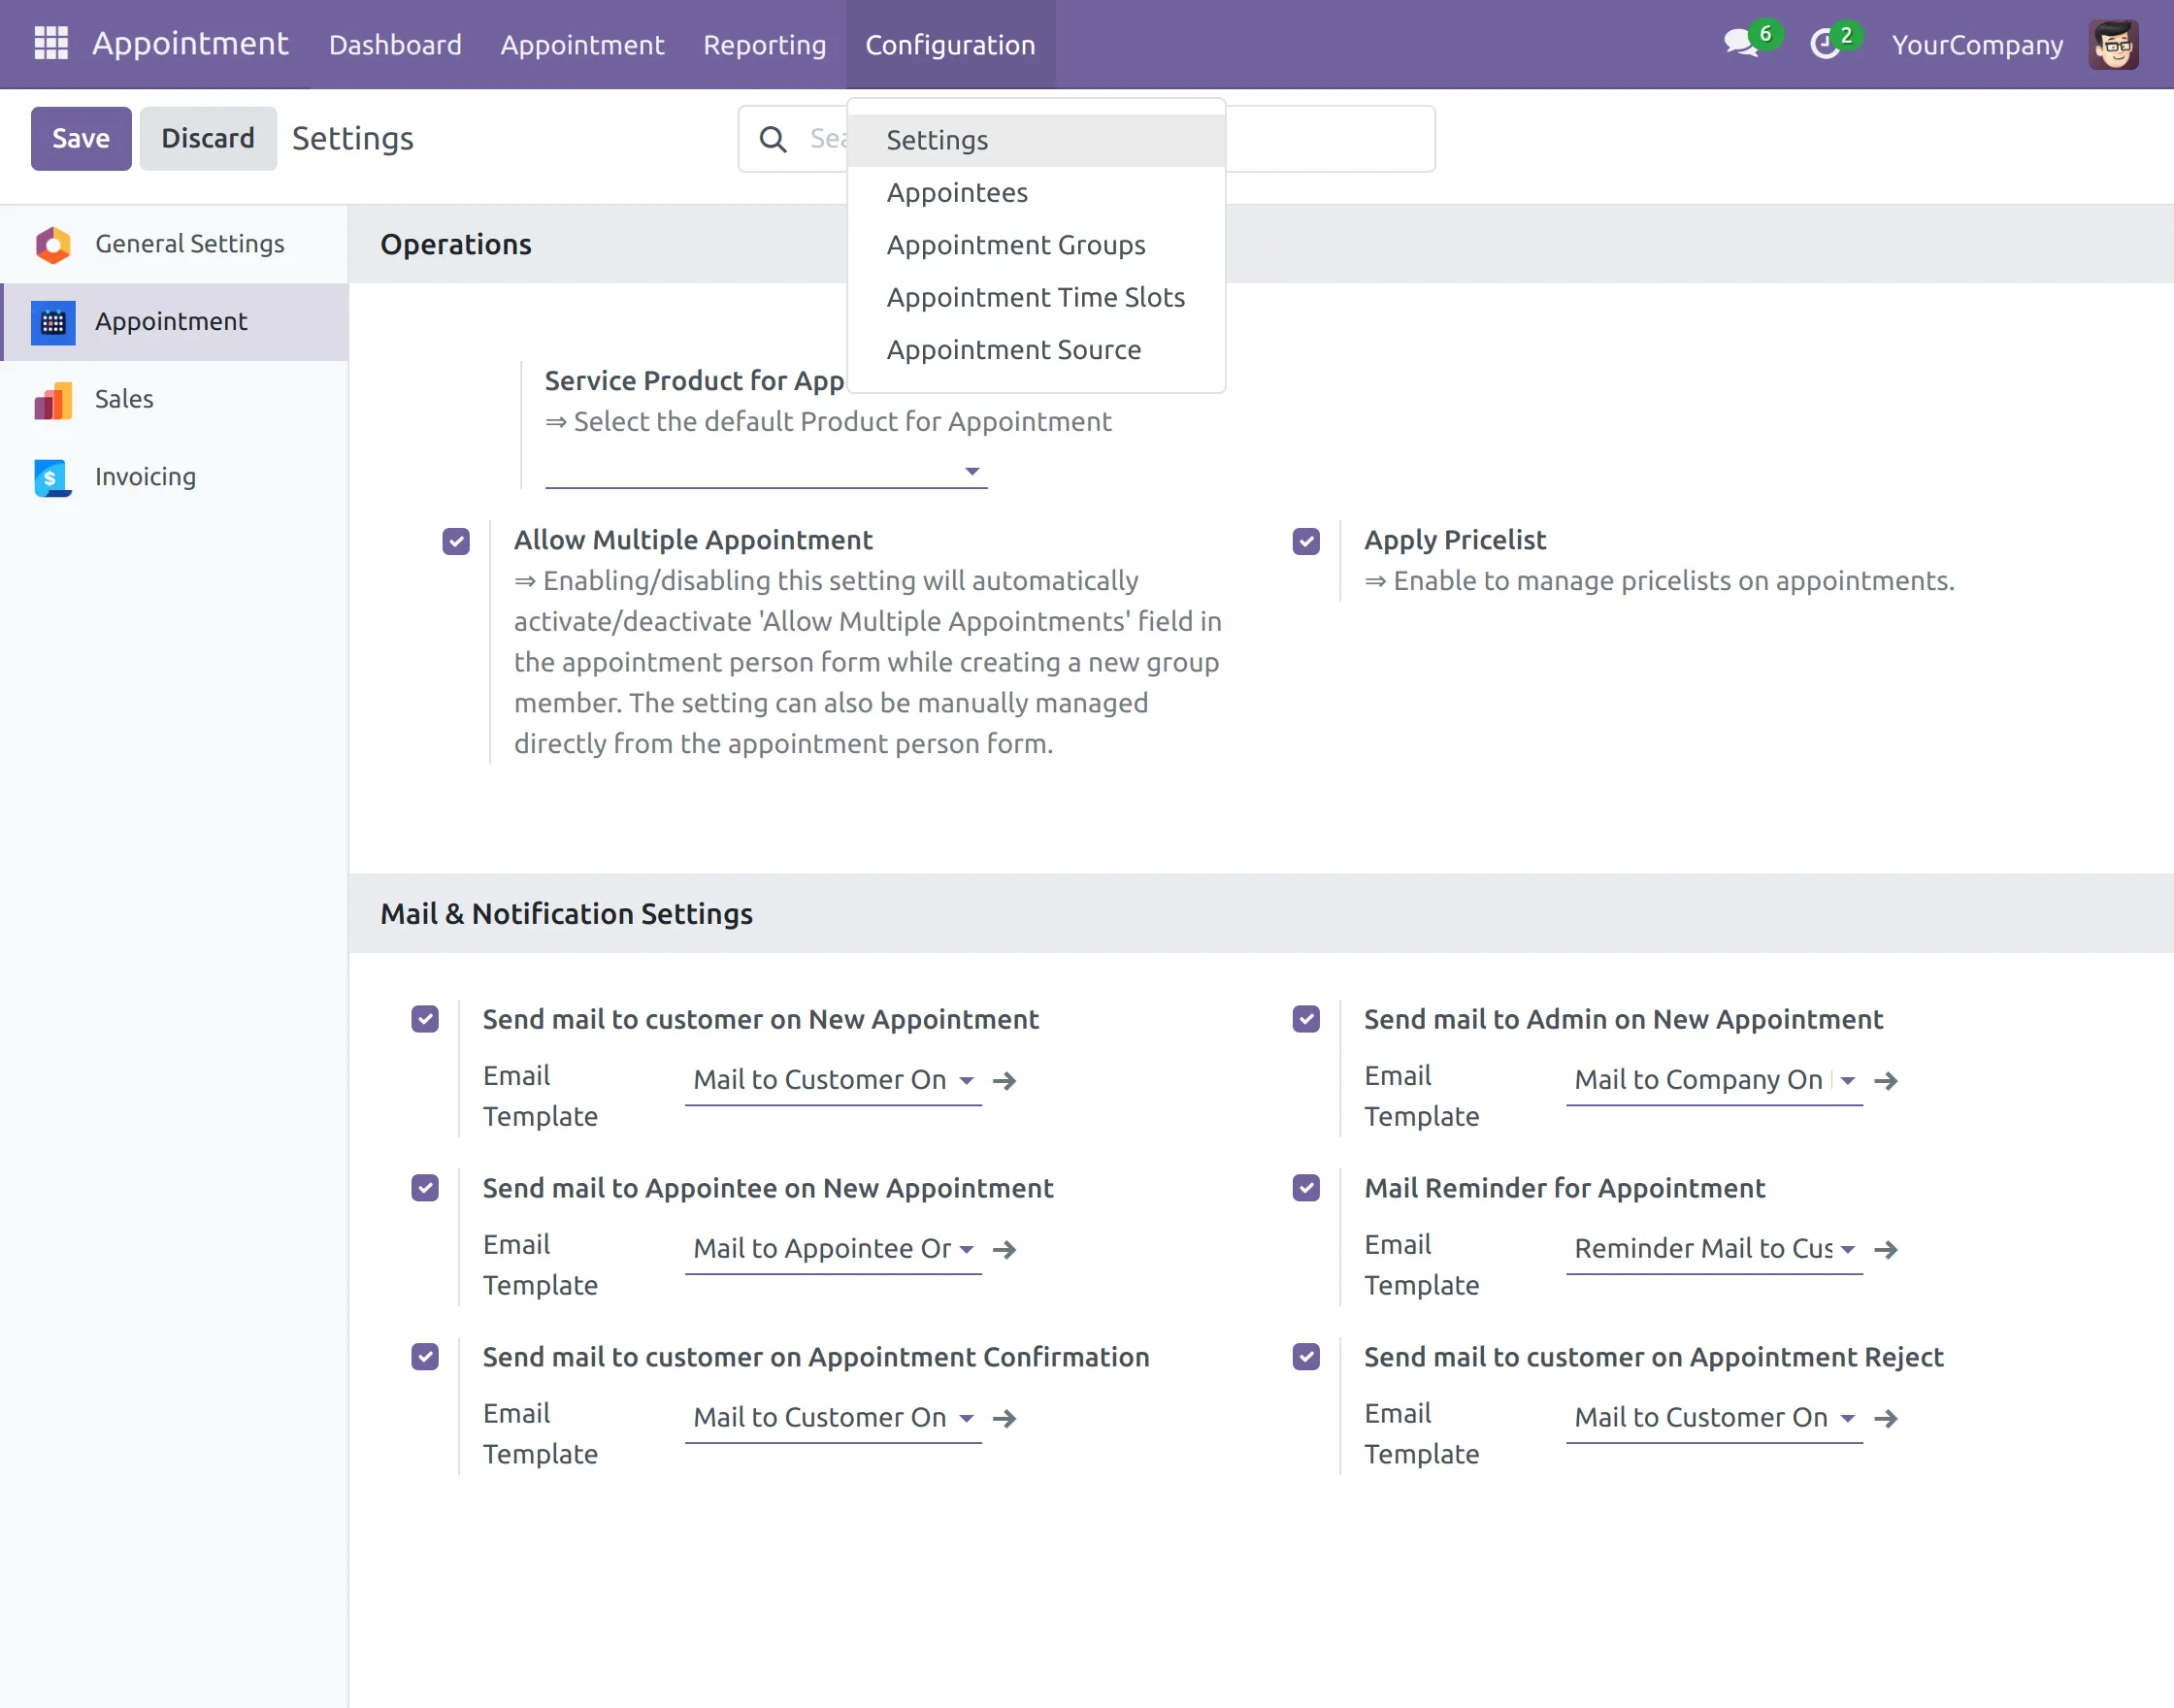
1. Log in to the Odoo backend, go to ‘Appointment> Configuration> Settings,’ and here open ‘Appointment’ and under ‘Mail and Notification’ tick the box next to the option you want to use. Once done, click the ‘Save’ button.
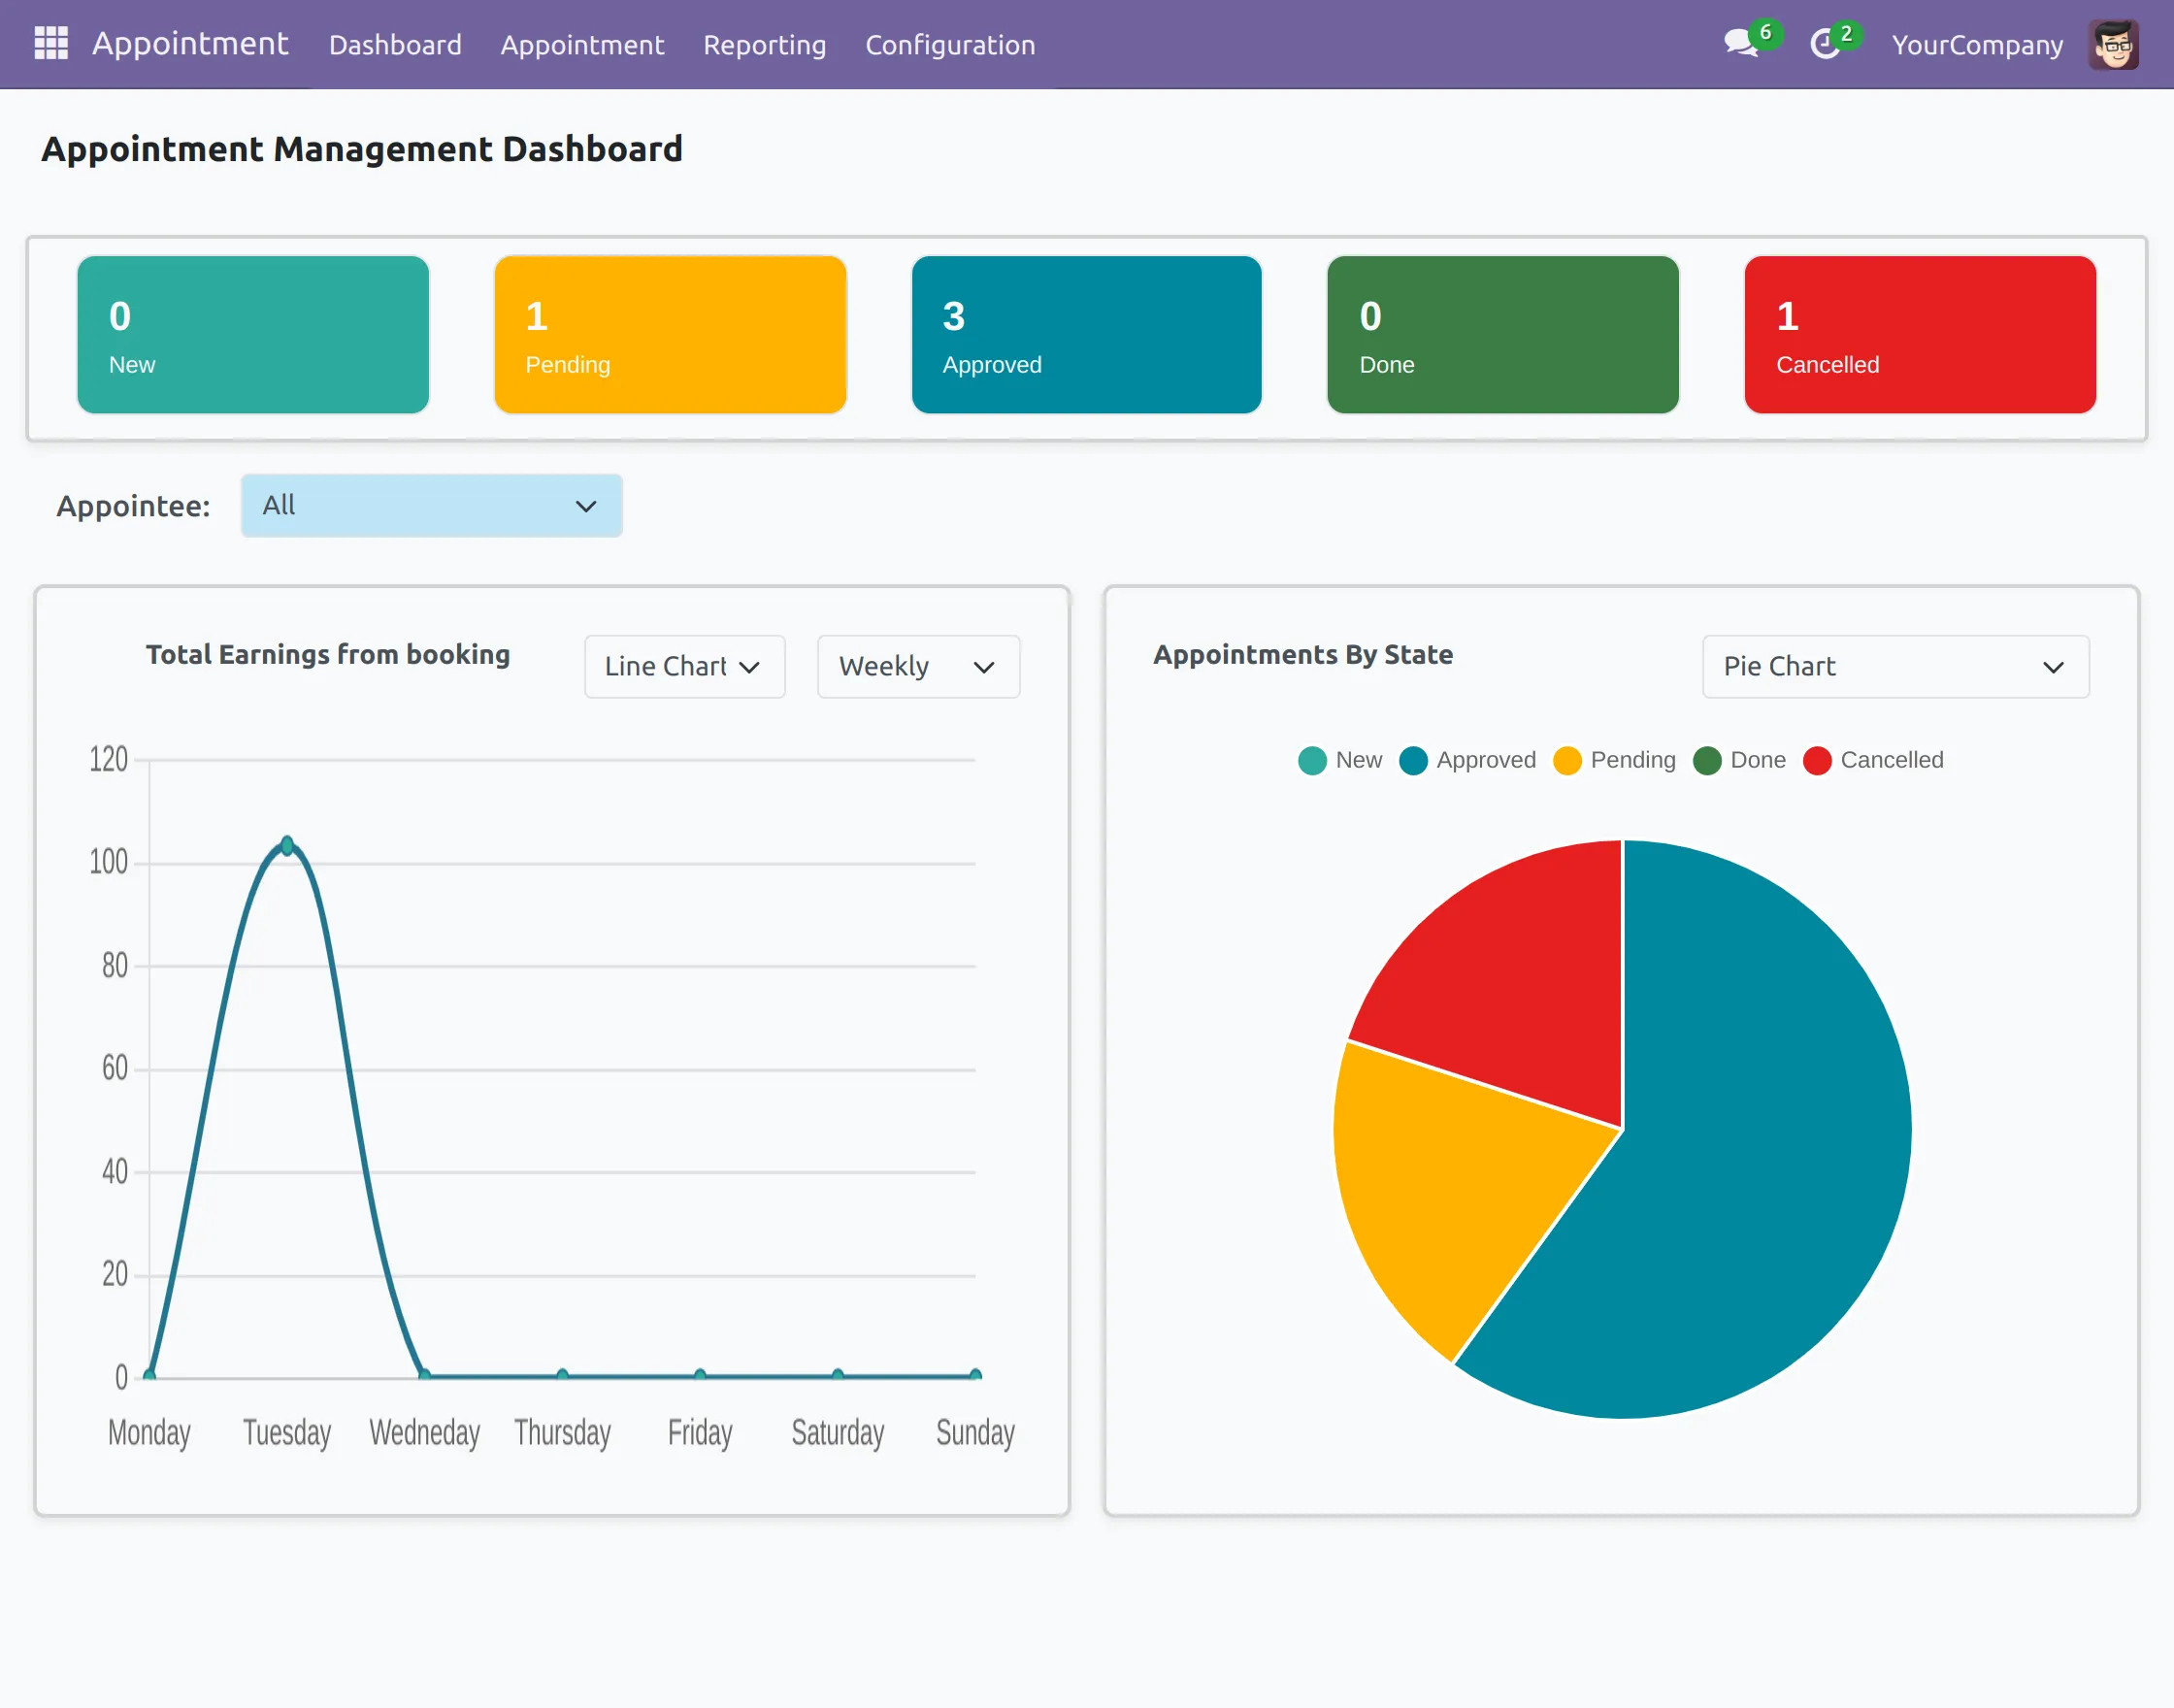
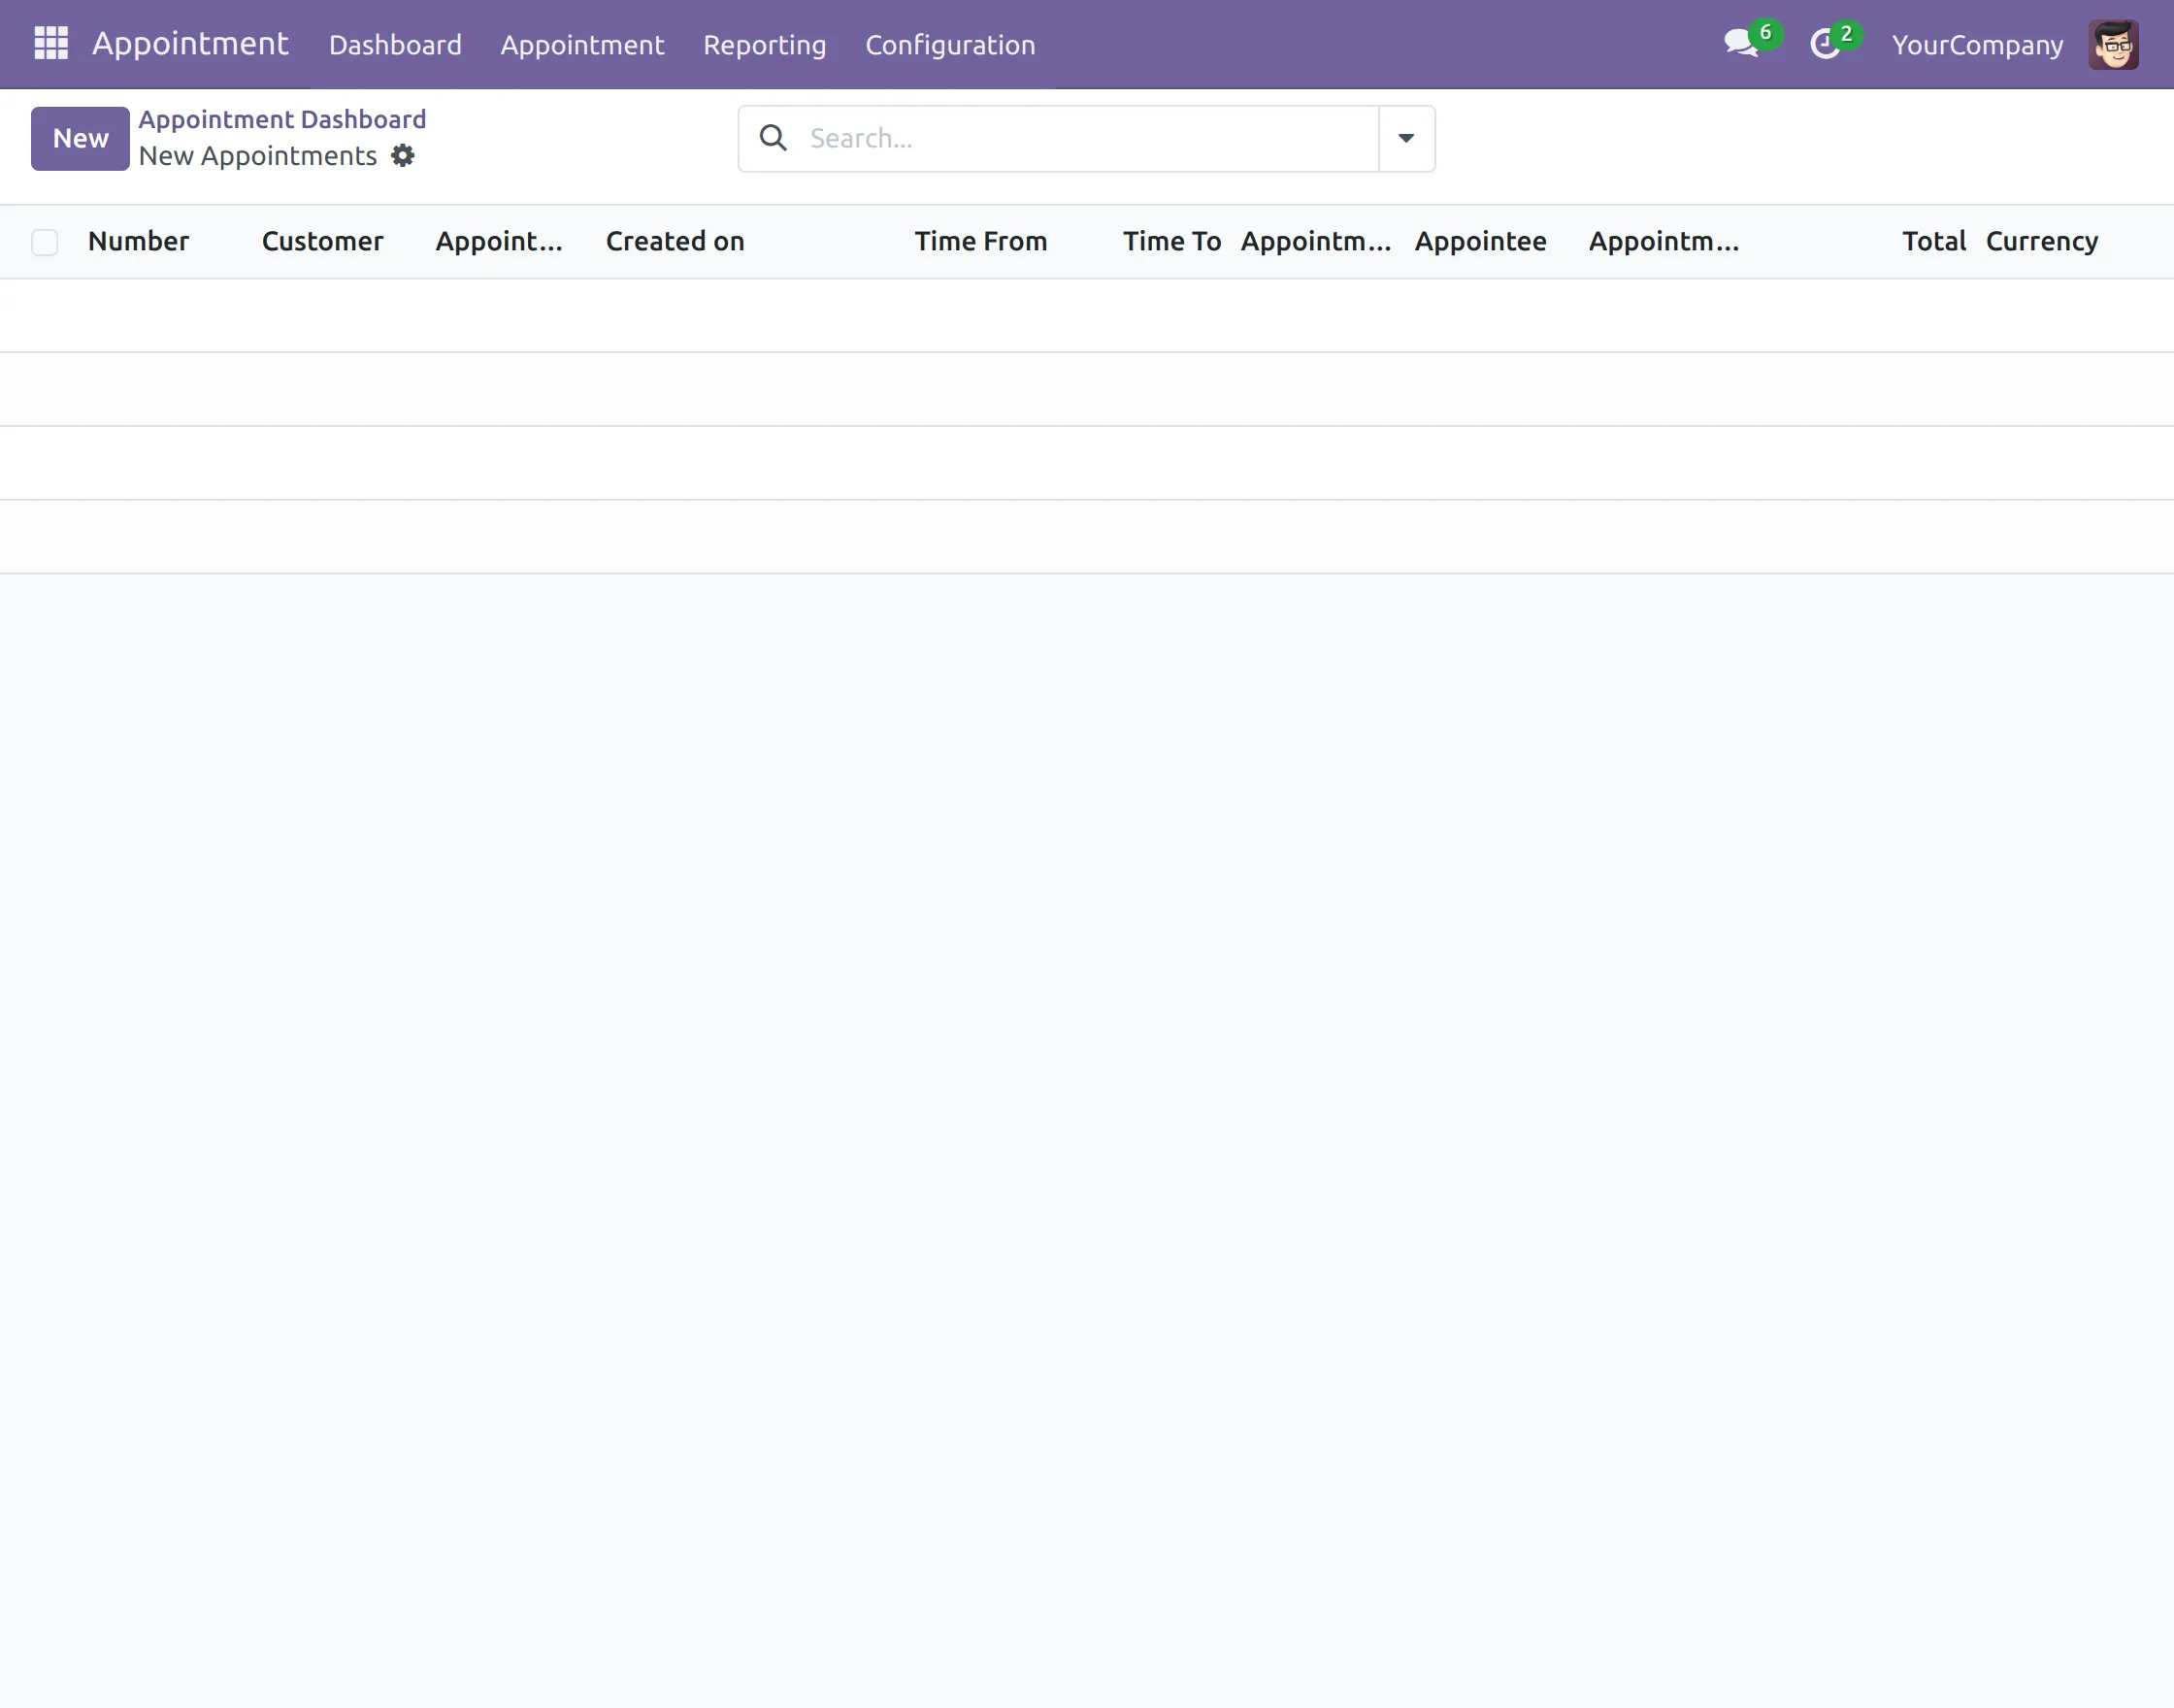
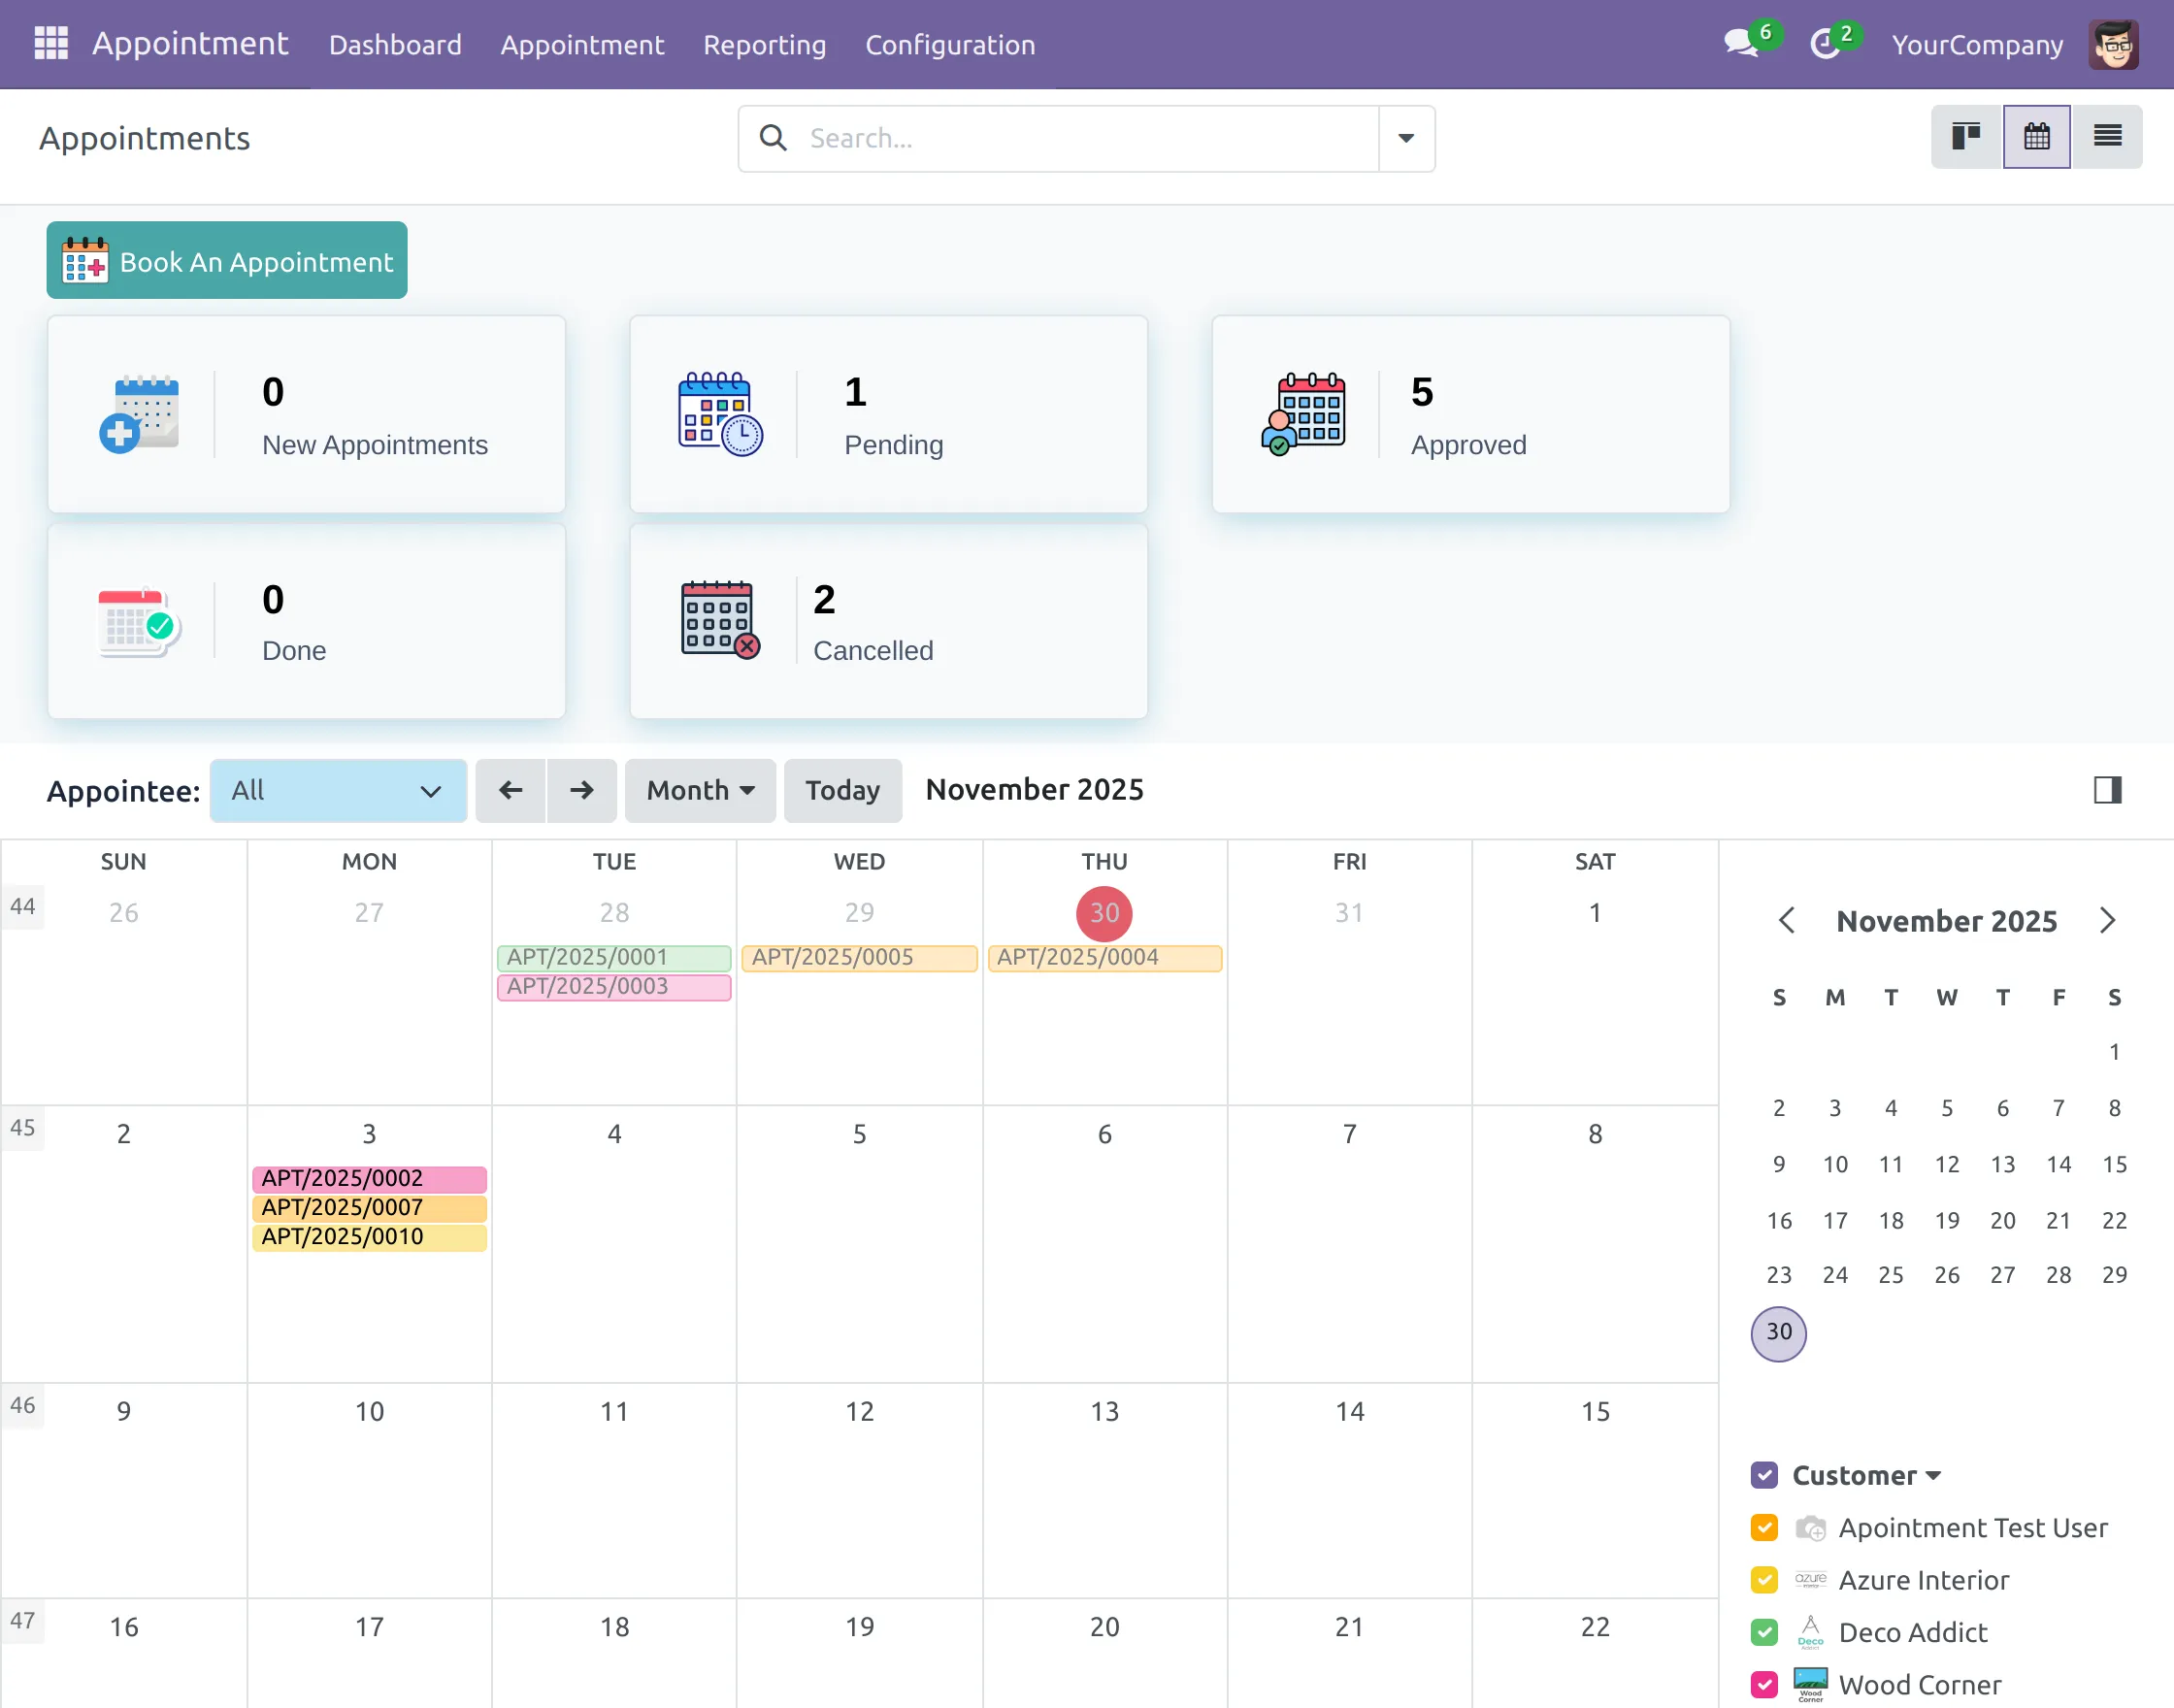
2. Next, open the Appointment Dashboard. The dashboard shows you all ‘ New, Pending, Approved, Done, and Cancelled.
With Graphs and Charts to help you with better visual representation.
3. After that, locate ‘Configuration> Appointees>Create’ and fill in the form with every detail of the appointee.
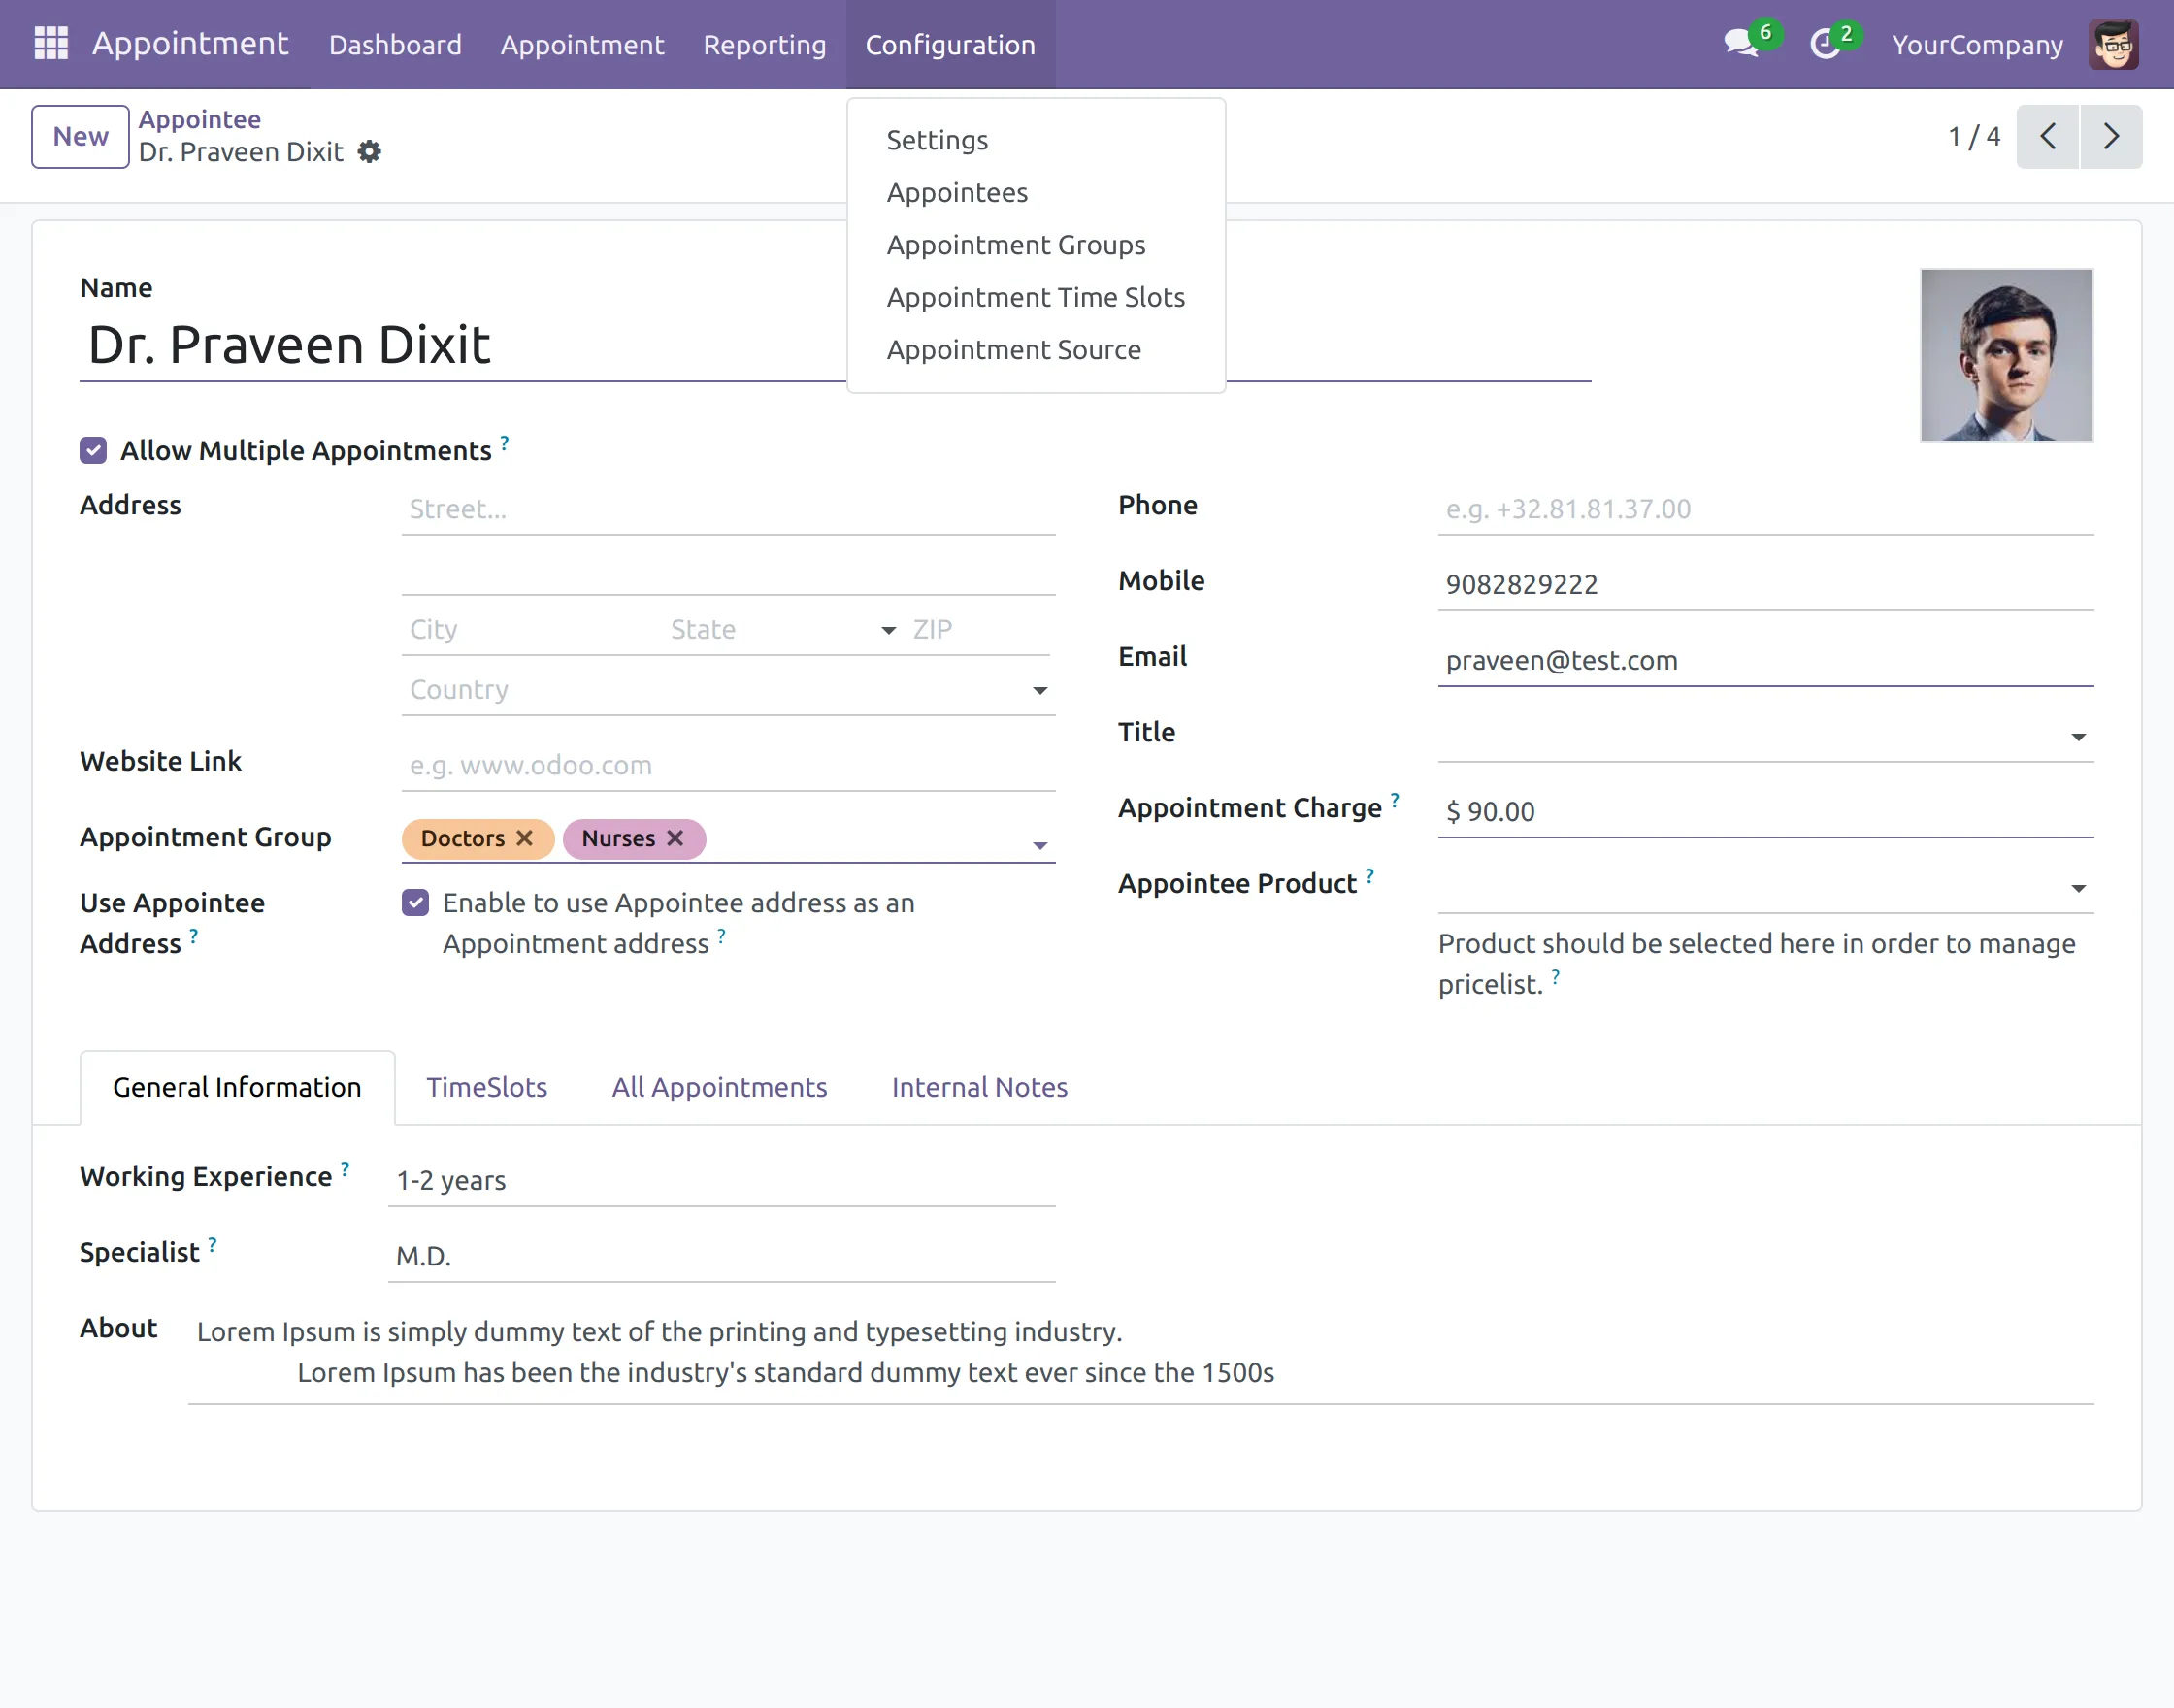
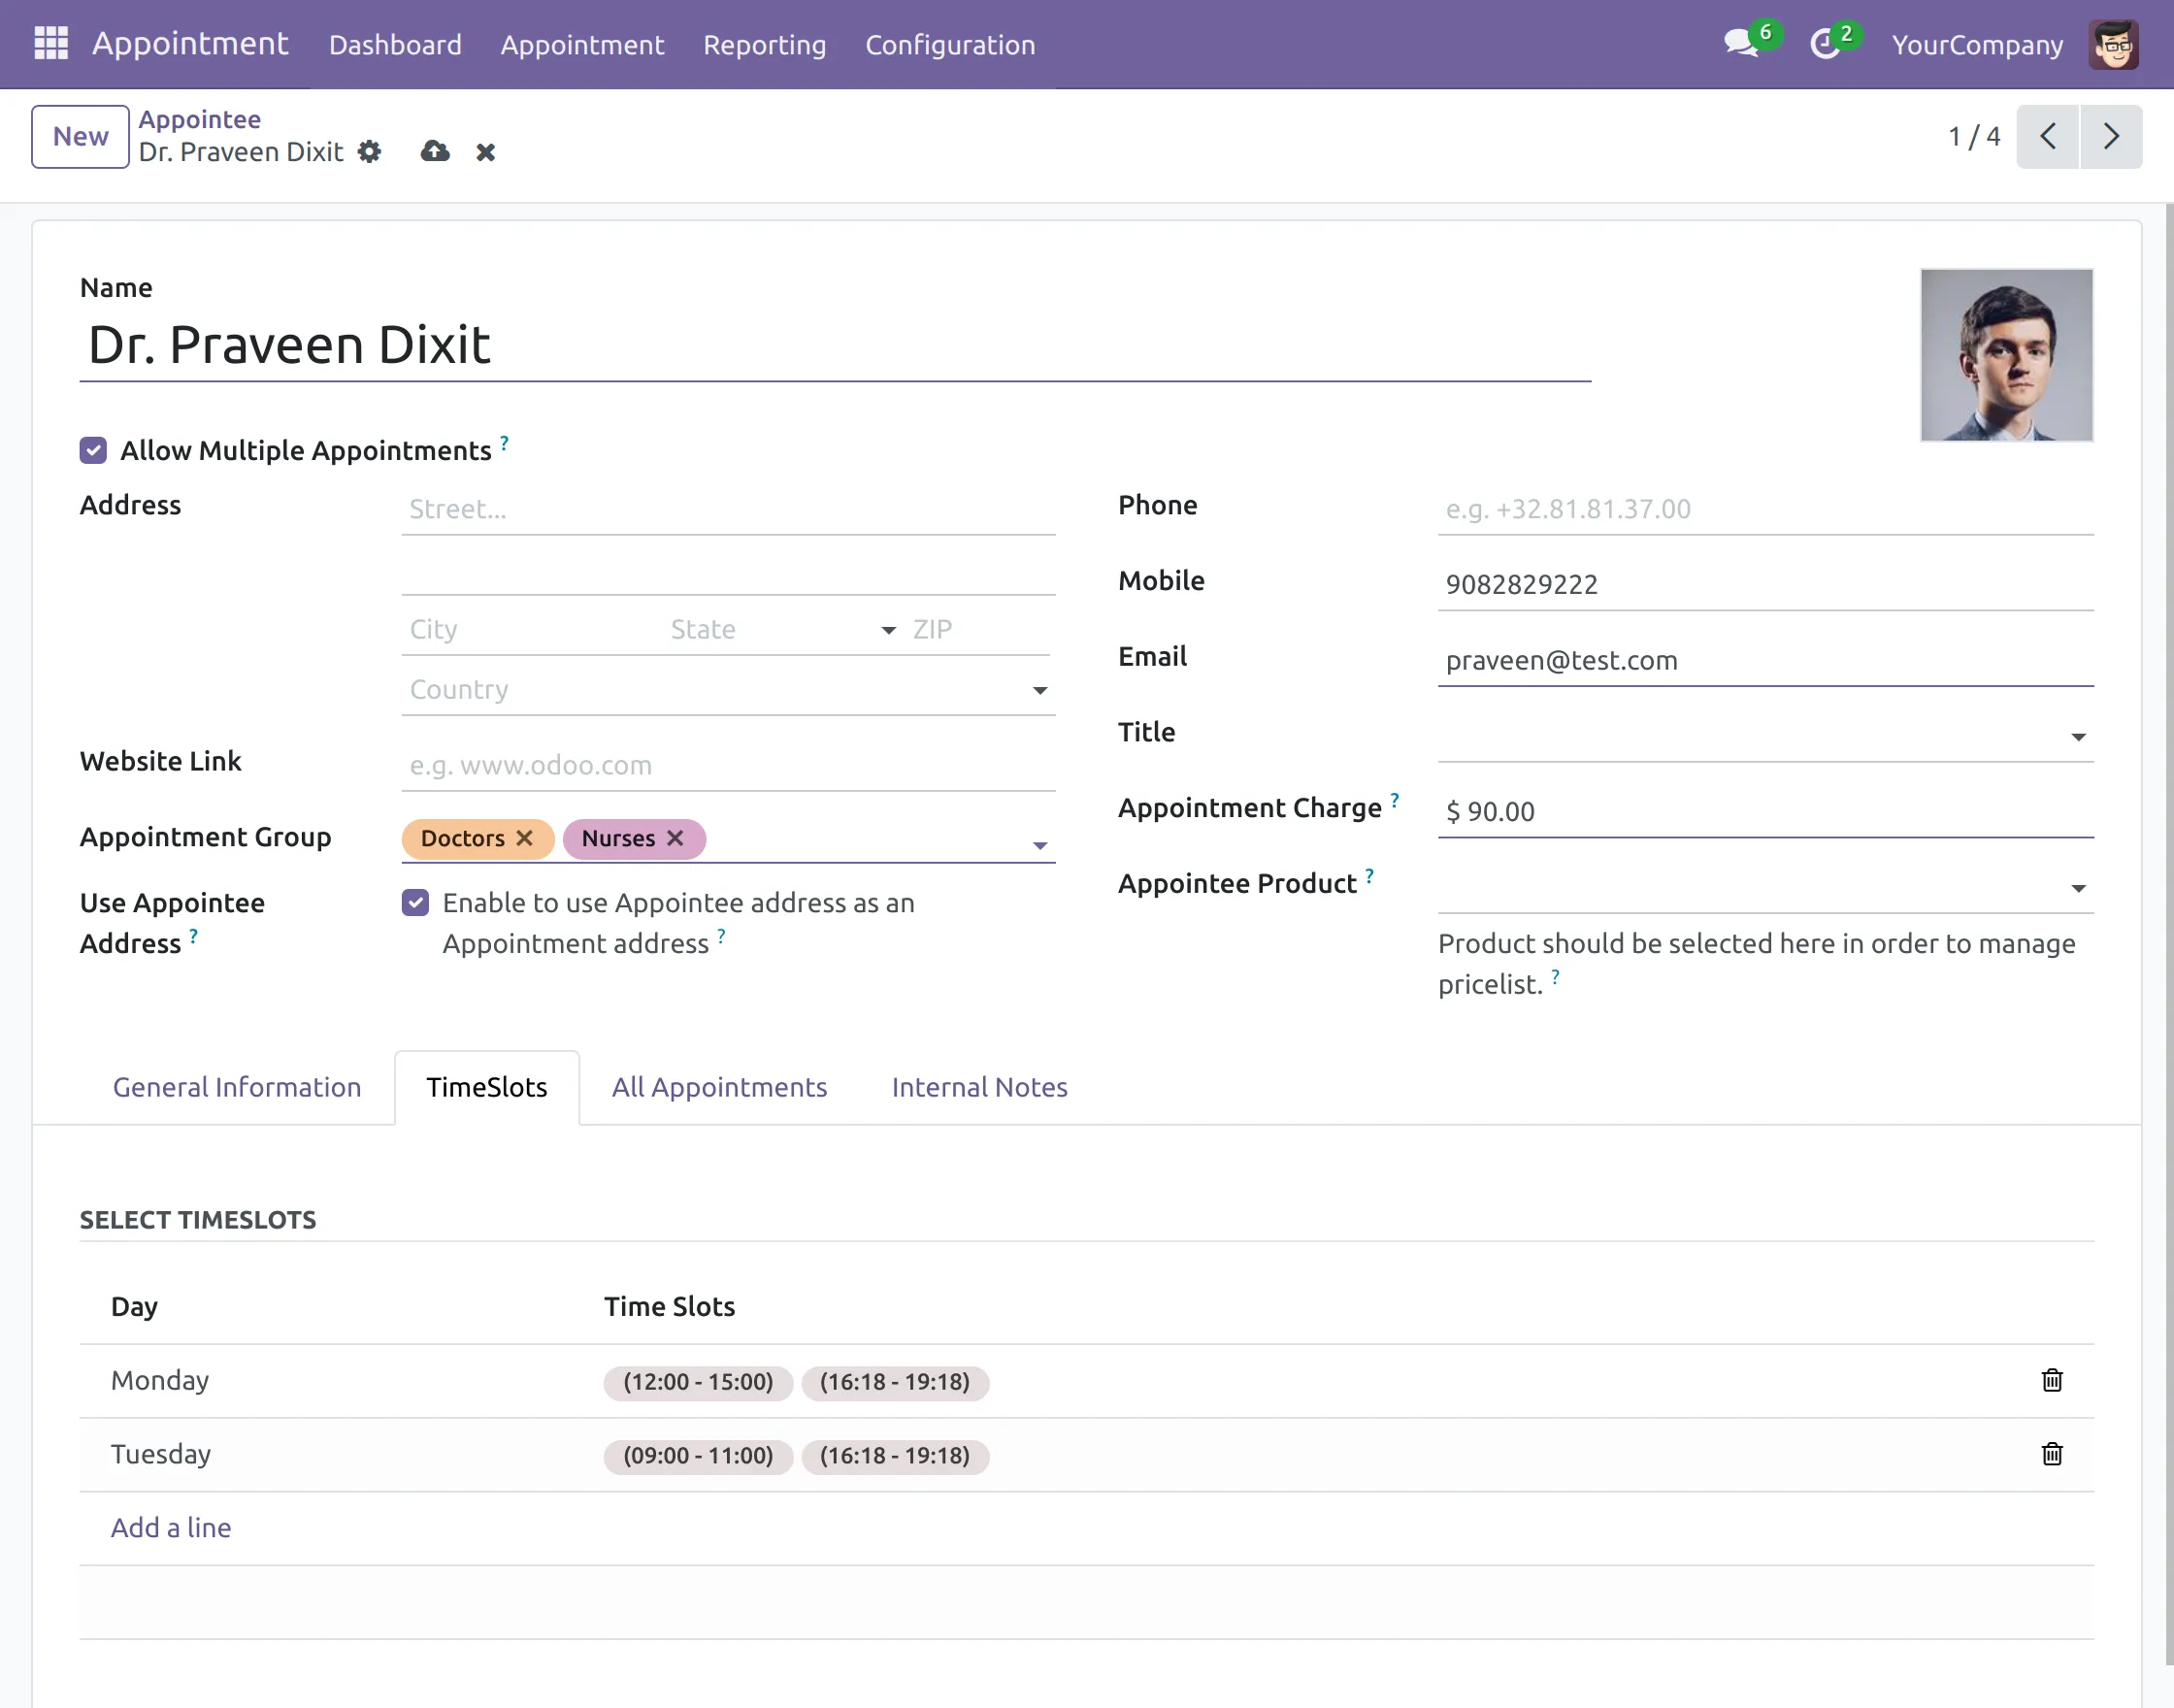
4. Now, move to the ‘TimesSlots’ tab and configure the appointment timings of the doctor.
In the ‘All Appointment’ tab, you can view every appointment of that particular user.
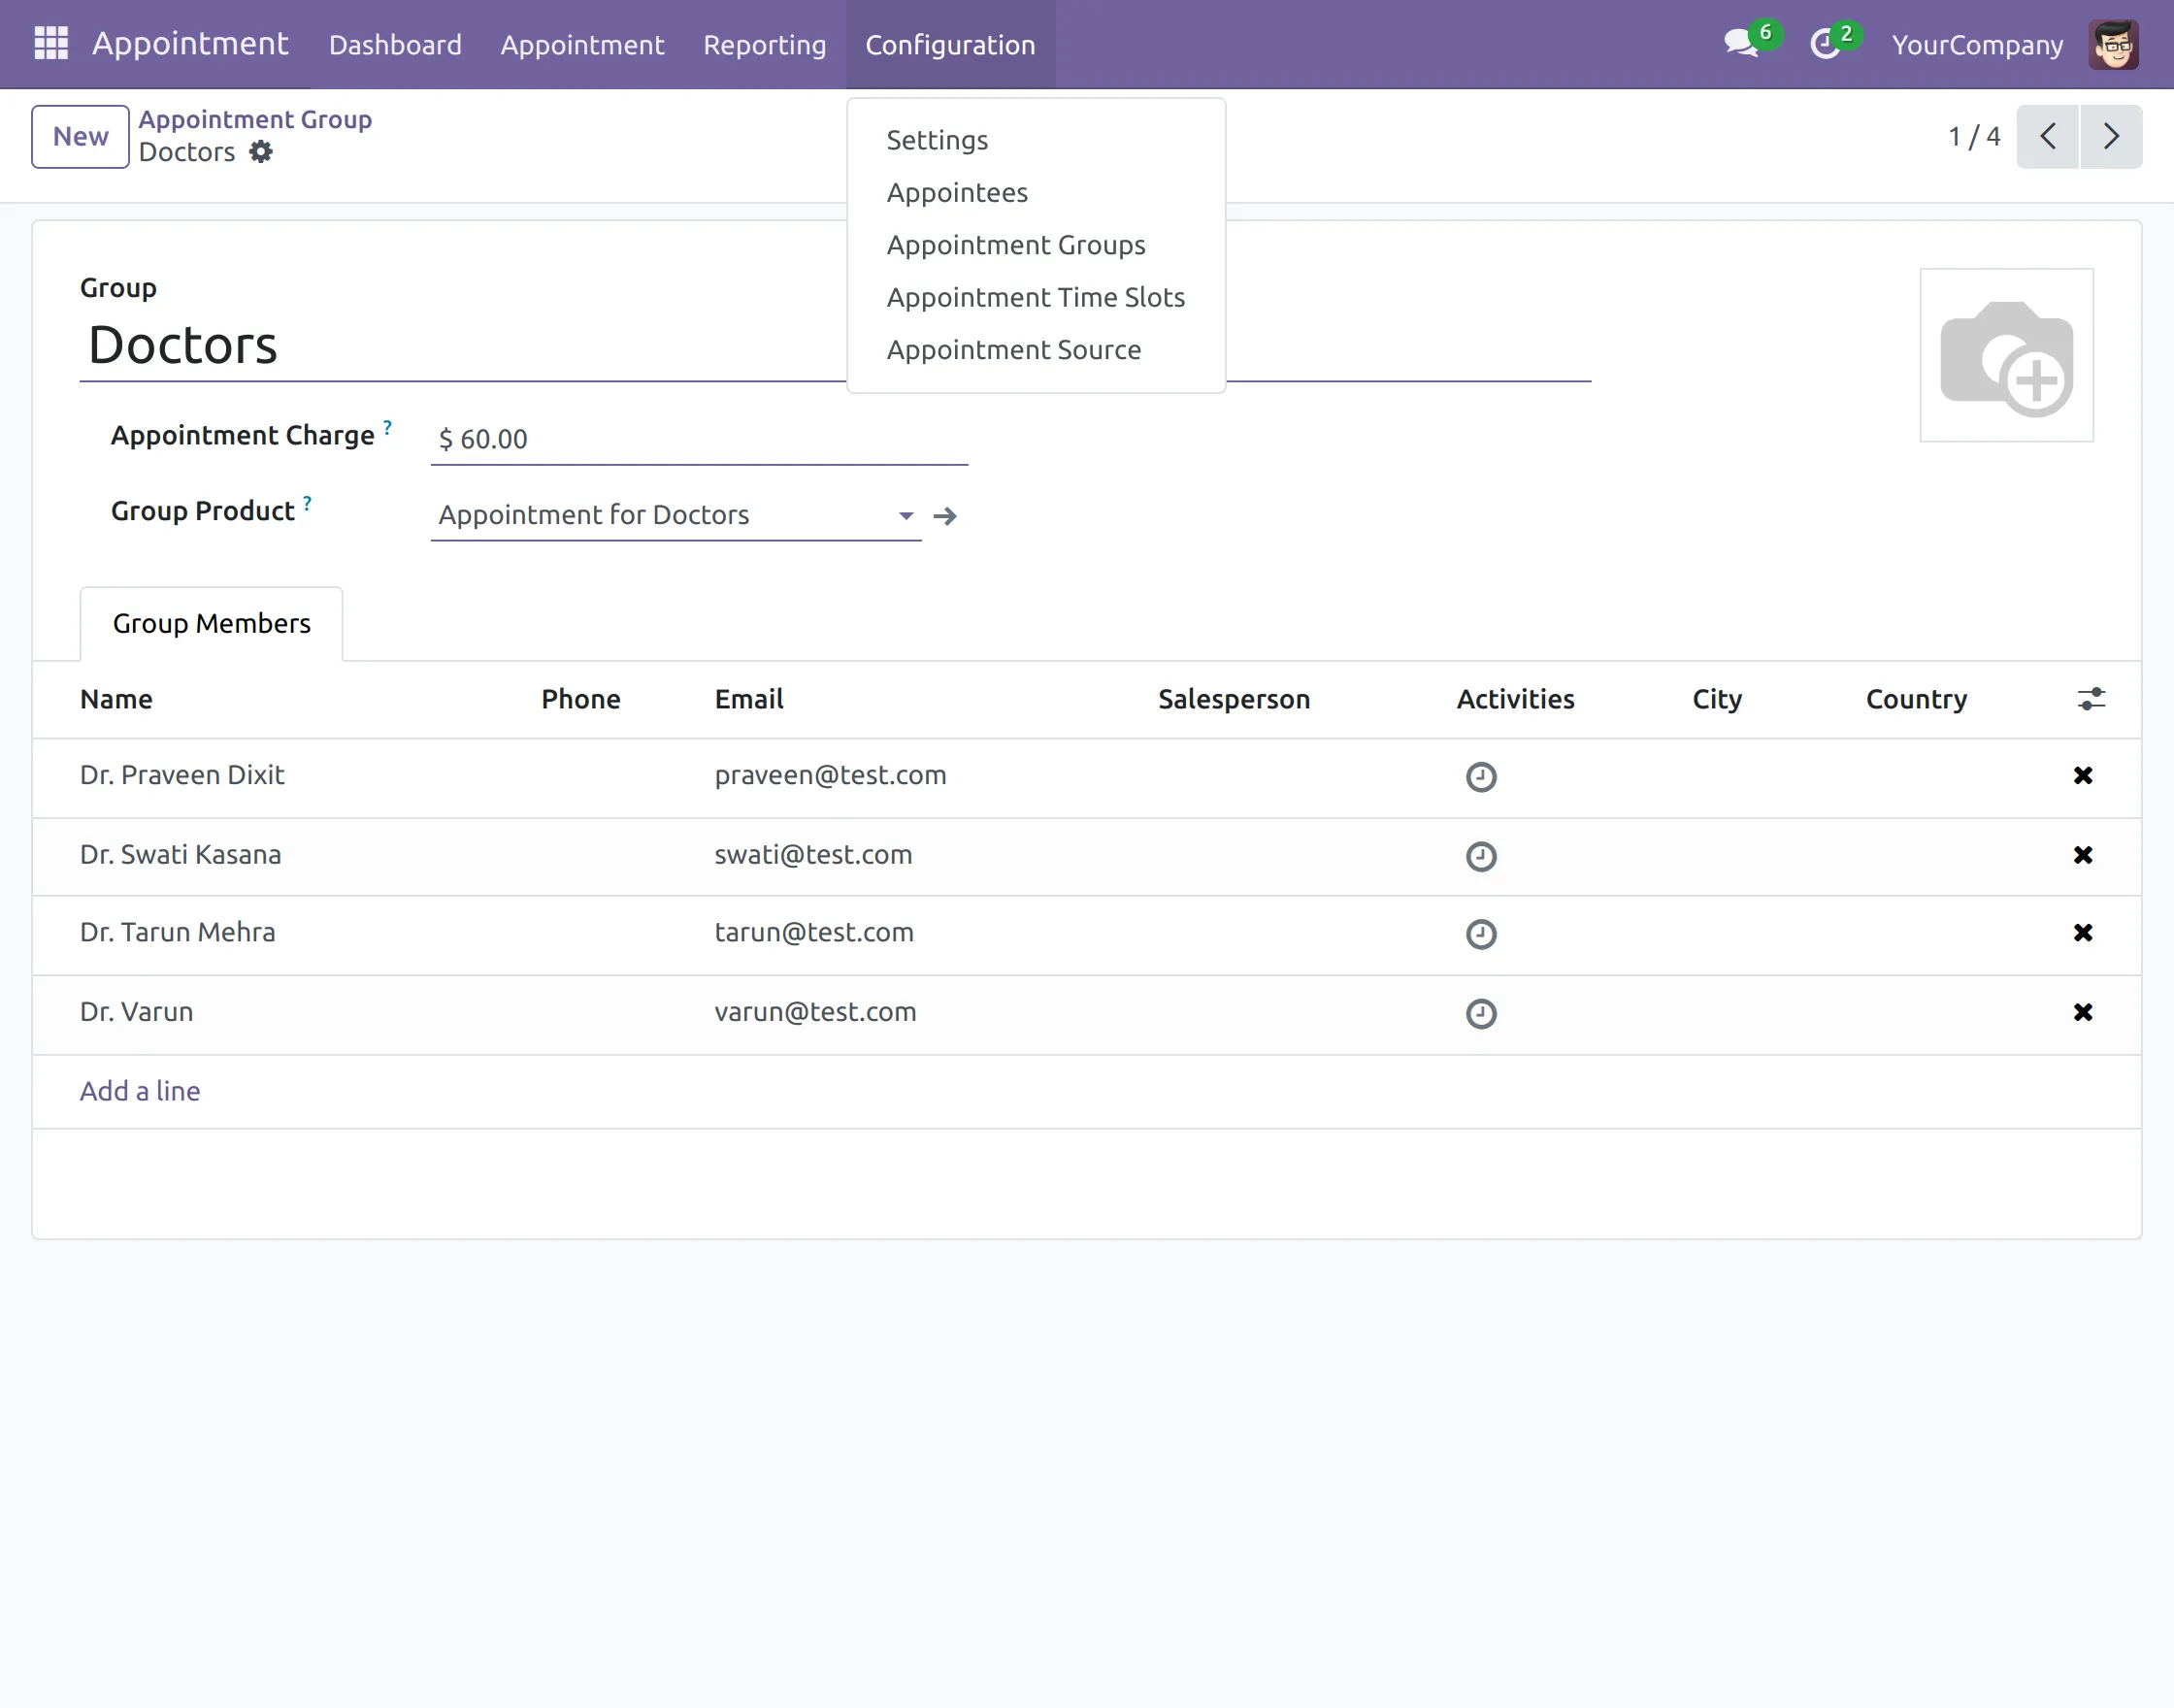
5. Next, go to ‘Configuration> Appointment Groups> Create,’ and on the page, fill in the details, and by the ‘Add a Line’ option, add group members.
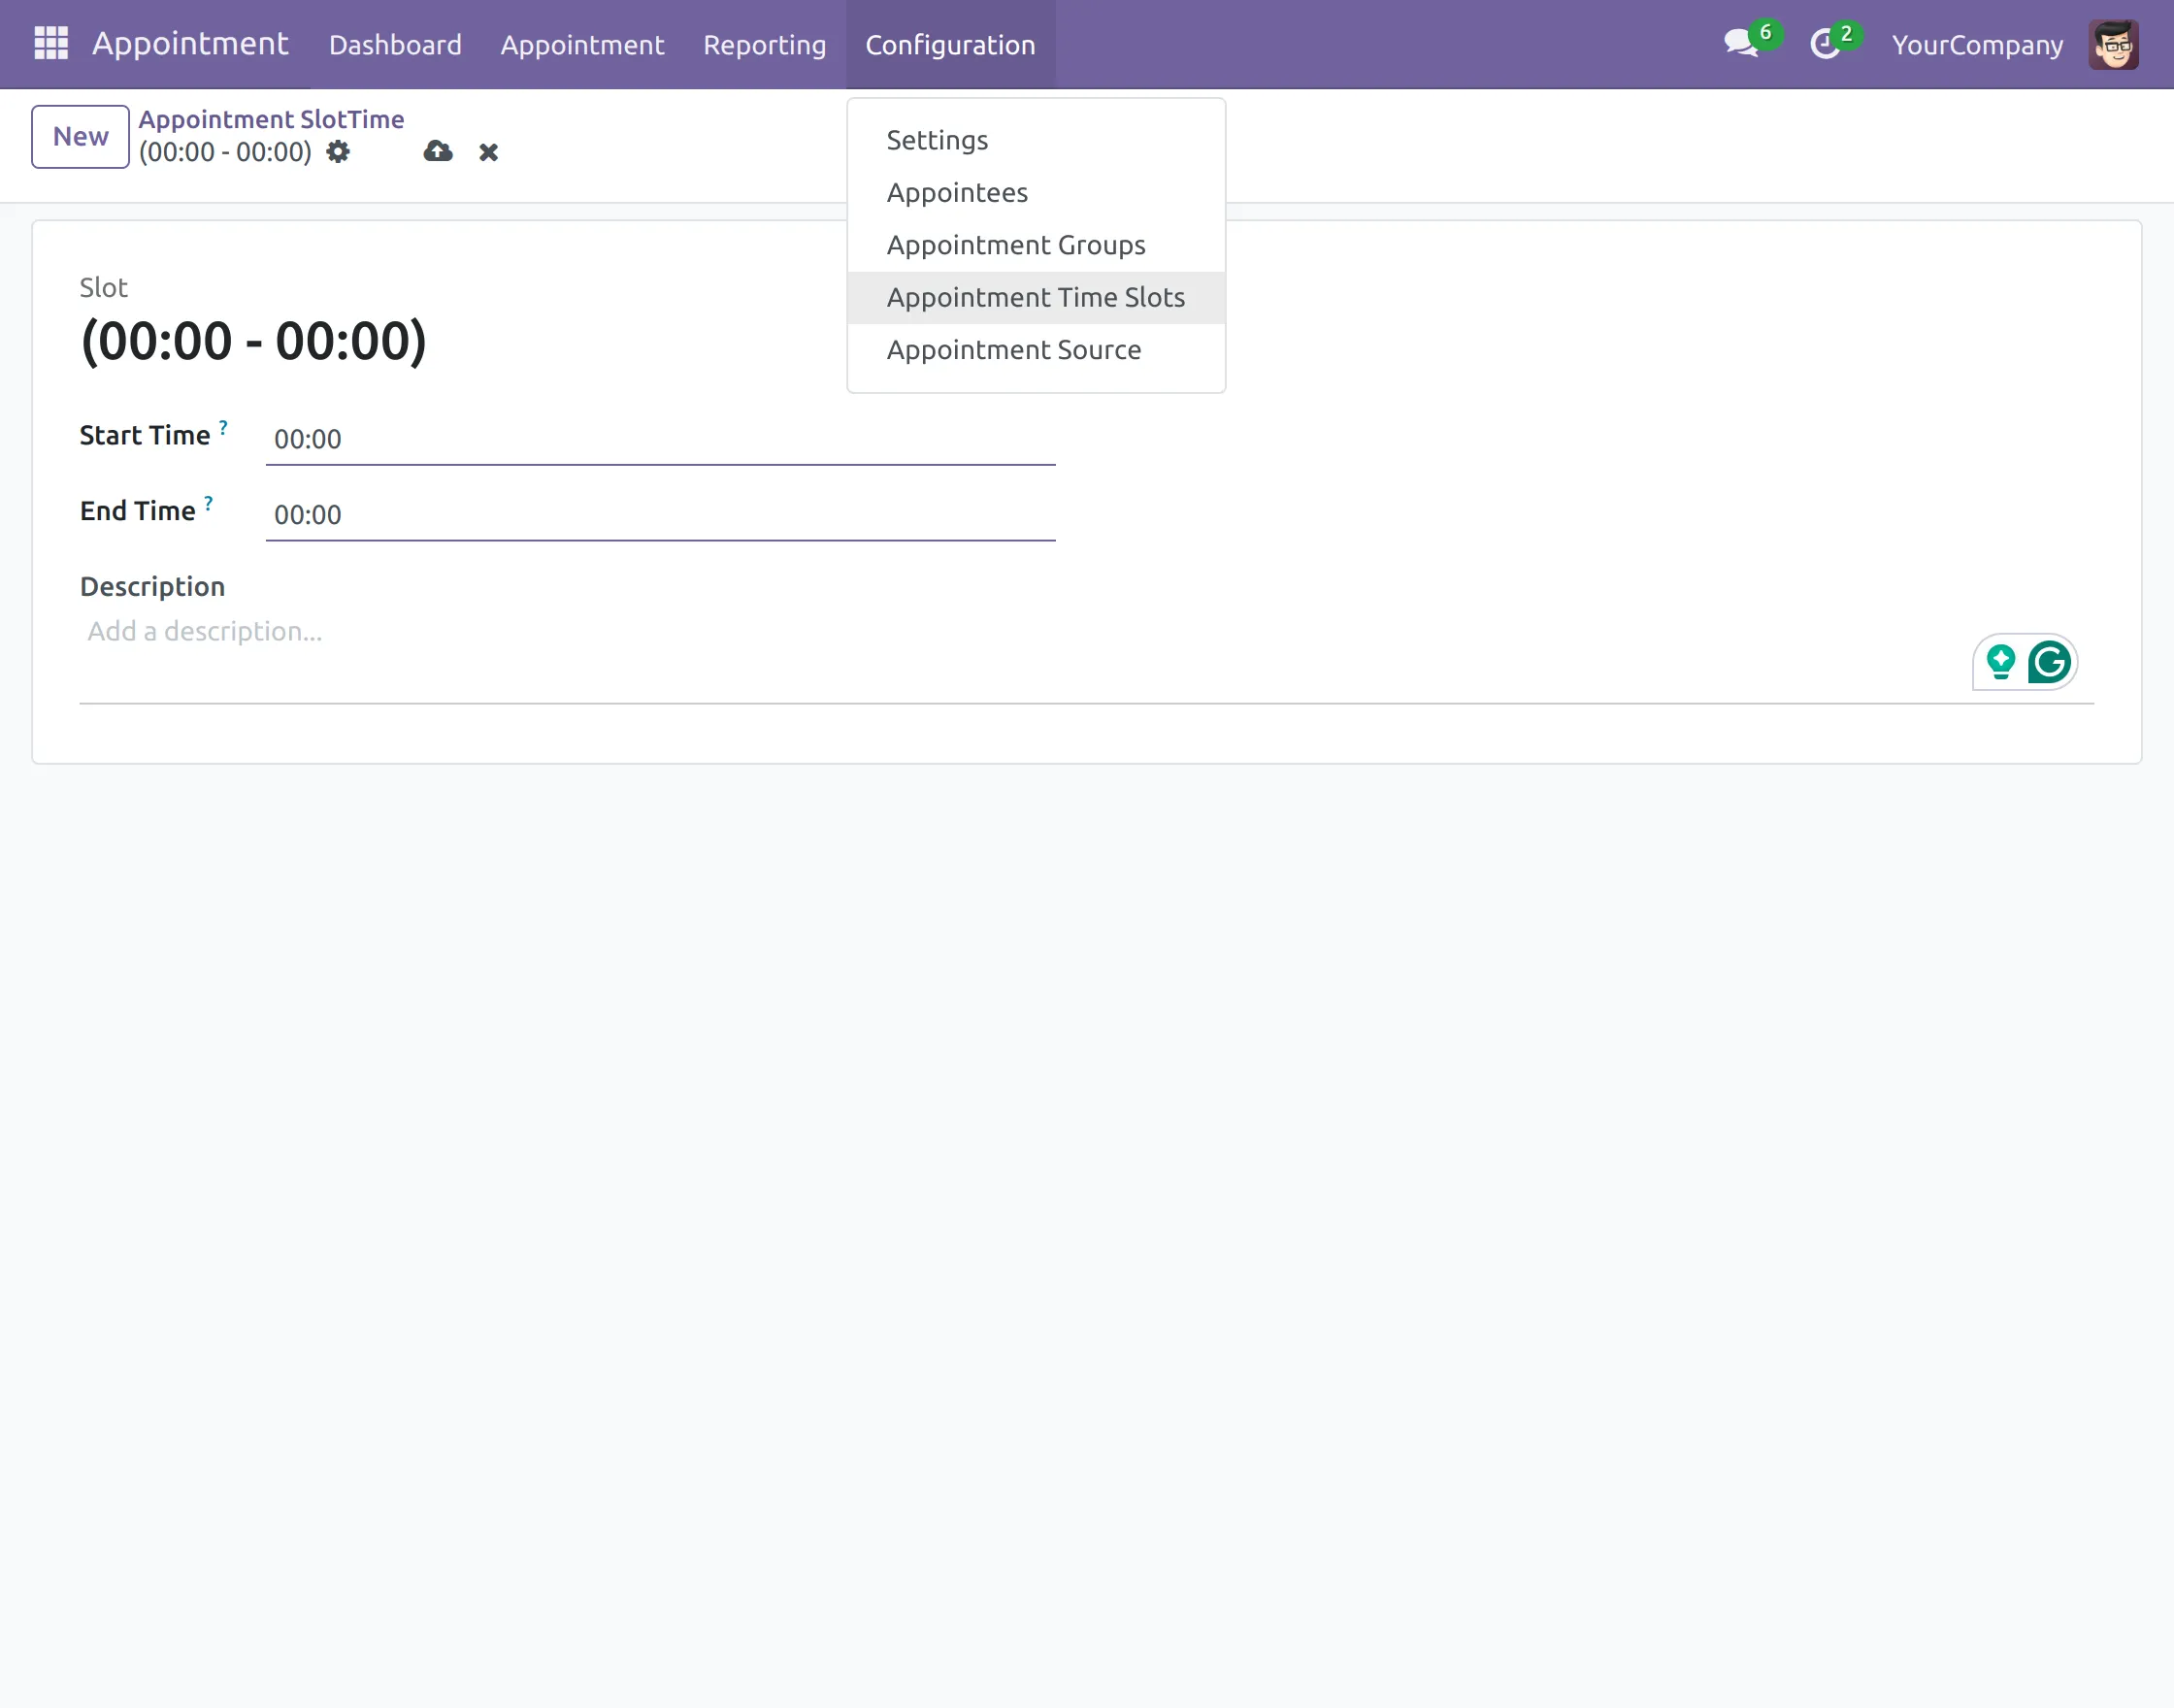
6. After that, open ‘Configuration> Appointment Slot> New’ and fill in the details in the form to create time slots for appointments.
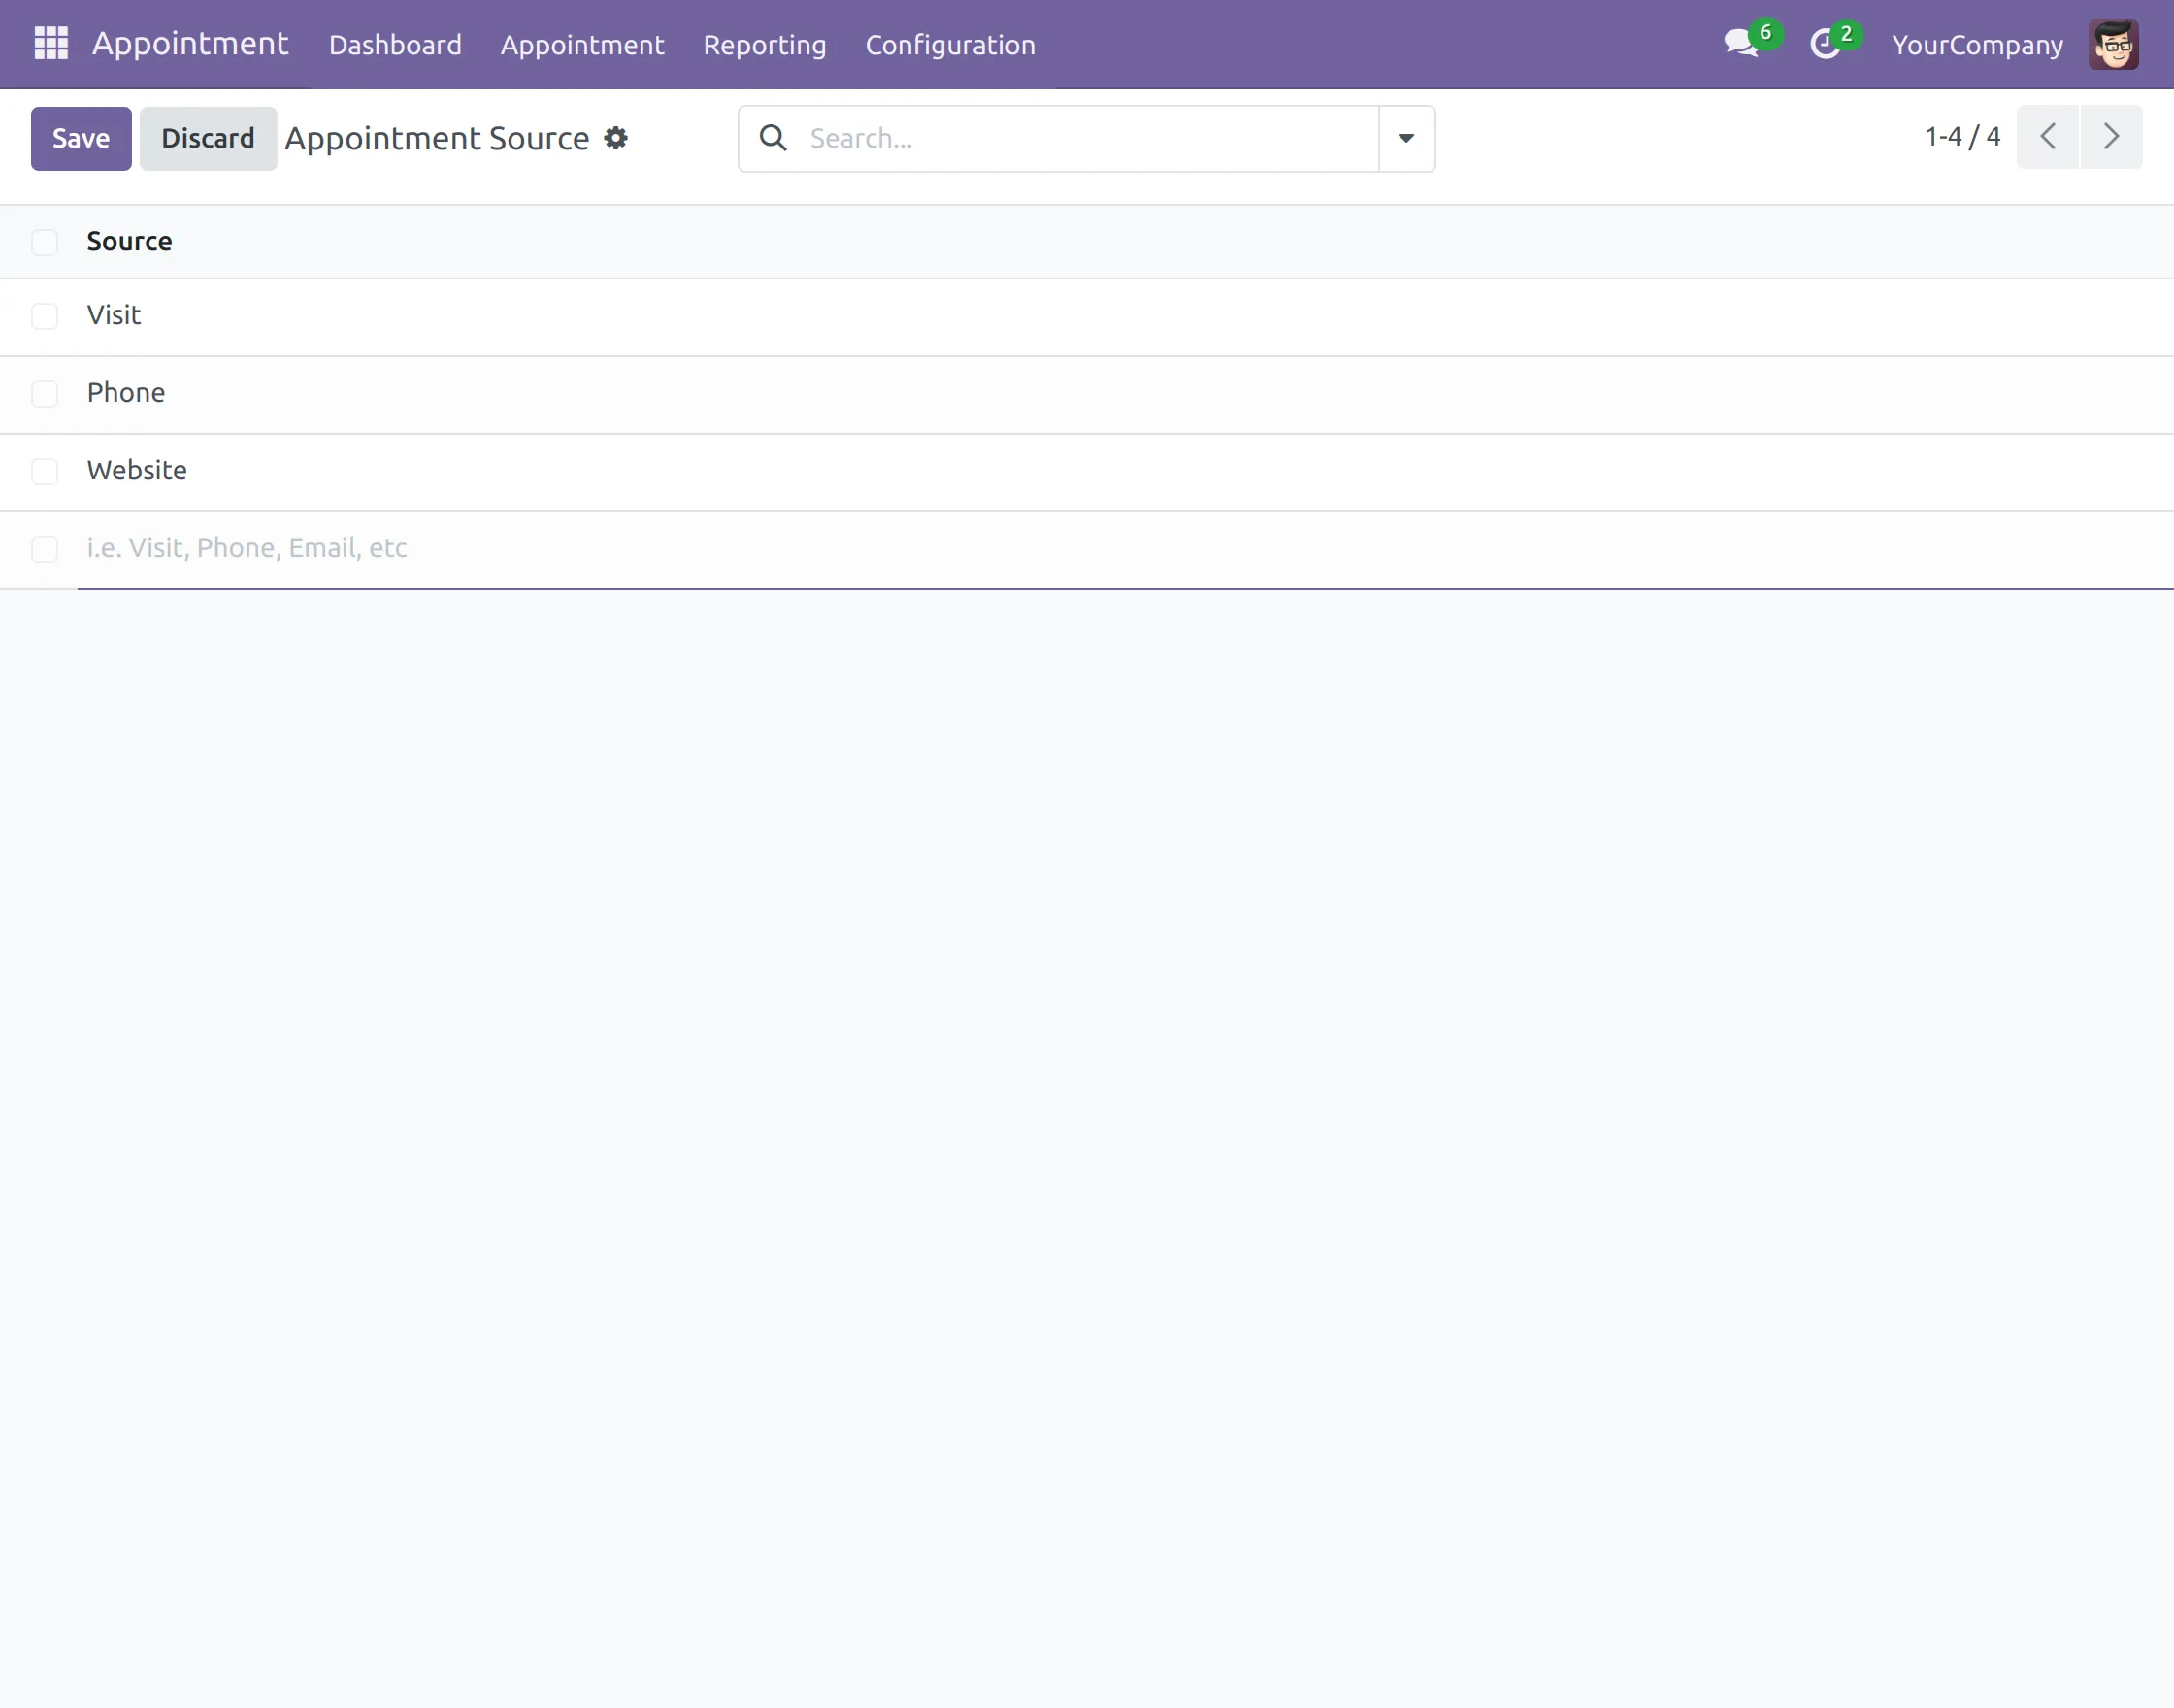
7.Once done, go to ‘Configuration> Appointment Source> New>Save’ and create a source by filling in the detail.
BOOKING AN APPOINTMENT
8. Open the Appointment Dashboard and click ‘New’>’New Appointment’
9. In the form, fill in ‘Customer, Appointment date, Appointment with (Appointment Group), Appointee, Source, and TimeSlot.’ In the ‘Charge’ tab, click ‘Add a Line’ and select the product or service required.
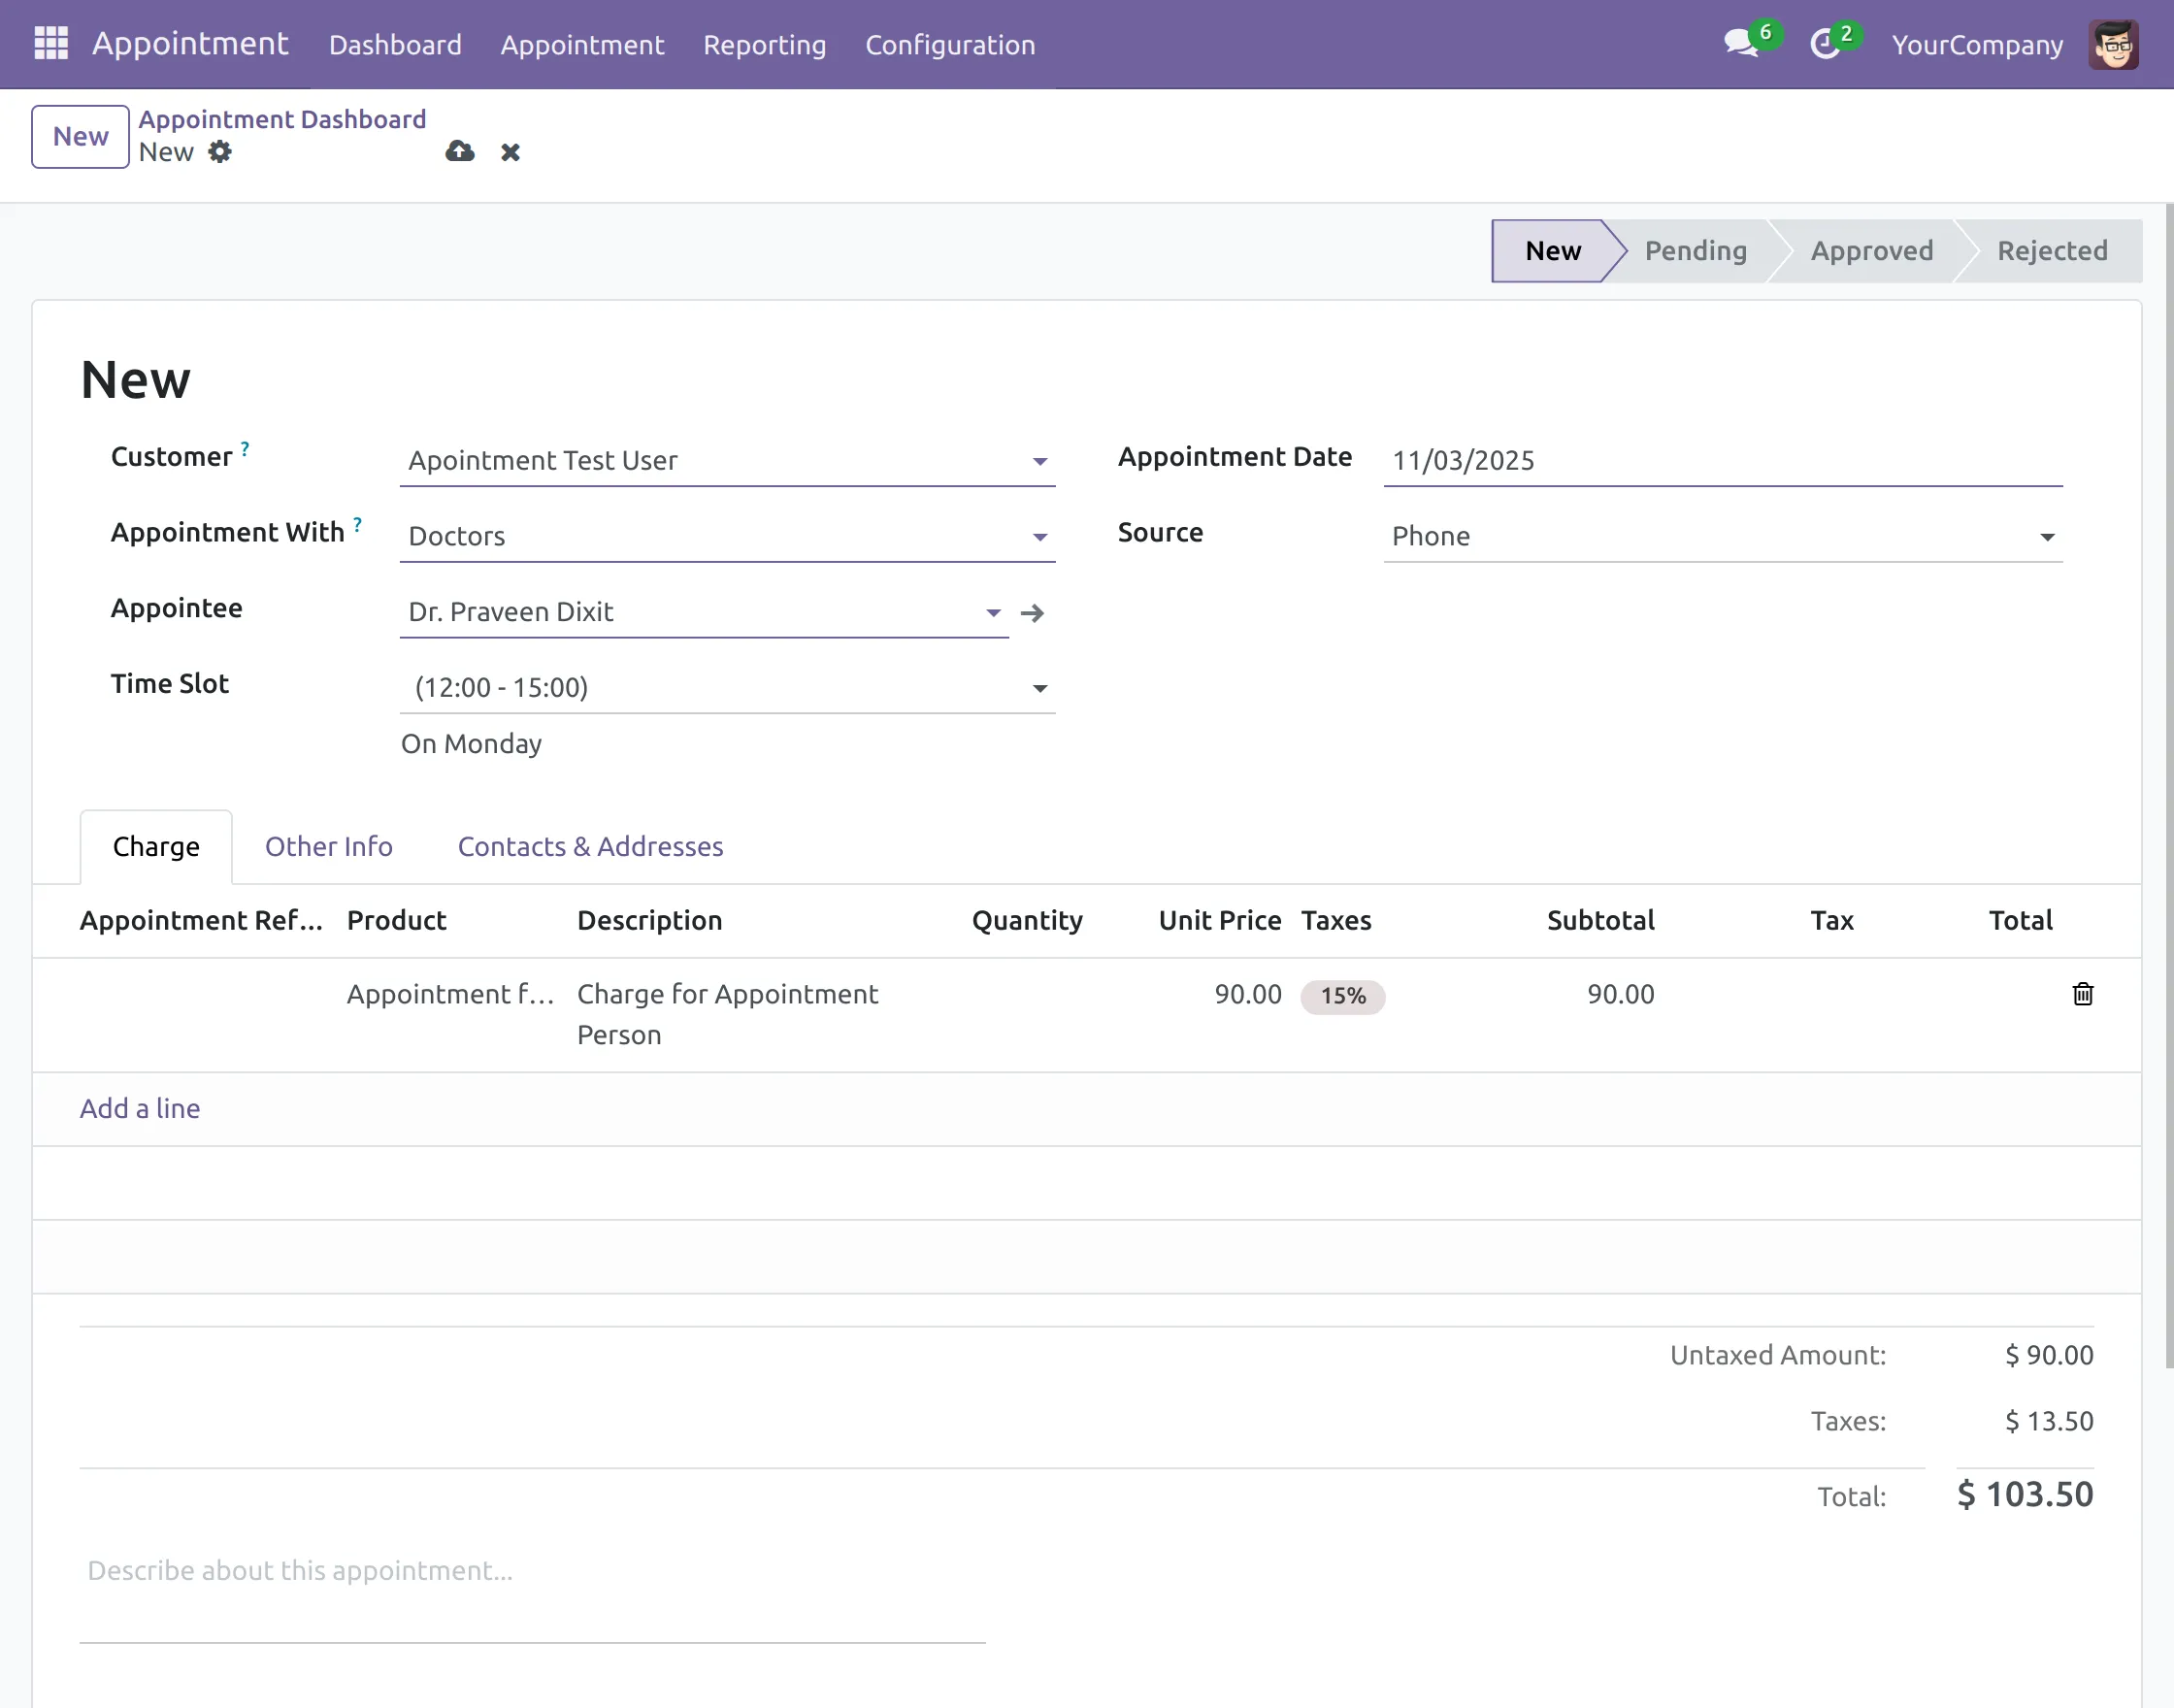
10. After saving, you can see the total amount at the bottom part of the form.
Set to Pending button will set the appointment in a pending state.
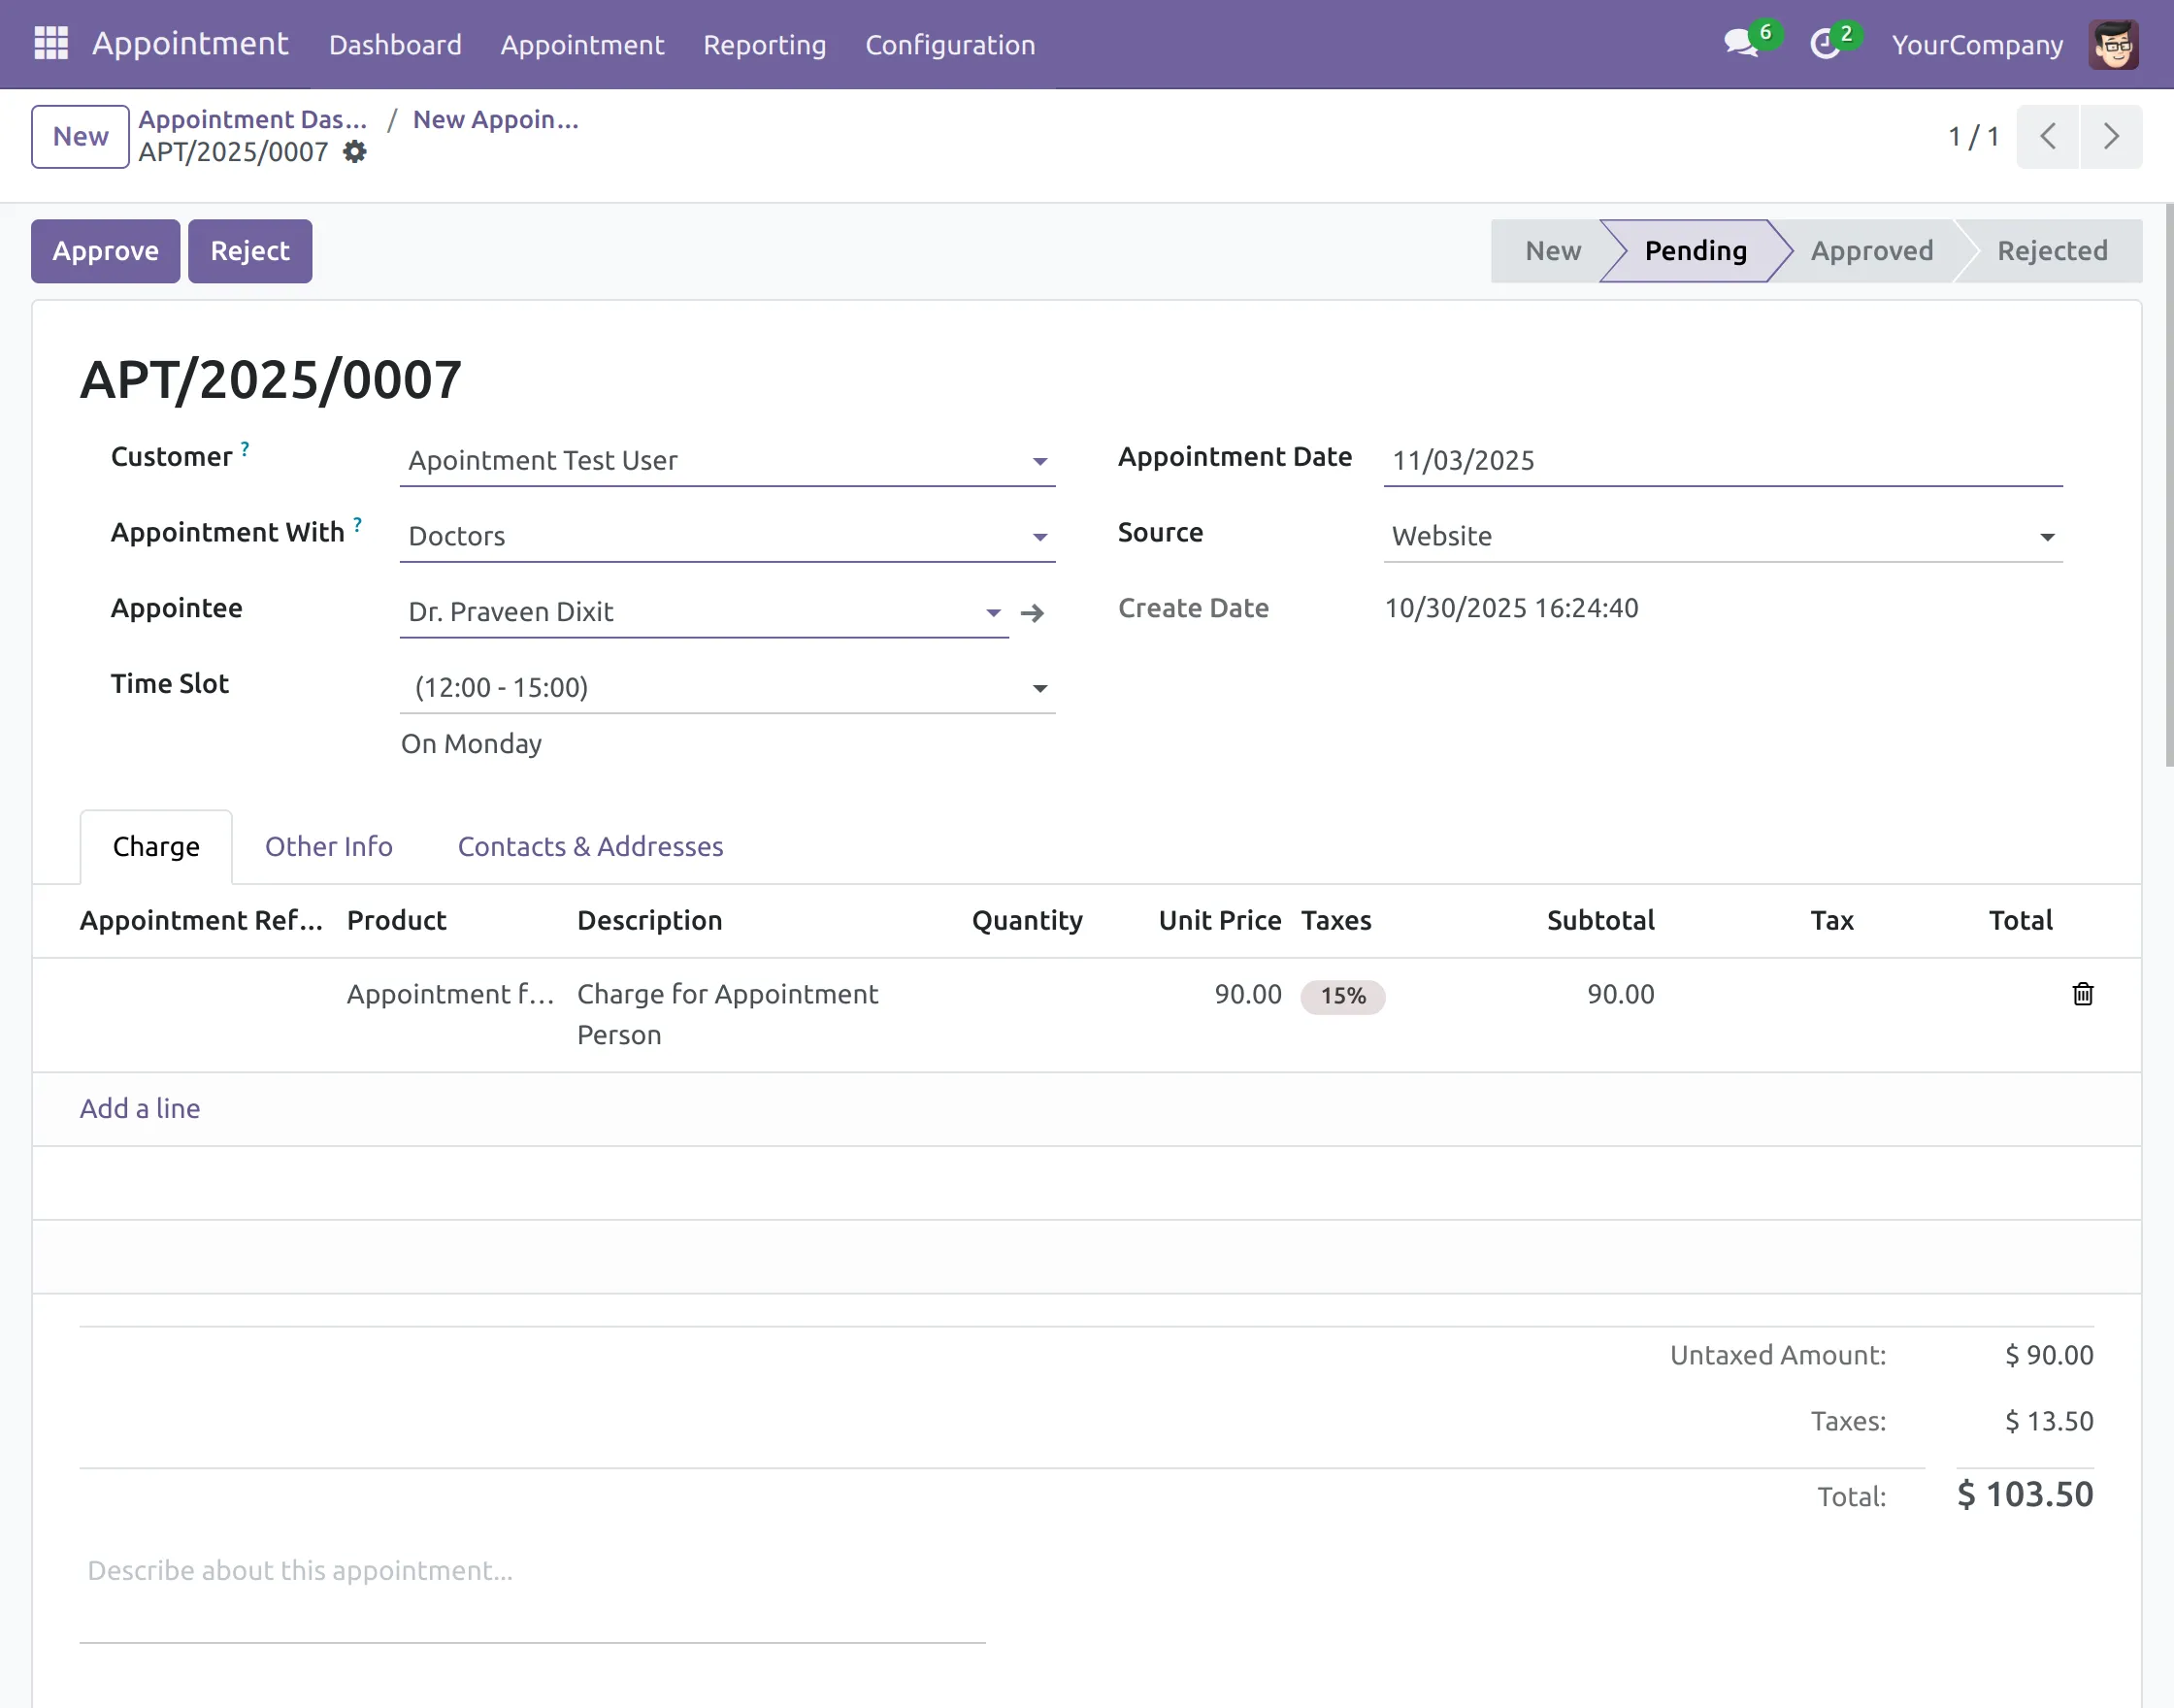
Approve simple accept the appointment request. Besides this, we will discuss the detailed approval flow in points 12-16.
Reject the customer’s request for an appointment, which we will discuss in points 17-18.
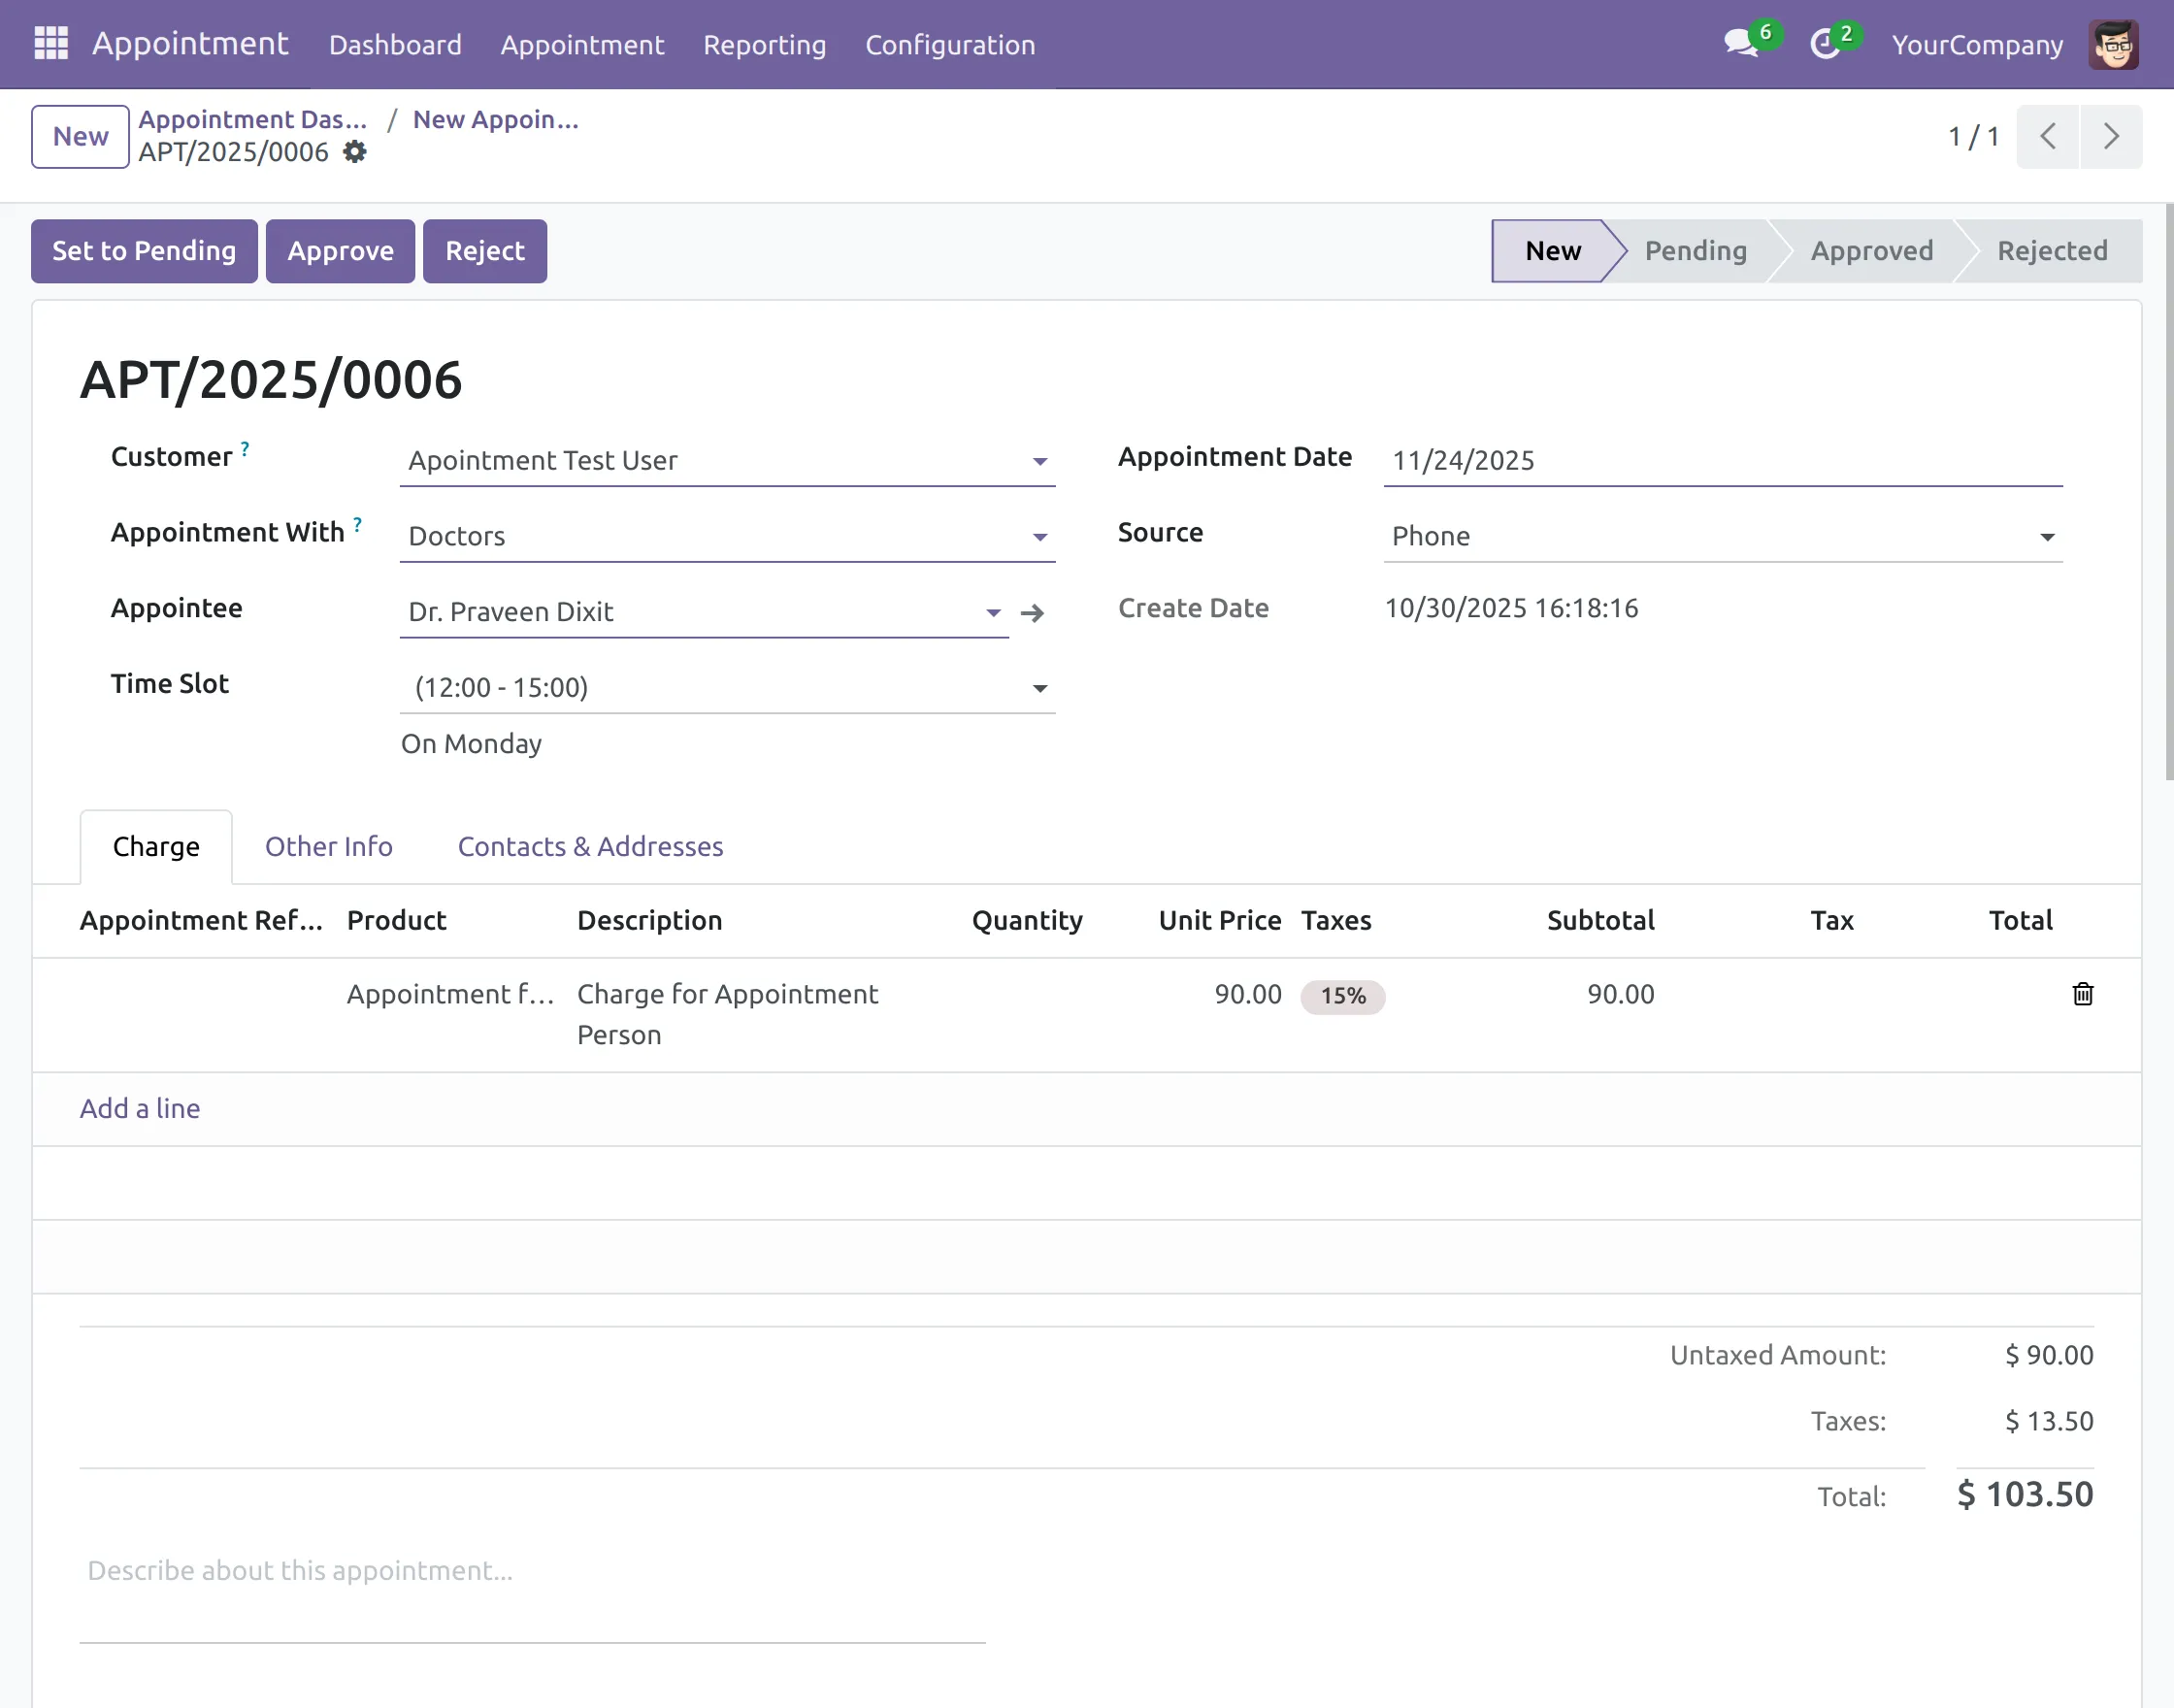
11. When we set an appointment to pending, we either approve or reject it.
APPROVING AN APPOINTMENT AND CREATING AN INVOICE
12. Now, accept the appointment by clicking the ‘Approve’ button.
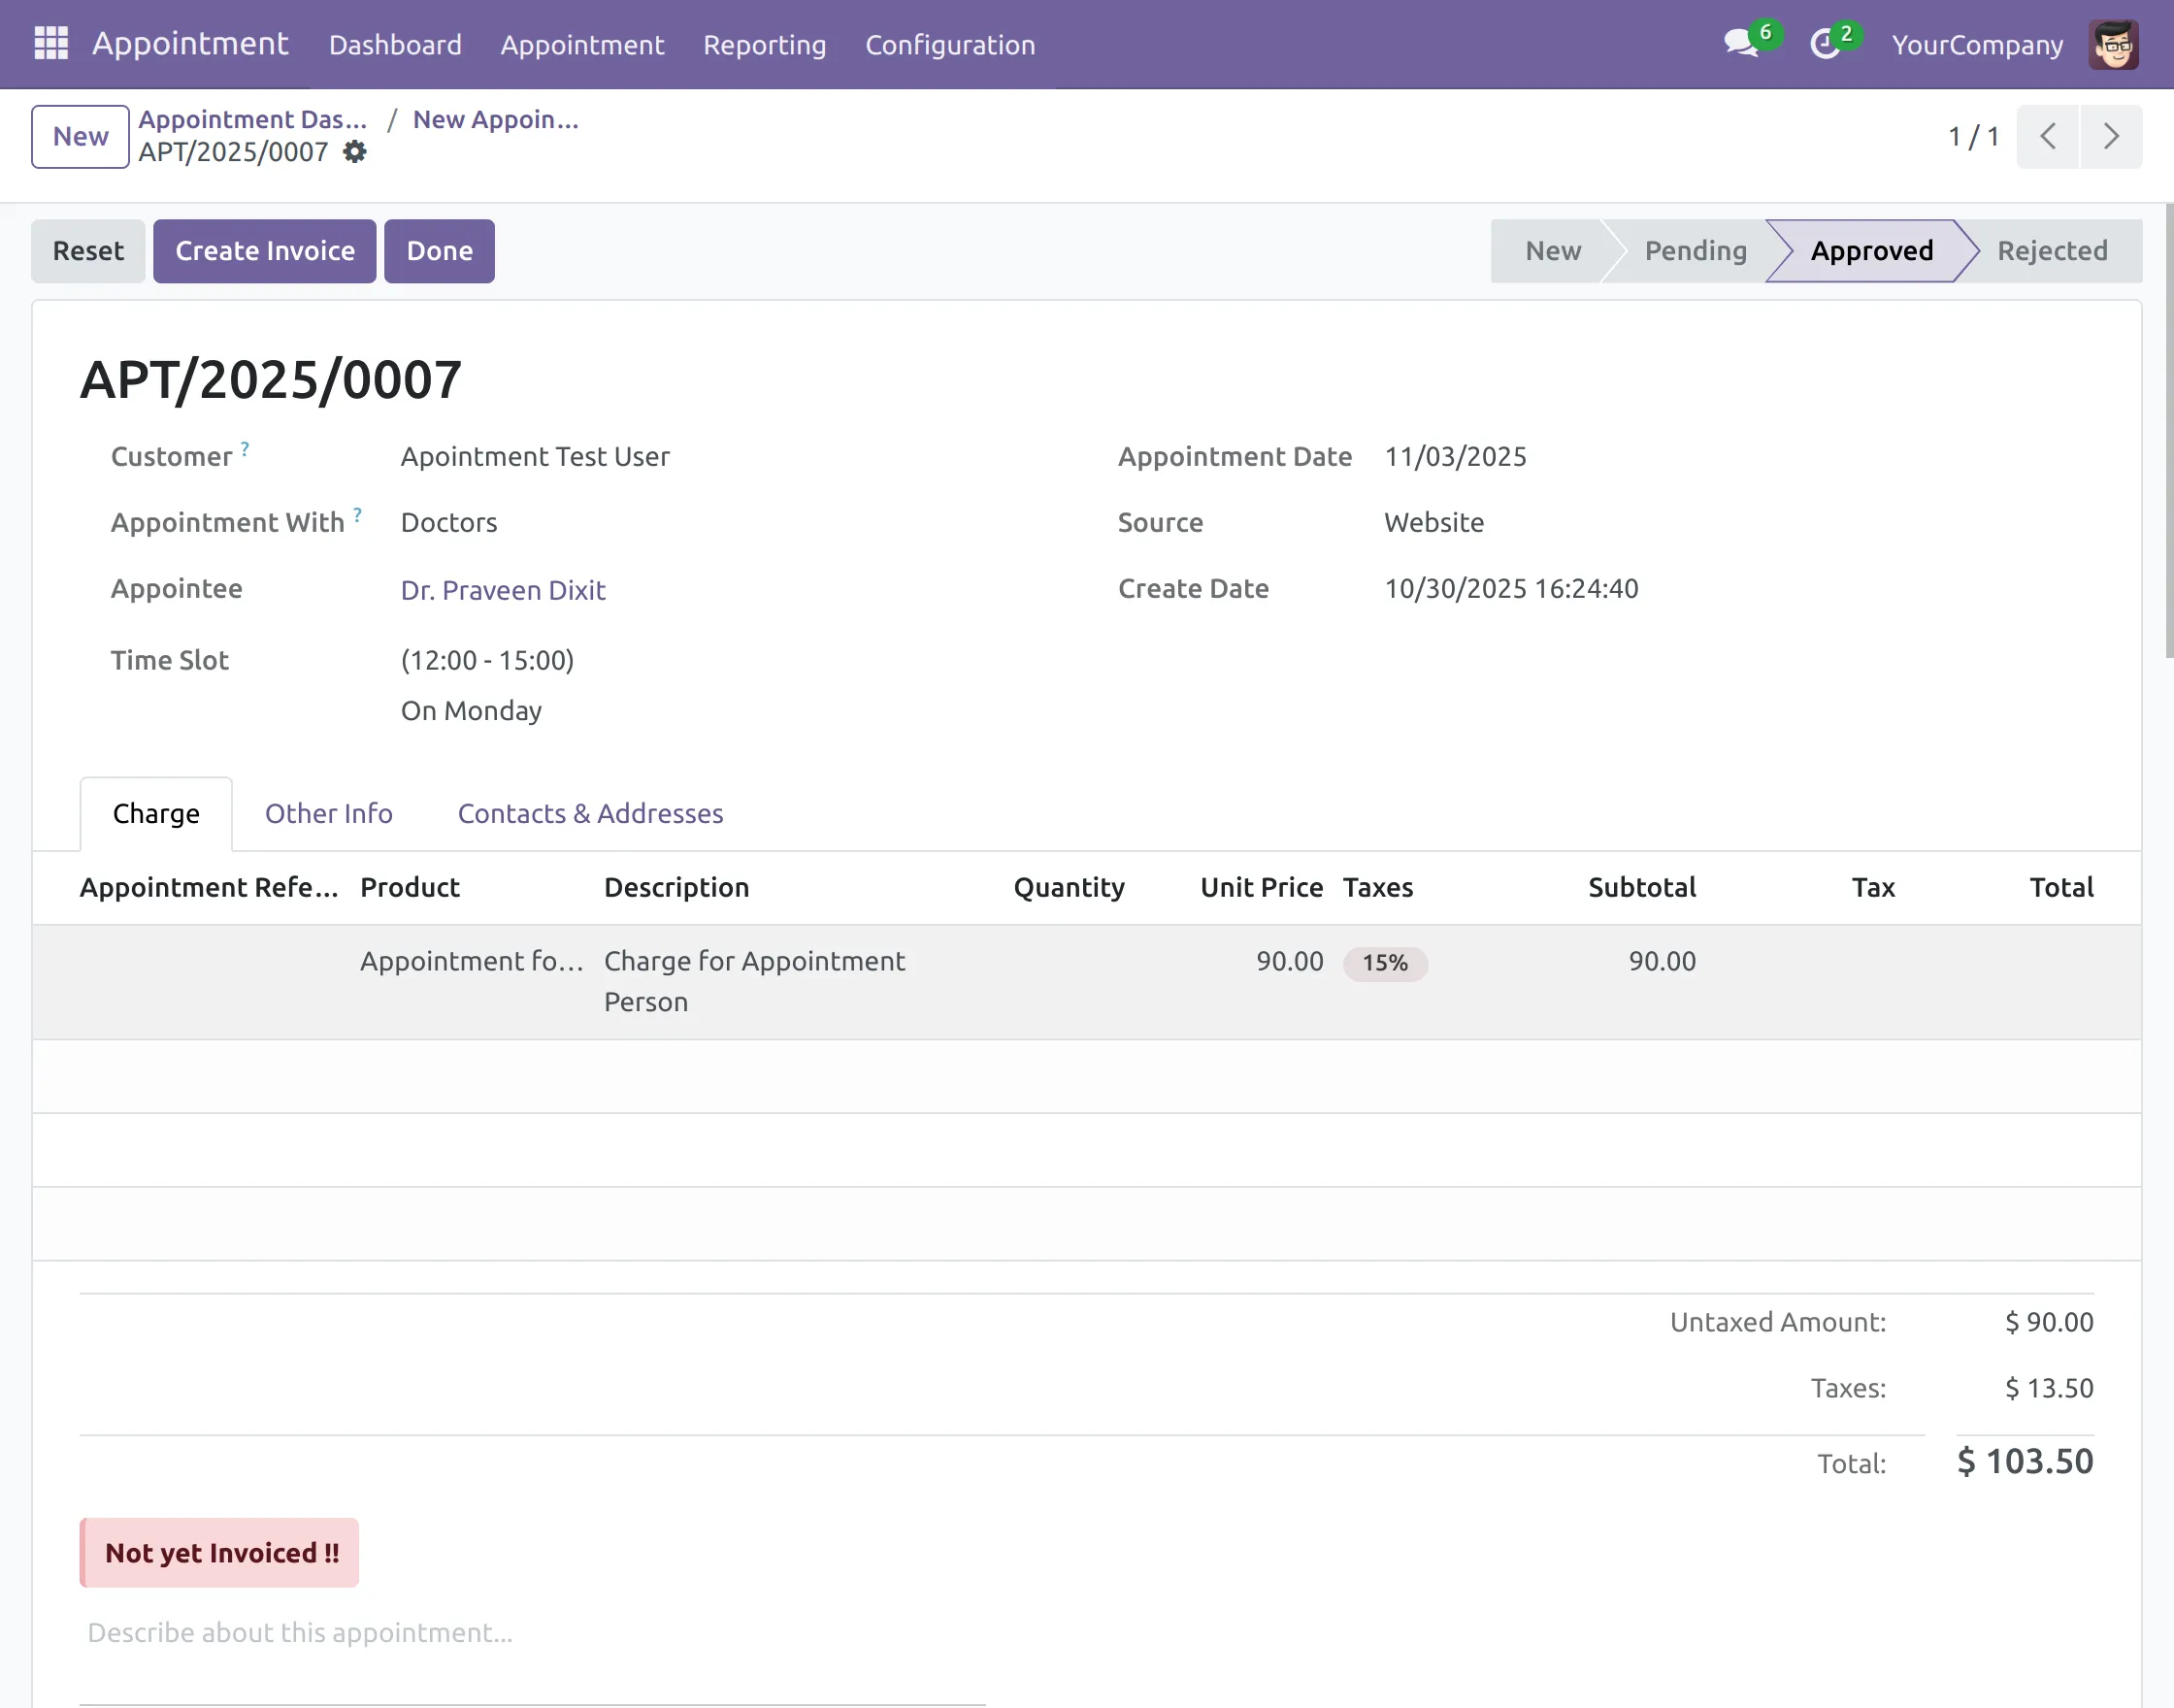
13. After approval, you will have three options:
Reset- This will reset the invoice to the draft stage.
Create Invoice- It will let you create the appointment invoice.
Done- Will only be marked when the customer has visited for an appointment.
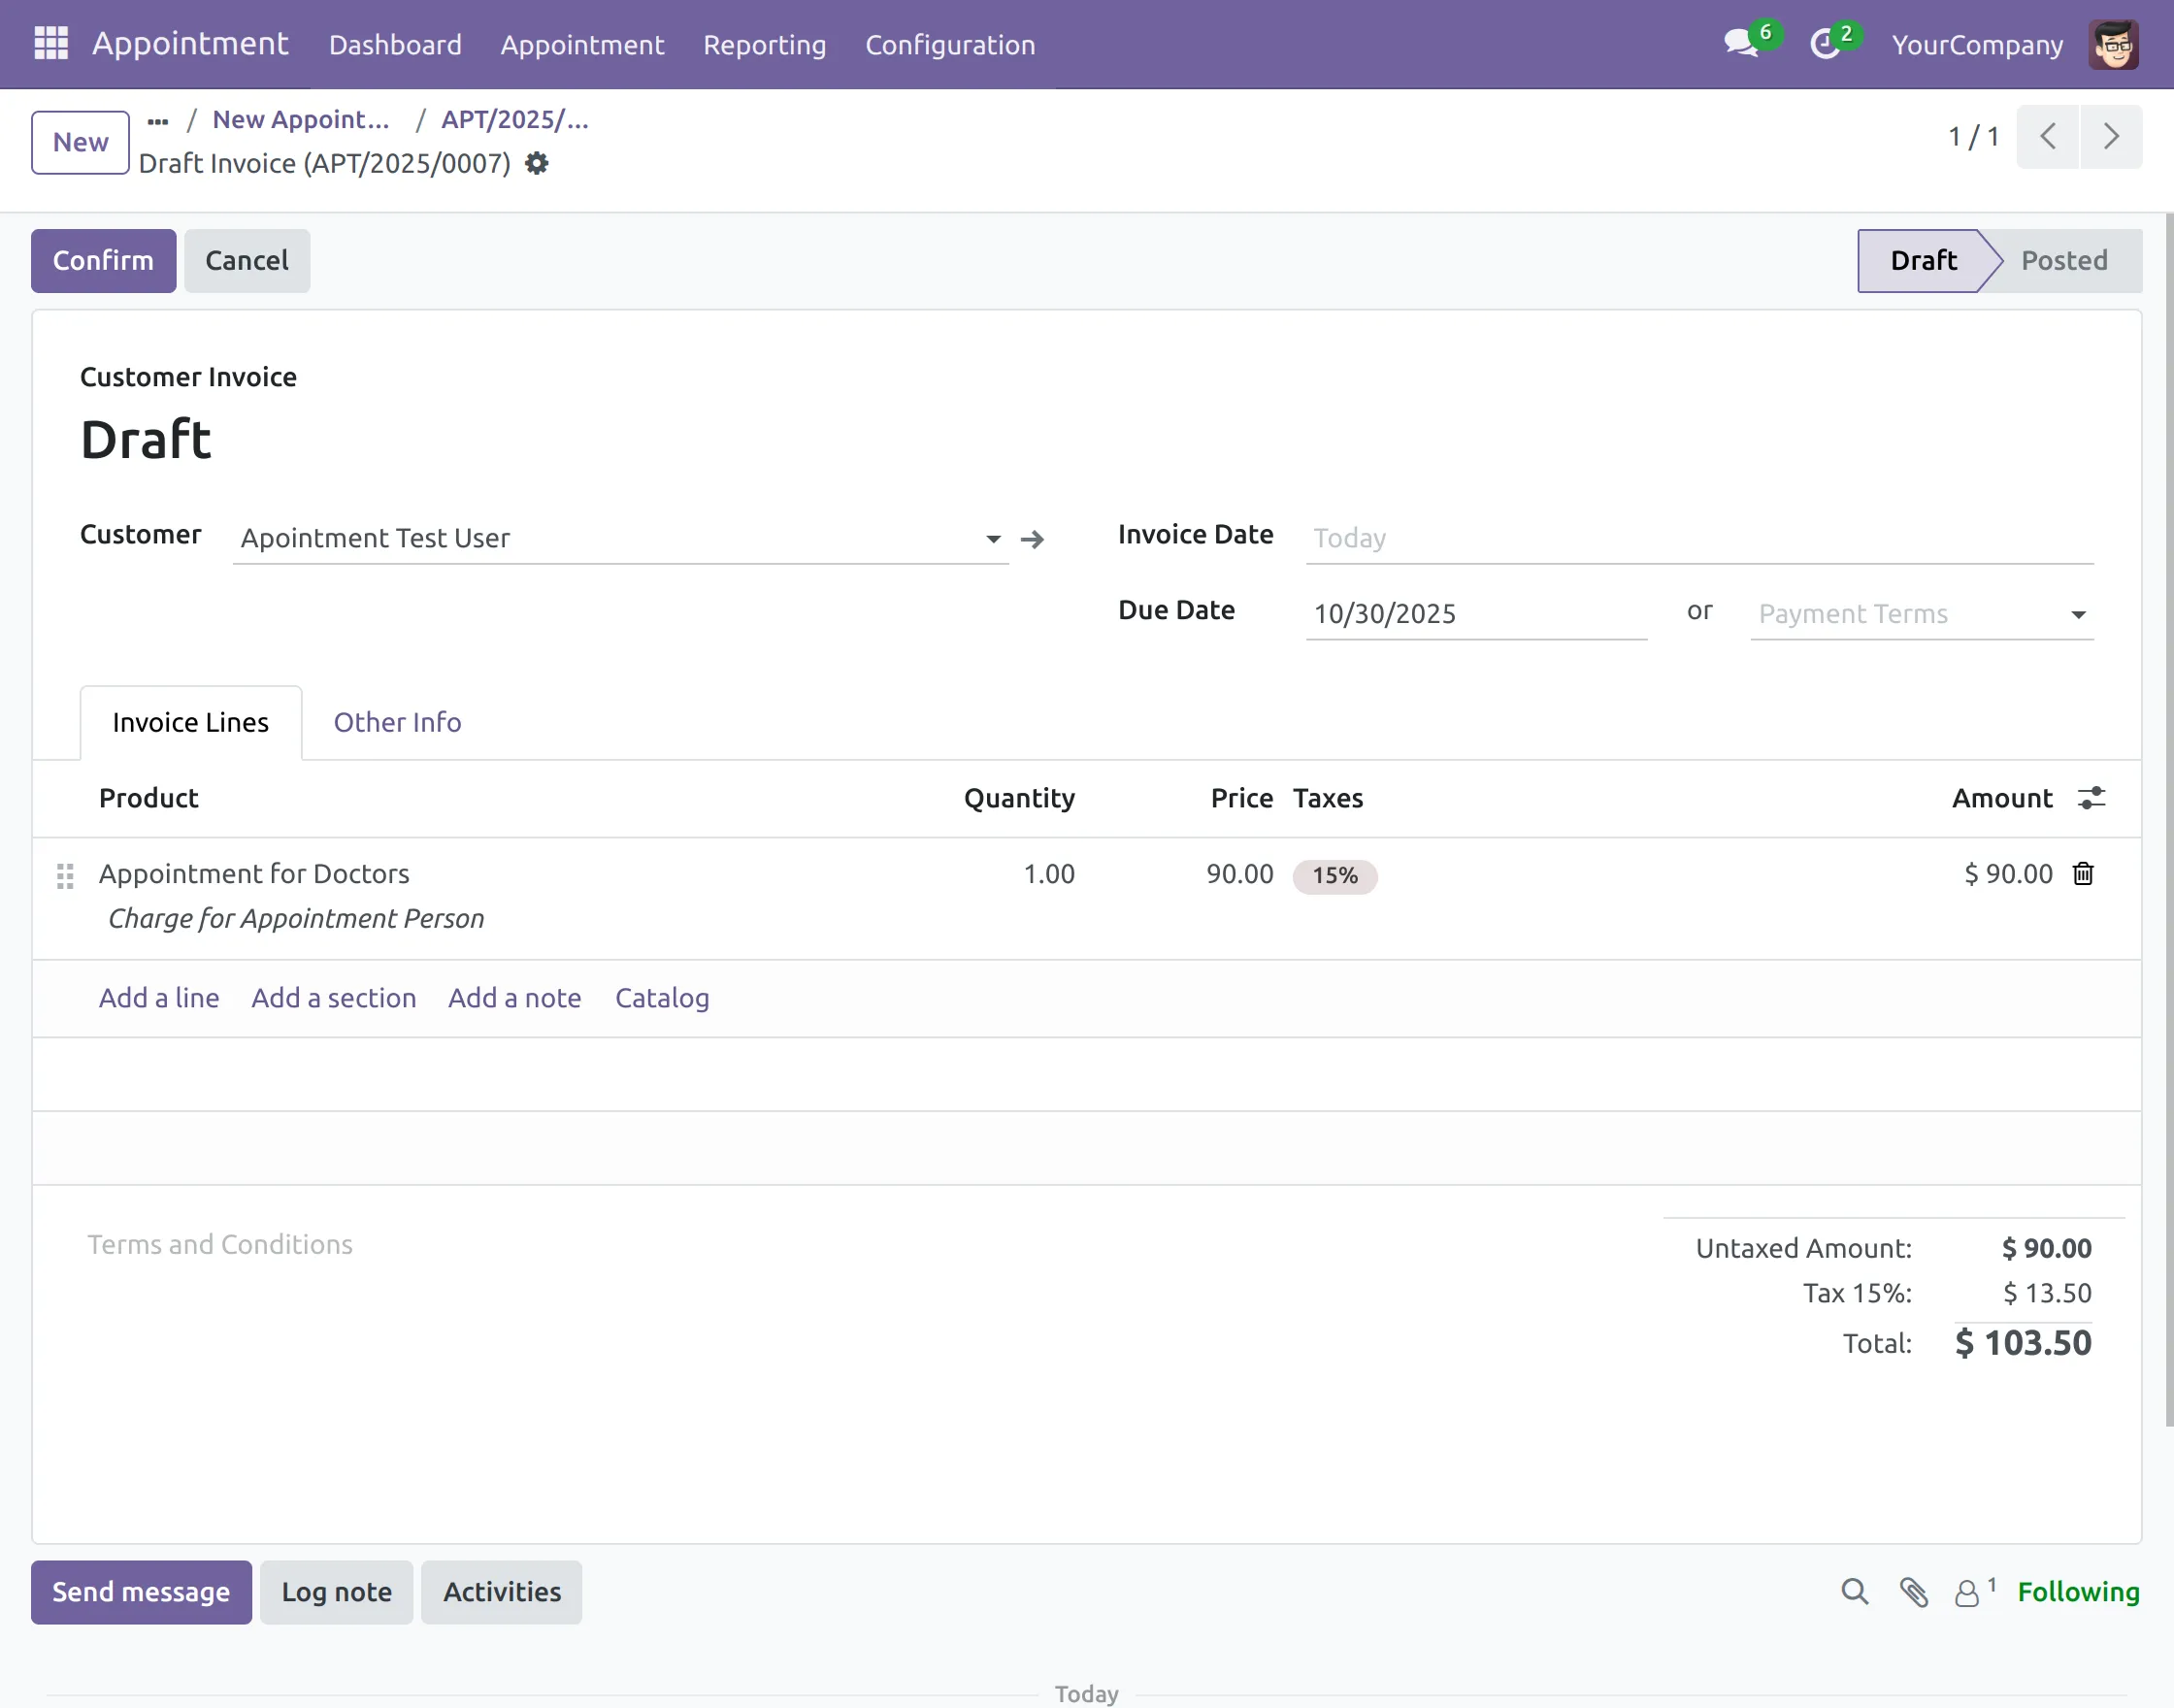
You can also see ‘Not yet Invoiced’ below the total amount. Click the ‘Create Invoice’ option.

14. Once invoiced, you can see ‘Confirm’> This will confirm the appointment.
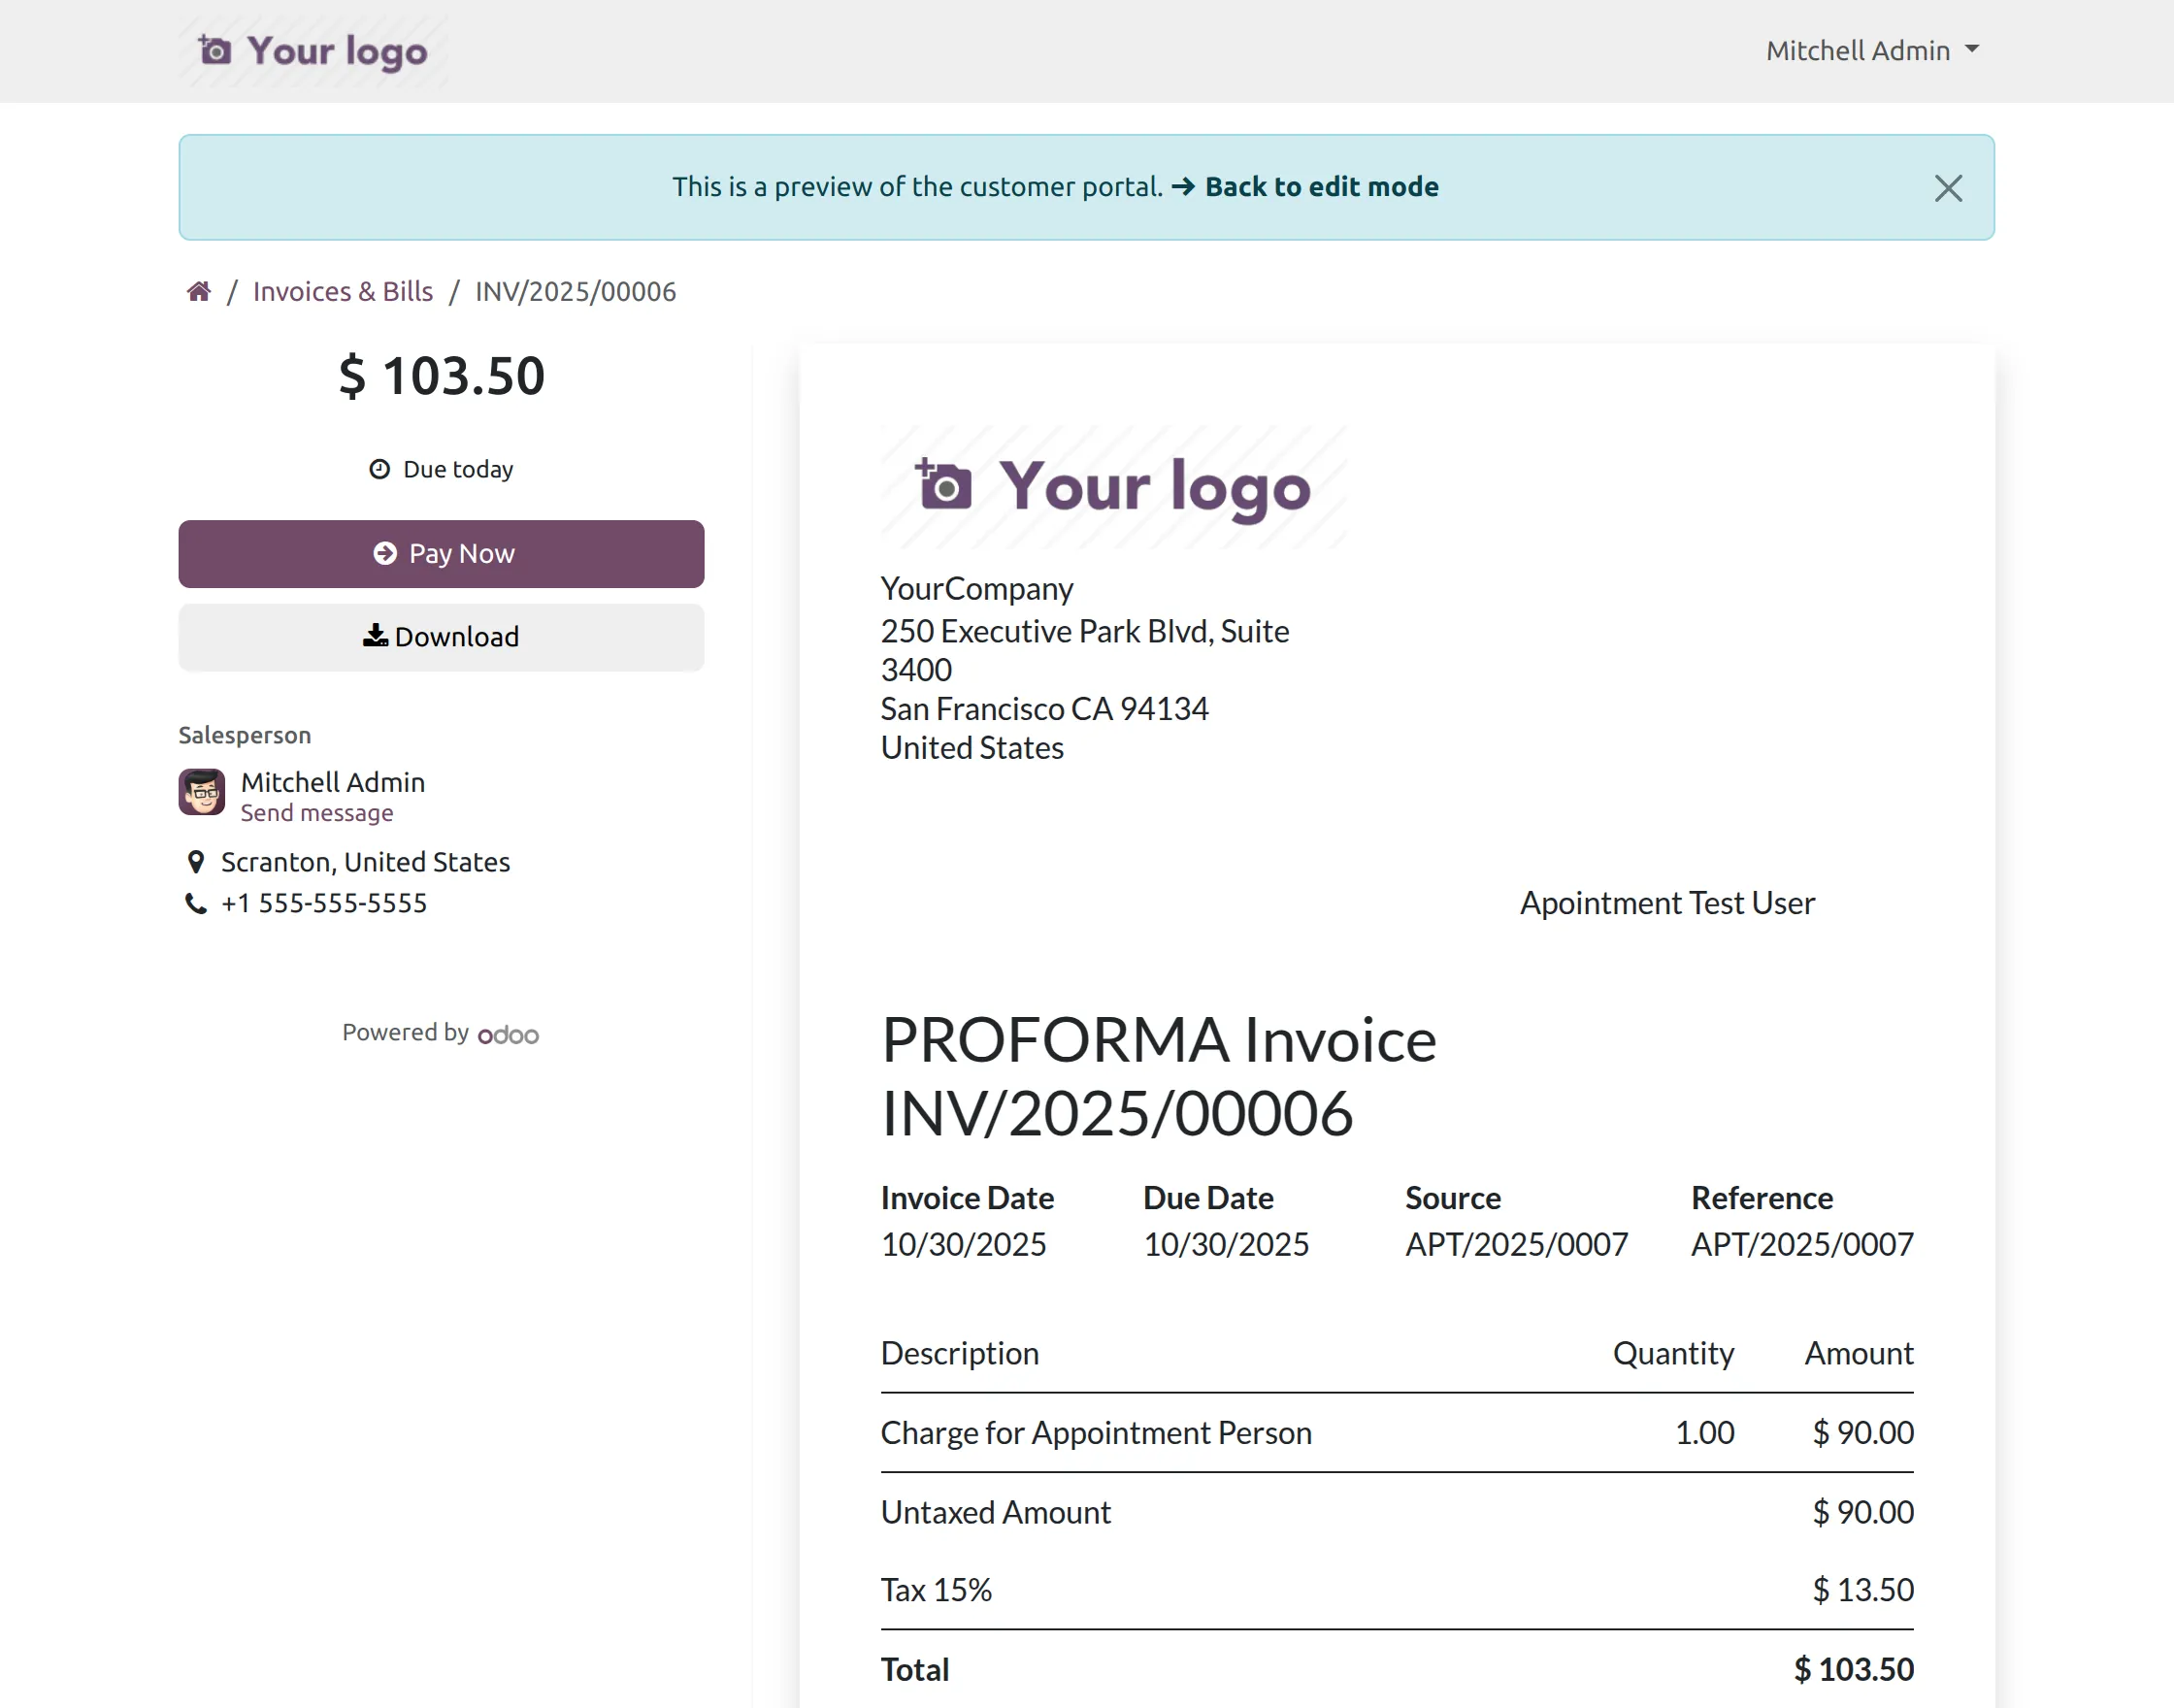
15. The preview option will show you an invoice like this.
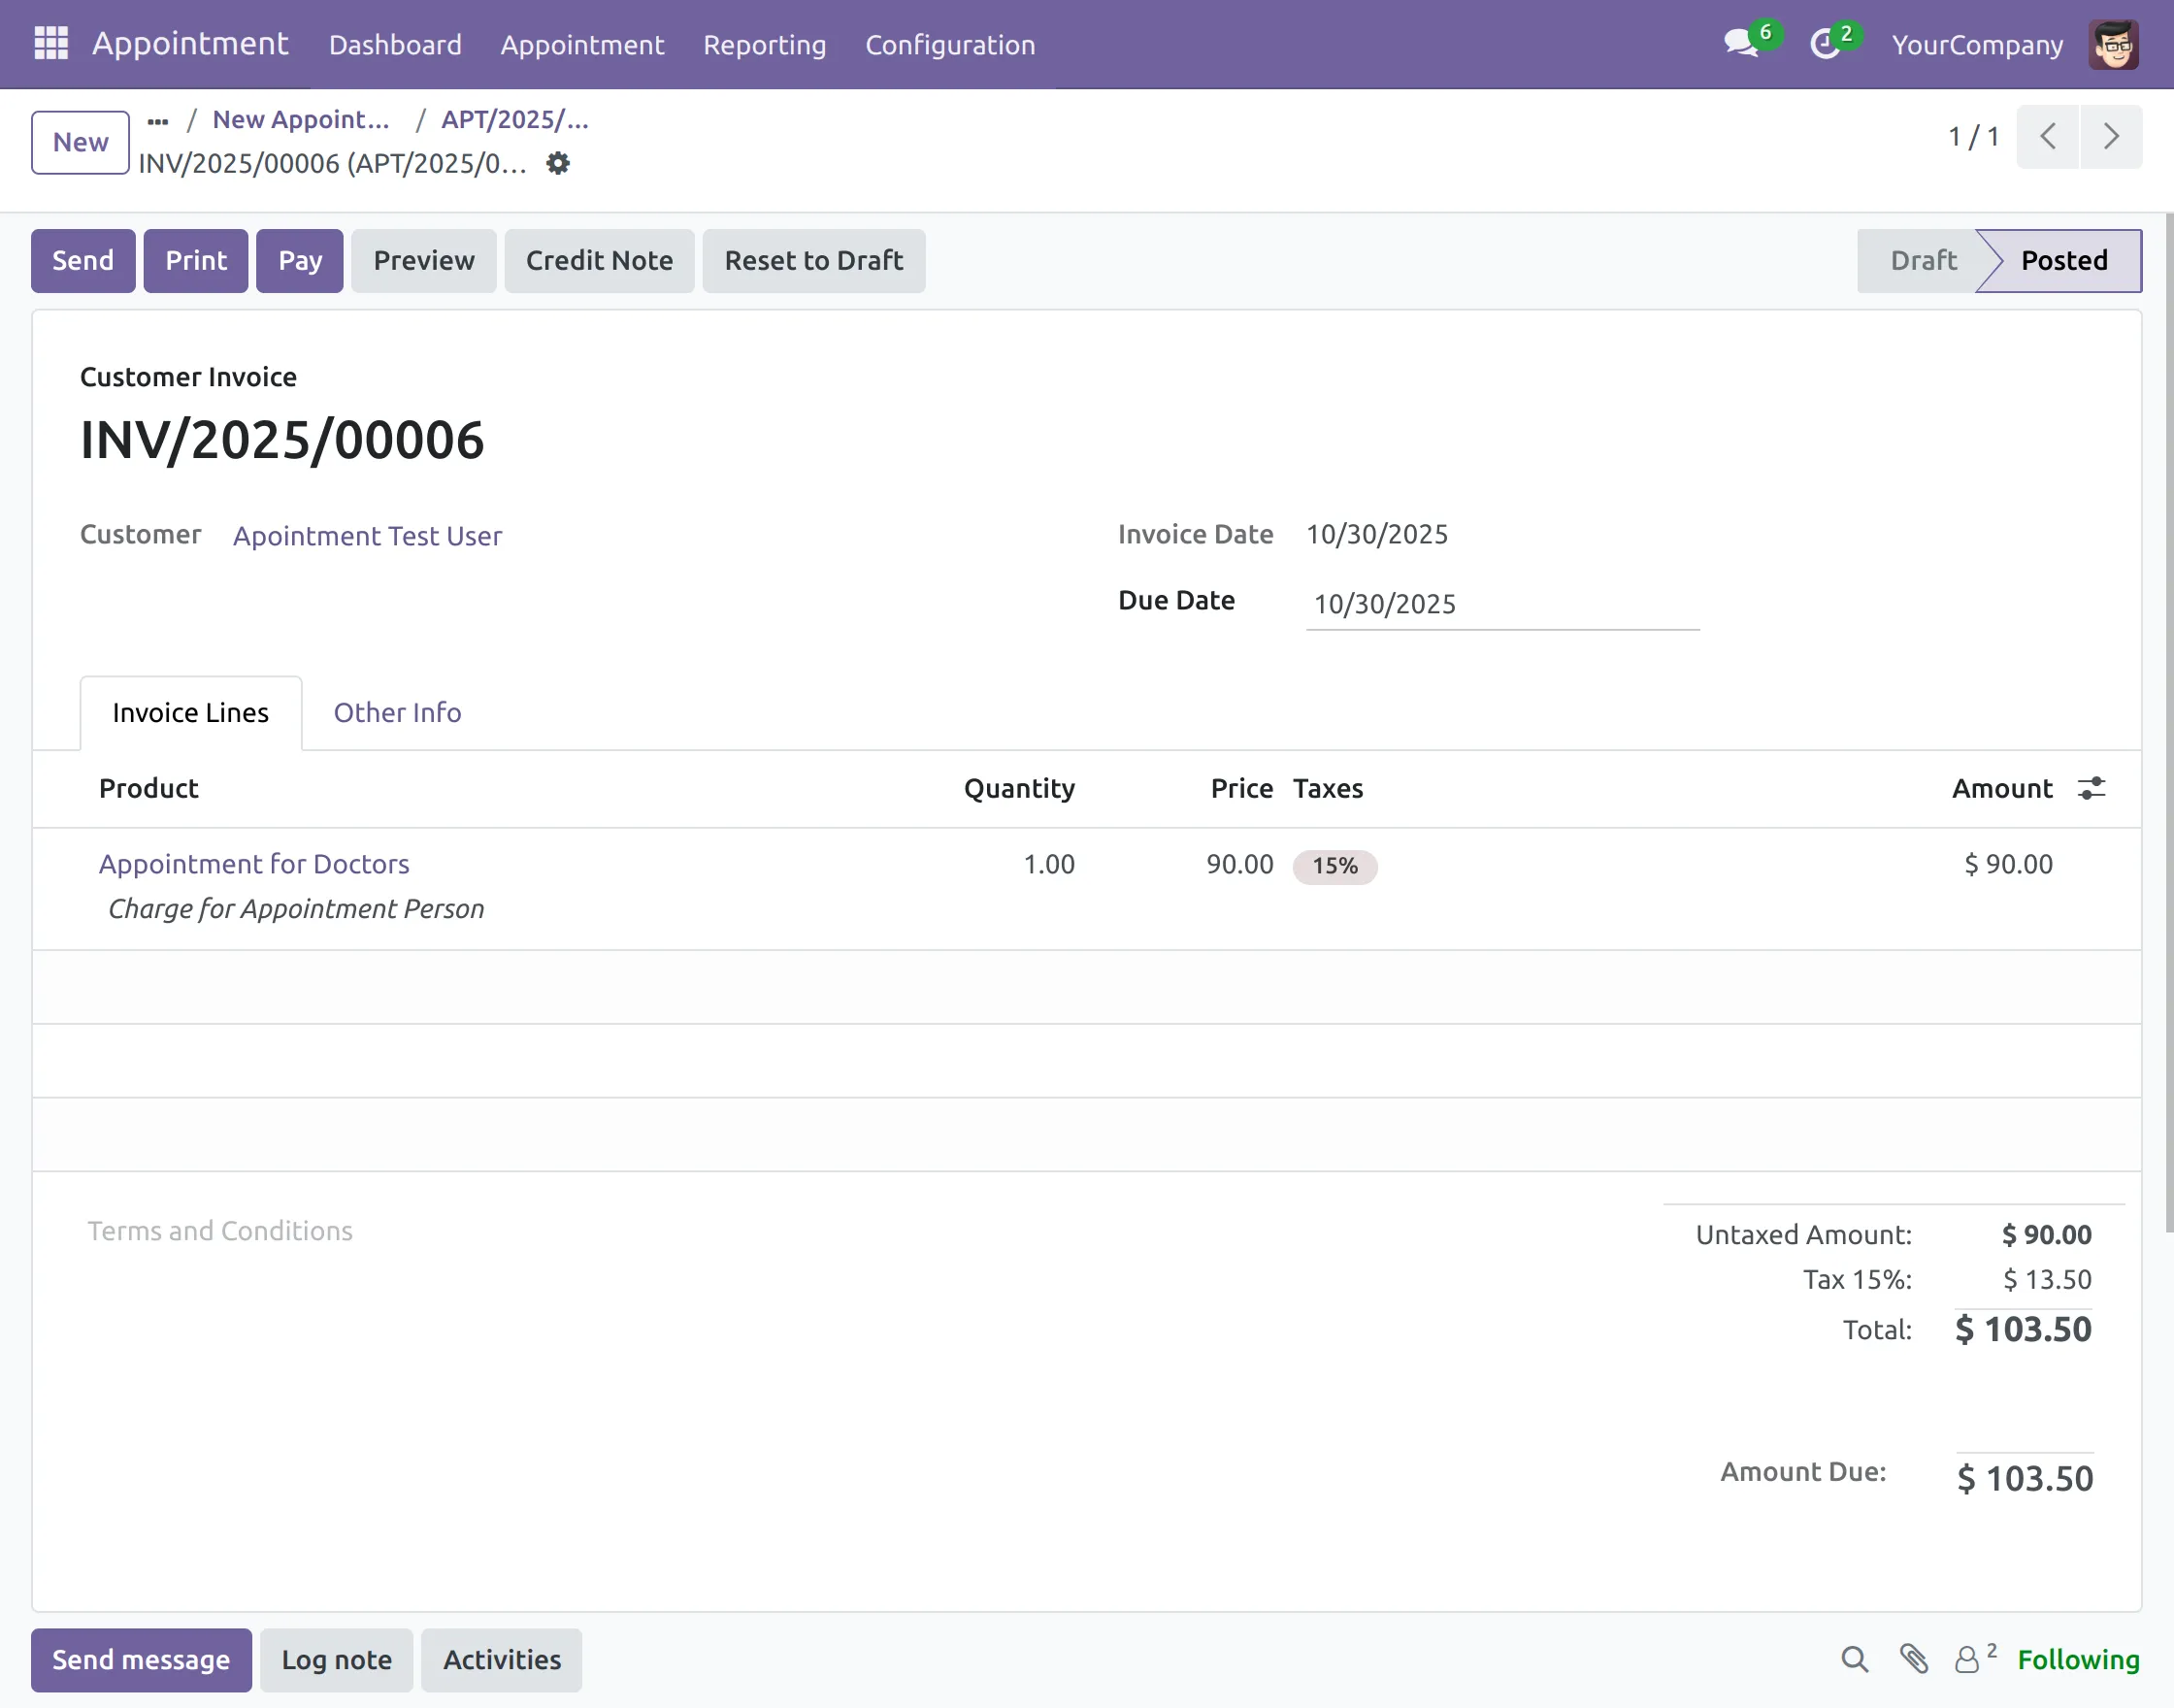
16. On confirming, the following options will appear on the screen:
- Send
- Pay
- Preview
- Credit Note
- Reset To Draft
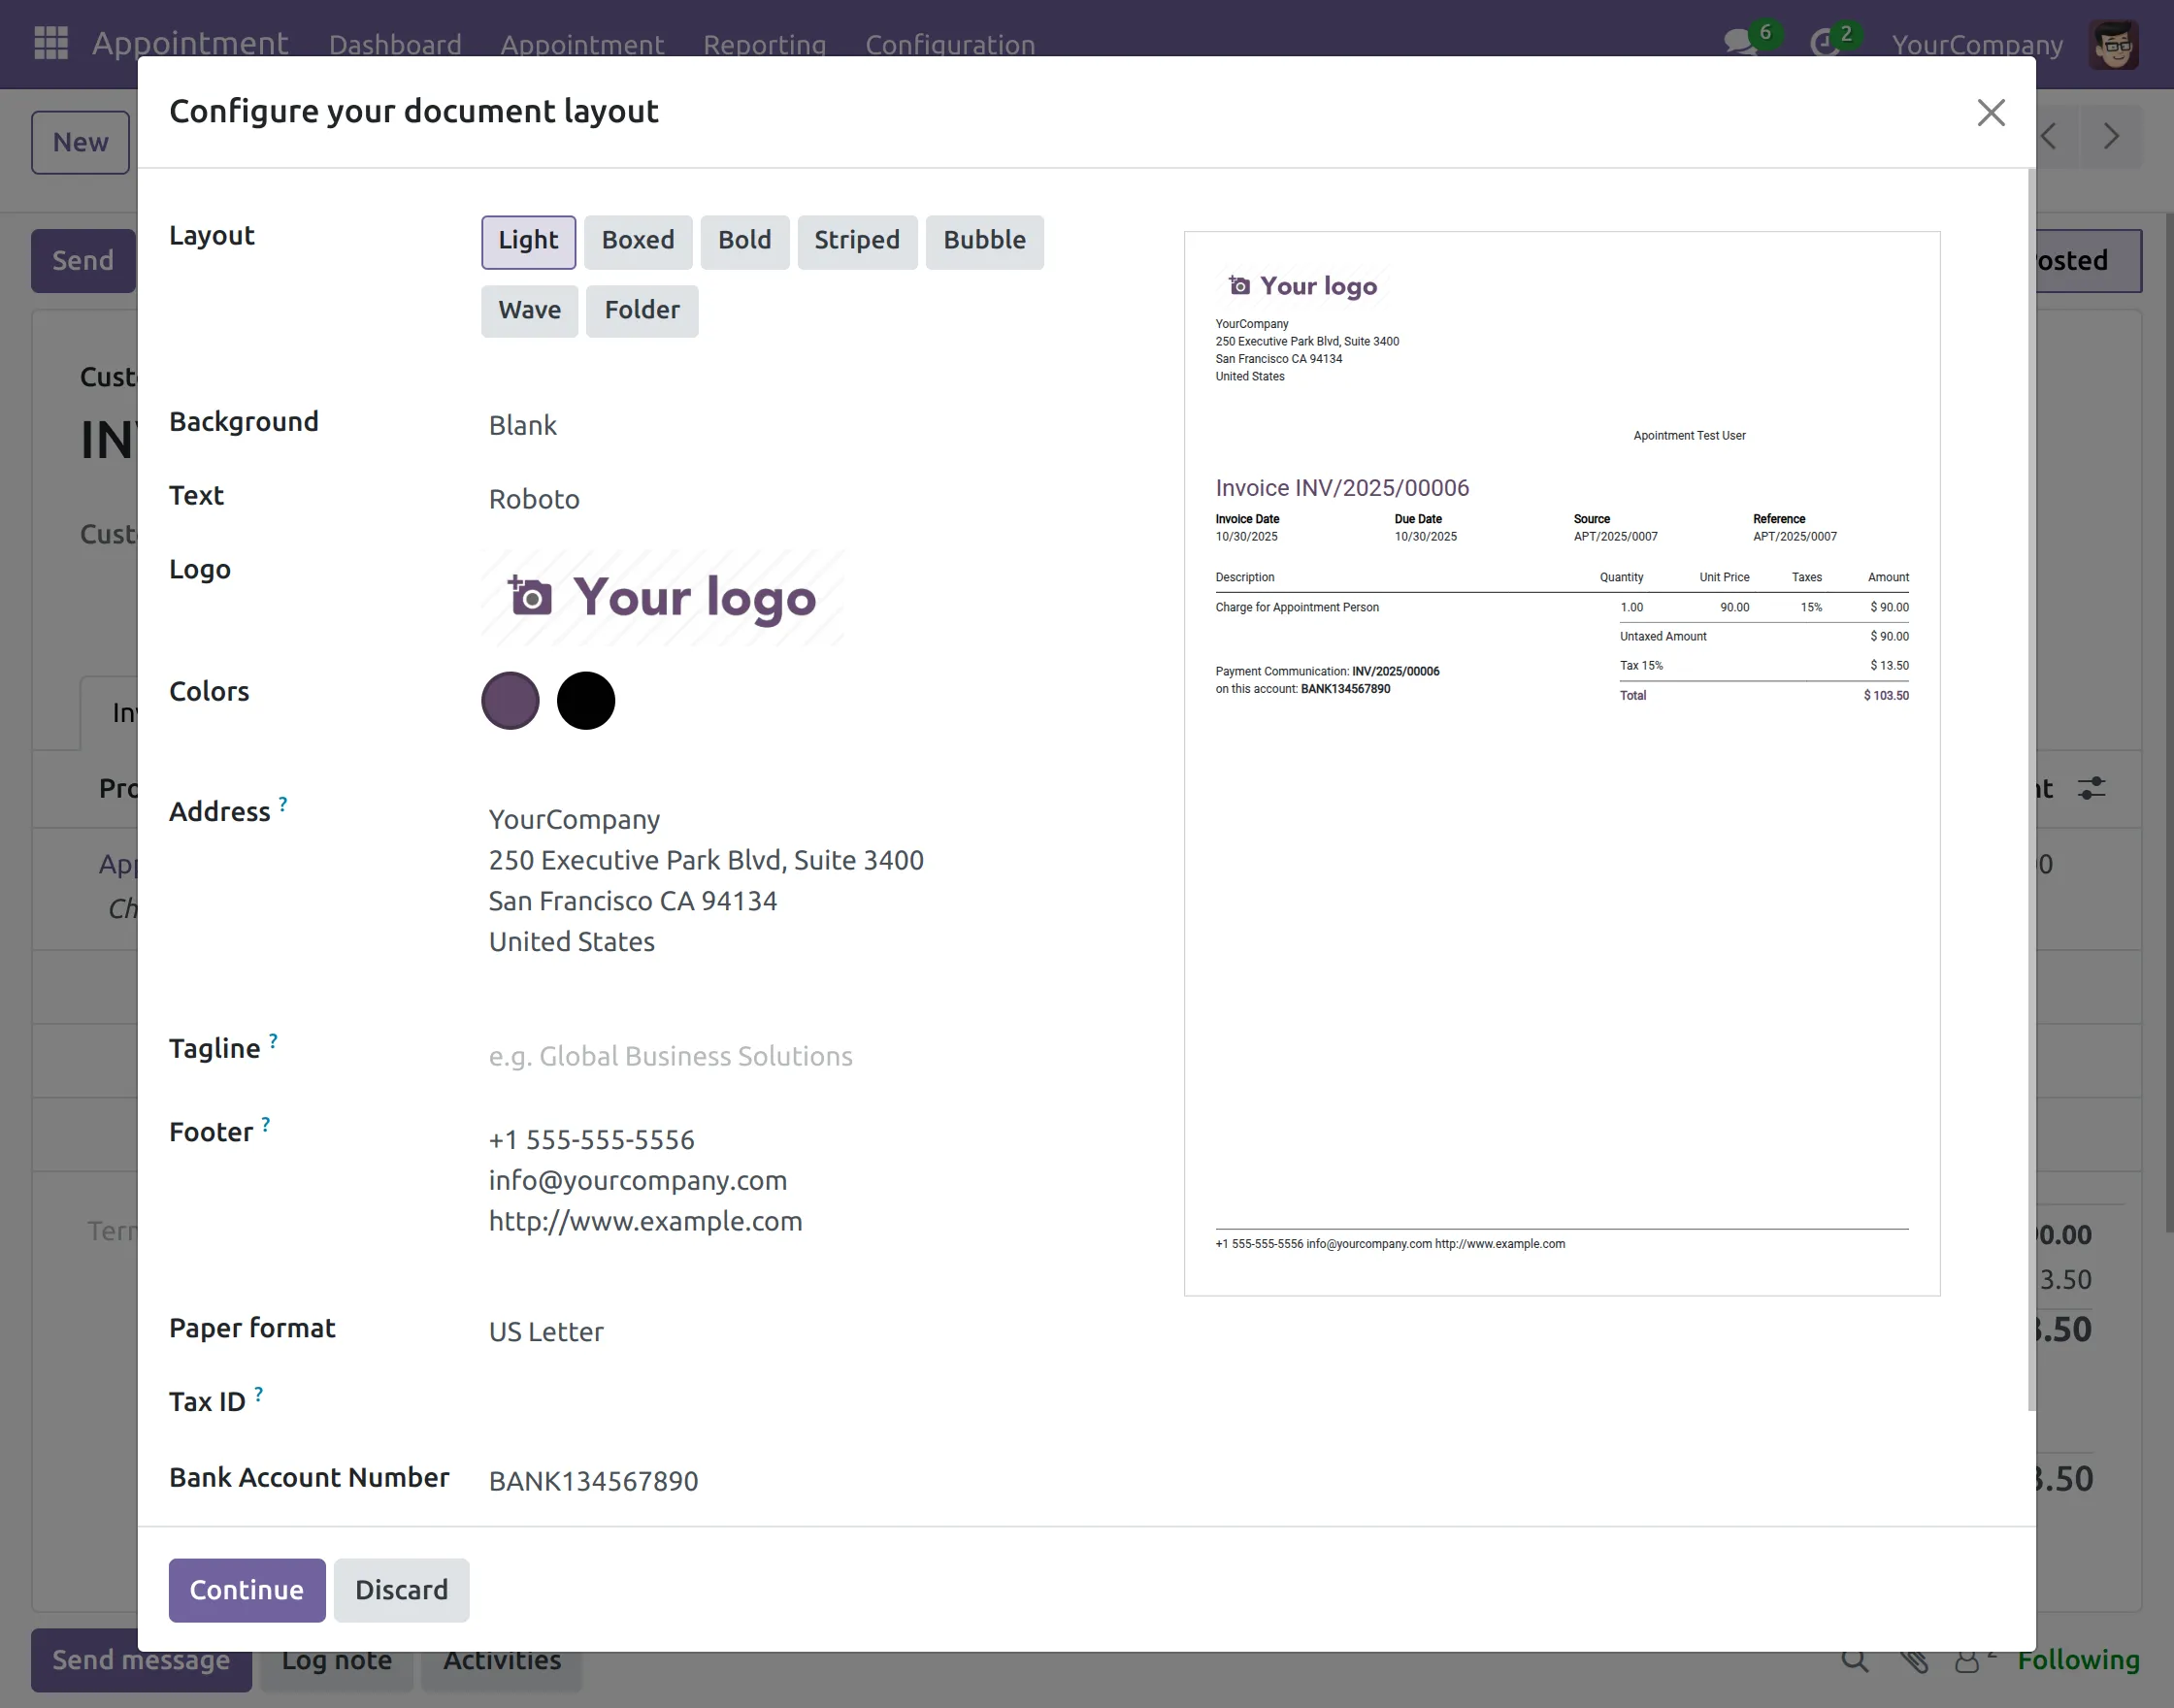
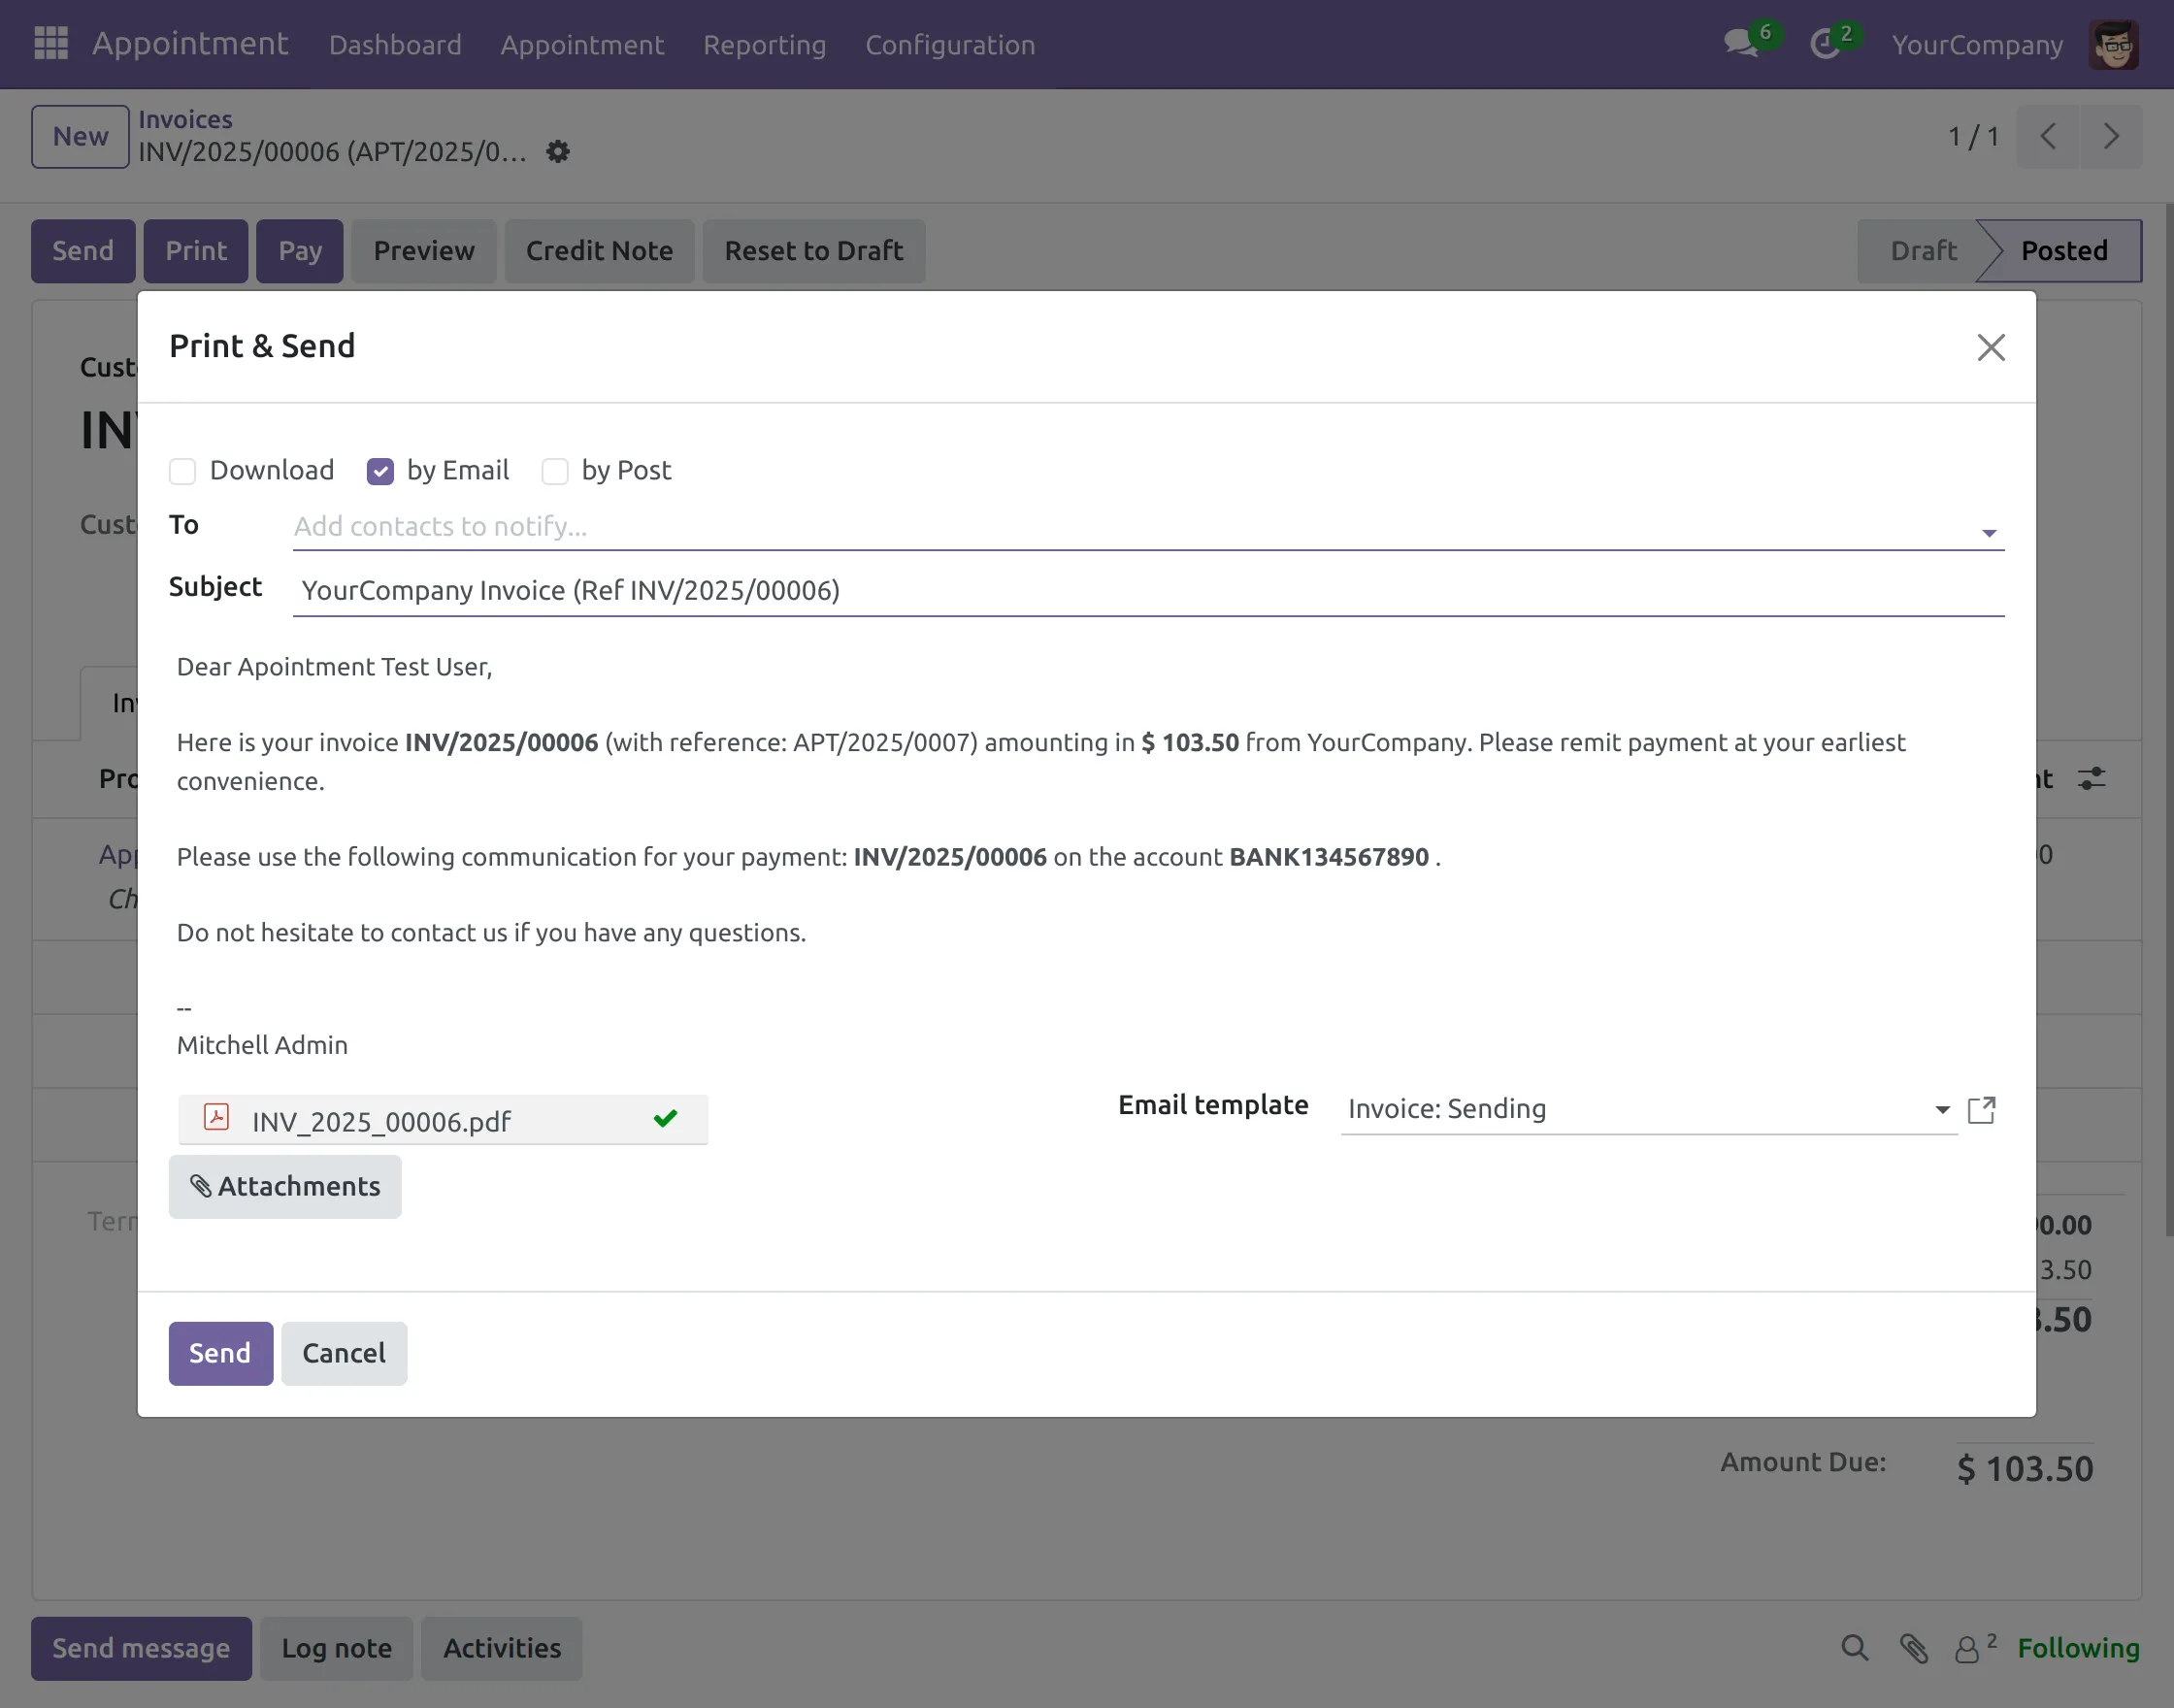
16.1. ‘Send’ button will open a pop-up will invoice details that you can edit according to your preference, which you can send to customer’s email.
16.2. Now click on “Continue” > ‘Send’ to send Email to the recipient.
16.3. The ‘Print’ button will directly download the receipt to your device.
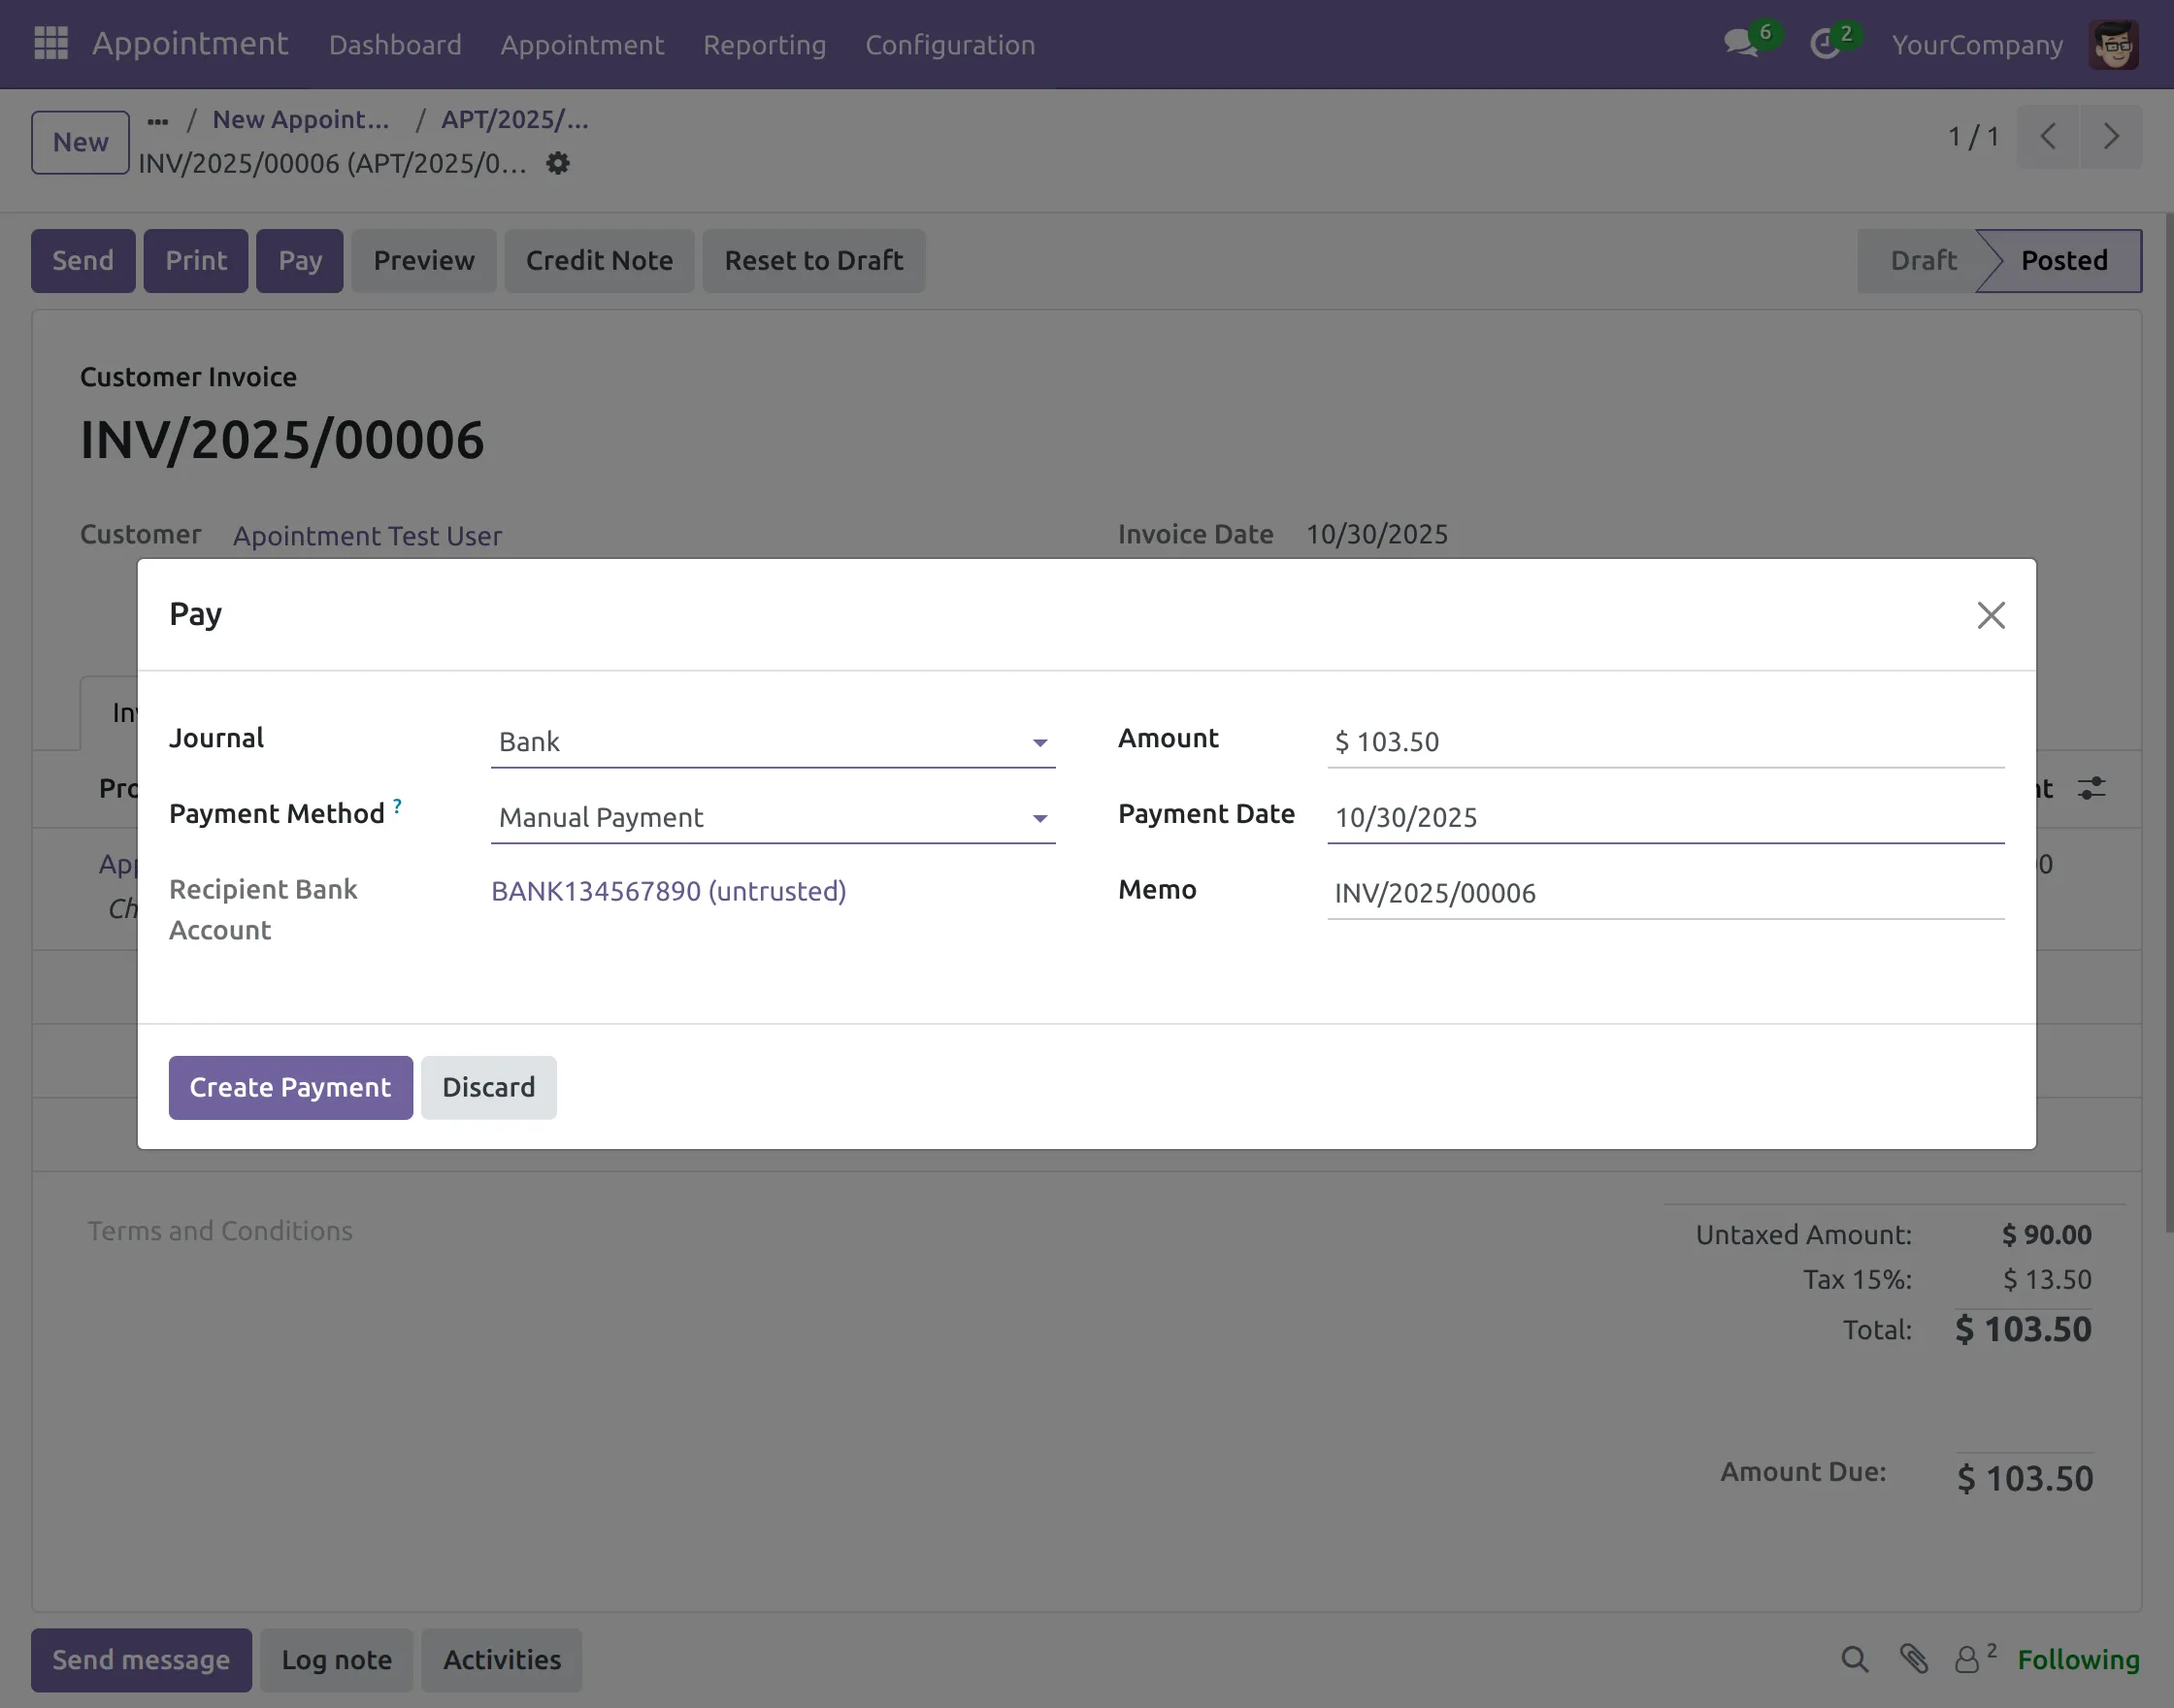
16.4. The ‘Pay’ button will let you register the payment with the recipient bank. After filling in the details ‘Create Payment’ to confirm payment.
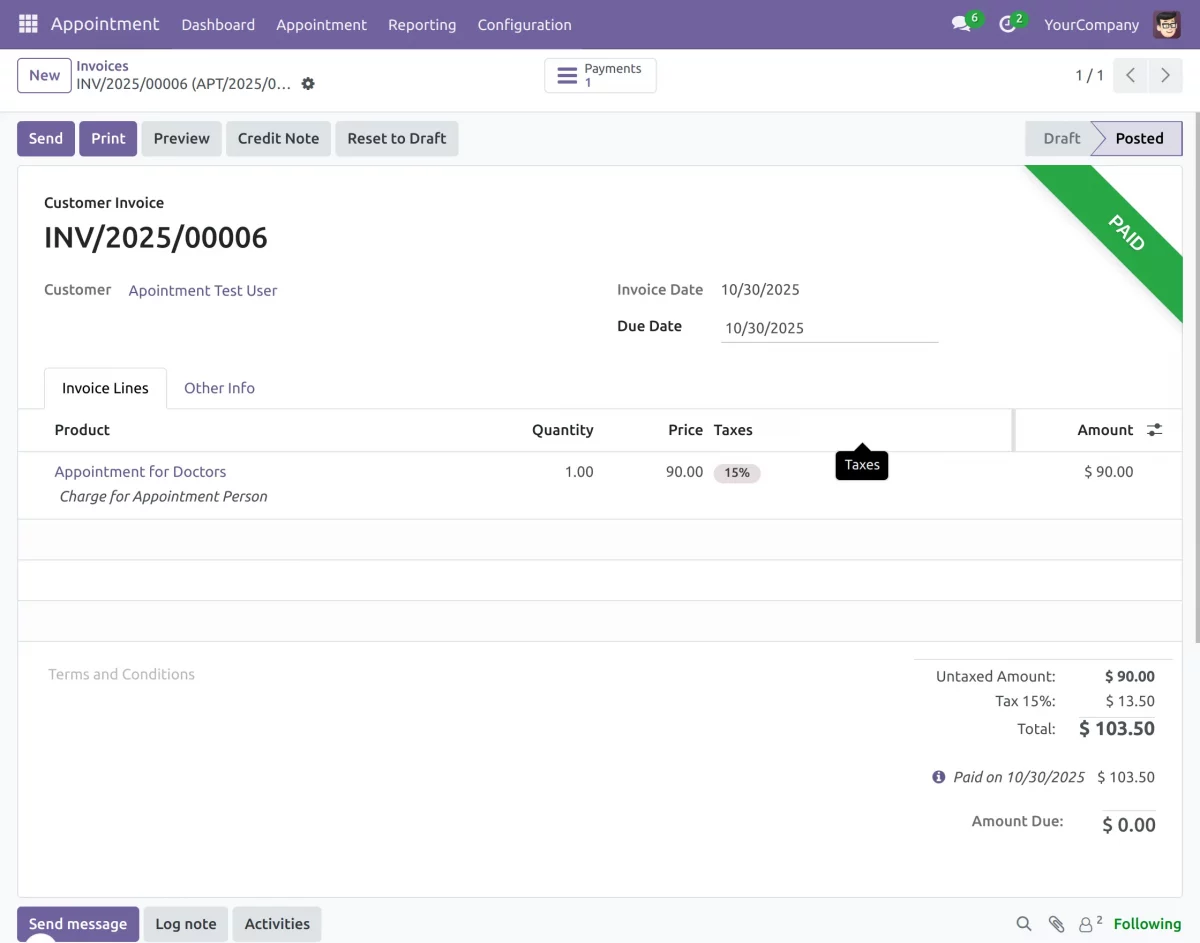
16.5. After that, you will see ‘Paid’ banner on the invoice.
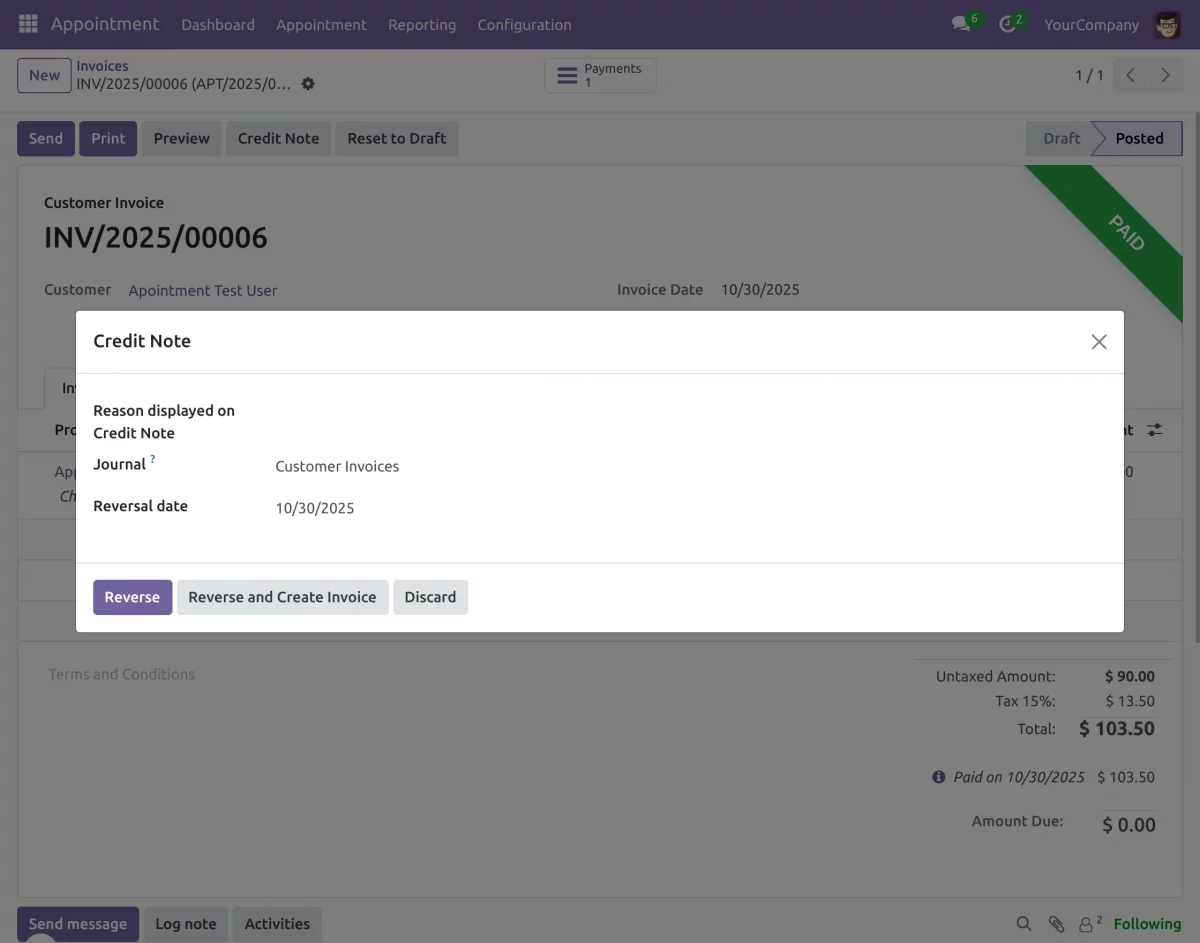
16.6. ‘Add Credit Note’ button will let you add a special note for taxation.
REJECTING AN APPOINTMENT
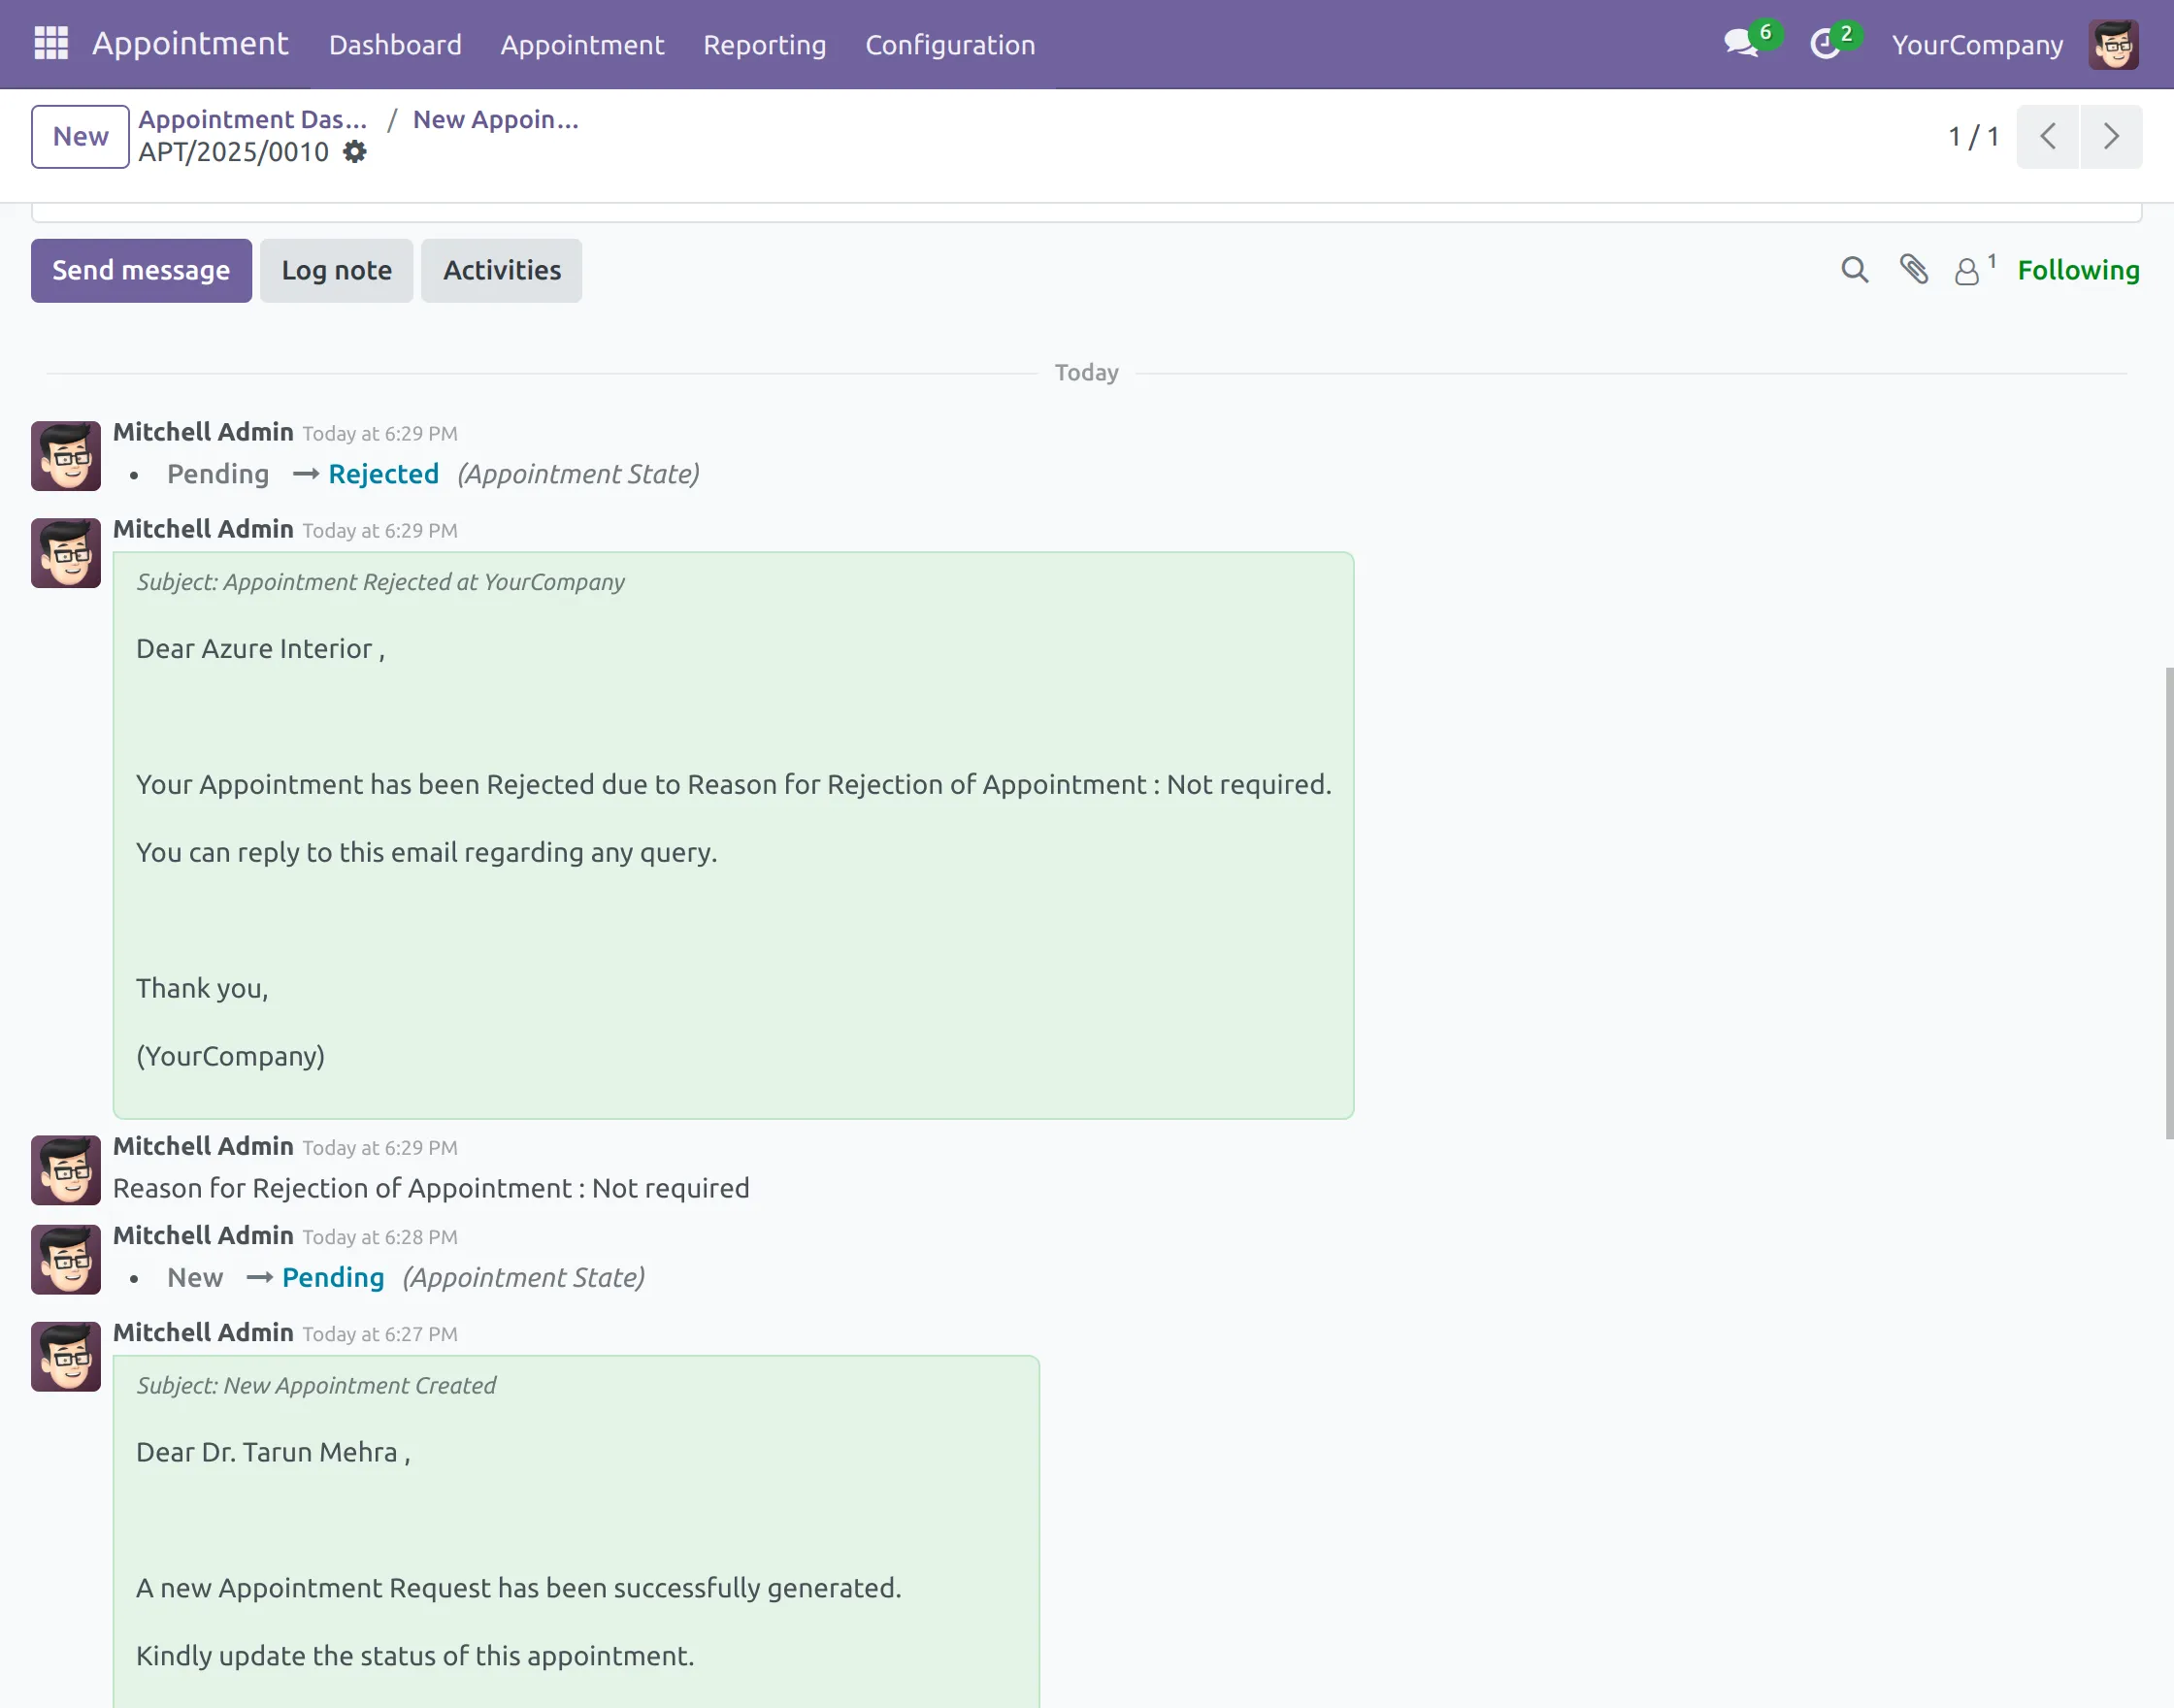
17. On clicking the ‘Reject’ button, a popup will appear on the screen asking for the reason for rejection.
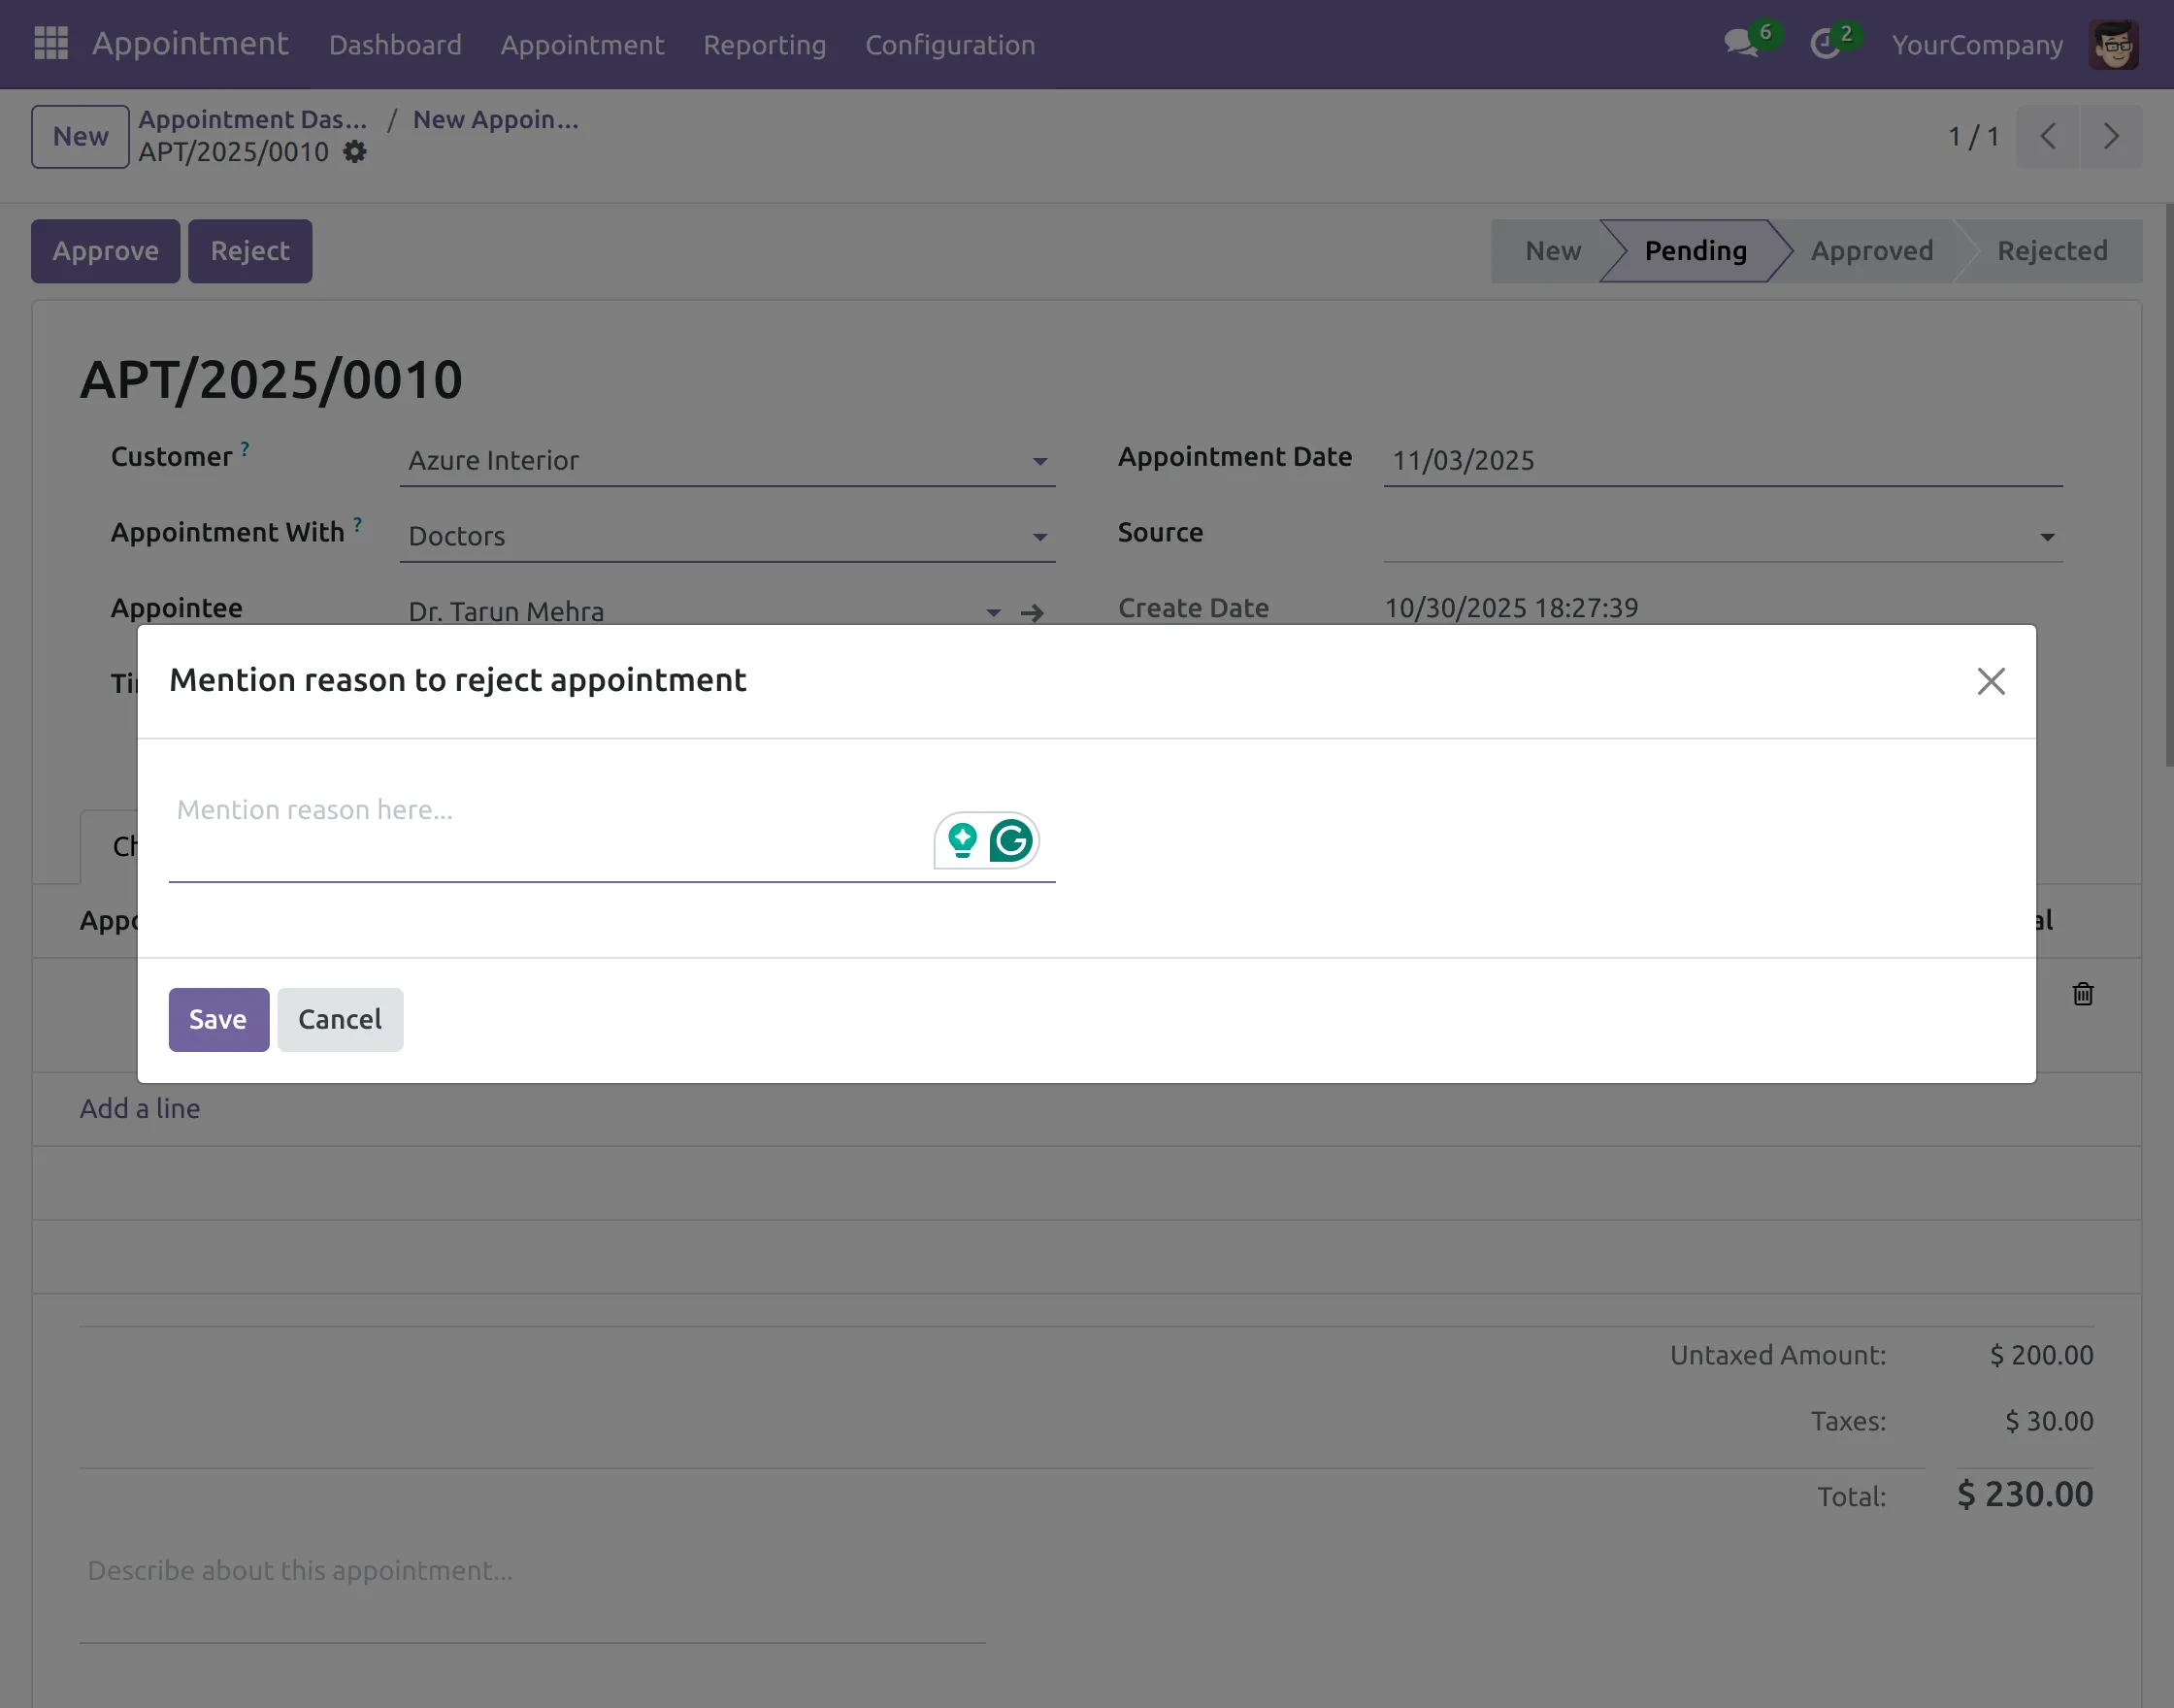
18. After submitting the reason, the admin can view it in the comment section of the invoice.
VIEWING APPOINTMENTS
19. Once the appointment booking part is completed, let’s move to the appointment view section. Click ‘Appointment> New Appointment’ to view all appointments on the Calander.
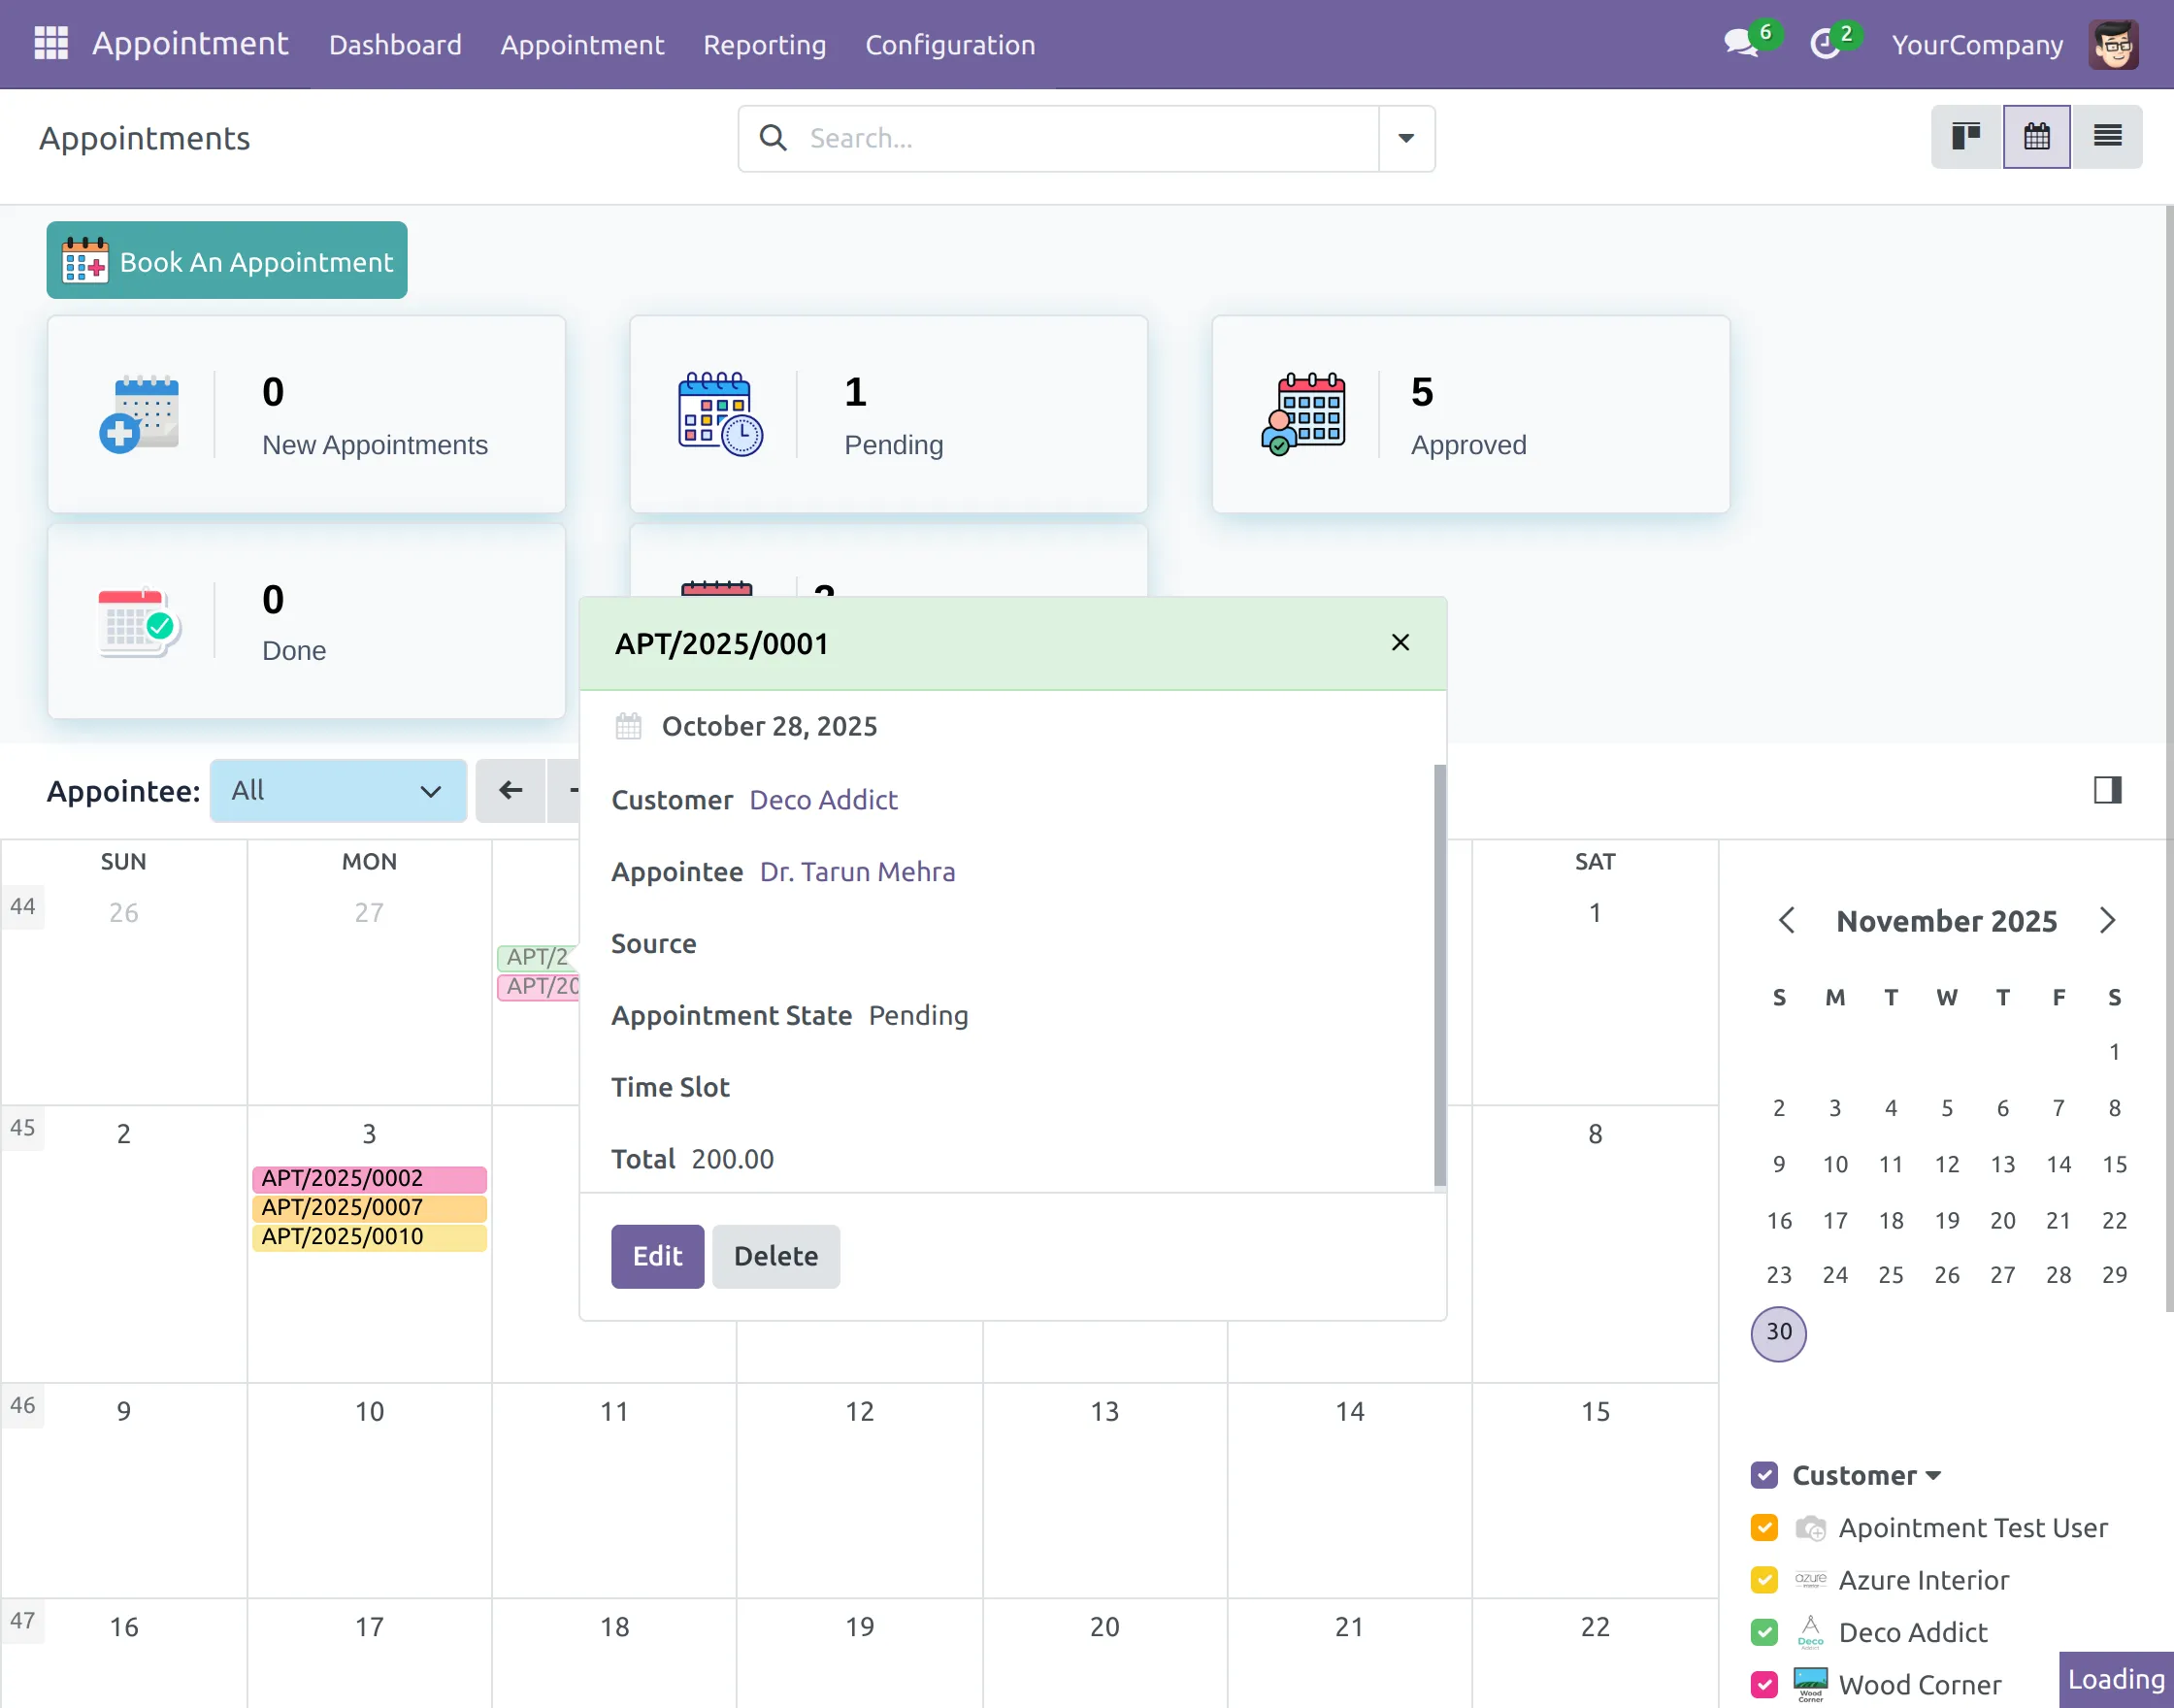
20. Click any appointment to view its details. Also, you can edit or delete it via the ‘Edit’ or ‘Delete’ buttons.
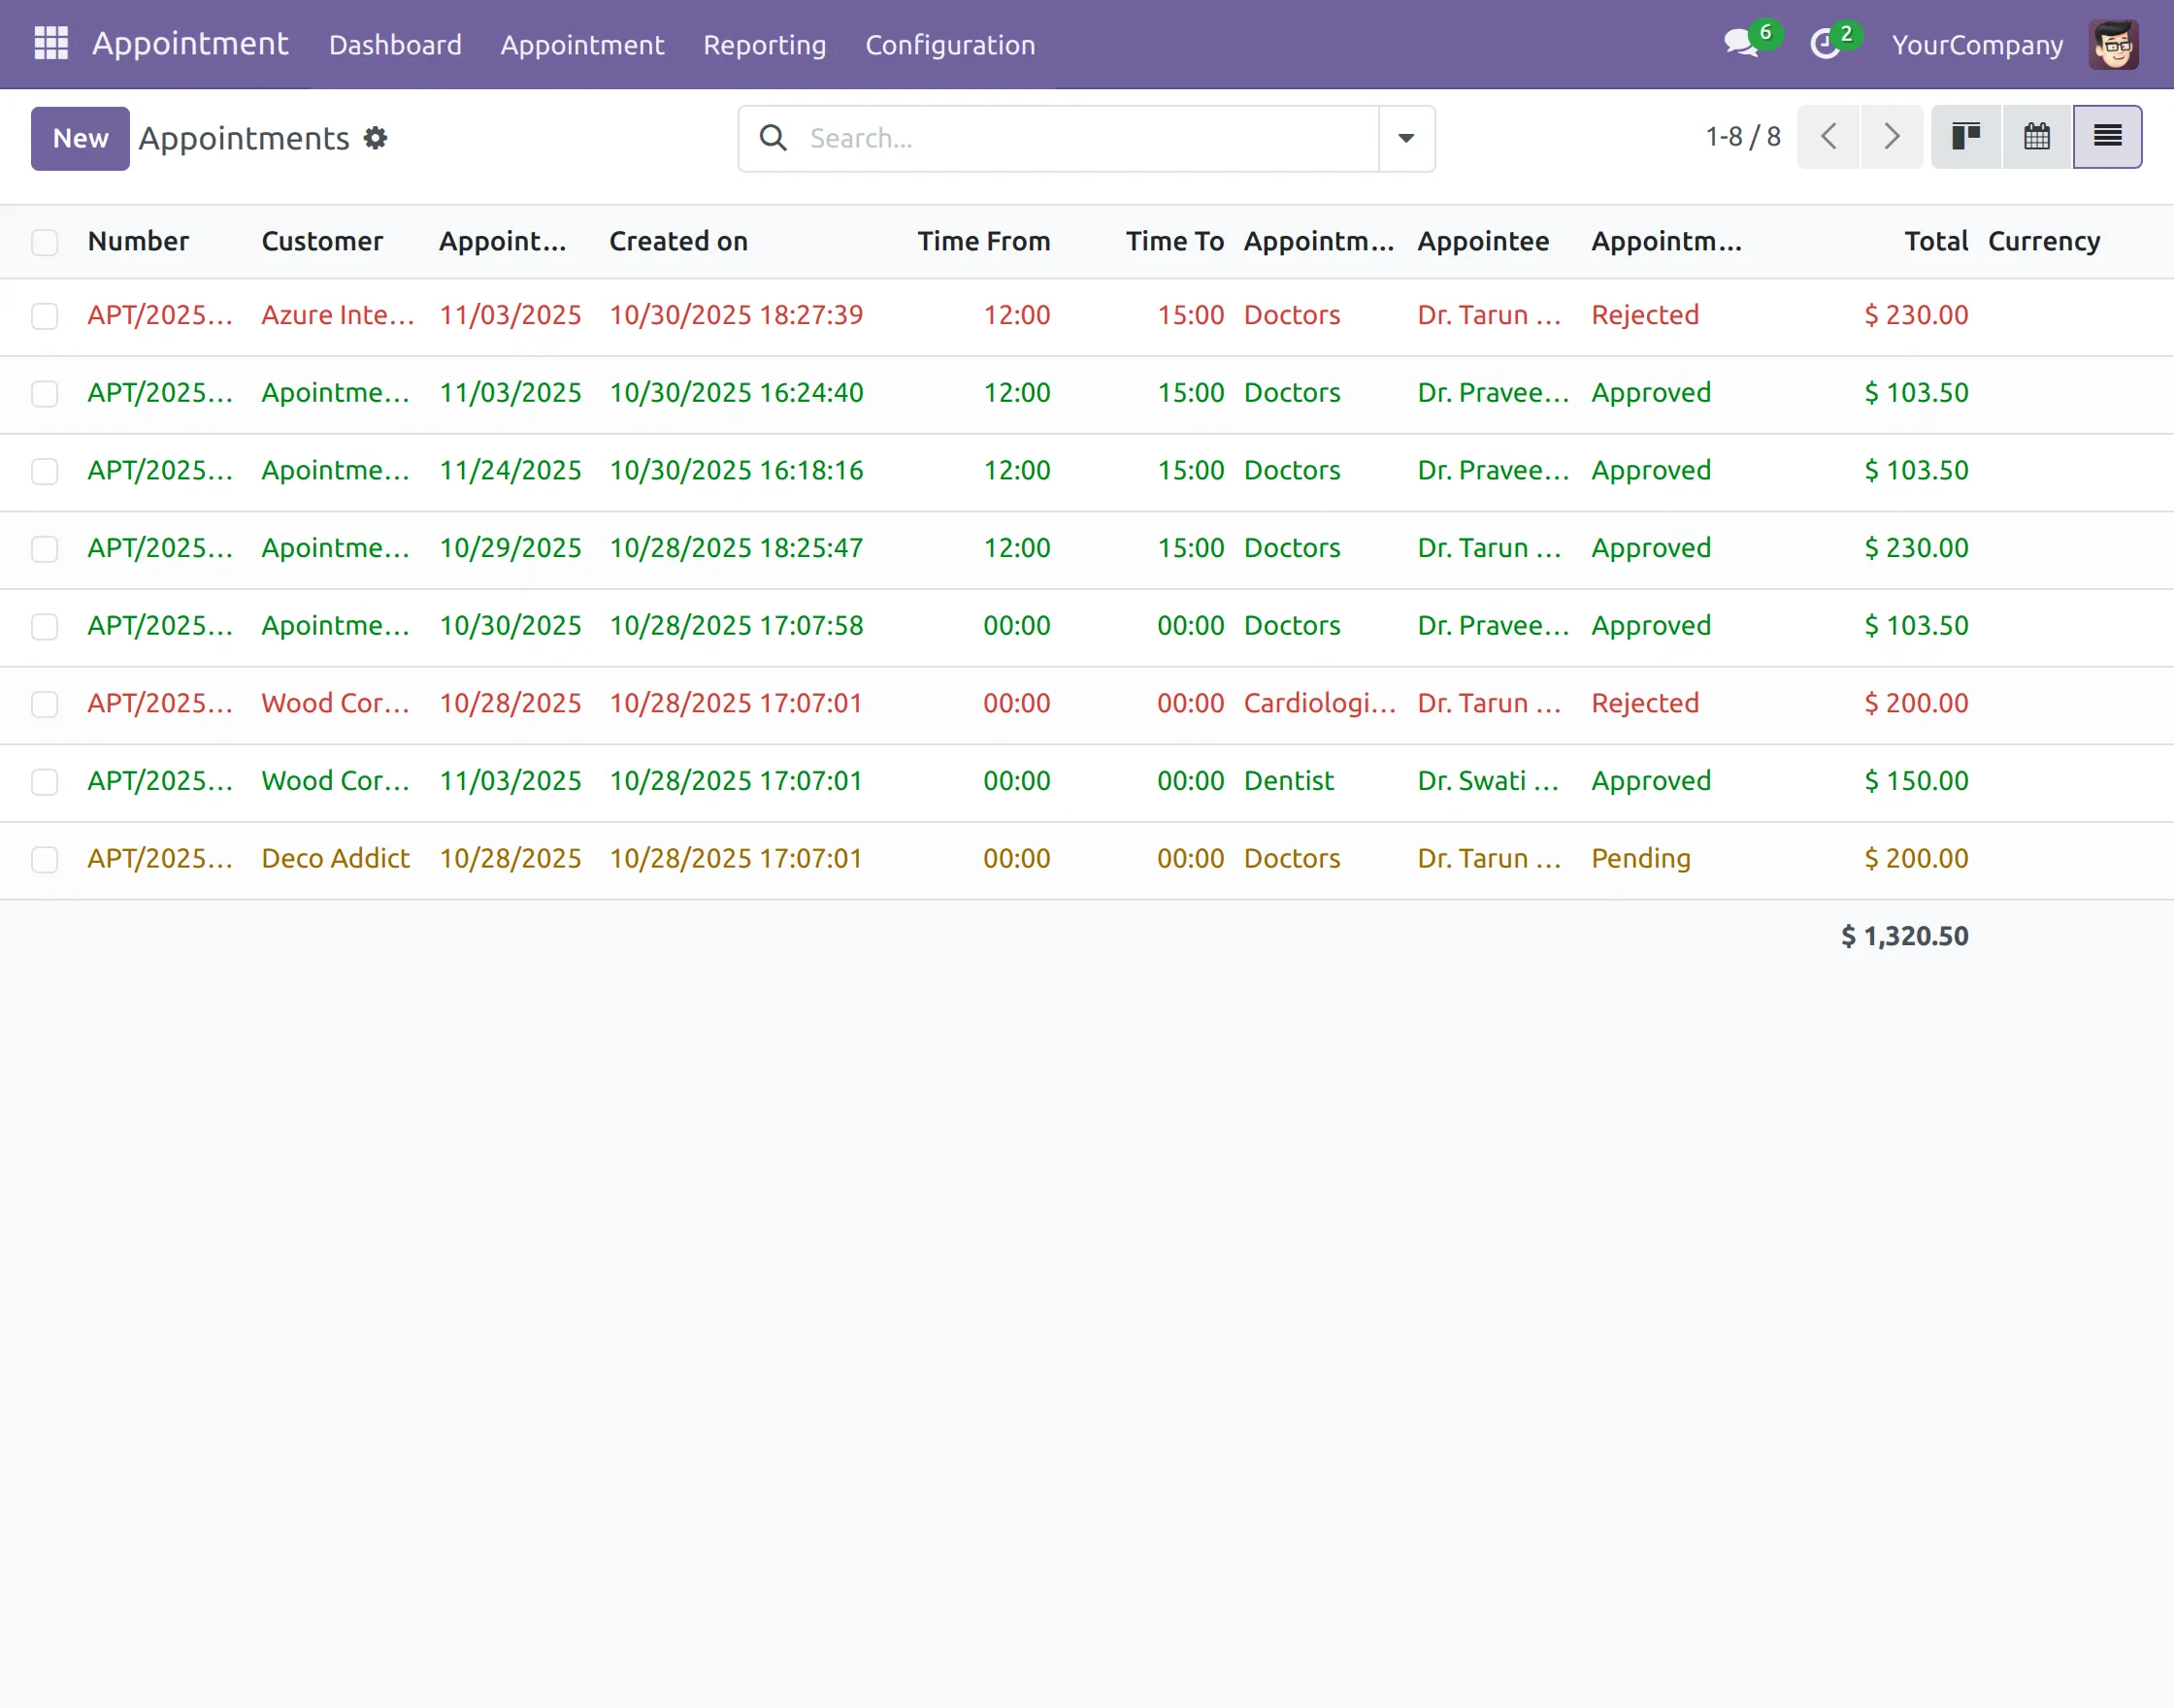
21. Next, Open the ‘All Appointments’ under ‘Appointments’ to view all appointments. You can also click on any record to view its details.
22. Lastly, go to ‘Reporting> Appointments Analysis’ to view the booking stats in graph or chart form.

OTHER ODOO WEBSITE MODULES
- Odoo Stock Per Warehouse
- Advance Stock Inventory Import
- Odoo Inventory Barcode Scanning
- Odoo Stock Picking Cancel
- Display Pricelist Price On Products
- Odoo Discount On Purchase Order
NEED HELP?
Hope you find the guide helpful! Please feel free to share your feedback in the comments below.
If you still have any issues/queries regarding the module, please raise a ticket at UV Desk.
Also, please explore our Odoo development services & an extensive range of quality Odoo Apps.
For any doubt, contact us at [email protected].
Thanks for paying attention!!
Current Product Version - 1.0.1
Supported Framework Version - Odoo V19, V18, V17

Be the first to comment.