INTRODUCTION
Store information at a centralized location with Odoo Virtual Card!
A virtual profile helps users store all their relevant details at a centralized location. Also, they can’t be stolen or lost as they don’t exist physically.
But how a person can get a virtual card without any website?
Odoo Virtual Card allows selling virtual cards on the Odoo website. Virtual cards, once approved, can be used by users to add their details, location, and social accounts.
Moreover, the Odoo admin can cancel or confirm a virtual card and even block it according to requirement.
All the virtual card details are recorded in the backend for research. The user can share the virtual profile URL or QR code with others to access it.
You can add a virtual card for purchase from the backend and confirm the purchase and virtual card from the Odoo backend.
Users can activate their profile from the available button on the Virtual card.
FEATURES
- Odoo Virtual card allows you to configure a virtual product from the backend.
- It allows you to configure various default settings like banner, icon, and virtual card auto-confirmation settings.
- Check the list of all approved, canceled, and draft virtual cards.
- It allows users to create a partner virtual card from theirs.
- Virtual cards generate a unique username, QR code, and URL to access the profile.
- The Odoo admin can block the card according to choice.
- The module adds a ‘Is Virtual Card’ in the product form, which can help create and update a product as a virtual card.
- The user gets the virtual card URL on their registered mail on approval.
- Users can edit their virtual card details and add information according to their needs, and their address is also updated on the map.
- Moreover, the users can share their QR with other users so they can view it.
INSTALLATION
- Once you purchase the App from Webkul store, you will receive the link to download the zip file of the module.
- Extract the file on your system after the download finishes. You will be able to see a folder named- ‘.’
- Copy and paste this folder inside your Odoo Add-Ons path.
- Now, open the Odoo App and click on the Settings menu. Here, click on Activate the Developer Mode.
- Then, open the Apps menu and click on ‘Update Modules List.’
- In the search bar, remove all the filters and search ‘.’
- You will be able to see the module in the search result. Click on ‘Install’ to install it.
WORKFLOW
Let’s move to the configuration of the Odoo Virtual Card. But before that, explore our Odoo development services & an extensive range of quality Odoo Apps.
CONFIGURATION AT ODOO END
1. Move to the ‘Virtual Card> Configuration> Settings’ and configure the default settings for the virtual card.

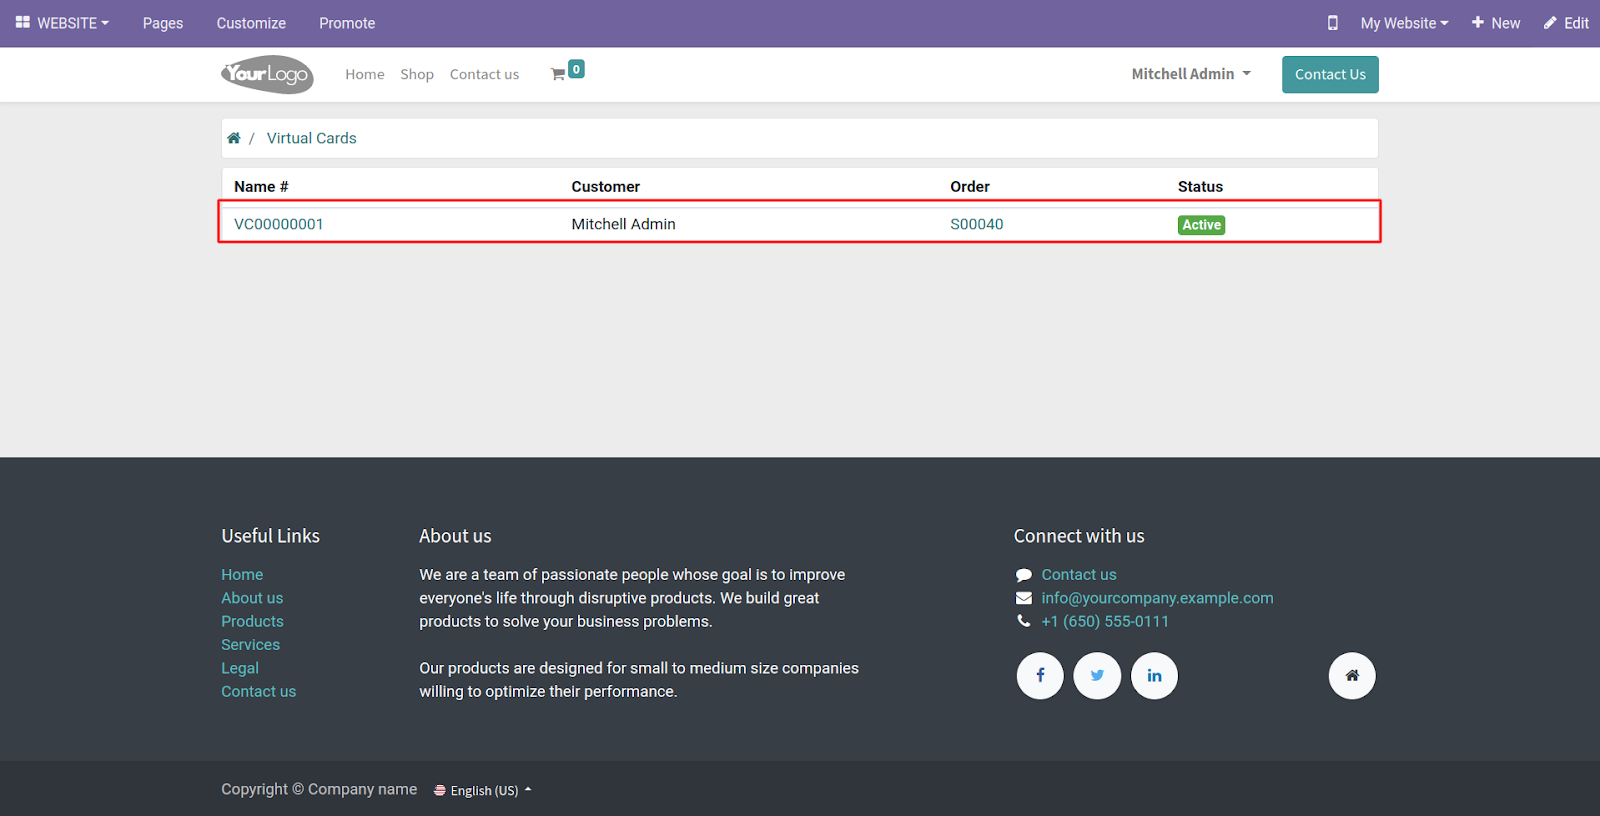
2. Go to the ‘Virtual Card’ homepage to check the list of all available virtual cards and their active status.

3. Open any virtual card to view its details. On approval, the virtual card QR code and URL are generated. You can also edit the username, reset the card to draft, and block it.

CREATING A VIRTUAL CARD
4. Navigate to the ‘Website> Products/eCommece> Products’ and hit the ‘Create’ button.

5. In the product form, enter the basic details and tick the checkbox after ‘Is Virtual Card.’ Similarly, this button can convert any existing product into a virtual card.

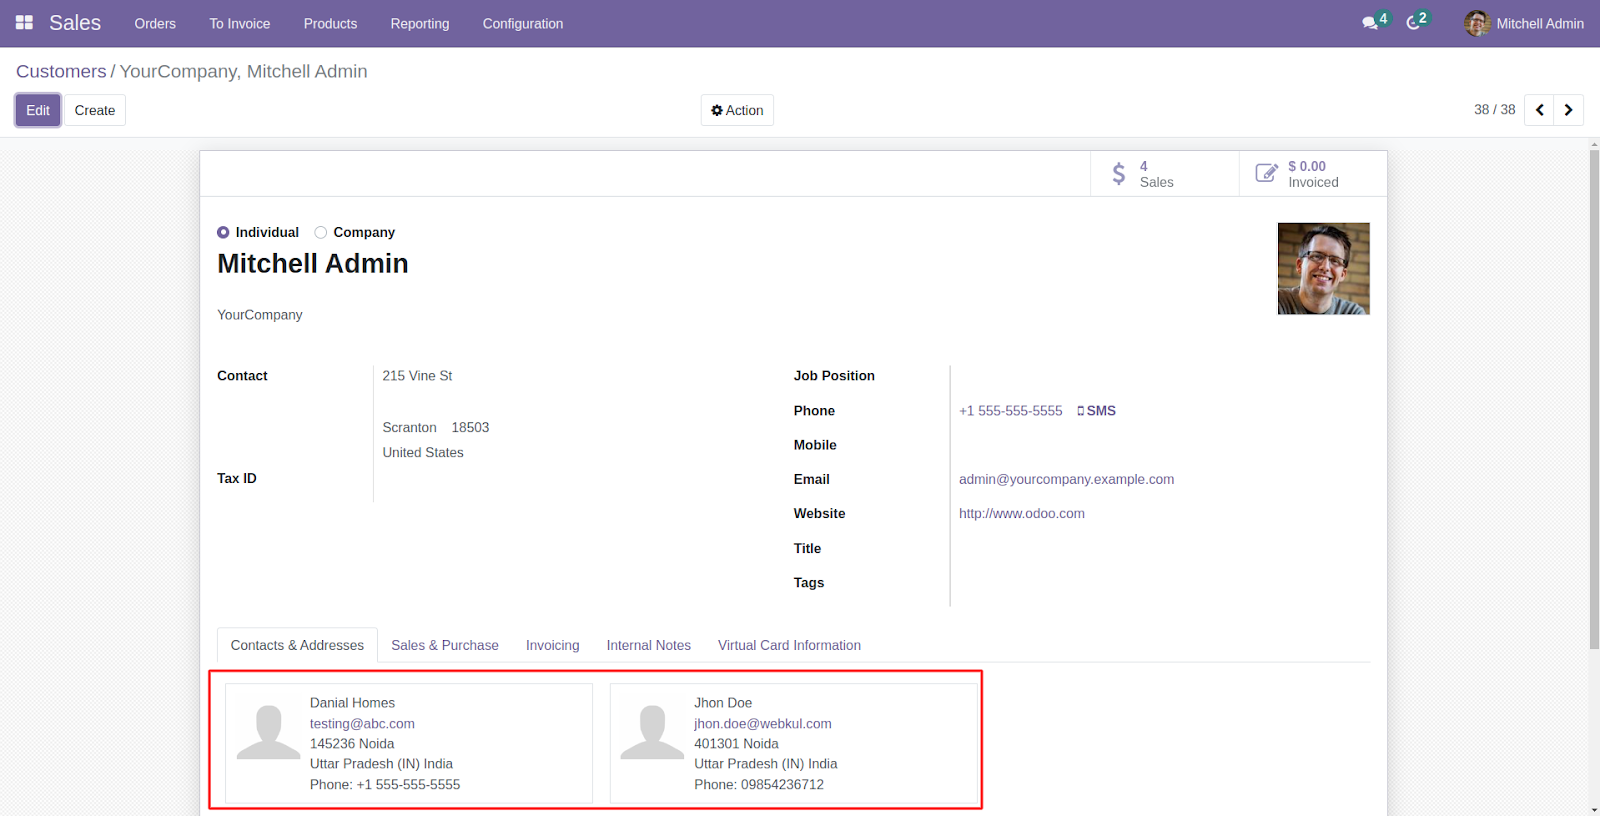
6. You can view the added partner in the Odoo backend in the ‘Customer’ profile.
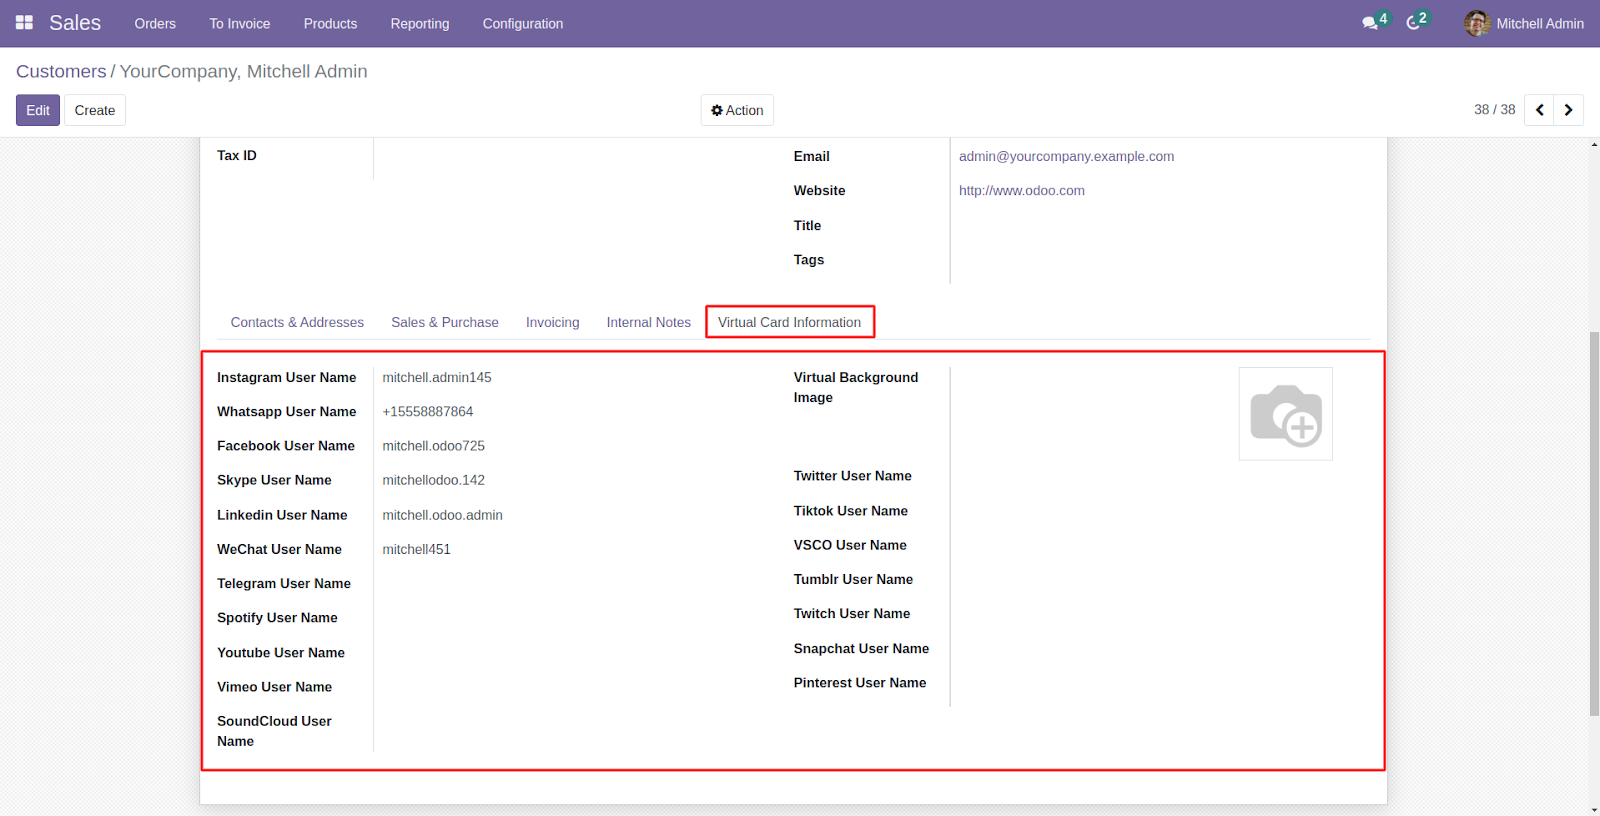
7. Additionally, the ‘Virtual Card Information’ tab shows all the added details in the backend.
ODOO WEBSITE
8. The users can buy the virtual card from the website by following the standard buying process.

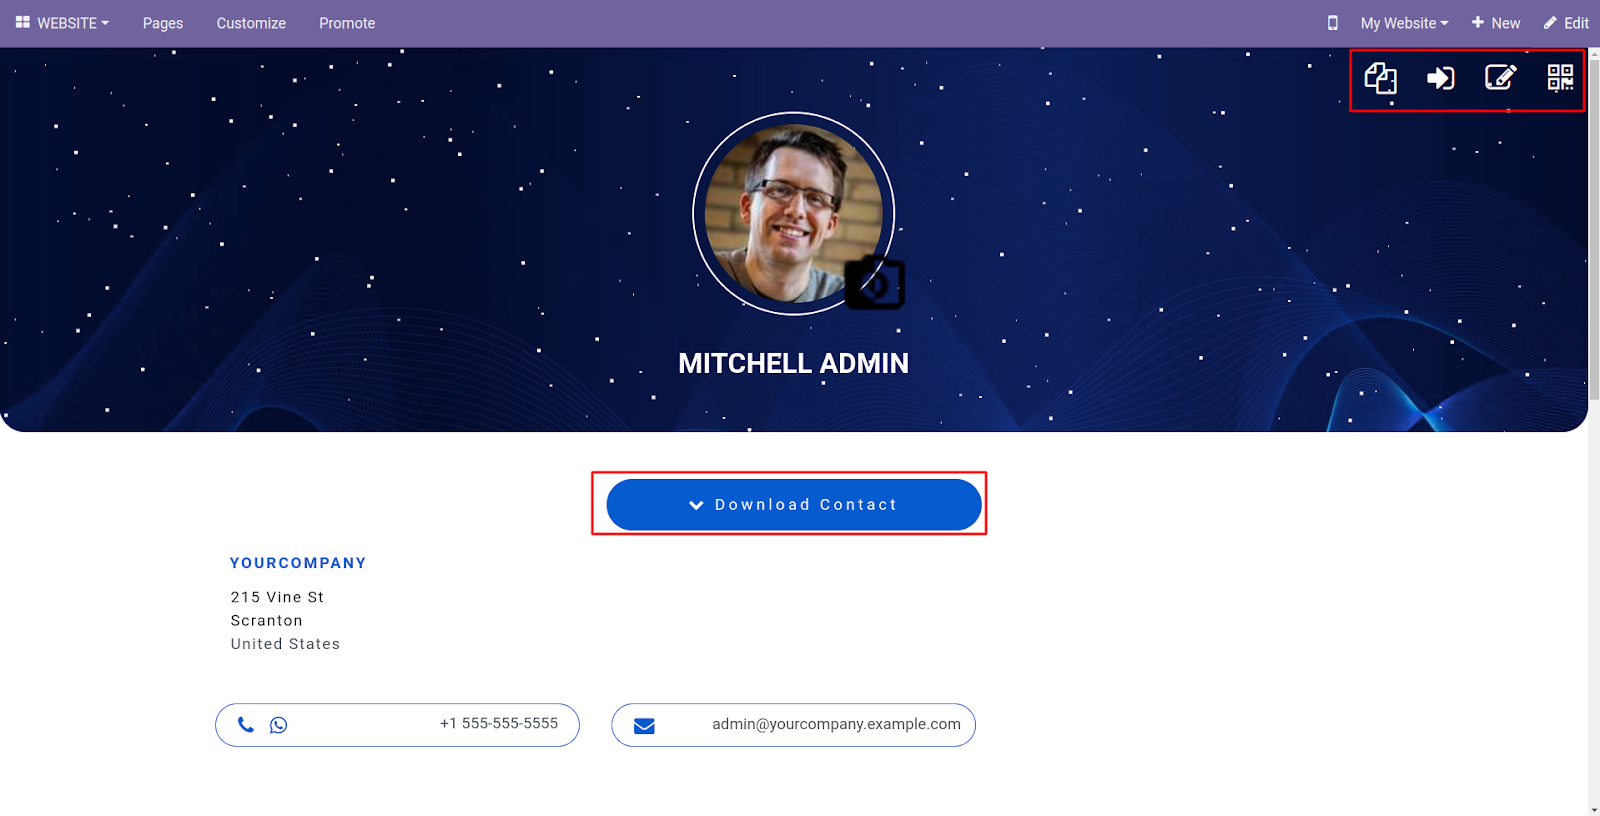
9. After virtual card approval and getting the URL on the registered mail. The user can access their profile. They can edit, copy, and download it from the given buttons.
10. Users can add their social media accounts (if they want) to the virtual profile.

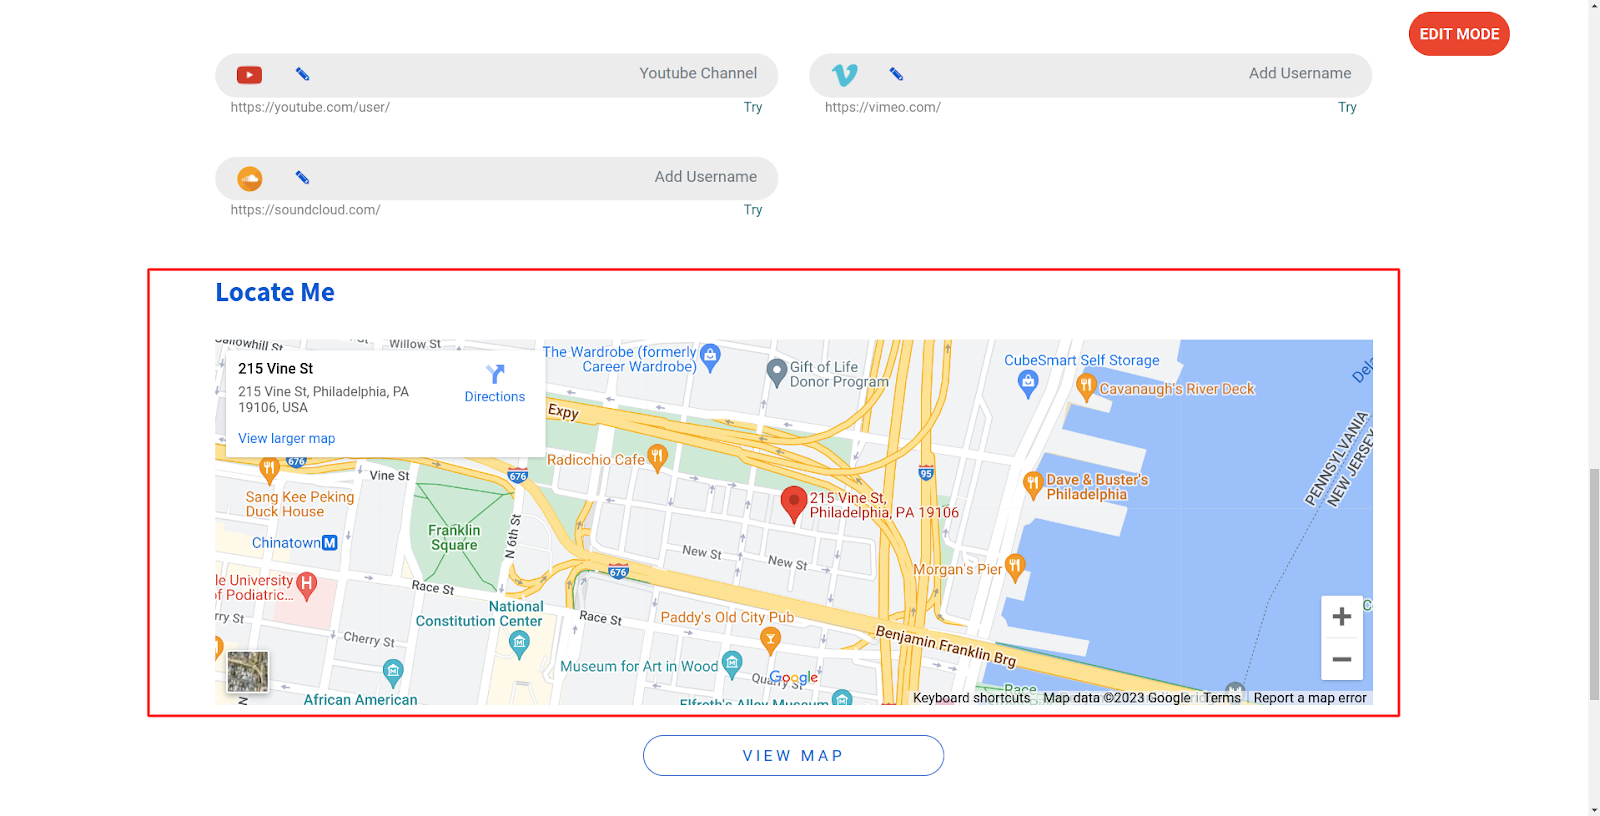
11. Also, they can view their location on the map.
12. They can access the QR code to scan and open the profile or download it for sharing.

13. In the ‘My Account’ section, a new tab is added for a virtual card, which contains all the purchased virtual cards.

14. In the virtual card section, you can check all the active/inactive virtual cards.
NEED HELP?
Hope you find the guide helpful! Please feel free to share your feedback in the comments below.
If you still have any issues/queries regarding the same, please raise a ticket at the UV Desk.
For any doubt, contact us at our support mail.
Thanks for paying attention!!
Current Product Version - 1.0.0
Supported Framework Version - Odoo 15

Be the first to comment.