PrestaShop Marketplace Product Tags- This is an amazing module that will allow sellers to add tags in multi-language on their products to make the visibility of the product page on top in the search results. This module works with the Marketplace module.
Features
- Easy to manage tags for products
- No limit for adding tags for a single product.
- Admin/seller can delete the tags.
- Seller can add tags in multi-language.
- Admin can also add/edit the tags to seller products in different language.
Note
- The module is multi-shop compatible with PrestaShop Advanced Multi-Vendor Marketplace version 5.4.0/3.4.0 and above.
- In order to install the module, you need to install the PrestaShop Advanced Multi-Vendor Marketplace module first.
- This module has been merged with Marketplace version 6.0.0 so if you are using Marketplace version 6.0.0 or above then no need to purchase this module separately.
Installation
After installing the marketplace module, you can now proceed to install the PrestaShop Marketplace Product Tags module.
- Firstly, go to the module manager in the back office and click on ‘upload a module’.
- After that, drag and drop the module file or select the file from the system.
- In this way, the module installation will be successful.


Workflow
After successful installation of module , go to Product -> add product button at front end, seller can see a new field named Product Tag at the end of the add product page.
Seller can add tags in any language. In order to add product tags in multi-language, the desired language should already be installed in PrestaShop.

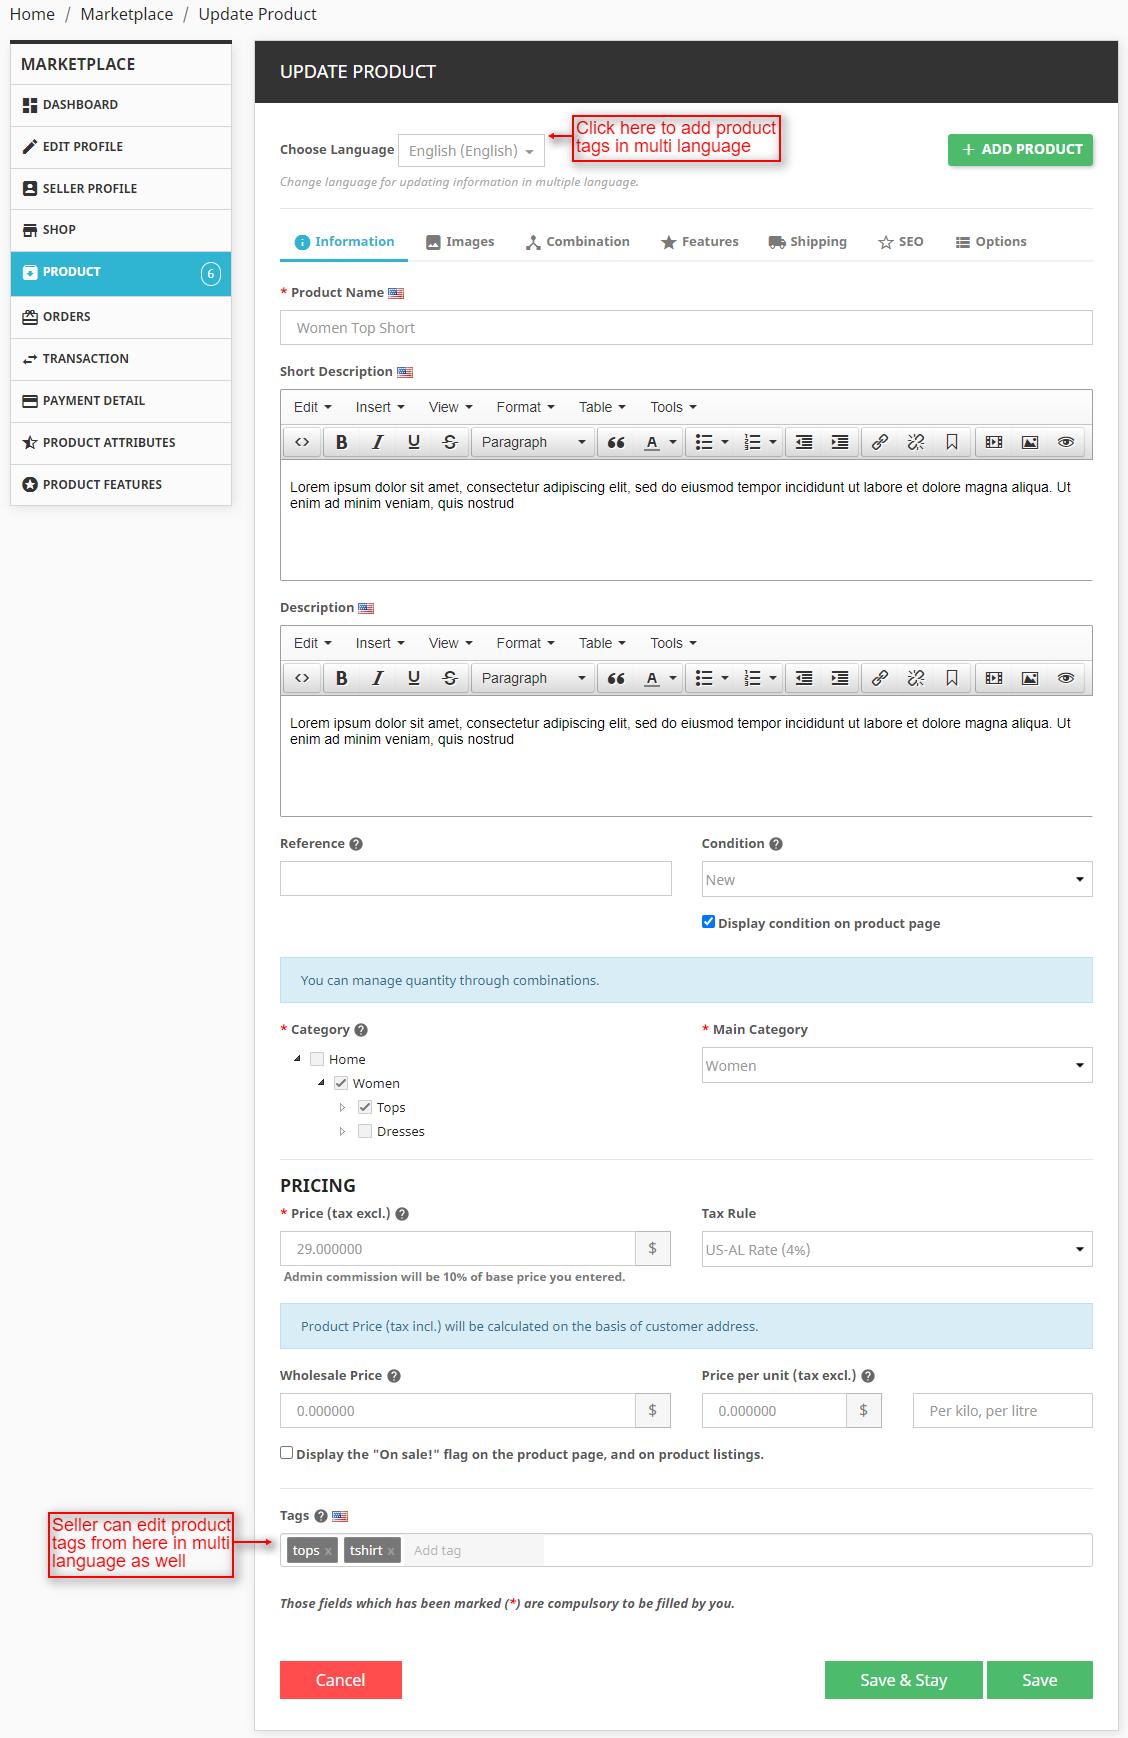
Seller can also update the product tag values from edit option available inside Product List page.

Clicking on edit button, will take seller to the update product page. Seller can edit or remove the product tags from here. Seller can also add product tags in multi-language from here.

After adding the product with tag values, admin can also view and edit the product tag values from back office.
Go to the admin back office and click on Marketplace Seller Product tab inside Marketplace management tab.
Click on the edit option of the product for which product tags have been added and admin can view and edit the added product tags.

Admin can add the product tags on seller products in multi-language.

Front-End View
Users can search products and based on the product tags added to the products if user search matches the product tags, products will be displayed.

If seller has added the tag in different language, then users can view the tag in the selected language.
Also can search products in desired language and accordingly products with tags added in that language will be displayed, if search matches product tags.

After searching for a product if any of the searched keyword matches the product tag which seller have added for product, users can view all the products for which that tag has been added.

So, this was all about the PrestaShop Marketplace Product Tags module. I hope this document will help you in checking the functionality of the module in a better way.
Also, do let us know about your views in the comments.
Support
For any kind of technical assistance or query, please raise a ticket at http://webkul.uvdesk.com or send us a mail at [email protected]
Also, please explore our PrestaShop development services & vast range of featureful PrestaShop Addons.
Current Product Version - 5.0.1
Supported Framework Version - 1.7.x.x
Be the first to comment.