INTRODUCTION
Odoo Multi Website, partner to manage multiple websites!
Odoo Multi Website- Vendors who run multiple eCommerce websites face a common issue, i.e., managing each with the same efficiency. They have to manage all the websites on their own, but it’s a difficult task for anyone to do so.
A solution that can help them is to manage every website from a single database. Also, creating a single database for all products gives the admin the freedom to choose on which website to sell a particular product.
Odoo Multi Website can help you with this by letting you manage multiple websites from a single admin. Further, all the product records, orders, invoices, etc., are maintained in a single place. In addition, the module lets you use unique domain names, payment methods, delivery methods, price lists, product segregation, and much more.
Odoo Website Product Visibility allows users to restrict product visibility on their website by only searching or listing categories. It also allows adjustments for both searching & category visibility & can be used to hide products.
FEATURES
Odoo Multi Website offers the following features to the users:
- Create and manage Multi-Websites with simple clicks from a single Odoo database.
- Assign unique domain names for different Websites from the Odoo backend/admin.
- Create Multi-Websites with the same or different Company(ies) with a unique theme.
- Use Odoo categories to further segregate the products and display them separately on multiple websites.
- Multi-eCommerce based on categories.
- Create different store-specific website menus for Multiple Websites.
- Multiple price lists for different Websites.
- Enable different shipping and payment methods for different Websites.
- Use different Categories for different Websites.
- Attach unique Logos and Favicon to each Website.
- Link numerous Social Media accounts like Twitter, Facebook, etc. to different Websites.
- Filter Reports and sale analytics data based on websites.
- Percolate and group Orders, Invoices, Pickings, and Customers based on websites.
- From the website menu, access each website with one click in the Odoo admin.
Upgrade your Odoo Website UI with the Odoo Website theme inventive , that allows easy customisation options with advance features that makes the website look attractive and interactive for customers.
INSTALLATION
- Once you purchase the App from Webkul store, you will receive the link to download the zip file of the module.
- Extract the file on your system after the download finishes. You will be able to see a folder named- ‘multi_websites.’
- Copy and paste this folder inside your Odoo Add-Ons path.
- Now, open the Odoo App and click on the Settings menu. Here, click on Activate the Developer Mode.
- Then, open the Apps menu and click on ‘Update Modules List.’
- In the search bar, remove all the filters and search ‘multi_websites.’
- You will be able to see the module in the search result. Click on ‘Install’ to install it.
WORKFLOW CONFIGURATION
MULTI WEBSITE BACKEND CONFIGURATION
1. Firstly, open the Odoo backend and go to ‘Website> Configuration> Settings’ and open click on the website drop down to select a website.

2. Next, on the same page, enter the name and favicon, choose the languages, and enter the website domain. Once done, click the ‘Save’ button.

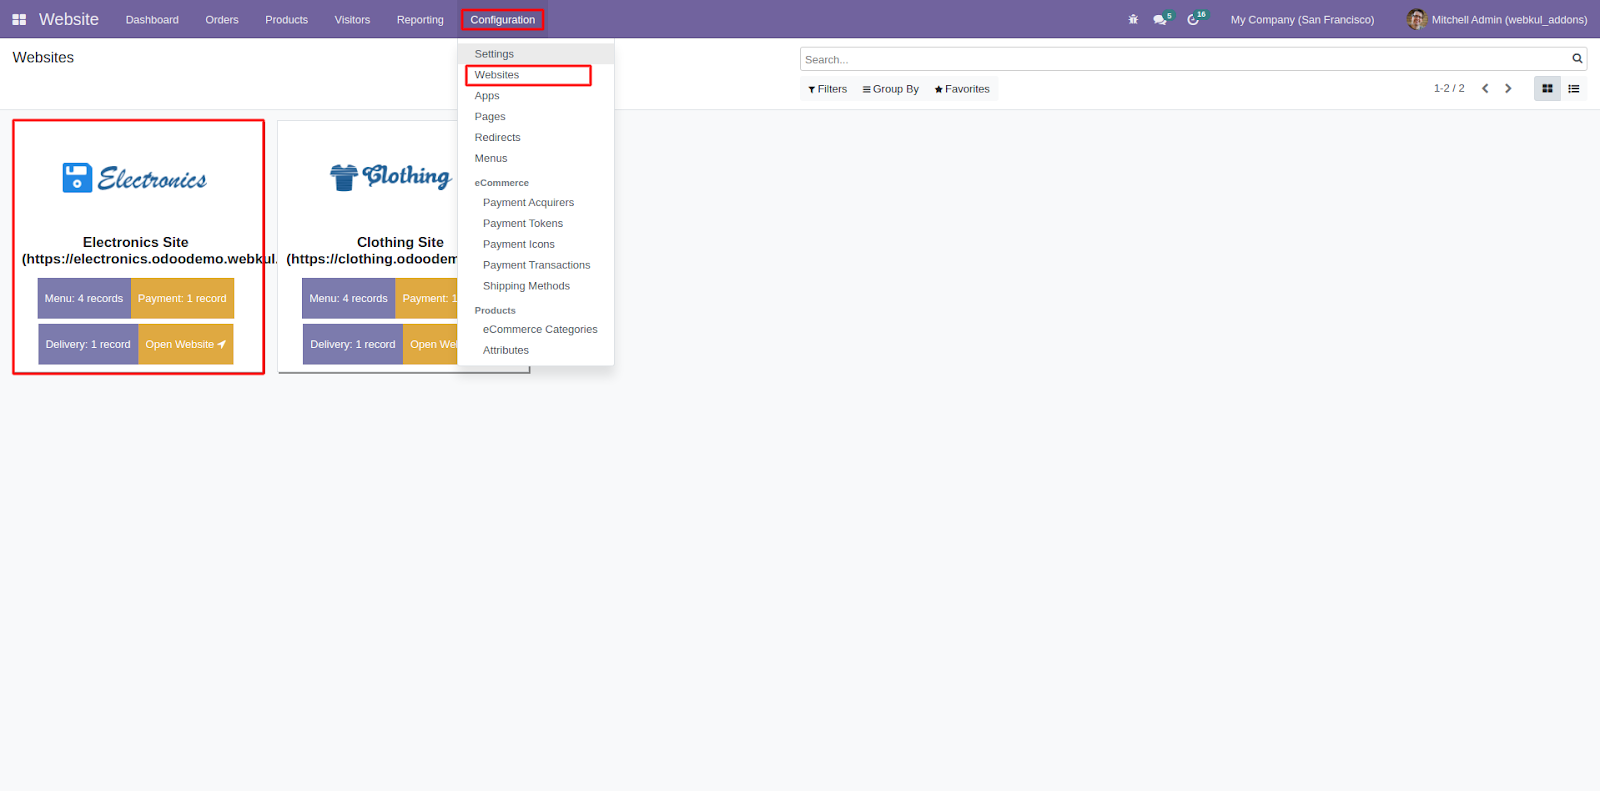
3. Now, go to ‘Configuration> Website’ to view every multi website. Click on any to open it.
Further, from here you can see the number of menus, payment methods, delivery options, and open website options.
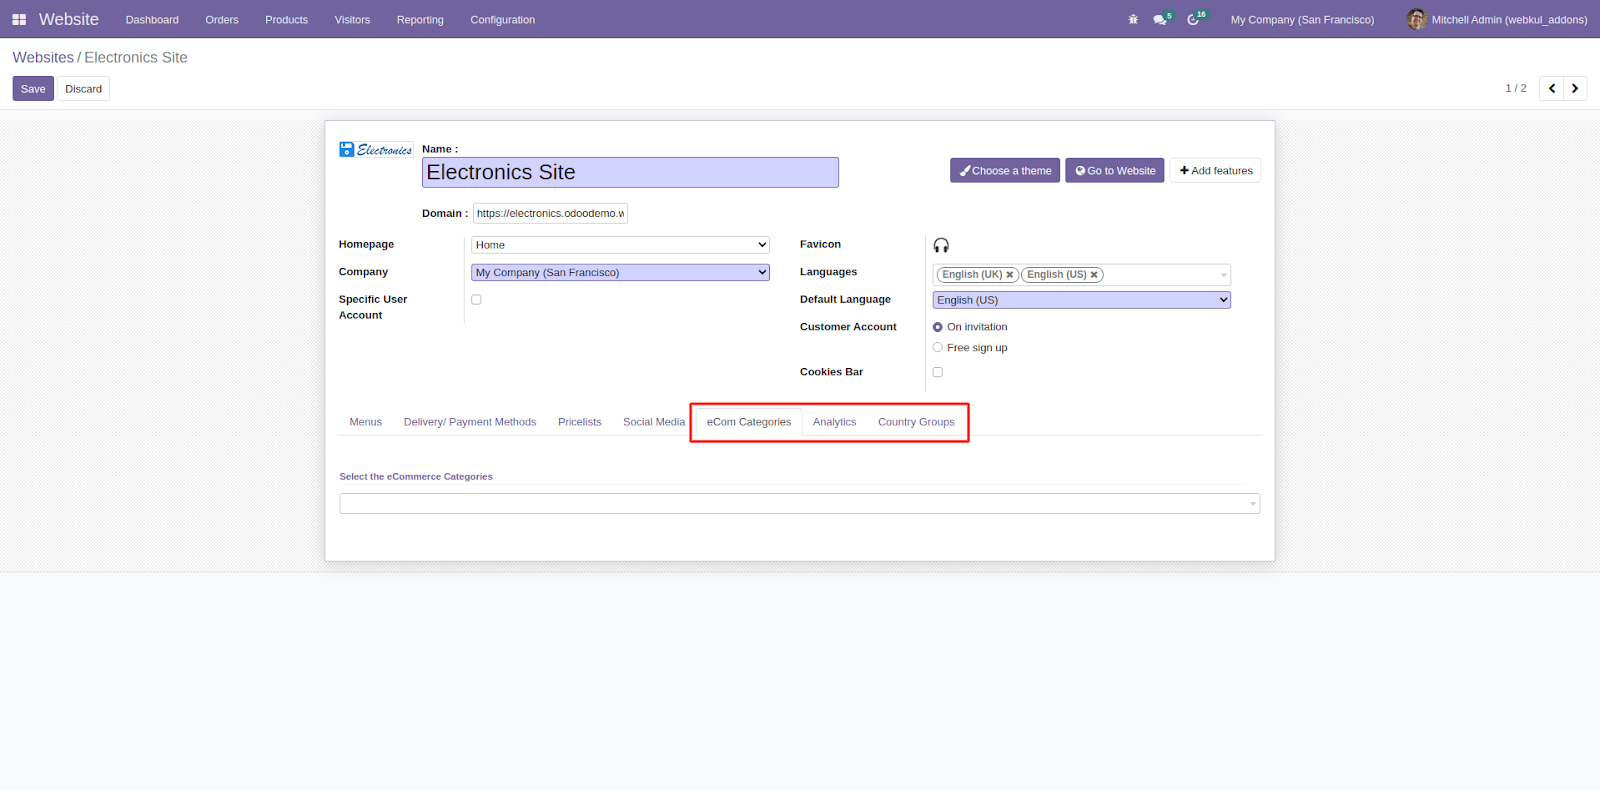
4. Click on the site and open the configuration page, enter the ‘Domain, Homepage’ and various other details of the website.

5. Configure the ‘Homepage’ and in the ‘Menu’ tab configure website menus and Pages.

6. In the ‘Delivery/Payment Methods’ tab, configure the ‘delivery method and Payment methods.’

7. In the ‘Social Media’ tab, configure the various social media account. Also, add the ‘Google Analytics Key’ here.

8. Once done, in the ‘eCom Categories, Analytics, and Country Groups’ tabs, configure the other website settings.
VIEWING DATA OF MULTI WEBSITE
9. Now, go to ‘Sales> Quotations’ and click on ‘Group By> Website’ to group the data according to Websites.

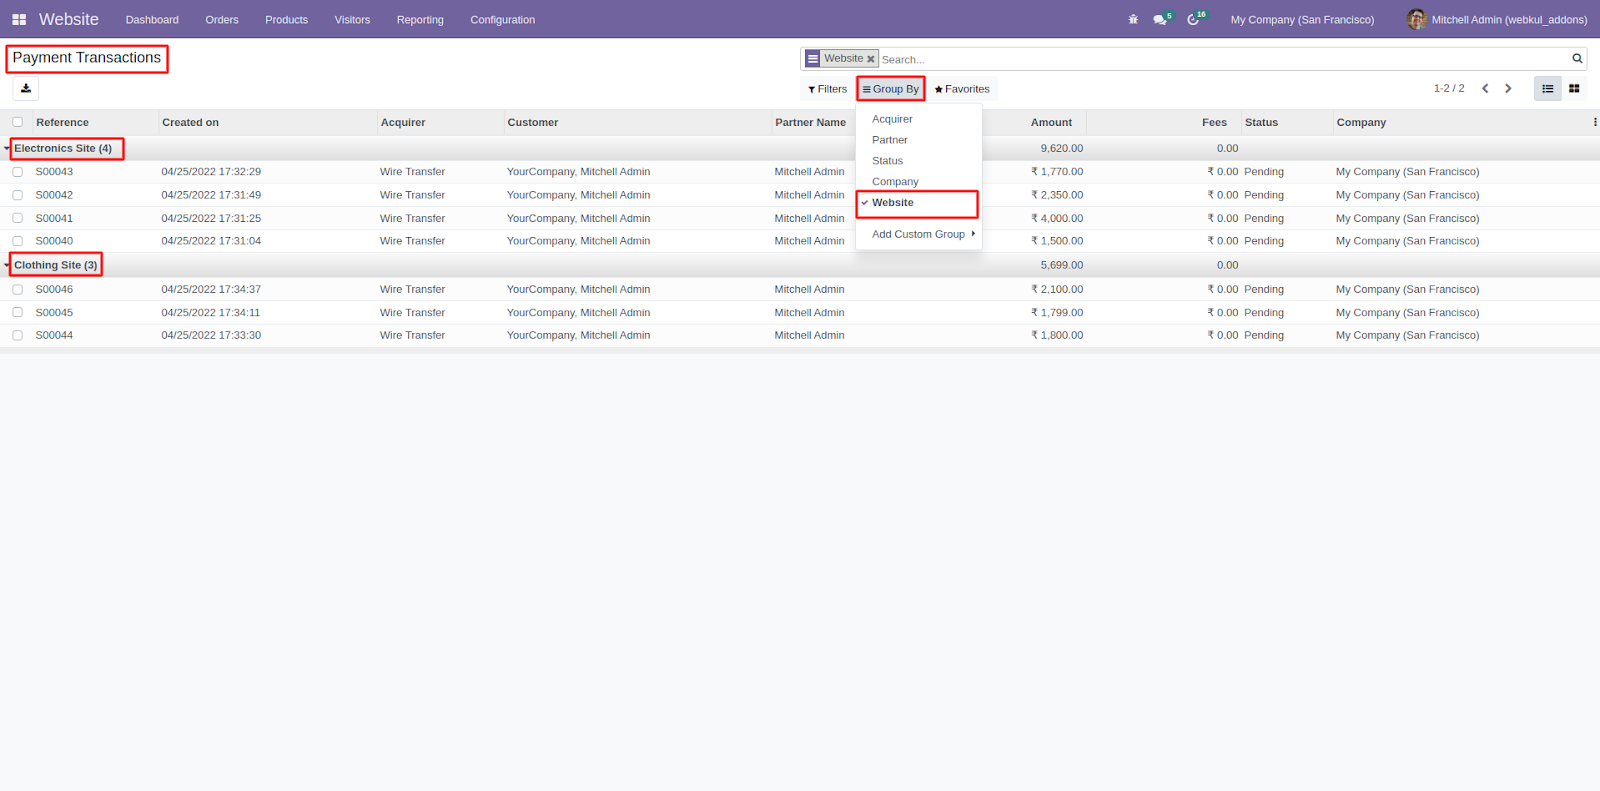
10. After that, follow the path ‘Website> Configuration> Payment Transactions,’ click ‘Group By> Website’ to view all the payment transactions on every website.
NOTE: The Payment Transaction option is available in ‘Developer Mode,’ which means you have to enable it from the settings to view it.
11. Next, go to ‘Inventory> Operations> Transfers’ and here also group the data by (‘Group By> Website’) to view data divided as per websites.

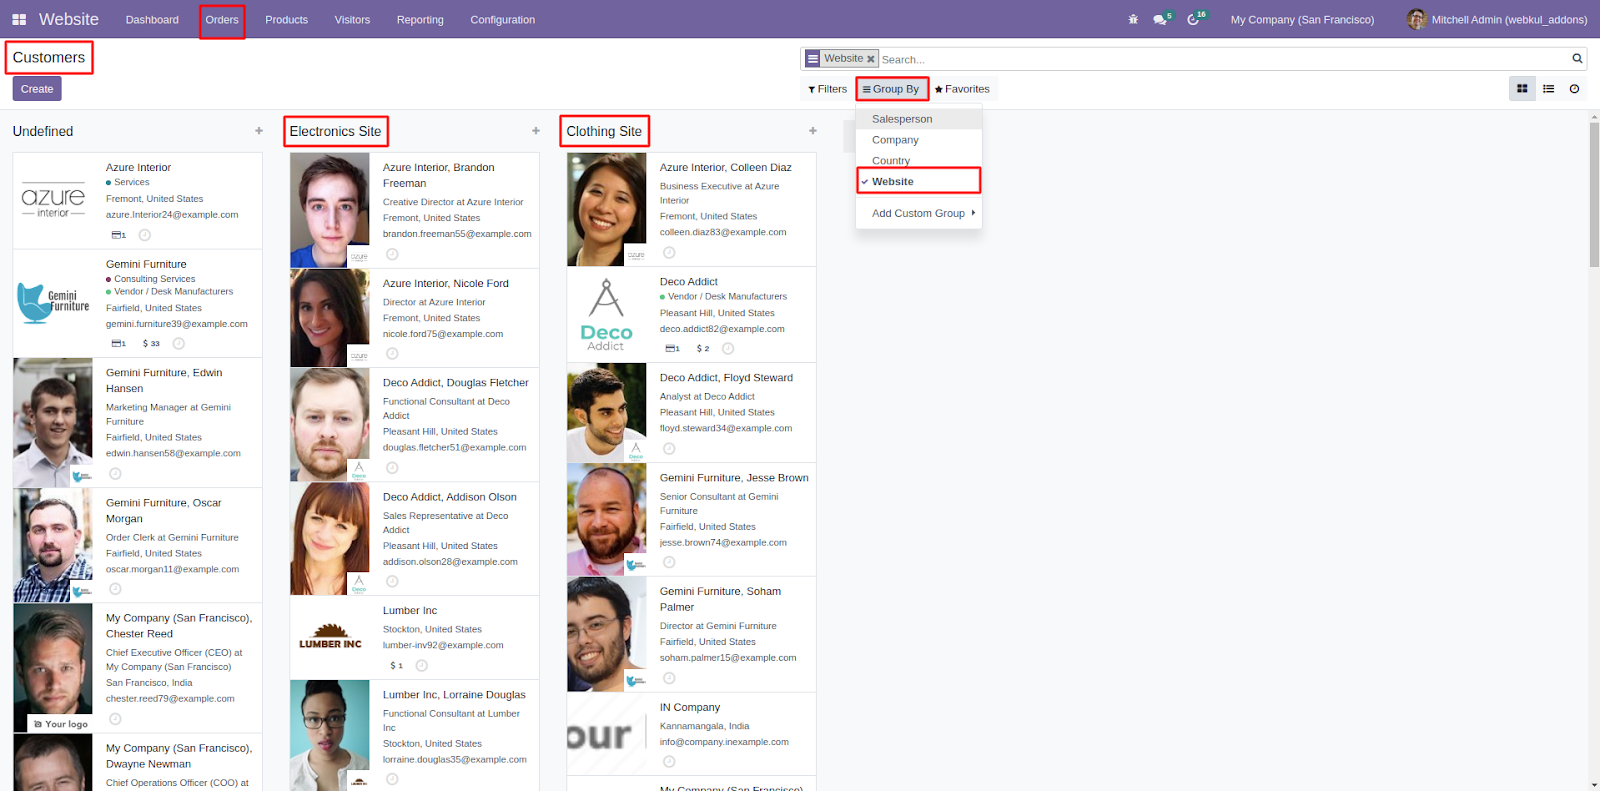
12. Additionally, you can view and manage your website customer base separately. Click on the ‘Orders> Customers’ and group data by the website to view the customers of each website.
13. Open any of the customers’ profiles and scroll to the button, open the ‘Sale & Purchase’ tab. In the ‘Website’ section, select the website (registered) and tick the box of the related website.

14. Lastly, go to ‘Configuration> website’ and click ‘Choose a Theme.’ It will open a new page where you have to select the theme for your website, once selected it will apply to the website once you click the ‘Apply’ button.

OTHER ODOO MODULES
- Odoo Website Product Pack
- Odoo Website Cart Settings
- Prescription Attachment for Products
- Odoo Website Coupons & Vouchers
- Odoo Website Daily Deals
- Website Social Network Tabs
NEED HELP?
Hope you find the guide helpful! Please feel free to share your feedback in the comments below.
If you still have any issues/queries regarding the module then please raise a ticket at https://webkul.uvdesk.com/en/customer/create-ticket/
Also, please explore our Odoo development services & a large range of quality Odoo Apps.
For any doubt contact us at [email protected].
Thanks for paying attention!!
Current Product Version - 1.0.0
Supported Framework Version - V15, V14, V13, V12, V11

Be the first to comment.