CS-Cart Gestpay Payment Gateway:
Integrate a secure payment gateway, Gestpay with CS-Cart via addon CS-Cart Gestpay Payment Gateway. With Gestpay, your e-commerce payments are simple and safe for you and your customers. Your buyer will be redirected to Gestpay hosted payment page.
After the payment, the user gets redirected again to your website. Gestpay accepts payments from anywhere in the world, from any card (such as Visa, Mastercard, American Express, JCB, Diners, UnionPay).
Note: Before installing the add-on, extract the downloaded package.
- Install the License Manager add-on first.
- Then install the required add-on.
- Follow the license activation steps to generate your license key.
Features
- Well integrated with CS-Cart Multi-Vendor.
- Payment option with hosted checkout method on GestPay Secure payment page.
- In addition Functionality to save Gestpay payment response at admin end.
- Works well in both Test and Production modes of payment.
- Offers an end-to-end security solution for fraud prevention.
- Moreover Easy to configure and manage at admin end.
How To Upload and Install
- After downloading CS-Cart Gestpay Payment Gateway add-on you’ll get one zip files, one install.txt file, and a relevant User Guide manual doc.Read it carefully for proper configuration.
- Firstly Go to Manage Add-ons, click on “+” as shown below in the snapshot.

Click on “Local” to browse the zip file and then click on “Upload & Install” as shown below in snapshot.

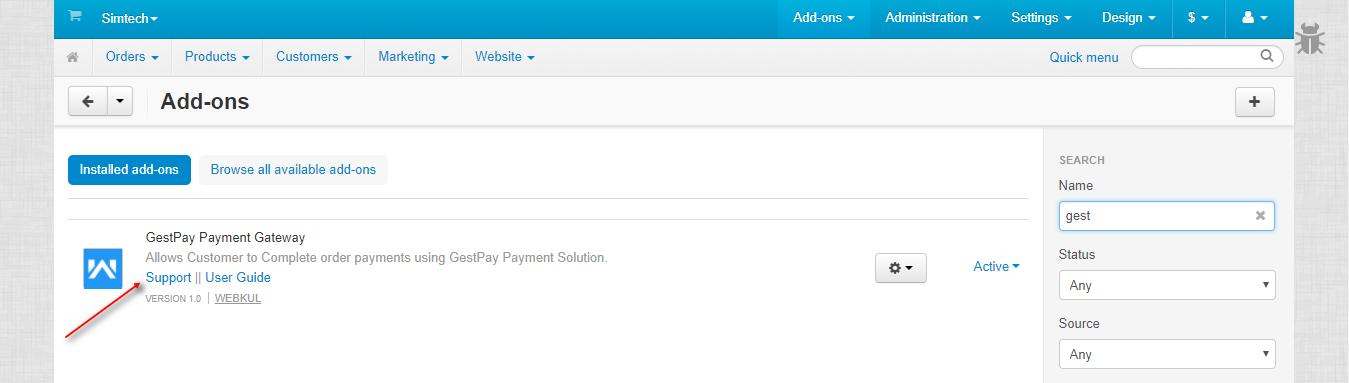
Finally after successful installation, there will be User Guide link and support link for quick support from Webkul’s end.
Payment Method Configuration At Backend
Our add-on CS-Cart Gestpay Payment Gateway supports hosted payment solution on the Gestpay payment page itself. Let’s see the process to configure Gestpay Payment Gateway at CS-Cart end.
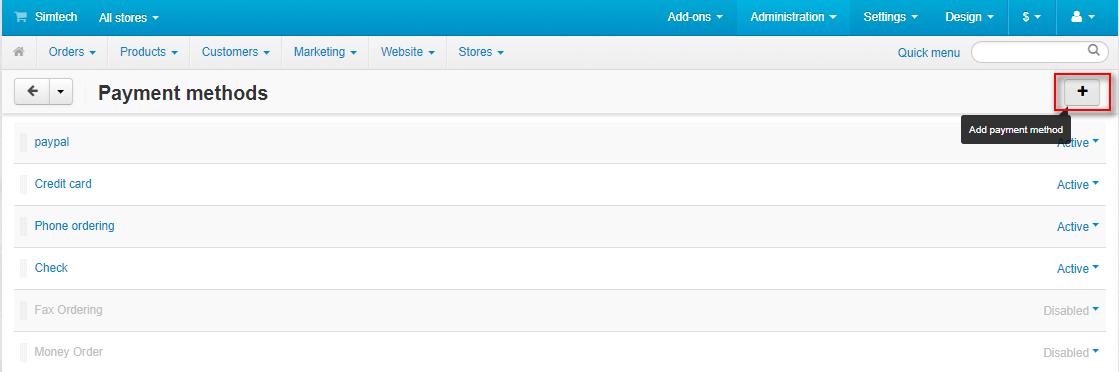
Go to “Administration” tab and click on “Payment methods”.

Click on “+” to generate a new payment method as shown below in the snapshot.
Set the parameters as shown below in the snapshot
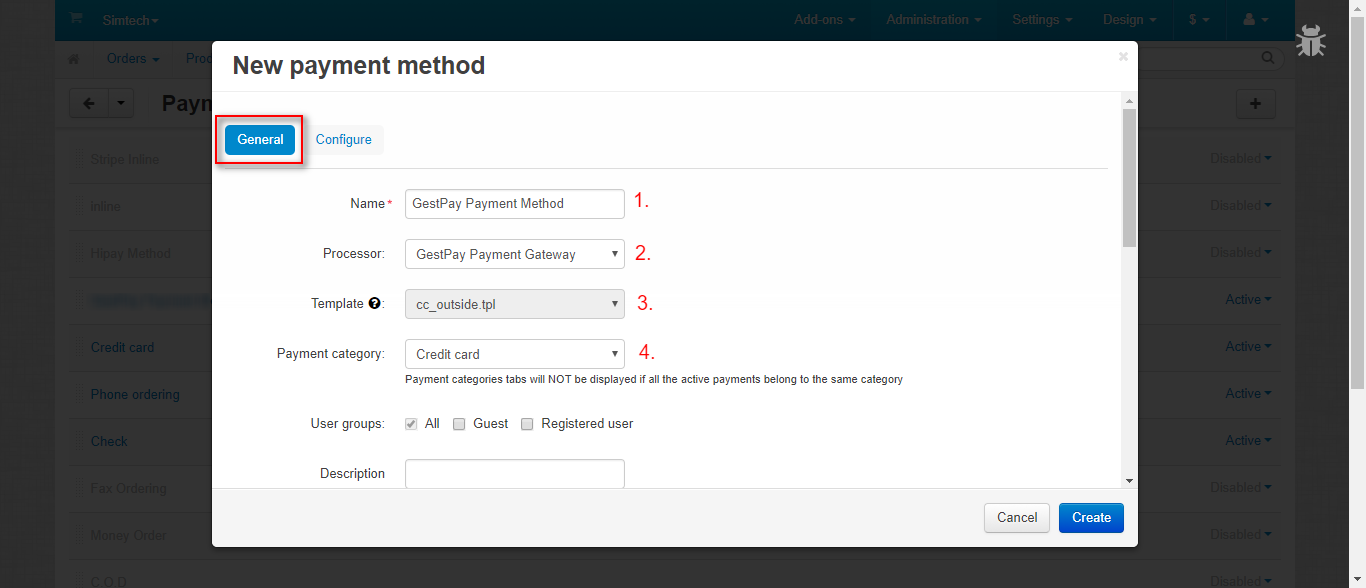
- Set the name of the payment method.
- For check out, choose the processor as “GestPay Payment Gateway”.
- Template for this payment processor will be “cc_outside.tpl”.
- Configure the other tabs accordingly as shown below in the snapshot.
Click on “Configure” and set the parameters as shown below in the snapshot.
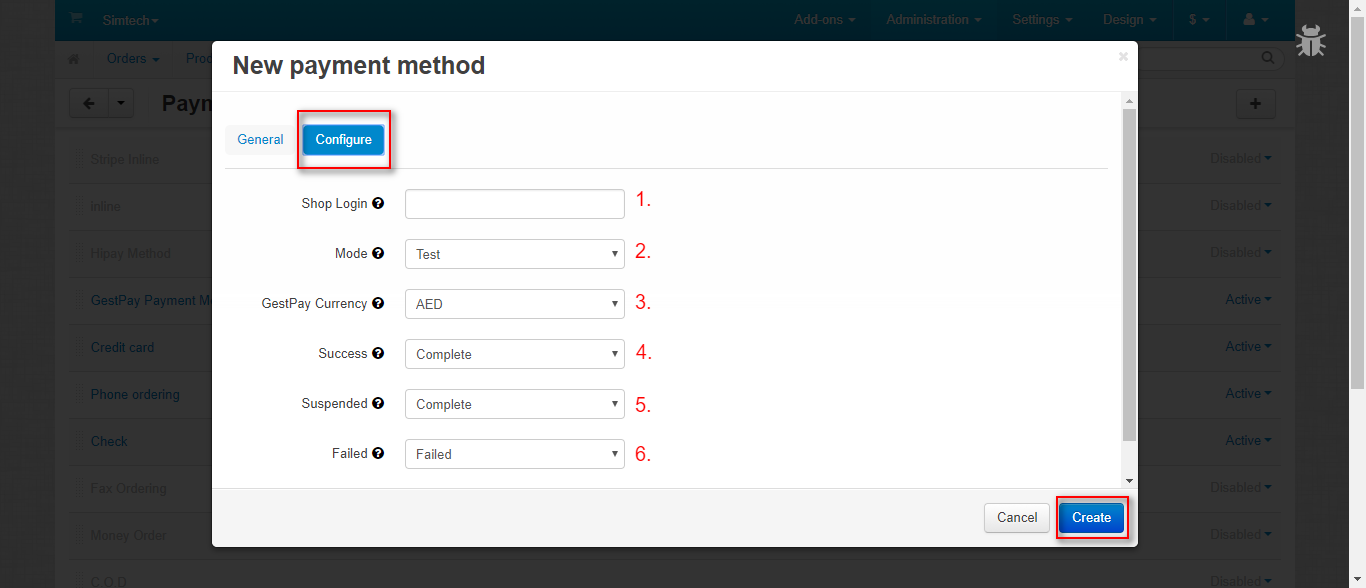
- Enter the Gestpay credential ie; Shop Login Id for Test/Production mode.
- Set the mode of payment (Test or Production).
- Select the currency for Gestpay Payments at your store.
- Select the default order status for the successful transactions.
- Set the order status for the suspended transactions.
- Set the order status for the failed transactions.
Click on Create button to add this payment method. This is how you can add Gestpay Payment Method in your CS-Cart Store.
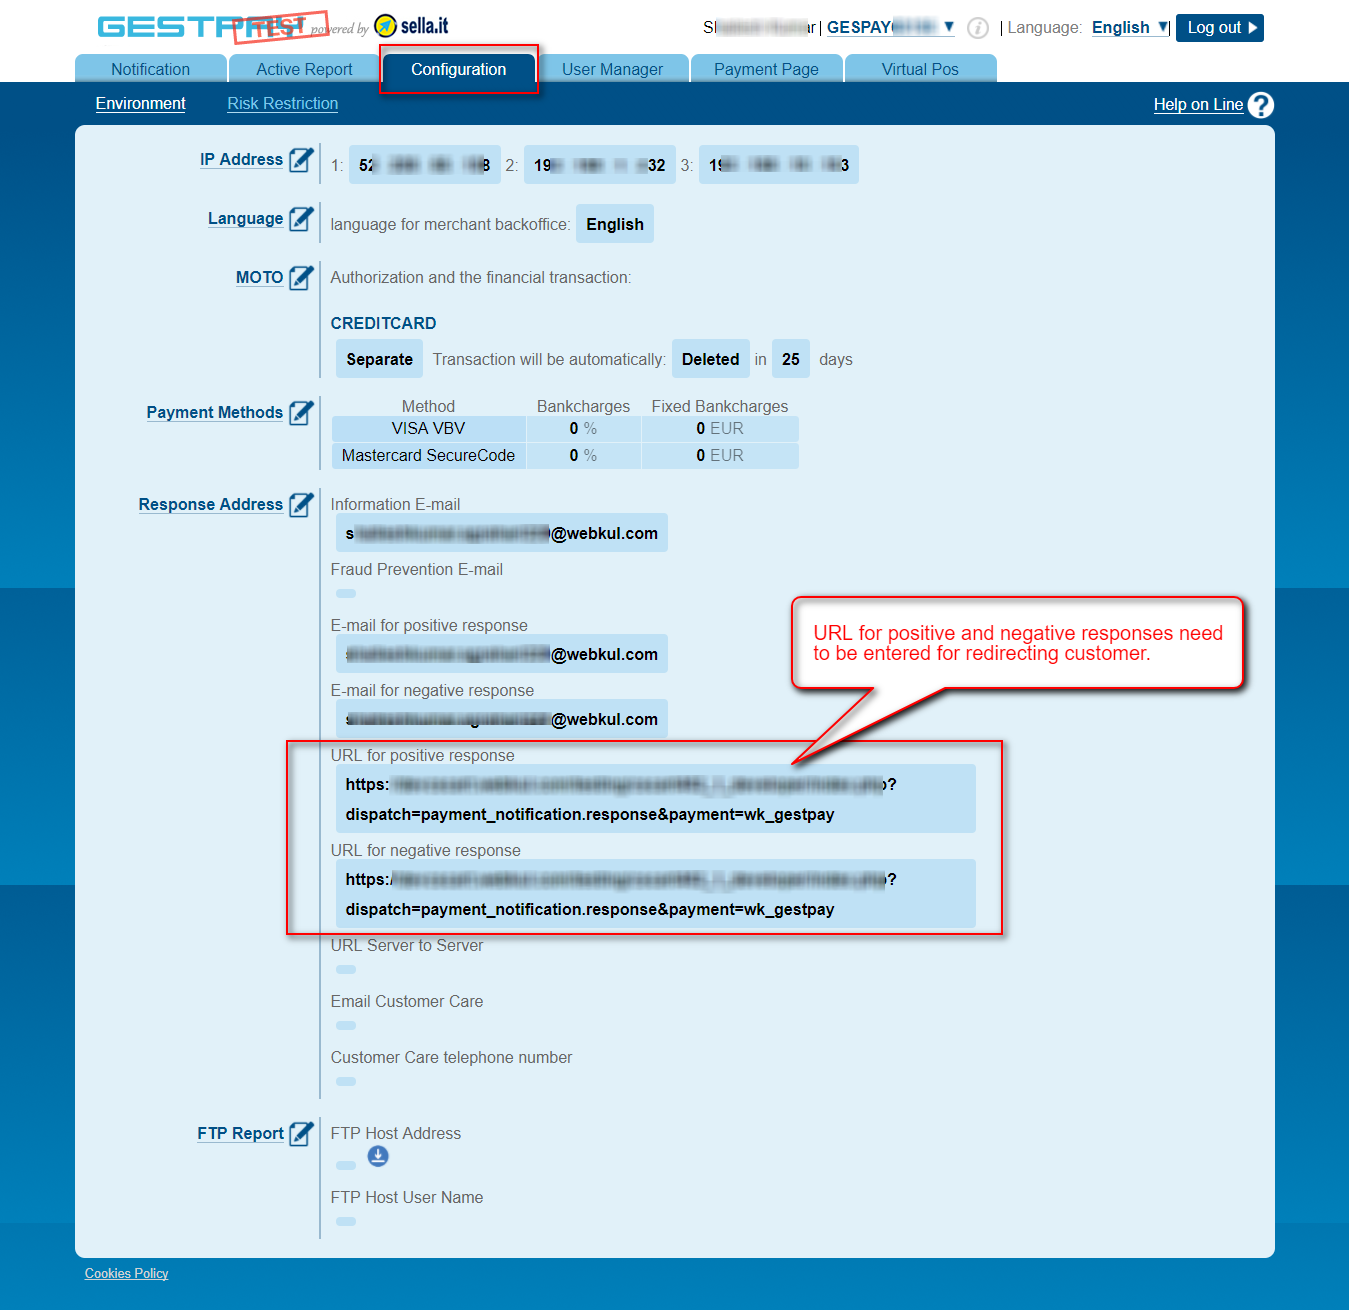
Configuration At Gestpay End
For Gestpay account sign-up process, firstly go through the doc available here – http://docs.gestpay.it/gs/how-gestpay-works.html
After merchant account creation, sign in with the Account code and Key as shown below.

Now, go to the “Configuration” Tab as shown and configure the IP and other mandatory details accordingly. For proper redirection of the customer, please enter the URLs for positive and negative payment response.
The format of URL will be < your_site_url >/?dispatch=payment_notification.response&payment=wk_gestpay
Front End View
Once the payment method is configured, New option for payment via Gestpay will be available for customers at the front end. For payment, customer needs to select the option as shown below in the snapshot and submit the order.

Customer will get redirected to the outside payment page of Gestpay as shown below. Customer needs to enter the card details & continue.
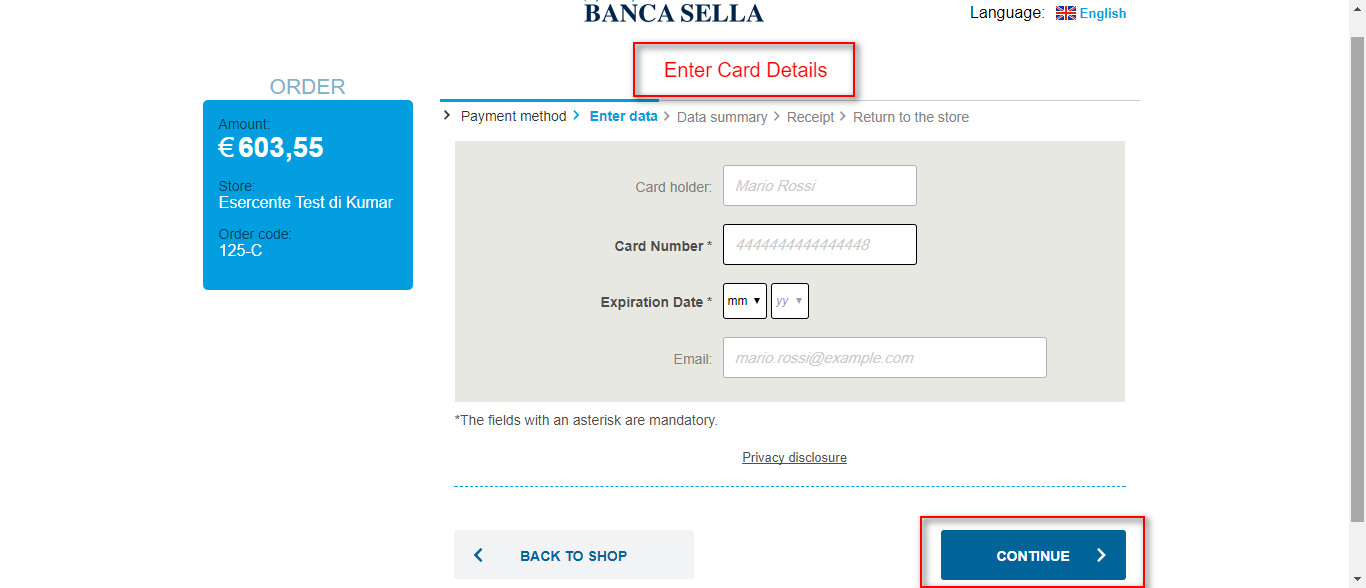
After adding, the customer will get the Data Summary as per the details entered. He then needs to Confirm if everything seems right.

After confirmation, the customer will get the option to download the receipt or return to the store. He can either download the receipt or get back to the store as per his desire.

Downloaded Receipt will be in pdf format as shown here – Receipt GESPAY.
This is how the customer can pay via any card using Gestpay payment method.
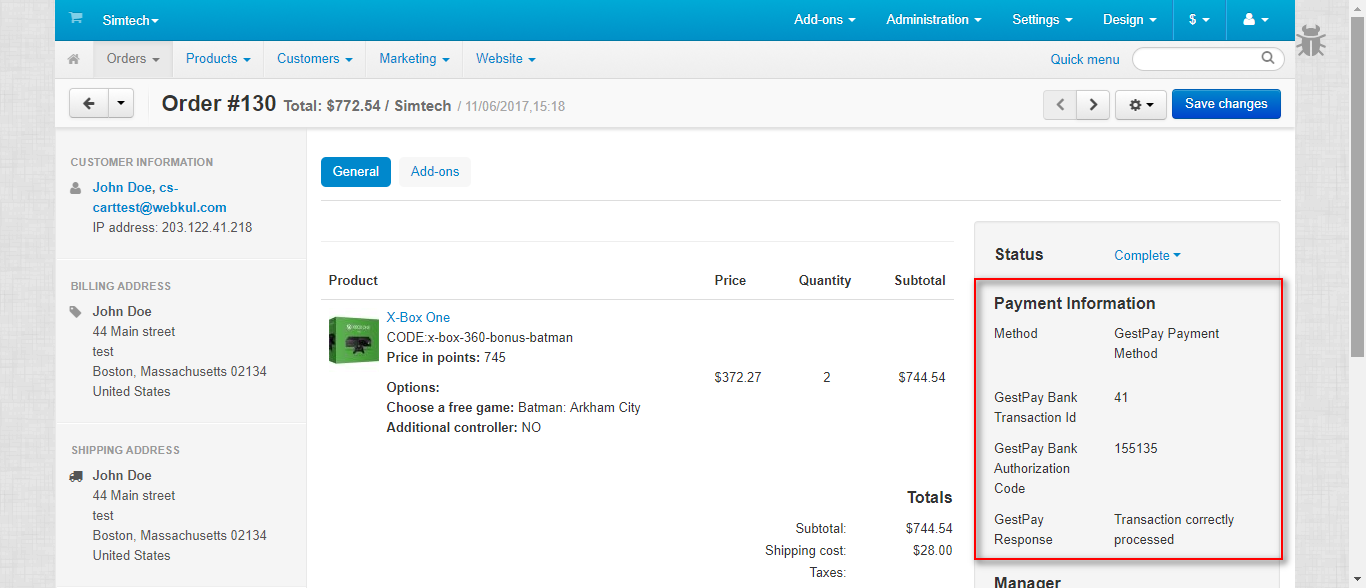
Payment Response At Backend
Payment response will be saved at the backend in the order details page. This response includes –
- Bank Transaction Id.
- Bank Authorization code.
- Gestpay transaction response.This is all about CS-Cart Gestpay Payment Gateway.
Support
- Still, have any issue, feel free to contact us at http://webkul.uvdesk.com and let us know your views to make the module better.
- Besides this you can explore our CS-Cart Development Services and quality CS-Cart add-ons.
Current Product Version - 1.0
Supported Framework Version - 4.18

Be the first to comment.