Communities are branded spaces for your employees, customers, and partners to connect. Communities are a great way to share information and collaborate with people outside your company who are key to your business processes, such as customers or partners.
It can be based on standard Salesforce functionality and tabs, or on one of our preconfigured templates. It may contain a subset of features and data available in your internal Salesforce organization and can be customized to use your company branding.
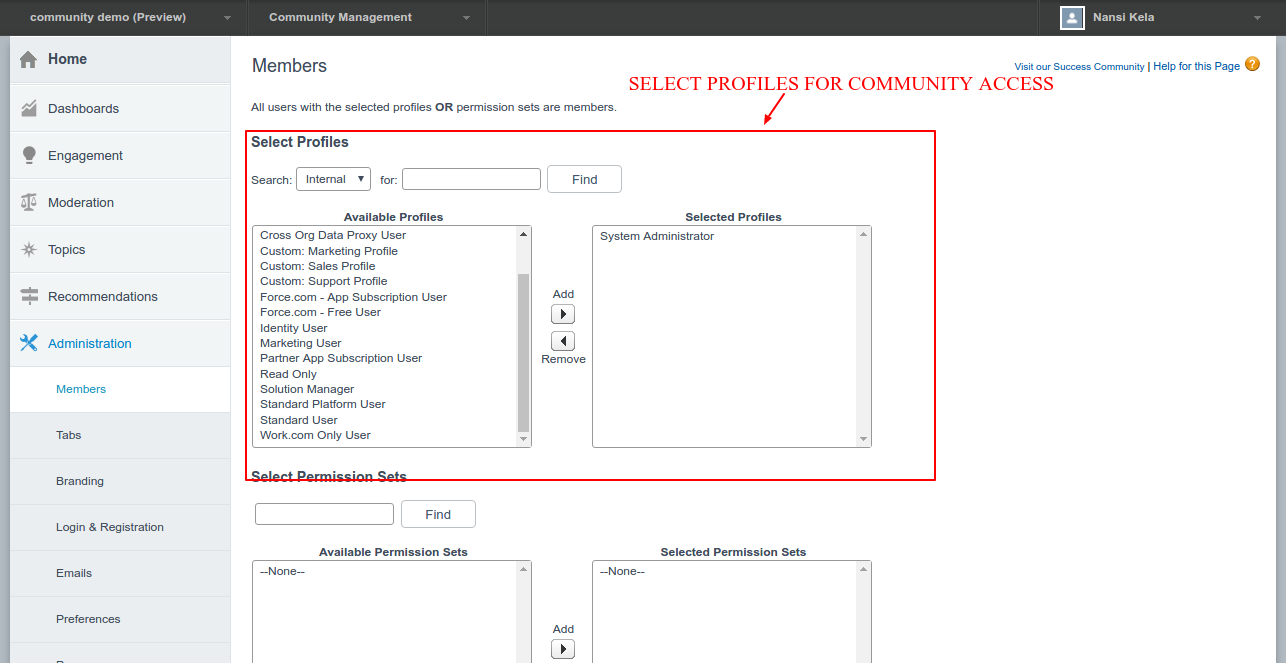
In this, you can choose which members(Profiles) from your company and which customers, partners, or other people outside your company can join.
Communities browser support varies by the device on which you access the community and the community template.
Available in: Salesforce Classic
Available in: Enterprise, Performance, Unlimited, and Developer Editions
Set Up Your First Community
Let’s assumes you’re setting up a community using the Salesforce Tabs + Visualforce template.
To get started using Communities, perform the following steps.
Step-1: Enable Communities in your organization

Step-2: Create a community

Step-3: Manage Community

Step-4: GO TO Administration –> Members
Step-5: GO TO ADMINISTRATION –> Tabs

Step-7: GO TO ADMINISTRATION –> Pages

Step-8: GO TO ADMINISTRATION –> Settings

Set Up Community Site
Go to Setup–> Site –> Community site link

Go to Public Access Settings and Manage Guest profile

For Enable Login setting and set all pages

Login settings

Customize Community URL
Create a branded, custom Web address, such as http://www.myname.com, by registering through a domain name registrar such as “name.com”. Create CNAME records to redirect your branded domain and subdomains to your Force.com domain without exposing the force.com name in the URL.
1. Adding the Custom Domain information in Salesforce.
2.Setup, enter Domains in the Quick Find box, then Add Domain.

3. Creating a CNAME entry in your DNS.

4. Go to Custom URLs and Create new Custom URL


2 comments
You can create a ticket for any query
https://webkul.uvdesk.com/en/customer/create-ticket/