Magento 2 Push Notification extension allows you to send real-time push notifications to your customers. The subscribed users can see the push notifications on their web browser. The advantage of using push notifications is that it delivers the message immediately.
Unlike emails that sometimes fail to deliver or go to the spam folder. Moreover, Web push notifications are always delivered and seen by the users.
As long as the browser is running, a subscribed user will get a message even without opening up your website. This improves user engagement and retention.
Note- If you want to check Magento 2 push notifications on your smartwatch then use our Magento 2 Watch app for the same.
Features
- It is very well integrated with Magento 2 Platform.
- Compatible with Mozilla Firefox, Google Chrome web browser, and mobile browsers.
- Designed to work with the SSL(Secure Sockets Layer) certificate websites.
- There is no monthly subscription required to notify customers.
- The admin can view the subscribed users list.
- There is no limitation on the number of subscribed users.
- The admin can create, edit and delete notification messages in the back end.
- A custom icon and target URL for their notification message can be set.
- Notifications can be sent to either all registered users or selected users.
Check the updated plugin overview and backend configuration as well in the video mentioned below –
Installation process
Initially, download the zip file and extract its content on your computer. The extracted folder will have a folder named as src, inside this folder, you will find app folder. Copy this app folder into Magento 2 root directory on the server as shown below.
After the successful installation, you have to run these commands in the Magento 2 root directory.
First command- php bin/magento setup:upgrade
Second Command – php bin/magento setup:di:compile
Third Command – php bin/magento setup:static-content:deploy
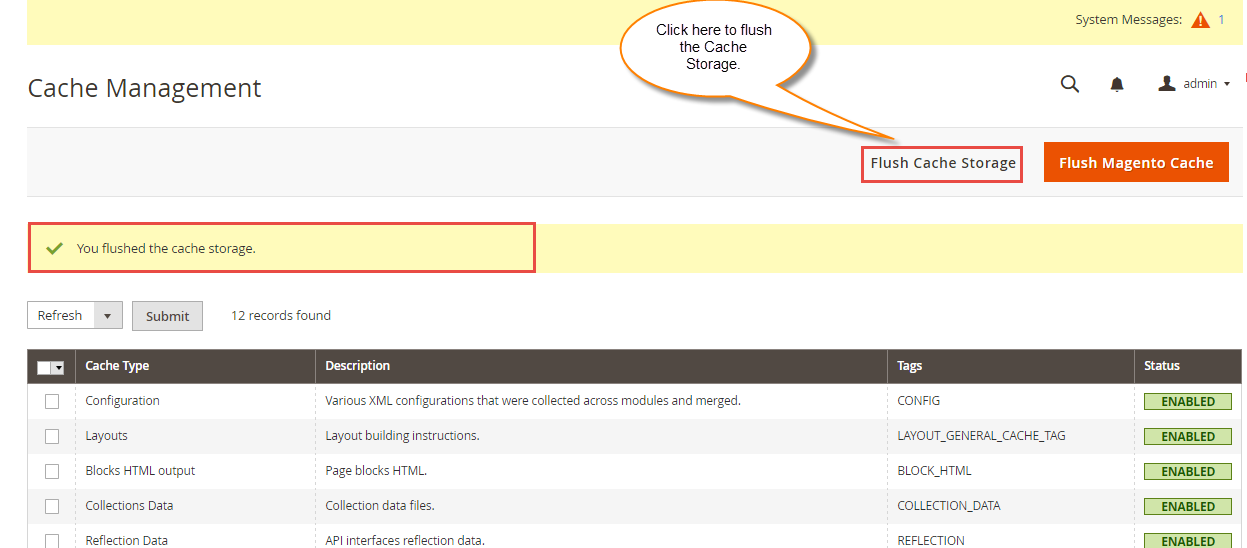
After running both commands, you need to flush the cache from the Magento admin panel. Navigate through System->Cache management as shown below.
After flushing the Cache storage you will get a confirmation message as shown below.
Multi-Lingual Configuration
Language Translation
Moreover, if you need to do the module translation, please navigate to the following path in your system app/code/Webkul/PushNotification/i18n.
Open the file named en_US.CSV for editing as shown in the below screenshot.

Once you have opened the file for editing. Replace the words after the†comma(,)†on the right with your translated words.

After editing and translating the CSV file, you need to save the translated file name according to your region language and country code such as – de_DE.CSV. Then upload the translated file to the same folder from where you have obtained it. Now your module translation is complete.

How to Get API Credentials?
To use Magento 2 Push Notification, you need to have Firebase Project Credentials. Meanwhile, it is required during module configuration. Please click here and create a new project with your Google account.
1. After opening the Firebase page. Please create a project by clicking Add project button.

2. Then, create a new project, enter the name of the project, and click continue.

The next step will ask you to set up Google Analytics. Let’s go ahead and set it up.
 (Optional) Enable Google Analytics for your project, then follow the prompts to select or create a Google Analytics account, if you don’t want to set google analytics disable the toggle button or you can click “Continue” and you will be taken to the project home page.
Choose or create new Google Analytics, and click “Create a new Account”.

Finally, select your Google Analytics location (the United States by default) and read and configure the sharing settings. Finally, accept the Google Analytics Terms of Use and create a project. The process only takes a few seconds. When finished, click “Continue” and you will be taken to the project home page.

3. After creating your new project, click the Settings menu icon. And then select the Project Settings option. Please view the below screenshot. A new Project Settings page will open.

4. After entering the Project Settings page, go to the Cloud Messaging tab. Further, from here you will find your Project Credentials. Copy and save your Server Key and Sender ID as shown in the snapshot below.
5. Moreover, navigate through Project Settings > General will find the other Firebase Project Credentials under web apps. You need to enter these credentials into the admin configuration.

Module Configuration – By Admin
After installing this module, log in to the Magento 2 backend admin panel and navigate through Stores > Configuration > Push Notification.
Push Notification Rule:
Here, the admin can enable the automatic push notification rule by enabling this option. The admin can add a new rule by setting up the time when the push notification will be sent out automatically to the subscribers and choosing the respective template for the same.

Here, you have to make use of the credentials that you have generated as shown under the section – “How to Get API Credentials?“.
Here, enter the –
Web API Key: The admin can get the Web API key from the firebase in the General tab under the project setting.

FCM(Firebase Cloud Messaging) Details:
- Auth Domain: enter the auth domain name here from the firebase web app.
- Database URL: enter the FCM database URL here
- Project Id: enter the generated FCM Project ID here.
Messaging Sender Id: enter the sender ID here.
FCM App Id: enter the FCM App ID here.
Server Key: The server key is generated using the firebase web app and it can be found in cloud messaging under the project setting.

Public Key: enter the public key here and it can be found in cloud messaging under the project setting as web push certificates as shown in the image below-
After entering the required values, tap the Save Config button at the top right-hand corner.
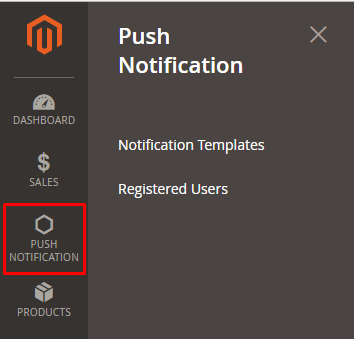
Once you have installed this module, you find a Push Notification menu option on the left side admin panel. Tap it and you will have two sub-menu options to configure –
- Notifications Templates
- Registered Users.
Creating a New Notification Template
After clicking the Notification Templates option, you will find all the push notification messages already created. Here, you can find the template title, message, redirect URL, logo, tags, creation date and time.
Further, the admin can add, edit or delete notification messages. To create a new push notification message, please click Create New.
After clicking Create New button you will arrive at Template Field set page. Here you need to fill out all the necessary information about your new template. After that, please click Save Template button to save your new template message.
Template Fieldset:
Title – This will be your title of your notification message.
Template Message – This is where you have to enter the content of your message.
Redirect URL – The web page link will be displayed on the notification message.
Template Tags – Add tags to your messages to identify them.
Template Logo – You can upload any customized logo for the notification.

How to Select Users for the New Web Push Notification?
After creating the template in the previous step, you need to select your recipients. Go to Push Notification>Registered Users option.
On this page, you can manage all the Registered Users. These are the subscribed users of your website. You can either delete or send them notification messages. Meanwhile, the admin can view subscribed user ID, name, browser, and subscribed time & date.
Send Web Push Notification
After creating a template the admin can select all or few subscribed users. To select all users click the small drop-down menu and click Select All option. To select few users use the checkbox option. After selecting the users. Go to Actions>Send Notification, then select the template.
Click OK button to send the notification.
Delete Template
For deleting template go to PUSH NOTIFICATION menu and select Notification Templates option. Then select the particular message using the checkbox. After selecting the message to go to Actions drop-down menu and click Delete. A confirmation message will appear, click OK.
Web Push Notification – Front-End view
After the installation of the module when a user visits your website, it will see a push notification. This first push notification will ask users whether to allow or block notifications. The users have to click the Allow button to receive notifications from your website. Please refer to the below screenshot:
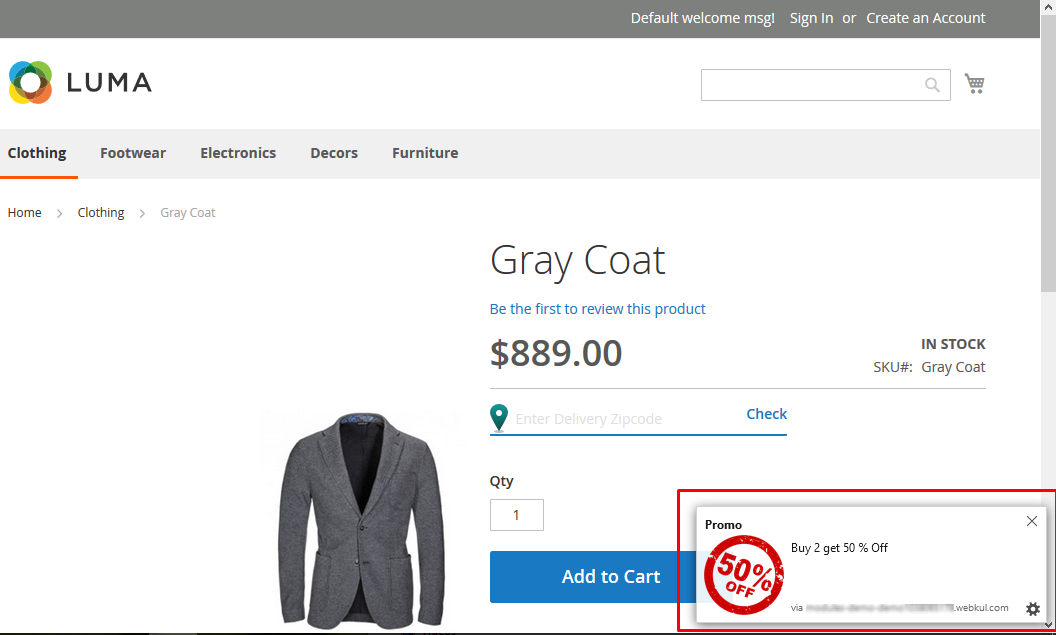
Sample Push Notification
You can check how the sent push notification will appear on the webstore front-end. Template Title, Template Logo, Template Message, and the Redirect URL are visible to the users.
Sample Push Notification (Mobile browser)

For any further queries or more information please feel free to contact us by creating a ticket at our HelpDesk system.
Current Product Version - 5.0.4
Supported Framework Version - Magento 2.0.x, 2.1.x, 2.2.x,2.3.x, 2.4.x


8 comments
Kindly elaborate on your requirement for better assistance. Also, you can mail us at [email protected] with your detailed requirement. So that our team can assist you in a better way.
Thanks and Regards,
Webkul Team.
Is this service free or it required to me purchase?
Are there any limitation on how many notification in a day/hour we can send and any limit of user subscription etc
For Firebase pricing related information, please visit – https://firebase.google.com/pricing/
There is no limitation on the notifications and the users. For more info, please contact – [email protected]
Please elaborate your query. What do you mean by ‘events’?. You can share your complete requirements on [email protected]
Thanks.