OpenCart AliExpress Dropship Management Module: Dropship is when the store owner does not keep the products stocked in its store.
Instead, all the products are stored in different warehouses across the region.
So when a customer places an order, the product is directly shipped from the nearest warehouse instead of the store.
The admin can add multiple warehouses for a product with the quantity.
The admin will also be able to import products from AliExpress into his store and can start selling those products within his store very easily.
Also, to place the orders at AliExpress the admin just needs to click a single button and make the payment.
Note:
- If you are using an updated version of AliExpress Chrome extension then you must have installed the latest version of OpenCart AliExpress Dropship Management module for proper functioning and vice-versa.
- Server Requirement: The get.max_value_length should be equal to or greater than 8000.
- This module supports all templates and themes including the Journal theme.
- OpenCart Aliexpress Dropship Management module supports the Multi-Store feature of default OpenCart.
- Dropship chrome extension only worked on the Aliexpress English store i.e https://www.aliexpress.com/
- Currently, Cron is not supported for this module.
Watch the video tutorials below to understand the extension workflow:
#1 Module Installation
#2 Module Configuration
#3 Importing Products from AliExpress into Opencart Store
#4 How to Place AliExpress Orders in Opencart
Features- Opencart Dropship Management
Admin End Features
- The admin can also import products with variations.
- Admin can update the store information and token key.
- The admin can create different pricing rules for different channels like – Manual and AliExpress.
- Admin can manage the warehouses.
- The admin will be able to add multiple warehouses.
- Admin can assign multiple products to warehouses.
- The admin can approve/disapprove warehouse products and can see the list of warehouse product with the warehouse product quantity.
- Import single or bulk products from AliExpress to your selected store.
- Enable the AliExpress products automatically or based on the configuration.
- View all AliExpress Orders in a separate section.
- Also, view AliExpress placed orders listed within the extension popup.
- View AliExpress order status details with their status(Not placed, Processing, and Placed).
- Edit product information on the AliExpress website before importing to Opencart store.
- Along with AliExpress Imported products Product description, Images & Additional Images, variations, variations with range, and Reviews also gets import.
- Choose AliExpress product’s images at the time of product importing.
- Set all variation prices while importing products with a variation.
- Update authentication credential option added within chrome extension popup.
- View the Seller Information after product import from AliExpress.
- Automated Order Process for the AliExpress Orders.
Warehouse End Features
- Filter warehouses using the filter types.
- Assign the same product to multiple warehouses of the same supplier(Warehouse Manager).
- View the warehouse income and see the payout button to make the payout to the warehouse managers.
- The warehouse transaction log for all the payouts for the warehouse managers.
- Warehouse managers have separate logins.
- The warehouse managers can add products from their own end.
- Warehouse Managers can see their warehouse products.
- The warehouse managers can see their warehouse orders.
- Buyers can select products from different warehouses in the same order.
General Features
- Easy to manage Store.
- Increase store Efficiency.
- Real-time sync
- Select the minimum or maximum product price accordingly.
- Remove keywords from aliexpress imported products.
Installation- Opencart Dropship Management
Installation of the Opencart Dropship Management is very simple. In the zip file, you will find 4 folders admin, catalog, ocmod, and wk_aliexpress_cron.php folders.
You just need to move admin, catalog, and wk_aliexpress_cron.php folders into the opencart root directory.

Once you have uploaded the file then login to admin and from the catalog section go to Extensions>Installer and upload the XML file.
The XML file will be available in the ocmod folder under the module directory. You need to upload the wk_dropship_management.ocmod.xml file from the ocmod folder.

After uploading the file go to the Extensions > Modification and click on the refresh field.

Also, after that in the Admin panel go to System -> Users -> Usergroup and edit ‘Administrator’
and choose to select all for both Access and Modify Permission and save it. After that under Extension > Extensions, Install the Dropshipping extension as shown below.

Installation – AliExpress Chrome Extension
The AliExpress Chrome Extension can be easily installed by clicking on the given link –Webkul AliExpress Importer.

- Click on the “ADD TO CHROME” button to install the Webkul Aliexpress Importer extension.
- Also, click on “Add Extension” pop-up to add the extension to your chrome browser.

After the extension is added successfully you will see a confirmation on the extension pop-up.

Admin Backend Configuration- Opencart Dropship Management
Also, After the successful installation of the extension, the admin will navigate to Extensions->Modules->Drop Shipping and click on the edit button as shown below in the snapshot.

Clicking the Edit button will bring up the module settings as shown below in the snapshot.

Here, under the General Tab, the admin can –
- Enable or disable the module from the backend.
- Enter the Google Map API key
- Select the Dropship User Group
The selected user group will act as the warehouse manager group and allow permissions will give to warehouse managers. - Also, select the Complete Order Status
The selected order status will check to perform transaction logs.
Under the Product Tab, the admin will –

- Set “Warehouse Manager can Add Products” to Enable
This allows the warehouse manager to add the products. Else, select Disable to not allow the warehouse manager to add the products.
- Also, set Direct To Store(For AliExpress Products) as Enabled or Disabled
If enabled the products will push to the store directly without any approval else if select disable, approval will need to push the products to store.
-
Product Fields
Under this setting, the admin will select the allowed products fields that can add by the warehouse manager.
Under the AliExpress Tab, the admin will –

- Enter the Username(This username will be used later to import products from AliExpress store to your store).
- Refresh to generate a Token(this token and username will use to import products from the AliExpress store to your store).
- Set the Quantity for AliExpress when products will import from there into your store.
- Also, Set the language for the imported products.
- Set the Imported Products Review Status as Enable or Disable. Product reviews are imported in both cases but to enable or disable the imported reviews select Enable or Disable as per your need.
- Choose the Store where the imported products will add.
- Remove Keywords are used to remove the selected keywords from the aliexpress imported product name, meta description, description, etc.
- Price is used while importing products from aliexpress, the admin can select the base price of the product as a maximum or minimum.
- Real Sync will be used to update the imported products from the aliexpress while running the cron.
Note:
When the cron is set, the price and quantity of the Aliexpress product is updated.
- Lastly, save the configuration by clicking the Save button.
All the variation options from AliExpress will get visible under the Catalog>Options>Option List as shown below in the snapshot.

Admin Management- Opencart Dropship Management
After the successful installation of the extension, the admin will find the Warehouse Management menu option on the admin back-end side panel.

Under Warehouse Management, we have the various sub-menu options that are related to the warehouse management which includes –
Sub-Menu Options:
- Aliexpress Configuration
- Warehouses
- Products
- AliExpress
- Products
- Sellers
- Orders
- Assign Warehouse Products
- Pricing Rule
- Orders
- Income
- Transaction Logs
- Aliexpress Cron log
We will go through all the tabs one by one but before that, the admin needs to create the User Group and Users(Warehouse Managers).
The admin will navigate through System->Users->User Groups. Here, the admin will create a User Group with the allowed access and modification permissions for the warehouses.
Also, the admin can set the access and modification permissions for the created groups as per the need. To create the User Groups tap the “Add” button.

After taping the add button another page to add the user groups appears. Here, enter the information related to the User Group –
- Set the User Group Name.
- Select the Access Permission of the warehouse that you want to allow for this user group.
- Also, select the Modify Permission of the warehouse that you want to allow for this user group.
- Lastly, click the Save button to save the User Group.
Please Note: For Opencart 3.x.x. version, all the required permissions have to be enabled manually.

Also, after creating the user groups, the admin will navigate to System->Users->Users to create the Users. Here, tap the “Add” button to add the users.

After taping the Add button another page appears to add the Users. Here, enter the required information for creating the users and tap the save button to save the user.

Aliexpress configuration- Opencart Dropship Management
By Navigating to Warehouse Management> Aliexpress Configuration the admin can view the Store URL, Username, and Token.
These credentials are used to configure the aliexpress chrome extension.

Manage Warehouses- Opencart Dropship Management
Under this section, the admin will be able to –
- Add Warehouses
- Delete Warehouses
- Edit Warehouses

Add New Warehouse-Opencart Dropship Management
To add a new warehouse just tap on the “Add” button which brings up the section to add a new warehouse.

Here, the admin will fill in all the required information for the warehouse and then lastly click the save button to save the warehouse.
- Warehouse Code – Enter a unique code for the warehouse that is identifiable.
- Title – Also, enter the title of the warehouse.
- Description – Enter the description of the warehouse.
- User – Select a user(Warehouse Manager) from the drop-down to assign to this warehouse.
- Origin Country – Here, select the origin country from the drop-down.
- The Origin State – Also, select the origin state.
- Origin City – Enter the origin city.
- Postal Code – Also, enter the postal code for this warehouse.
- Origin Street – Enter the origin street for this warehouse.
- Longitude – Longitude will automatically be set.
- latitude – latitude will automatically be set.
- Status – Enable or disable the status of the warehouse.
- Applicable Shipping Methods – Select the shipping methods that will be available to the customers at the checkout time.
**Note: No need to enter the longitude and latitude of the warehouse.
The values are automatically populated after you save a warehouse.
Assign Warehouse Products- Opencart Dropship Management
Under this section, the admin will find all of his products listed as shown below in the snapshot.

Now, the admin can select the “Warehouse” from the drop-down option so as to assign the products to that warehouse.
After that, the admin will mark the products that are to add to this warehouse.
The admin will also be able to set the quantity for each of the products that are being assigned to this warehouse.
Lastly, tap the Save button to assign these marked products to the selected warehouse.

Warehouse Products
Under the Products section, the admin will be able to see a complete list of all the warehouse products that have been assigned to the warehouses.
Further, the admin will also find the details related to the products like – warehouse manager, warehouse code, warehouse title, warehouse quantity, price, and the status of the warehouse product.
Here, the admin can enable or disable the warehouse products and can also add the products to various warehouses.

The admin can also update the product quantity by tapping the quantity next to the products.
Pricing Rule
Under the pricing rule section, the admin will be able to create the pricing rules. Here, the admin will be able to add, edit, or delete a pricing rule.
Also, the admin will be creating the pricing rules for the products that the admin will assign to the warehouses.
If we have a product P1 whose price is set to $20 and the admin creates a price rule that if a product is within the price range of $0 – $100 increase the product price by $10.
Then, when the admin assigns this product to a warehouse with the quantity, the price of this product P1 changes to $30 when assigning to the warehouse.

To add a new pricing rule click on the “Add” button that brings up a section to create the pricing rule.

Here the admin will enter –
- Price Rule Name – Name for the price rule that is easily identifiable.
- Channel – You can select within Manual and AliExpress.
Also, If you select the channel as AliExpress the price rules will be applicable on the Aliexpress products else if you select Manual then the price rules will apply to the admin products only. - Price Range – Enter the price range for the rule to apply.
- Operation Type – You can select the operation type as “+“(adds the set amount to the product price), “–“(subtracts the set amount to the product price), and “*“(multiplies the set amount to the product price).
- Amount Type – Select the amount type as Fixed or Percentage.
- Enter Amount – Enter the amount that will be used for performing the operation type for the set price range.
AliExpress Products
**Note: If you already have installed the Chrome extension then no need to do the under the given step.
Step: Go to your store front end and at the top side click on the “Install Opencart Aliexpress Importer for Chrome“.

How to import the AliExpress product into your store –
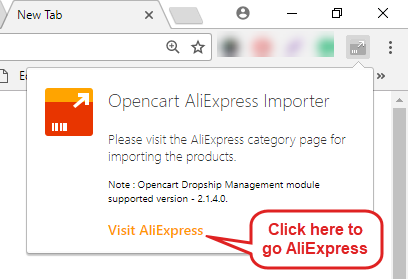
Go to the AliExpress website “https://www.aliexpress.com” and navigate to the products.
Here, while hovering your mouse on the products at the category and the product page the store owner can see the icon for the “AliExpress product Importer“.
Here, the store owner can import single or bulk products to the store.
To import the products in bulk just select the products and click on the Bulk Import.
Also, the store owner can import a single product by clicking on the arrow sign on the product.

Clicking the Importer icon brings up the section with the product details.
Here, the admin can edit the product details as per his need, select the images to keep, and can also set the price of the product and its variations.
Now, click the Submit button on this pop-up as shown below in the snapshot.


Now, after clicking the Submit button above you need to authenticate your store first before you can import the products. Just enter the URL and other aliexpress credentials from the admin back-end.
**Note: Please make sure the store URL must be HTTPS(SSL enabled) to import products from AliExpress. Also, you need to select the OpenCart Store version.

Also, to get the credential navigate to Warehouse Management> Aliexpress Configuration and get the credentials.

Now enter these credentials (Username and Token) to the aliexpress chrome extension as shown in the image below-

Lastly, click the “Submit” button in the above snapshot your store will be authenticated.
Now, you will see a success message “Product Successfully Imported” after the product is successfully been imported.

Edit Product Before Import:
Now, after the authentication when the admin will click the importer icon, the admin can see a popup on the same page.
This popup will ask to change the product information.
The admin can change the product information like product name, price, meta tag title, meta tag description, meta tag keywords,
images (remove images that are not needed), variations(change price for all the variations) before importing to Opencart store.


After clicking on the next button, the product will get imported into the Opencart store and the admin can see a message “Product has been successfully imported“.
The AliExpress products can also import from the product page, to import just click the importer icon on the product page as shown below in the snapshot.

Edit Product Before Import:
When the admin will click on import product link from the product page then the admin can see a popup. The admin can see all available combinations and can set prices for each combination.


Here, you can also enter the number of product reviews for this particular product you want to import. Just enter the number of reviews to import.

Update Authentication Details:
The admin can update authentication details from the Chrome browser by clicking the exporter Icon which brings up the extension pop-up. Here, click on “Update Authentication Details” button.
![]()
Clicking the importer icon brings out the extension pop-up. Just click on the “Update Authentication Details“.
This brings up the section to correct your store URL. Update it, choose the OpenCart store version, and click the Next button.

Also, this will bring up the section to update the credentials for your store. Enter the Updated Username and token and then hit the Submit button.
Lastly, you can see the “Authenticated Successfully” message as shown below and you are done updating the credentials for your store. 
Chrome extension will work only on the AliExpress website. When the admin will visit the AliExpress website then this icon becomes active/colorful.
Also, If the admin will click on the icon without going to AliExpress website then it will show the information as below:
Imported Product View at Store Front–
Products are Imported with – Description, Images & Additional Images, attributes, and Reviews.
Description and Images(With Additional Images):

Attributes:

AliExpress Sellers
After the AliExpress products are imported to your store you can check the respective seller details under this section.
Here, the admin can see a list of AliExpress sellers with their total number of products count. Also, the admin can edit the information by clicking the edit button.

Clicking the edit button brings up the section where the admin can find all the products of the respective seller.
The admin can see the product details like – Product Name, AliExpress Product Id, and the Status. Also, the admin can edit the information related to the product by clicking the edit button.

Tapping the edit button brings up the section to edit the details of the product as shown below in the snapshot.

AliExpress Orders
When the products that are imported from AliExpress to your store get purchased within your store, then all those orders will be visible under this section.
Also, the admin will be able to check the AliExpress Order Status i.e whether the order has been placed or not.
There are three different states of the AliExpress Order status – Not Placed, Processing, and Placed.

Aliexpress Orders:

Initially, when the customer places an order for the AliExpress product within your website, AliExpress Orders status is set to Not placed.
Now, when the admin clicks the Place Order button the status is changed to Processing and when the admin will click the Place button within the extension pop-up the status will be changed to Placed.

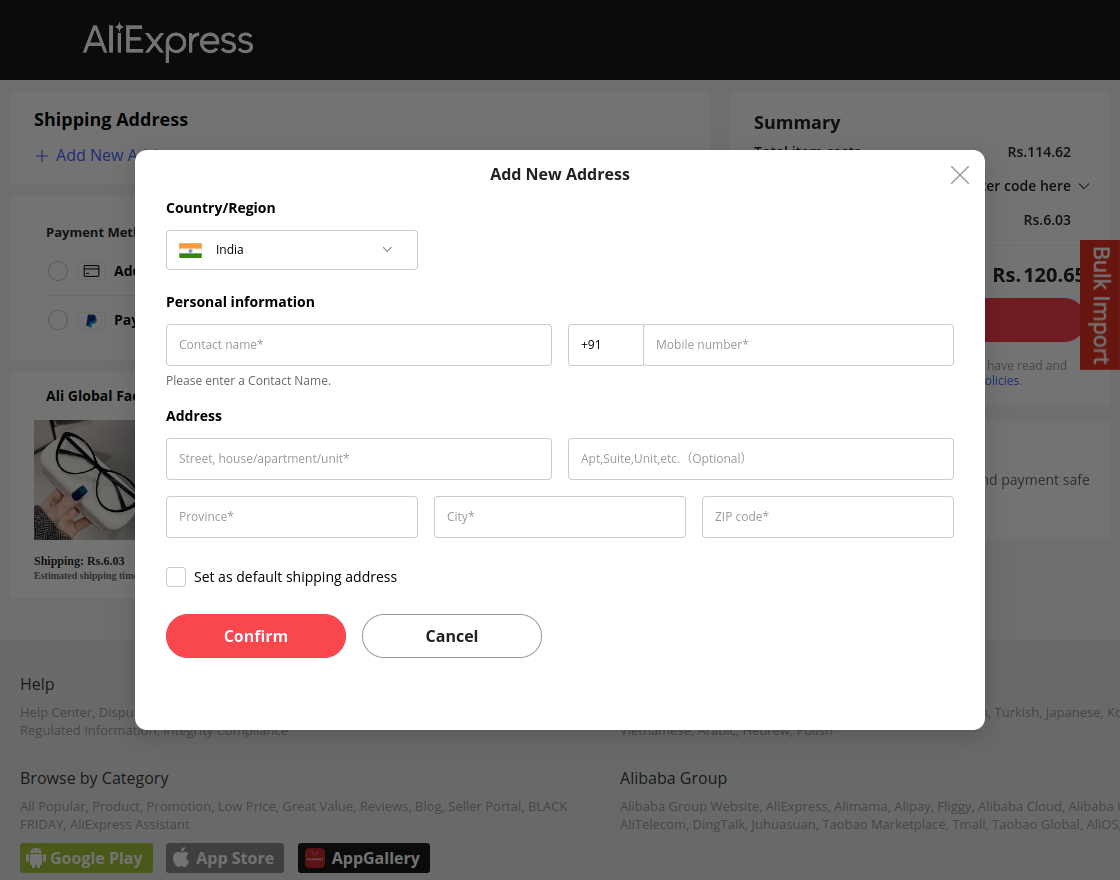
Clicking the “Place Order” button will redirect the admin to AliExpress. Here, the order placement process is automated up to the “Review Your Order” section.

Now, when the admin will click on the “Place Order” button, the admin will be redirected to AliExpress and the product gets automatically added to the cart.

Click on Add New Address a pop-up will appear as shown below:
Click on the select payment method a pop-up will appear as shown below:

Now proceed further to complete the purchase:

Warehouse Orders
Under this section, the admin can see all the orders that have been placed in each respective warehouse. The admin can also take the printout of the placed orders.

Clicking the “Action” button brings up the page with the order details as shown below in the snapshot.

Income
Under this section, the admin can see a list of all the warehouse suppliers.
The admin can find the information for each of the suppliers like the –
warehouse name, warehouse code, total income, admin income, shipping, gross warehouse income, payable amount, paid amount, and a tab under the Action column to make the payout to the warehouses.

Here, the admin can make a payout to the suppliers when the order status for all of their orders equals to the status selected under the “Complete Order Status“.
After that, under the action column, the admin can see a button make a payout(this is just for maintaining the record).

Transaction Log
Here the admin can see all the transaction details/payouts. The details of payouts that are made to the warehouse suppliers are visible.

Aliexpress Cron logs
To set up the cron for a user, first ssh login to the server then run the command crontab -e to edit the cron and add the below the entry-
12 */12 * * * /usr/bin/curl https://example.com/wk_aliexpress_cron.php
It will run every 12-hours 12th minute.
You can check current cron by running the command crontab -l
From the Warehouse Maanagement> Aliexpress Cron logs, the admin can check the status of the cron products-
The admin can even download and clear this log file.

Warehouse Manager’s Options
After the admin has created the warehouse manager and assigned products to the warehouse, the warehouse manager can log in to their account.
Aliexpress Configuration
After login, the warehouse manager can navigate to Warehouse Management->Aliexpress Configuration. Here, the warehouse manager can manage/edit his account details like – Store URL, Username, and Token
The warehouse manager can see all the products in his warehouse. Warehouse managers can see the products with their – Name, Model, Quantity, Price, and Status.

The warehouse manager can also add products to his warehouse.
If there is more than one warehouse assigned to the warehouse manager then he can add products into both of the warehouses.
Orders
Under the orders section, the warehouse manager can find all the orders that have been placed for their products.

Clicking the “View” button will show the order details as per the snapshot below.

Clicking the print will print the order details as shown below.

Income
Under this section, if the admin has made any payouts to the warehouse manager, then those details will be visible under this section.

If any transactions have been made by the admin towards this warehouse manager, then those transactions will be displayed under this section.
Here, the warehouse manager will find a total transaction amount of his listings.

That’s all for the Opencart Dropship Management. Still, have any issue feel free to add a ticket and let us know your views to make the module better [email protected]
Current Product Version - 6.1.0.1
Supported Framework Version - 3.x.x.x

I have OpenCart 3.0.4.1. Is OpenCart AliExpress Dropship Management Module compatible with this version, and any problems I would need to be aware of?